

'%20x='0'%20y='0'%20height='100%25'%20width='100%25'%20%0A%20%20%20%20%20%20%20%20%20%20xlink%3Ahref='data:image/jpg;base64,/9j/2wBDAAYEBQYFBAYGBQYHBwYIChAKCgkJChQODwwQFxQYGBcUFhYaHSUfGhsjHBYWICwgIyYnKSopGR8tMC0oMCUoKSj/2wBDAQcHBwoIChMKChMoGhYaKCgoKCgoKCgoKCgoKCgoKCgoKCgoKCgoKCgoKCgoKCgoKCgoKCgoKCgoKCgoKCgoKCj/wgARCAAGAAoDASIAAhEBAxEB/8QAFQABAQAAAAAAAAAAAAAAAAAABQf/2gAIAQEAAAAAh7X/xAAUAQEAAAAAAAAAAAAAAAAAAAAF/9oACAECEAAAAA//xAAUAQEAAAAAAAAAAAAAAAAAAAAB/9oACAEDEAAAAH//xAAgEAABAwQCAwAAAAAAAAAAAAACAQMEABESIQUTFDFh/9oACAEBAAE/AOI5A5DceM4y04RSgK5auuKoN/l6mxWPNkd0qSDvYWYtNDgi32g79V//xAAZEQABBQAAAAAAAAAAAAAAAAAAAQIEEiP/2gAIAQIBAT8Al5uSp//EABYRAQEBAAAAAAAAAAAAAAAAAAIAA//aAAgBAwEBPwDJq//Z'%3E%3C/image%3E%3C/svg%3E)
Minecraft servers have existed for over a decade and are a great way to experience the game in a multiplayer environment.
One of the best things about Minecraft servers is that server admins can fully customize the gameplay experience via server-side plugins. The sky is the limit with plugins, and new game modes, enchantments, and even NPC characters can be brought into the game.
For those looking to add a plugin to their Minecraft server, this guide will explain exactly how to do just this in the easiest way possible.

Chart New Territories with the ultimate Minecraft Seed Generator!
Best way to add any plugin to a Minecraft 1.18 server
Players should note that they must be running Spigot or some other fork of Spigot, such as PaperSpigot (Formally known as Paper). Minecraft plugins require some API to function correctly, so some form of Spigot is necessary for them to run correctly.
Players can follow the tutorial below to install any plugin of their choosing into a server.
Steps to install a plugin to a Minecraft server
Step 1: Choose a suitable plugin
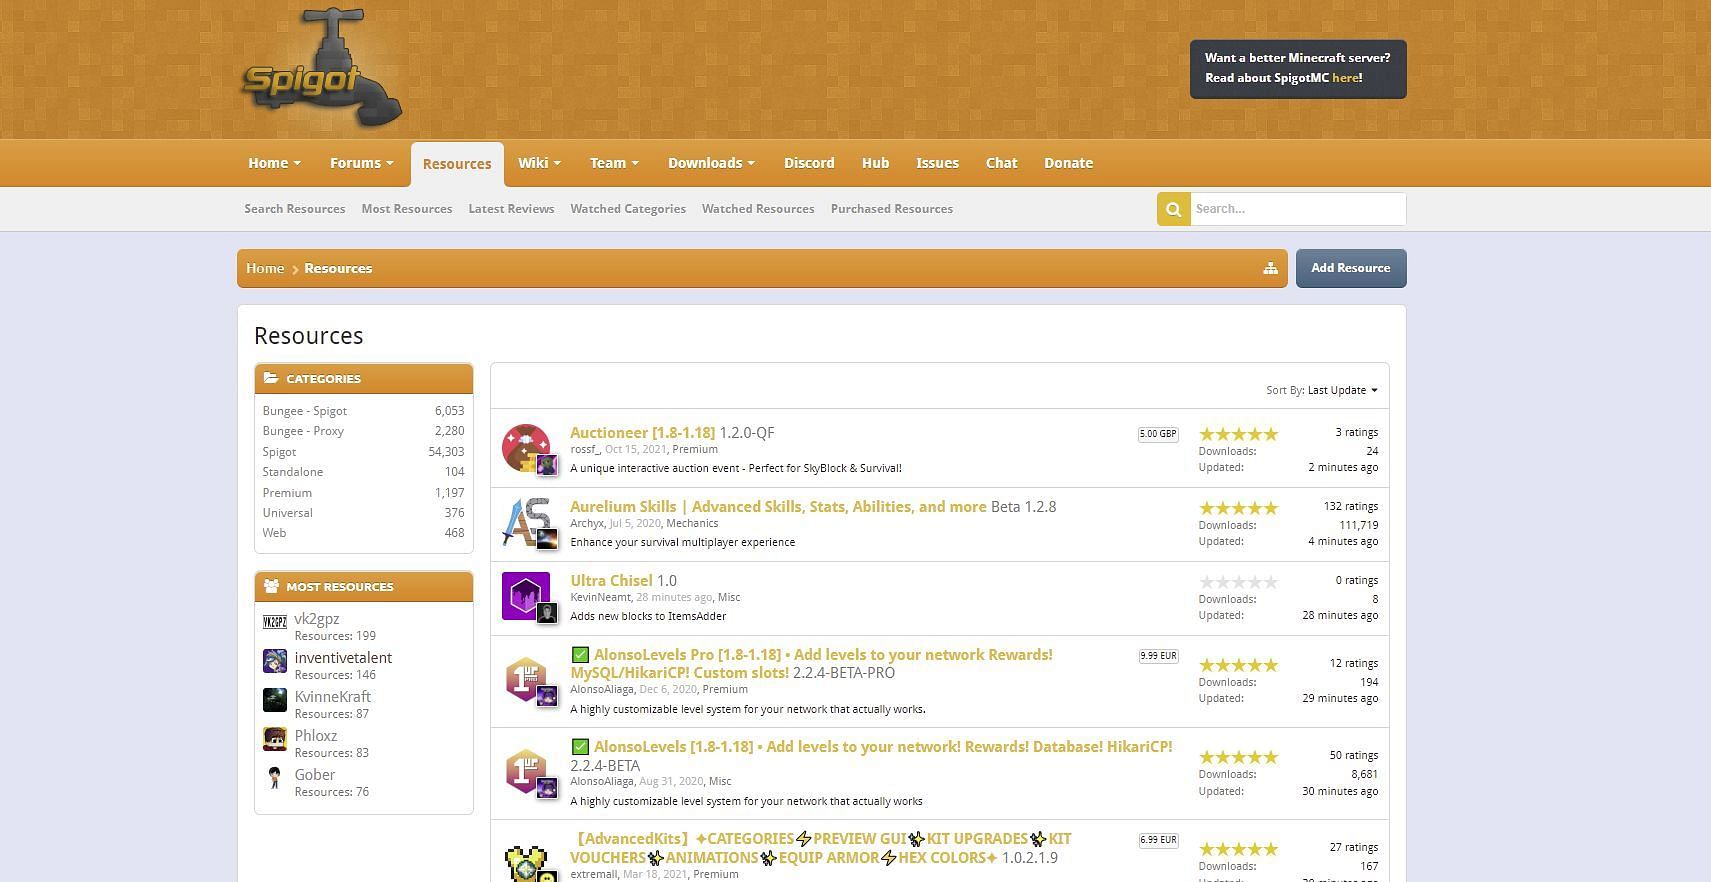
One of the best places to find good free plugins on the internet is the Spigot forums, which can be found here. After players have chosen a suitable plugin, it must be downloaded.
One helpful tip is to always check the compatible game version of the plugin before trying to install it. Plugins should list precisely what version they are compatible with on their spigot page. If an incompatible plugin is downloaded and attempted to be used on a server, it will not load correctly.
Step 2: Open the plugins folder
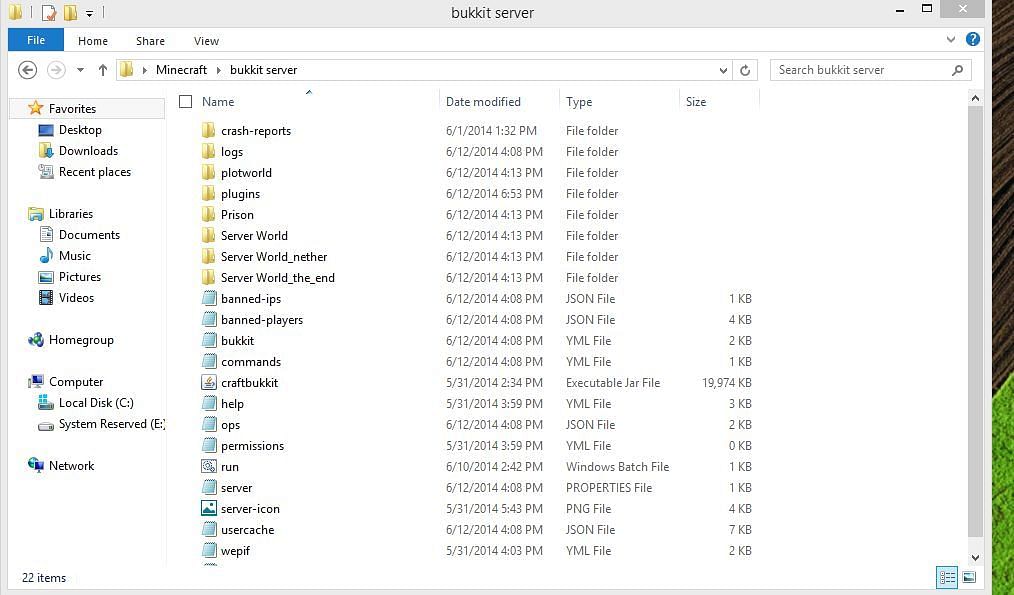
Players must now open the plugins folder inside their Minecraft server directory, ready for the plugin downloaded in step 1 to be installed.
Step 3: Install the plugin
The plugin downloaded in step 1 must now be dragged and dropped into the server directory.
Step 4: Start the server
After successfully installing the plugin to the plugins directory, players must start up their server (or reboot it if it's currently running.)
Step 5: Final checks
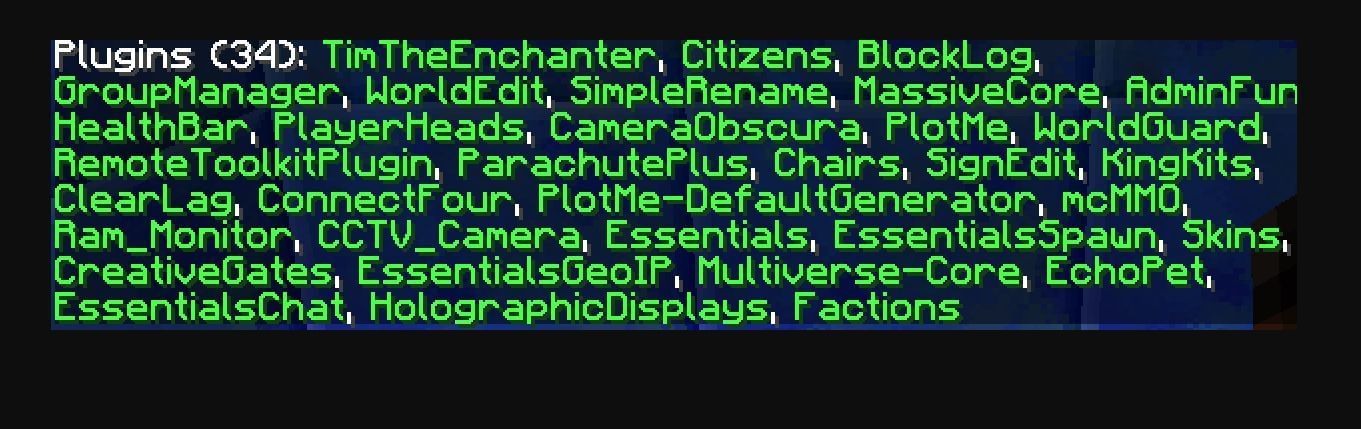
Once the previous steps have been completed, it's time to perform the final checks to ensure the plugin was successfully installed without errors.
To do this, players can type the command: "/plugins" on their server, which should output all of the currently loaded plugins. If everything has gone to plan, the newly installed plugin should be visible in green colour, as seen in the image above.
There is an issue if the plugin is not seen or written in red colour. Players experiencing a problem can refer to the troubleshooting guide below for a fix.
Troubleshooting issues
If the plugin trying to be installed is written in red text after the command: /plugins has been typed, there was an error loading the plugin. Players should check the log files for error details, which can be found in the logs folder inside the main server directory.
If it is not visible after typing the command /plugins, it is not installed correctly. Players must ensure that they install the plugin inside the correct folder, as detailed in step 2 above.

Uncover new worlds with our Minecraft Seed Generator!