
'%20x='0'%20y='0'%20height='100%25'%20width='100%25'%20%0A%20%20%20%20%20%20%20%20%20%20xlink%3Ahref='data:image/jpg;base64,/9j/2wBDAAYEBQYFBAYGBQYHBwYIChAKCgkJChQODwwQFxQYGBcUFhYaHSUfGhsjHBYWICwgIyYnKSopGR8tMC0oMCUoKSj/2wBDAQcHBwoIChMKChMoGhYaKCgoKCgoKCgoKCgoKCgoKCgoKCgoKCgoKCgoKCgoKCgoKCgoKCgoKCgoKCgoKCgoKCj/wgARCAAGAAoDASIAAhEBAxEB/8QAFQABAQAAAAAAAAAAAAAAAAAABAf/2gAIAQEAAAAAixv/xAAUAQEAAAAAAAAAAAAAAAAAAAAE/9oACAECEAAAAA//xAAUAQEAAAAAAAAAAAAAAAAAAAAD/9oACAEDEAAAAD//xAAgEAABAwMFAQAAAAAAAAAAAAABAgMEAAUSBhEhMWLS/9oACAEBAAE/ALPYIKWn44W+XJGKATjx3StHREqILz+49D5r/8QAGBEAAgMAAAAAAAAAAAAAAAAAAAECERP/2gAIAQIBAT8A0lSZ/8QAFxEAAwEAAAAAAAAAAAAAAAAAAAEREv/aAAgBAwEBPwDTh//Z'%3E%3C/image%3E%3C/svg%3E)
Iron is one of Minecraft’s most essential resources. A crafting ingredient in many of the game’s most vital recipes, Minecraft players, may need to get their hands on quite a lot of this item throughout their playthrough. Fortunately for players who don’t want to try their luck mining, there are several ways to acquire iron. One of these ways is by building a Minecraft iron farm.
Ad
Building an iron farm in Minecraft Java Edition

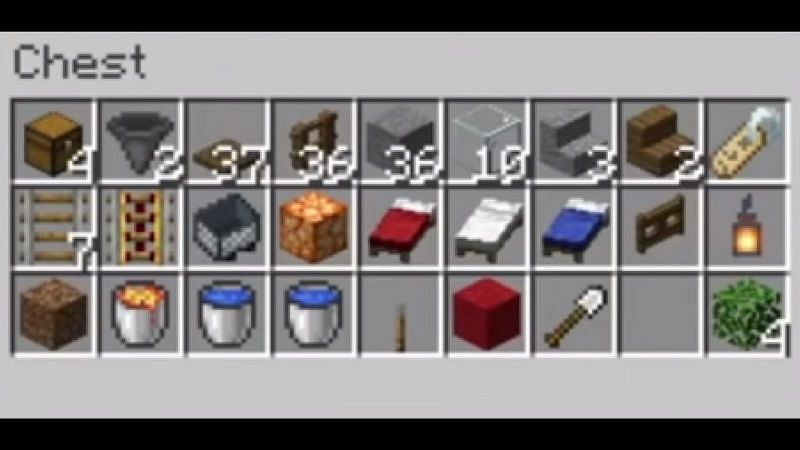
Chart New Territories with the ultimate Minecraft Seed Generator!
Building your farm
Ad
- Build a 21x21 grid with a 5x5 footprint in the center.
- Place a shroomlight/glowstone block in the center of the footprint.
- Place three beds over this, with the middle bed covering the light-emitting block.
- Place a double chest on the top-right of the grid. Place a hopper on the right side of it.].
- Place a second double chest on the right side of the first. This should cover the hopper.
- Place the last hopper on the top of the second double chest. It should be on the right side.
- Remove the block at the top of the bed on the left, and replace it with a stone slab.
- Place your temporary block on the block next to the slab. This should be behind the head of the bed in the middle.
- Build a wall three blocks tall around the chests and hoppers, with stairs above the chests so that you can still open them.
- Build a wall one block high around the beds. Follow this with a row of glass on top.
- Fill in the empty space within the grid. Reversed stairs should be used on the spot not covered by walls or glass.
- Place another layer of stone over the glass blocks. This wall should now be three blocks tall.
- Use trapdoors and cover the opening overtop your new structure.
- Place five fences along the length of these trapdoors.
- Put wooden stairs next to the endpoints of the fence. These stairs should be opposite one another. Fence in the rest of the structure. This should go over the hopper.
- Make the fencing three blocks tall, except the side you first placed along the length of your Minecraft structure.
- Place three trapdoors between the fences.
- Open these trapdoors, and cover the rest of the fencing with trapdoor until it’s made a roof.
- Place three trapdoors underneath, two vertical blocks from the hopper.
- Put between the trapdoors on top of the face and the trapdoors on top of the roof. The lava should be stuck in place, but be careful.
- Place two water buckets on the steps so water flows towards the hopper.
- On the ground-level of your structure’s base, place rails along the perimeter of your 21x21 block grid. Start from the wall’s opening.
- Place dirt down. Put leaves on top.
- Put a powered rail next to it, if you haven’t already.
- Make sure there’s a lever on the dirt block, to power the powered rails. It should be on the side of the block opposite the rails. Place a minecart down.
- Open the walls near the bed and wait for a villager to go to bed.
- Spade the land around the walls, and fill the remaining are with leaf blocks.
- Line a zombie up on the rails, and push it into a minecart. Use a nametag on it.
- Flip the switch and trap the zombie near the villagers.
- Remove your temporary Minecraft block, and wall the zombie inside.
Ad
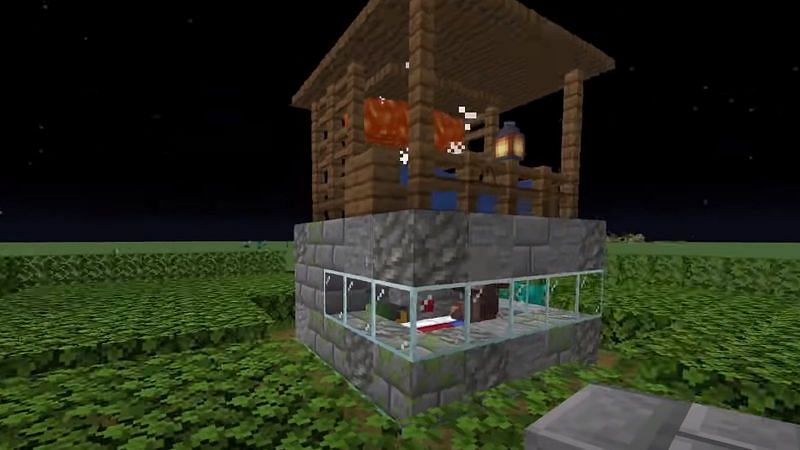
This is one of the smallest farms which players can build in Java Edition. Fortunately, it's also one of the most productive.
Feedback


Uncover new worlds with our Minecraft Seed Generator!
Edited by Yasho Amonkar