
'%20x='0'%20y='0'%20height='100%25'%20width='100%25'%20%0A%20%20%20%20%20%20%20%20%20%20xlink%3Ahref='data:image/jpg;base64,/9j/2wBDAAYEBQYFBAYGBQYHBwYIChAKCgkJChQODwwQFxQYGBcUFhYaHSUfGhsjHBYWICwgIyYnKSopGR8tMC0oMCUoKSj/2wBDAQcHBwoIChMKChMoGhYaKCgoKCgoKCgoKCgoKCgoKCgoKCgoKCgoKCgoKCgoKCgoKCgoKCgoKCgoKCgoKCgoKCj/wgARCAAFAAoDASIAAhEBAxEB/8QAFAABAAAAAAAAAAAAAAAAAAAABP/aAAgBAQAAAAAIf//EABQBAQAAAAAAAAAAAAAAAAAAAAH/2gAIAQIQAAAAP//EABQBAQAAAAAAAAAAAAAAAAAAAAH/2gAIAQMQAAAAf//EAB8QAAIBAwUBAAAAAAAAAAAAAAEDBAACQQUSFSFUkv/aAAgBAQABPwCSmVJU1MvU5j1PG24X3jojIwK4BPplfYr/xAAXEQEAAwAAAAAAAAAAAAAAAAABAAIR/9oACAECAQE/ANbKs//EABcRAQADAAAAAAAAAAAAAAAAAAEAAhH/2gAIAQMBAT8AwqAT/9k='%3E%3C/image%3E%3C/svg%3E)
With just a little bit of redstone and a handful of blocks, Minecraft players can build a shower that they can turn on and off.
The sheer number of things that Minecraft players have been able to accomplish using redstone is frankly very impressive. Feats that have been achieved in Minecraft include the completion of a fully functional in-game cell phone and the working recreation of the classic game Battleship.
However, Minecraft players do not need to have professional engineering skills or years of Minecraft experience in order to start experimenting with redstone. One very simple build that players can create is a basic shower for their base or home.

This build can serve as a tremendous addition to any Minecraft world, as well as showcase that basic redstone usage is not that scary at all.
This article showcases how to build a shower in Minecraft.
How to build a shower in Minecraft
Before getting started, Minecraft players are going to need to get their hands on a number of different items. To fully complete the build that is showcased in this article, players will need:
- 30 Smooth Quartz Blocks
- 10 Quartz Pillars
- 3 Smooth Quartz Stairs
- 1 Smooth Quartz Slab
- 6 Glass Panesgla
- 16 wood planks
- 3 Blocks of any prefered color
- 1 Lever
- 1 Water Bucket
- 1 Piston
- 5 Redstone Dust
Once players have all the items they need, they can begin constructing their very own Minecraft shower.
Step #1
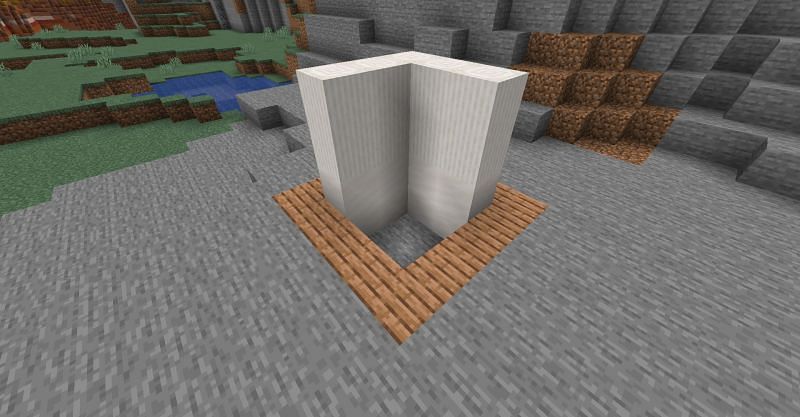
First things first, Minecraft players will need to build the base and walls for their new shower. Players can do this by placing five smooth quartz blocks into an L-formation or right angle.
After this is done, players should stack an additional five smooth quartz blocks right on top of the ones that they just placed.
From there, players can stack 10 quartz pillars right on top of all the smooth quartz blocks, while maintaining the right angle structure. Minecraft players can then surround the shower frame with an outline of wood planks.
Step #2

In the next step, Minecraft players will be adding in some extra touches. To begin, players should place three smooth quartz stairs around the base of the shower. Then, players can place one smooth quartz slab in the block space that is remaining.
If this was done correctly, it should look very similar to the image above. From there, Minecraft players can place their glass panes, to form their shower "doors."
Step #3
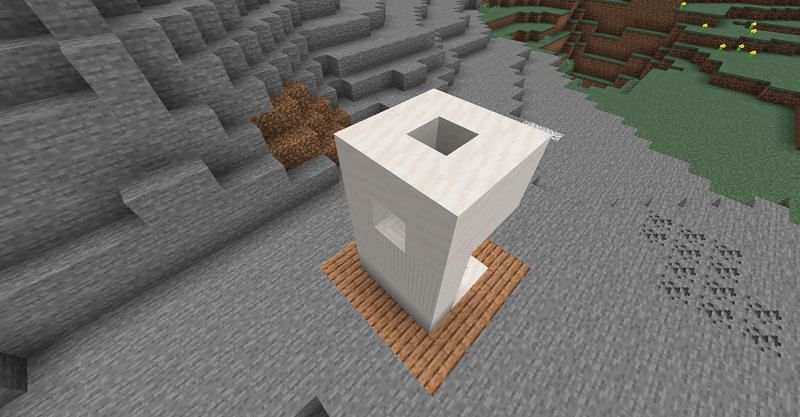
In the next step, Minecraft players will need to add some additional smooth quartz blocks on top of their existing shower. A gap on the side wall must be left in order for players to later place a piston.
The single block gap right on top is where the water will be placed with the water bucket.
Step #4
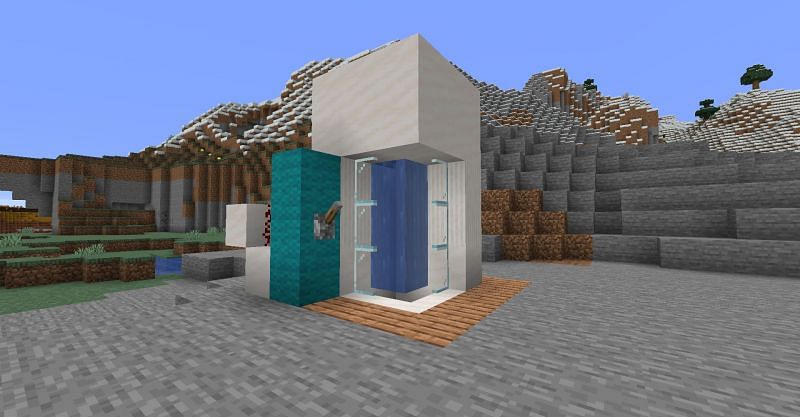
At this point, Minecraft players are actually a lot closer to being done than they might think. The first thing they should do is stack three blocks of any kind or color to the immediate left of their shower frame.
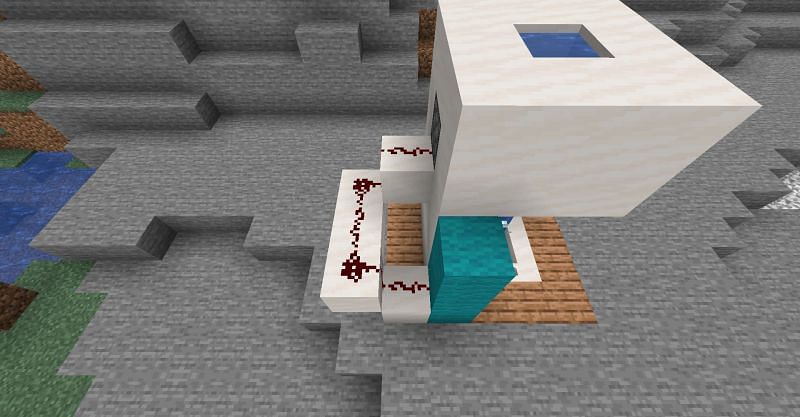
Then players are going to need to place a piston in the one block gap in the shower wall, so that it faces into the shower. From there, players can use their water bucket to fill in the single block gap right on top.
Lastly, Minecraft players need to get some redstone laid down. This can be done by using smooth quartz blocks to conenct the newer three blocks to right near the piston. On top of those five blocks, Minecraft players will need to place a trail of redstone dust.
Step #5
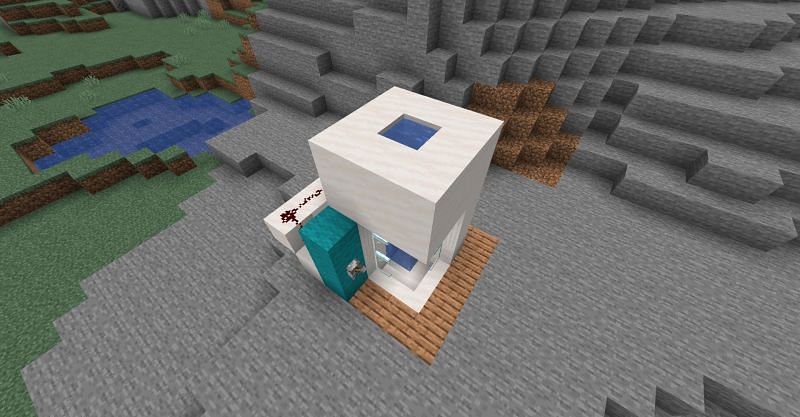
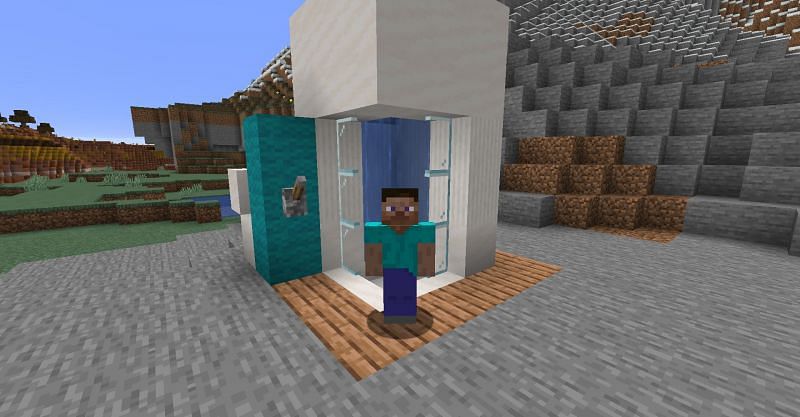
From there, Minecraft players will just need to place a lever as pictured above. If everything is working correctly, Minecraft players should be able to turn their shower on and off by using the lever.
The lever will control the piston that will either block the water from flowing down, or recoil back to allow the water to flow down.
Step #6

That's it! All Minecraft players have to do now is enjoy their new epic creation. Nothing quite beats a hot shower after a long day of adventuring.
Note: This build was made entirely in vanilla Minecraft, without the use of mods of any kind.
