
'%20x='0'%20y='0'%20height='100%25'%20width='100%25'%20%0A%20%20%20%20%20%20%20%20%20%20xlink%3Ahref='data:image/jpg;base64,/9j/2wBDAAYEBQYFBAYGBQYHBwYIChAKCgkJChQODwwQFxQYGBcUFhYaHSUfGhsjHBYWICwgIyYnKSopGR8tMC0oMCUoKSj/2wBDAQcHBwoIChMKChMoGhYaKCgoKCgoKCgoKCgoKCgoKCgoKCgoKCgoKCgoKCgoKCgoKCgoKCgoKCgoKCgoKCgoKCj/wgARCAAGAAoDASIAAhEBAxEB/8QAFQABAQAAAAAAAAAAAAAAAAAABQf/2gAIAQEAAAAAmhf/xAAUAQEAAAAAAAAAAAAAAAAAAAAE/9oACAECEAAAACf/xAAUAQEAAAAAAAAAAAAAAAAAAAAC/9oACAEDEAAAAF//xAAfEAACAQMFAQAAAAAAAAAAAAABAgMABAUREiNxk9H/2gAIAQEAAT8Asw82PuZ1kLPGxAEgGhA6FLk5do5W8k+V/8QAGBEAAgMAAAAAAAAAAAAAAAAAAAMBESL/2gAIAQIBAT8AW9lzo//EABgRAQADAQAAAAAAAAAAAAAAAAIAAQMh/9oACAEDAQE/ANAaJ5P/2Q=='%3E%3C/image%3E%3C/svg%3E)
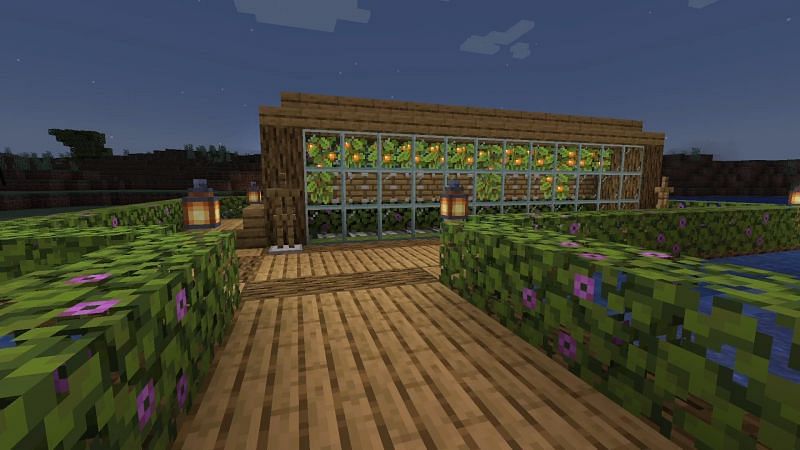
Glow berries are a new light source and food item coming in the Minecraft Caves and Cliffs update. This item can be found in the upcoming lush cave biomes and minecart loot chests.
Like other items in Minecraft, players can also farm glow berries automatically. This article is a guide on how to build an automatic glow berry farm.

Chart New Territories with the ultimate Minecraft Seed Generator!
Automatic glow berry farm in Minecraft: Requirements & Steps
Items needed:
- Dispenser
- Two hoppers
- Two chests
- building blocks
- slab
- Some redstone dust
- comparator
- lever
- Lots of bonemeal
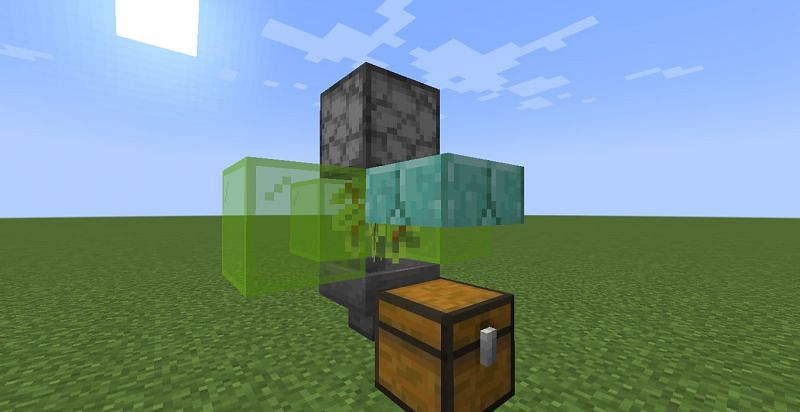
1) Place a dispenser two blocks above the ground
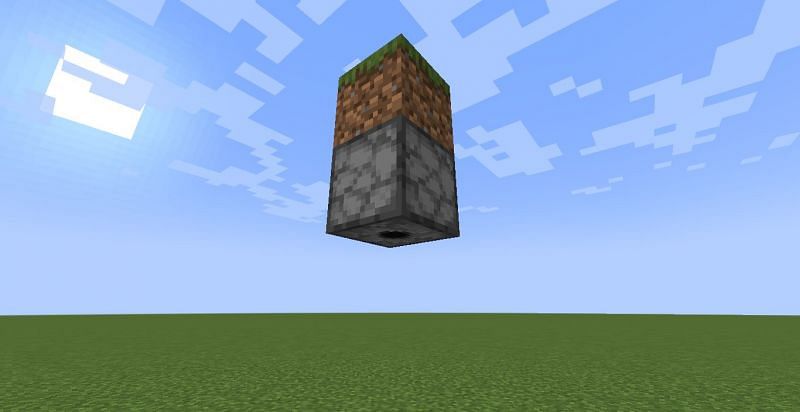
The first step is to place a dispenser two blocks above the ground. This dispenser will be used to grow glow berries. Players can use a block behind to put the dispenser in the air, as shown in the image.
2) Put a hopper on the ground below the dispenser and connect it to the chest
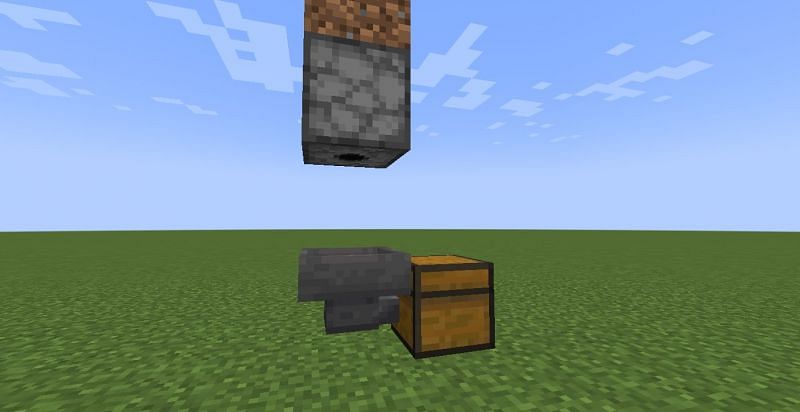
After placing the dispenser, place a hopper connected to the chest below the dispenser, as shown in the image. It will collect all the glow berries and send them to the chest.
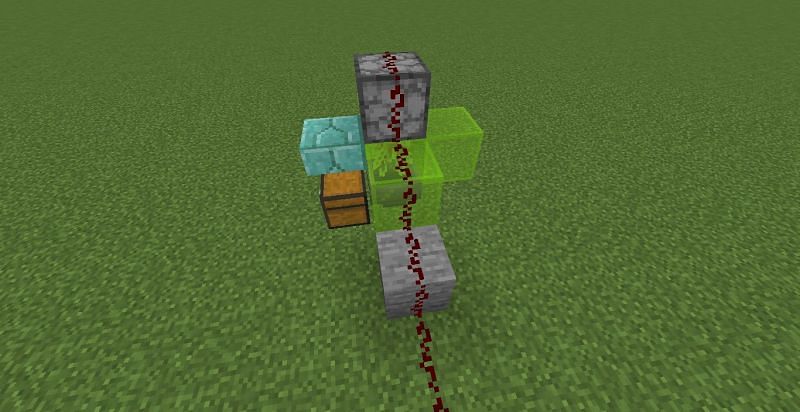
3) Surround the middle area with blocks
Players can use any block to cover the farm. This is done to stop glow berries from spilling all over the ground. Surround the middle area with blocks, except the front side.
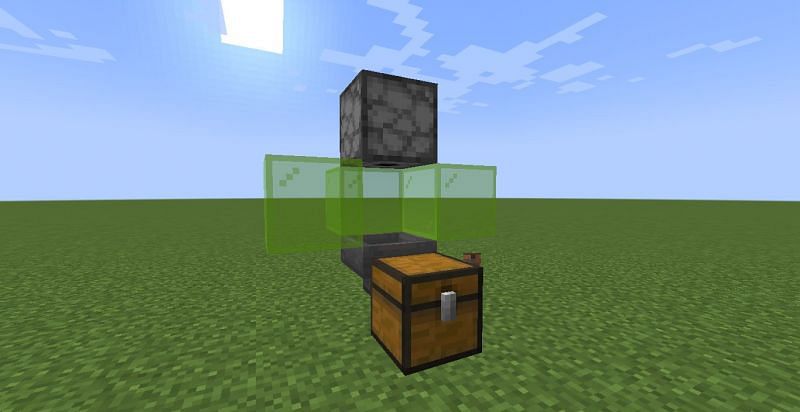
4) Hang a glow berry from the dispenser
Glow berries can only be attached to the bottom side of blocks. Crouch and place a glow berry on the bottom side of the dispenser.
After hanging the glow berry, place a top slab on the chest, as shown in the image.
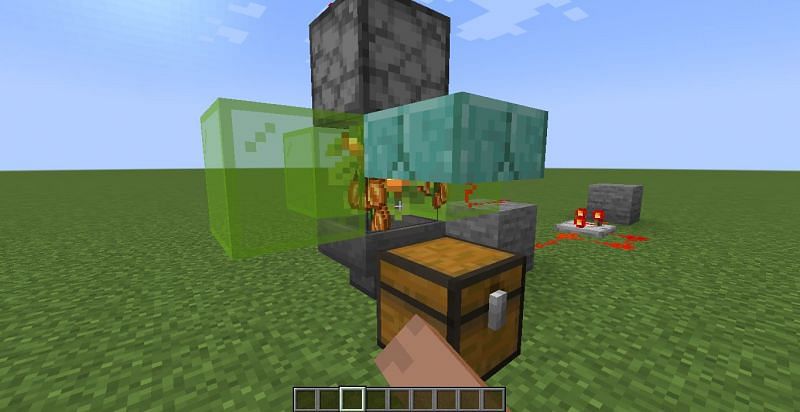
5) Time to add some redstone magic
Place a block on any one side of the farm, except the chest side. Put redstone dusts above the dispenser and other blocks, as shown in the image.
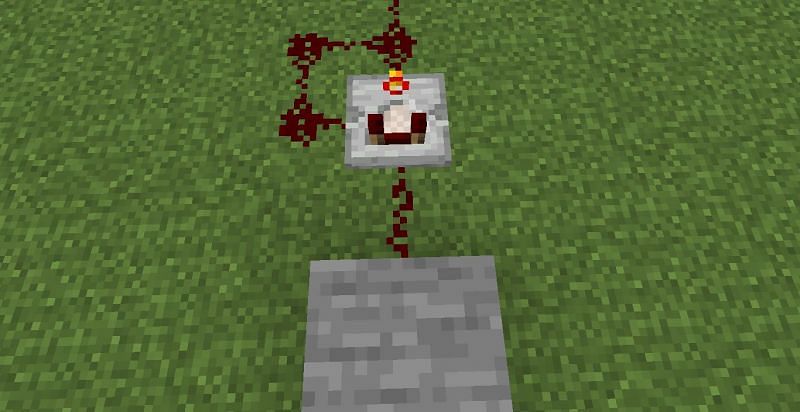
Place a comparator on the ground and make a redstone dust loop, as shown in the image. Right-click on the comparator to turn it into subtracting mode. Put a redstone dust behind the comparator and connect it to a solid block.
Attach a lever to the block. Turning on the lever will create fast alternating redstone signals. For now, keep the lever switched off.
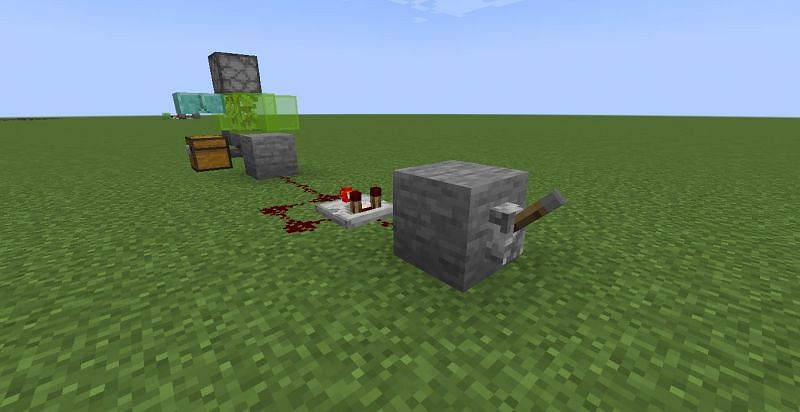
6) Fill the dispenser with bonemeals
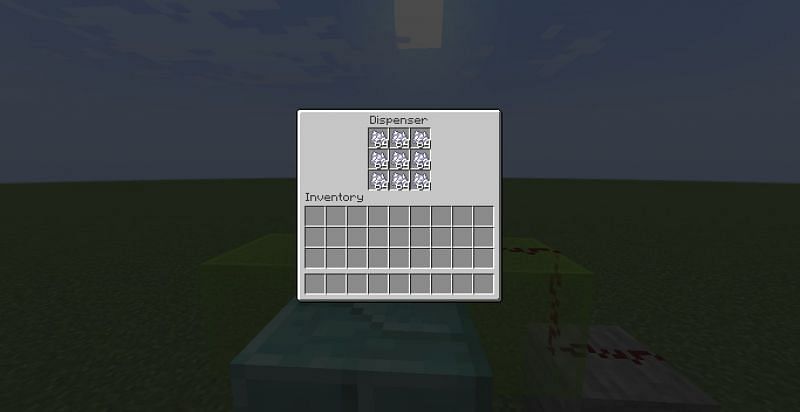
This design uses bonemeal to farm glow berries. With the redstone loop, the dispenser will dispense bonemeal continuously. Attach a hopper to the dispenser and place the chest above that hopper. This chest is for supplying bonemeal to the dispenser.
After the dispensers are filled with bonemeals, activate the lever and stand in front of the slab. Clicking on the glow berries will harvest them. Players can use an auto-clicker to farm glow berries automatically in Minecraft.

Uncover new worlds with our Minecraft Seed Generator!