
'%20x='0'%20y='0'%20height='100%25'%20width='100%25'%20%0A%20%20%20%20%20%20%20%20%20%20xlink%3Ahref='data:image/jpg;base64,/9j/2wBDAAYEBQYFBAYGBQYHBwYIChAKCgkJChQODwwQFxQYGBcUFhYaHSUfGhsjHBYWICwgIyYnKSopGR8tMC0oMCUoKSj/2wBDAQcHBwoIChMKChMoGhYaKCgoKCgoKCgoKCgoKCgoKCgoKCgoKCgoKCgoKCgoKCgoKCgoKCgoKCgoKCgoKCgoKCj/wgARCAAGAAoDASIAAhEBAxEB/8QAFgABAQEAAAAAAAAAAAAAAAAAAAQF/8QAFQEBAQAAAAAAAAAAAAAAAAAAAAH/2gAMAwEAAhADEAAAAMCgj//EAB4QAAIBBAMBAAAAAAAAAAAAAAECAwAEBRESFSGS/9oACAEBAAE/ALWbMMrP2M3EhtAysdeHVRZe9SJEkuZHdQAzcm9P1X//xAAWEQADAAAAAAAAAAAAAAAAAAAAARL/2gAIAQIBAT8Atn//xAAVEQEBAAAAAAAAAAAAAAAAAAAAAv/aAAgBAwEBPwCn/9k='%3E%3C/image%3E%3C/svg%3E)
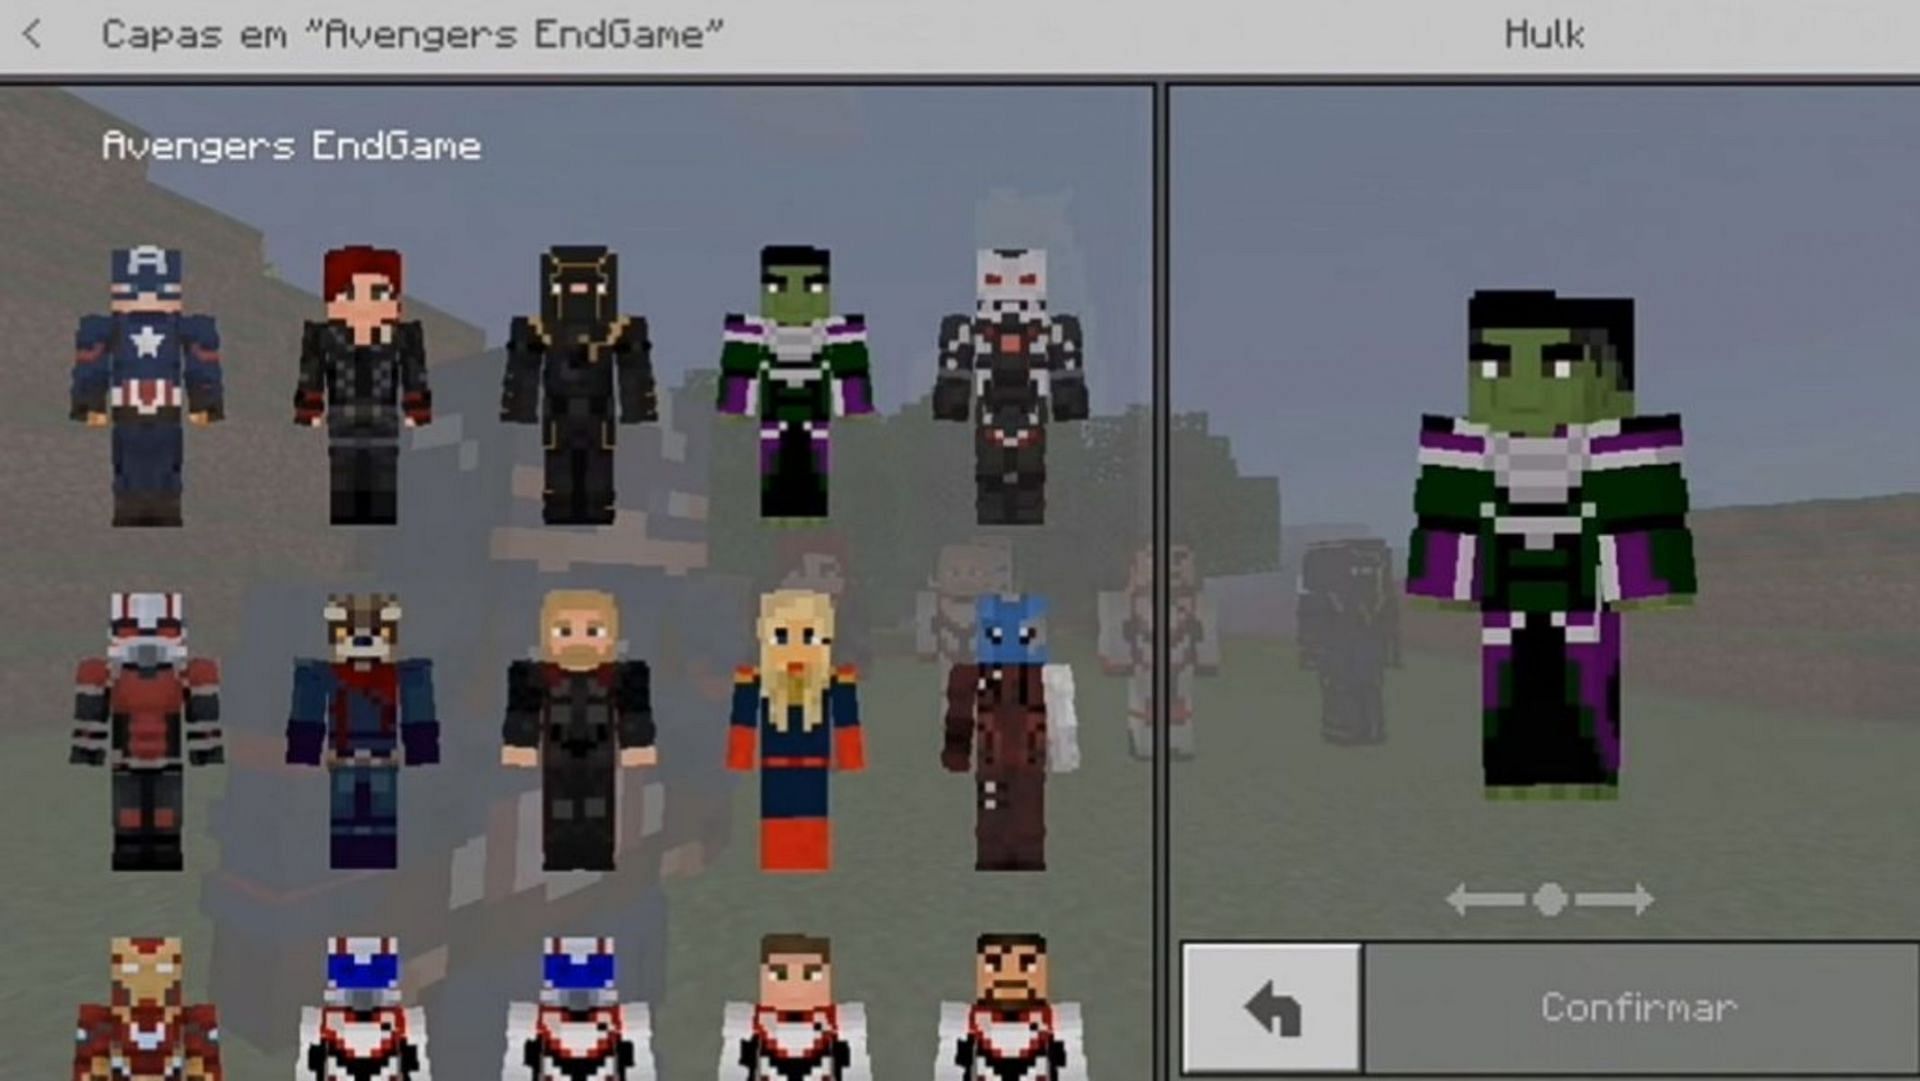
Minecraft: Bedrock Edition and the versions that work from its codebase (Pocket and Education Editions) operate player skins in a slightly different way compared to Java. One of the most prominent features of Bedrock's skin mechanics comes in the form of the dressing room/character creator, which allows you to swap between skins on the fly from within the game itself.
This stands in contrast to Java Edition, which typically requires the skins to be changed on the game's website. Skins can even be imported in bulk in the form of skin packs, providing plenty of additional options. Custom skin packs can even be created, allowing for a large collection of skins to be selectable within Bedrock Edition without needing to make purchases on the Minecraft Marketplace.

How to create a custom skin pack in Minecraft Bedrock using McBuild
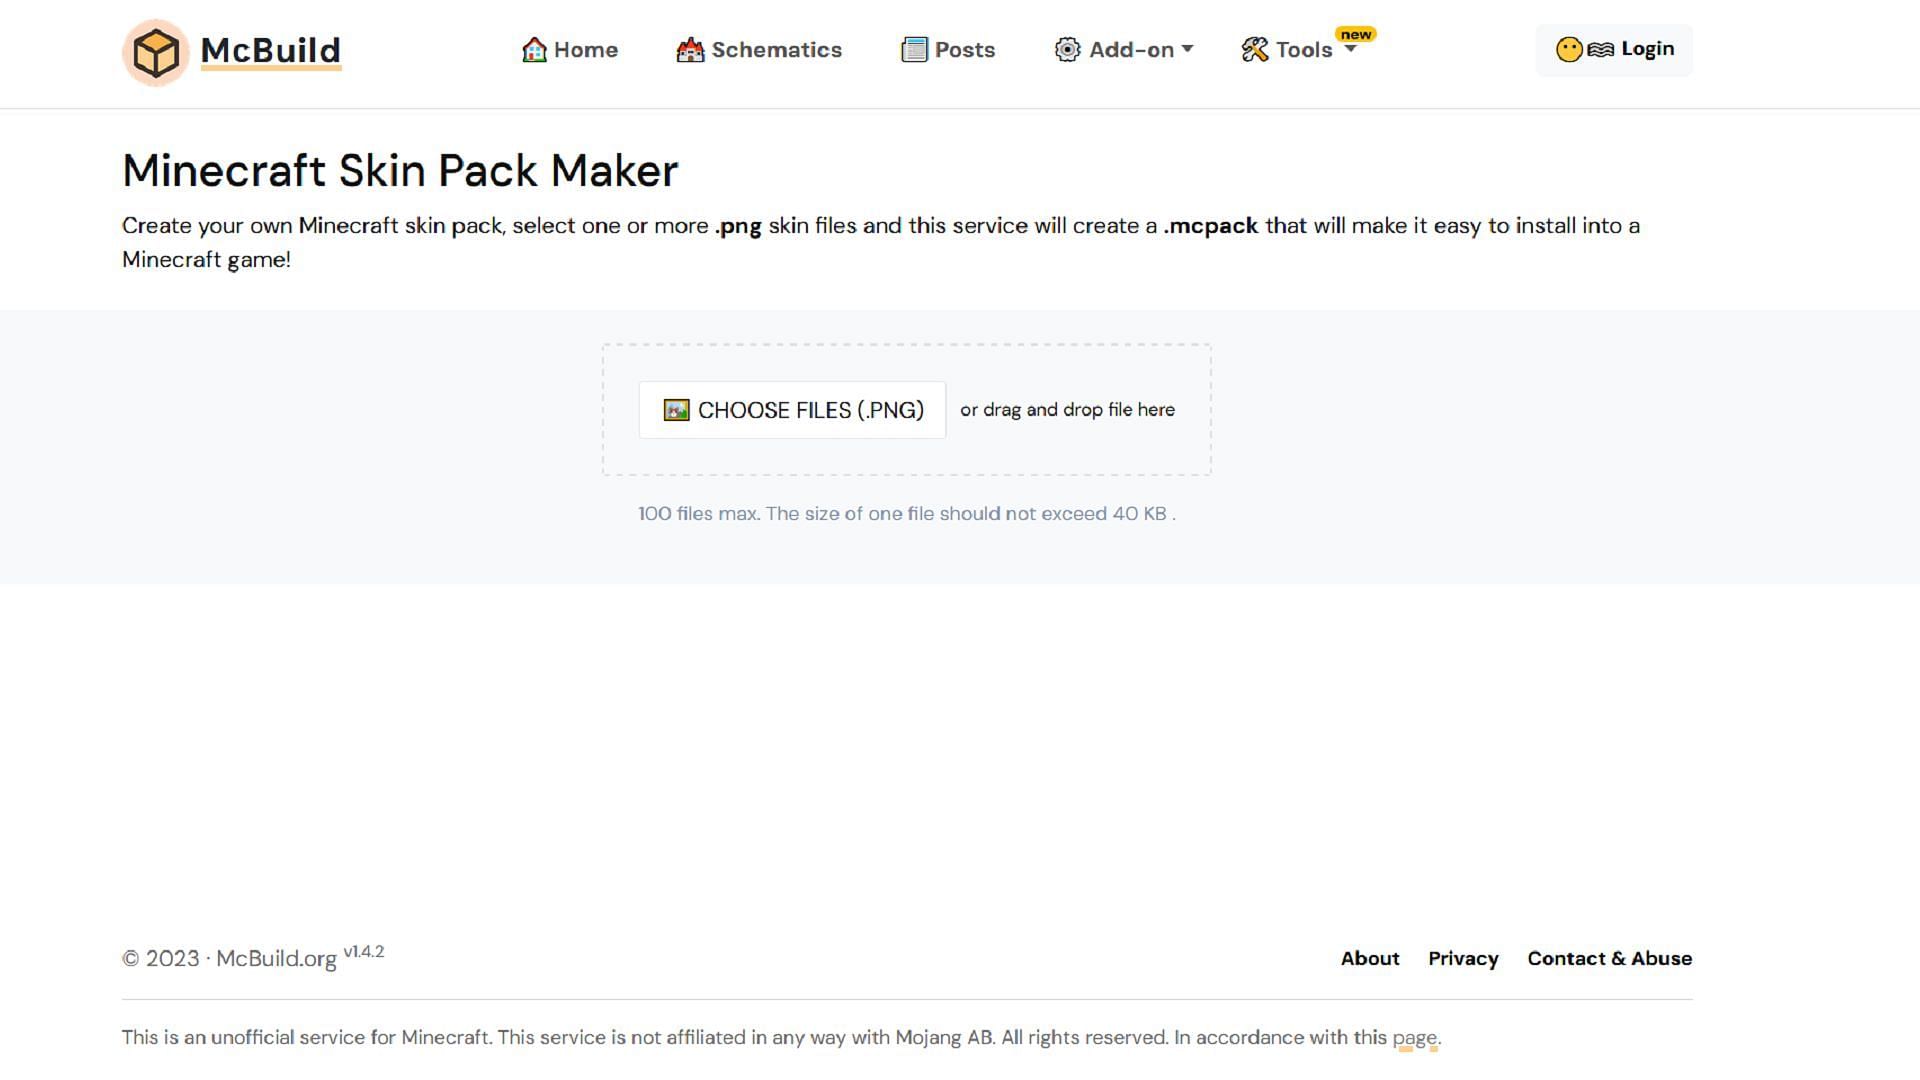
Chart New Territories with the ultimate Minecraft Seed Generator!
Fortunately, there are a ton of different resources available online to create custom skin packs. These websites and apps do not require you to know how to change the game's files or use any mod or add-on manager. One excellent example is McBuild, which allows you to simply upload the image files of skins you've downloaded and then condense them into a skin pack (.mcpack) file.
Below, you can find a quick set of steps to create and import a Minecraft Bedrock skin pack using McBuild's skin pack creator:
- Open your web browser and head to any Minecraft skin website of your choosing including NameMC, The Skindex, or other sites, and download any skins you'd like to include in your pack. Ensure that the skins you've downloaded are in the .png image format.
- Next up, still in your browser, head to https://mcbuild.org/skin-pack-maker/ where you'll find McBuild's skin pack creator.
- Click the "choose files (.png)" button, which will open a window asking for you to select skin .png files. Navigate to the folder you downloaded your skin files to in Step 1 and select the skin files you'd like to upload. You can select up to 100 different skin files (though that might be a bit too many) and the size of one skin file should not exceed 40kb, otherwise, it can't be uploaded to McBuild's skin pack builder.
- As you upload your Minecraft skins to the pack, you can scroll down and select a name for your skin pack as well as name individual skins. Once you're happy with your skins and names for the pack, click the green "make skin pack" button next to where you entered the name for your skin pack. A button that reads "Download (.mcpack)" should appear. Click this to receive your pack's .mcpack file.
- Navigate to where you downloaded the .mcpack file and open the file. If Bedrock Edition is installed on your device, the game will open and automatically import the custom skin pack.
That's all there is to it! From here, you can head to the dressing room and click the green coathanger icon to navigate to your classic skins. You should be able to find your custom skin pack by its name in the sidebar along with all of your new equippable Minecraft skins.

Uncover new worlds with our Minecraft Seed Generator!