
'%20x='0'%20y='0'%20height='100%25'%20width='100%25'%20%0A%20%20%20%20%20%20%20%20%20%20xlink%3Ahref='data:image/jpg;base64,/9j/2wBDAAYEBQYFBAYGBQYHBwYIChAKCgkJChQODwwQFxQYGBcUFhYaHSUfGhsjHBYWICwgIyYnKSopGR8tMC0oMCUoKSj/2wBDAQcHBwoIChMKChMoGhYaKCgoKCgoKCgoKCgoKCgoKCgoKCgoKCgoKCgoKCgoKCgoKCgoKCgoKCgoKCgoKCgoKCj/wgARCAAGAAoDASIAAhEBAxEB/8QAFgABAQEAAAAAAAAAAAAAAAAAAAQI/8QAFQEBAQAAAAAAAAAAAAAAAAAAAgP/2gAMAwEAAhADEAAAAM6SE3//xAAcEAACAgIDAAAAAAAAAAAAAAABAwAhAhIiMZH/2gAIAQEAAT8AxesLYAnlWuW3ULrNH2f/xAAUEQEAAAAAAAAAAAAAAAAAAAAA/9oACAECAQE/AH//xAAUEQEAAAAAAAAAAAAAAAAAAAAA/9oACAEDAQE/AH//2Q=='%3E%3C/image%3E%3C/svg%3E)
Minecraft's atmosphere can easily be altered using shaders, and you can enhance their gaming experience to the next level. These mods change the game's lighting, shadows, colors, and textures, offering a more realistic or stylized visual appeal. Depending on the shader, you can get a colorful, vibrant environment or a cinemaesque atmosphere in Minecraft.
One such sought-after shader pack for the game is Insanity Shader, which infuses the game with a unique horror-themed twist. In this article, learn how to install Insanity Shader for Minecraft. Whether you use Optifine or Iris, follow the steps below and immerse yourself in the darkness!

Insanity Shaders' installation guide for Minecraft
Chart New Territories with the ultimate Minecraft Seed Generator!
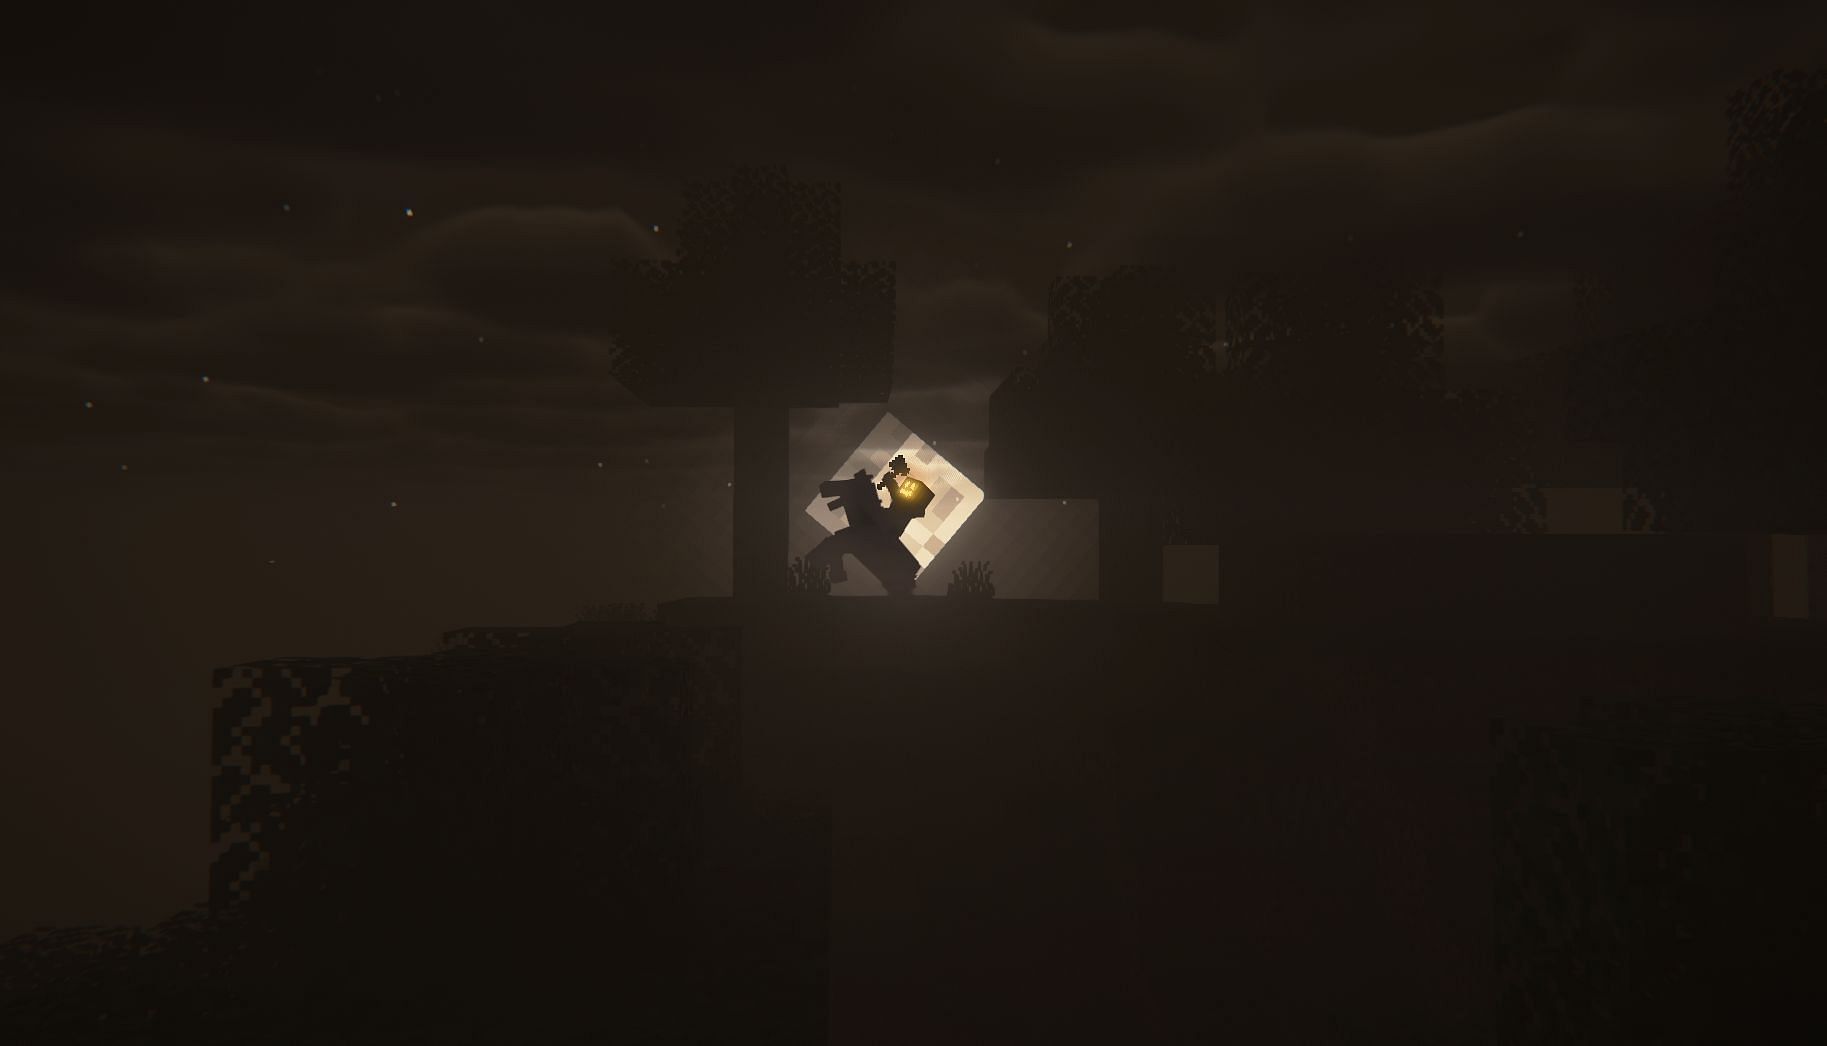
Insanity Shader creates a darker, more chilling, and immersive ambiance, featuring foggy weather, realistic clouds, and eerie effects. Based on BSL Shaders by Capt Tatsu, this pack expands customization options and optimizes performance.
Should you wish to experience Insanity Shader yourself, you must install it on your game. There are two methods to achieve this: by using OptiFine or Iris. OptiFine is a modification that enhances Minecraft's performance and graphics. At the same time, Iris is an alternative incorporating Sodium, another mod that boosts the game's FPS. Both methods enable you to utilize shaders in Minecraft.
How to install Insanity Shader using OptiFine
1. Download OptiFine from their website, ensuring you select the version compatible with your Minecraft version.
2. Run the downloaded file and click Install, creating a new profile in your launcher called OptiFine.
3. Download Insanity Shader from CurseForge, obtaining a .zip file containing the shader pack.
4. Open your game launcher and select the OptiFine profile. Click Play to launch the game.
5. Go to Options > Video Settings > Shaders and click on Shaders Folder, opening a folder where you should place the Insanity Shader .zip file.
6. Drag and drop the .zip file of Insanity Shader into the Shaders Folder without unzipping it.
7. Return to the game, click on Done, and then on Shaders again. Select Insanity Shader from the list on the left.
8. Click on Done once more and start a new world or join a server to witness the shader effects in your game.
How to install Insanity Shader using Iris
1. Download Iris, making sure you choose the version compatible with your game version.
2. Run the downloaded file and click Install, which will add Iris and Sodium to your the game, and create a new profile called Fabric Loader in your launcher.
3. Download Insanity Shader from CurseForge, obtaining a .zip file containing the shader pack.
4. Open your Minecraft launcher and select the Fabric Loader profile. Click Play to launch the game.
5. Go to Options > Video Settings > Shaders and click on Shaders Folder, opening a folder where you should place the Insanity Shader .zip file.
6. Drag and drop the .zip file of Insanity Shader into the Shaders Folder without unzipping it.
7. Return to the game, click on Done, and then on Shaders again. Select Insanity Shader from the list on the left.
8. Click on Done once more and start a new world or join a server to witness the shader effects in your game.
Insanity Shader is an excellent way to infuse your game with horror and style. It is also compatible with most modern PCs and supports realistic texture packs. Depending on your preference, you can install it using OptiFine or Iris and add a dark theme to your world.

Uncover new worlds with our Minecraft Seed Generator!