
'%20x='0'%20y='0'%20height='100%25'%20width='100%25'%20%0A%20%20%20%20%20%20%20%20%20%20xlink%3Ahref='data:image/jpg;base64,/9j/2wBDAAYEBQYFBAYGBQYHBwYIChAKCgkJChQODwwQFxQYGBcUFhYaHSUfGhsjHBYWICwgIyYnKSopGR8tMC0oMCUoKSj/2wBDAQcHBwoIChMKChMoGhYaKCgoKCgoKCgoKCgoKCgoKCgoKCgoKCgoKCgoKCgoKCgoKCgoKCgoKCgoKCgoKCgoKCj/wgARCAAFAAoDASIAAhEBAxEB/8QAFQABAQAAAAAAAAAAAAAAAAAABQb/2gAIAQEAAAAAkhP/xAAUAQEAAAAAAAAAAAAAAAAAAAAC/9oACAECEAAAAB//xAAUAQEAAAAAAAAAAAAAAAAAAAAD/9oACAEDEAAAAF//xAAjEAABAwMCBwAAAAAAAAAAAAABAwQSAgURAAYHFCEiMXLT/9oACAEBAAE/ANm3B7bdtczb3rpFwpg1mc6InuiKKhge2nHES+FdTDnpI+UUPnr/xAAZEQACAwEAAAAAAAAAAAAAAAACIQABA5H/2gAIAQIBAT8AzIm77P/EABkRAAMAAwAAAAAAAAAAAAAAAAECAwAEIv/aAAgBAwEBPwCWvJj0oz//2Q=='%3E%3C/image%3E%3C/svg%3E)
Minecraft servers are one of the best ways to enjoy the multiplayer mode and remain highly popular to this day. One of the most attractive things about Minecraft multiplayer servers is that they can be modified using server mods.
Server admins can pick and choose their favorite mods and install them to their own server. For those new to the world of Minecraft modding, this guide will explain how to add mods to a server easily.

Easiest way to install mods on a Minecraft server
In order to install any mods, players will need some kind of server that supports those particular mods. This can either be a regular Forge server or some other fork such a Sponge server.
Chart New Territories with the ultimate Minecraft Seed Generator!
For the purpose of this tutorial, a simple Forge server will be installed. However, if players are feeling adventurous, they can install whatever they like.
Step 1: Setup Forge server software
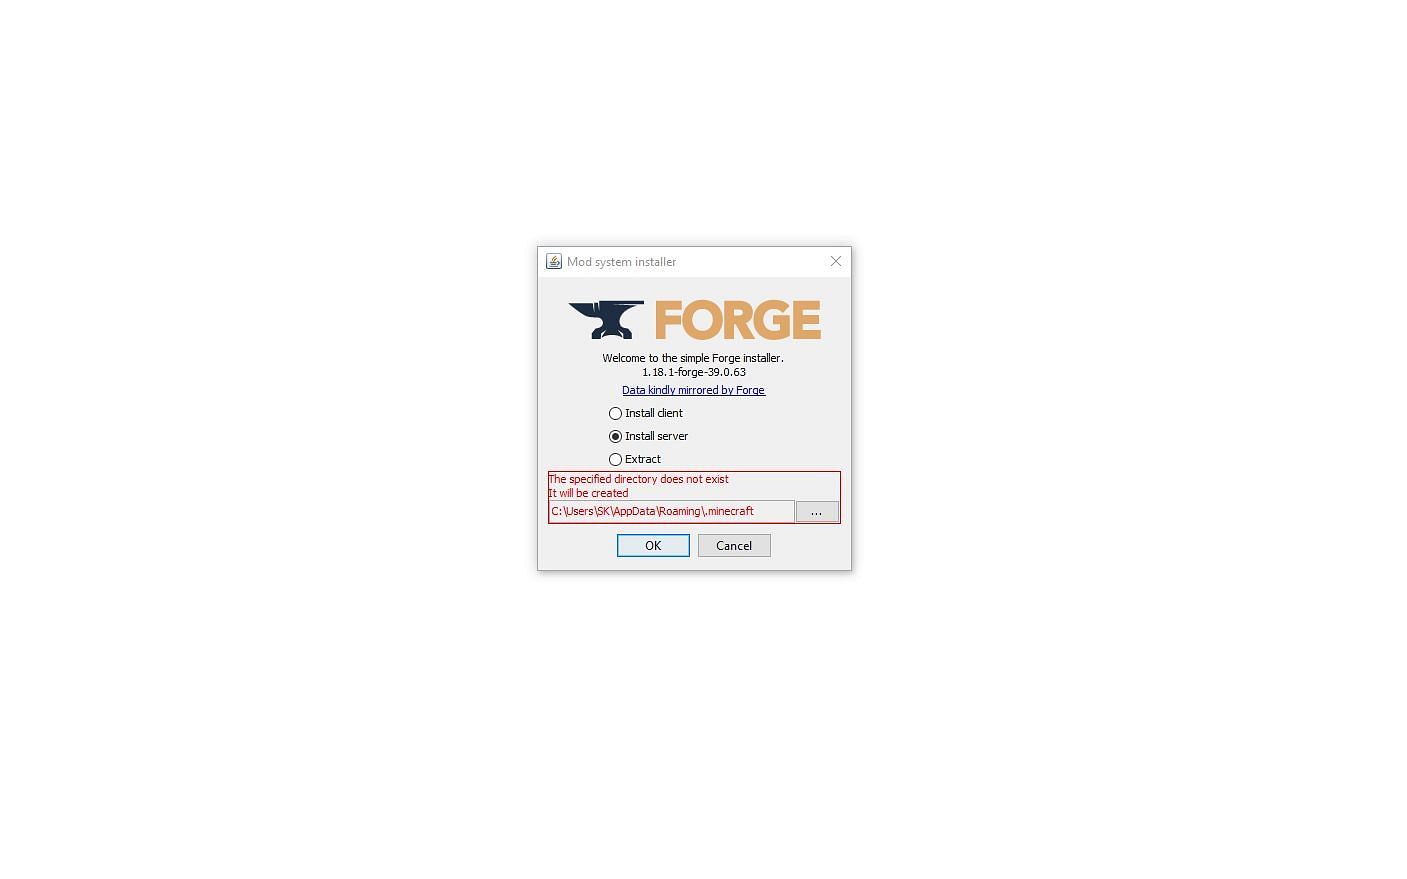
The first step of installing mods to a Minecraft server is downloading the Forge server software, which can be found here.
Once downloaded, players can run the installer and select the option to install a server to a specific file directory, as seen above.
Step 2: Accept EULA and run server

After players have selected the option to install the forge server, they should be able to find a newly generated .jar file inside the installation path specified in the previous step.
Players need to double click this .jar file in order to start the server. After this is done, a file named EULA.txt will be generated and players will need to accept it by changing "eula=false" to "eula=true". After this, the server can be started again.
Step 3: Download a mod
Before proceeding to install a mod, players must have one prepared in advance. Players can check out some of the best mods for Minecraft version 1.18 here.
NOTE: Players must ensure that their desired mod is compatible with the version of Forge that was installed in the first step.
Step 4: Install the mod
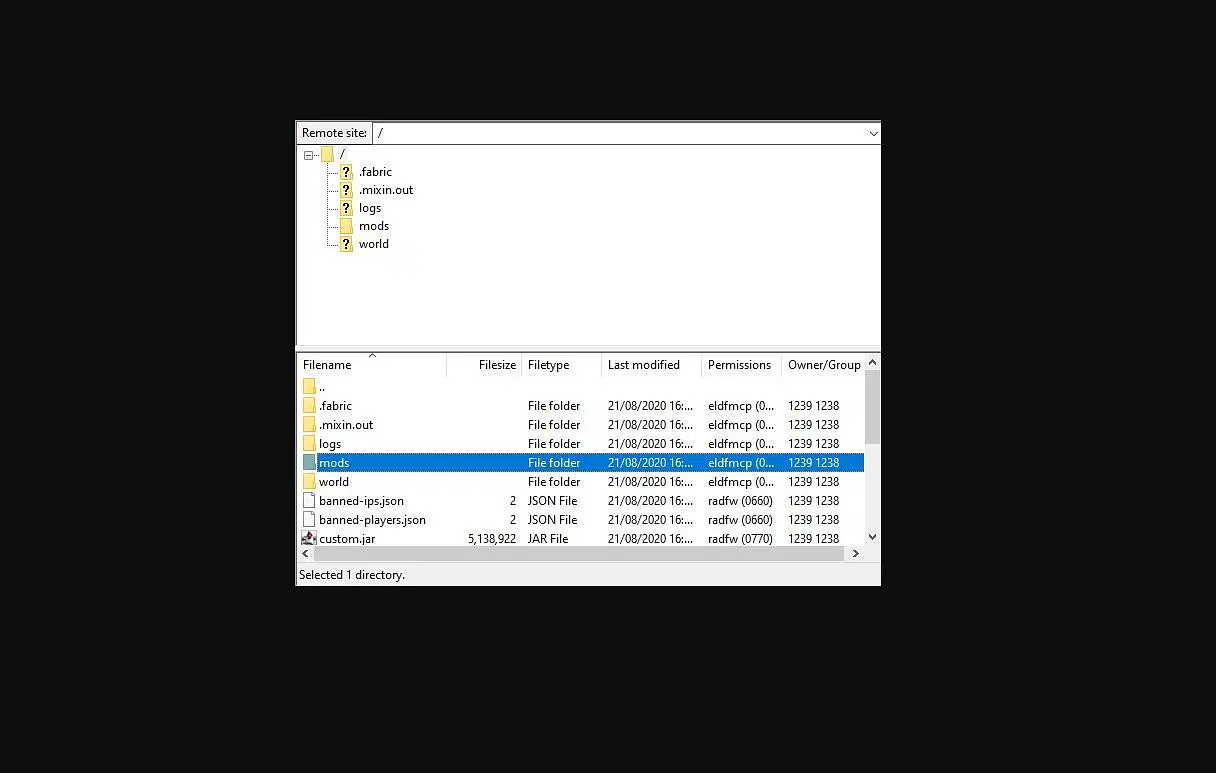
Once a mod has been chosen, players can install it via navigating to the generated folder named "mods". This folder should have been generated when the server was started in the second step.
Once inside the mods folder, all players need to do is drag and drop the desired mod into this folder. Multiple mods can be installed in this folder by following the same process.
Step 5: Start the server
Players now need to boot the server with the mod installed. If the server is already online, then it needs to be restarted.
Provided everything has gone according to plan, the mod should now be fully installed on the Minecraft server.

Uncover new worlds with our Minecraft Seed Generator!