
'%20x='0'%20y='0'%20height='100%25'%20width='100%25'%20%0A%20%20%20%20%20%20%20%20%20%20xlink%3Ahref='data:image/jpg;base64,/9j/4AAQSkZJRgABAQAAAQABAAD/2wCEAAMDAwMDAwQEBAQFBQUFBQcHBgYHBwsICQgJCAsRCwwLCwwLEQ8SDw4PEg8bFRMTFRsfGhkaHyYiIiYwLTA+PlQBAwMDAwMDBAQEBAUFBQUFBwcGBgcHCwgJCAkICxELDAsLDAsRDxIPDg8SDxsVExMVGx8aGRofJiIiJjAtMD4+VP/AABEIAAUACgMBIgACEQEDEQH/xABiAAEBAAAAAAAAAAAAAAAAAAAABxAAAQMDAwUAAAAAAAAAAAAAAQADBAIFEQYSIQcIFCJxAQEAAAAAAAAAAAAAAAAAAAAGEQACAgIDAQAAAAAAAAAAAAABAgMEABIFIkNR/9oADAMBAAIRAxEAPwClO6j1TcLHIFFwjsvxm9xkiCya3CBnngKKDuB6jNgUeRAq2jGTAYyfvqiIpcvXkaPW1OOg9GxHy9OpWkQRQRKGLEjQH5n/2Q=='%3E%3C/image%3E%3C/svg%3E)
Since its release, Minecraft has been able to maintain its original blocky and slightly pixelated nature as minimal changes have been made to the graphics. However, modders are constantly at work, and Optifine has been updated for every single Minecraft version since the beta days of the game.
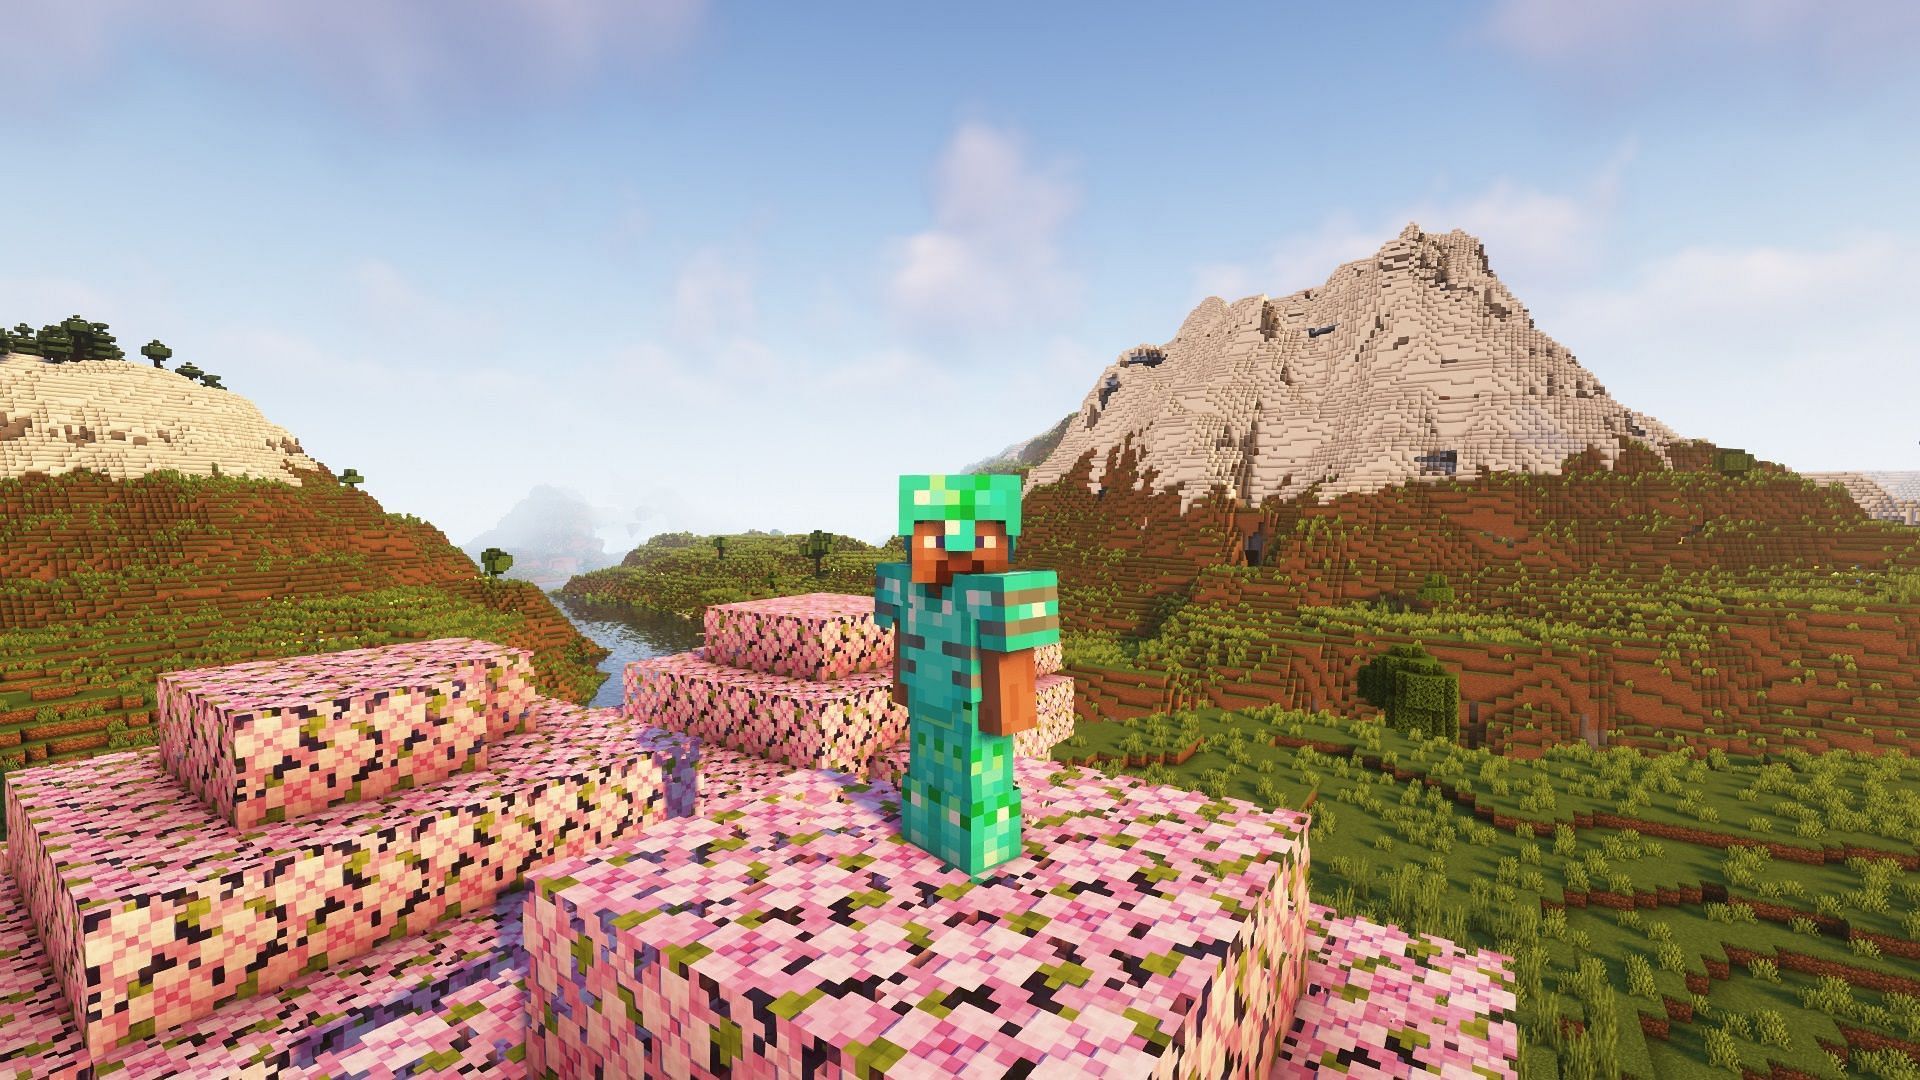
Being a visual mod, Optifine allows users to run custom shaders in the game that can make it look like a modern AAA title. Although not everyone's systems can handle the task of making Minecraft look realistic, Optifine is, to date, one of the most downloaded mods of all time. A few weeks ago, this renowned mod was released for version 1.19.4, allowing players to experience the latest features with better visuals.

Minecraft 1.19.4 shaders installation guide
Chart New Territories with the ultimate Minecraft Seed Generator!
There are a few options when it comes to mods that support shaders. However, this installation guide will have a detailed step-by-step guide to installing Optifine, as it is the most popular and stable visual mod with shader support.
To install Optifine, you must have the 1.19.4 version installed on their system. Once that is done, you can follow these steps to install Optifine:
Step 1: Navigate to the official Optifine site and download the latest mod for version 1.19.4.
Step 2: Open the downloaded installer using Java. If your system does not have Java, you will have to download it.
Step 3: Ensure that the game directory displayed in the installer is correct, and then click on the install button.
The installation usually takes only a few seconds, depending on your system. Once completed, a new Optifine installation for version 1.19.4 will appear in the game launcher.
The next thing you need to do is open the Optifine installation to allow the launcher to download the necessary files and allow the game to create the necessary folders in the game directory.
Once the game opens, simply close the game and proceed with the steps to install the shaders:
Step 1: Download any shader of choice that is 1.19.4 compatible.
Step 2: Open the new Optifine installation.
Step 3: Navigate to the shaders option in the video settings.
Step 4: Click on the Shaders folder option. The game's shaderpacks folder will open.
Step 5: Move the downloaded shader here.
Step 6: Switch back to the game and apply the shaders.
As long as the shader has no compatibility issues with Minecraft 1.19.4, it should perform well.
If there is a shader feature that you do not like and want to disable, you might be able to find it in the shader options present on the bottom right when applying the shader. Most renowned shaders, such as Complementary shaders and SEUS, come with presets available in the same settings.
If you find your system struggling to maintain playable framerates on default settings, you can try a preset with settings that are much easier to run smoothly. The Optifine mod also features many customization options that can enhance or downgrade the game's visuals to improve quality or performance.

Uncover new worlds with our Minecraft Seed Generator!