

'%20x='0'%20y='0'%20height='100%25'%20width='100%25'%20%0A%20%20%20%20%20%20%20%20%20%20xlink%3Ahref='data:image/jpg;base64,/9j/2wBDAAYEBQYFBAYGBQYHBwYIChAKCgkJChQODwwQFxQYGBcUFhYaHSUfGhsjHBYWICwgIyYnKSopGR8tMC0oMCUoKSj/2wBDAQcHBwoIChMKChMoGhYaKCgoKCgoKCgoKCgoKCgoKCgoKCgoKCgoKCgoKCgoKCgoKCgoKCgoKCgoKCgoKCgoKCj/wgARCAAGAAoDASIAAhEBAxEB/8QAFgABAQEAAAAAAAAAAAAAAAAAAAUG/8QAFQEBAQAAAAAAAAAAAAAAAAAABAb/2gAMAwEAAhADEAAAAMJGLoP/xAAeEAACAQQDAQAAAAAAAAAAAAABAwIABBIhERMiYf/aAAgBAQABPwC1k9NkURczUPMsz5HymWB7JZNkTzs5Gv/EABkRAAIDAQAAAAAAAAAAAAAAAAEDAAIEMf/aAAgBAgEBPwDBpYtjTQ9M/8QAFxEBAAMAAAAAAAAAAAAAAAAAAQACEf/aAAgBAwEBPwCxoT//2Q=='%3E%3C/image%3E%3C/svg%3E)
Prismarine shards are probably the best loot available from a Minecraft ocean monument. This is due to the fact that they are used to make sea lanterns, one of the sleekest and most modern-looking blocks in all of Minecraft. This means that farming for them is a near requirement for anyone looking to do any megabuilds using sea lanterns.
Detailed below is how to build a simple, nether portal-free guardian farm for Minecraft's early and mid-game.

How to build a Minecraft guardian farm in update 1.20
1) The awful, terrible, no-good preparations
Chart New Territories with the ultimate Minecraft Seed Generator!
Helpful tip: Between waterbreathing to perform activities beneath the sea and invisibility to avoid guardians, there are several very useful Minecraft potions for those who enjoy the alchemical side of crafting.
This first part of the farm-building process is by far the worst, as you will need to take care of three major things:
- Kill all three Minecraft elder guardians.
- Break down the entire ocean monument.
- Drain a significant surrounding portion of the ocean.
This process is slow and arduous, but assuming you use invisibility potions, it is completely free of risk. The rest of the instruction process will assume that the monument has been reduced to foundations and the ocean has been drained.
2) Find the center of the ocean monument

The next thing you will want to do is find the exact center of the monument. The easiest way to do this is to place blocks from one corner diagonally until you reach the opposite corner. Do the same for the remaining corners. The intersection of these lines is the center of the monument.
3) Line out the spawn and collection chambers
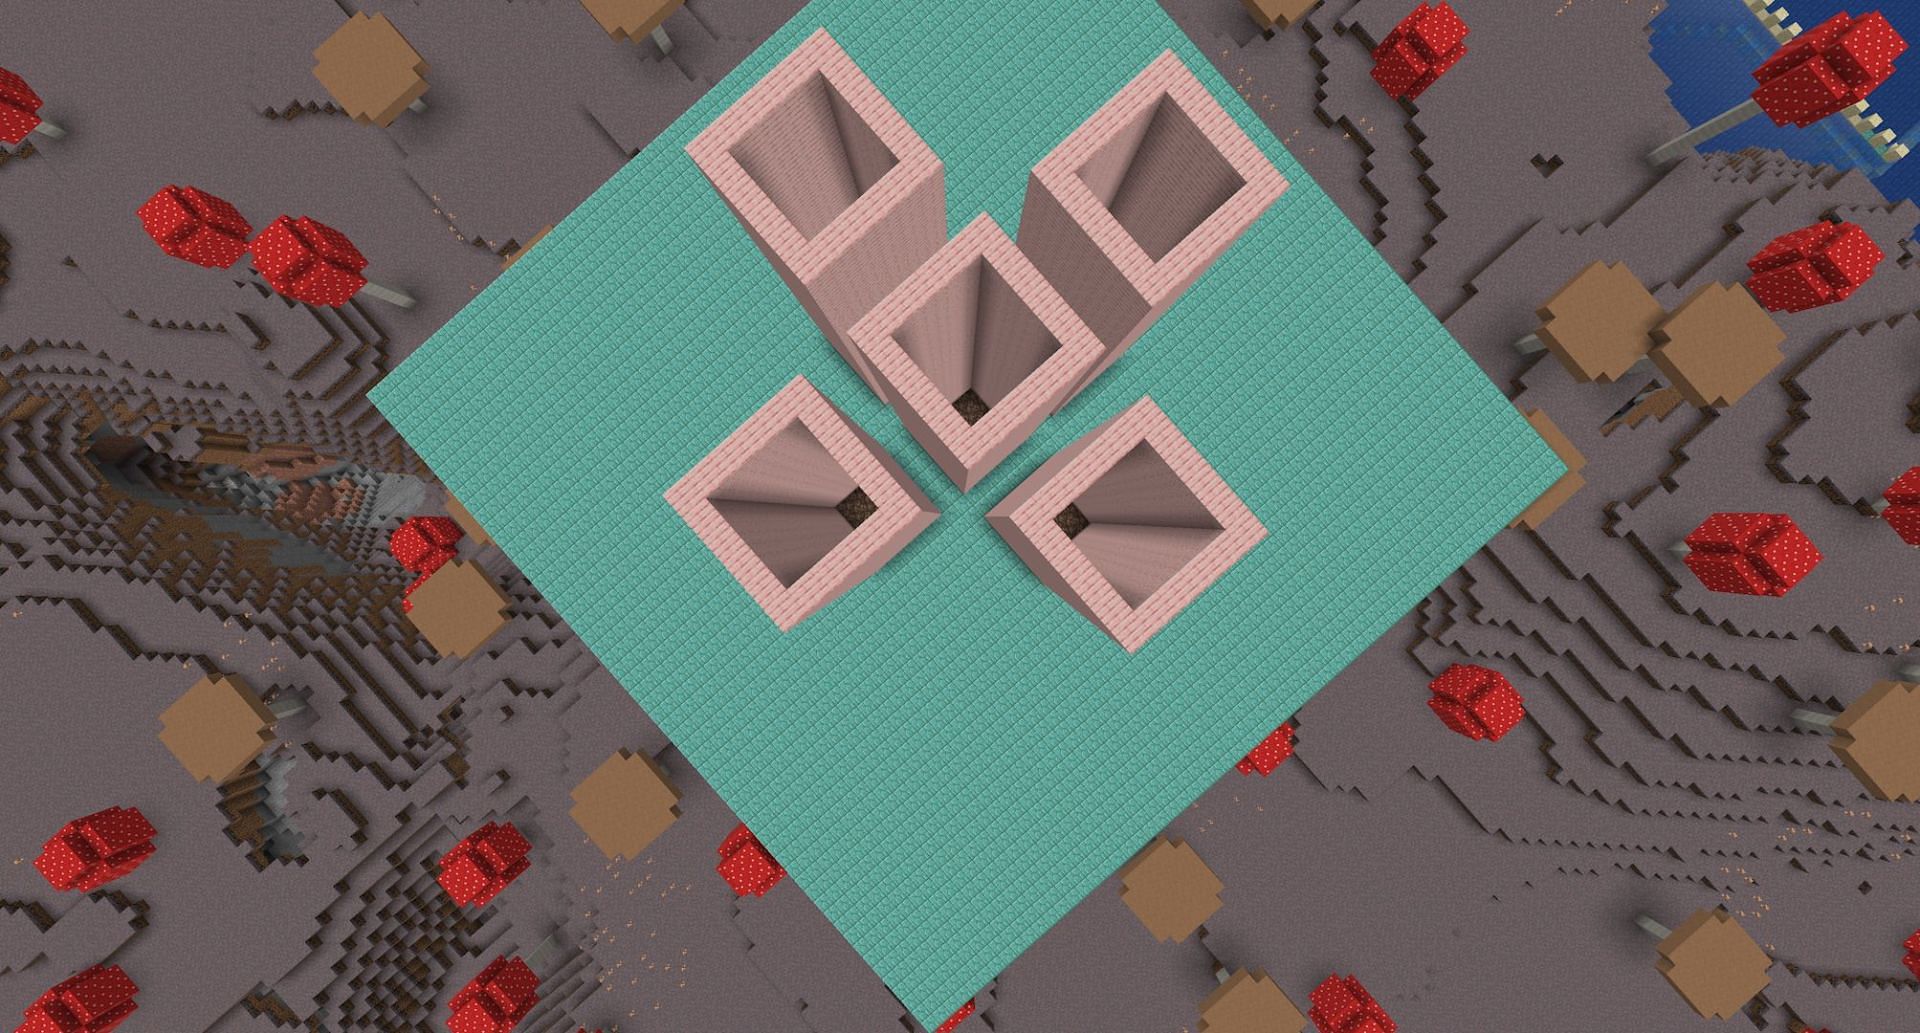
The next thing you will need to do is line out the spawn and collection chambers. From the four middle blocks, build a ring starting two blocks out from the corners. From this outer ring, make four additional identical rings in each cardinal direction, three blocks away. The shape should resemble a D-pad.
Fill the outer ones with soul sand and the one in the center with Minecraft's hoppers, with 15 of them all leading into a single output hopper that will feed items down.
Raise the walls on all of these chambers for a total of 22 blocks. Then, connect the outer spawn tubes to the inner chute, using a ring of glass panes as the border of the drop. Between this extreme drop and some campfires, the guardians should process through this Minecraft farm quite quickly. Build up a two-and-a-half block perimeter around these upper areas.
4) Storage
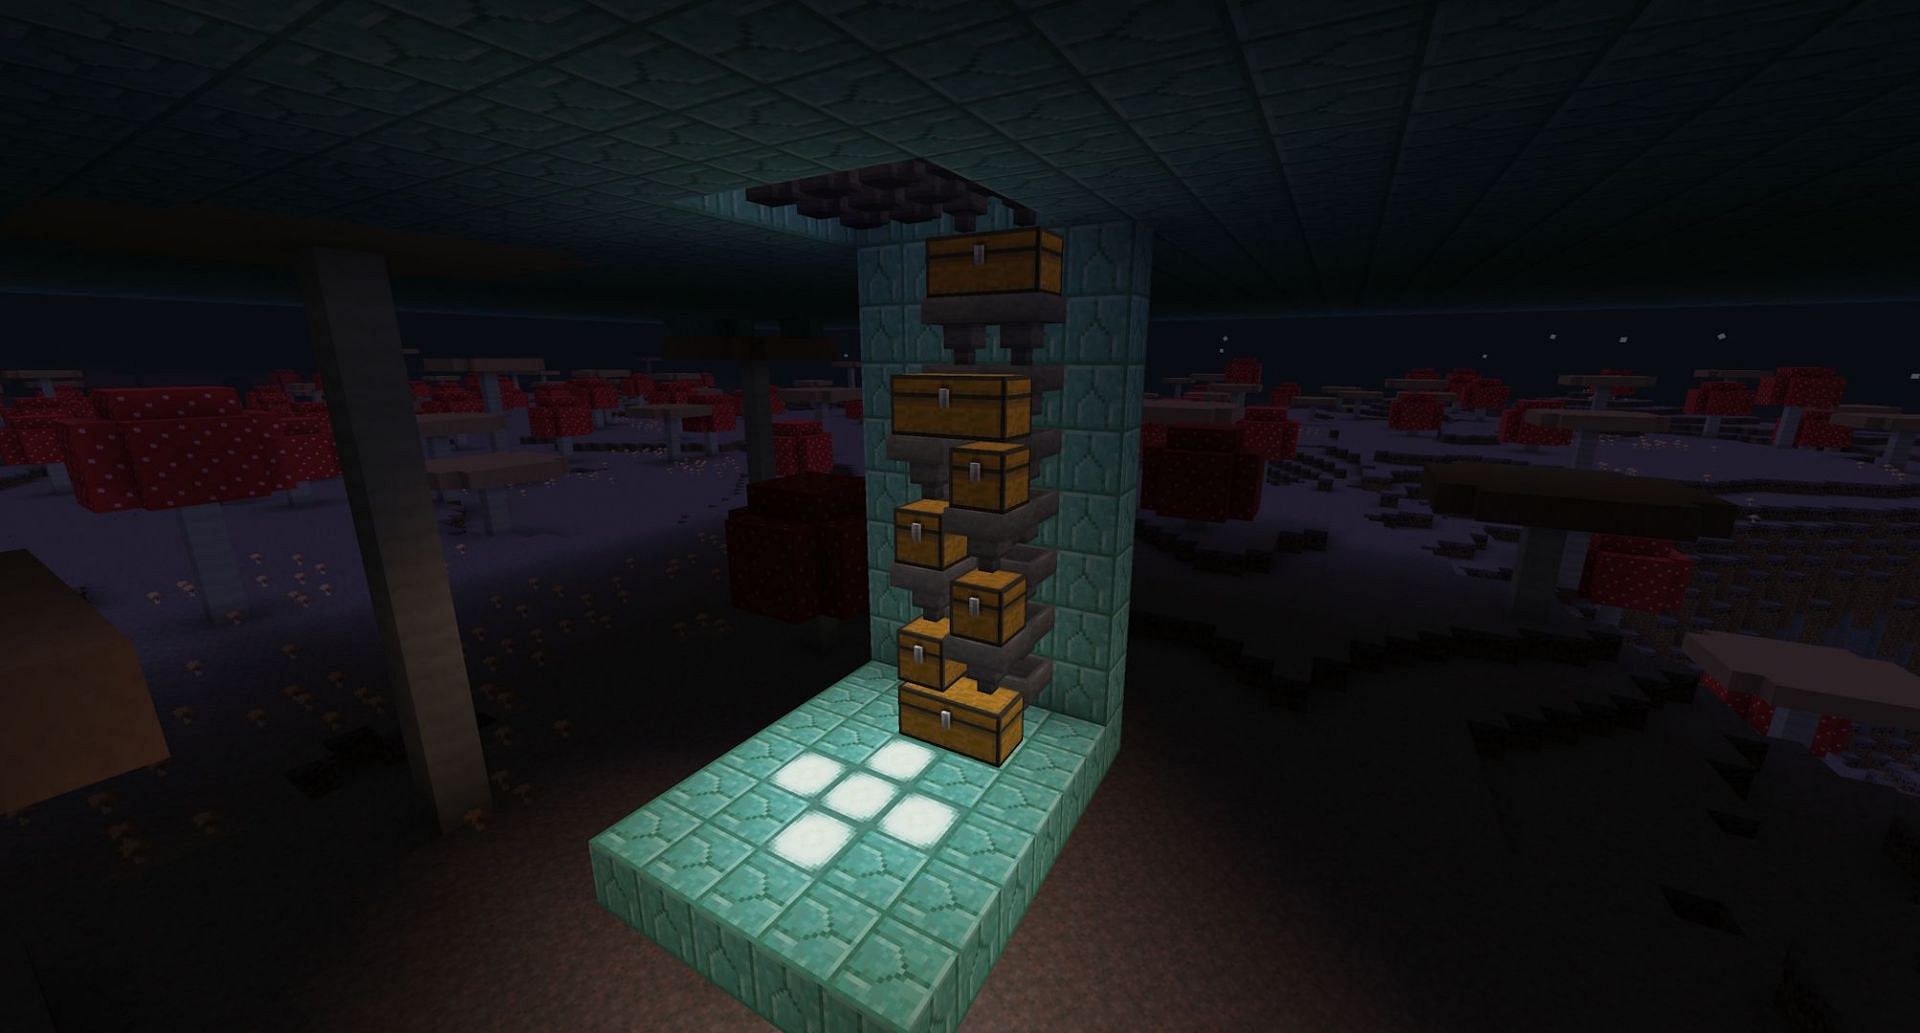
The next vital piece of the farm construction process is making the storage area where output items will be collected. Players will need to dig out and waterproof an area underneath the base large enough to contain the storage area and a room from which players can access the output chests.
You can either build a complex auto-sorting item storage system or, as in this example, a series of hoppers that accumulate items within several chests.
5) The kill mechanisms
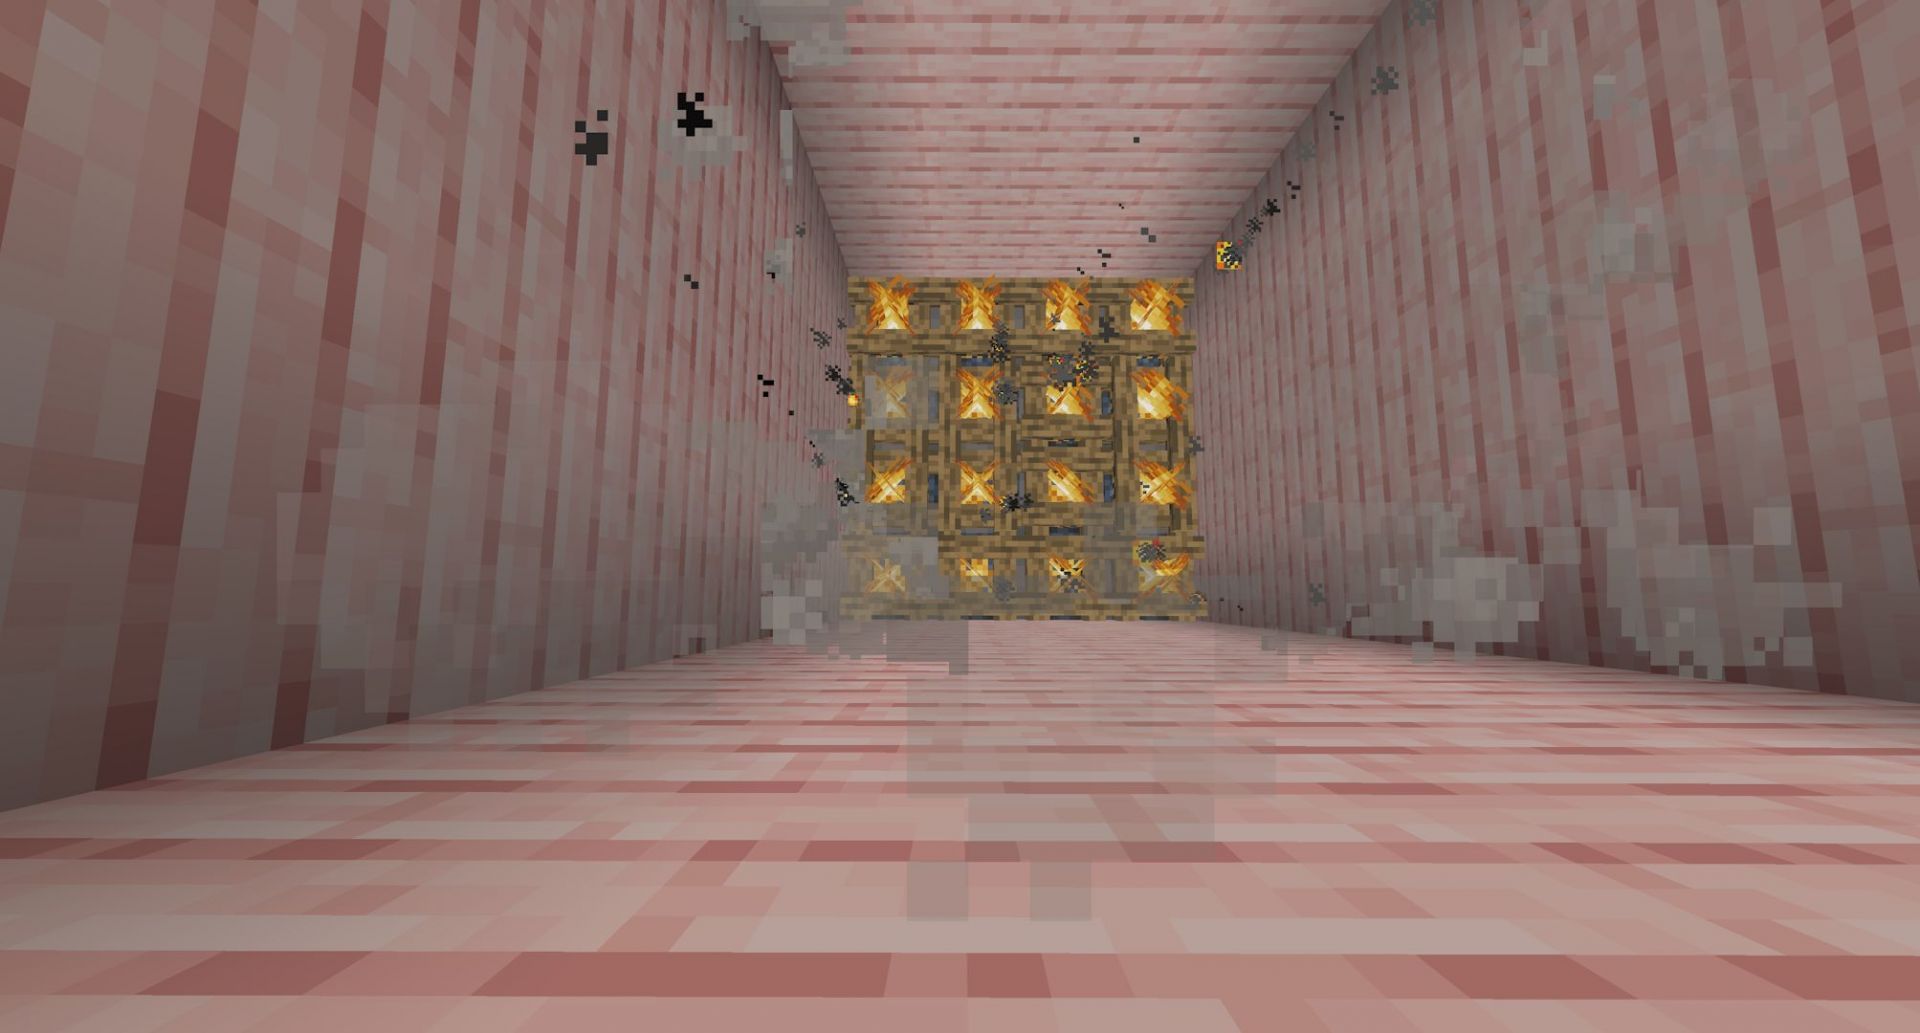
The next thing you need to build is the infrastructure within the farm that pushes mobs into the pit and the backup systems in place to handle any that survive the fall. In this case, you should place campfires atop the hoppers in the collection chute, as that will quickly burn any stragglers.
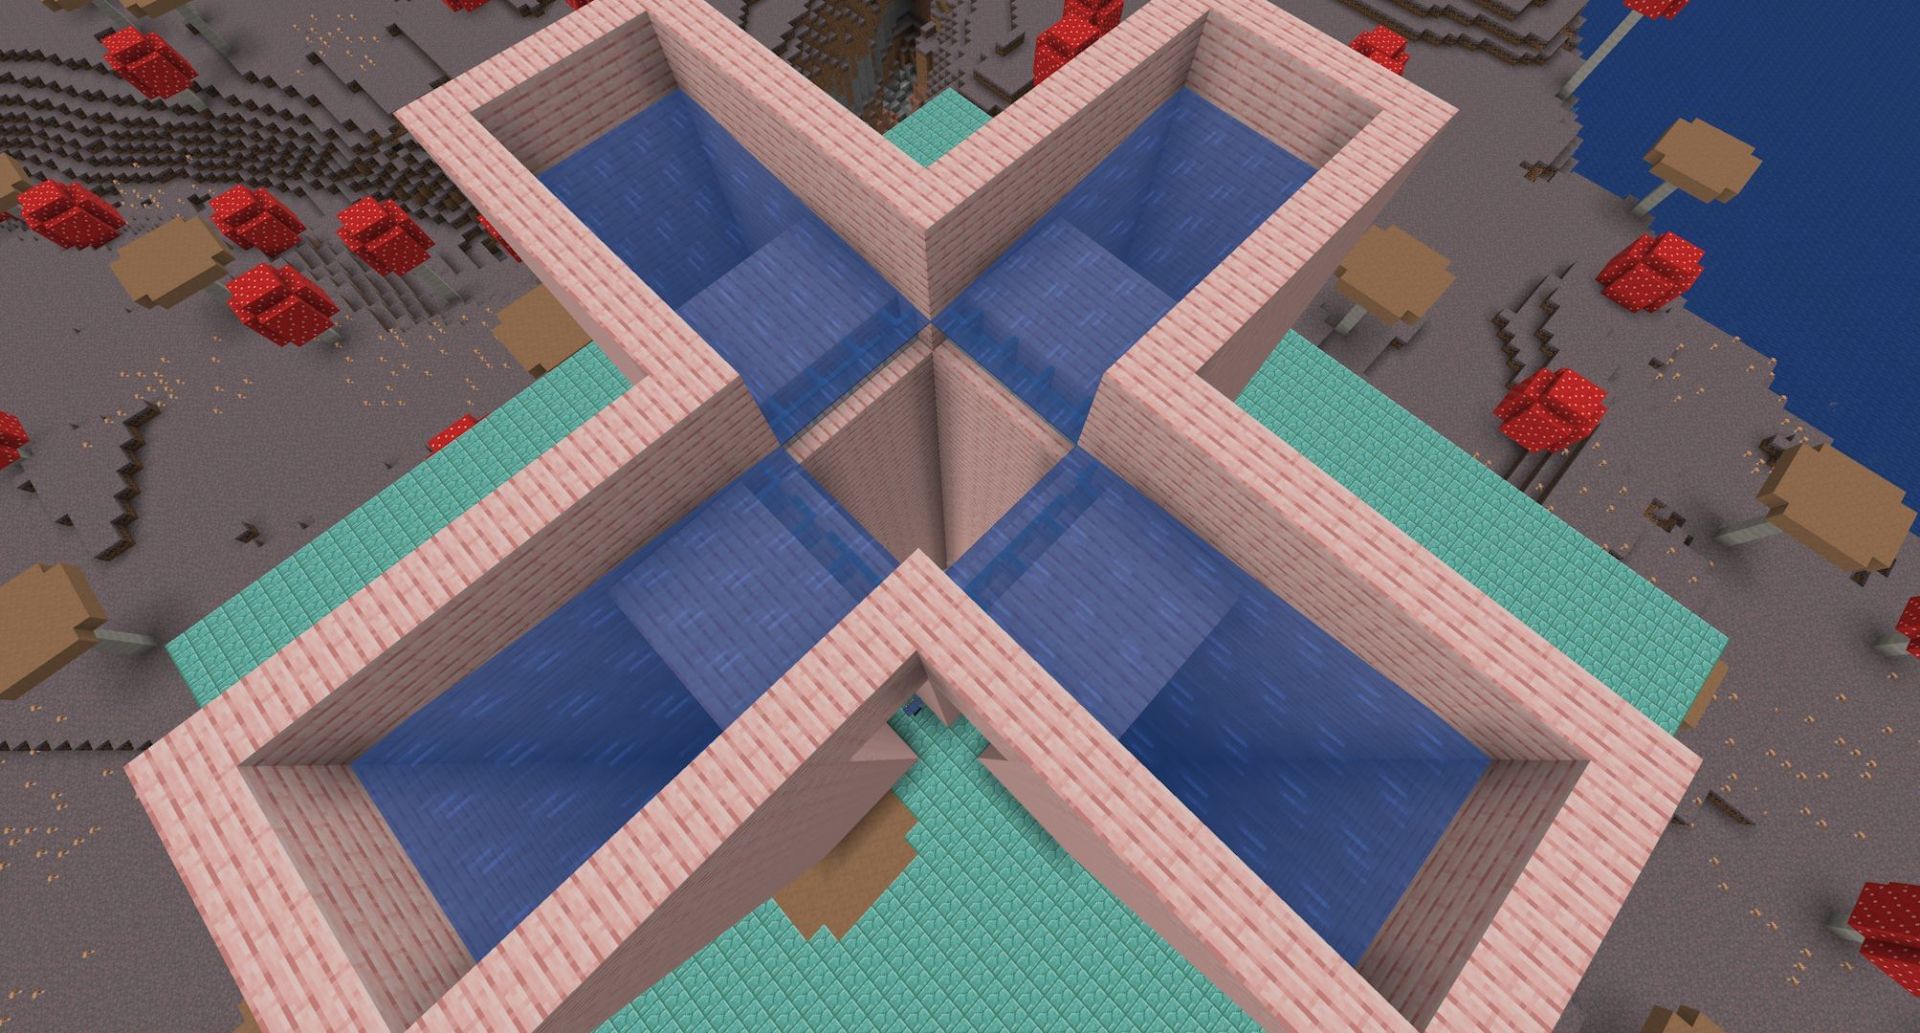
Then, add water to the spawn chambers. Place a series of temporary slabs over the gaps above the spawn chambers while placing water source blocks along the farthest edge away from the center. Break the slabs. Assuming all upper slabs were placed, the water should fall down into the tube while also continuing to flow to the edge of the kill chamber.

From here, you will want to use kelp to convert this downward-flowing water into source blocks that can be bubbled. Make sure not to convert the upper flowing water into source blocks, just the water in the tube itself. This is the mechanism that will push spawned guardians to their demise. Seal the farm off, and it is technically done and functional.
While the farm is now technically functional, the rates will be less desirable if left like this in an ocean. Thankfully, though, you can improve the rate. The first way would be to create a safe house about 100 blocks above the farm. This will cause the farm to be the only spawnable area within your player spawn sphere, causing rates to skyrocket.
However, in the early to mid-game, when Minecraft's Elytra is inaccessible and a giant staircase would be ugly, the basic version of this farm should allow for decent item drops.

Uncover new worlds with our Minecraft Seed Generator!