

'%20x='0'%20y='0'%20height='100%25'%20width='100%25'%20%0A%20%20%20%20%20%20%20%20%20%20xlink%3Ahref='data:image/jpg;base64,/9j/2wBDAAYEBQYFBAYGBQYHBwYIChAKCgkJChQODwwQFxQYGBcUFhYaHSUfGhsjHBYWICwgIyYnKSopGR8tMC0oMCUoKSj/2wBDAQcHBwoIChMKChMoGhYaKCgoKCgoKCgoKCgoKCgoKCgoKCgoKCgoKCgoKCgoKCgoKCgoKCgoKCgoKCgoKCgoKCj/wgARCAAGAAoDASIAAhEBAxEB/8QAFgABAQEAAAAAAAAAAAAAAAAAAAYH/8QAFQEBAQAAAAAAAAAAAAAAAAAAAAL/2gAMAwEAAhADEAAAANXoCX//xAAeEAACAgIDAQEAAAAAAAAAAAABAwIFBCEAERIHsv/aAAgBAQABPwC3qLlf0yisMSxxUU7YOi5SscRf0tQkV+tgxl5jvRHBYTYPYwEkS3t57/HP/8QAFhEBAQEAAAAAAAAAAAAAAAAAAQIA/9oACAECAQE/AIkd/8QAFhEAAwAAAAAAAAAAAAAAAAAAAAEC/9oACAEDAQE/AKZ//9k='%3E%3C/image%3E%3C/svg%3E)
It's important to keep Minecraft bases safe, especially in multiplayer servers and settings. Bases are where players keep all of their loot, items, animals, farms, and everything else they collect in a world. Given just how important bases are and how annoying it can be to start all over again, keeping one’s base safe and well-protected is vital.
Thankfully, as redstone in Minecraft has increased in complexity, so have the methods of security. One of these methods is the Minecraft equivalent of a real-world keycard door, using specific items to open a door and allow access to the base.

Minecraft: How to make a simple keycard door
Chart New Territories with the ultimate Minecraft Seed Generator!
1) The materials
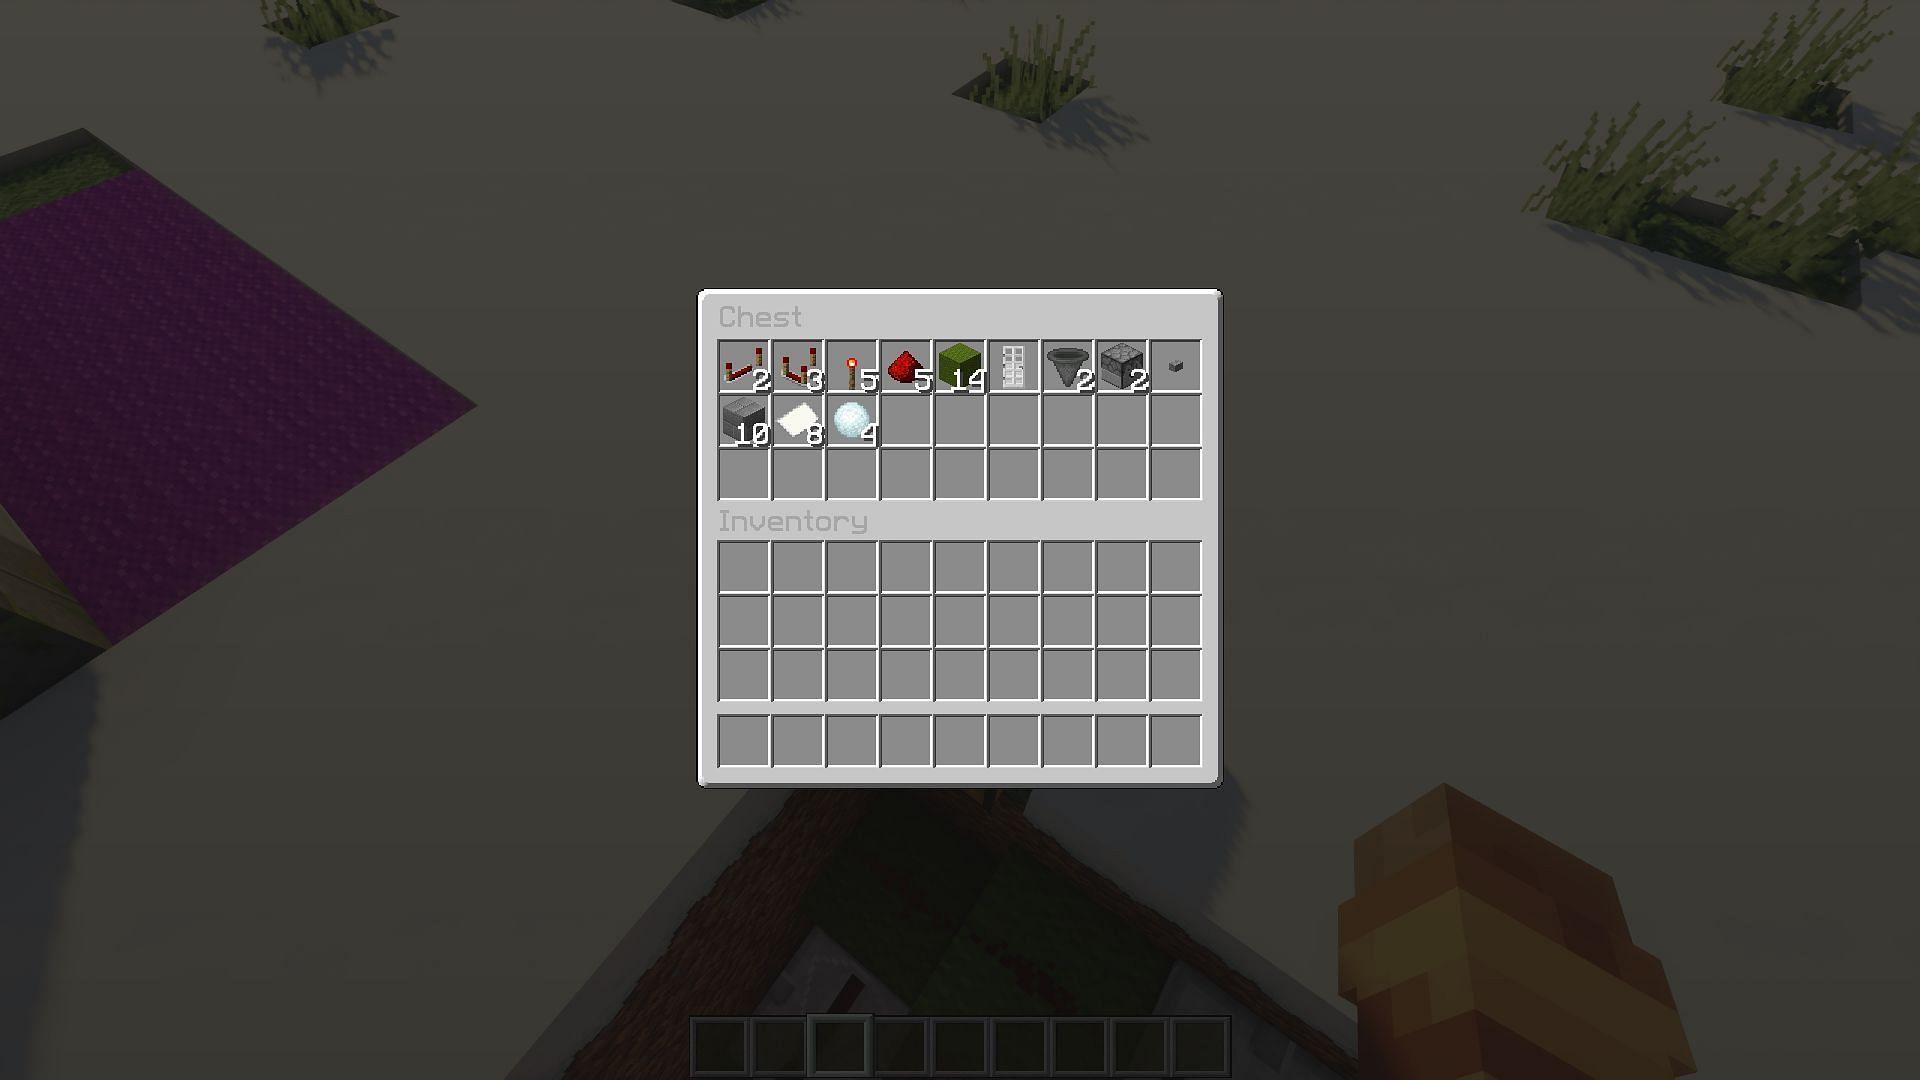
Thankfully, the list of materials needed to create this simple keycard door is relatively short and easy to obtain, with the most complex redstone blocks needed being hoppers, droppers, and comparators. Players will need:
- Two hoppers
- Two droppers
- One iron door
- Three comparators
- Two repeaters
- Five redstone dust
- Five redstone torches
- One button
- Fourteen blocks that redstone will be placed onto
- Eight keycard items
- Ten filer items
- Ten building blocks
- Nine carpet
2) Dig out the area
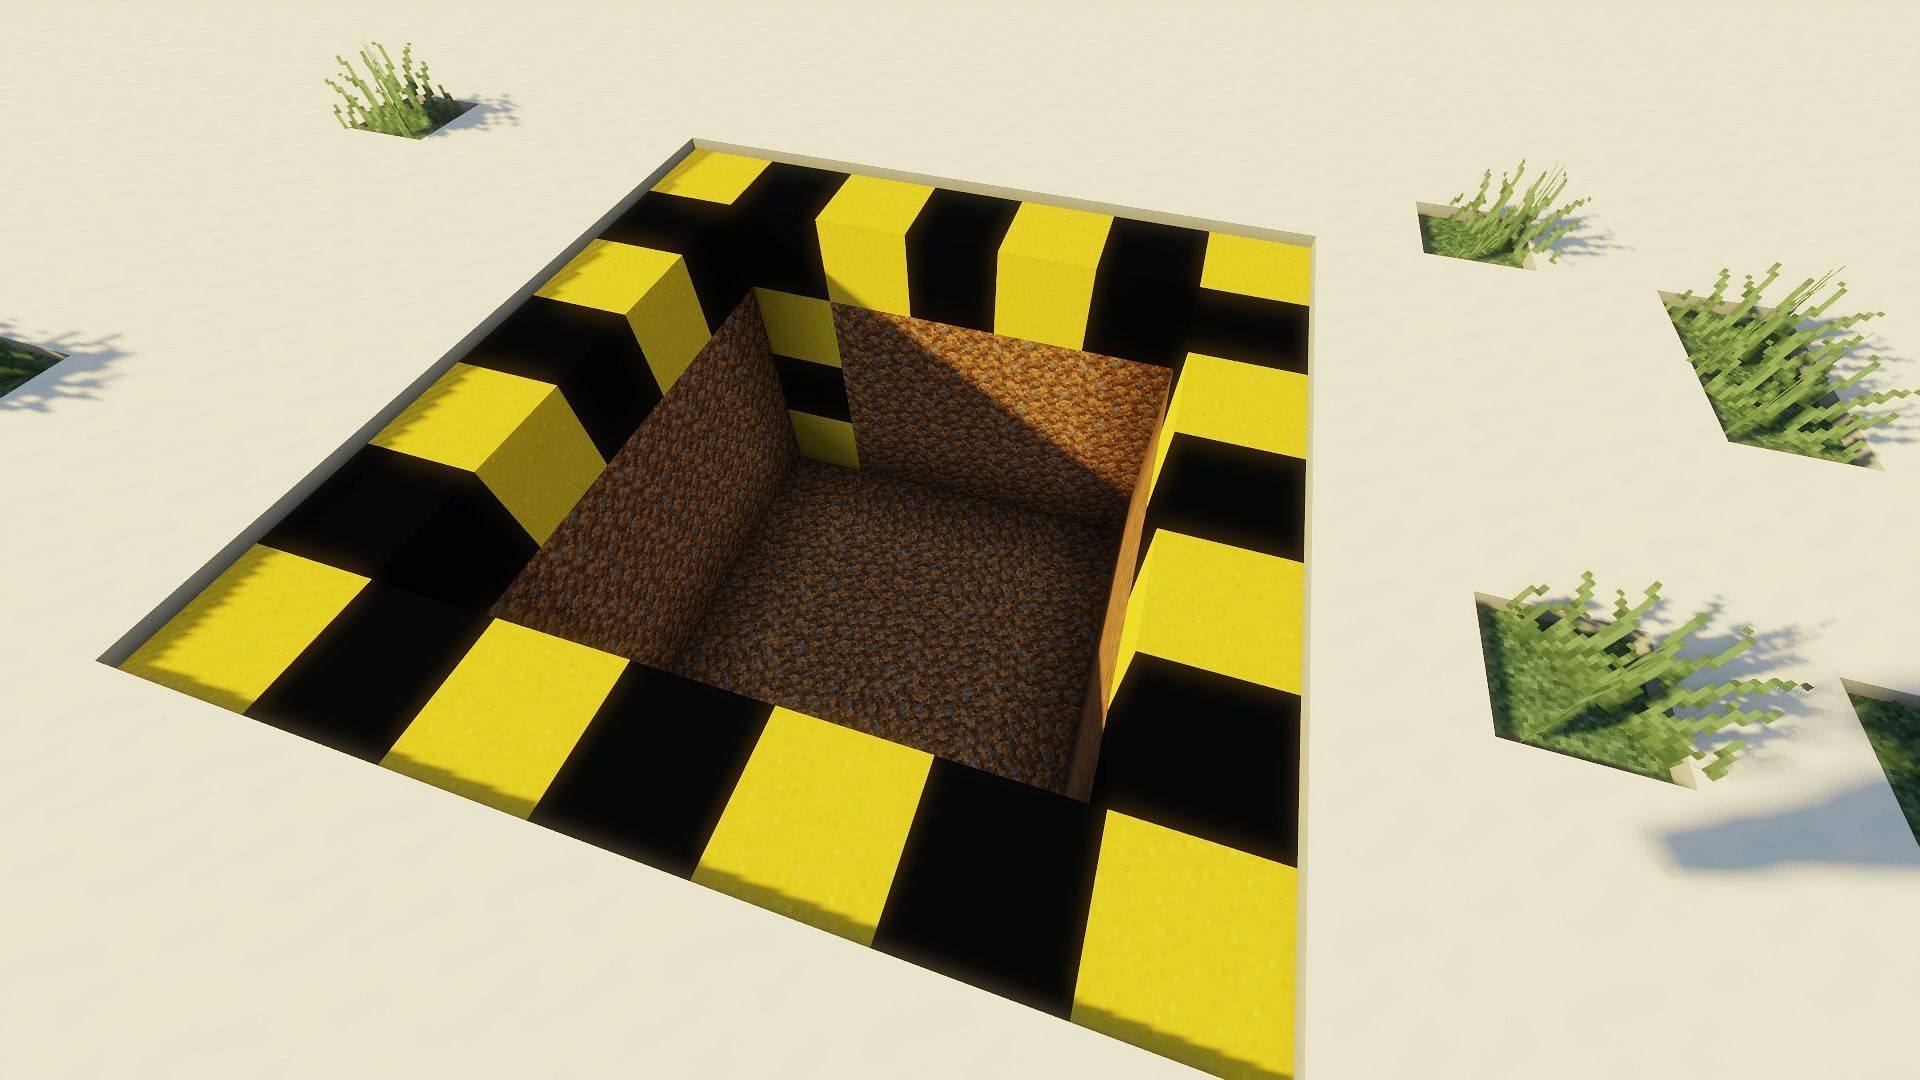
Once a player has gathered all the materials needed to make a simple keycard door, they will need the space to build it.
All the redstone can be hidden in the ground, but to do that, a player has to dig out the space for the redstone before building can begin.
They will need to dig out a cube with a length of five blocks, width of five blocks, and a depth of four blocks from the ground.
The door will be in the middle of the five blocks length-wise and off-center from the middle width-wise by a single block.
3) Place the foundation blocks
The first thing players have to do is place the foundational blocks on which the redstone components and the door will be placed.
This is done by placing 13 blocks of any variety so long as redstone dust and components can be placed on them. These blocks should be placed in the pictured configuration.
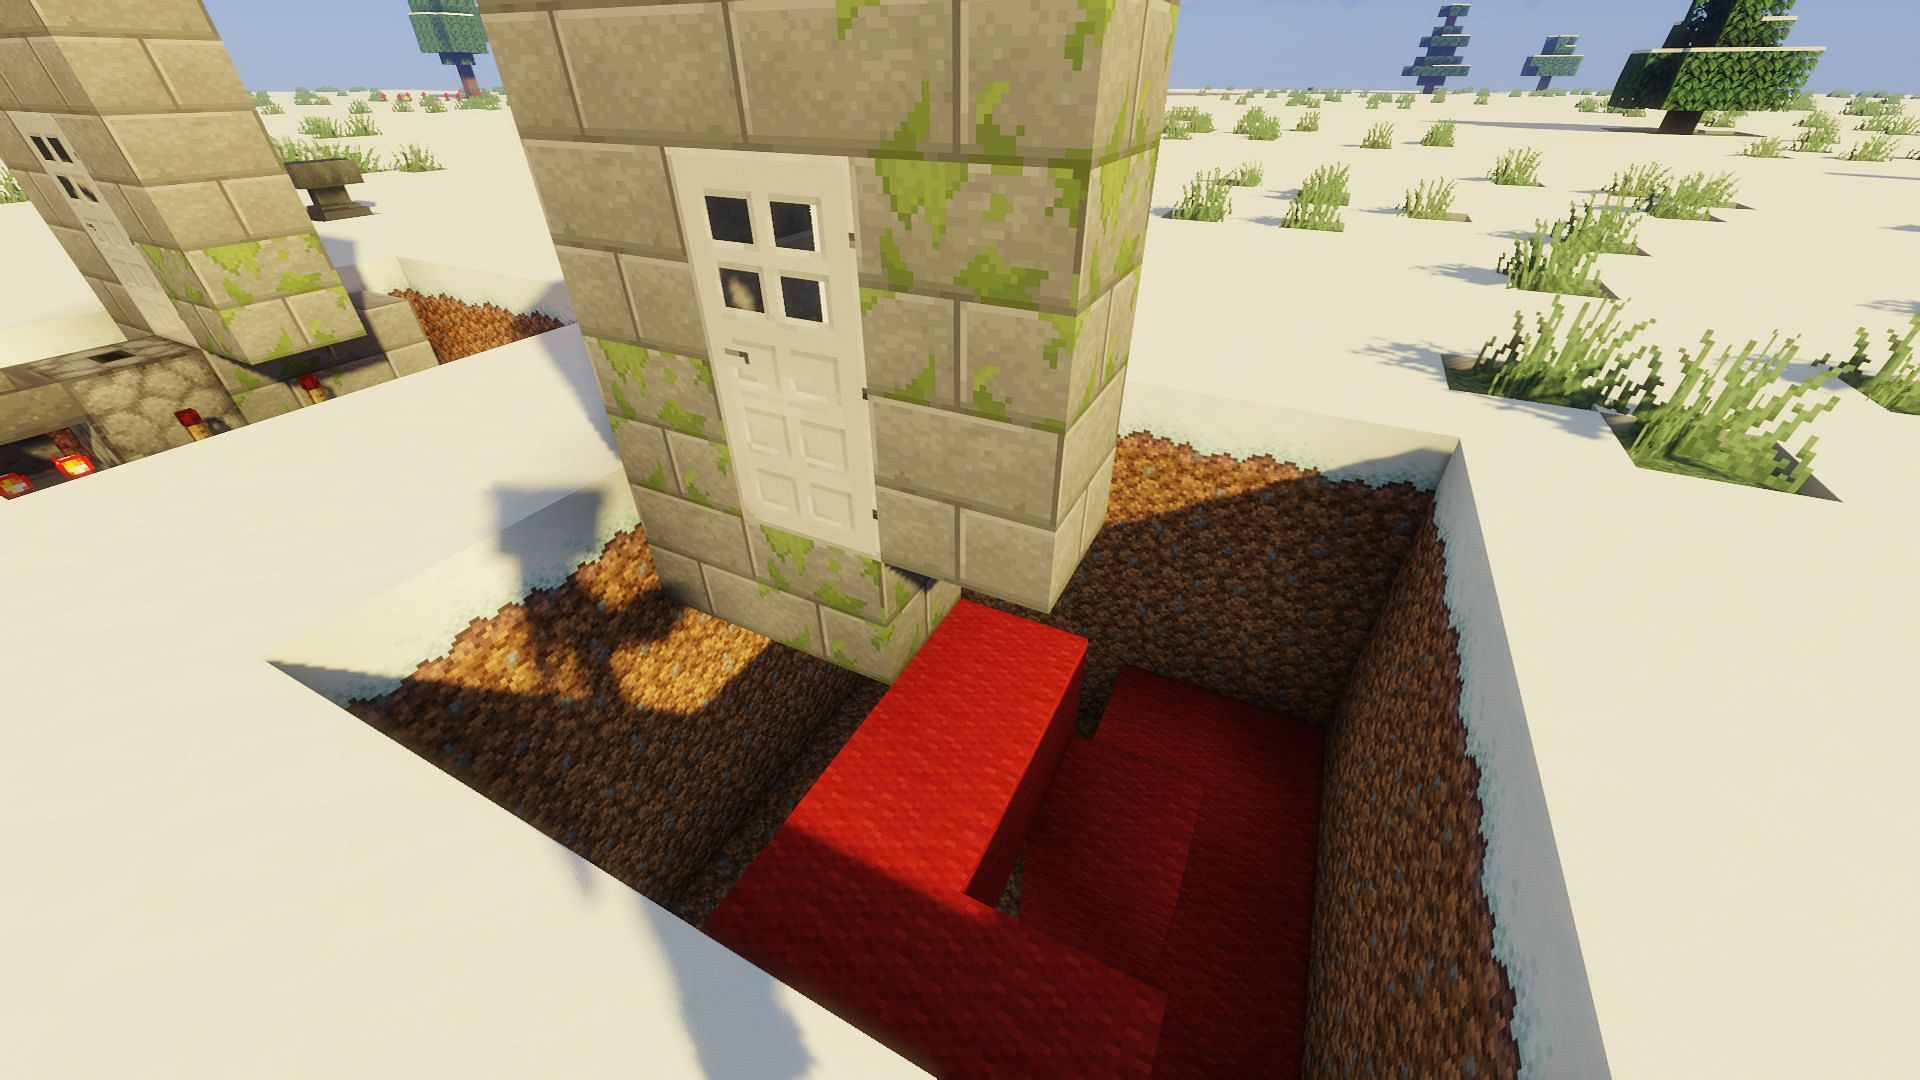
In addition, the player will need to put down the iron door and doorframe that will be unlocked with the keycard. The appropriate configuration can be seen above.
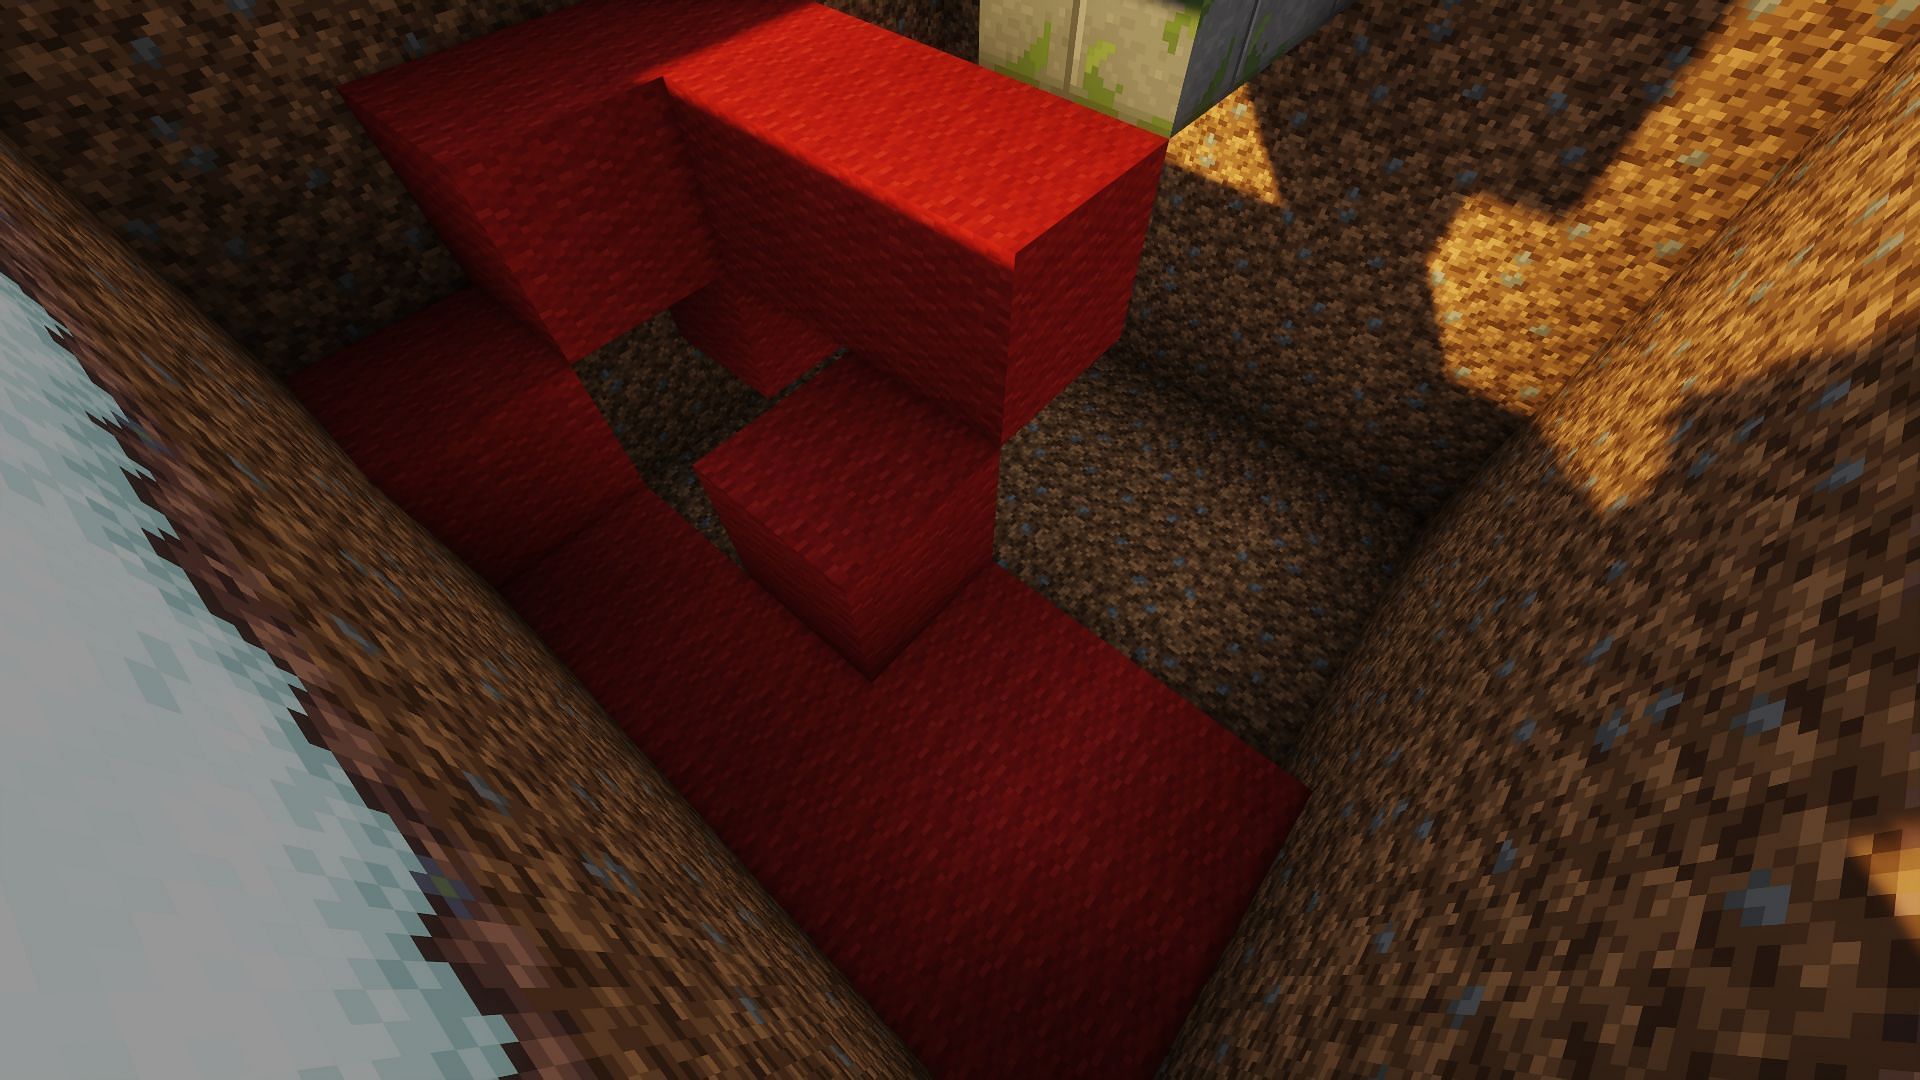
4) Place the redstone components
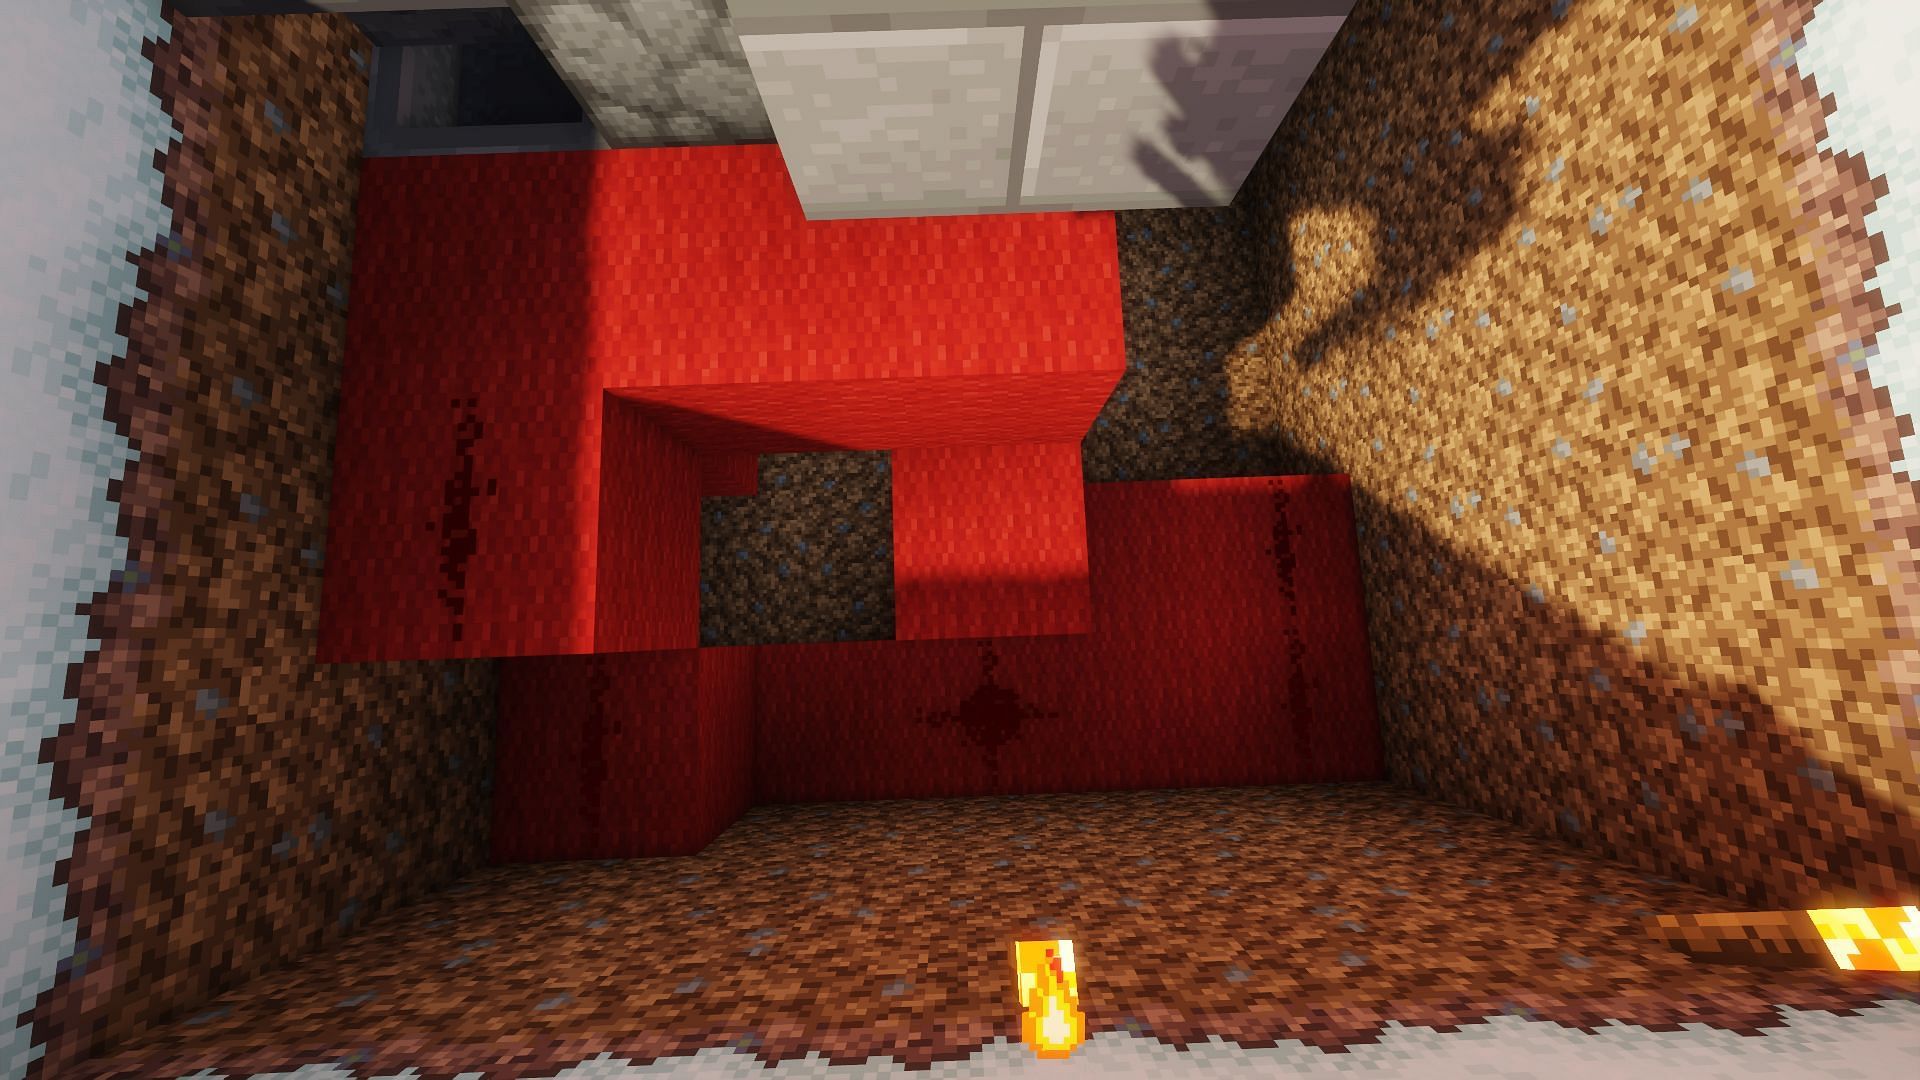
Once the foundational blocks have been placed, the player can add the redstone components, beginning with the redstone dust. A total of five dust is needed, which will need to be placed as shown.
Next, players should place the droppers and hoppers, which will input the keycard item into the system and return the keycard to the player after opening the system.
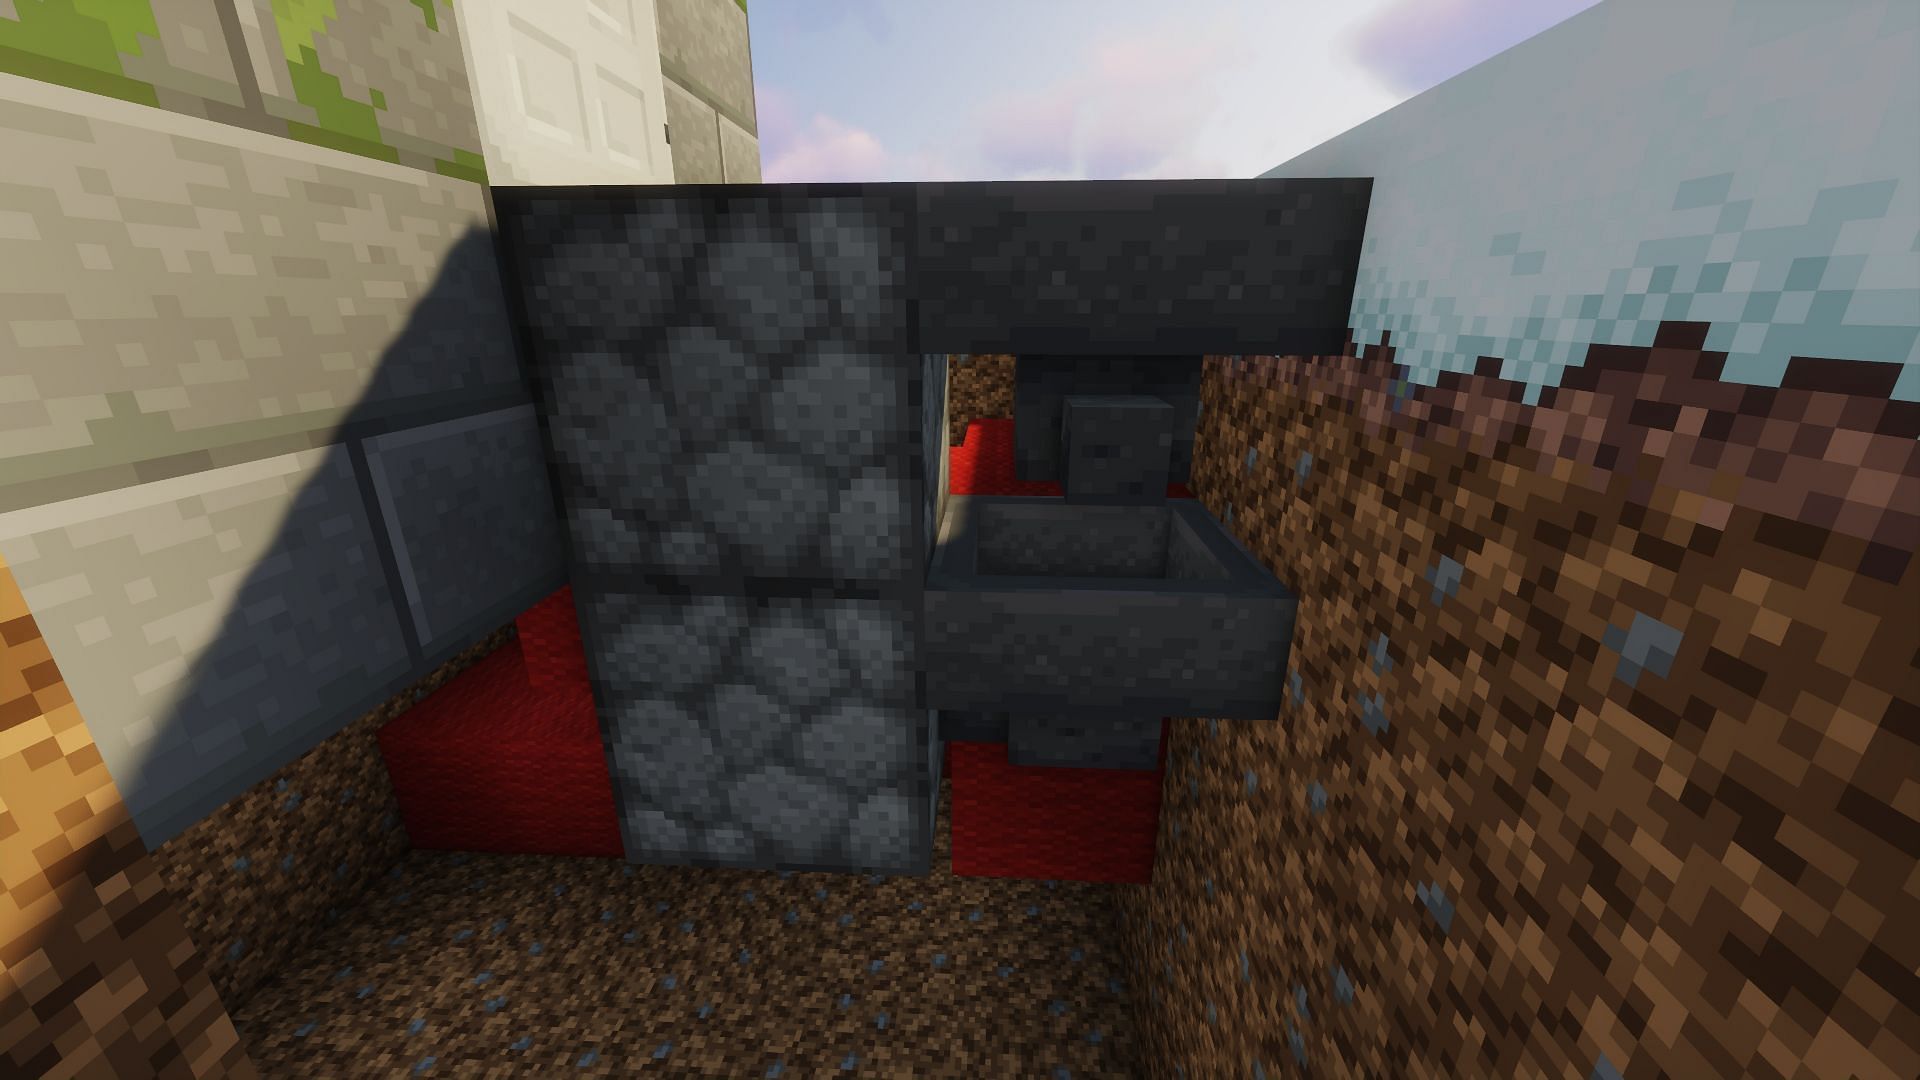
The droppers should be placed one on top of the other, facing upwards, right in front of the door. The bottom hopper should connect to the bottom dropper, and the top hopper needs to face any direction but into the dropper or other hopper.
Players should now place the comparators, of which there are three in total. One of them will lead out of the hoppers, whereas the other two will be on the bottom blocks to create a sharp U-turn of redstone without the dust connecting to itself.
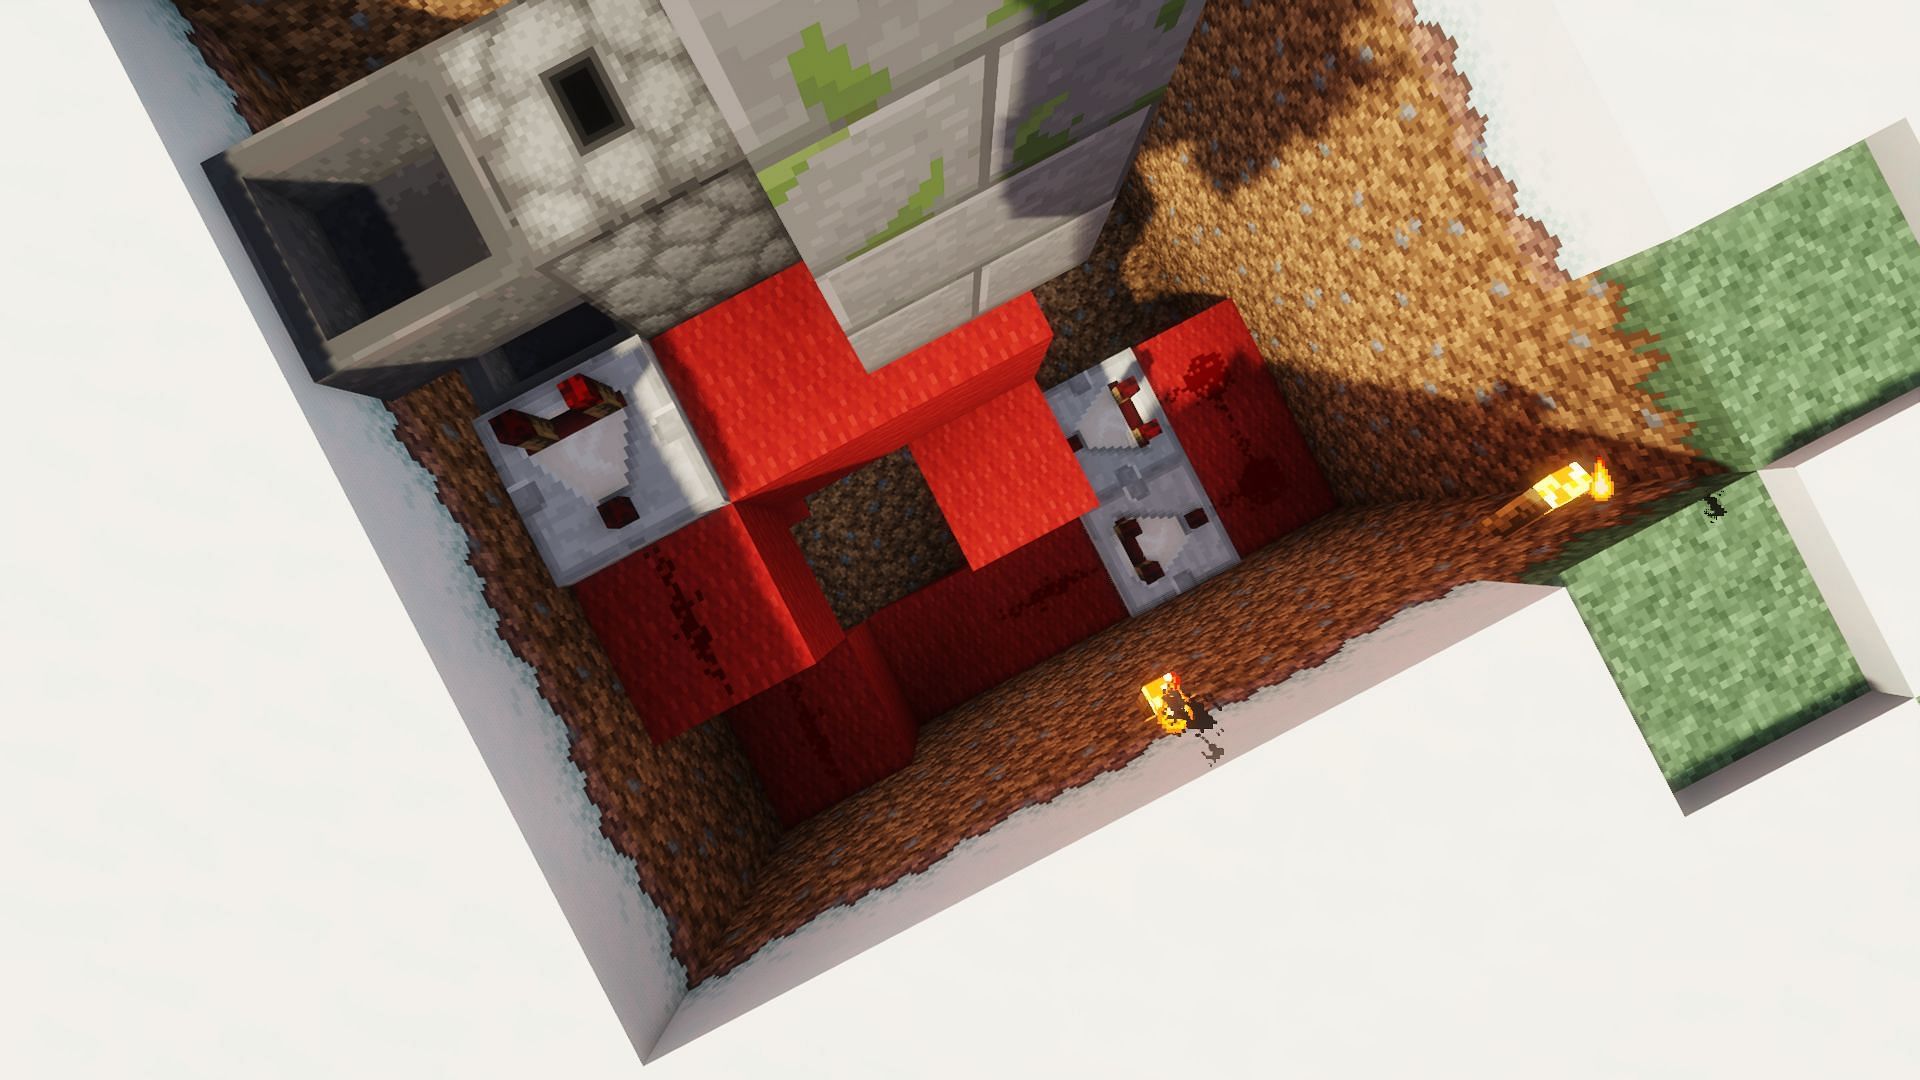
At this point, players have to place the two redstone repeaters next to each other in the corner of the build, before placing the restone torches as seen above and below. Next to the droppers and underneath the doorframe should be two torches that are turned off, and three lit redstone torches underneath the droppers and hoppers.
5) Creating the filters
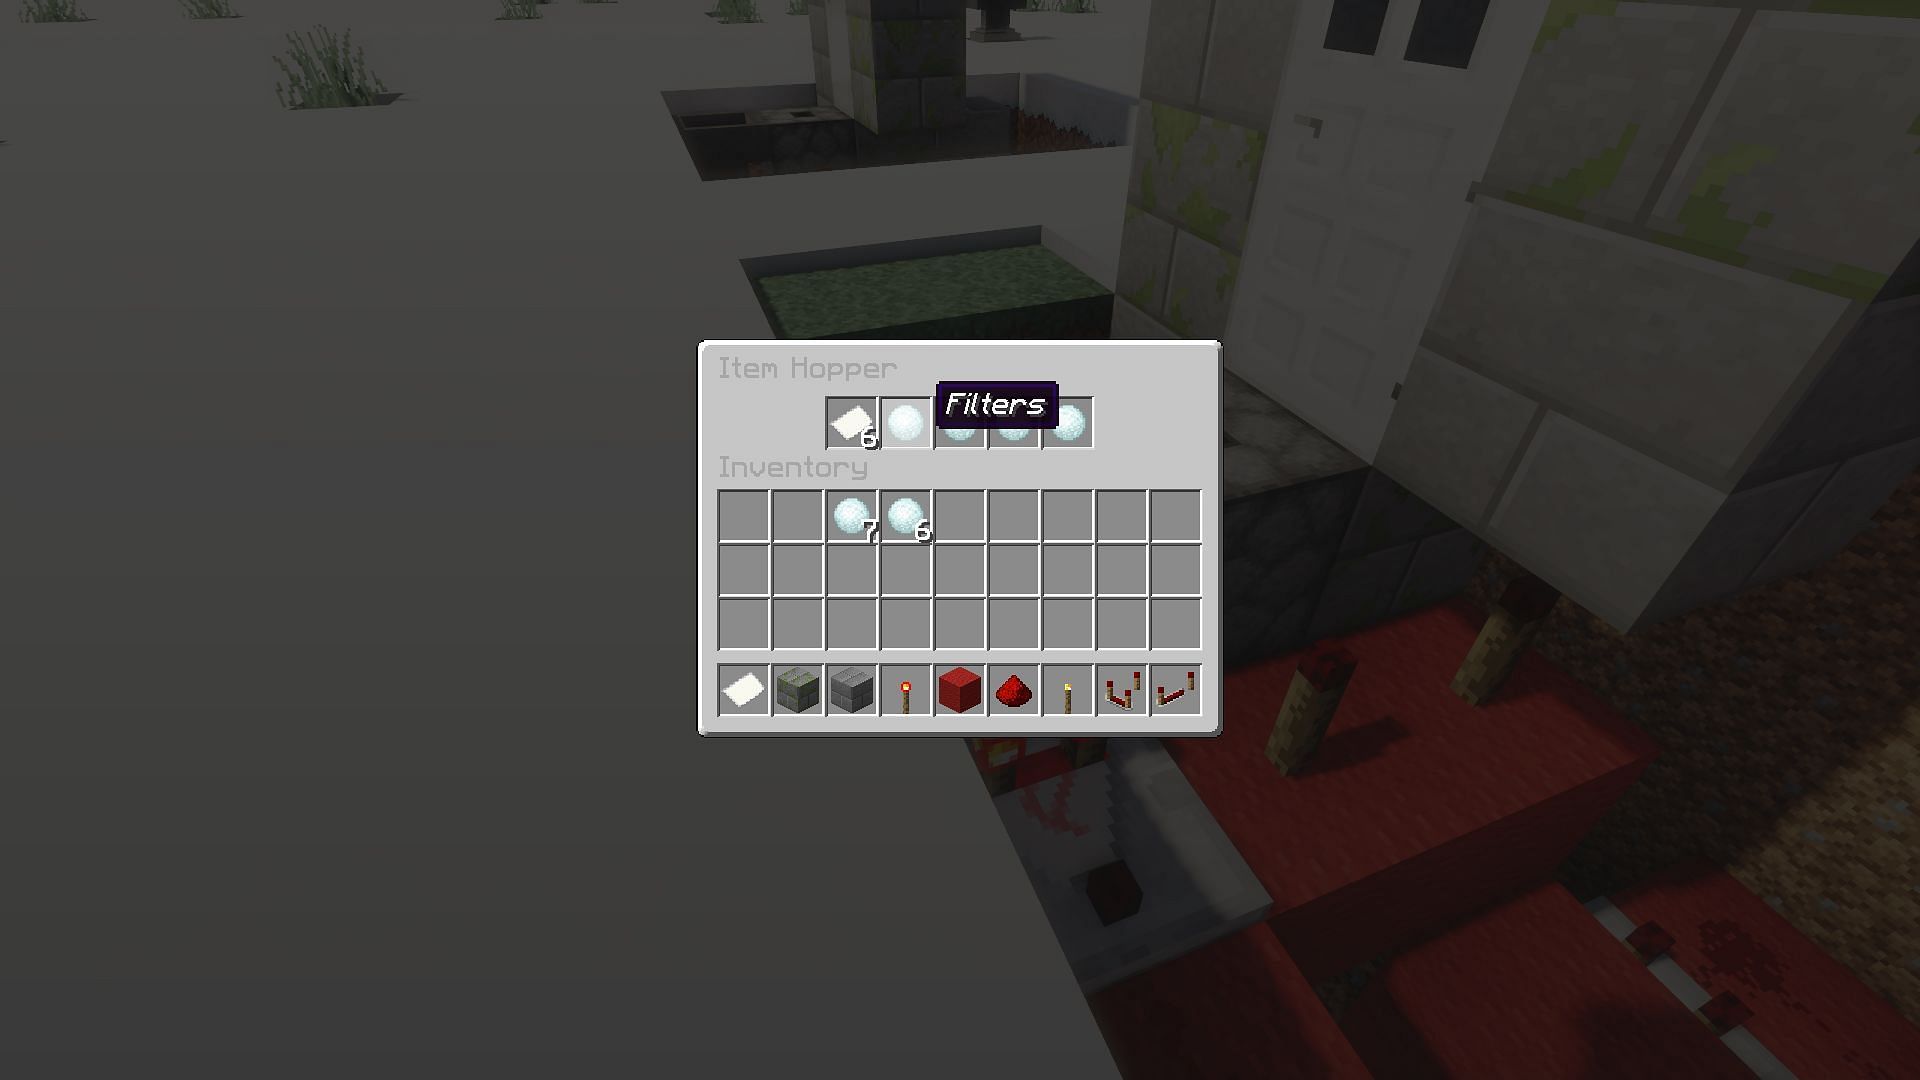
From here, players should decide if they will use snowballs or ender pearls. It does not matter which, so long as an item that is stackable up to 16 is used.
Four of the items should be renamed at an anvil. In the example build here, the name “Filters” was used to signify their use as a filter item. Players also need to decide on what their keycard item will be.
The item does not matter, though paper is the closest to a real-world keycard the game offers. A total of eight items will need to be renamed. Though the name does not matter, “Keycard” was used in the example build.
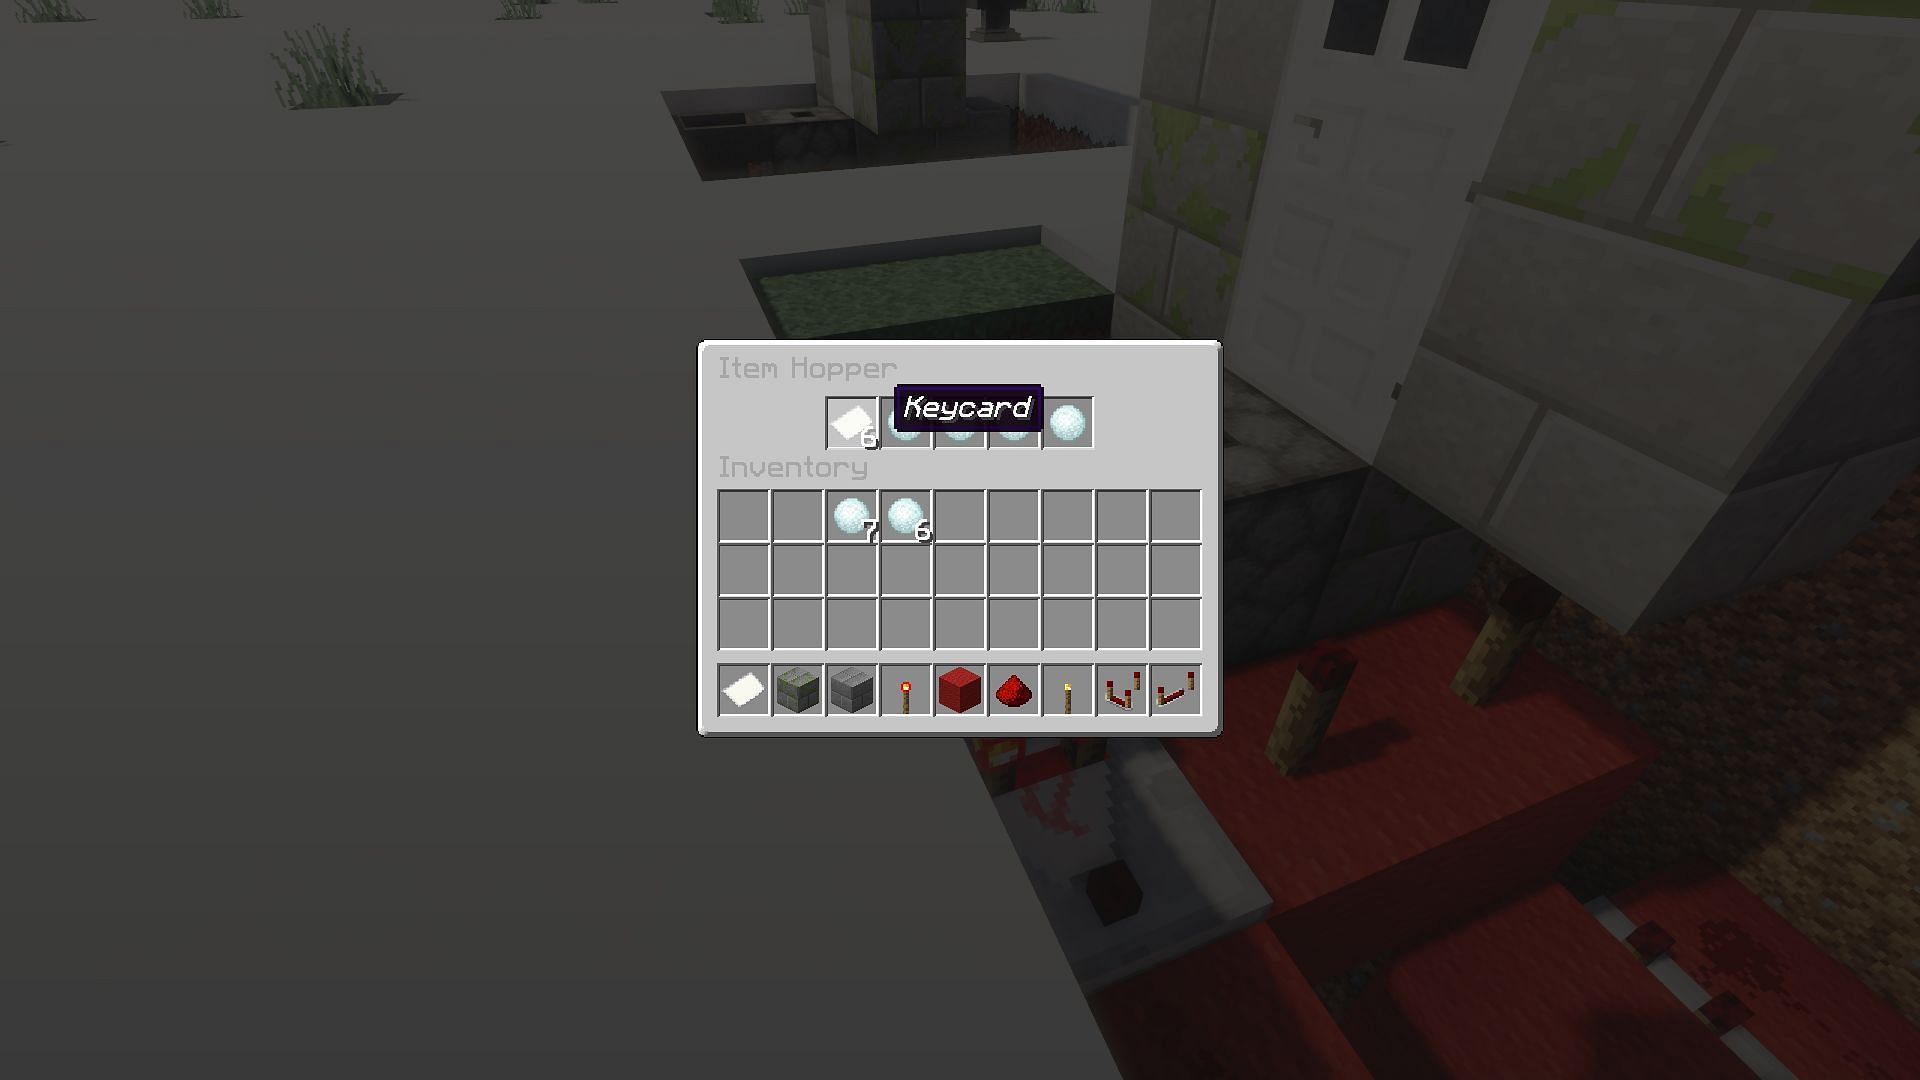
After renaming the items, players should place four filter items in the top hopper, in stacks of one, to take up four of the five slots. The final slot should feature seven of the eight keycard items.
From here, players should be able to throw their keycard into the hopper, the dropper should return it to the player, and the door should open.
The button should be placed anywhere on the frame to open the door from the other side, completing the keycard door.

Uncover new worlds with our Minecraft Seed Generator!