

'%20x='0'%20y='0'%20height='100%25'%20width='100%25'%20%0A%20%20%20%20%20%20%20%20%20%20xlink%3Ahref='data:image/jpg;base64,/9j/2wBDAAYEBQYFBAYGBQYHBwYIChAKCgkJChQODwwQFxQYGBcUFhYaHSUfGhsjHBYWICwgIyYnKSopGR8tMC0oMCUoKSj/2wBDAQcHBwoIChMKChMoGhYaKCgoKCgoKCgoKCgoKCgoKCgoKCgoKCgoKCgoKCgoKCgoKCgoKCgoKCgoKCgoKCgoKCj/wgARCAAGAAoDASIAAhEBAxEB/8QAFgABAQEAAAAAAAAAAAAAAAAAAAQH/8QAFAEBAAAAAAAAAAAAAAAAAAAABP/aAAwDAQACEAMQAAAAzeYEn//EACAQAAICAQMFAAAAAAAAAAAAAAECAwQAERIiFBUhkcL/2gAIAQEAAT8As37F0p17boZkkgbTk2gAP0vrO4leK2bZA8AkKM//xAAWEQEBAQAAAAAAAAAAAAAAAAABAAP/2gAIAQIBAT8A0BC//8QAGBEBAQADAAAAAAAAAAAAAAAAAQIAAxH/2gAIAQMBAT8A1XR1HP/Z'%3E%3C/image%3E%3C/svg%3E)
The ability to remotely obstruct enemy teams in Valorant from planting or defusing the spike is a crucial skill that players should acquire. The use of map structures and ability trajectory to create such scenarios are called lineups and is a common practice done by players who pick Agents like Brimstone.
Brimstone has an incendiary grenade that can be launched from afar to land in default plant positions, which can disorient the opposing team easily. Lotus is the latest map introduced in Valorant with the Episode 6 update alongside a new Battle Pass and a new Exclusive Edition weapon bundle available in the in-game store.
Brimstone moly lineups for Lotus in Valorant
Valorant offers a variety of choices to the player base when selecting Agents from the list of several Duelists, Controllers, Sentinels, and Initiators. Brimstone is a Controller Agent who can utilize smokes and a high-damage incendiary grenade which can stop players from pushing or forcing them out of their positions.
Brimstone’s moly has proved to be a boon for the player base, as he can use different lineups to stop the defenders from defusing the spike and winning the round. It can also temporarily slow down attackers and prevent them from planting in default positions of the bomb sites.
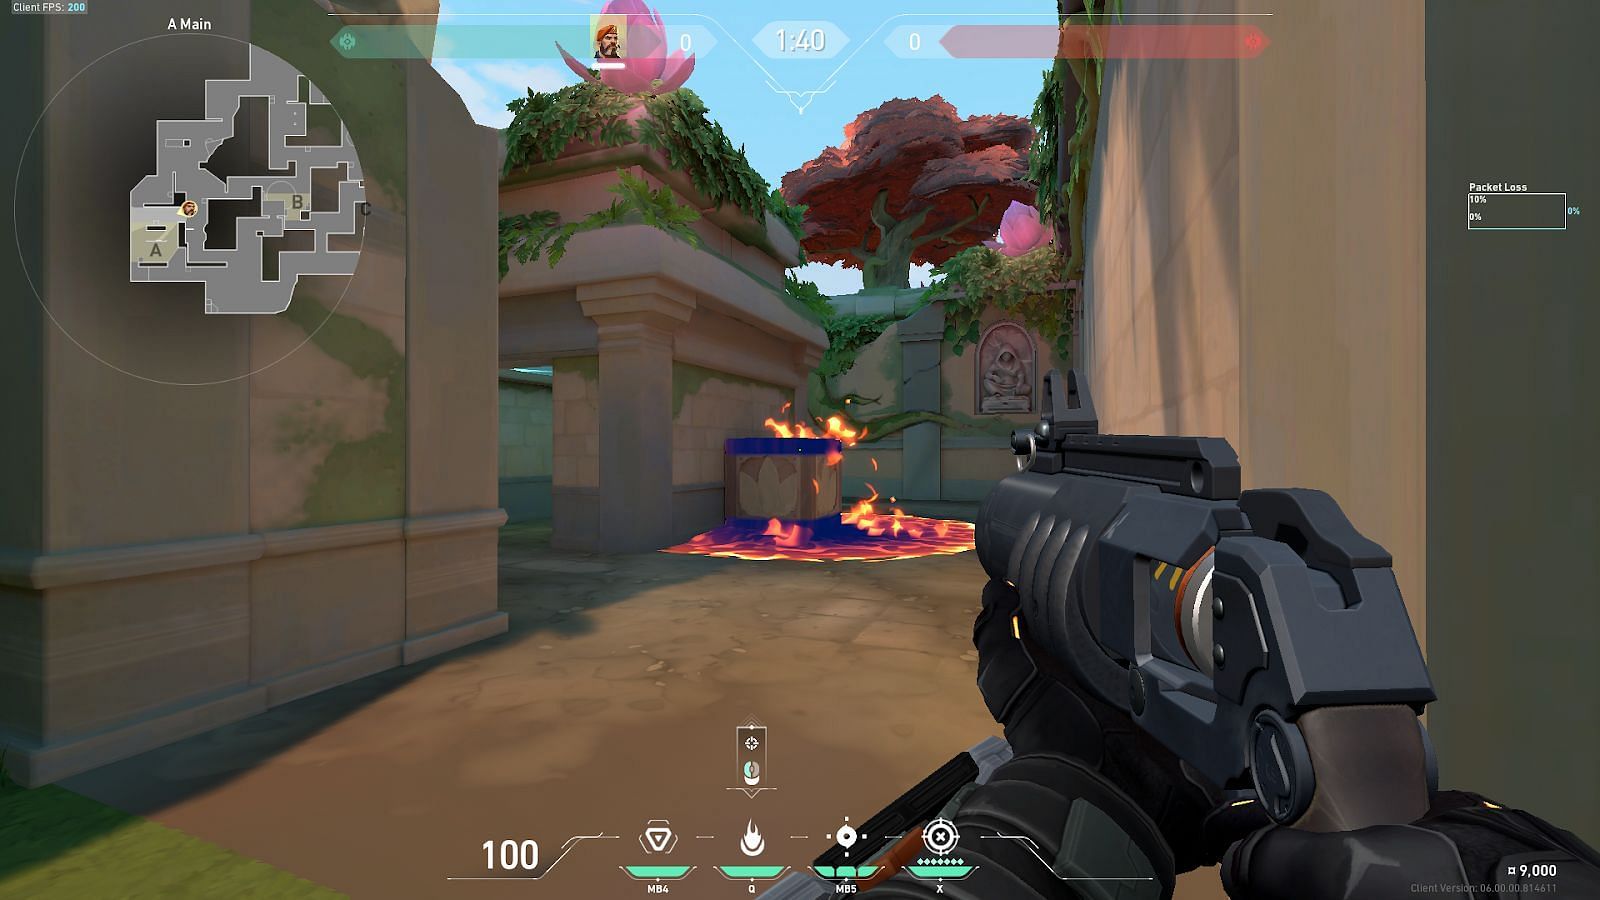
1) A-Site default plant (outside A-Hut)
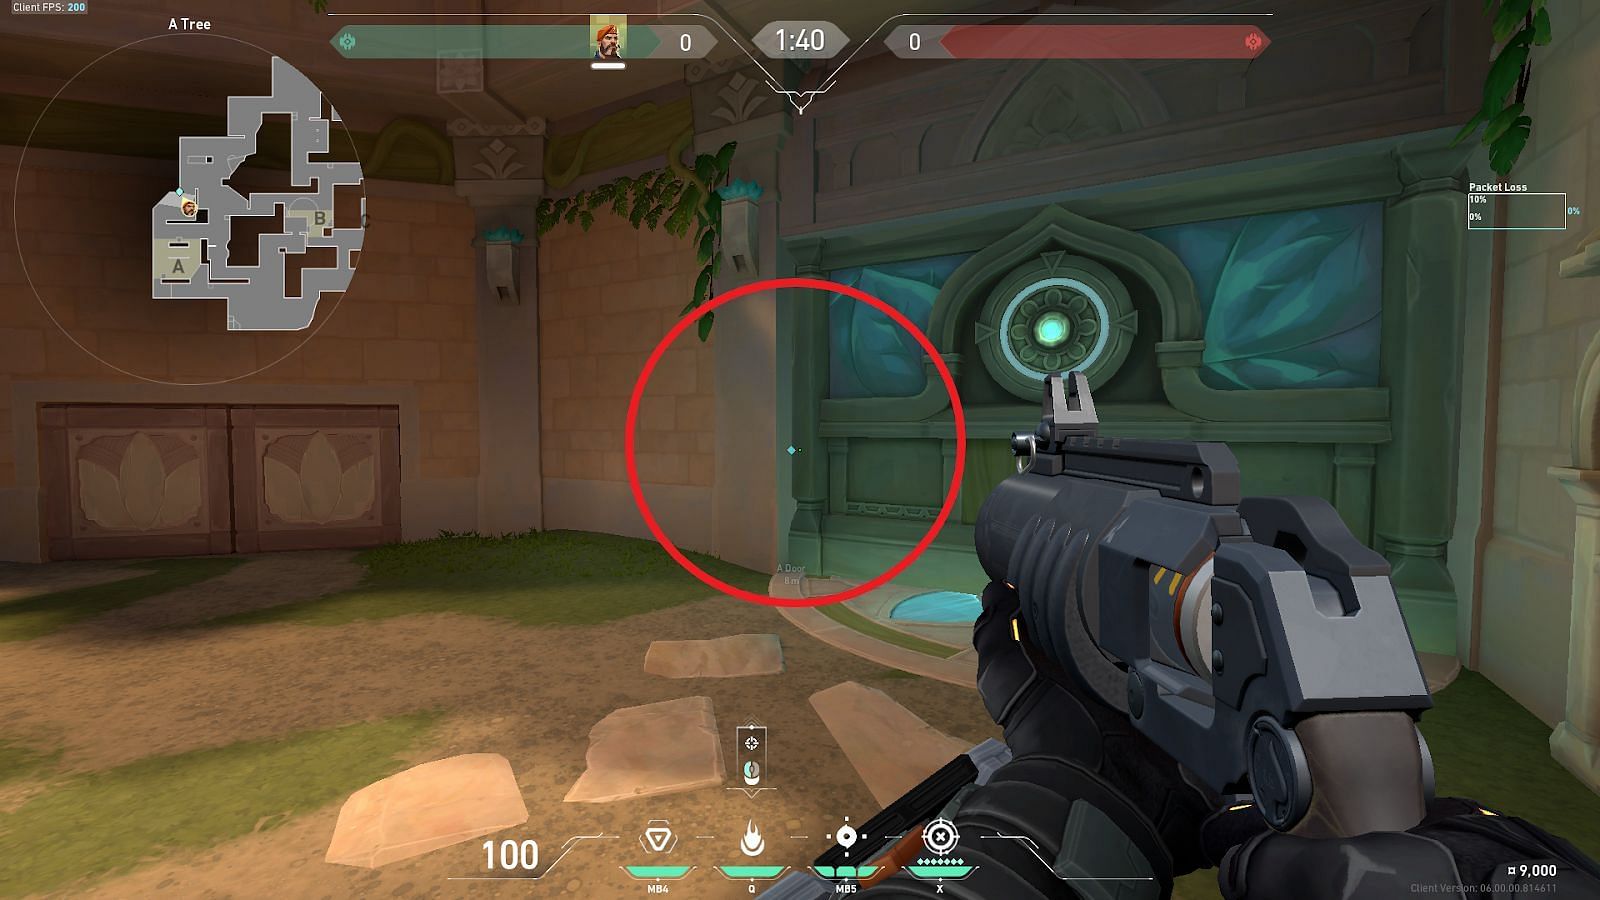
Plant the spike in the default position in A-Site near the wooden box outside A-Hut. Position yourself in the marked corner near A-Door and tuck inside the corner.
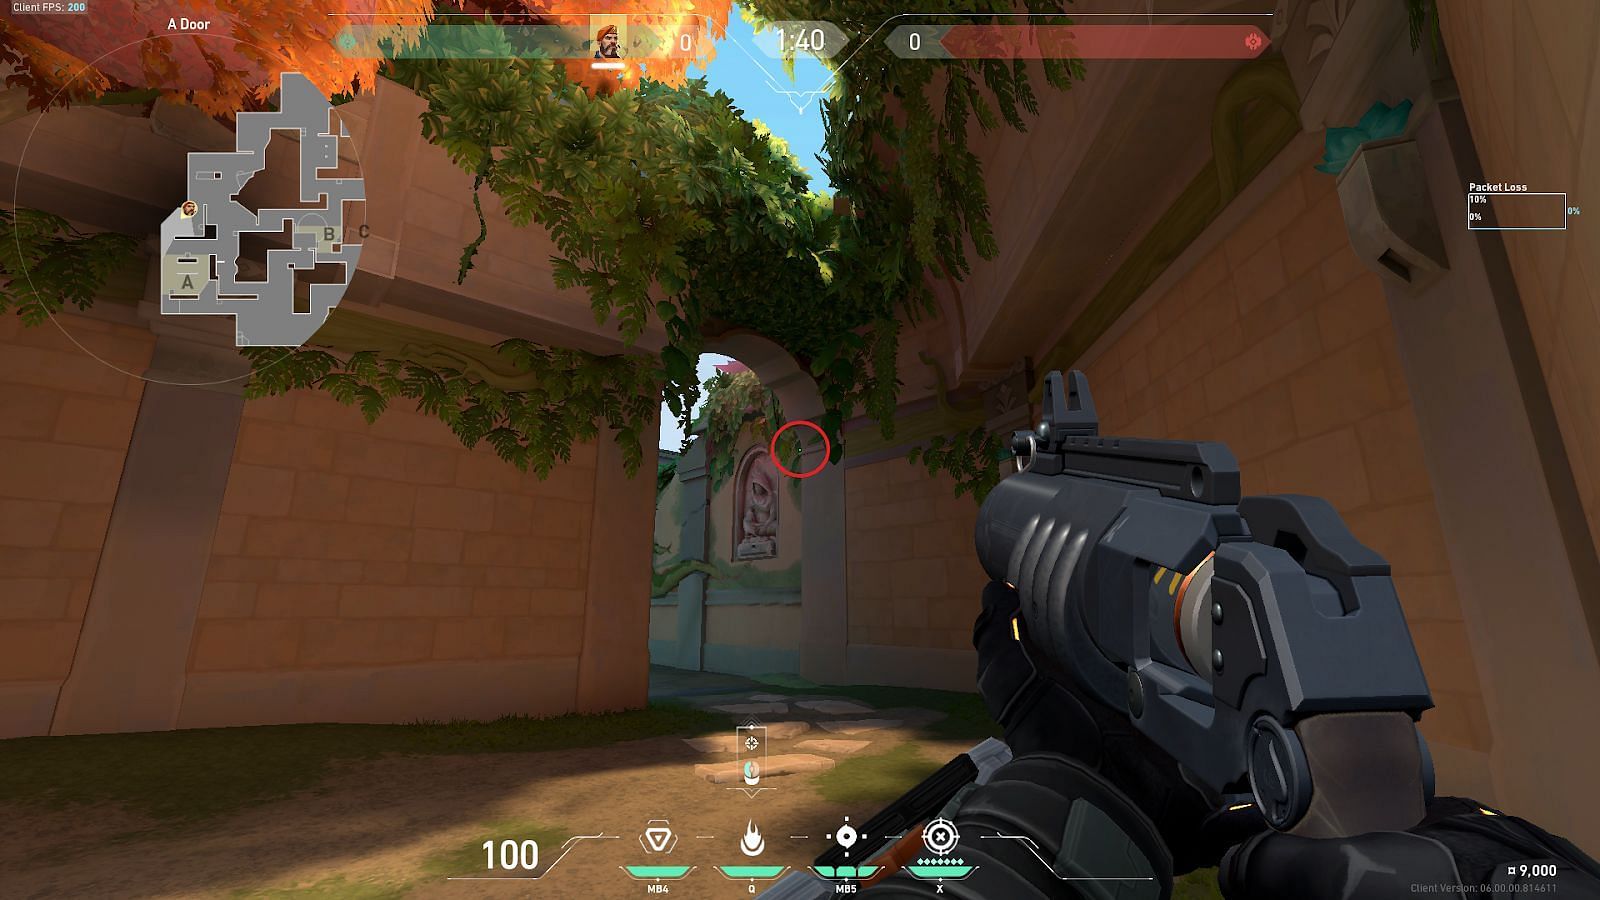
Aim at the A-Site entry arches in A-Tree on the marked corner. Aim at the ledge of the arch and perform a simple left click to deploy the moly.
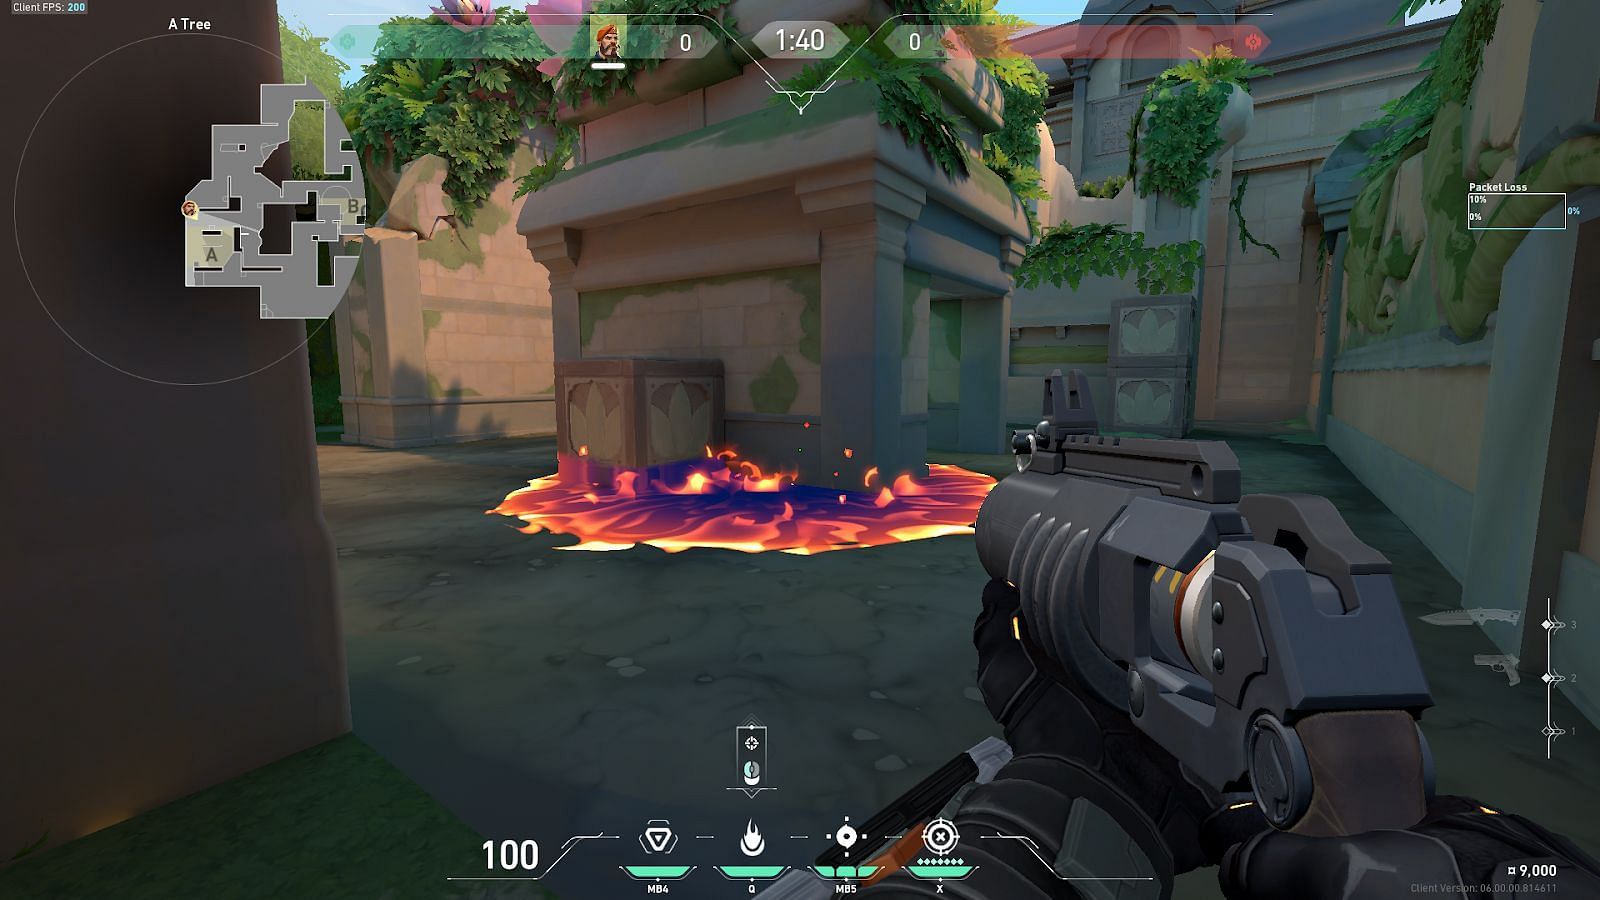
The moly will bounce off the arch in A-Tree and land directly near the wooden box outside A-Hut. This will stop the defending team from defusing the spike and buy the team more time to protect the spike.
2) A-Root to A-Site default
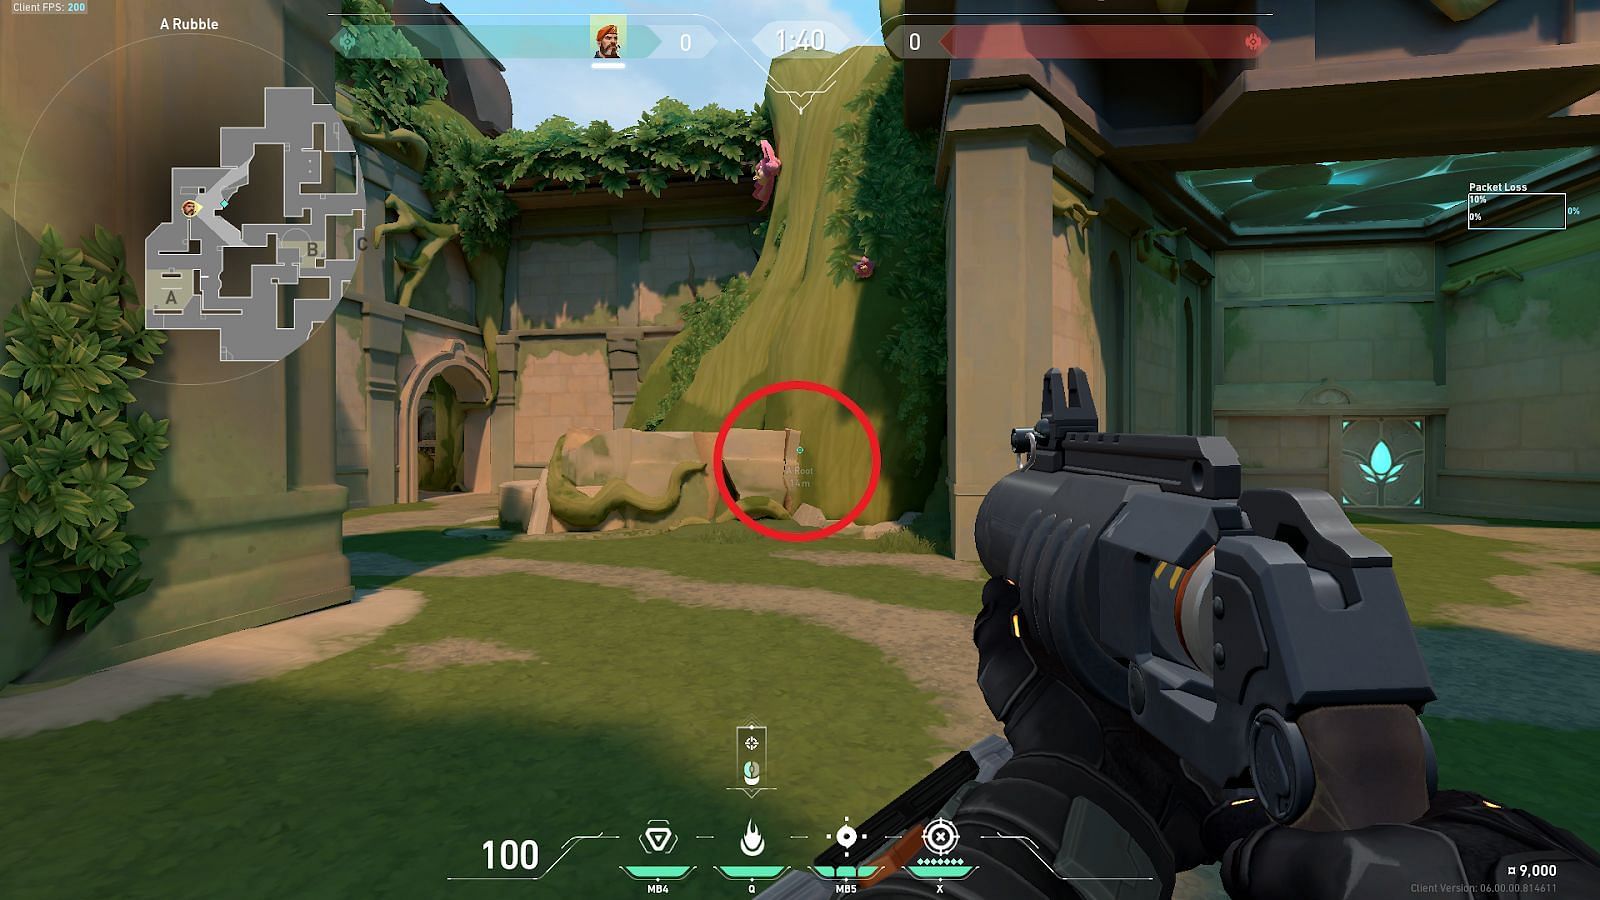
Position yourself in A-Root and go to the marked corner. Tuck yourself between the map structures inside the corner.
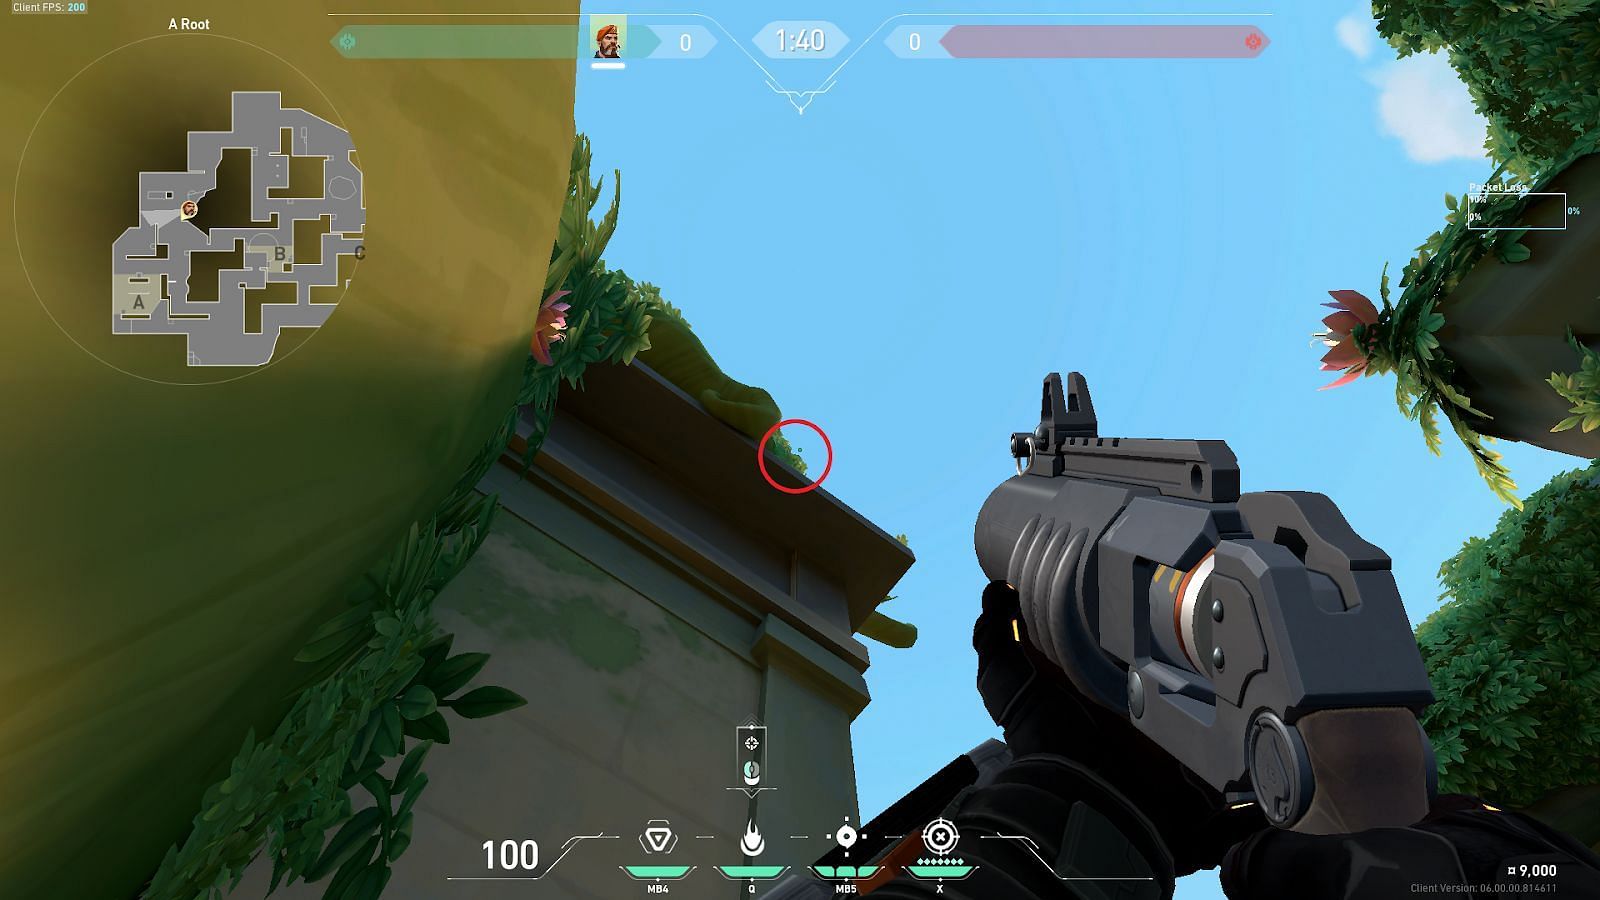
Place your crosshair above the roof ledge in A-Root and to the left of the leaves. Perform a simple left-click to deploy the moly from A-Root.
Successfully lining your crosshair with the shown position will land the moly directly on the wooden box in A-Site near A-Hut in the default plant position. This lineup is a bit difficult and will require some practice before it can be reproduced without errors.
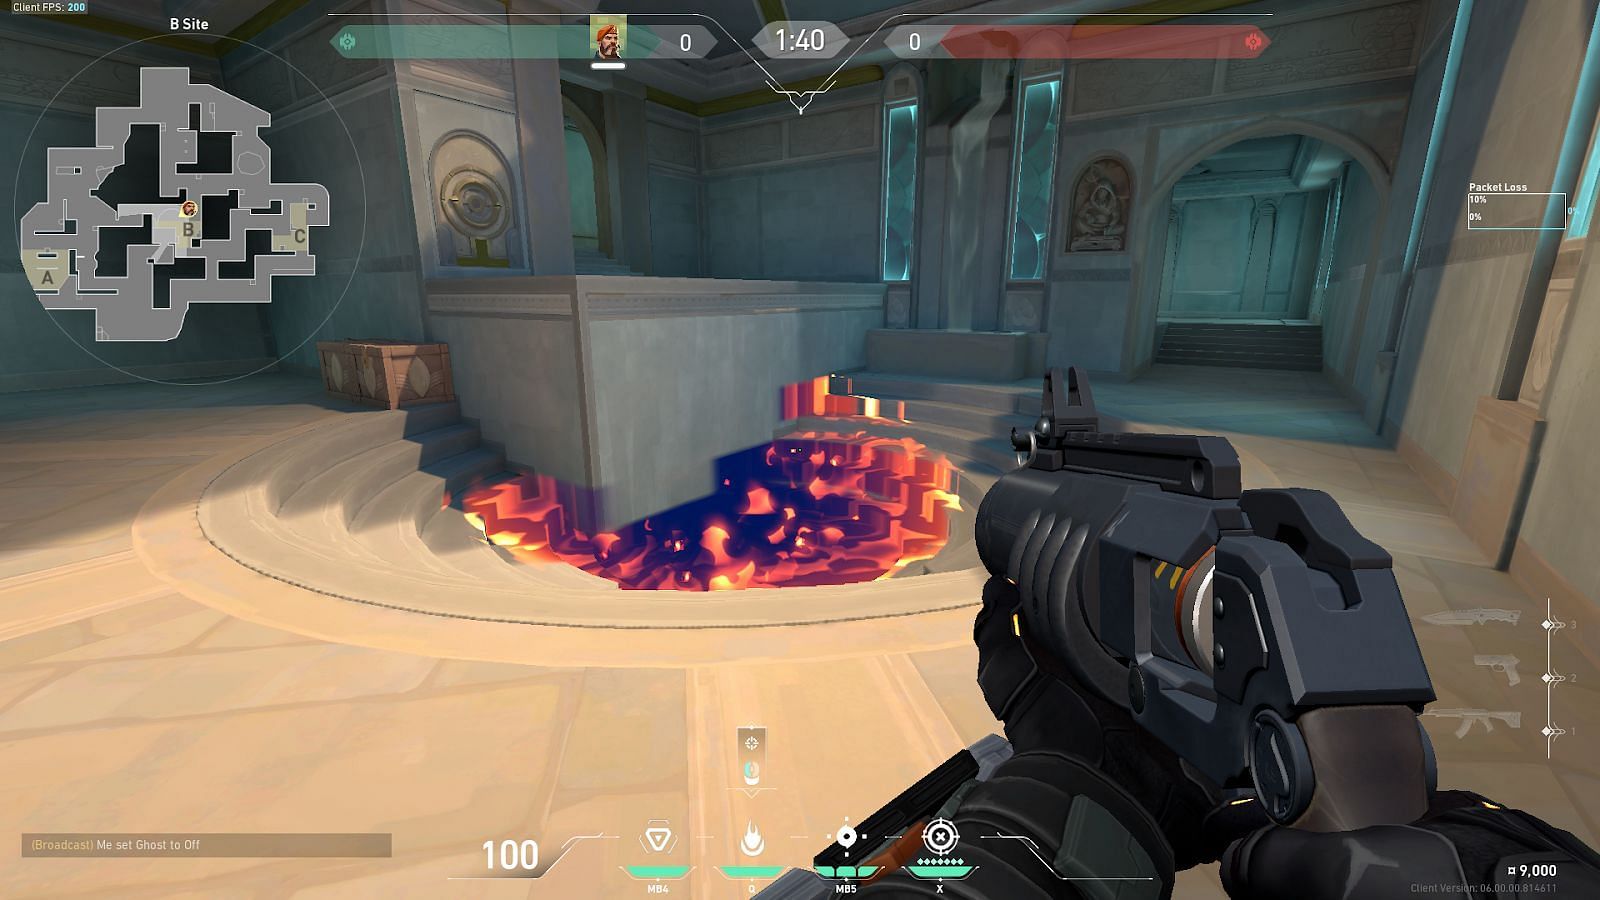
3) Attacker Spawn to B-Site default pit area
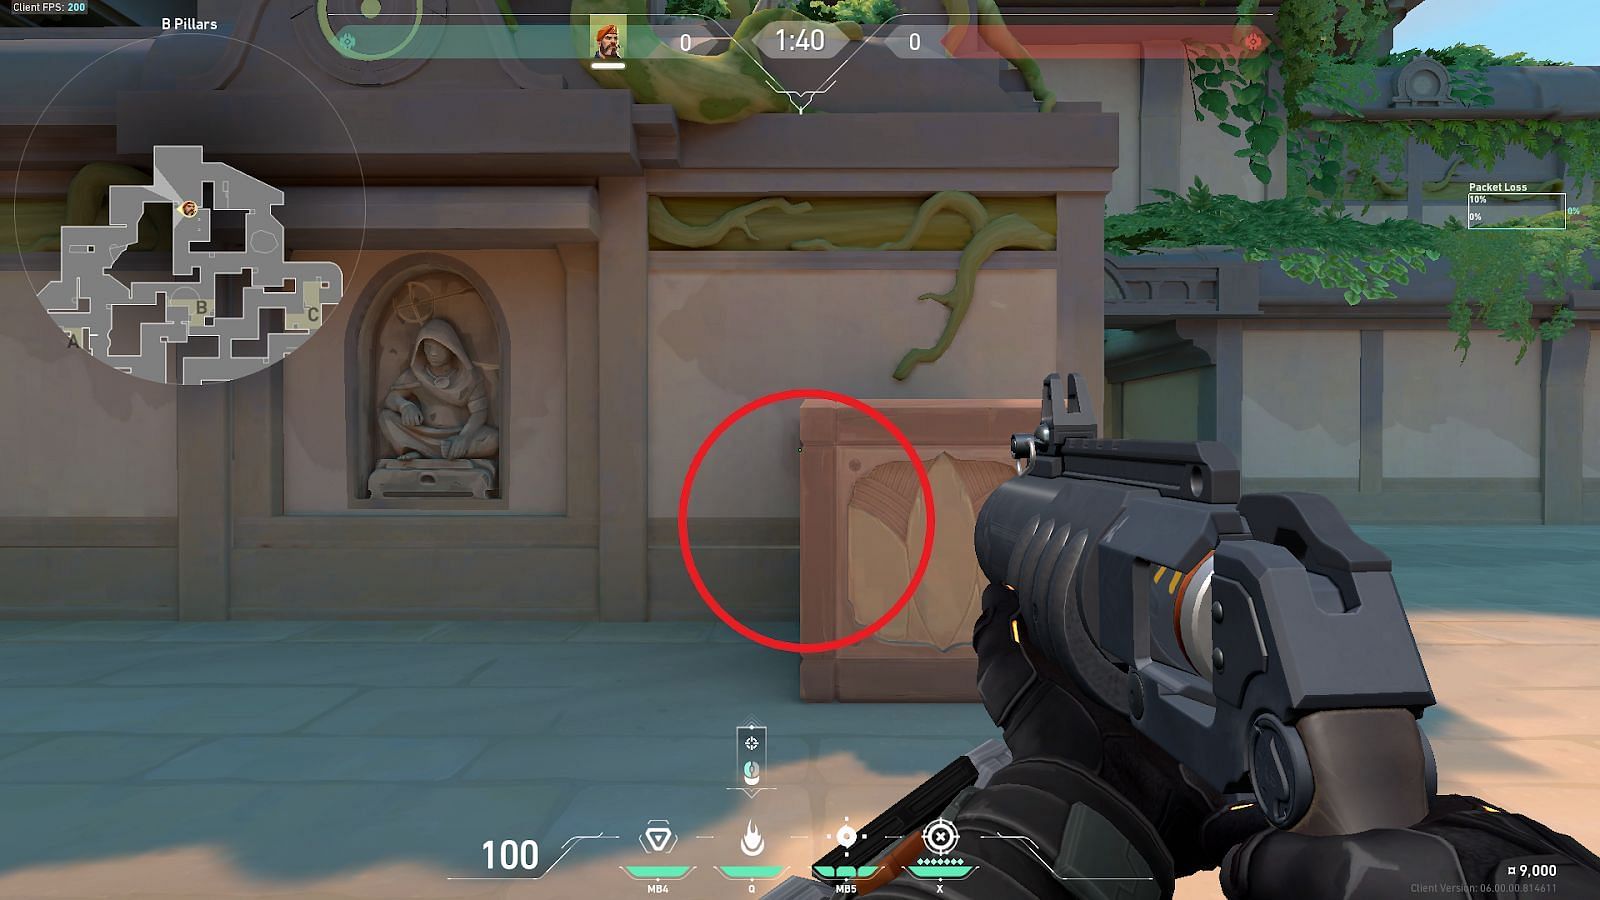
Position yourself in Attacker Spawn in front of the marked wooden box. Tuck to the wooden box’s left edge symmetrically to line up with the wall.
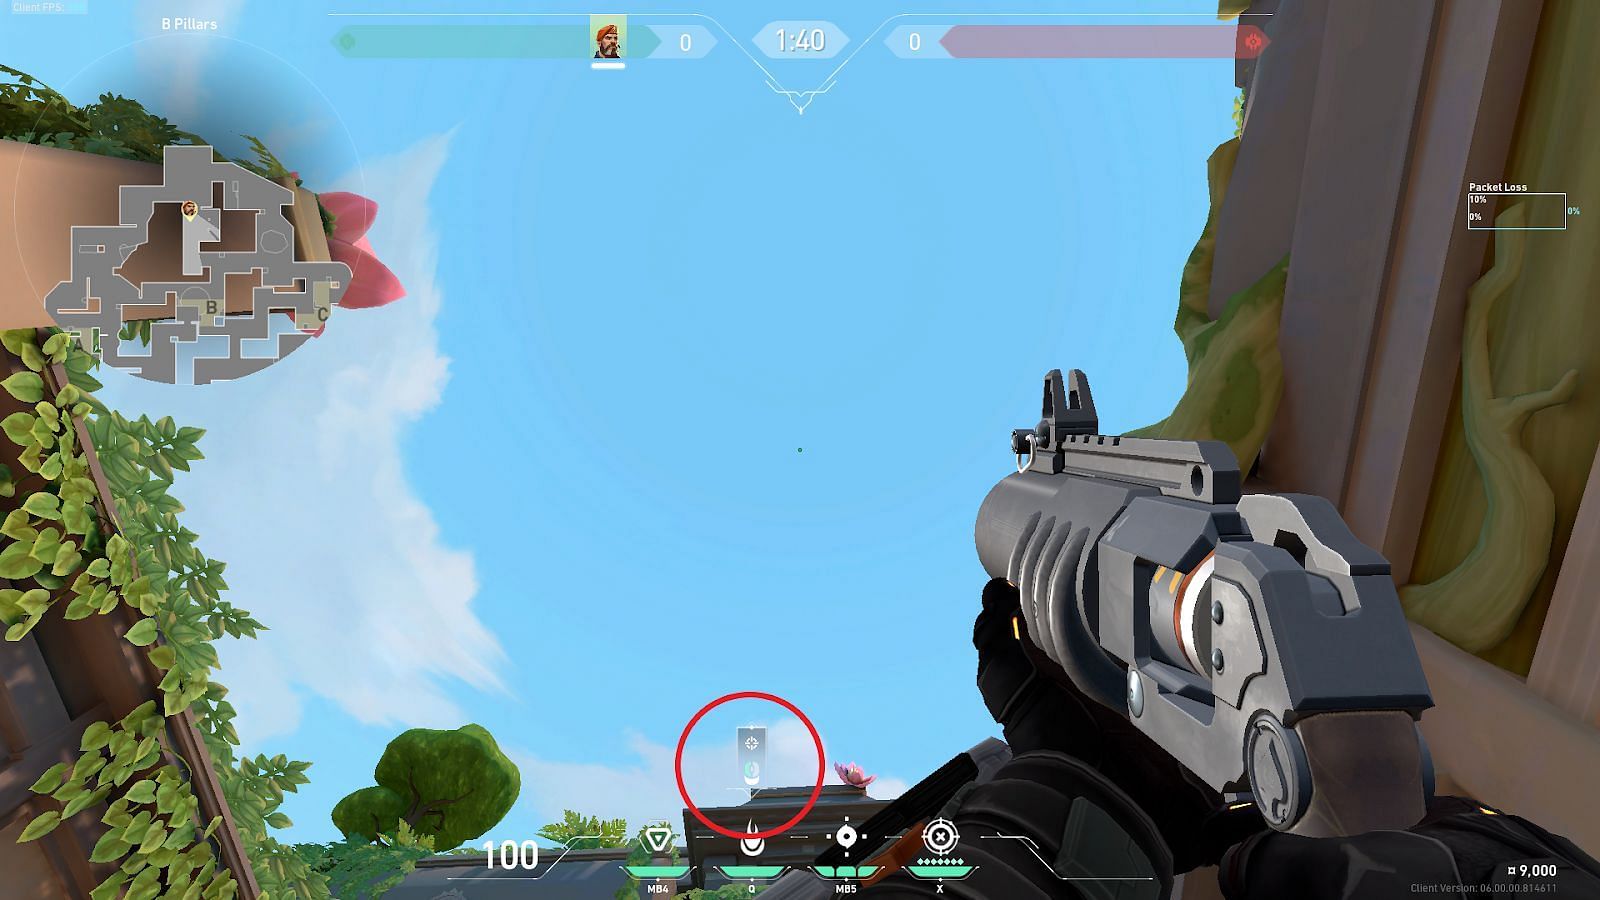
Position the mouse indicator icon above the moly icon on the roof ledge as shown, and perform a simple left-click to deploy the moly.
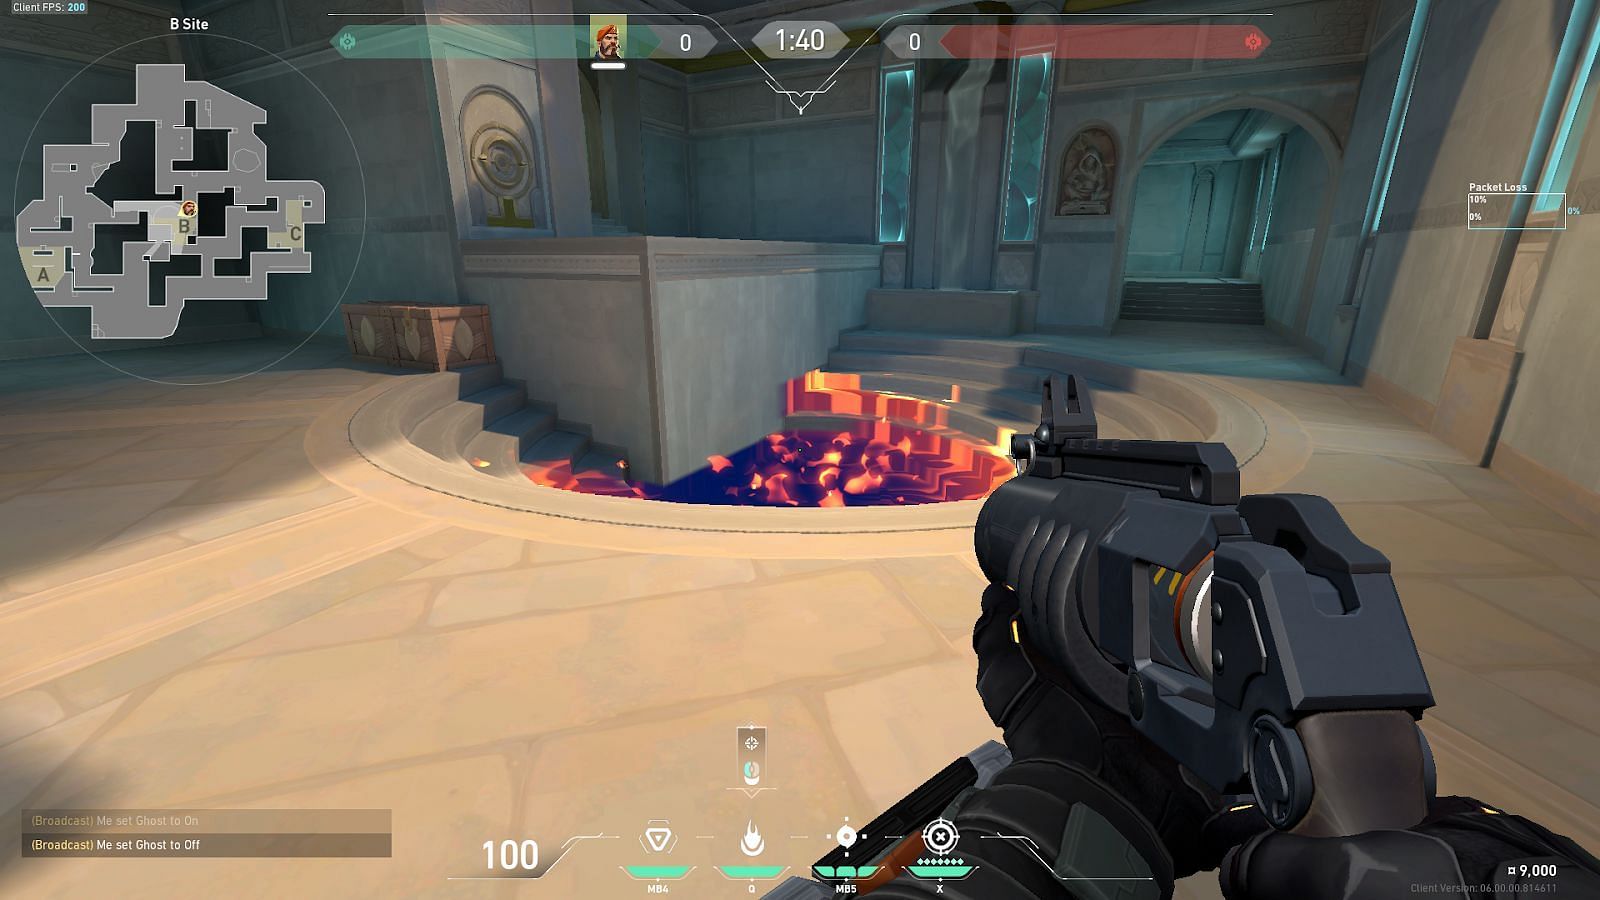
Lining the mouse indicator correctly with the roof ledge will land the moly on the B-Site default pit plant at the center. This can easily stop enemies from defusing the spike in a post-plant scenario. This is a comparatively easy lineup, but players will need a bit of practice to reproduce it accurately.
4) C-Mound to C-Site
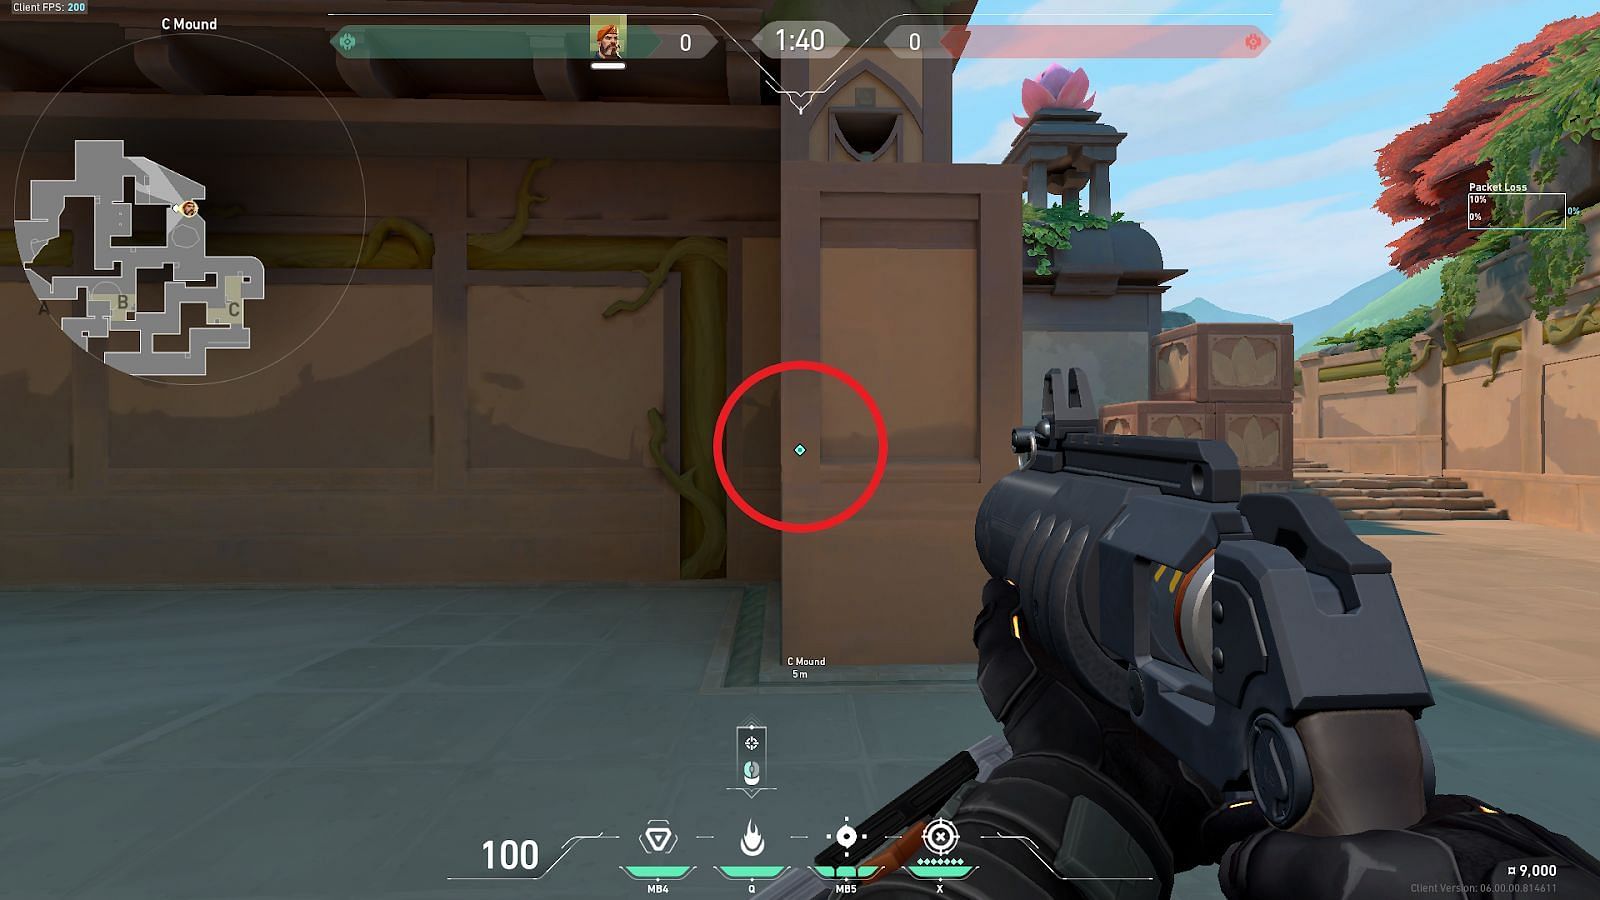
Position yourself in front of this corner in C-Mound and tuck to the center of the beam on the corner, as shown with the marker.
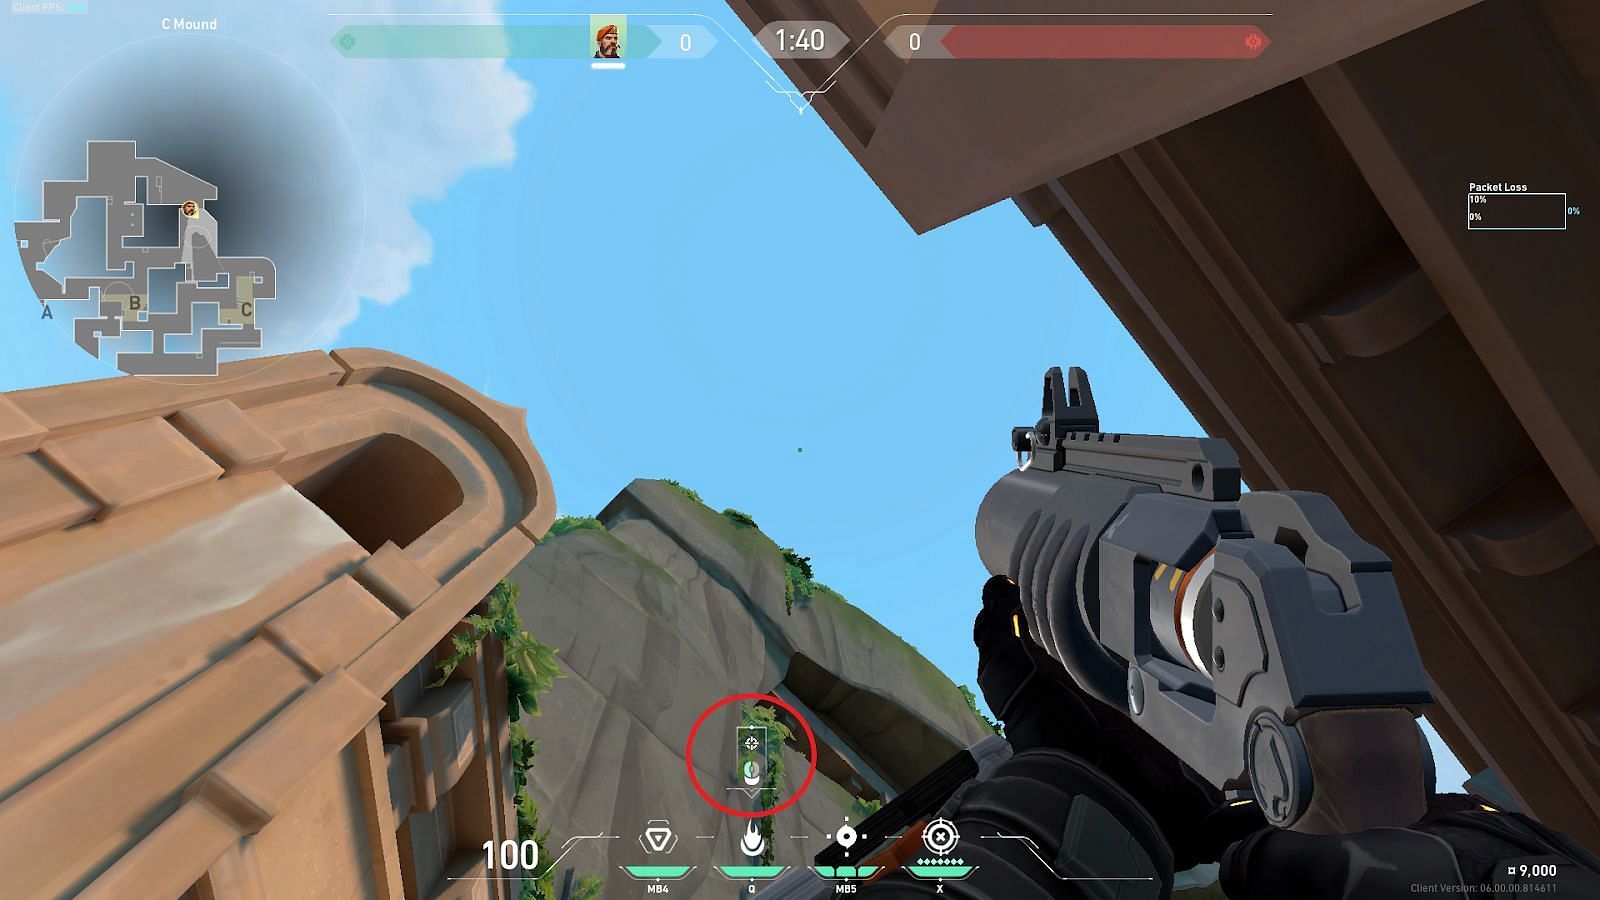
Position the mouse indicator icon above the moly icon marked with the circle. Perform a simple left-click to deploy the moly towards C-Site.

Correctly lining up the mouse indicator icon will land the moly directly on the C-Site corner near C-Bend. This lineup can be extremely helpful in contesting the defending team from defusing the spike while taking peeks from C-Mound.
5) C-Mound to B-Site default pit plant

Position yourself in C-Mound in front of the marked arch edge. Tuck to the wall directly lining up with the edge and look towards B-Site.
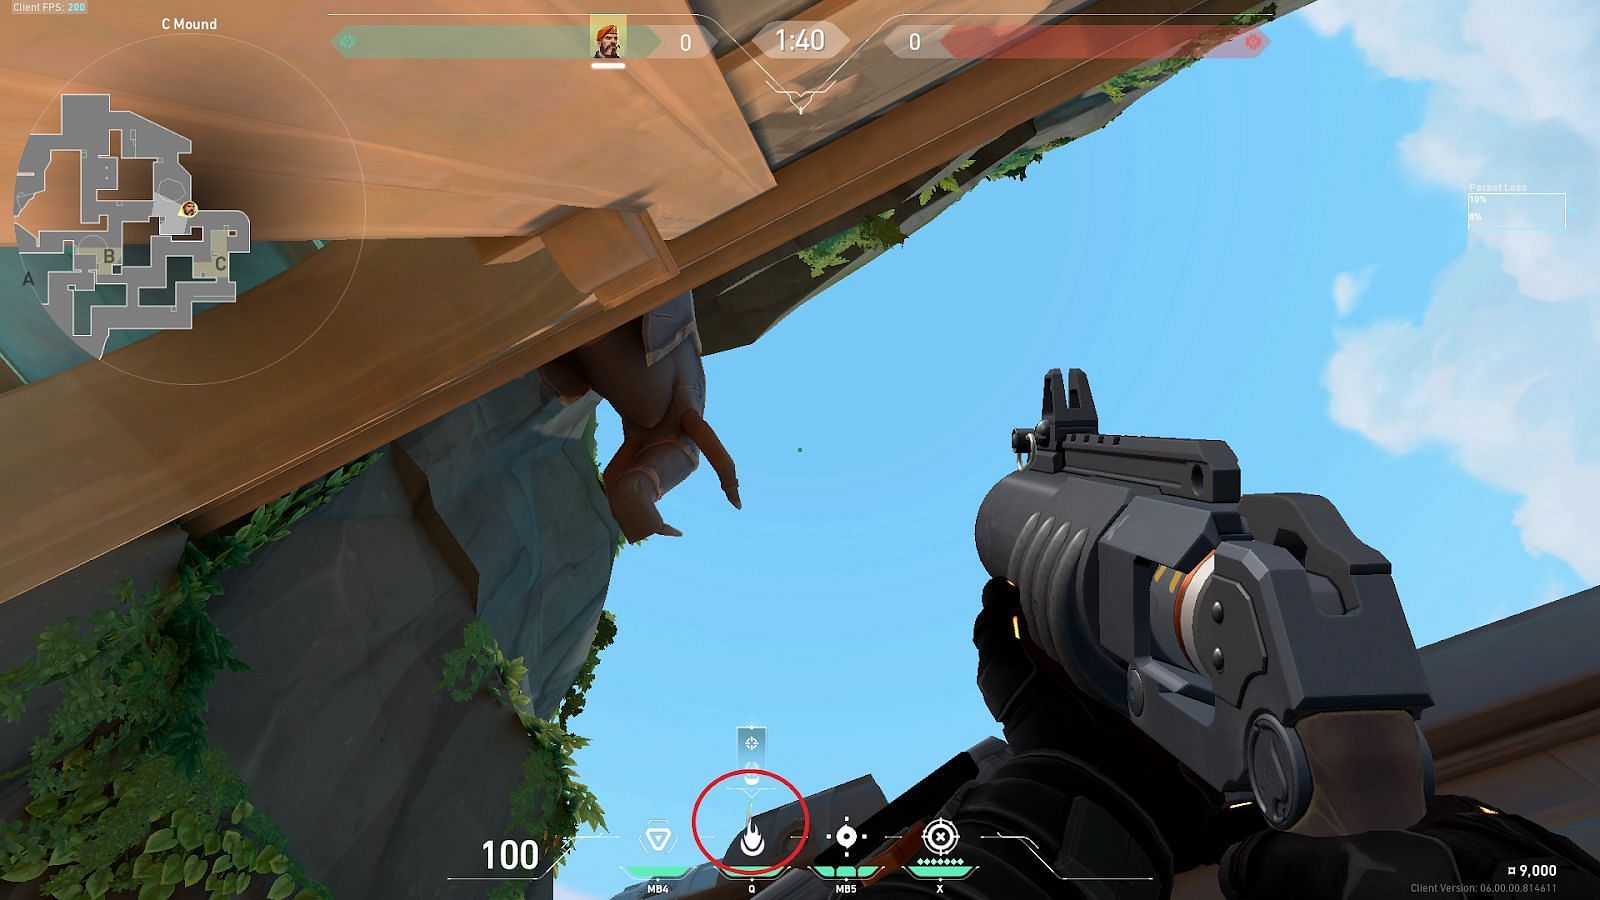
Place the tip of the moly ability icon on the roof ledge as shown, marked with a circle. Perform a simple left-click throw to deploy the moly towards B-Site.
Performing this lineup accurately will land the moly directly on the B-Site default pit plant. This will stop the defending team from defusing the spike and is very effective in a post-plant scenario to win.
