

'%20x='0'%20y='0'%20height='100%25'%20width='100%25'%20%0A%20%20%20%20%20%20%20%20%20%20xlink%3Ahref='data:image/jpg;base64,/9j/4AAQSkZJRgABAQAAAQABAAD/2wCEAAMDAwMDAwQEBAQFBQUFBQcHBgYHBwsICQgJCAsRCwwLCwwLEQ8SDw4PEg8bFRMTFRsfGhkaHyYiIiYwLTA+PlQBAwMDAwMDBAQEBAUFBQUFBwcGBgcHCwgJCAkICxELDAsLDAsRDxIPDg8SDxsVExMVGx8aGRofJiIiJjAtMD4+VP/AABEIAAYACgMBIgACEQEDEQH/xABfAAEBAQAAAAAAAAAAAAAAAAAABQcQAAIBBAIDAAAAAAAAAAAAAAECAwAEBxEFBhITQgEBAQAAAAAAAAAAAAAAAAAAAwURAAICAwEAAAAAAAAAAAAAAAECAxEAQVEh/9oADAMBAAIRAxEAPwCbFk3LFtcWHv5uC8lliungmmTXgFCsQyqAG2F0d1mk/fcmyTyu3c+bDM7EhLtkUEn5UDQFKU8IJUkvIbNm3bgGSpgsjLar4ulA2eZ//9k='%3E%3C/image%3E%3C/svg%3E)
Valorant players can find solutions to win even in the most adverse situations. In the past, the community has figured out several absurd lineups for Agents like Sova, Brimstone, and Viper, baffling even the pros. Killjoy is one of the Agents who can utilize throwable abilities that can be remotely activated to damage enemy players.
The game's latest Episode 6 update introduced a new map, Lotus, to the game, which soon became a challenge for almost all players. Killjoy deployers have already started grinding the game and understand the map structure to make lineups. These lineups are essential as an Agent like Killjoy can win rounds from a distance without gunfights in post-plant situations.
Here are some of the most effective Killjoy lineups players can use in Valorant’s Lotus.

Disclaimer: This article reflects the opinions of the author.
Attacker Spawn to B-Site default pit plant and other Killjoy lineups for Lotus in Valorant
Riot Games tries to provide the best and most balanced first-person shooter (FPS) experience through Valorant. Lineups have been a crucial part of Valorant’s competitive ranked matches, using which players could gather their resources and secure a match. Killjoy is a Sentinel Agent who can be instrumental while defending bomb sites and maintaining map control.
1) C-Lobby to C-Site default plant
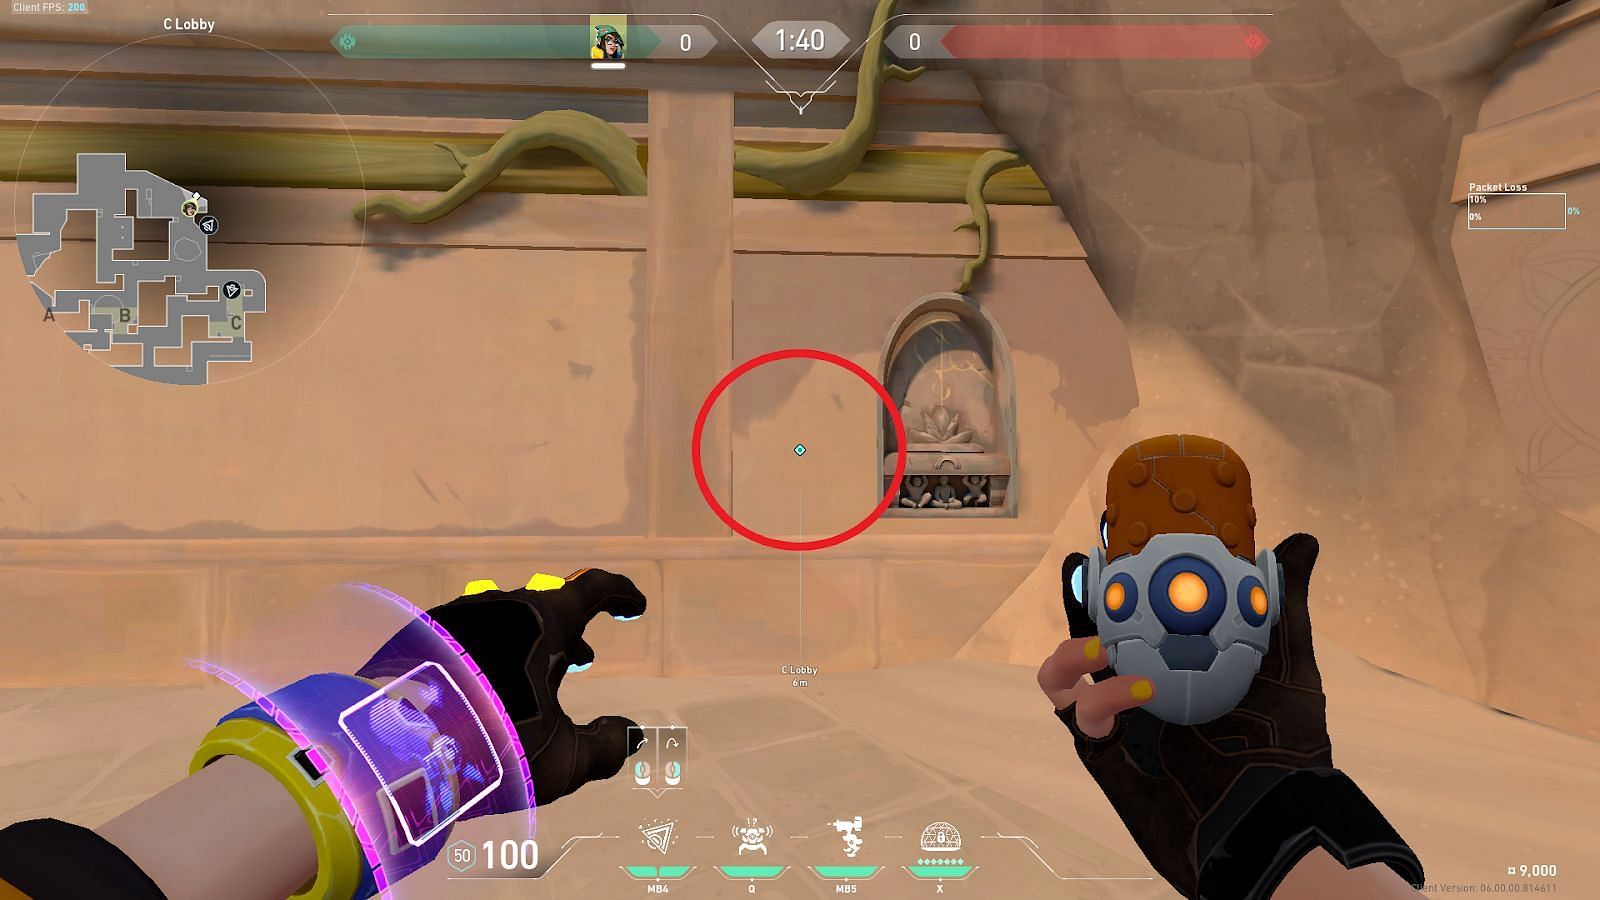
Position yourself in C-Lobby and place yourself between the shown structure and the column on the wall. Tuck into the wall in between and look towards C-Site.
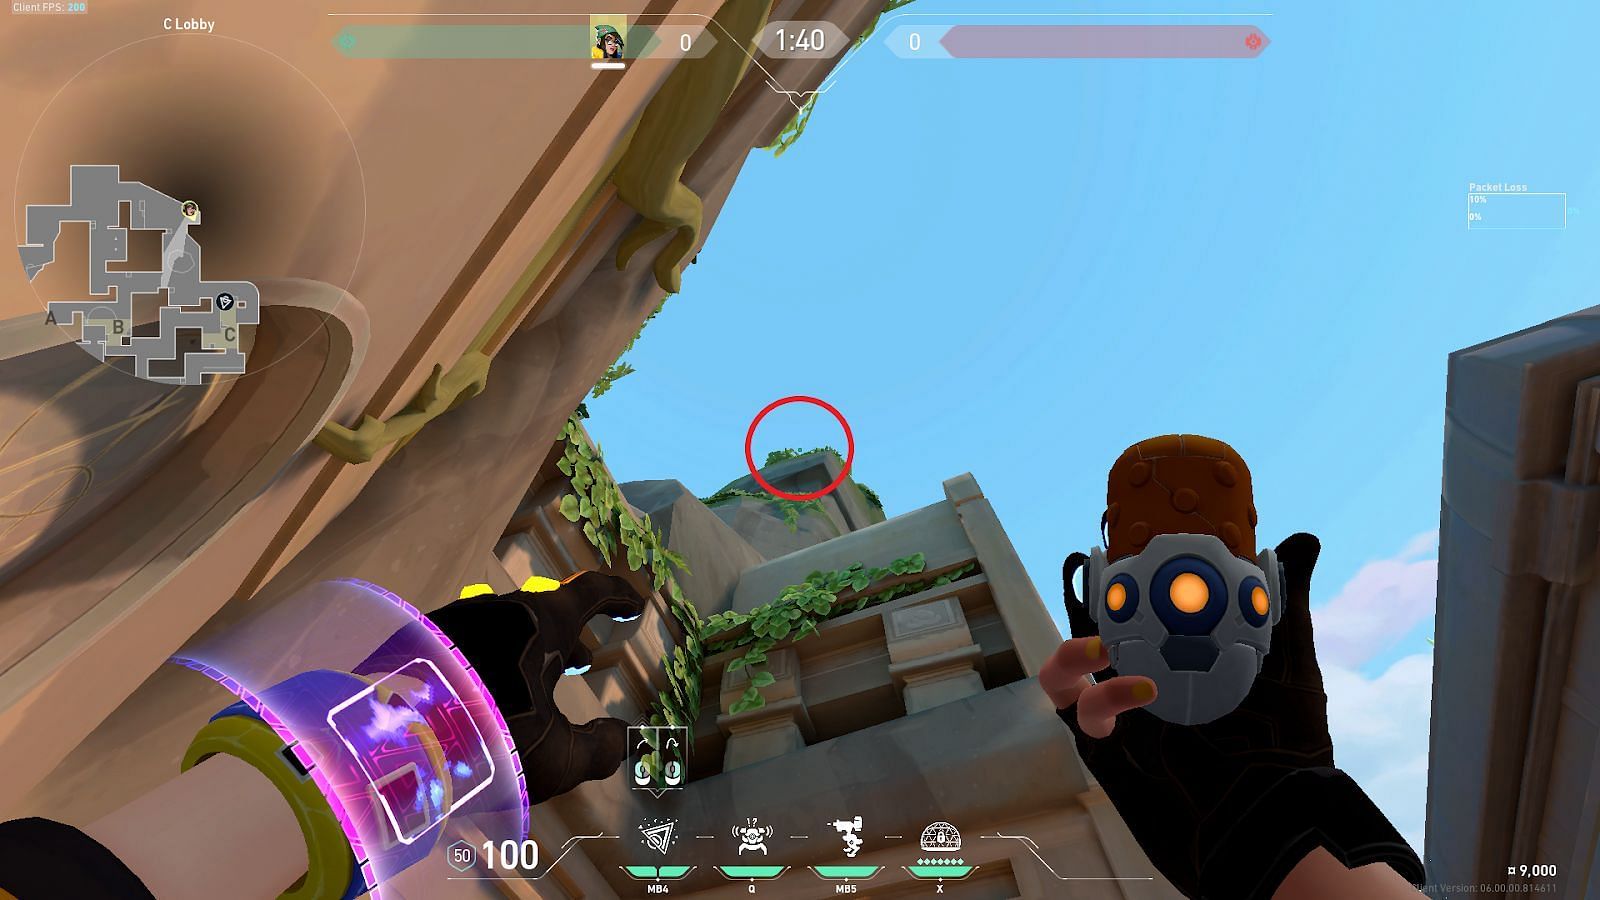
Position the crosshairs above the roof ledge and above the overgrowth of leaves. Perform a jump left-click throw to deploy the nano swarm towards C-Site.
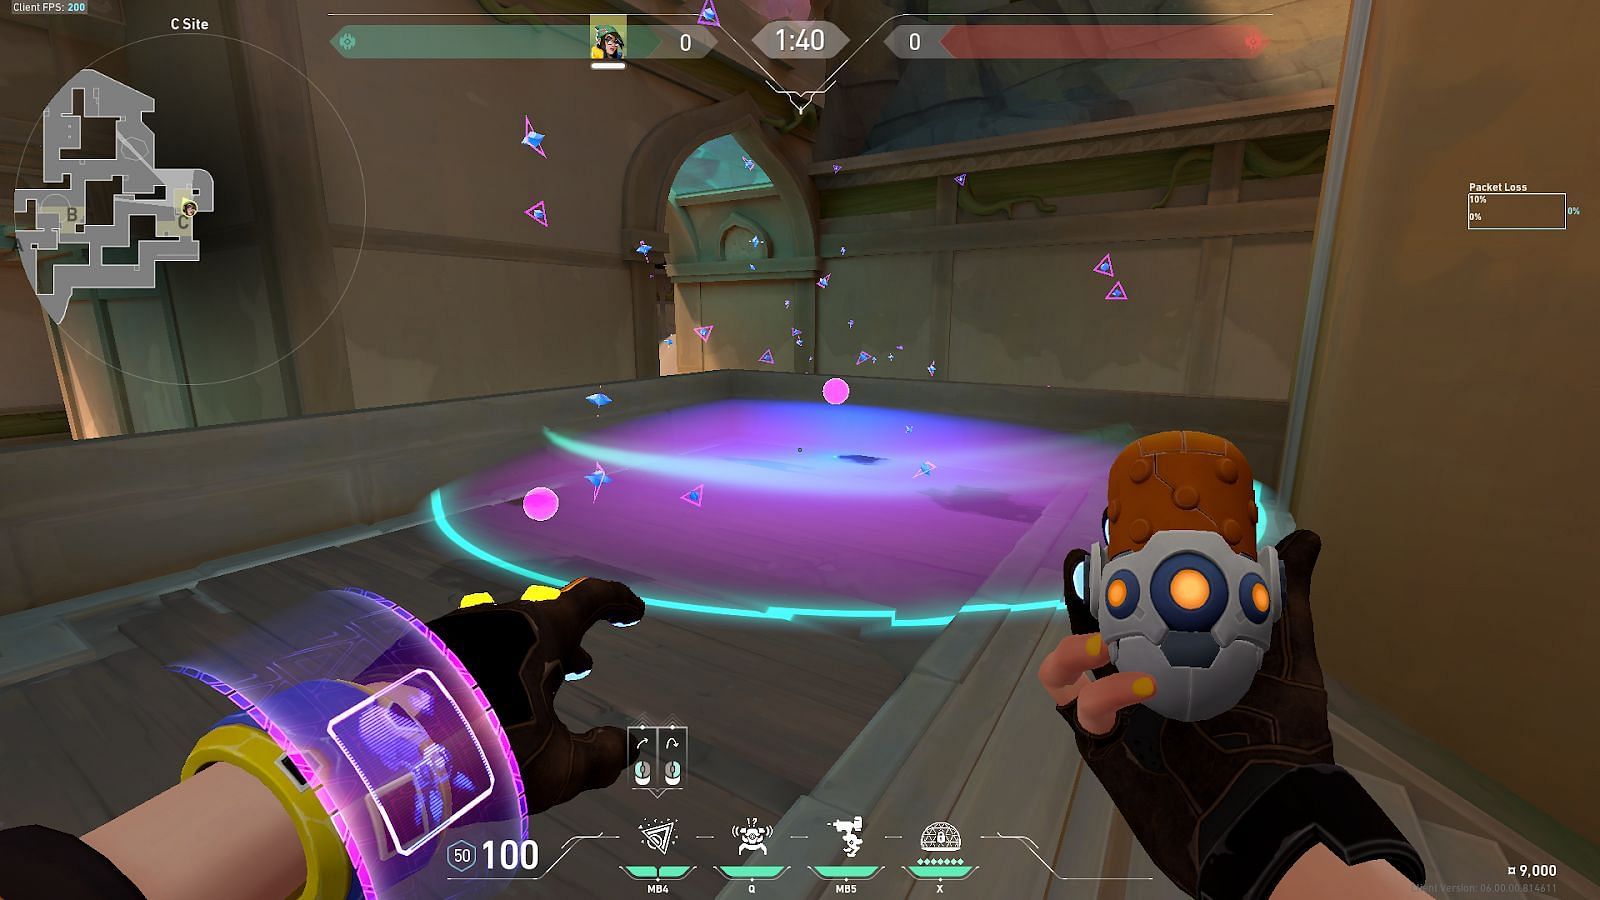
Correctly lining up will land the nano swarm directly on C-Site near the elevated edges at the default plant position. It is a tricky lineup, but players can reproduce the results consecutively with enough practice.
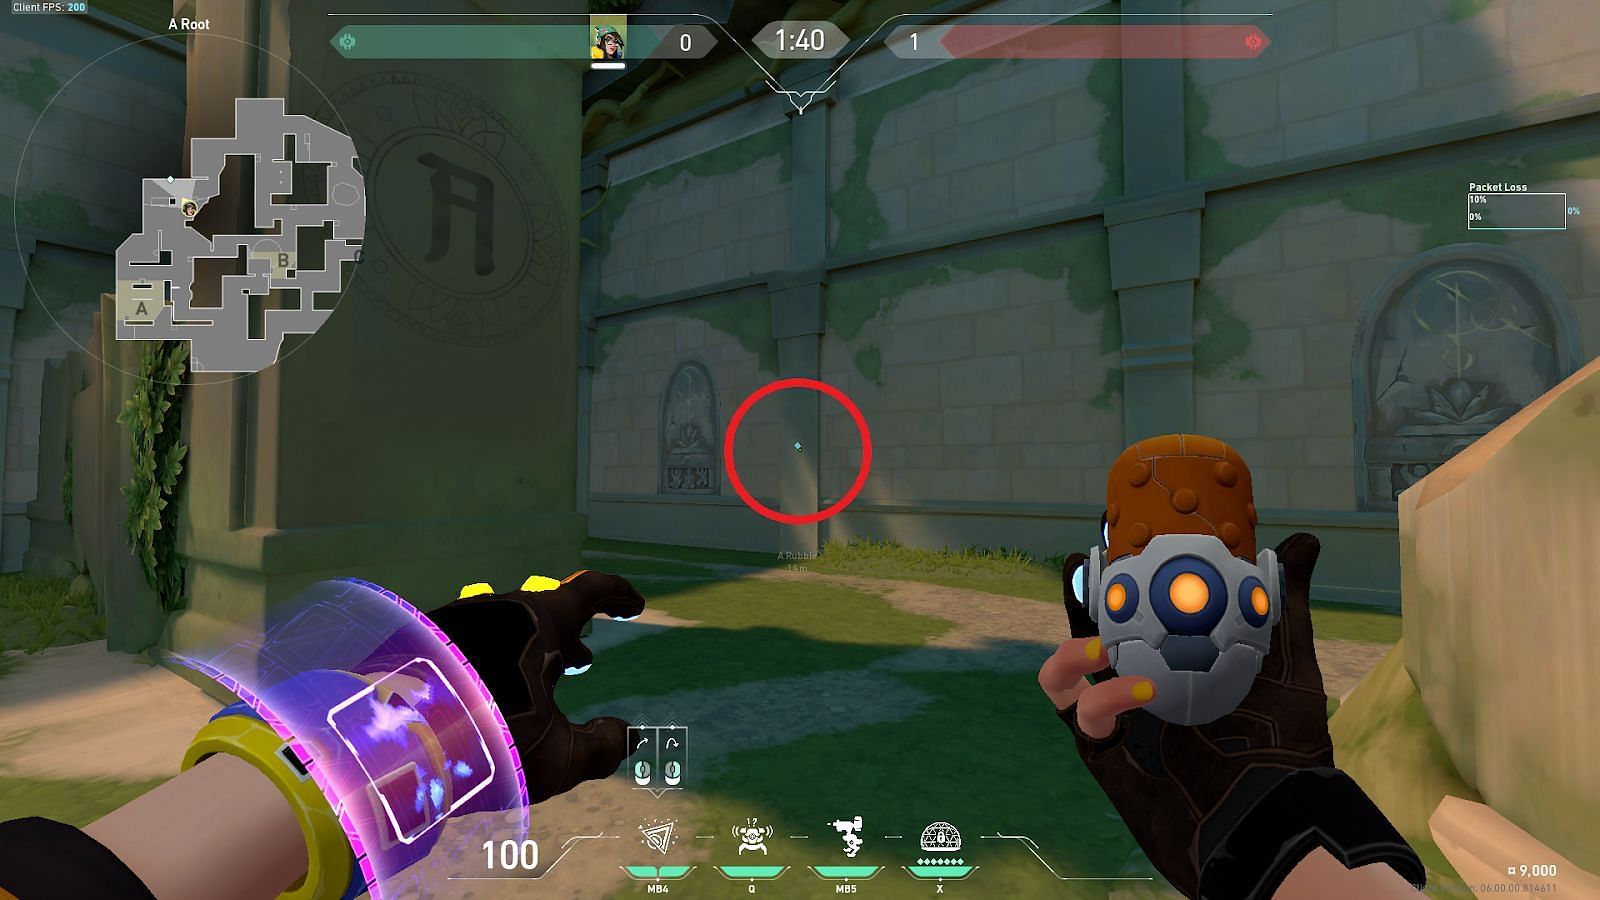
2) A-Root to A-Site default plant
Position yourself in the shown corner in A-Root and tuck inside the marked corner. Look towards A-Site after going in the corner.
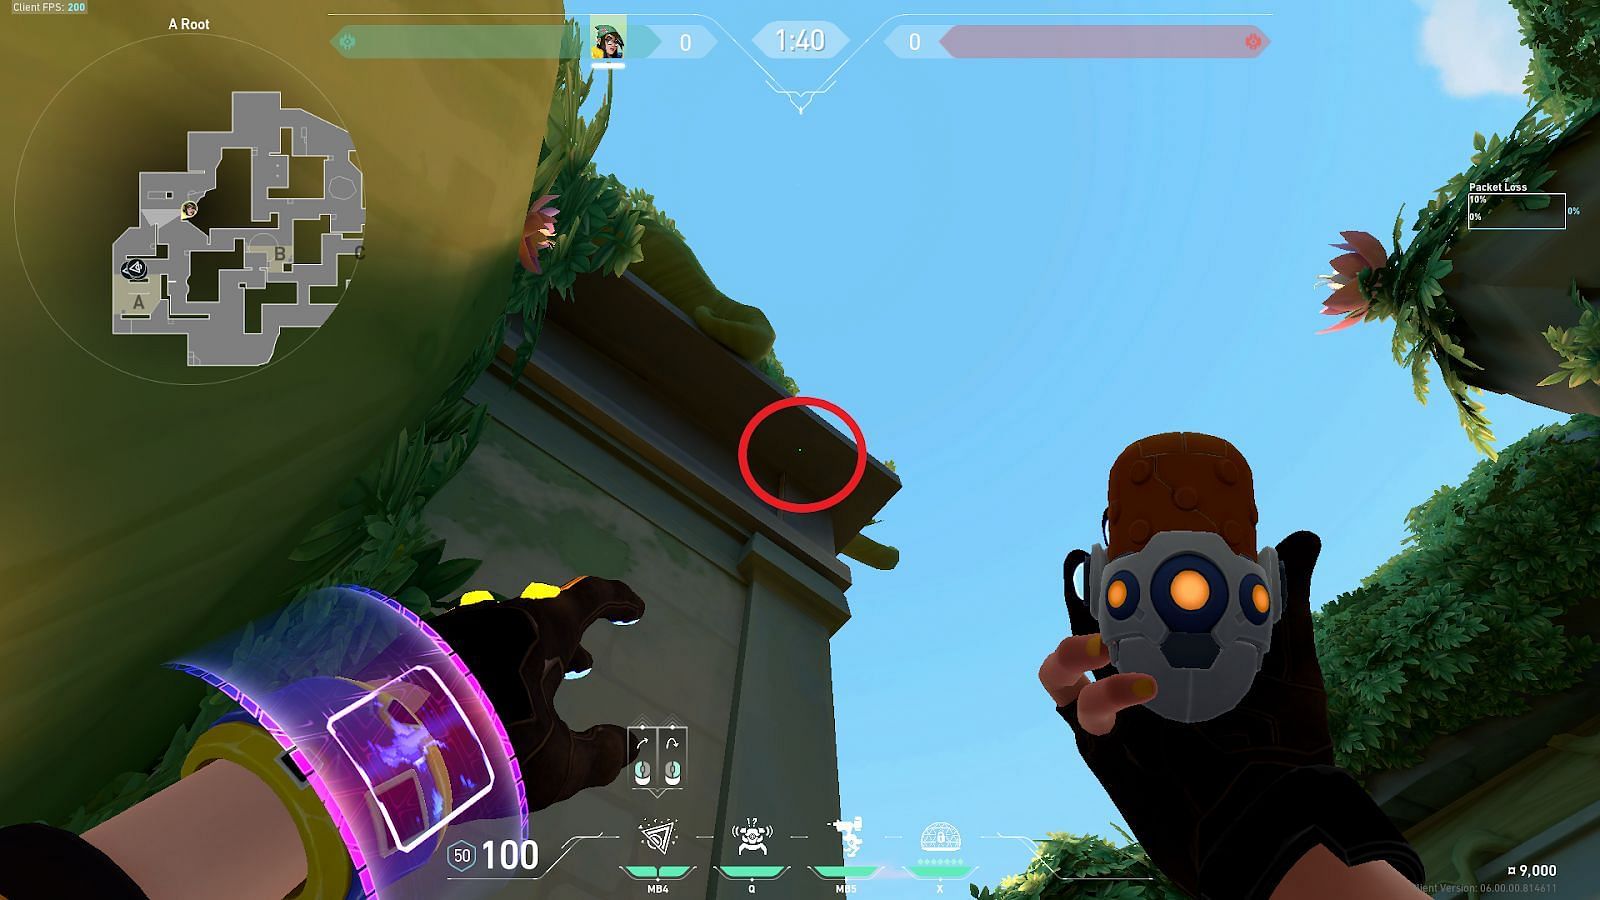
Position the crosshair as shown with a circle on the roof ledge above A-Root. Perform a jump left-click throw to deploy the nano swarm towards A-Site.
Correctly lining up the throw will land the nano swarm directly next to the wooden box in A-Site near A-Hut. This can deter defenders from defusing the spike without alerting them of possible attackers in the A-Tree area.
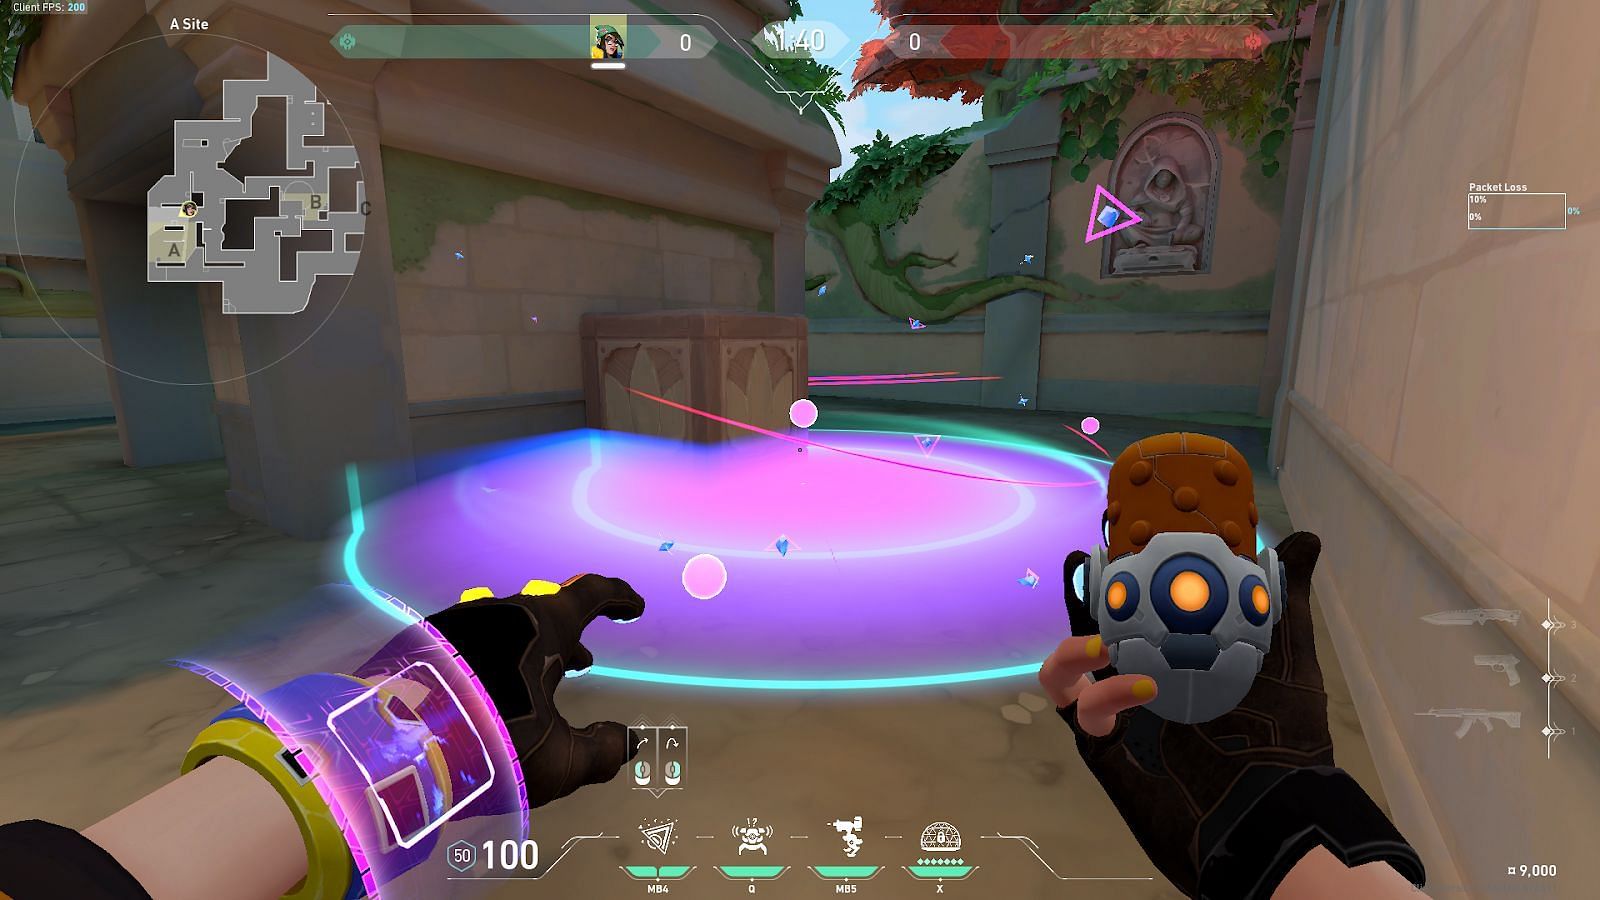
3) Attacker Spawn to B-Site default pit plant
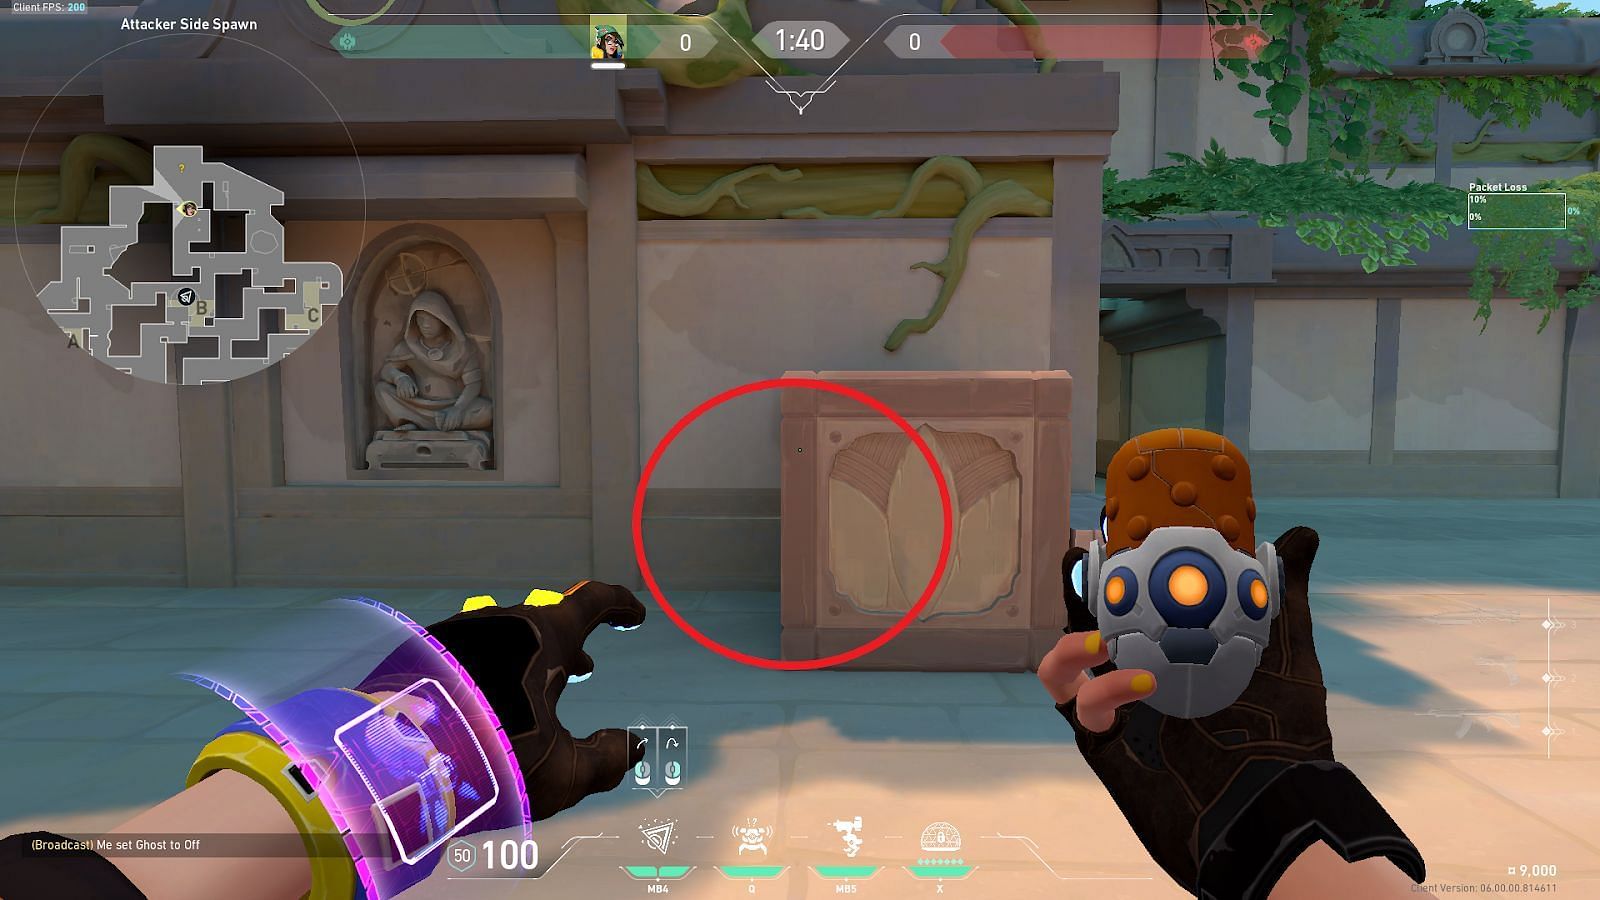
Position yourself in front of the shown wooden box near Attacker Spawn and tuck to the marked edge of the box. Look towards the B-Site after tucking with the edge of the wooden box.
Place the right-click mouse indicator icon as shown and position the diamond shape on the first arch ledge marked with a circle. Perform a jump left-click throw to deploy the nano swarm towards B-Site.
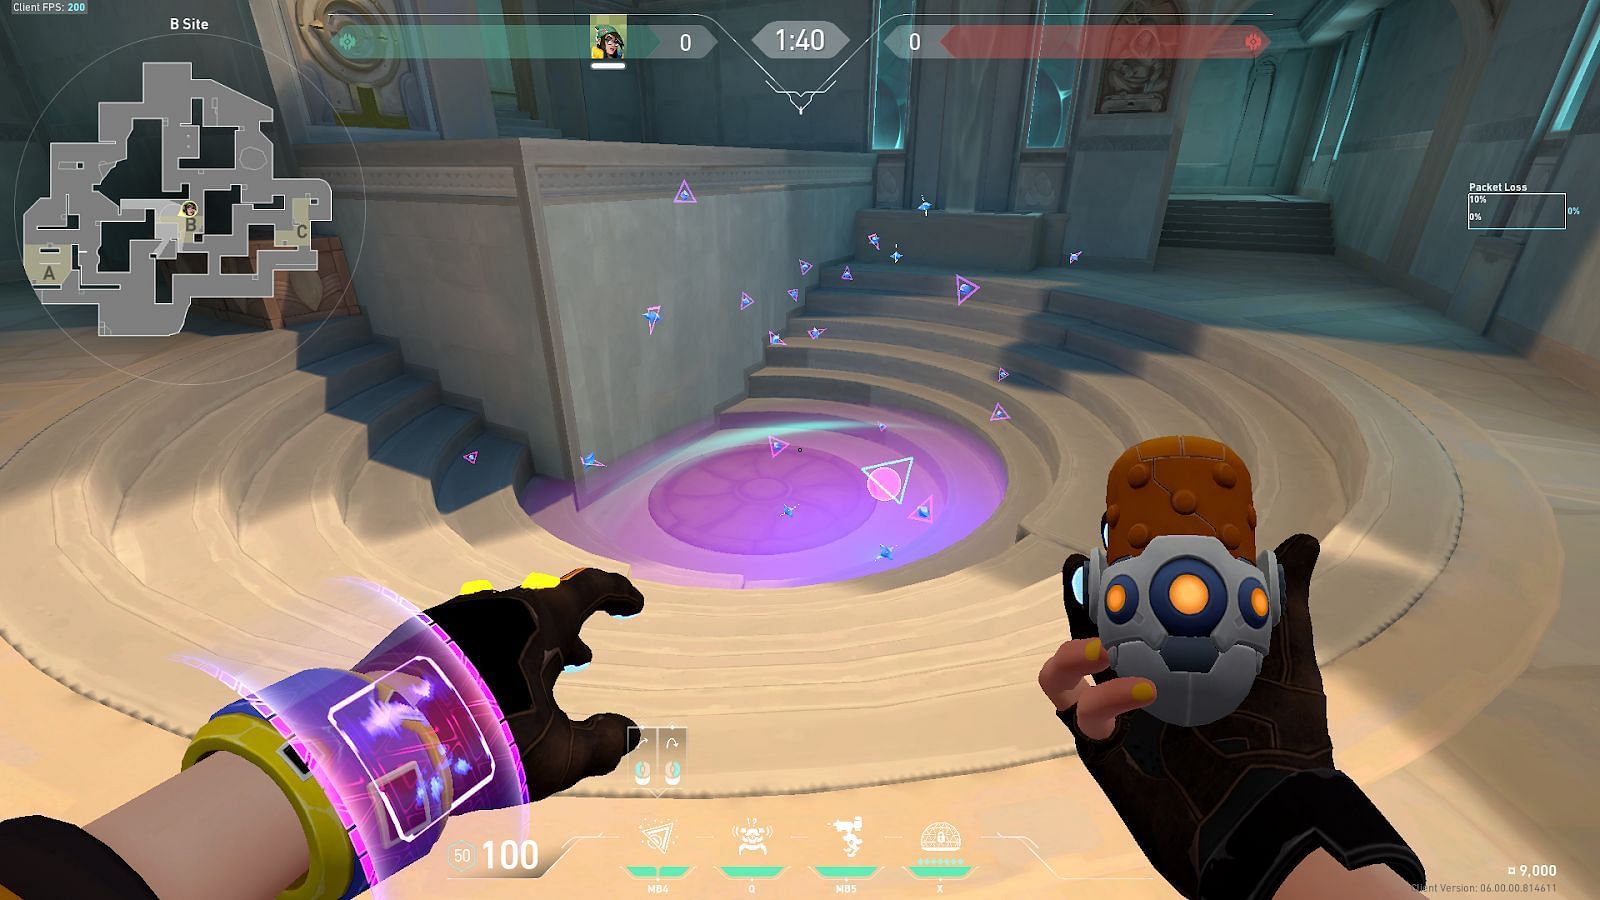
Matching the lineups and timing the jump-throw correctly will deploy the nano swarm over the roofs and land directly inside the B-Site pit default plant position. This lineup is comparatively easy to perform and can be perfected with a few tries.
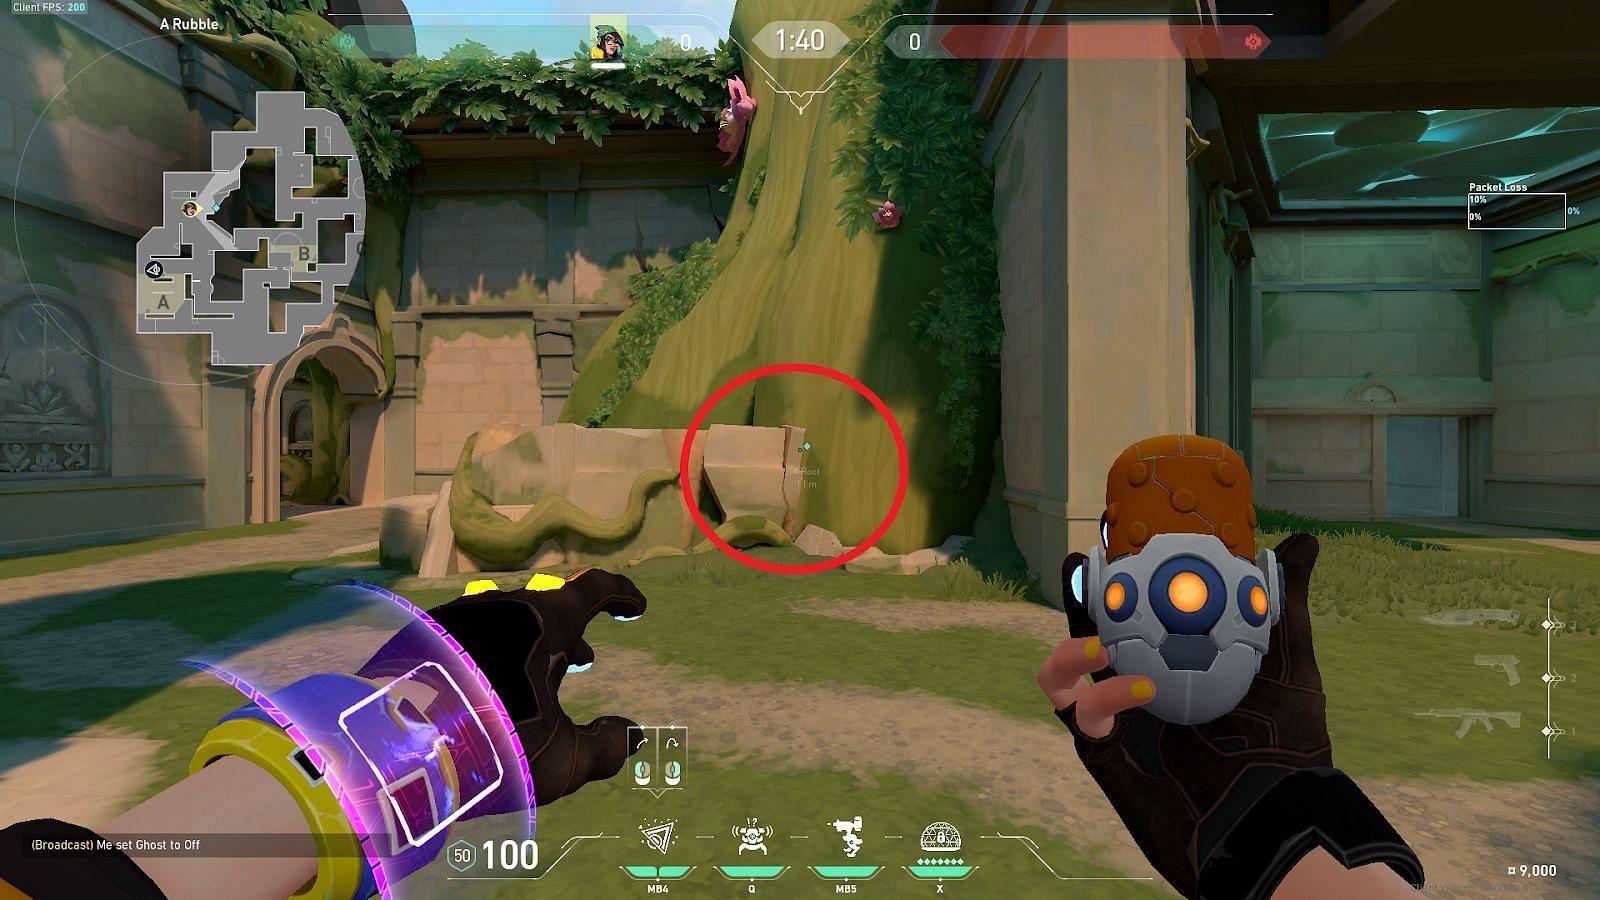
4) A-Rubble to A-Site default plant
Position yourself in A-Rubble near the marked wall structure, as shown with a circle. Tuck to the center of the column and look towards A-Site.
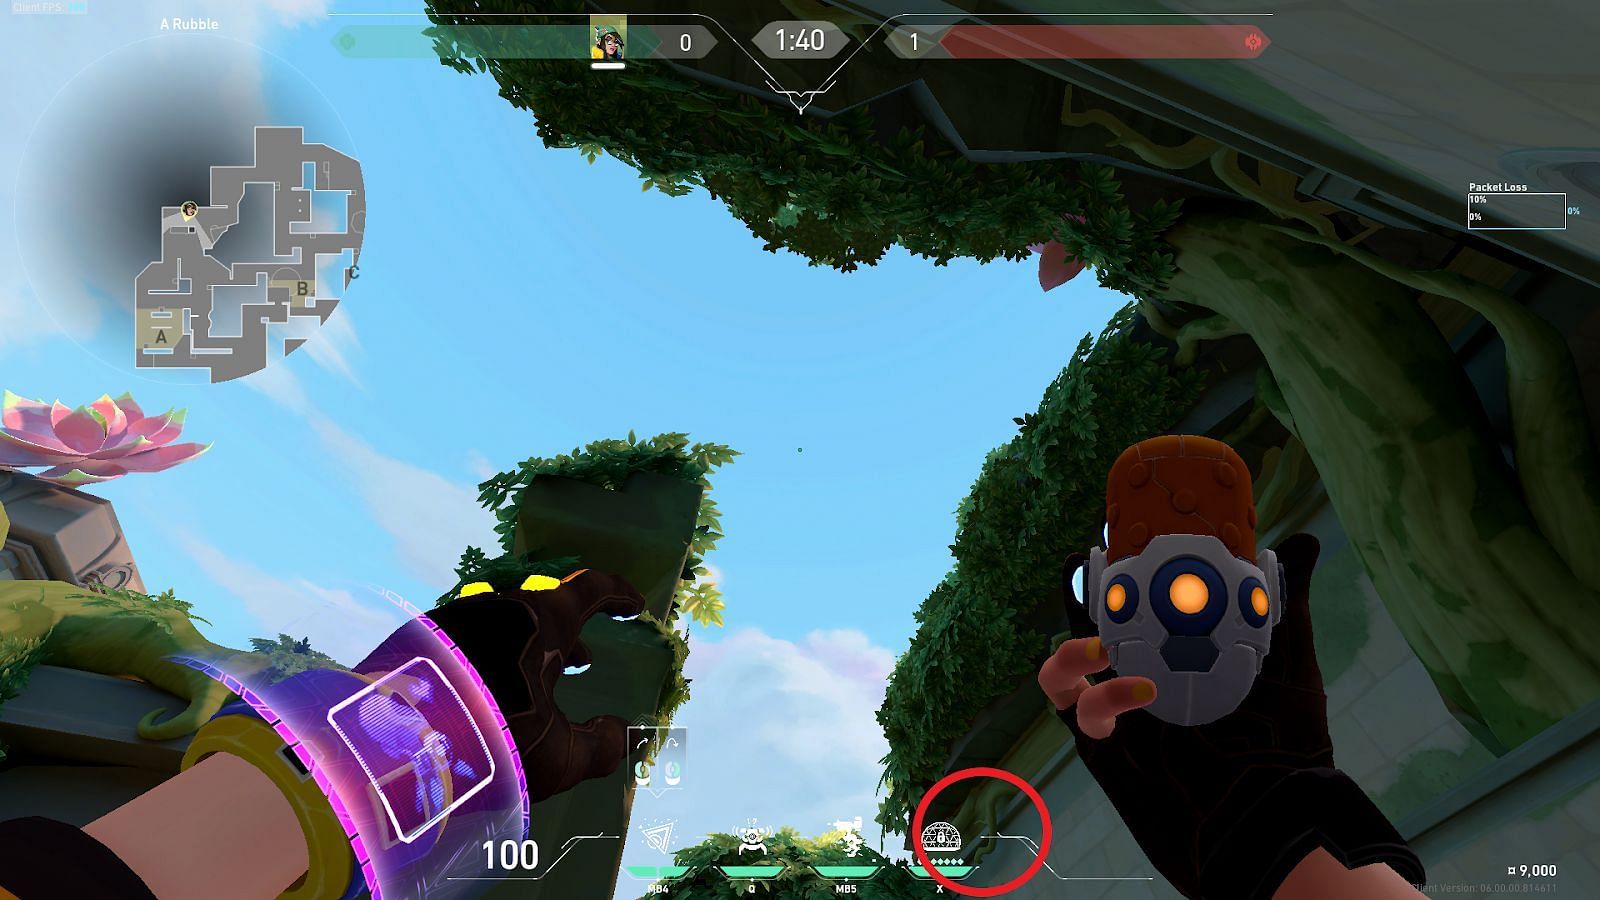
Place the Heads-Up Display (HUD) near Killjoy’s ultimate ability icon, as shown near the roof ledge above A-Door. Perform a jump left-click throw to deploy the nano swarm towards A-Site.

Using this lineup correctly, the nano swarm will directly land outside A-Hut near the wooden boxes in the A-Site default plant position. This can be a great way to disorient enemies from defusing the spike from A-Rubble.
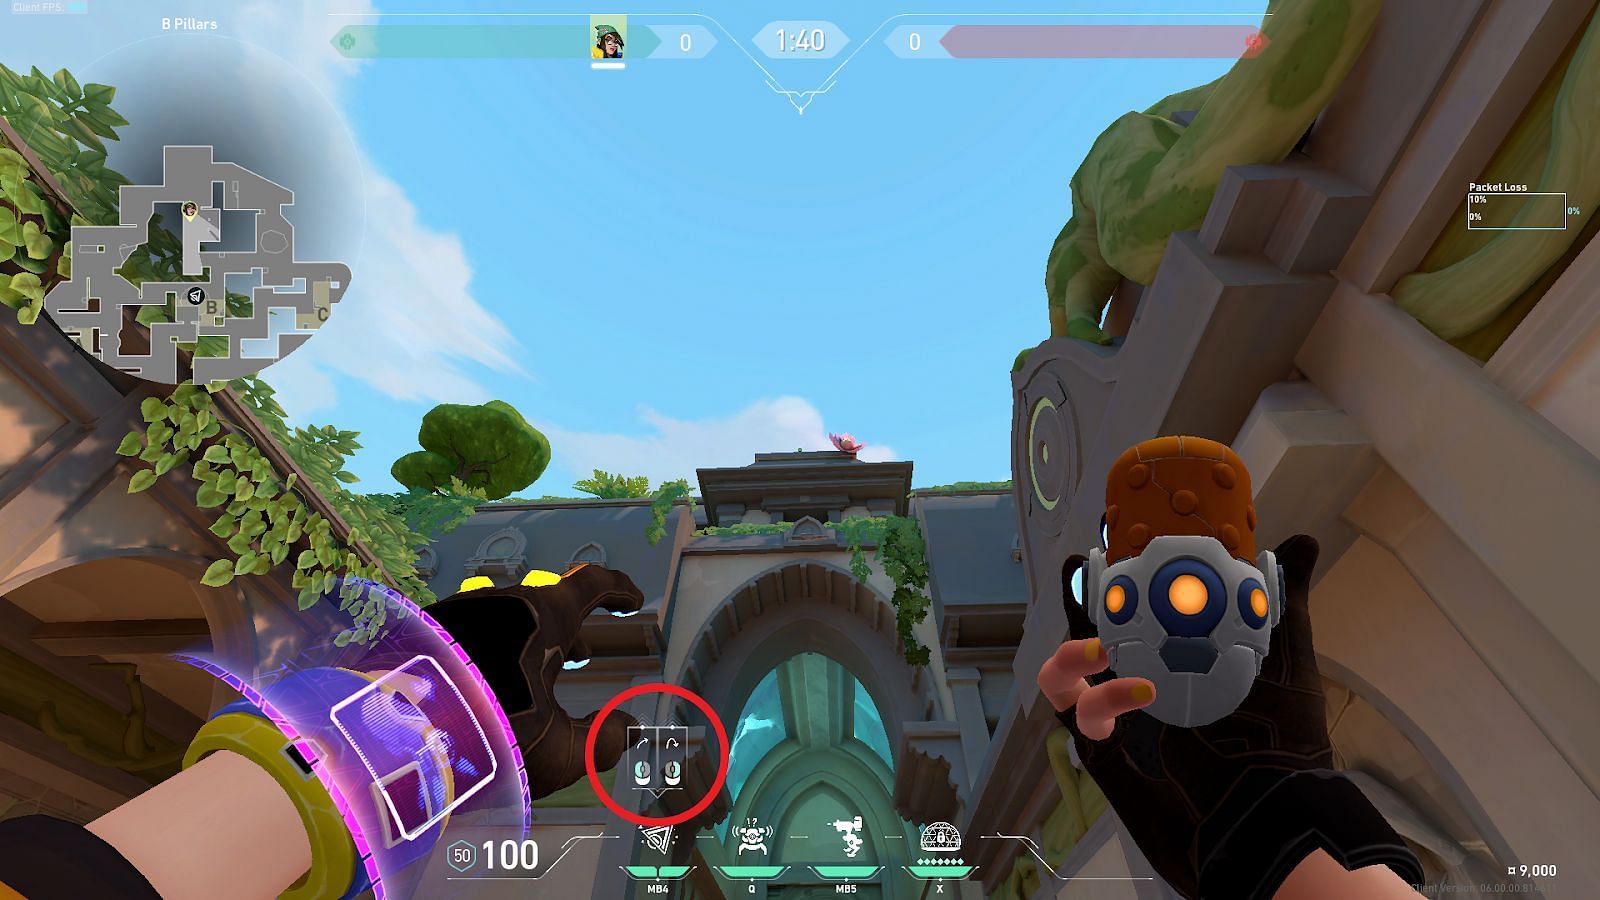
5) A-Link to B-Site default pit plant
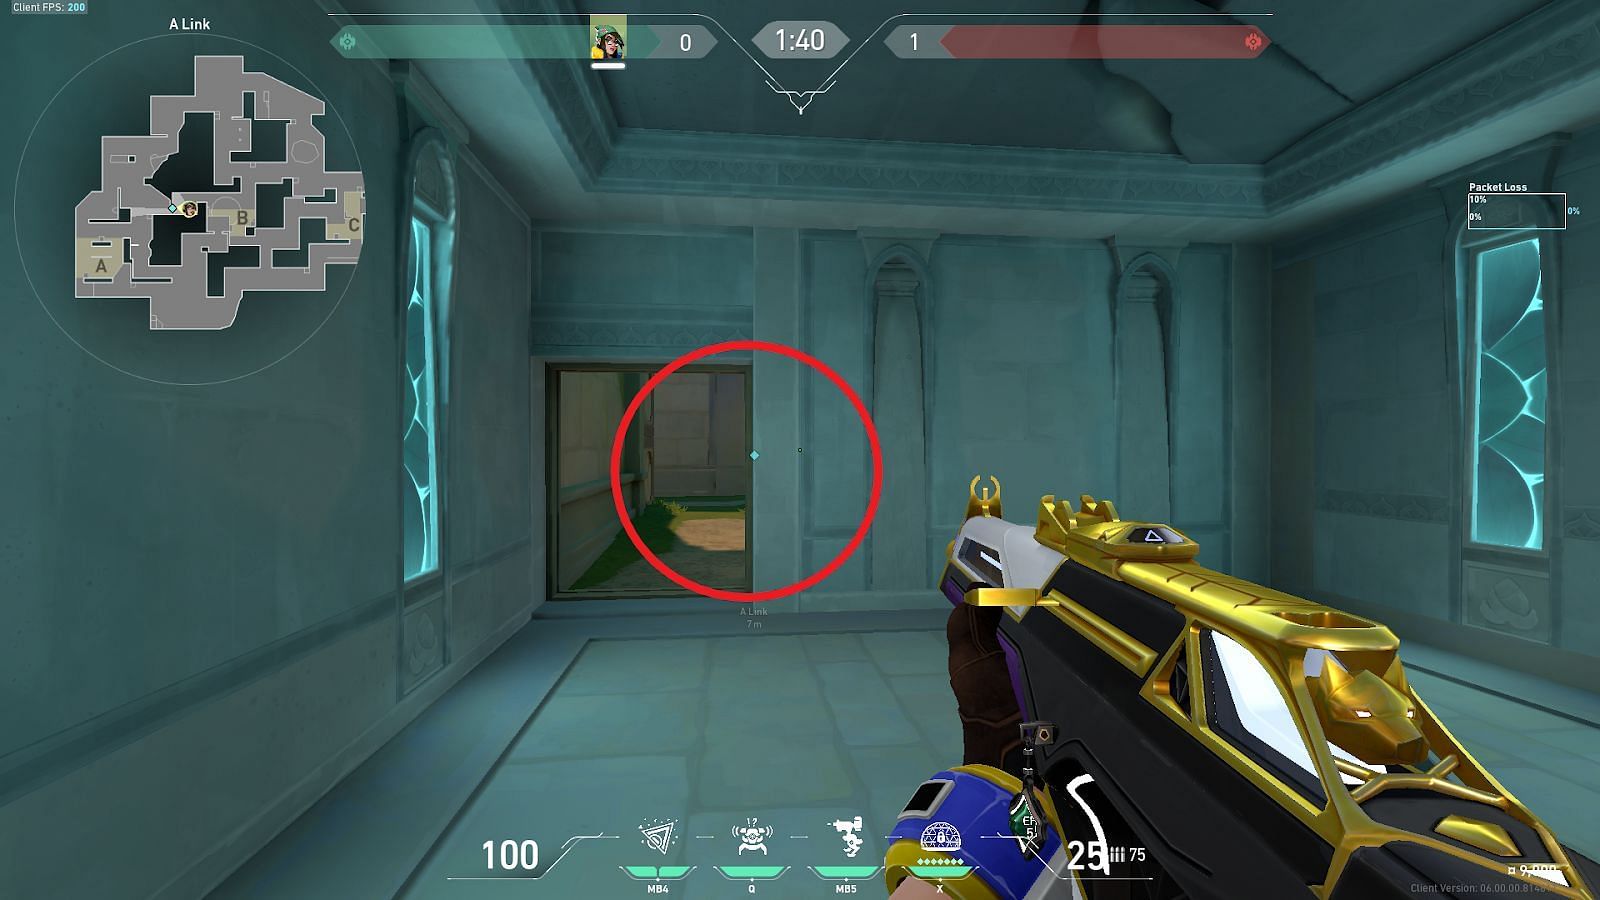
Position yourself in front of the marked corner near A-Link, where the destructible door is present on Lotus. Tuck to the edge of the wall and look towards the B-Site.
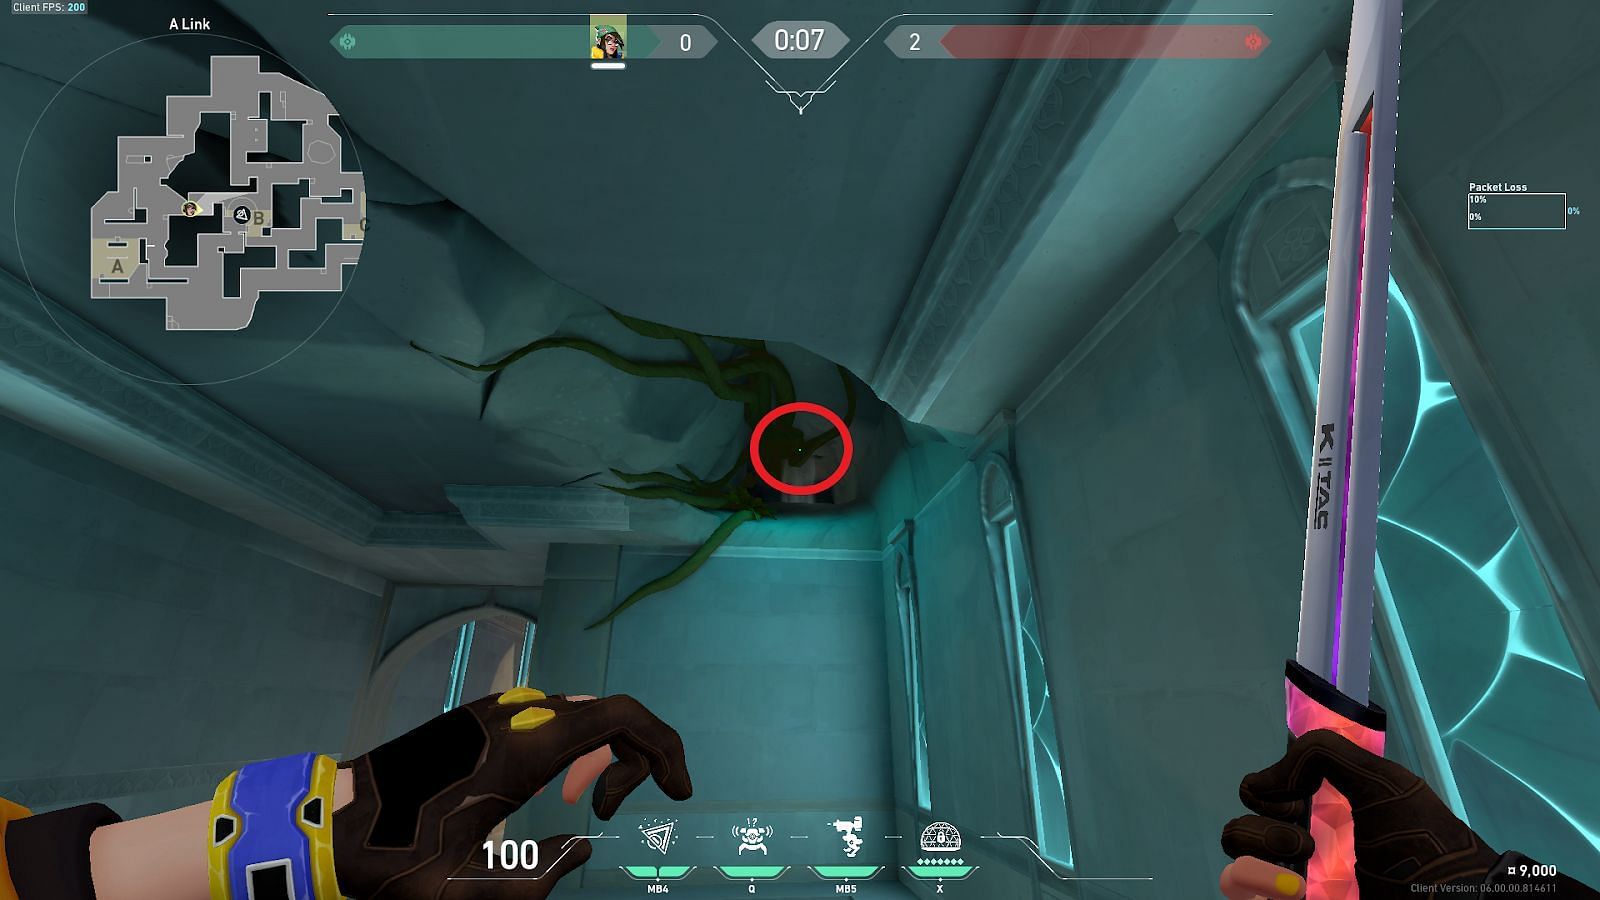
Place your crosshair on the gap present on the roof, as shown with a circle. Perform a simple left-click throw to deploy the nano swarm.
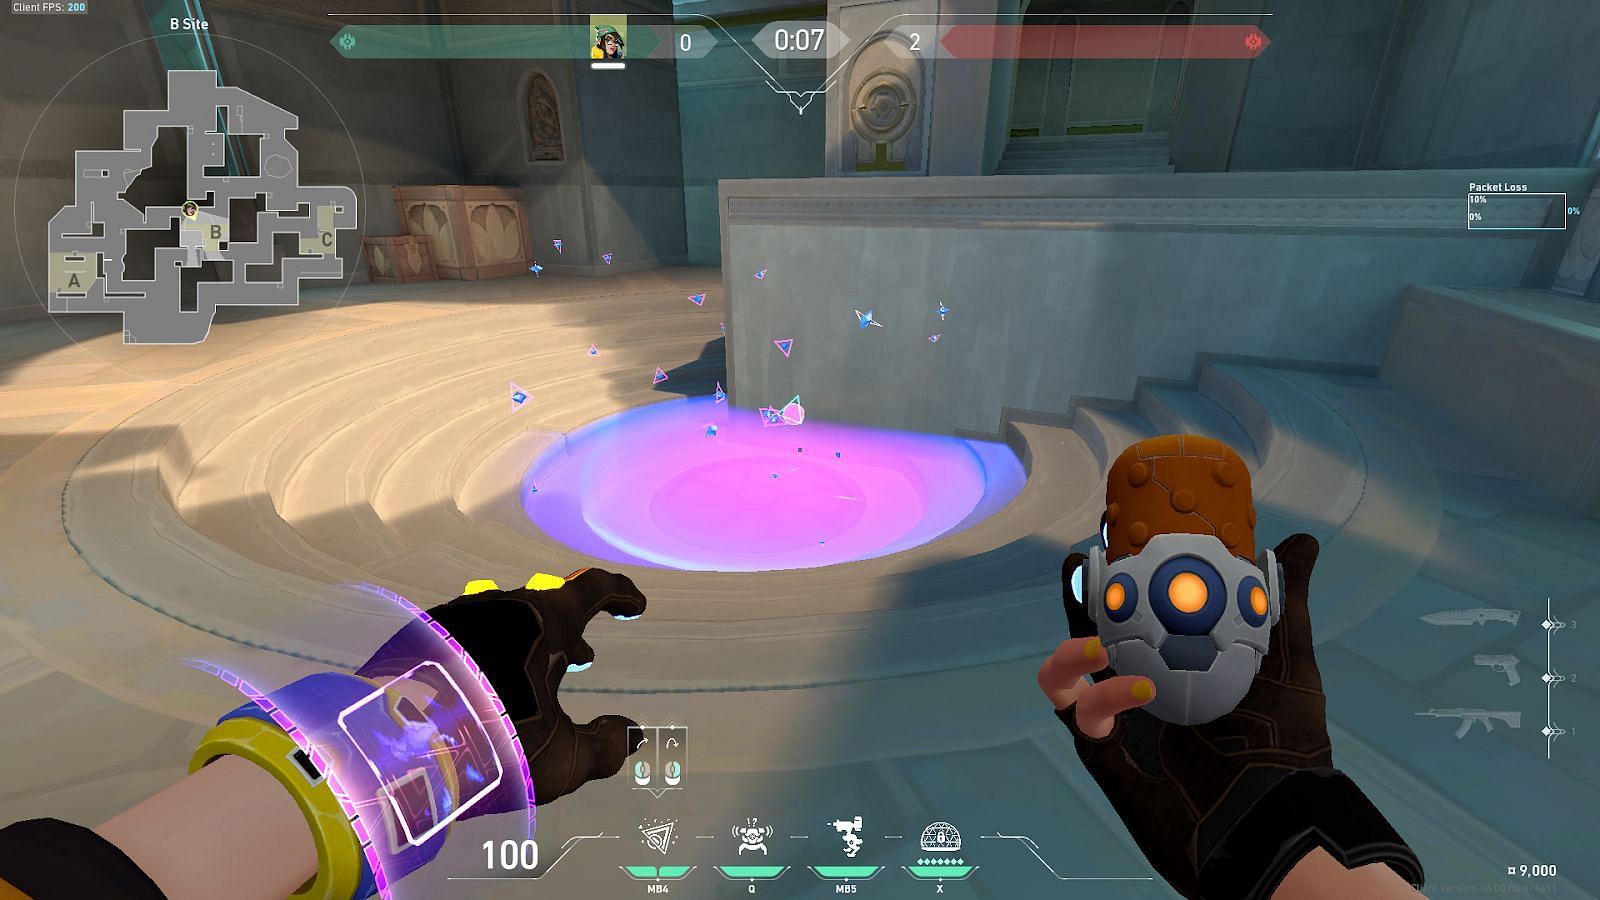
This is a simple but highly effective lineup for the B-Site default pit plant. It is one of the easiest lineups for Killjoy on this map, which can be easily recreated. Parts of the nano swarm remain invisible due to the stair structure around the pit in B-Site, making the swarm even deadlier.
This concludes with the most effective Killjoy lineups players can use on Valorant’s Lotus. Stay tuned to Sportskeeda for the latest updates and more Lotus tips and tricks.
