
'%20x='0'%20y='0'%20height='100%25'%20width='100%25'%20%0A%20%20%20%20%20%20%20%20%20%20xlink%3Ahref='data:image/jpg;base64,/9j/2wBDAAYEBQYFBAYGBQYHBwYIChAKCgkJChQODwwQFxQYGBcUFhYaHSUfGhsjHBYWICwgIyYnKSopGR8tMC0oMCUoKSj/2wBDAQcHBwoIChMKChMoGhYaKCgoKCgoKCgoKCgoKCgoKCgoKCgoKCgoKCgoKCgoKCgoKCgoKCgoKCgoKCgoKCgoKCj/wgARCAAGAAoDASIAAhEBAxEB/8QAFgABAQEAAAAAAAAAAAAAAAAAAAYH/8QAFQEBAQAAAAAAAAAAAAAAAAAAAgP/2gAMAwEAAhADEAAAAM7rR2//xAAjEAABAwEIAwAAAAAAAAAAAAABAgMEAAUGBxESIyQxMkLR/9oACAEBAAE/ALuTJULfgLDSQ6HClZ1kqA7zp7Ea0C85x43kfU/a/8QAFxEBAAMAAAAAAAAAAAAAAAAAAgABEv/aAAgBAgEBPwBpAnNz/8QAFxEAAwEAAAAAAAAAAAAAAAAAAQIRAP/aAAgBAwEBPwBFU2jf/9k='%3E%3C/image%3E%3C/svg%3E)
Valorant received a new map called Sunset in the recent Episode 7 Act 2 update. It is a comparatively straightforward map with a standard double spike site layout. Sunset does not feature over-the-top gimmicks like Lotus’s rotating doors and breakable walls. It does have a door that can be shut down and destroyed, just like Ascent, and several deep corners that can easily be used by enemy players.
The developers designed the map to have ample space for rotations and cheeky flanks while providing enough area on the bomb sites for multiple entry routes. Valorant’s Sage is set to become a crucial Agent for this map as she can utilize her Wall ability to peek over windows and short roofs.
Sage can also be extremely reliable while taking control of the sites and safely planting the spike in difficult scenarios.

Best Sage Walls for the new Sunset map in Valorant
Despite the effectiveness of Sage on the new map, it is worth noting that repetition of strategies can cost you crucial rounds. Sage can be quite versatile and should be used to place unexpected walls to boost over various structures on the map and surprise the enemy team. Here are five of the best Sage Walls that Valorant players can try out on the new map, Sunset.
1) A-Elbow
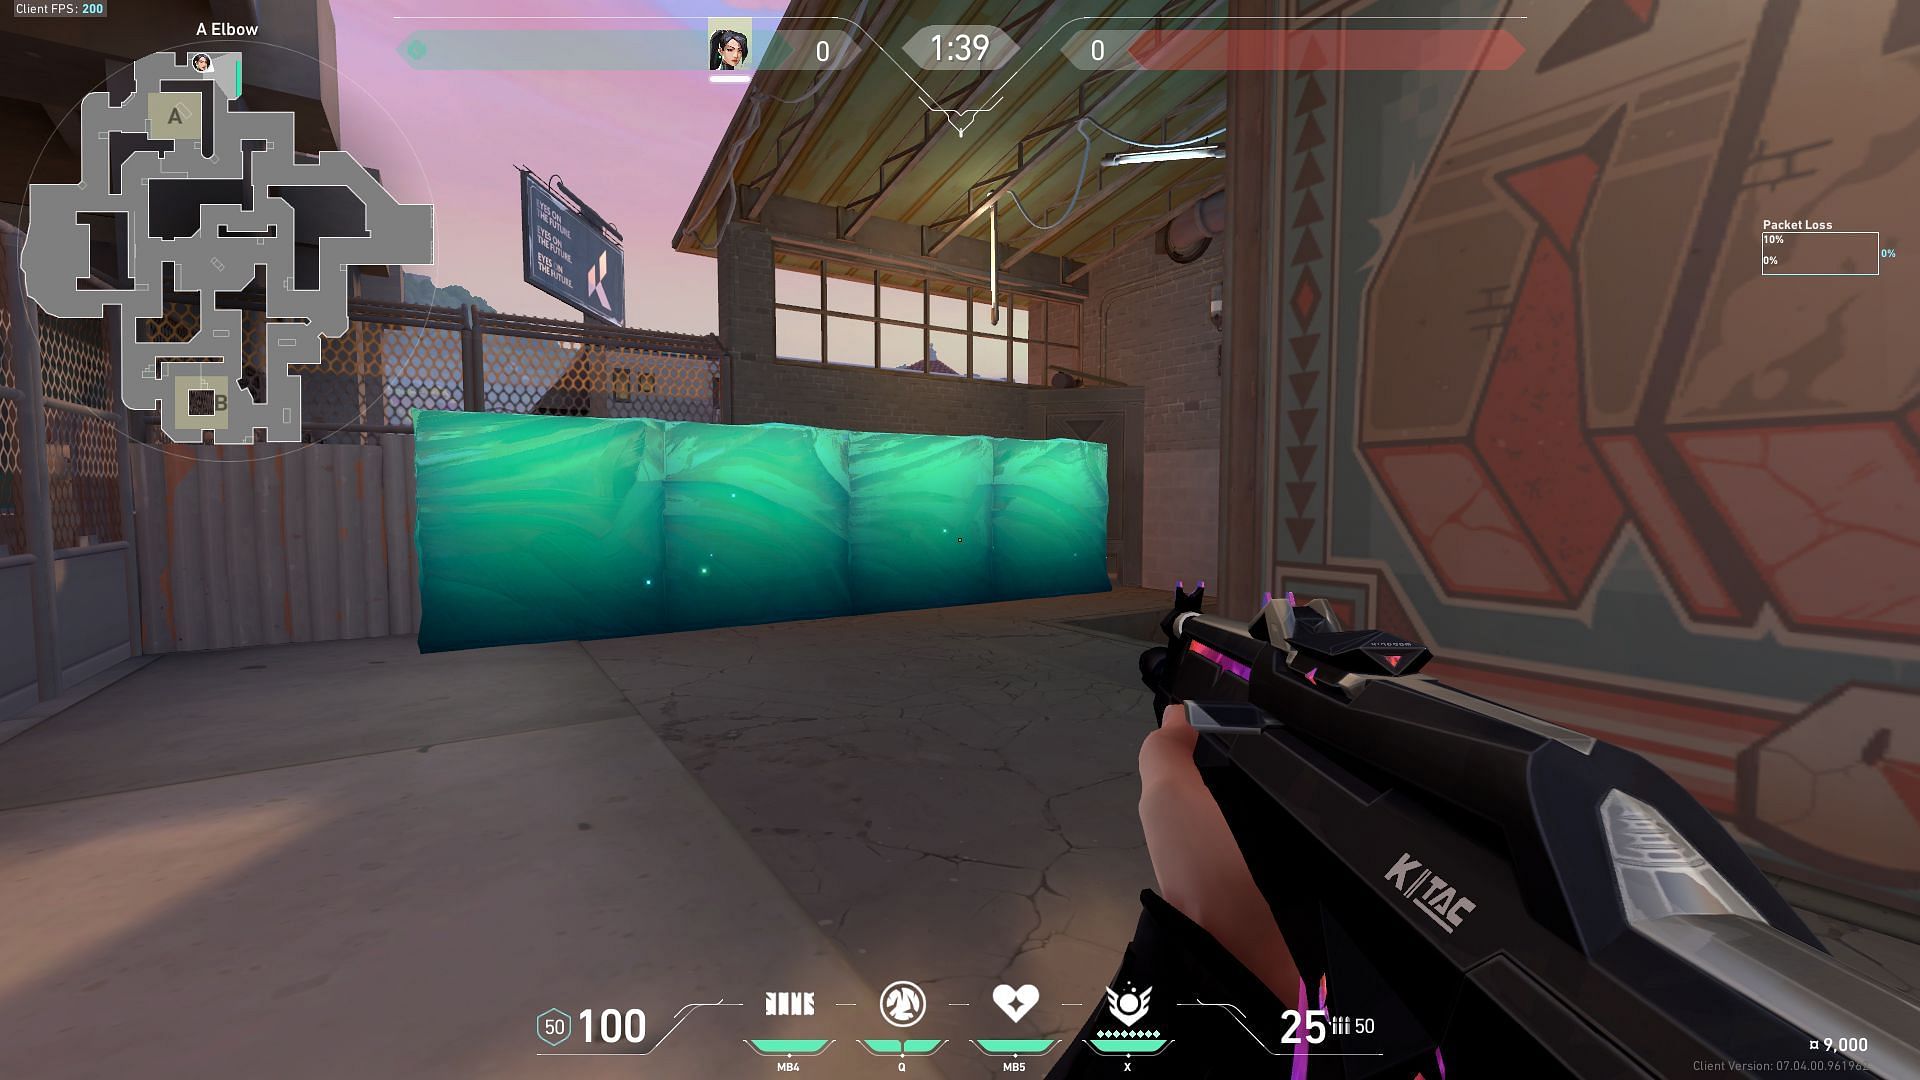
Go to the A-Elbow location on the map and cast your Sage wall in the location shown in the image. This wall can be used to directly peek A-Lobby and catch any enemy player off-guard with its off-angle elevation. This can be most useful for the defending team and can be great for slowing down aggression toward the A-Site at the start of the round.
This boost can pair perfectly with weapons like the Operator or the Vandal that can guarantee one-shot kills in most scenarios.
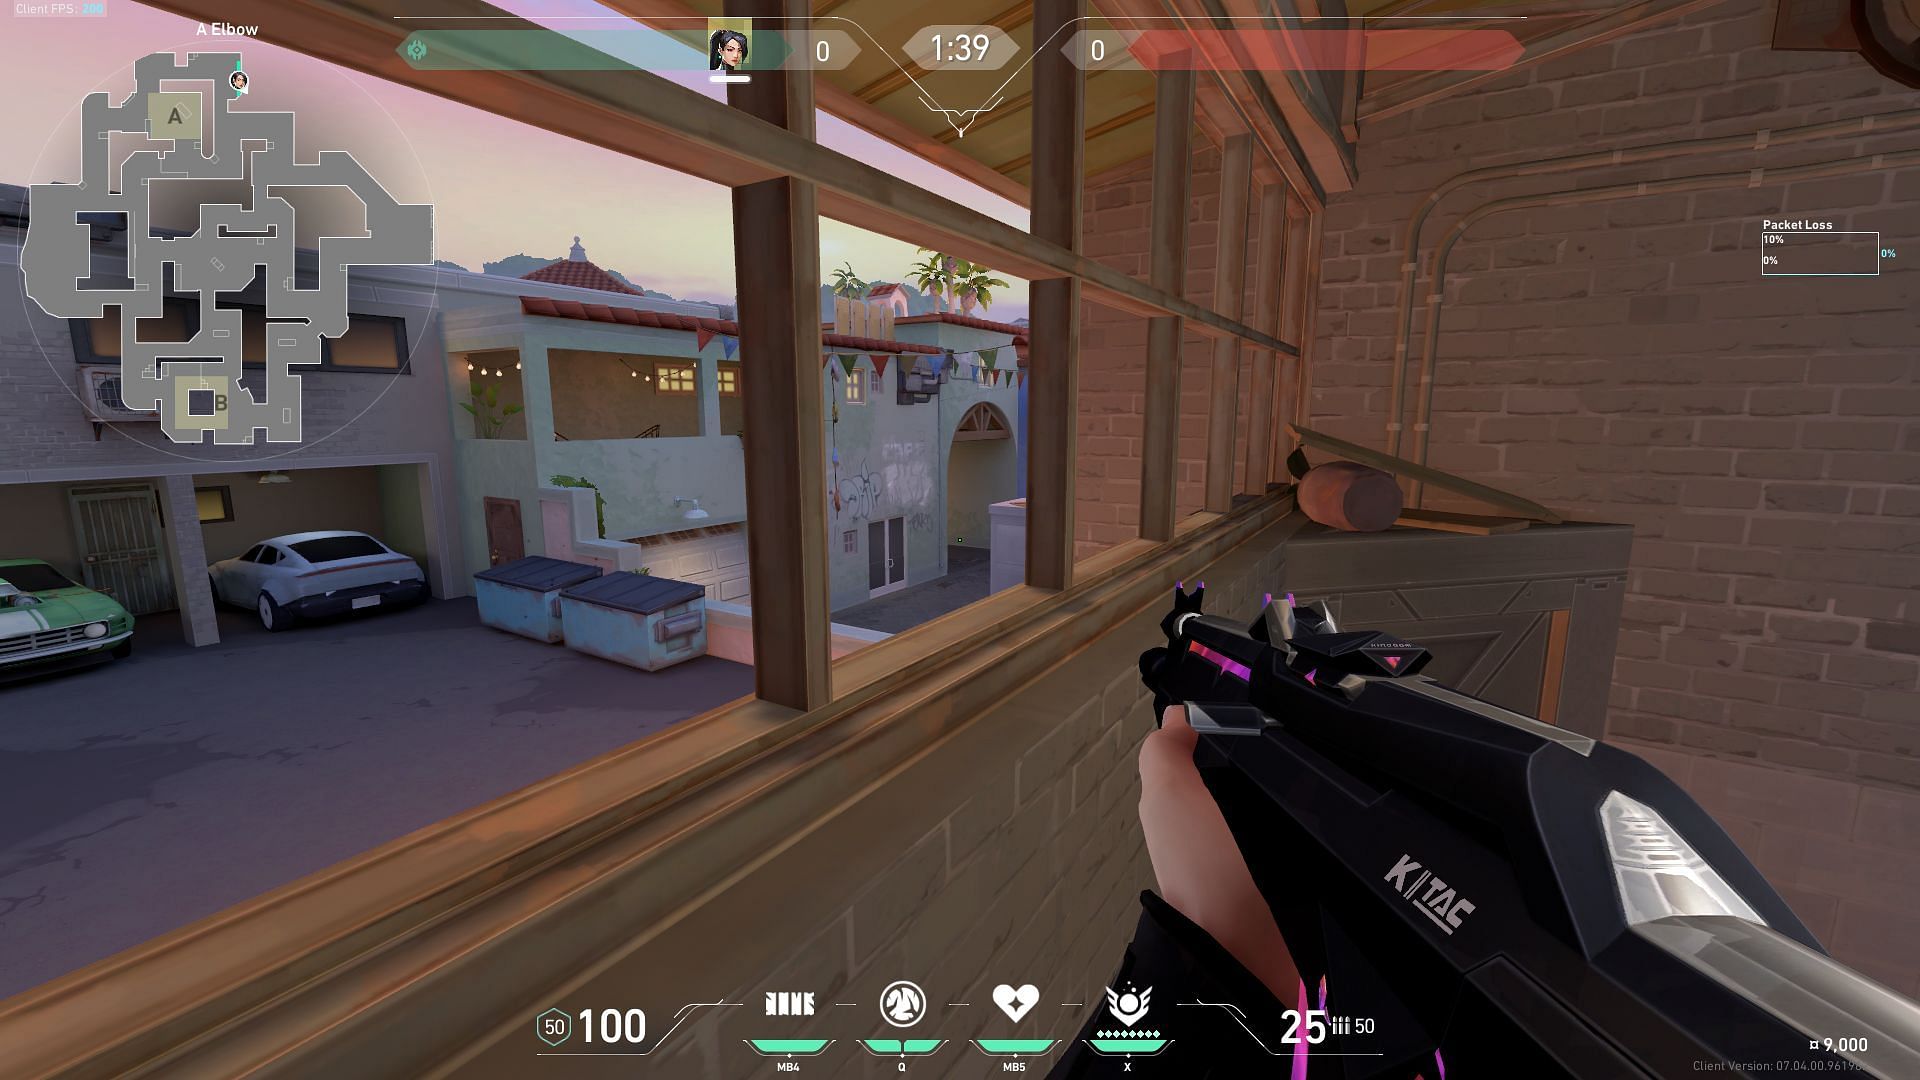
2) A-Main
The A-Main area has a small elevation change near the map wall. You can place a Sage wall in this area above the box (as shown in the image) to peek over the stacked Radianite boxes and get a few kills on enemies pushing through the A-Lobby area. This is another defender-sided wall that can surprise the attackers and punish any fast-execute strategies towards A-Site.
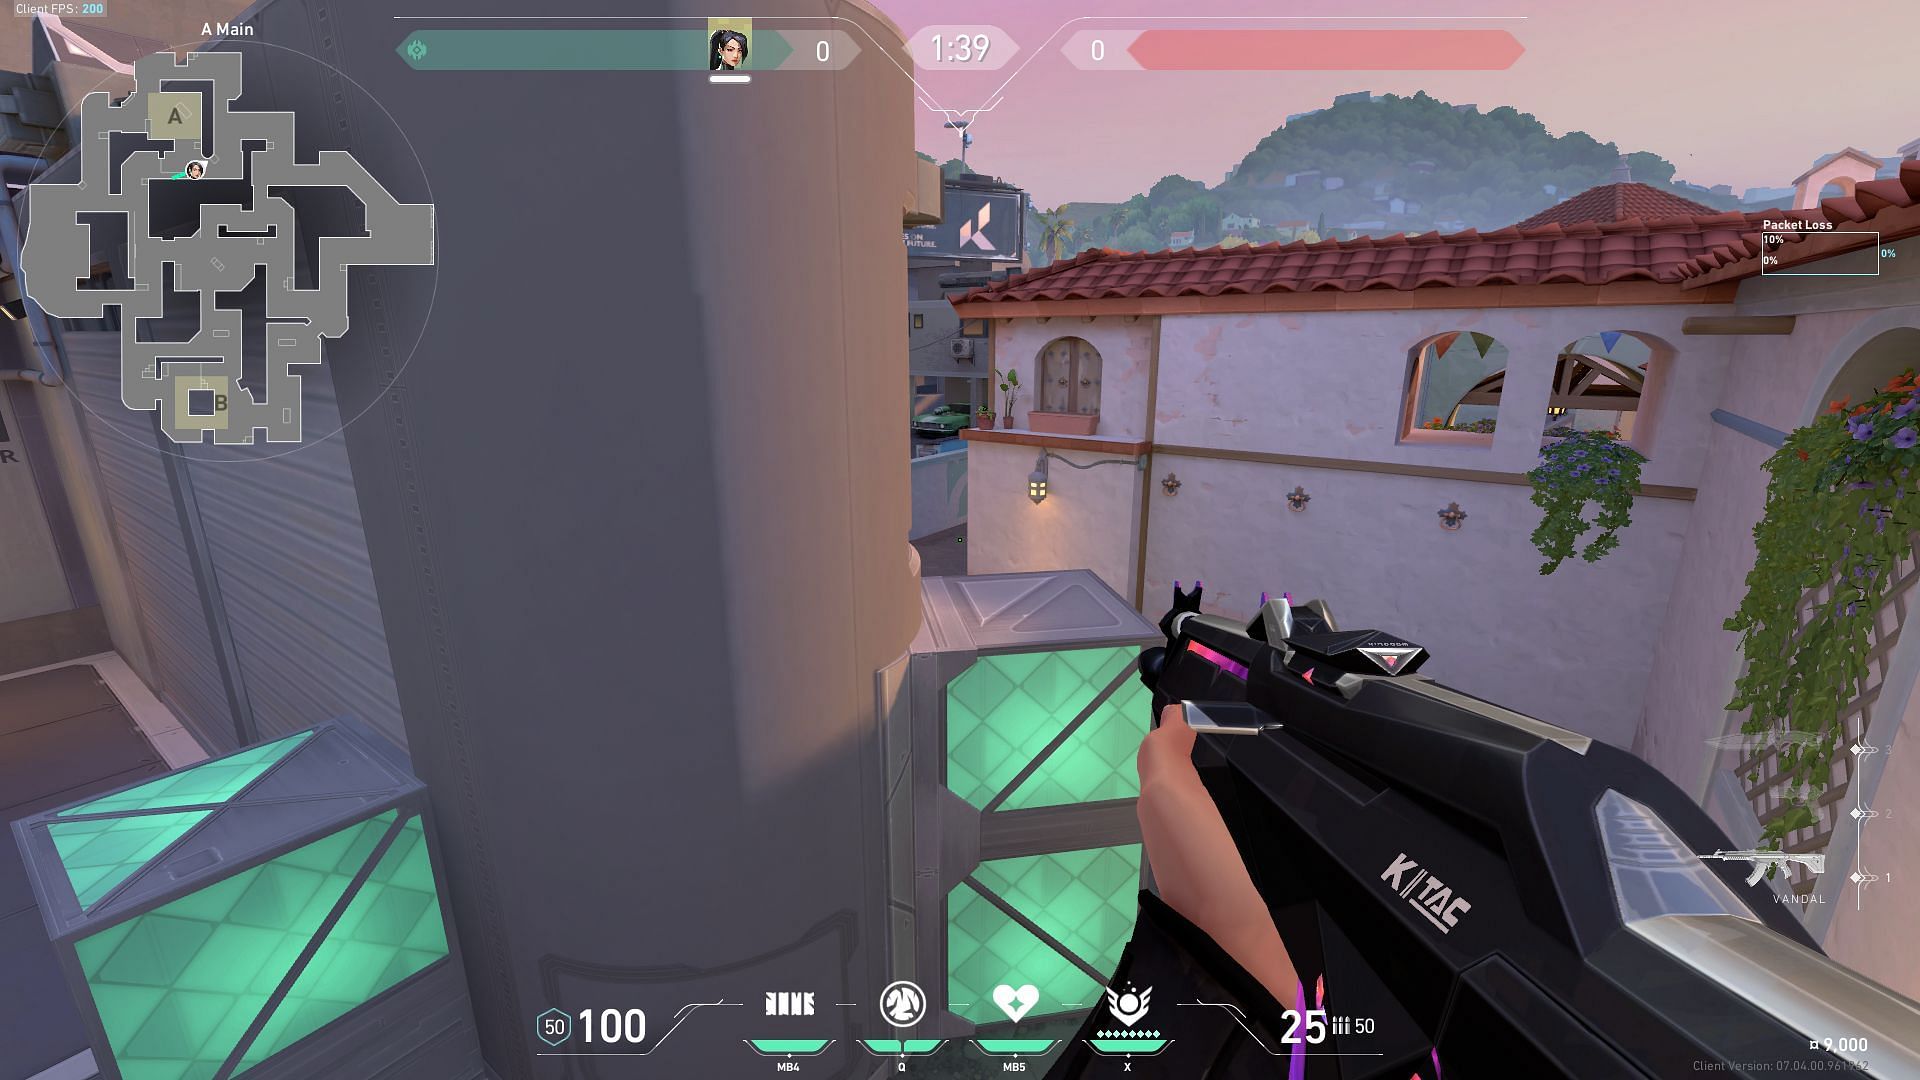
Beware of flashes from Agents like Breach or Reyna, as they can quickly disorient you and punish the boosted position.
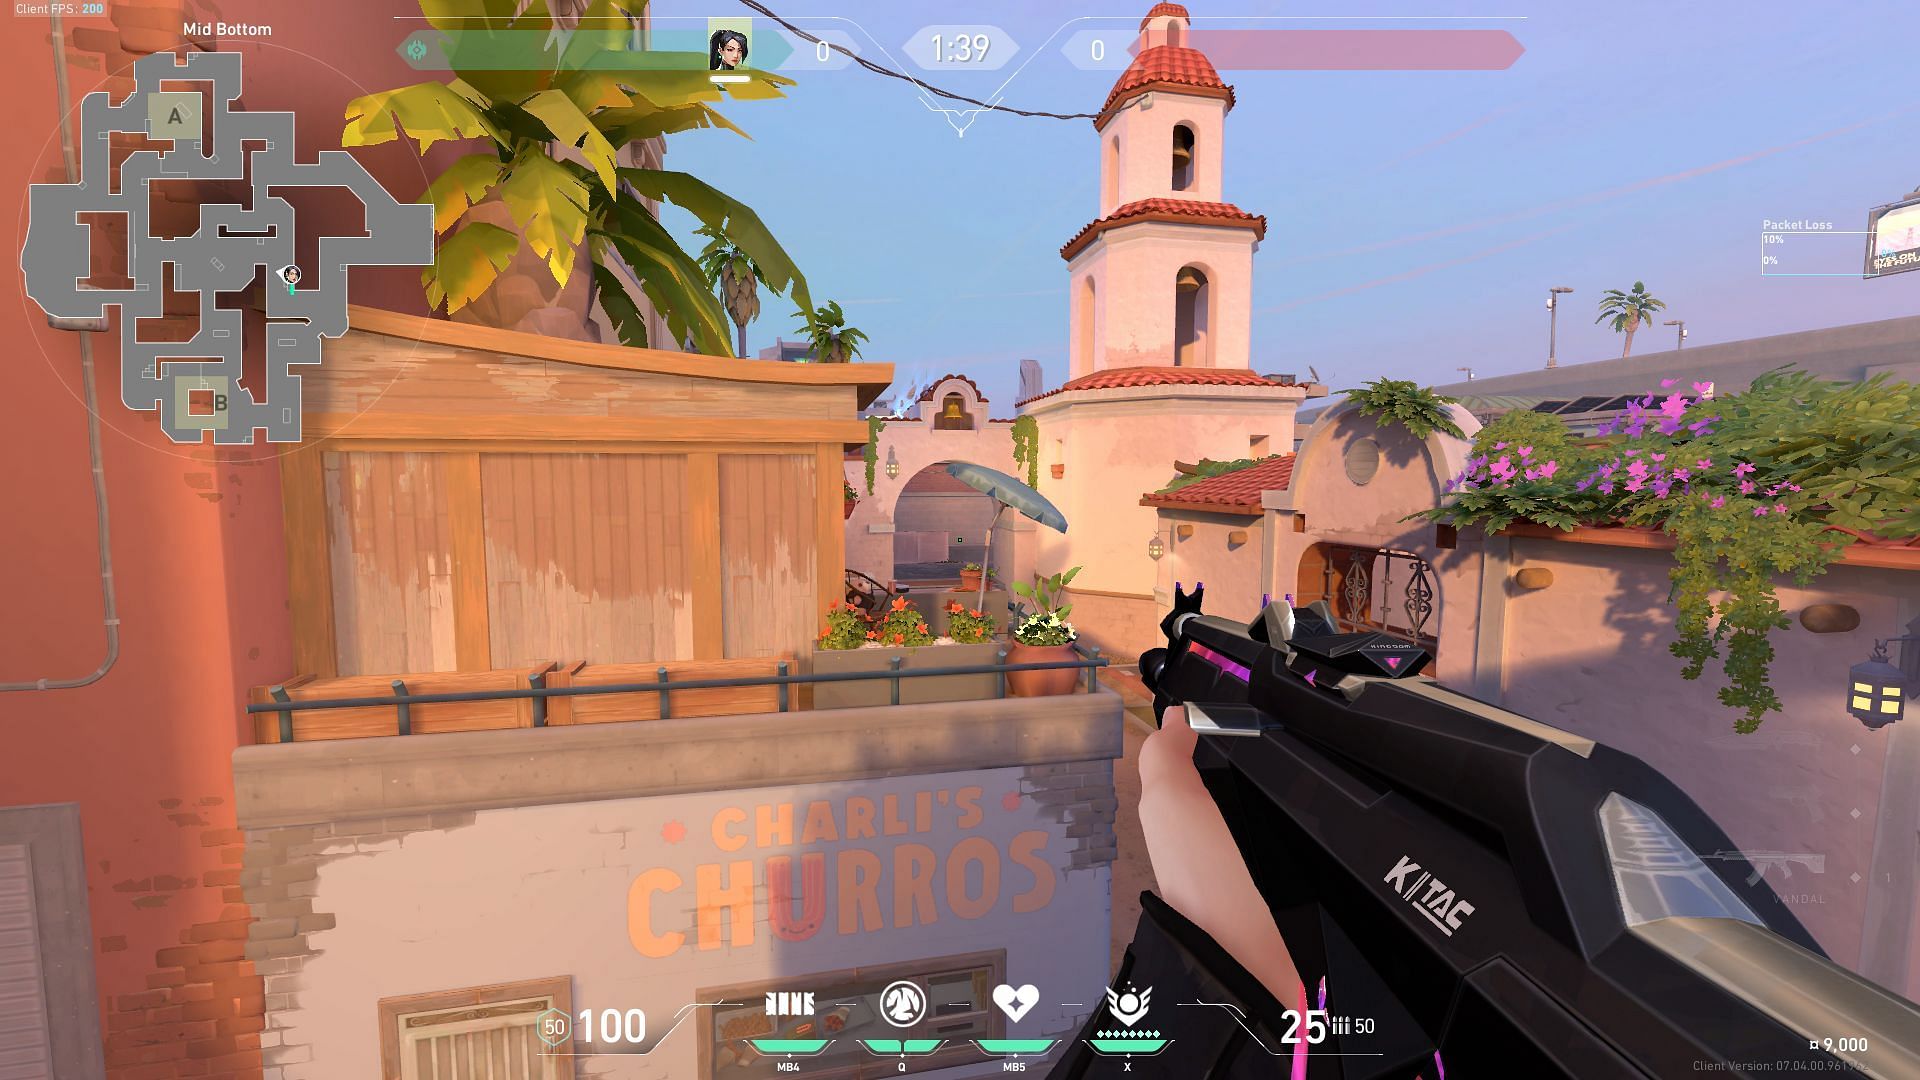
3) Mid-Bottom
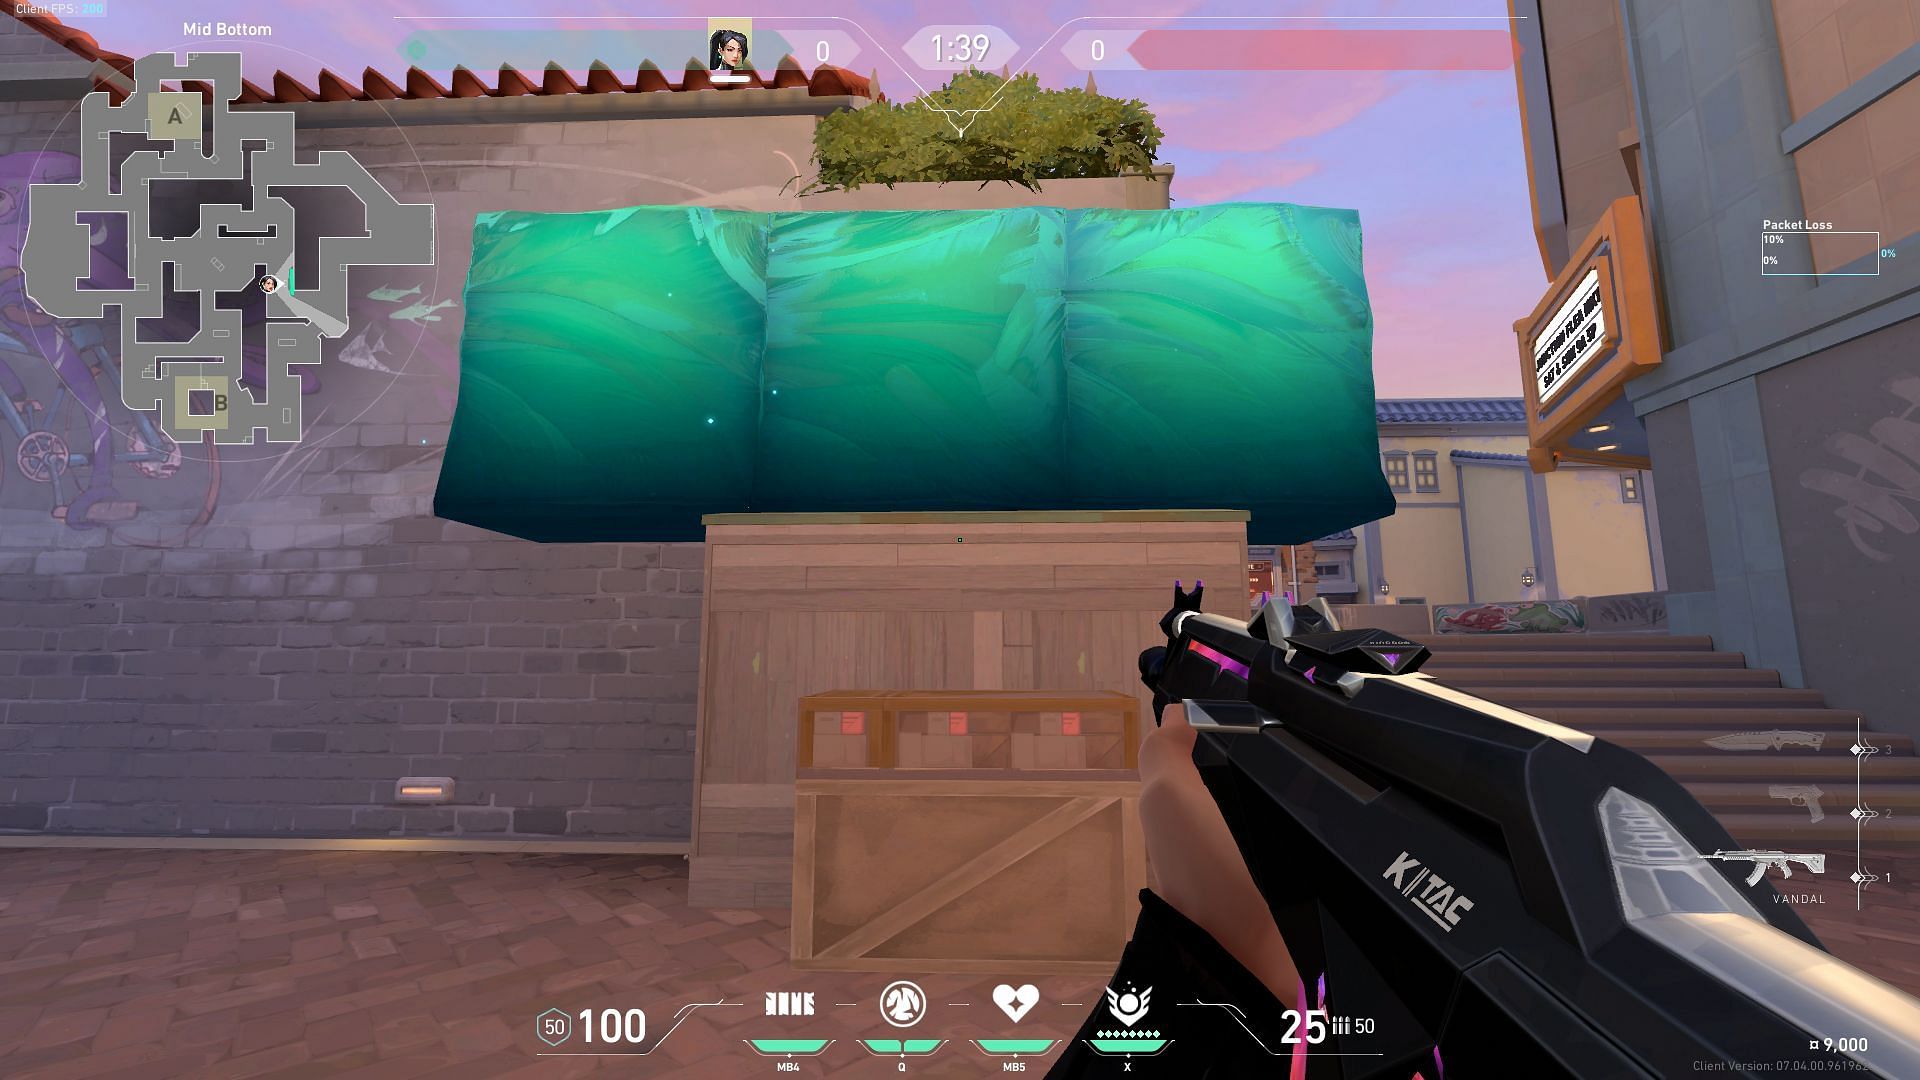
This is a straightforward Sage wall that you will generally see in almost all Sunset matches. It provides crucial information and mid-control, both of which can be essential in pivoting to either bomb site. The wall will provide you with a clear line of sight to Mid-Top and anyone peeking from the arch structure.
Most defenders will expect this wall boost, and can cost you your life. You should avoid repeating this strategy to take mid-control and try peeking different corners every time.
4) B-Site near B-Boba
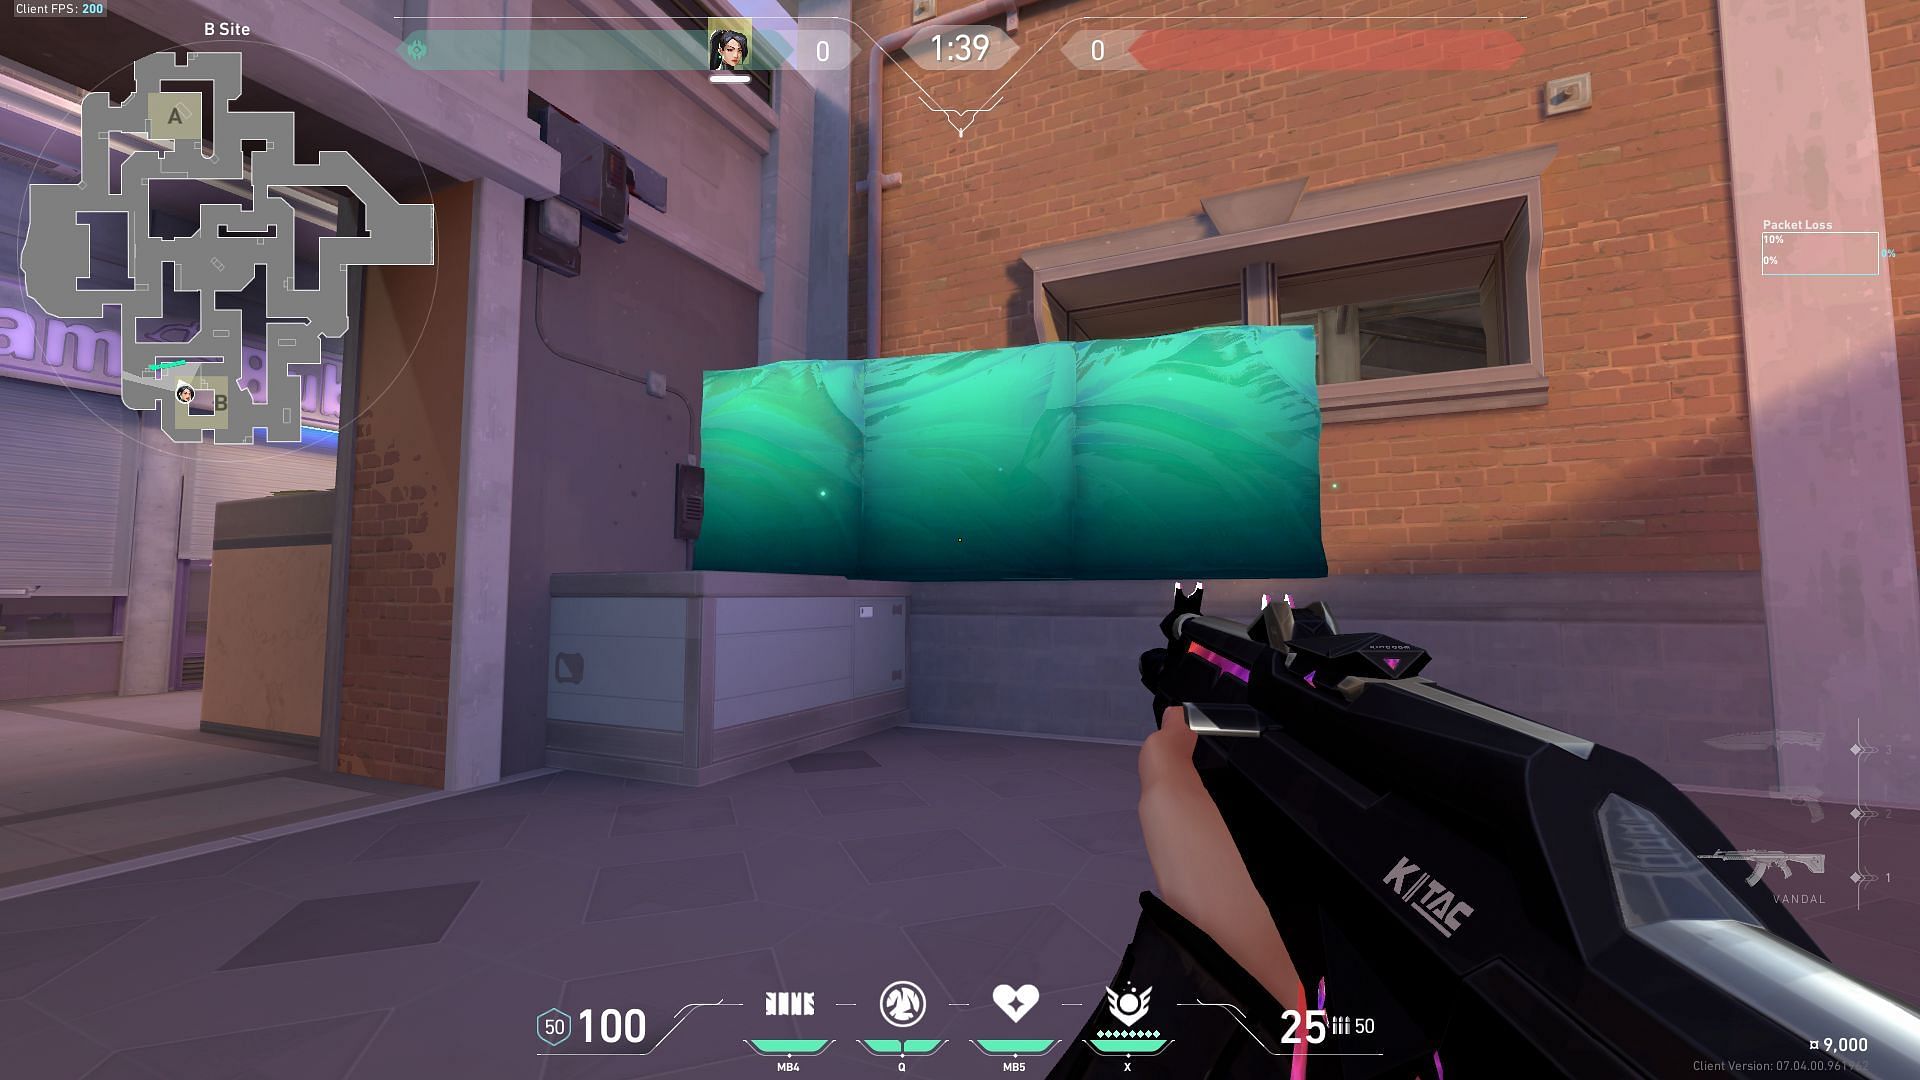
This is a complicated wall and will require some practice to create as you have to time your jump and place the Sage wall perfectly. The wall needs to be placed on top of the box present near the B-Boba entry (as shown in the image). It provides a direct vision of the B-Market area and can be used to secure multiple kills due to its cheeky angle.

It is a difficult wall to master, and you should not waste much time trying to perfect it in a live match. Beware of enemies pushing from B-Main, as they can see you from the corner.
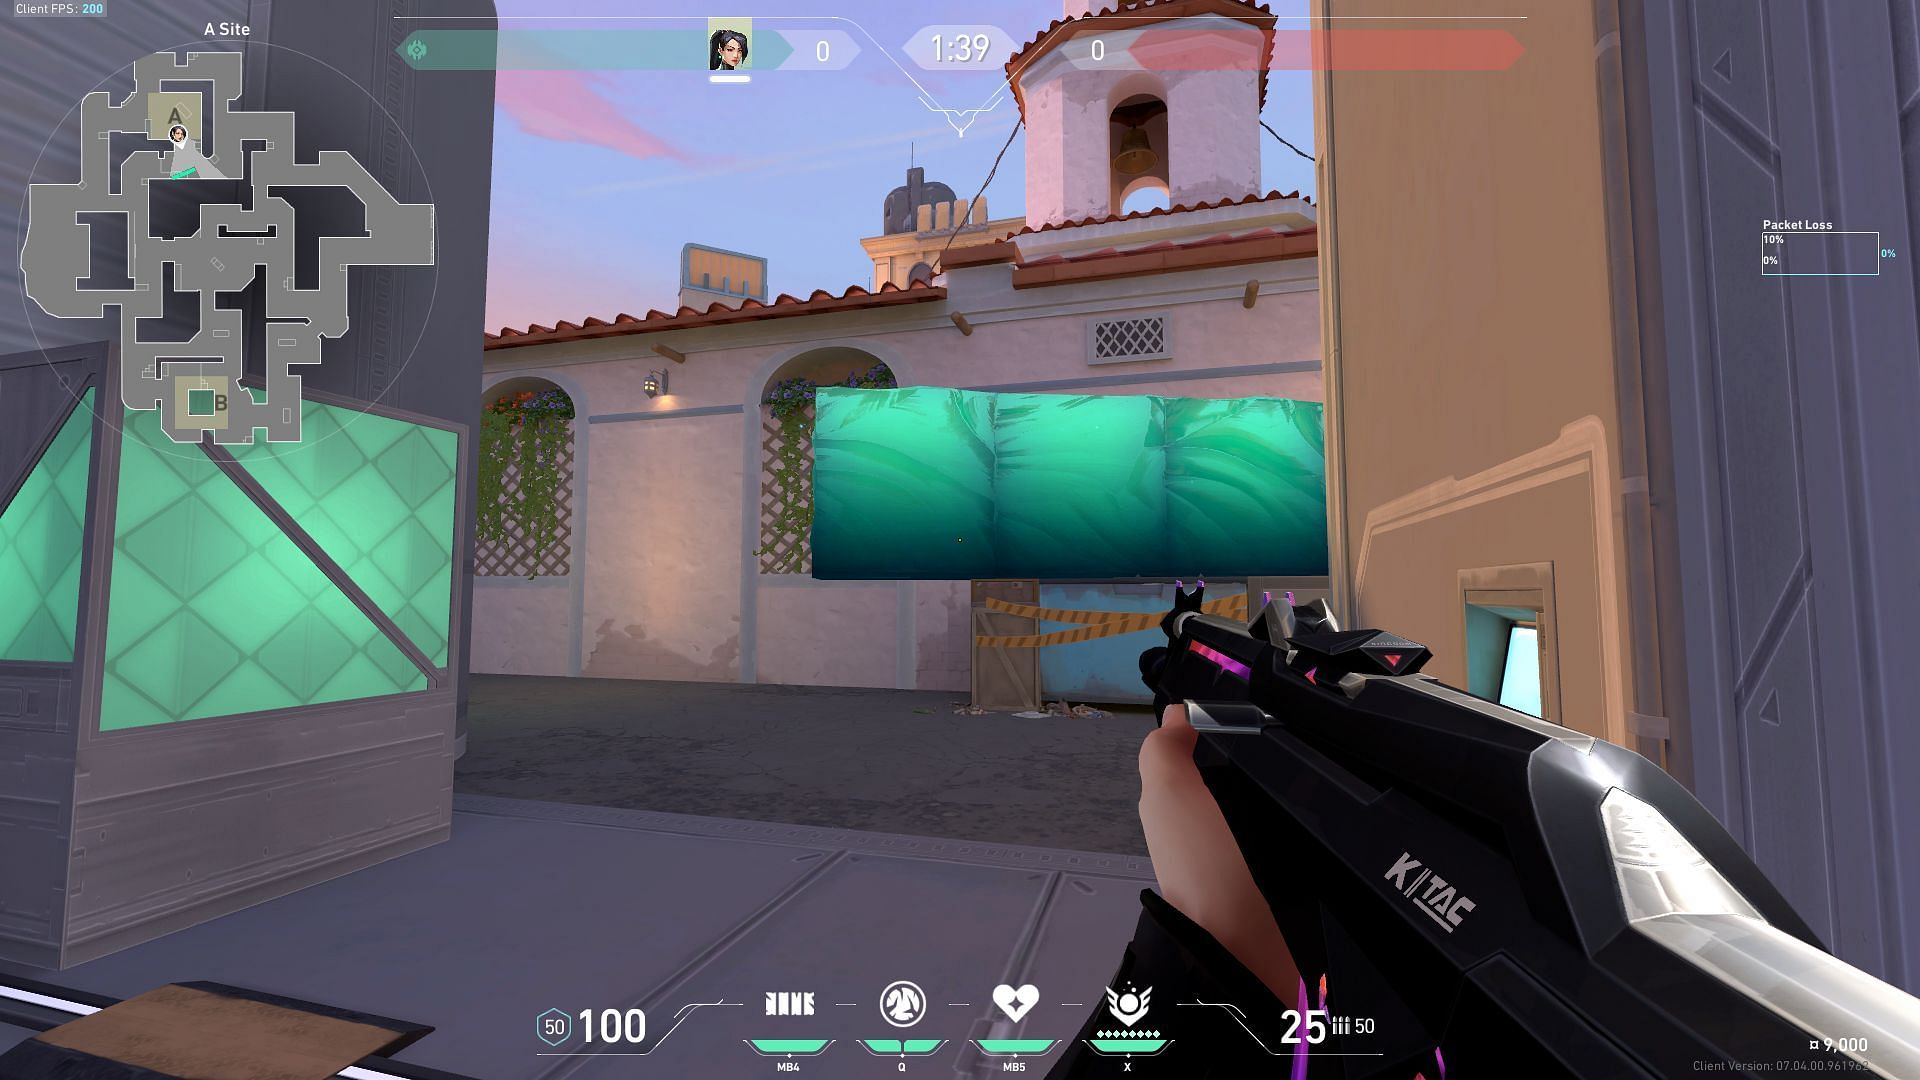
5) A-Site near A-Alley
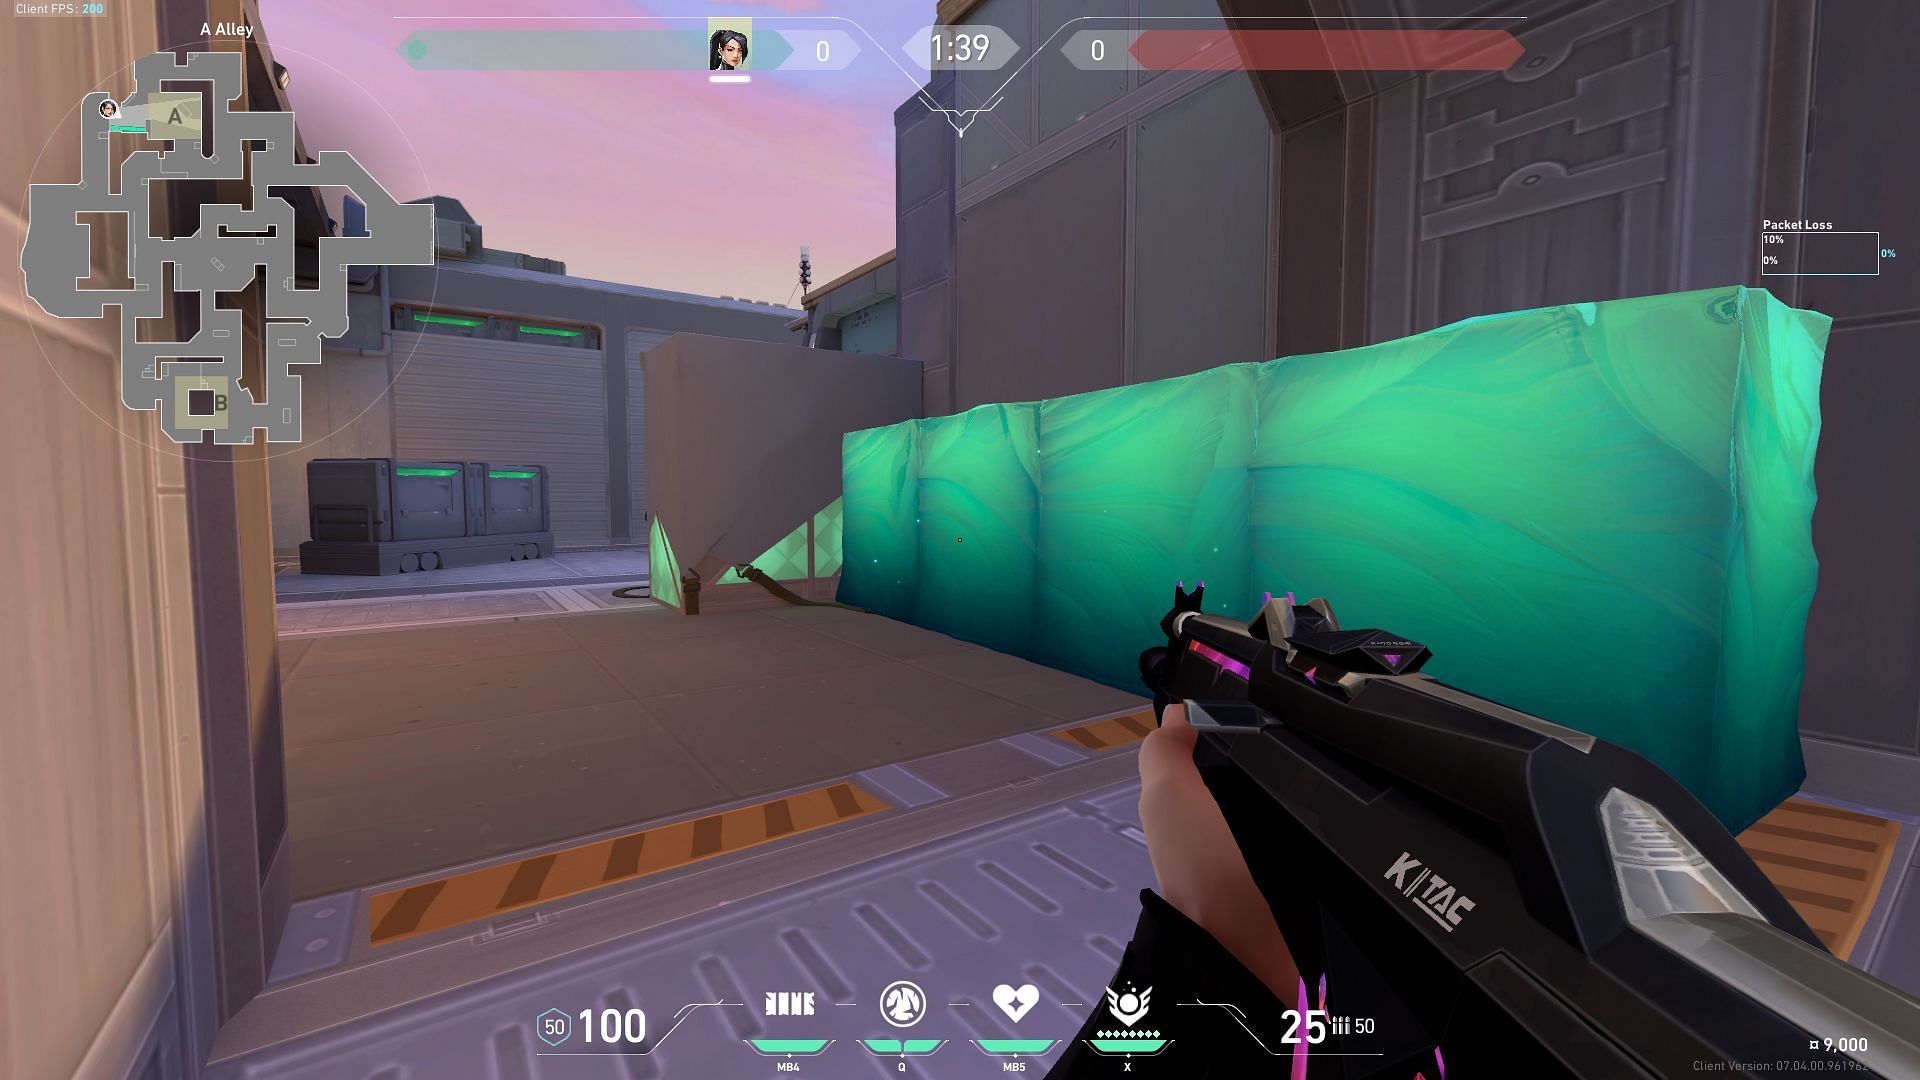
Sunset's A-Site is quite open and can be controlled easily. You can utilize a basic Sage wall behind the Radianite boxes near A-Alley to boost yourself and take down any enemy trying to push into A-Site (as shown in the image). This can be a risky maneuver as you will remain vulnerable and completely exposed to any attacker entering from the A-Elbow area.
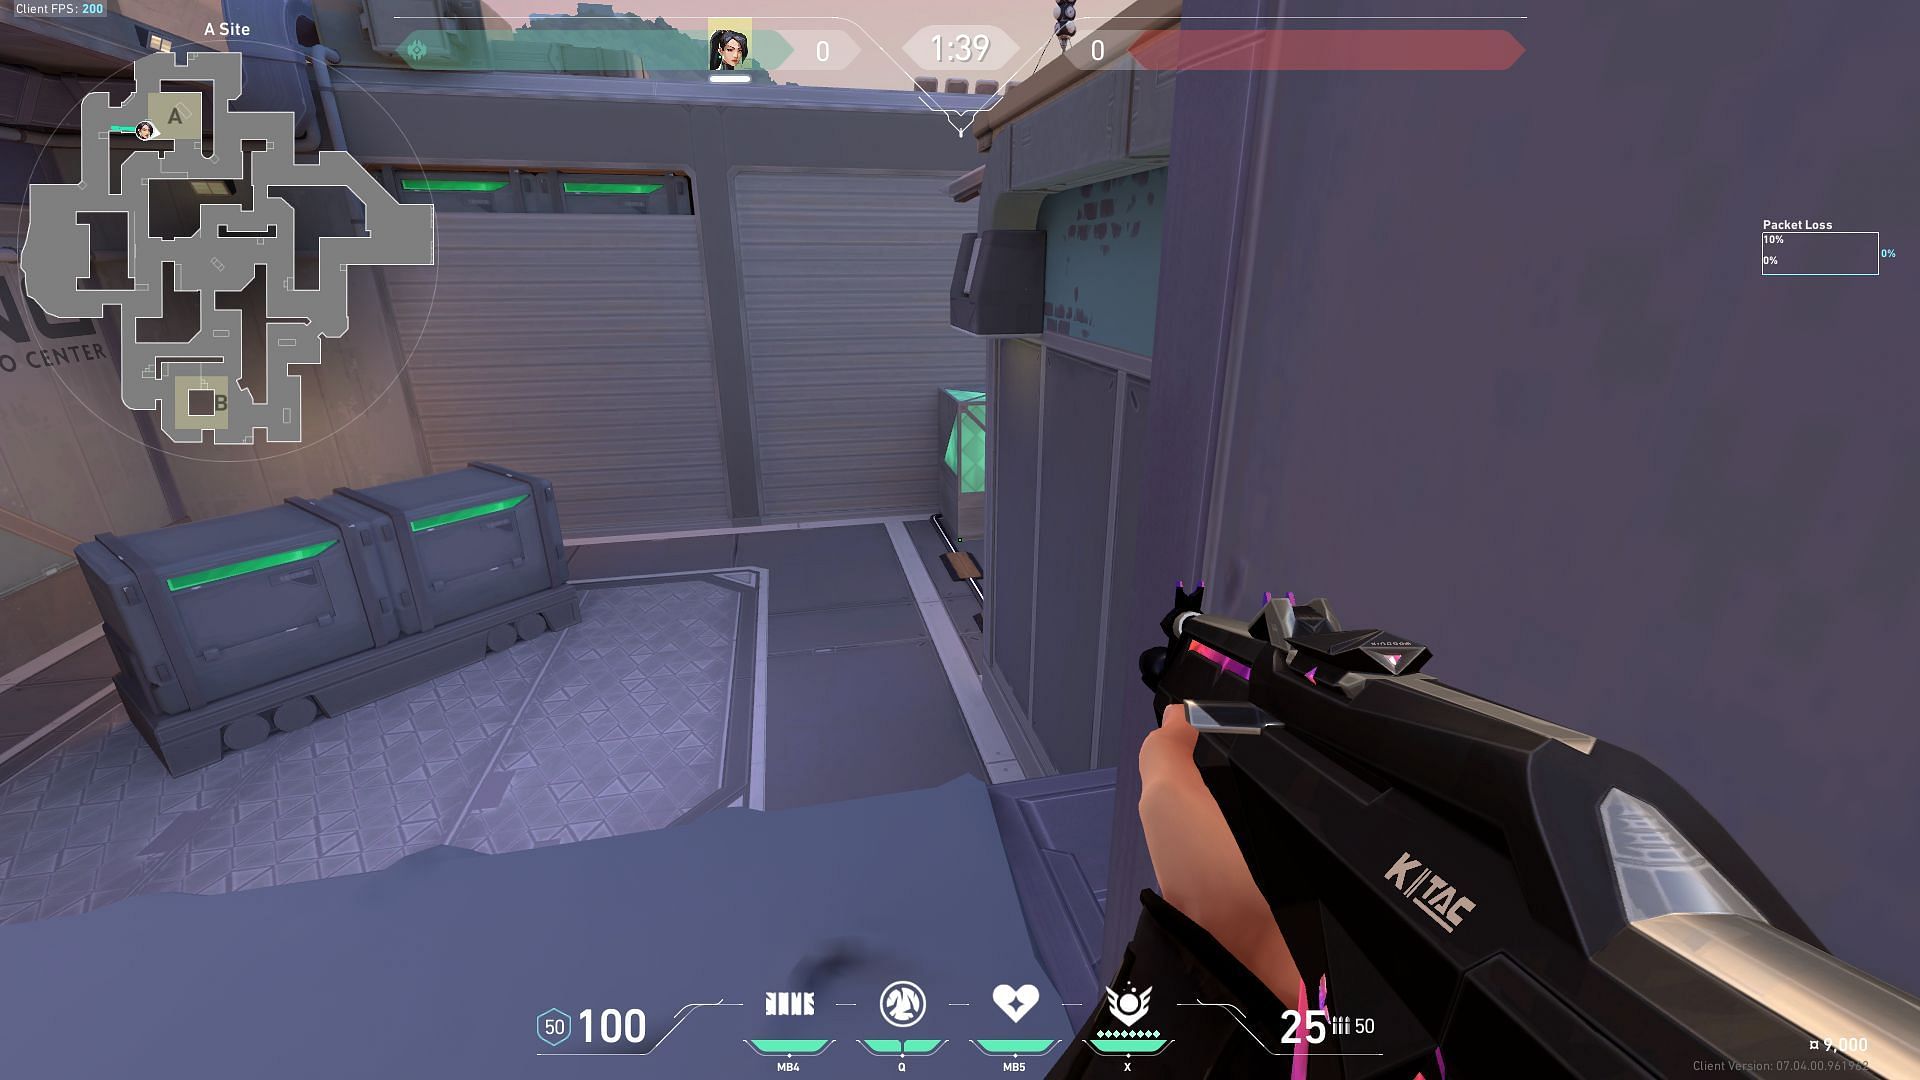
This is another useful defender-sided wall that can help maintain A-Site control. Your team can support you by posting up in A-Elbow to maintain map control.
Valorant's new Act also introduced a brand new weapon bundle called The Imperium collection alongside the new Episode 7 Act 2 Battlepass. The Sunset map is currently unavailable in the competitive map pool. However, you can familiarise yourself with the map in the dedicated Sunset matchmaking.
Stay tuned to Sportskeeda for more recent updates and Sunset guides.
