'%20x='0'%20y='0'%20height='100%25'%20width='100%25'%20%0A%20%20%20%20%20%20%20%20%20%20xlink%3Ahref='data:image/jpg;base64,/9j/2wBDAAYEBQYFBAYGBQYHBwYIChAKCgkJChQODwwQFxQYGBcUFhYaHSUfGhsjHBYWICwgIyYnKSopGR8tMC0oMCUoKSj/2wBDAQcHBwoIChMKChMoGhYaKCgoKCgoKCgoKCgoKCgoKCgoKCgoKCgoKCgoKCgoKCgoKCgoKCgoKCgoKCgoKCgoKCj/wgARCAAGAAoDASIAAhEBAxEB/8QAFgABAQEAAAAAAAAAAAAAAAAAAAMF/8QAFQEBAQAAAAAAAAAAAAAAAAAAAAT/2gAMAwEAAhADEAAAAMaIl//EAB8QAAEEAgIDAAAAAAAAAAAAAAECAwQSBhEABQcUov/aAAgBAQABPwCXlOQ+l1r8buZjDMZ+gaQrQIpxflTJG1lAk3qdWNdn55//xAAWEQEBAQAAAAAAAAAAAAAAAAACABH/2gAIAQIBAT8ALWX/xAAXEQADAQAAAAAAAAAAAAAAAAAAAQMh/9oACAEDAQE/AK4z/9k='%3E%3C/image%3E%3C/svg%3E)
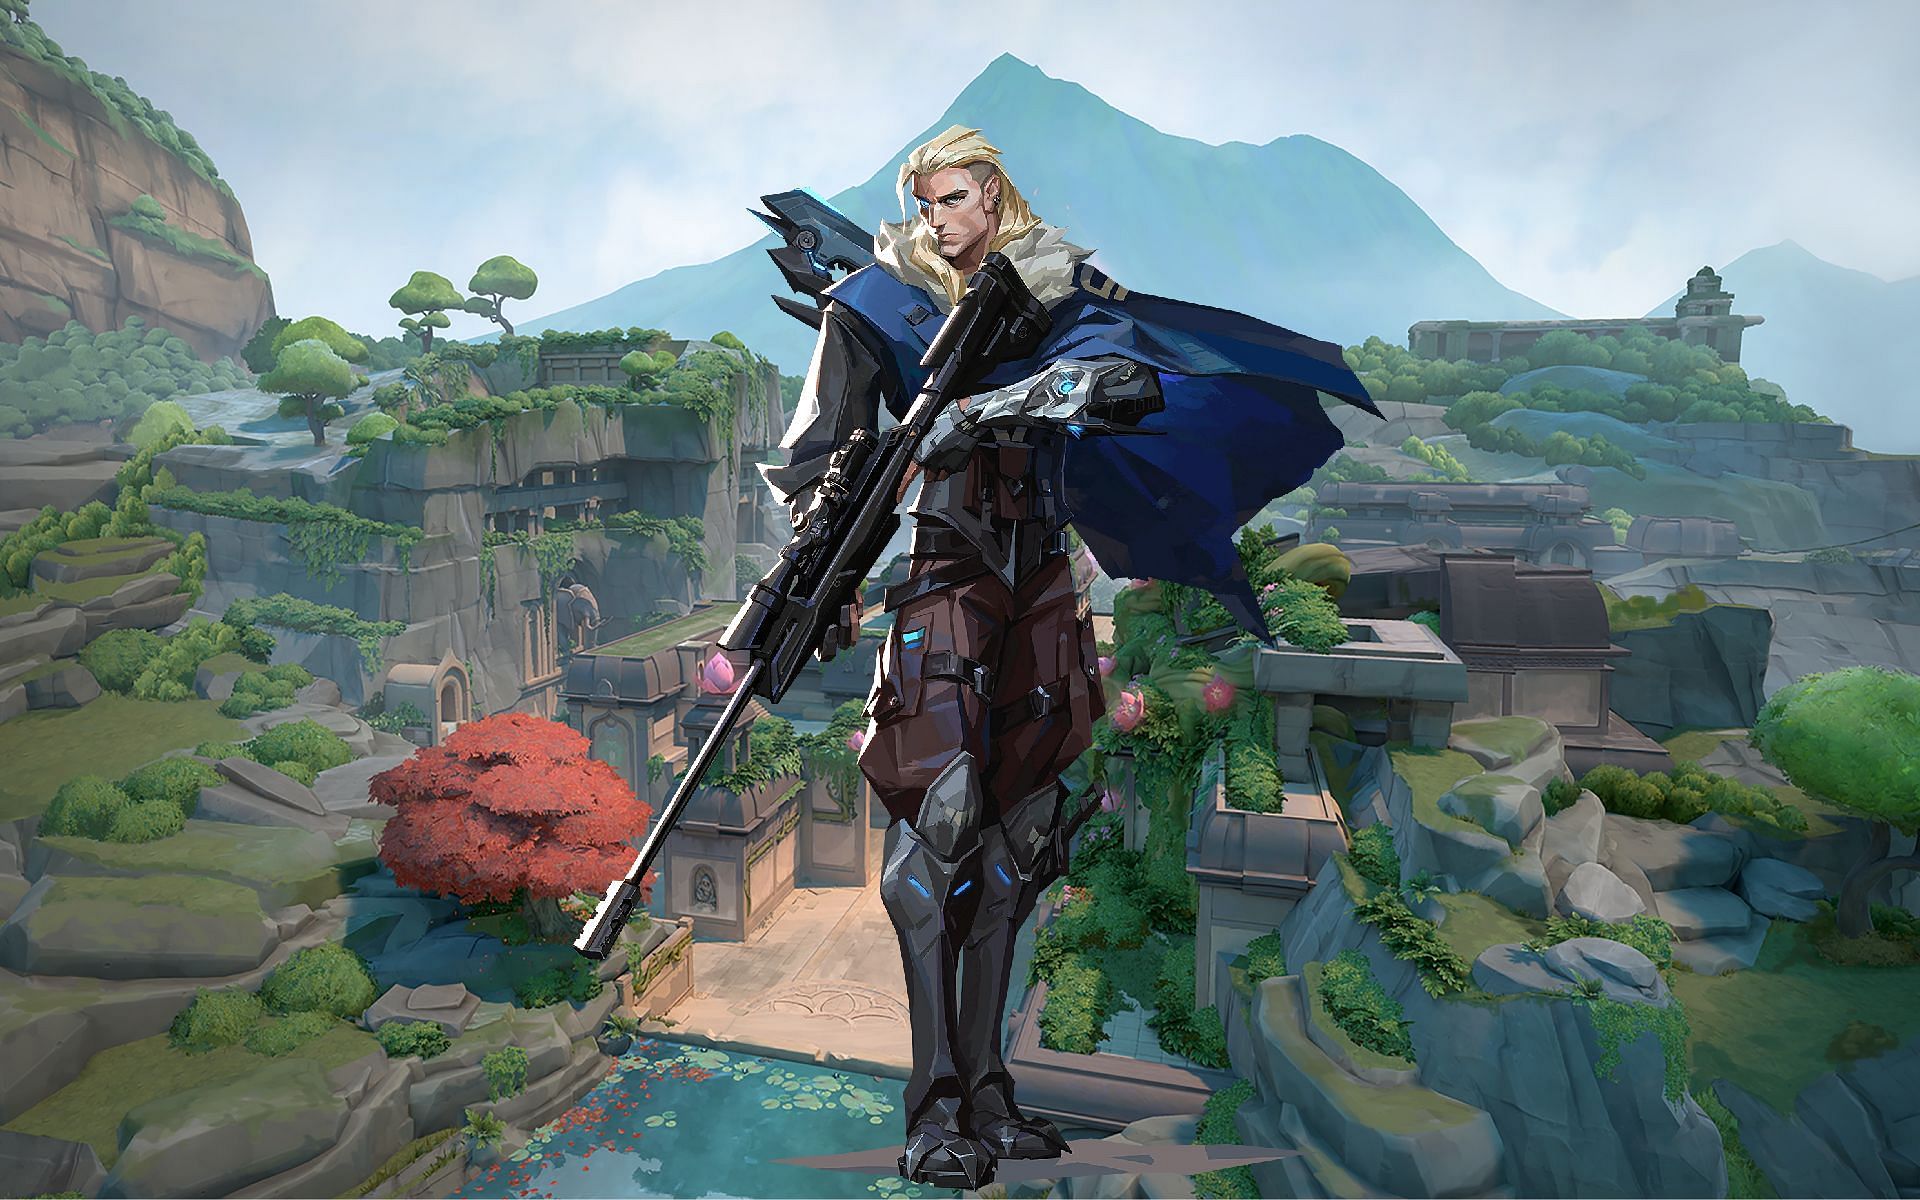
Valorant is a popular first-person shooter game that requires players to use a variety of different strategies and tactics to succeed. One of the best agents in the game is Sova, who has access to unique abilities that can be used strategically to gain an edge over opponents.
He is best known for his Recon Bolt and Shock Bolt abilities, which can provide valuable intel and deal significant damage to enemies. The former allows Sova to fire a dart that reveals enemy locations in a specific area, giving his team valuable information on opponents' positions.
Meanwhile, the Shock Bolt fires a dart that deals damage to enemies within a specific area and can also be used to destroy their equipment in Valorant.
Now let's look at some possible lineups that use these two abilities together, depending upon the situation/objectives present during each match session in Valorant.
Sova guide: How to win on Lotus in Valorant
Lotus is one of Valorant's new maps and it will be released for competitive play later on. It presents its own set of challenges due to its unique layout and design elements such as high walls blocking off certain areas from view or giving enemies cover when attacking particular sites or objectives.
A different approach than other maps is needed to succeed on the Lotus map. Luckily, Sova has several powerful tools at his disposal that make him well-suited for this type of map.
A Site Recon Bolt
The first lineup is the Recon Bolt lineup for the A Site, which will reveal attackers holding A Rubble and A Root. To perform this strategy, players should position themselves next to the single stack box on the A site, and align the lines on their lower HUD with the lotus etching on the wall.
They should then charge the Recon Bolt to two bars and set it to two bounces before firing. This will reveal the attackers and allow allies to peek from A Stairs or A Main to time their aggression better.
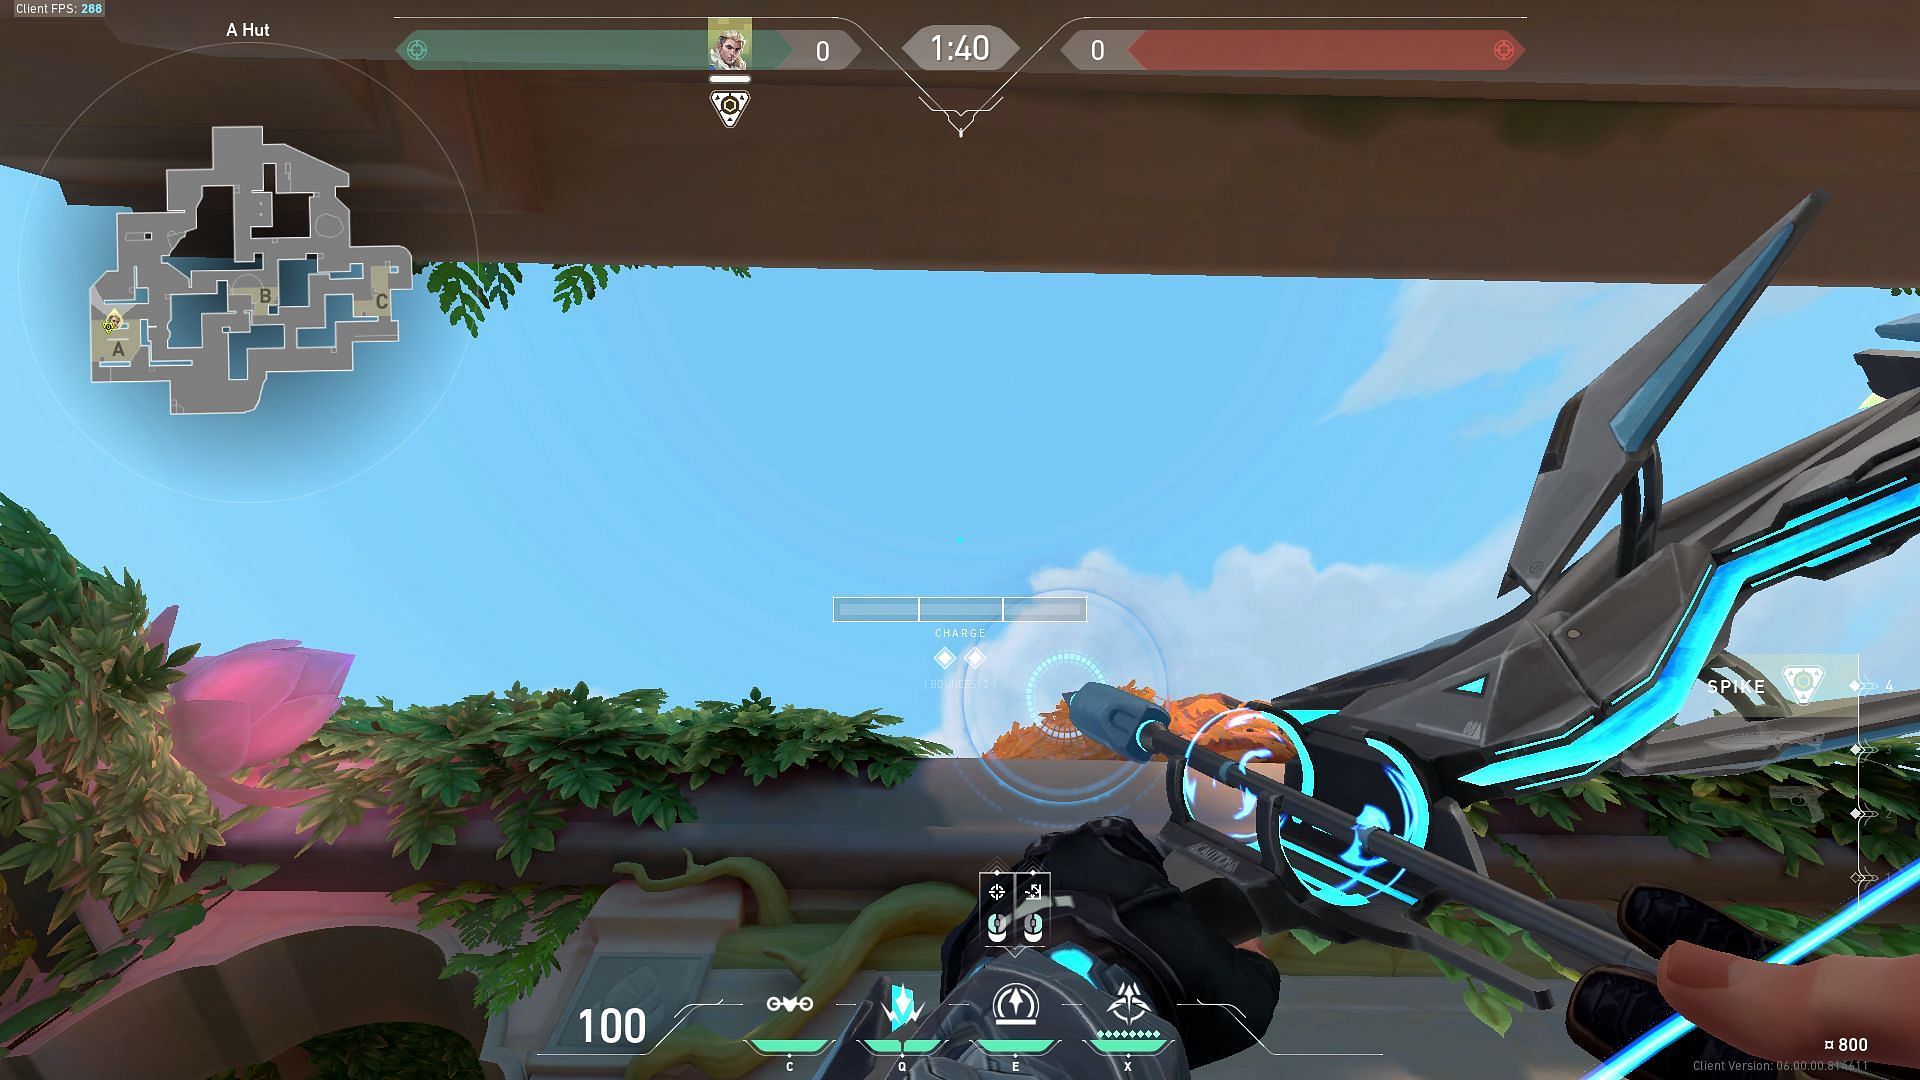
A Main Recon Bolt
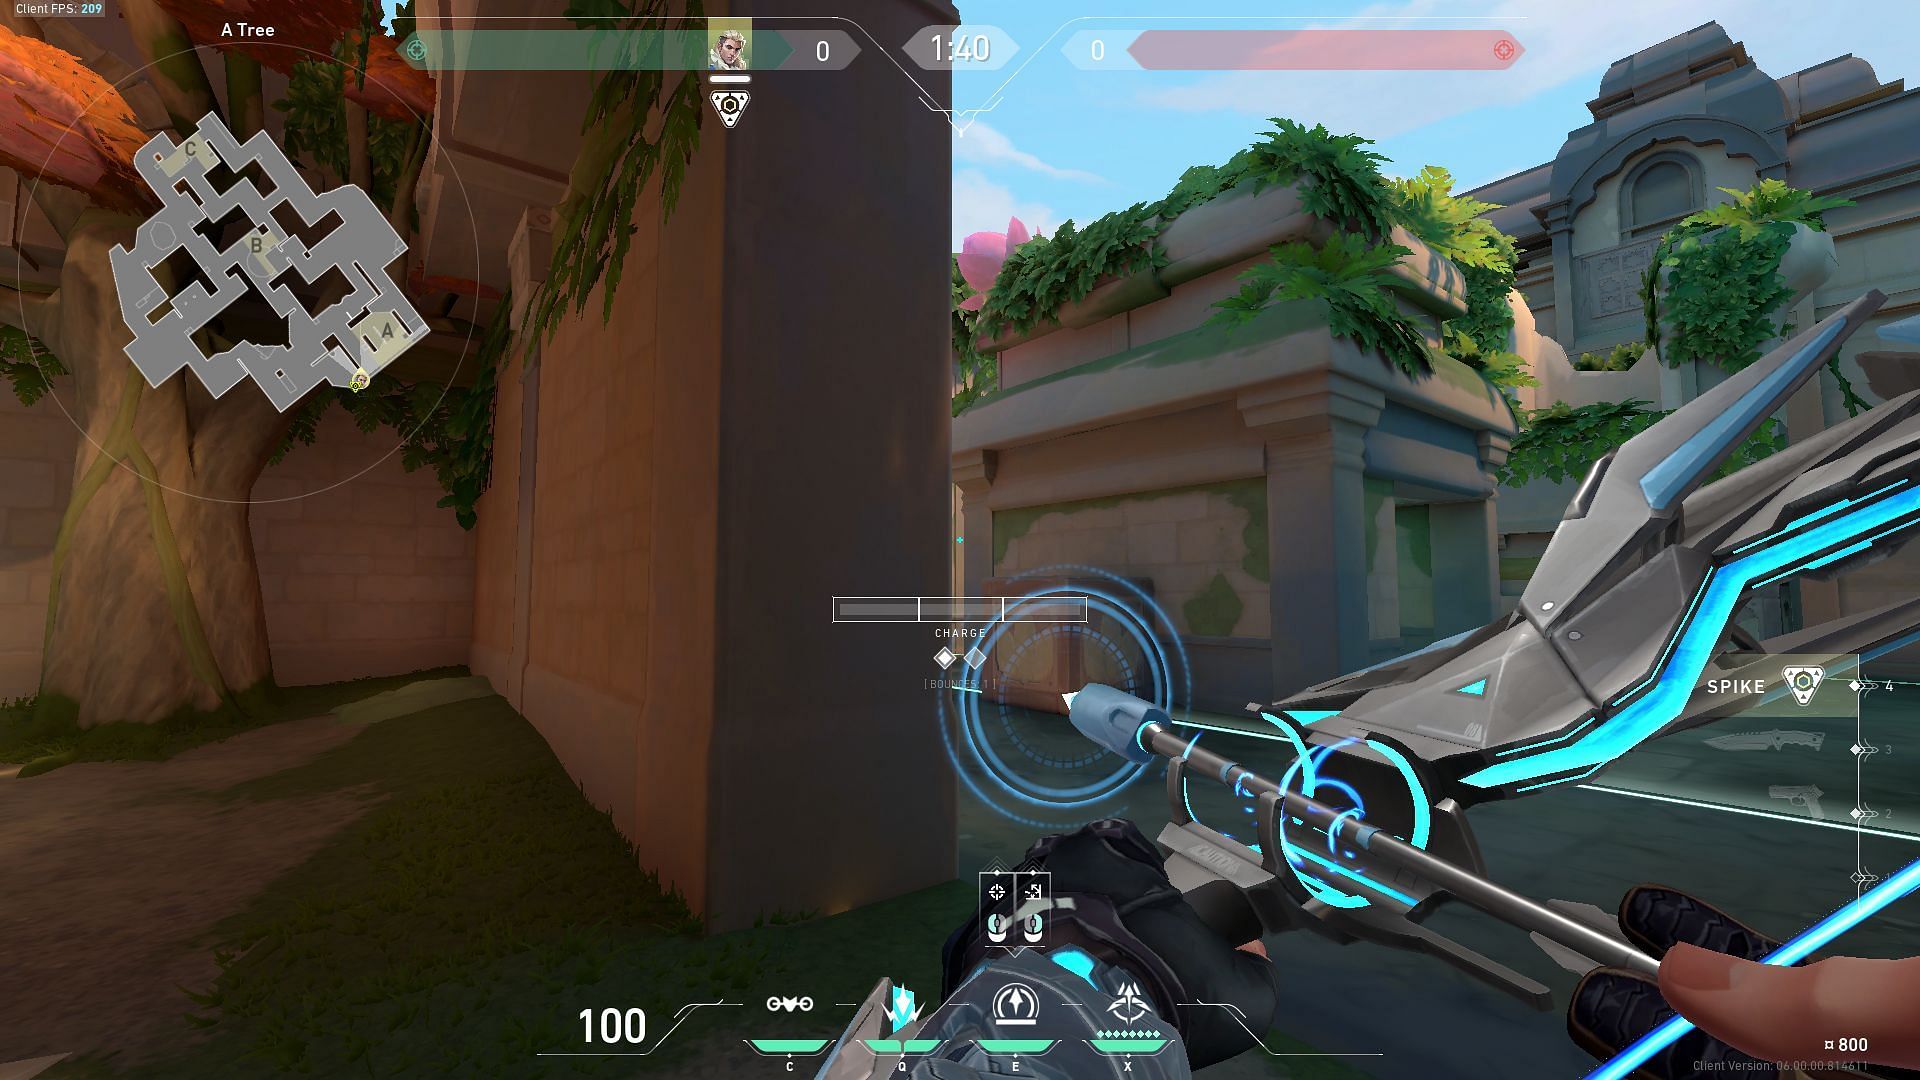
Another Recon Bolt lineup is for A Main, where players should place their backs against the wall between A Tree and A Main. For this strategy, they should aim their crosshair directly at the wall of the closest A Hut to A Main. They should charge the Recon Bolt to three bars and set it to one bounce before firing.
This dart will scan attackers approaching A Door, and it will be difficult to destroy as it will land on the far side of the wall near A Link. Players can also get easy kills with this Recon Bolt, and can purchase an Ares or Odin to shoot targets that are revealed through the revolving door.
B Site post-plant Shock Bolt

The Shock Bolt lineup for B Site in the post-plant scenario is another good strategy. First, Valorant players should make sure their team plants the spike at the lowest level of the B Site. They should then make their way to A Link and hug the wall-facing the defender's side spawn.
For this strategy, players should aim their crosshair at the gap between the wall and target the root located next to the small hole. To help land the lineup, they can use the left mouse click icon on the bottom of their HUD and align it with the gaps between the stone blocks. To execute it, they should use the left click and set the Shock Bolt to one bounce to land the dart in the targeted area.
C Site post-plant Shock Bolts
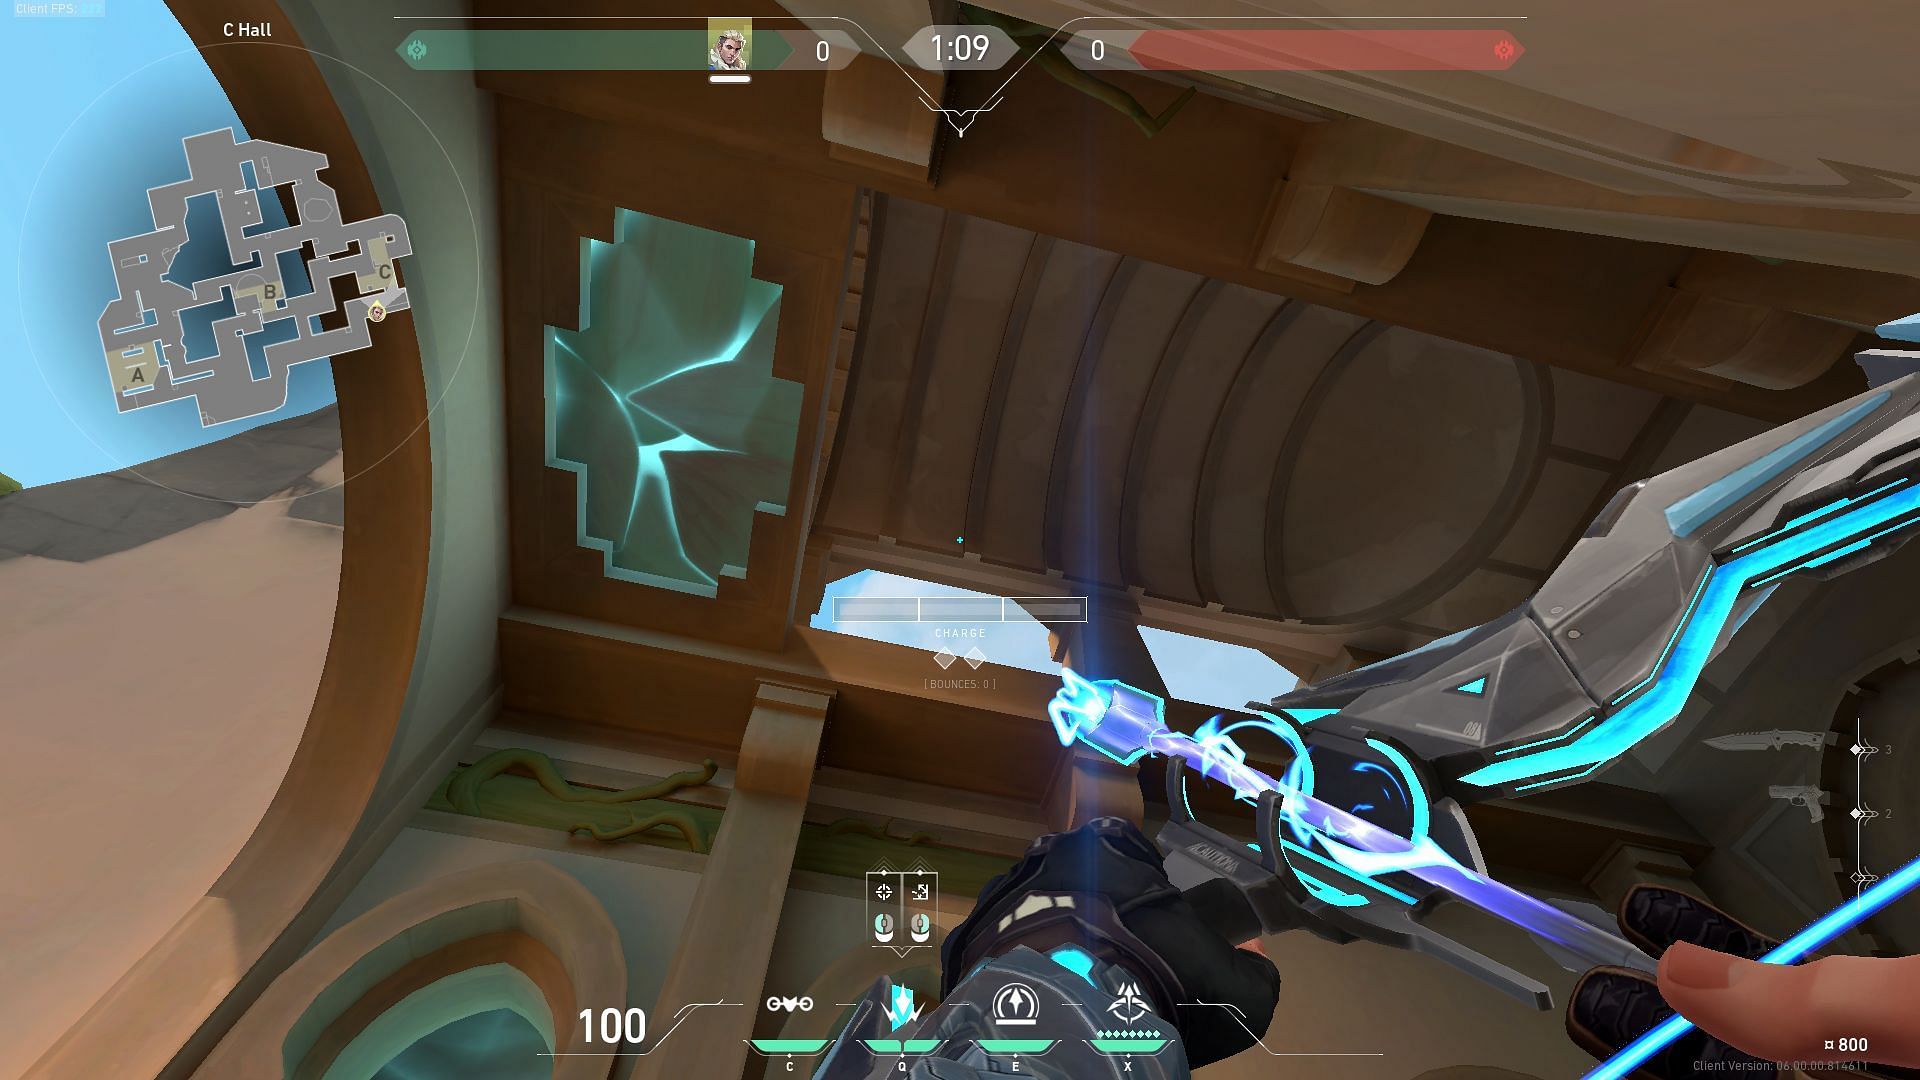
For the C Site post-plant, players should use the Double Shock Bolt lineup, which will instantly kill defenders who are trying to defuse the spike. To execute this strategy, they should ensure that the plant is made on the high ground, specifically in the area with an L-shaped wall.
Then, they should position themselves at the top of the ramp leading to the ledge of C Hall. They should aim their crosshair at the roof of C Hall and align the left side of their lower HUD against the window of the wall connecting C Hall and C Site. They should then shoot the first Shock Bolt with no power and no bounce.
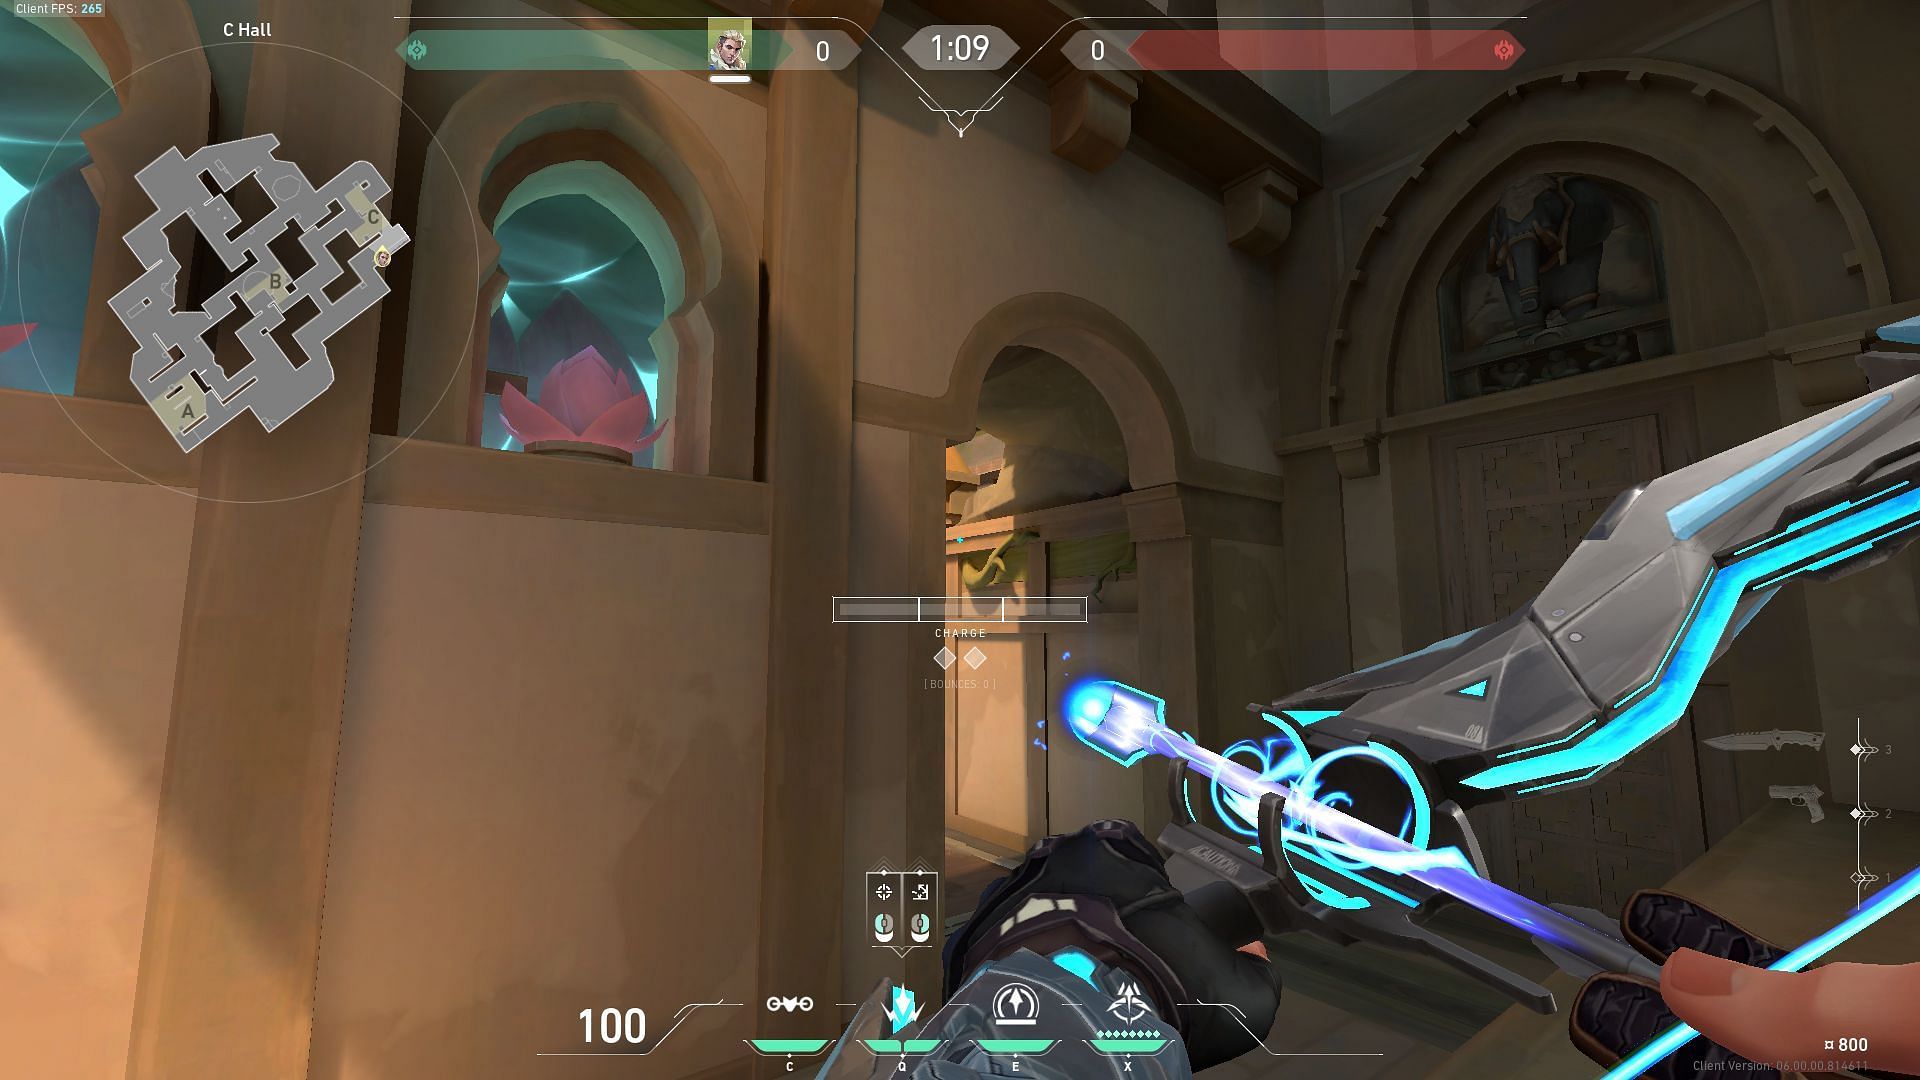
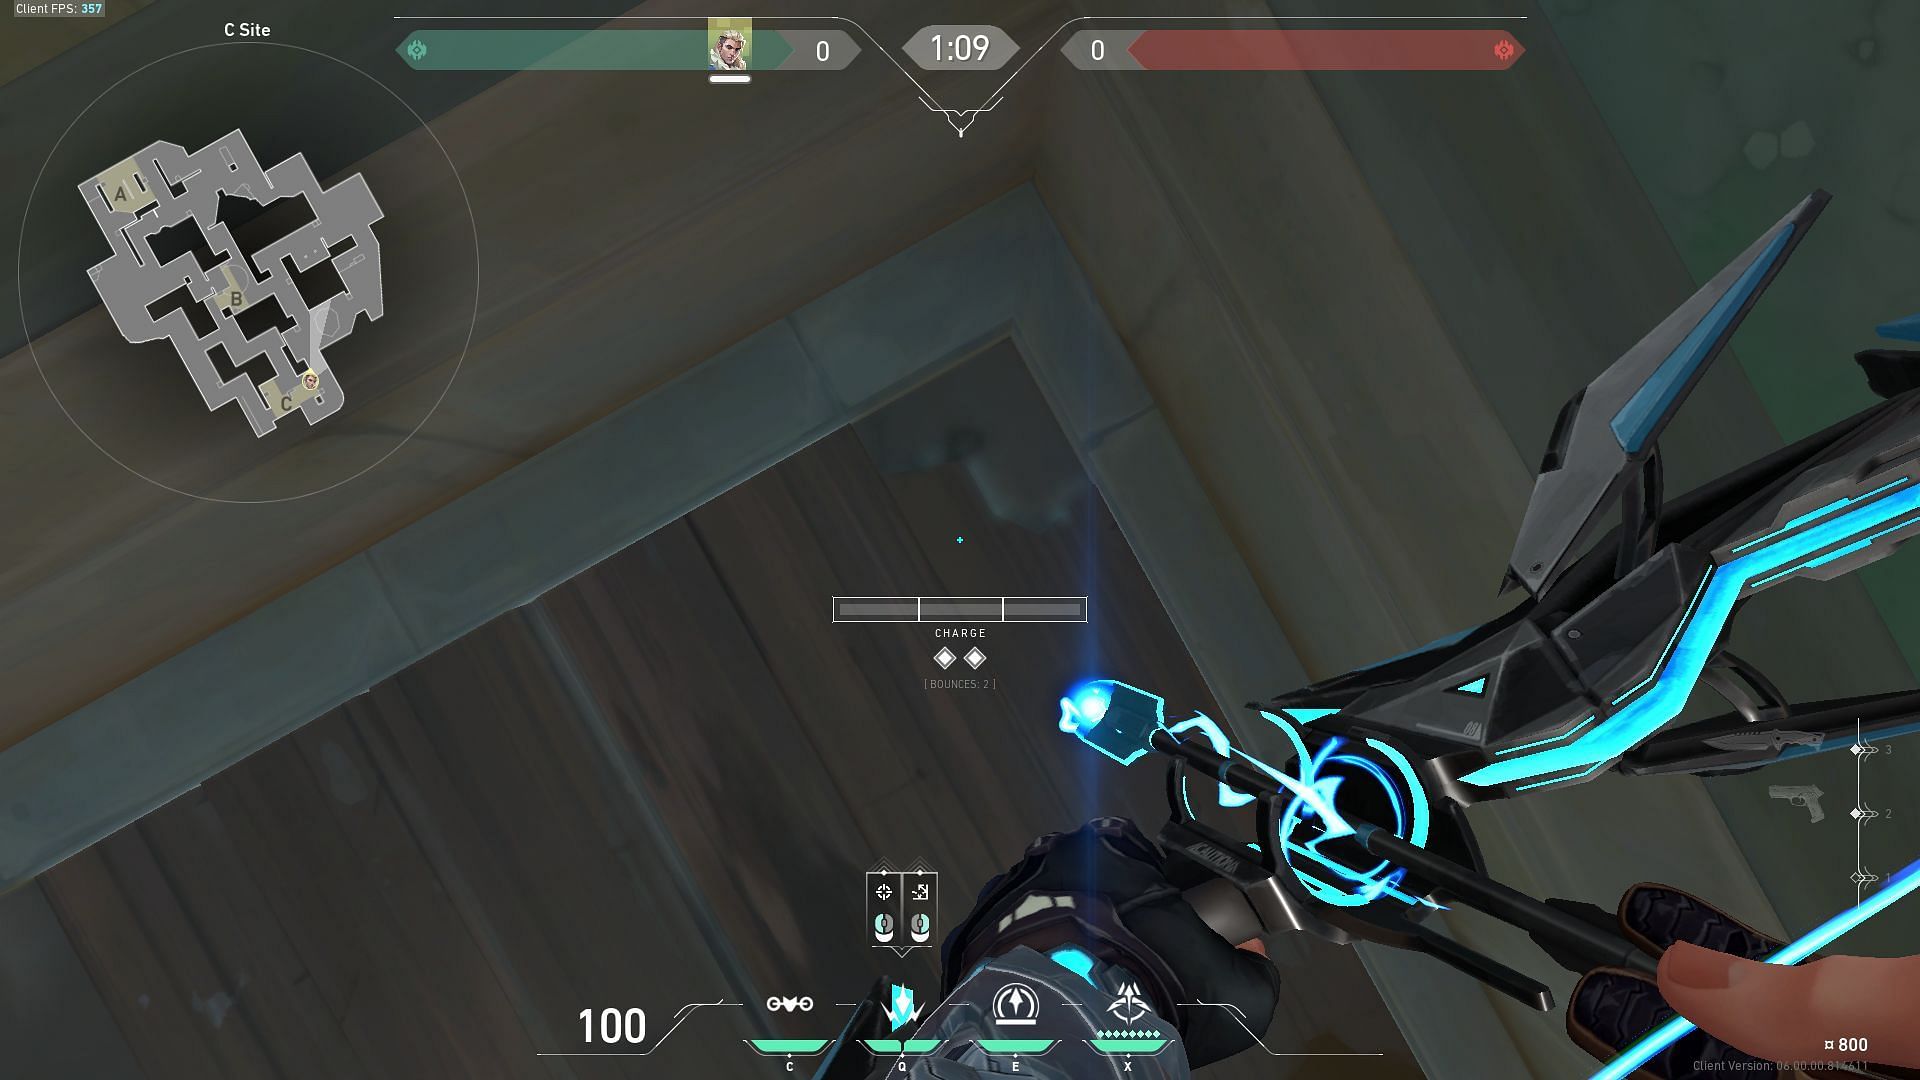
For the second dart, players should face the C Site wall and aim for the space between the two wooden boards and fire a no-power, single-bounce Shock Dart to damage the defuser.
A Site and C Site default plant Shock Bolts
In addition to these lineups, Valorant players can also use easy double-bounce Shock Bolts for A Site and C Site default plants. To pull this off, they should aim their crosshair at the corner of the wall, just above the plant spot.
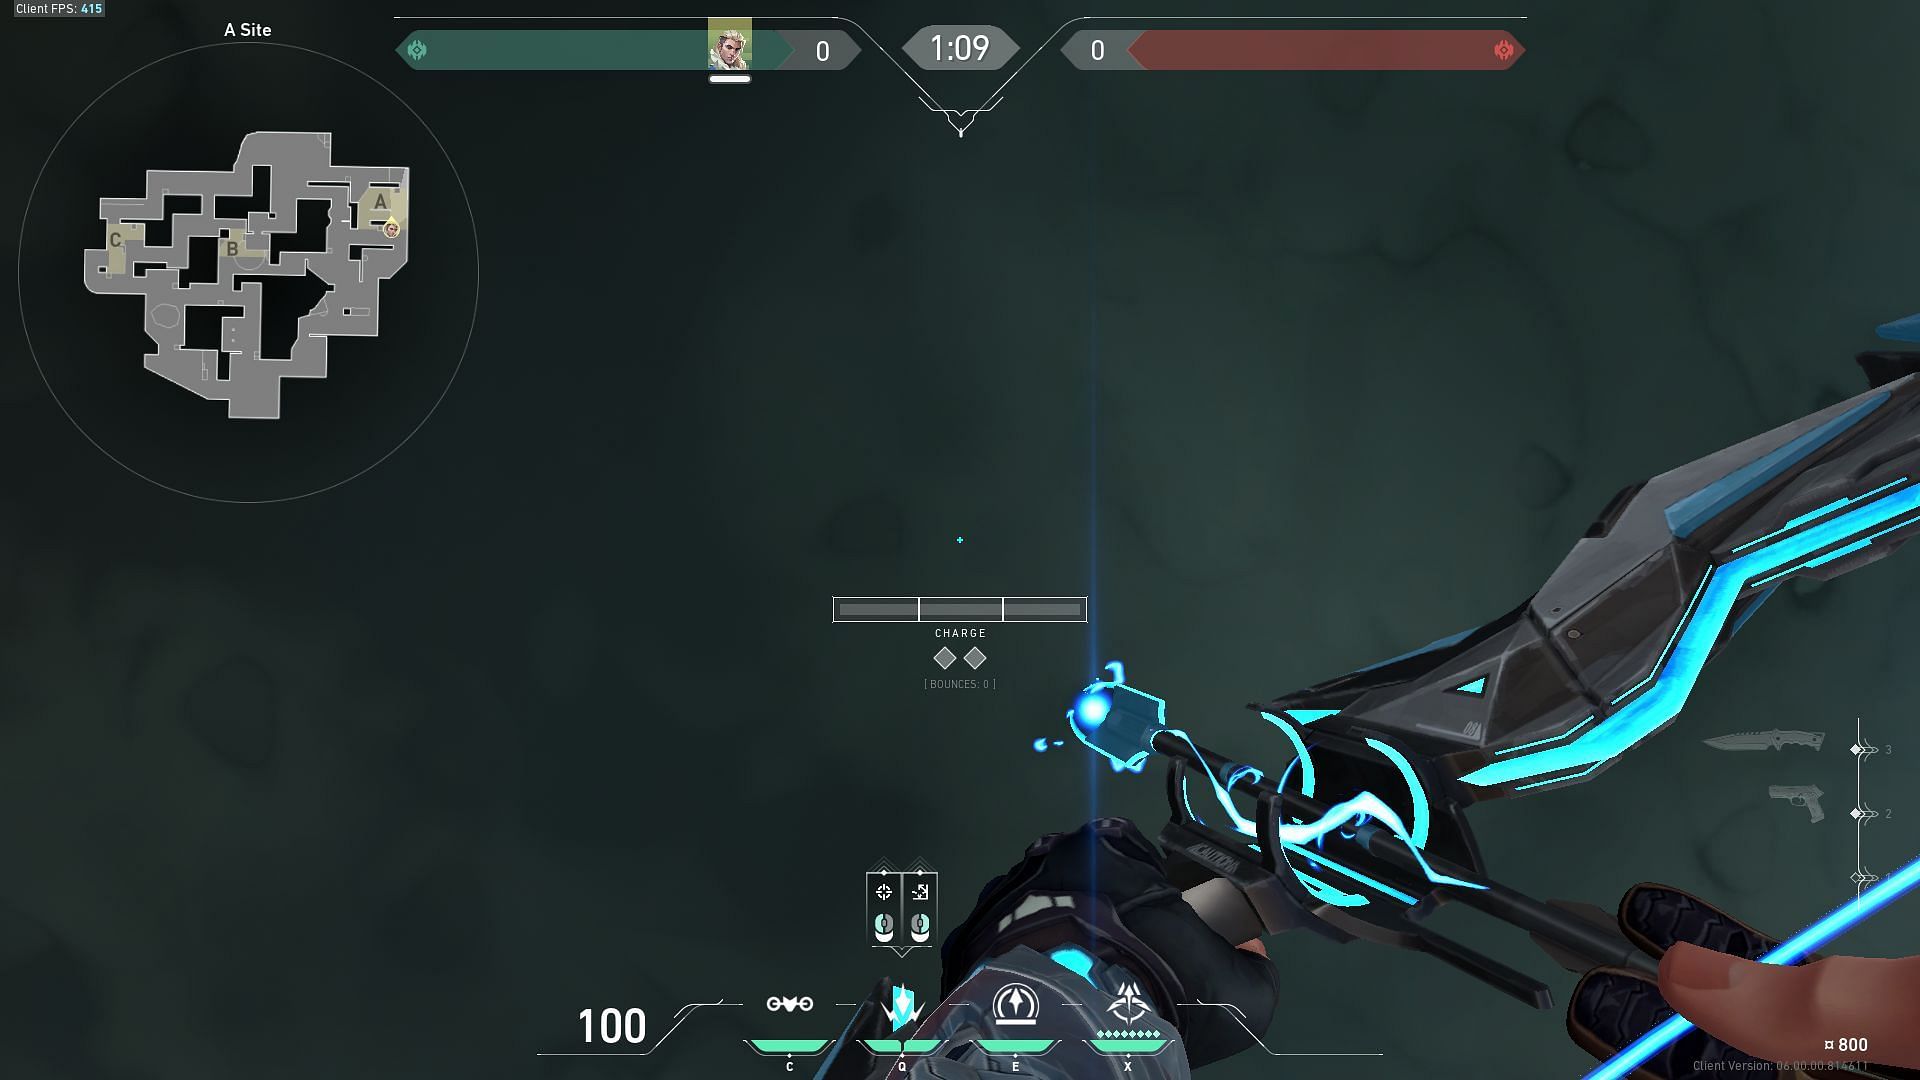
Valorant players can use the left mouse click icon on the bottom of their HUD to align it with the spike and fire a double-bounce Shock Bolt. This will damage or kill any defender trying to defuse the spike.
In conclusion, Sova is a powerful agent in Valorant and the Lotus map offers a variety of opportunities to utilize his abilities effectively. By using the Recon Bolt and Shock Bolt abilities in conjunction with one another, players can gain valuable information on enemies' positions, deal damage, and destroy their equipment.
Using these lineups and strategies will help them gain an edge over their opponents and increase their chances of winning matches on Lotus in Valorant.