
'%20x='0'%20y='0'%20height='100%25'%20width='100%25'%20%0A%20%20%20%20%20%20%20%20%20%20xlink%3Ahref='data:image/jpg;base64,/9j/2wBDAAYEBQYFBAYGBQYHBwYIChAKCgkJChQODwwQFxQYGBcUFhYaHSUfGhsjHBYWICwgIyYnKSopGR8tMC0oMCUoKSj/2wBDAQcHBwoIChMKChMoGhYaKCgoKCgoKCgoKCgoKCgoKCgoKCgoKCgoKCgoKCgoKCgoKCgoKCgoKCgoKCgoKCgoKCj/wgARCAAGAAoDASIAAhEBAxEB/8QAFgABAQEAAAAAAAAAAAAAAAAAAAUG/8QAFQEBAQAAAAAAAAAAAAAAAAAAAwT/2gAMAwEAAhADEAAAAKuRKW//xAAgEAABAgYDAQAAAAAAAAAAAAACAwQAAQUREyIGEiEk/9oACAEBAAE/AOWjU1qE4yO1swJEoH0aa3nPsPSV4YUOrrMW6udrumJemd/ZR//EABcRAAMBAAAAAAAAAAAAAAAAAAABAhH/2gAIAQIBAT8Alaf/xAAWEQADAAAAAAAAAAAAAAAAAAAAESH/2gAIAQMBAT8AVP/Z'%3E%3C/image%3E%3C/svg%3E)
A Viper Corrode guide can help you navigate the ways you can utilize the Agent on the new Valorant map. Corrode was released in-game on June 25, 2025. The new map features a long and narrow mid-section and two somewhat compact sites. Viper mains may face some difficulty trying to maintain a universal presence given the map's size. However, with the right setups, everything can be accomplished.
This Viper Corrode guide will help you better navigate the new Valorant map with the Controller Agent and explain some viable lineups along with strategies.
Complete Viper Corrode guide in Valorant
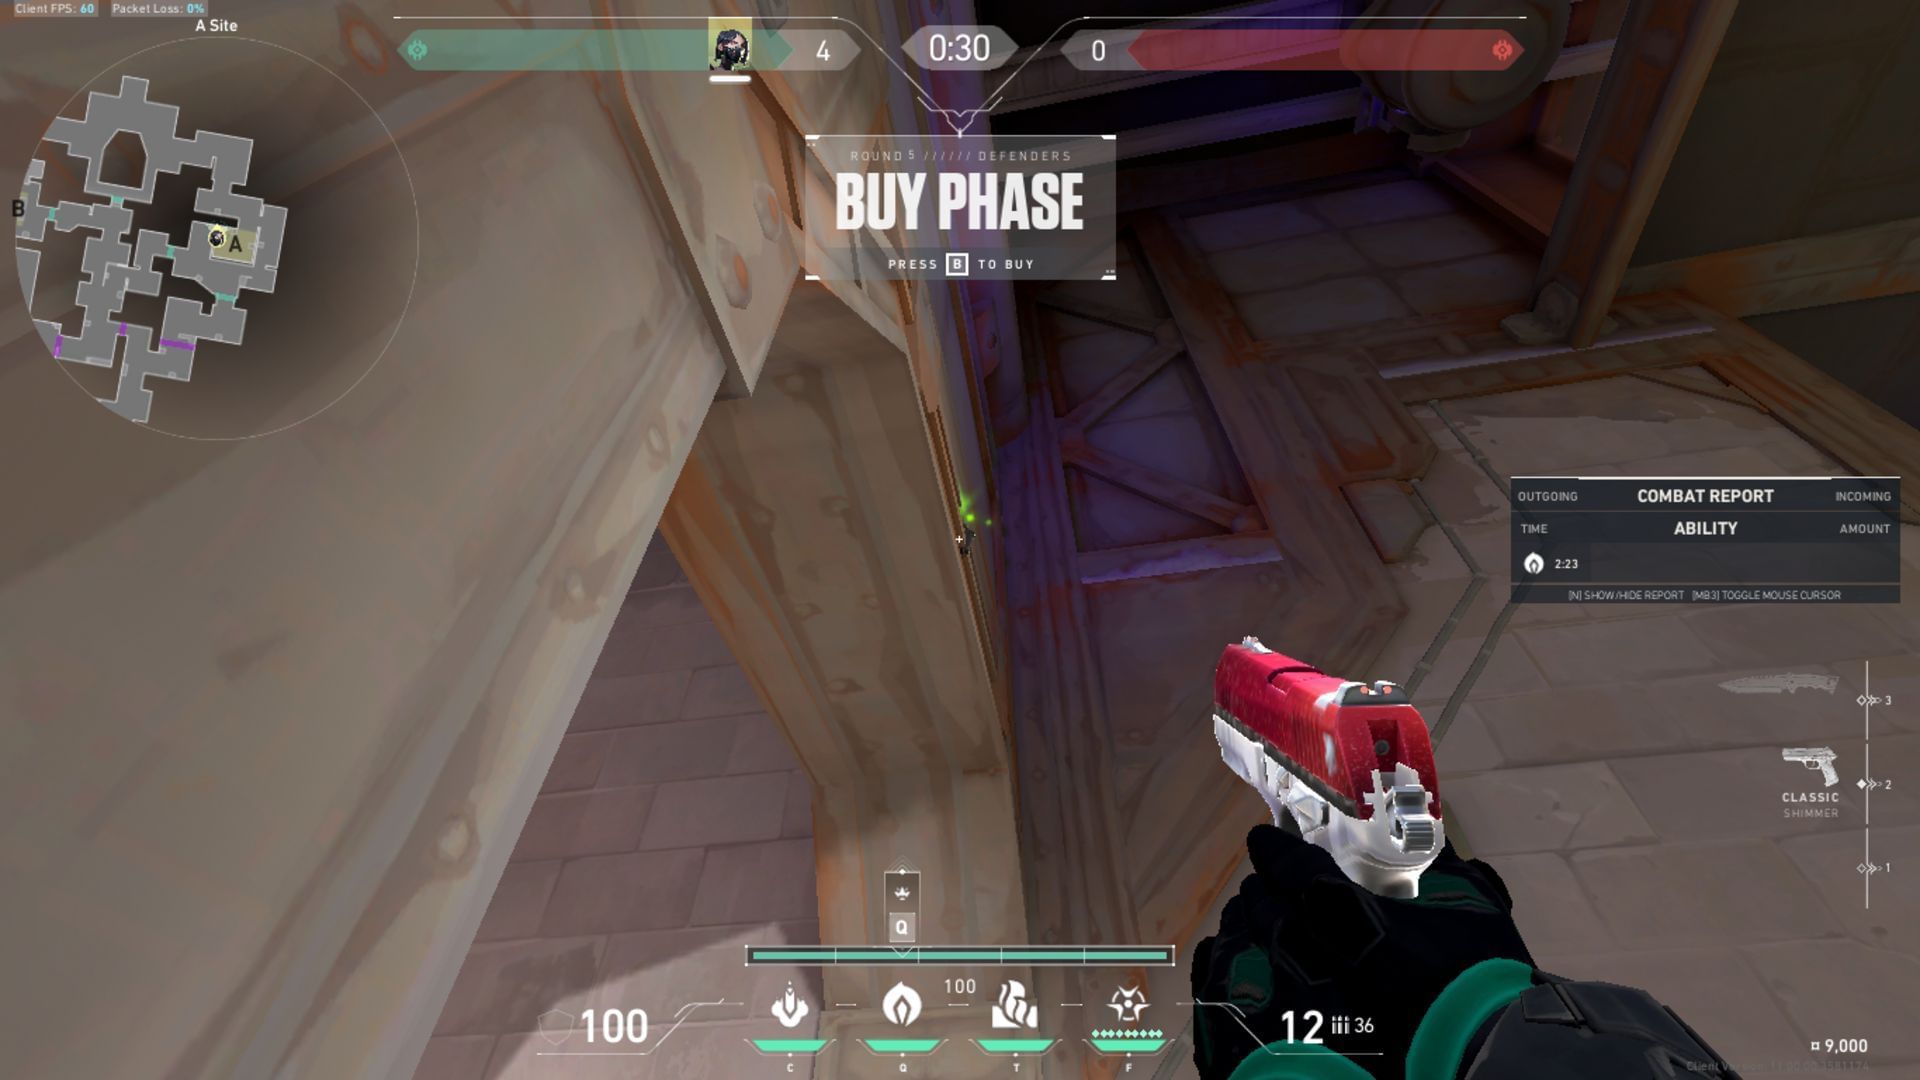
Defense
A Site

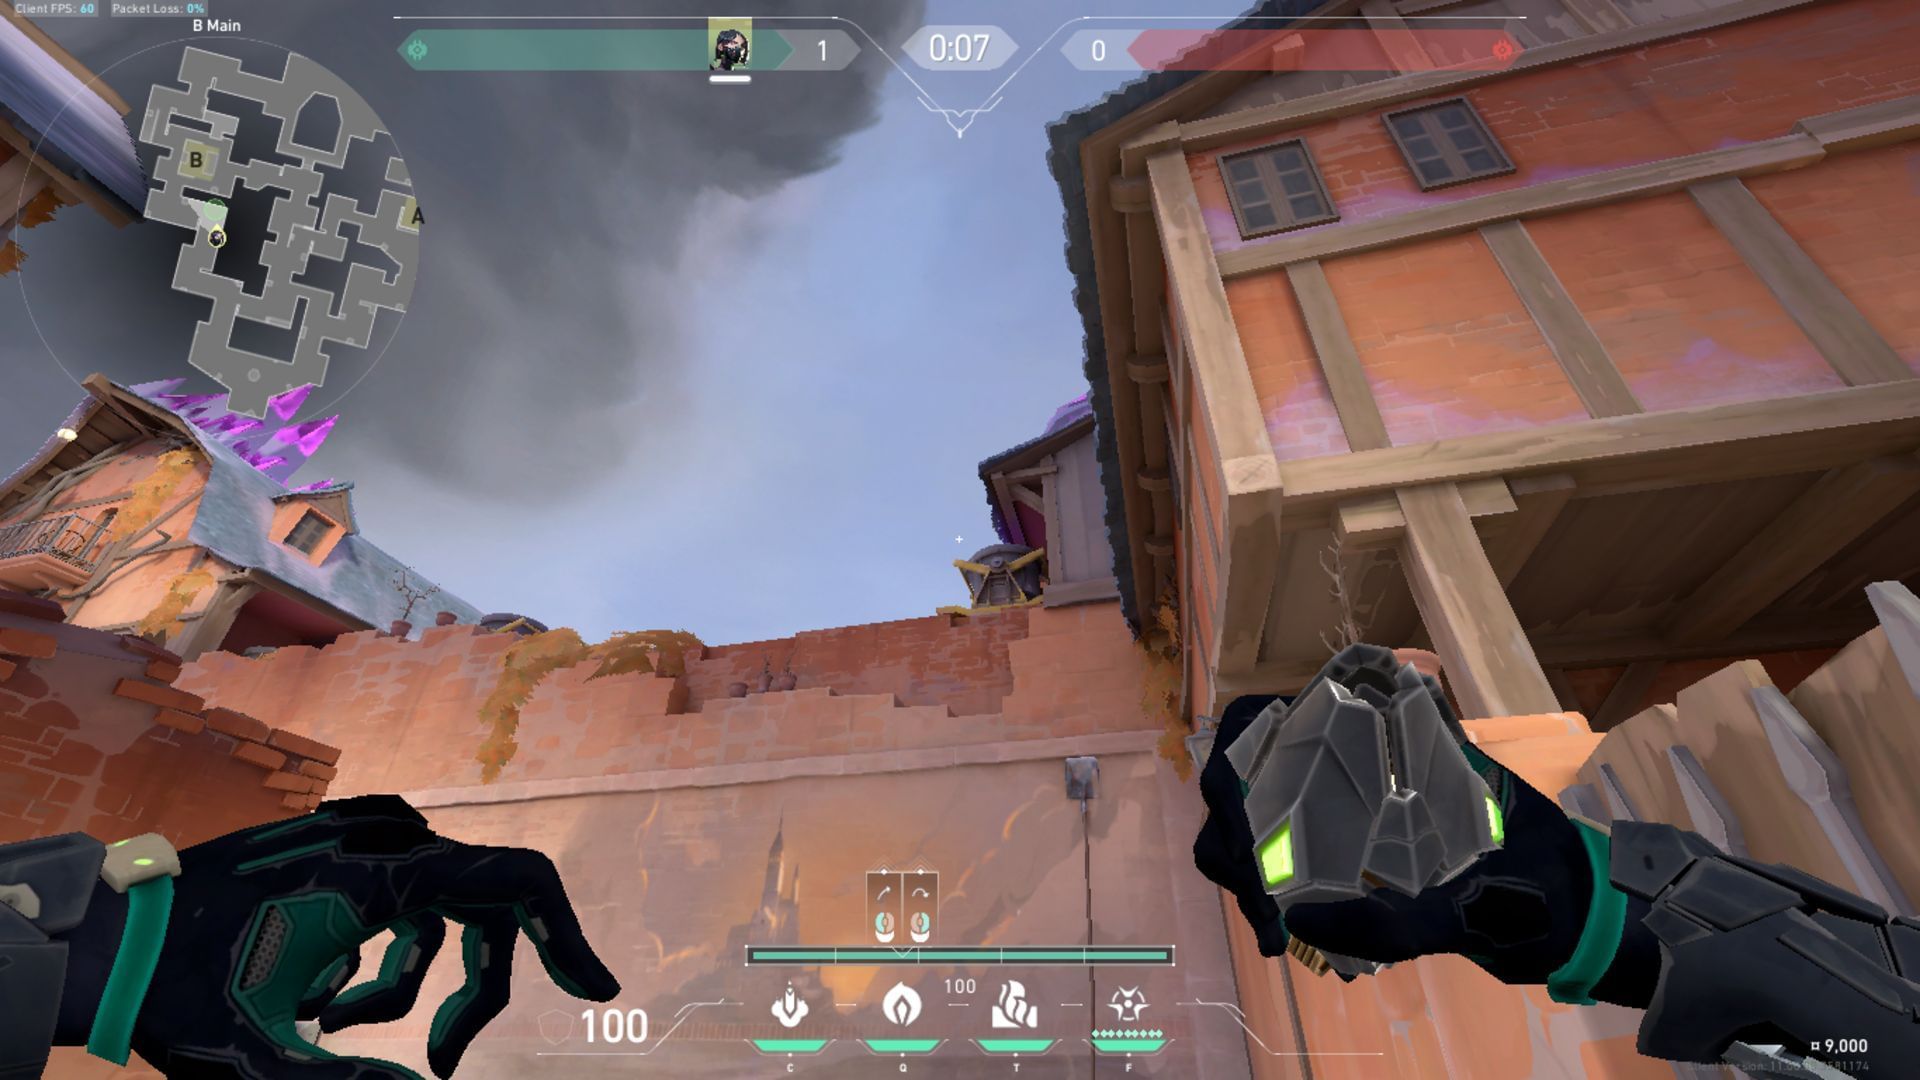
The simplest A Site setup in the Viper Corrode guide involves using your Poison Cloud on the A Main Entrance. You place it flat in the center, and then you can walk your way to Mid Stairs from the site.
Once you're there, you can draw your wall from there to the B Main entrance. By doing so at the right angle, you can successfully cover up access to B Main as well as Mid. It's a rather solid and easy-to-execute wall and orb setup for both sites.
Also read: Best Vyse setup on Corrode in Valorant
B Site
For the B Site, you can tuck yourself in the corner of the main entrance and release your Toxin Screen. It will cover up a significant portion of the Mid as well as the main entryway.
Furthermore, you can also use the orb to cover up the other entry point from Mid. However, it's generally just better to have another teammate watch it since Mid is already covered up.
Naturally, this leaves A a little bit exposed if you're playing Viper solo. However, a well-executed orb lineup can help you in this situation, which will be covered in the next section of the article.
Orb lineups
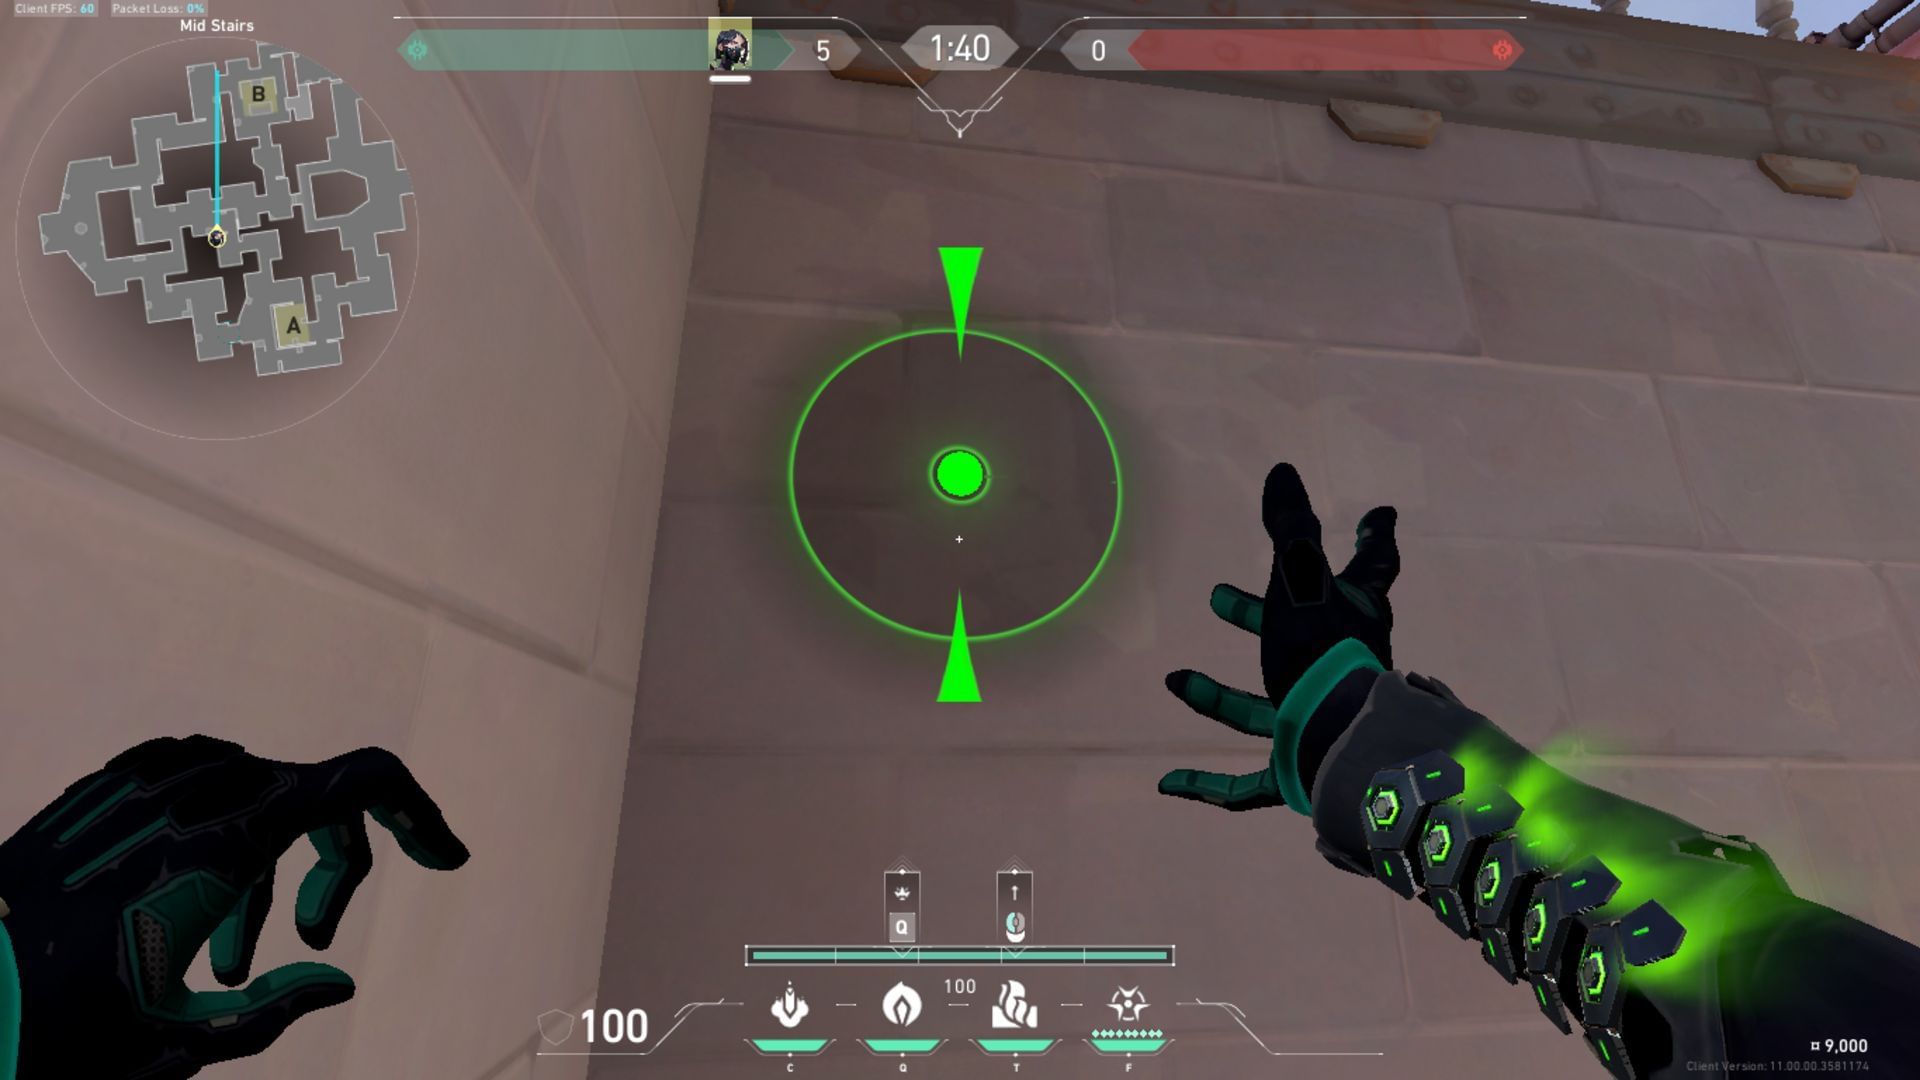
B Site to A Main - Defending
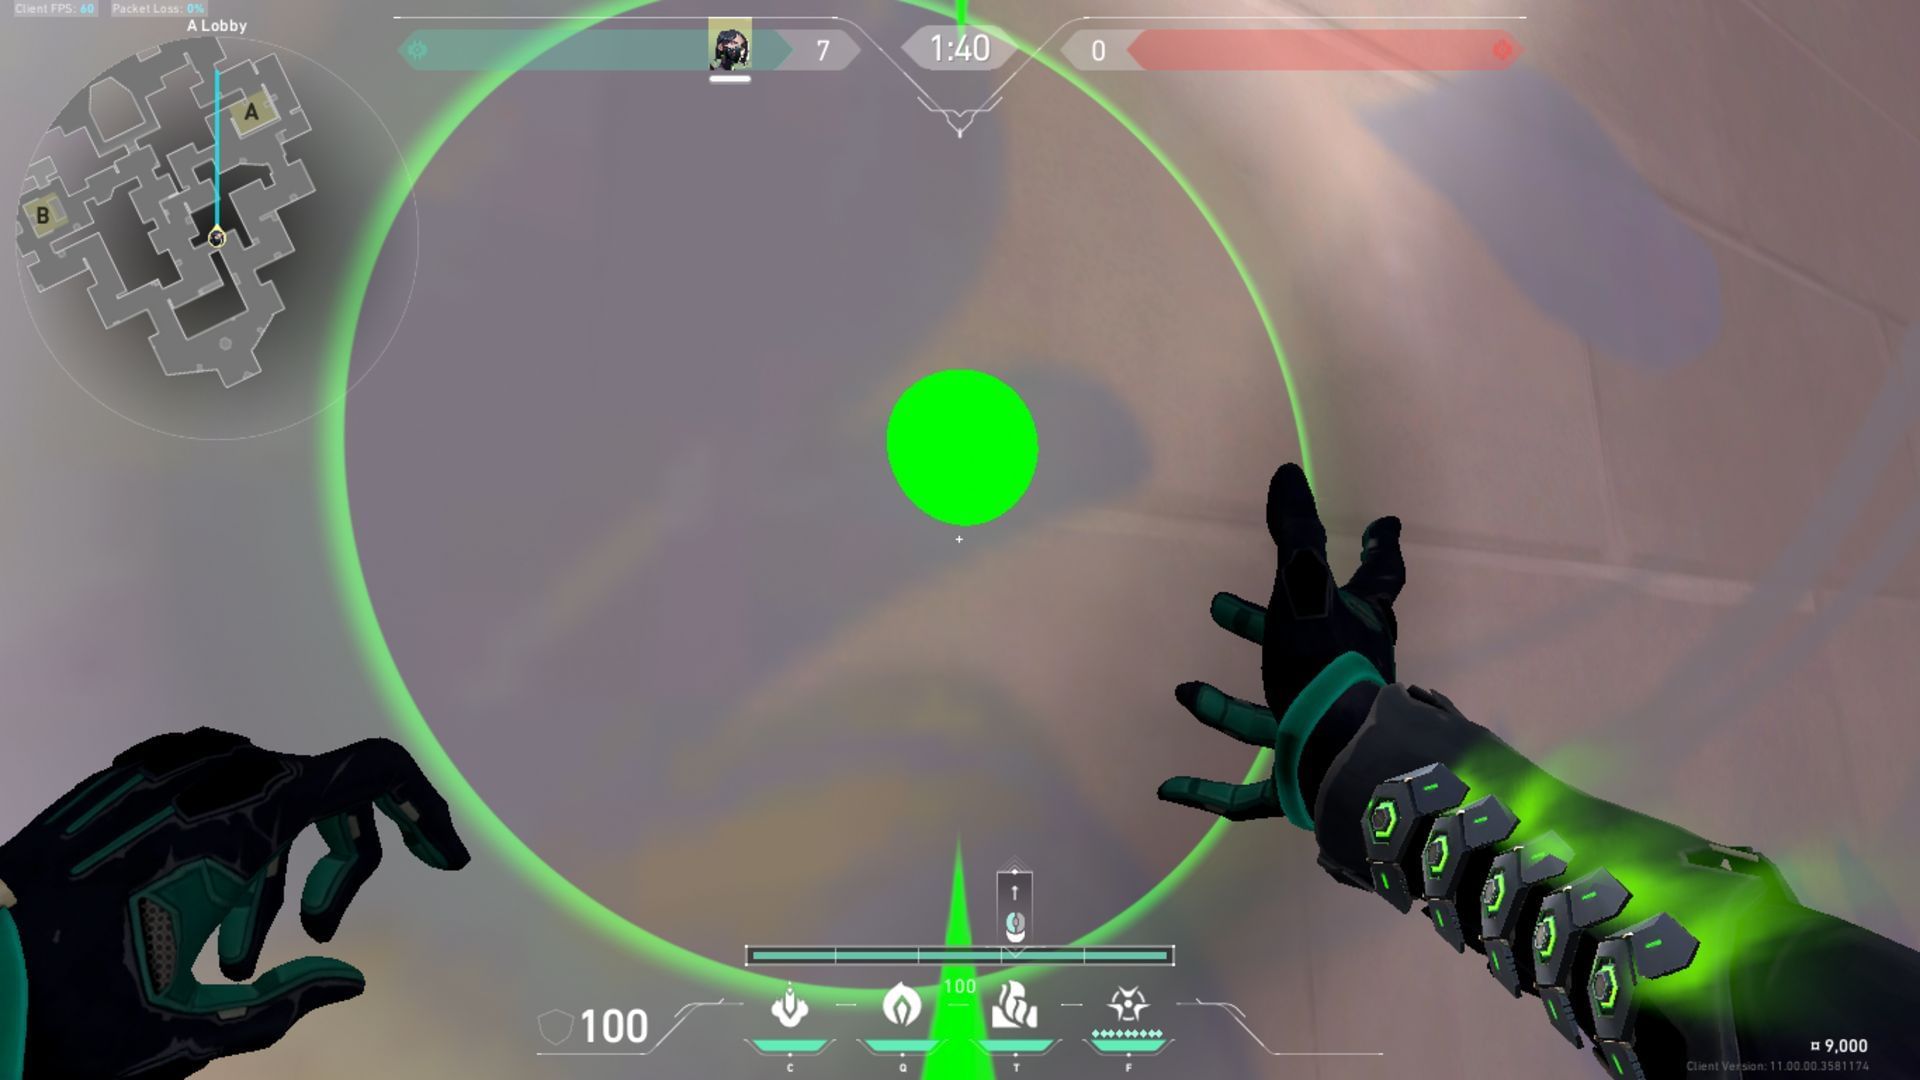
You can execute a quick jump-throw from B Site to have your Poison Cloud land directly in the entryway to A Site. To do this, aim at the edge of the tree's canopy as shown in the image. Then run until your toxin bar aligns with the top edge of the wall opposite you and execute a running throw.
This way, you can cover up A Main with your orb and B Main and Mid with your wall.
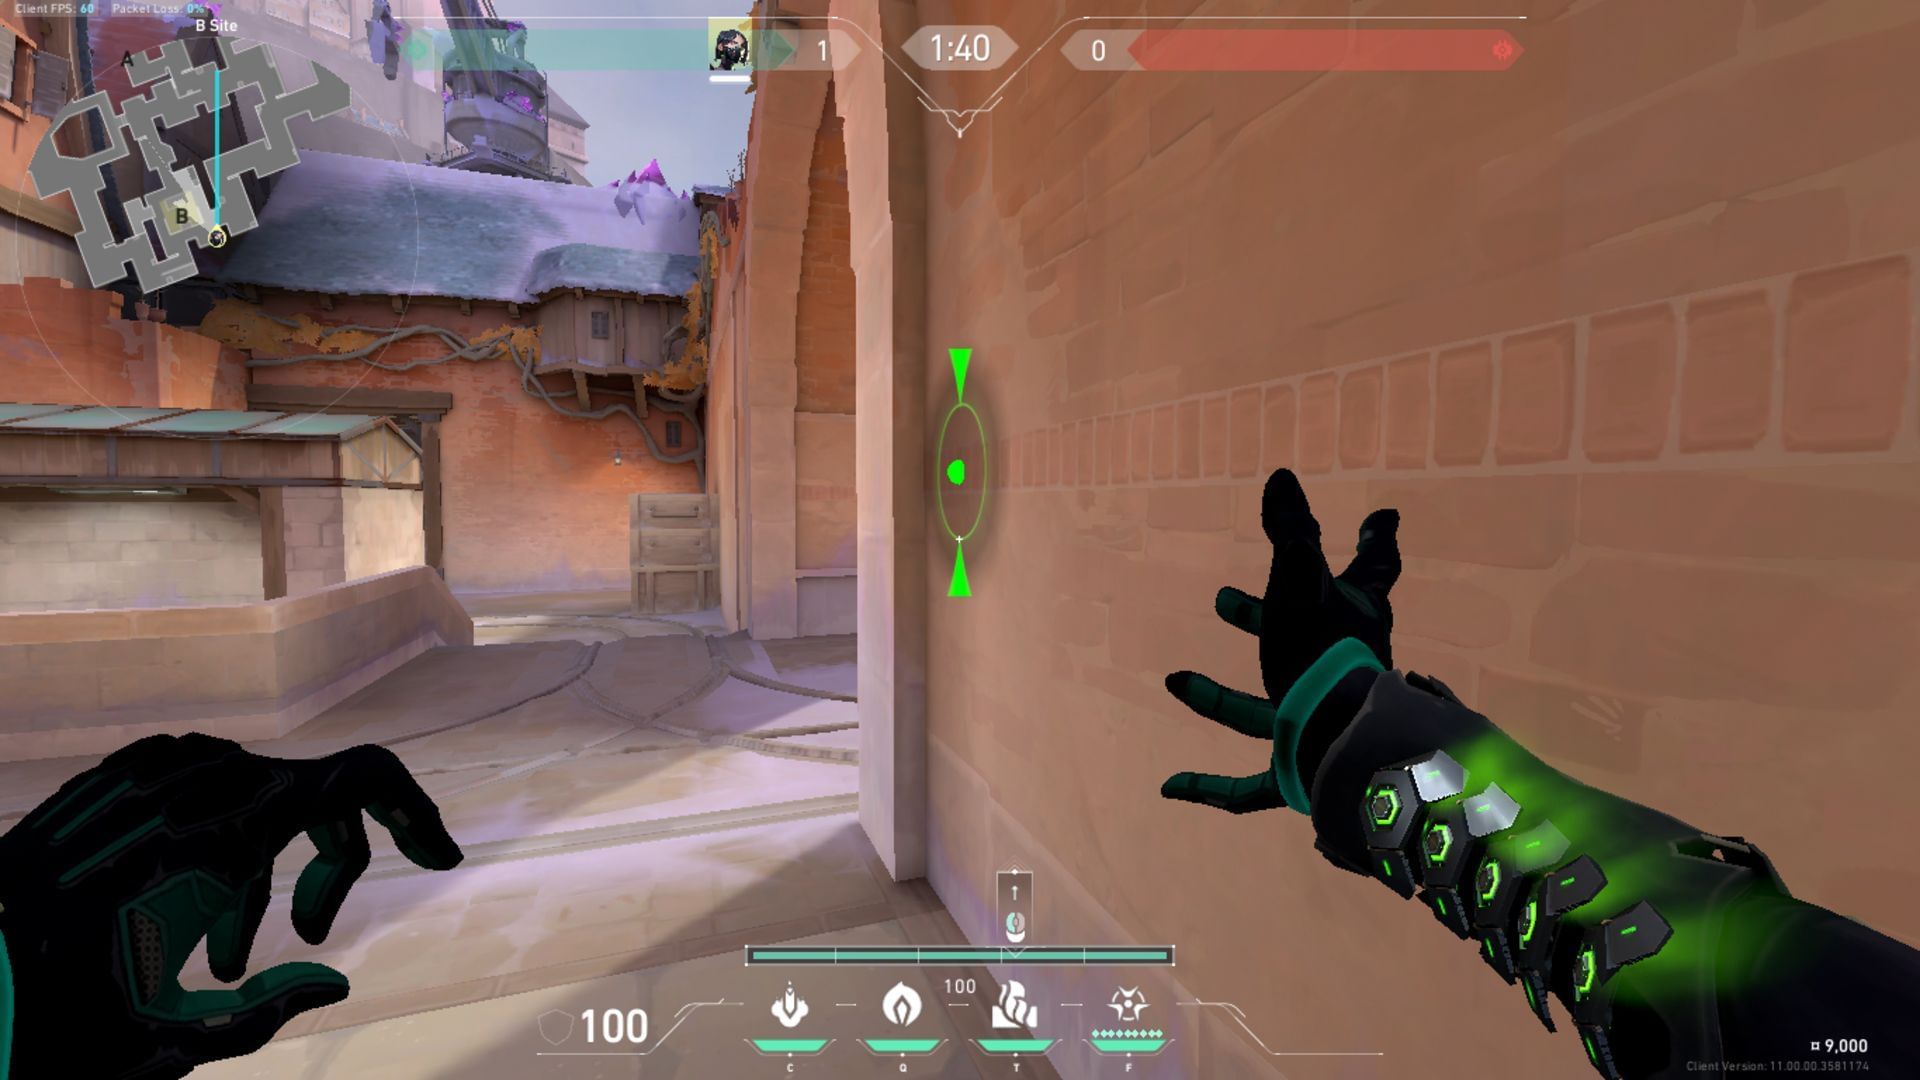
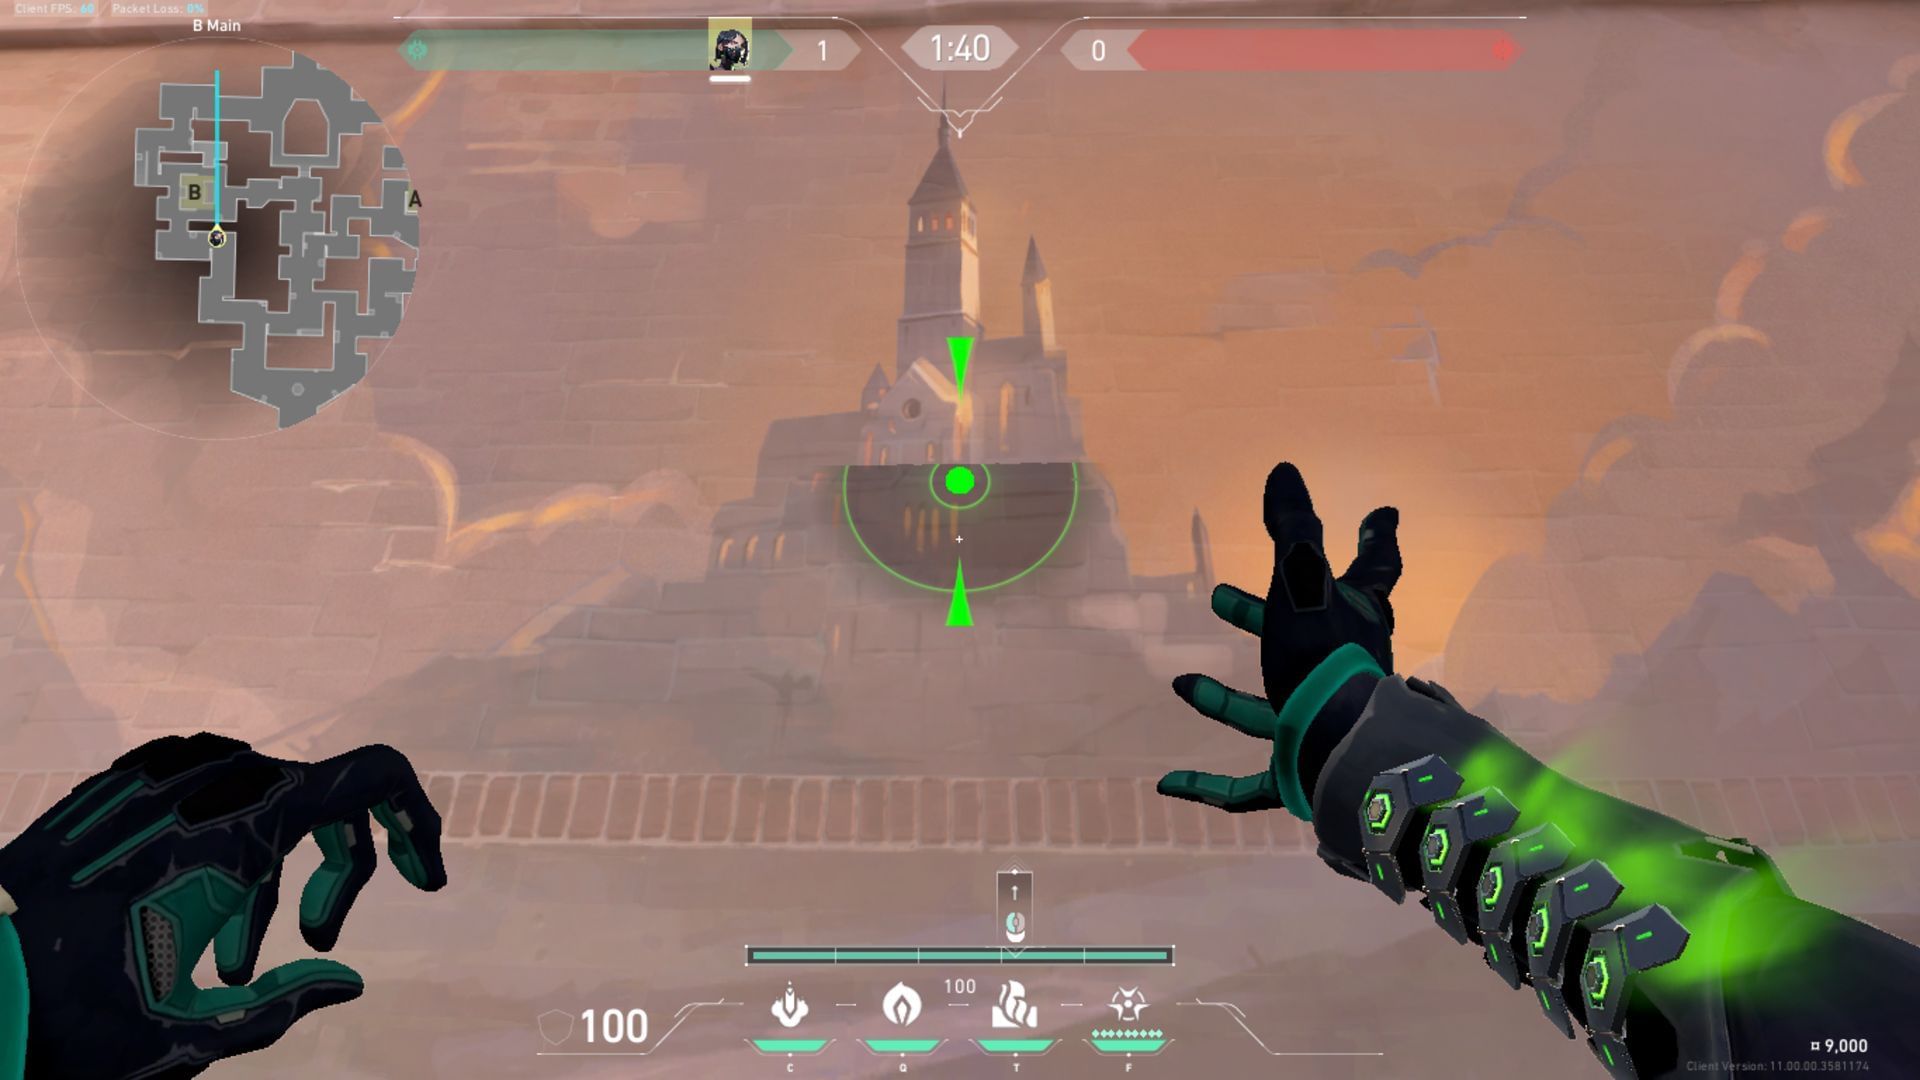
B Main to B Heaven - Attacking
You can stand in this location in B Main and aim your reticle at the bucket's edge, and then move it a bit upwards. It doesn't have to be too precise, so don't worry. Once it's all aligned, execute a simple left click throw and the orb will land in B Heaven from Main.
This lineup may take some time to fully grasp, but it's only a matter of practice and habit. In the long run, it's incredibly useful, especially if you're running with Viper as a solo Controller.
Also read: Best Cypher setup on Corrode in Valorant
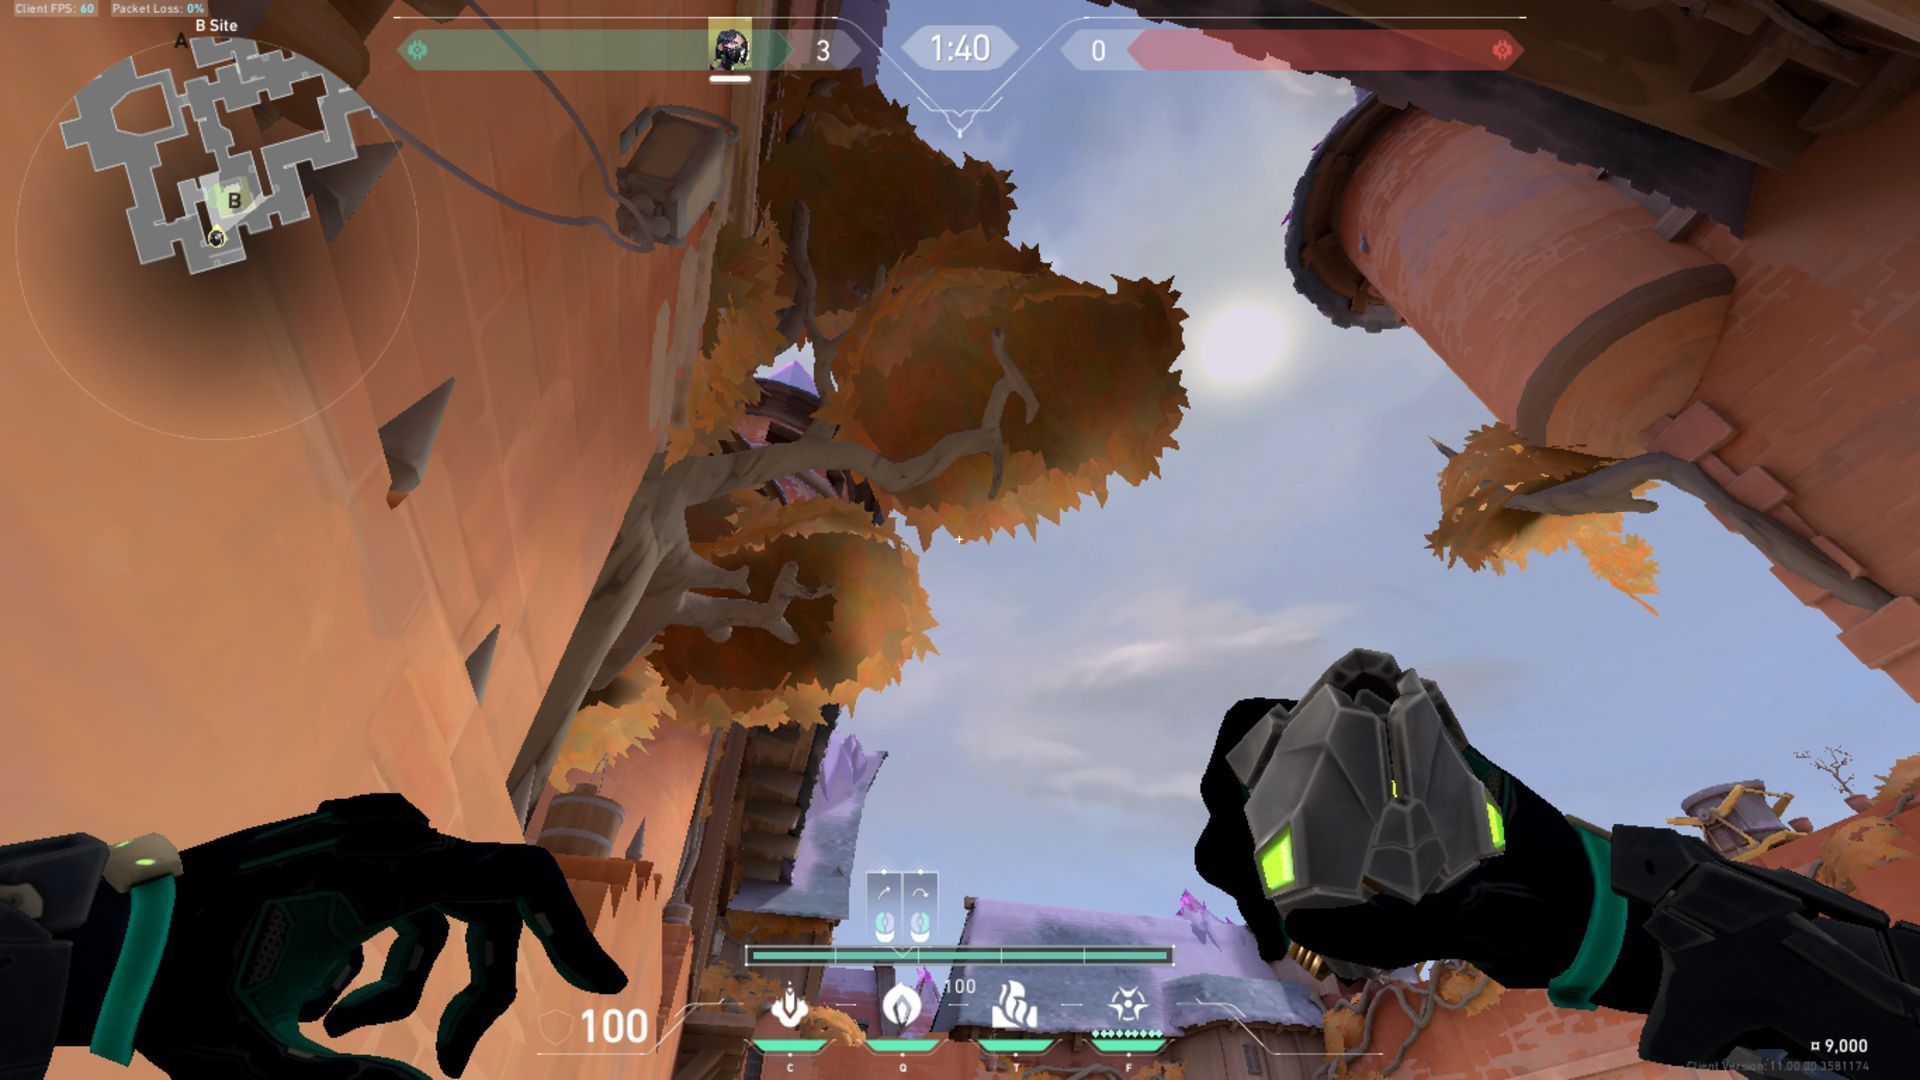
A Site one-way - Attacking
On A Site, you can execute a simple Poison Cloud throw by aiming upwards at the doorframe as shown in the image. As you can tell, all you have to do is stand in the doorframe and plant your spike underneath.
Next, look upwards at the given angle and do a quick left-click throw. The Poison Cloud will get stuck in the frame and create a perfect one-way for you and your team to abuse during post plant.
Attack setups
A Site
You can execute an A Site entry with ease by following this Viper Corrode guide. Simply shut off the left side of the site with your wall. This includes shutting off A Link as well as A Crane, which provides Defenders the quickest access to the entire site.
This quick wall can help you get onto the site easily if you're playing as a solo Controller. However, the wall cuts deep through the A Crane entryway, so once you are on site, you may want to put down your orb to further control more space, as shown in the image. Alternatively, you can also use the orb one-way from the previous section for the post-plant scenario.
If you are using the one-way setup, you can also go ahead and play with lineups after taking space in A Link. You can use Snakebite lineups from this place to further delay defusing.
Also read: Best Brimstone molly lineups on Corrode in Valorant
B Site
For the B Site, you can use the orb lineup shown in the earlier section. Furthermore, you must couple it with a wall that covers up the back of the site without closing off B Hut.
Simply line up your wall as shown in the image and let it go. This will allow your Duelists and Initiators plenty of space to capture on-site with some flash plays.
This concludes our Viper Corrode guide. Follow Sportskeeda for more gaming news and guides.
