
'%20x='0'%20y='0'%20height='100%25'%20width='100%25'%20%0A%20%20%20%20%20%20%20%20%20%20xlink%3Ahref='data:image/jpg;base64,/9j/2wBDAAYEBQYFBAYGBQYHBwYIChAKCgkJChQODwwQFxQYGBcUFhYaHSUfGhsjHBYWICwgIyYnKSopGR8tMC0oMCUoKSj/2wBDAQcHBwoIChMKChMoGhYaKCgoKCgoKCgoKCgoKCgoKCgoKCgoKCgoKCgoKCgoKCgoKCgoKCgoKCgoKCgoKCgoKCj/wgARCAAGAAoDASIAAhEBAxEB/8QAFQABAQAAAAAAAAAAAAAAAAAAAwb/2gAIAQEAAAAAhU//xAAUAQEAAAAAAAAAAAAAAAAAAAAF/9oACAECEAAAAC//xAAUAQEAAAAAAAAAAAAAAAAAAAAC/9oACAEDEAAAAF//xAAdEAACAgIDAQAAAAAAAAAAAAABAgMEERIAQZGx/9oACAEBAAE/AJ6AuOZL00jzSJgqpwijPXvBRs4Gpr69bBifvP/EABgRAAIDAAAAAAAAAAAAAAAAAAABAxEh/9oACAECAQE/AJdds//EABcRAAMBAAAAAAAAAAAAAAAAAAABAgP/2gAIAQMBAT8A1SczJ//Z'%3E%3C/image%3E%3C/svg%3E)
There are all types of ways to build a house in Minecraft. Materials, size, location, and more can vary depending on what's available (in survival) or what players want for their home. It all ultimately comes down to what they decide to do, but there are a lot of commonalities across Minecraft houses.
Mansions, underground bunkers, and other types of homes will vary but have similar ideas behind them. The same can be said of Japanese houses, which are becoming very popular among crafters.
They're not easy to build, given how unique and specific they are. Here's how gamers can create them and what blocks they might need.

Chart New Territories with the ultimate Minecraft Seed Generator!
Minecraft Japanese house design
One of the critical aspects of a Japanese build is the curved roof. The roof is arguably the most recognizable part of those houses, so translating it into Minecraft is essential. This can easily be done with wooden planks and stairs placed upside down.
Crafters can try either one and see what looks best according to them, but as long as they get the general look of the Japanese roof, they're well on their way to creating one.
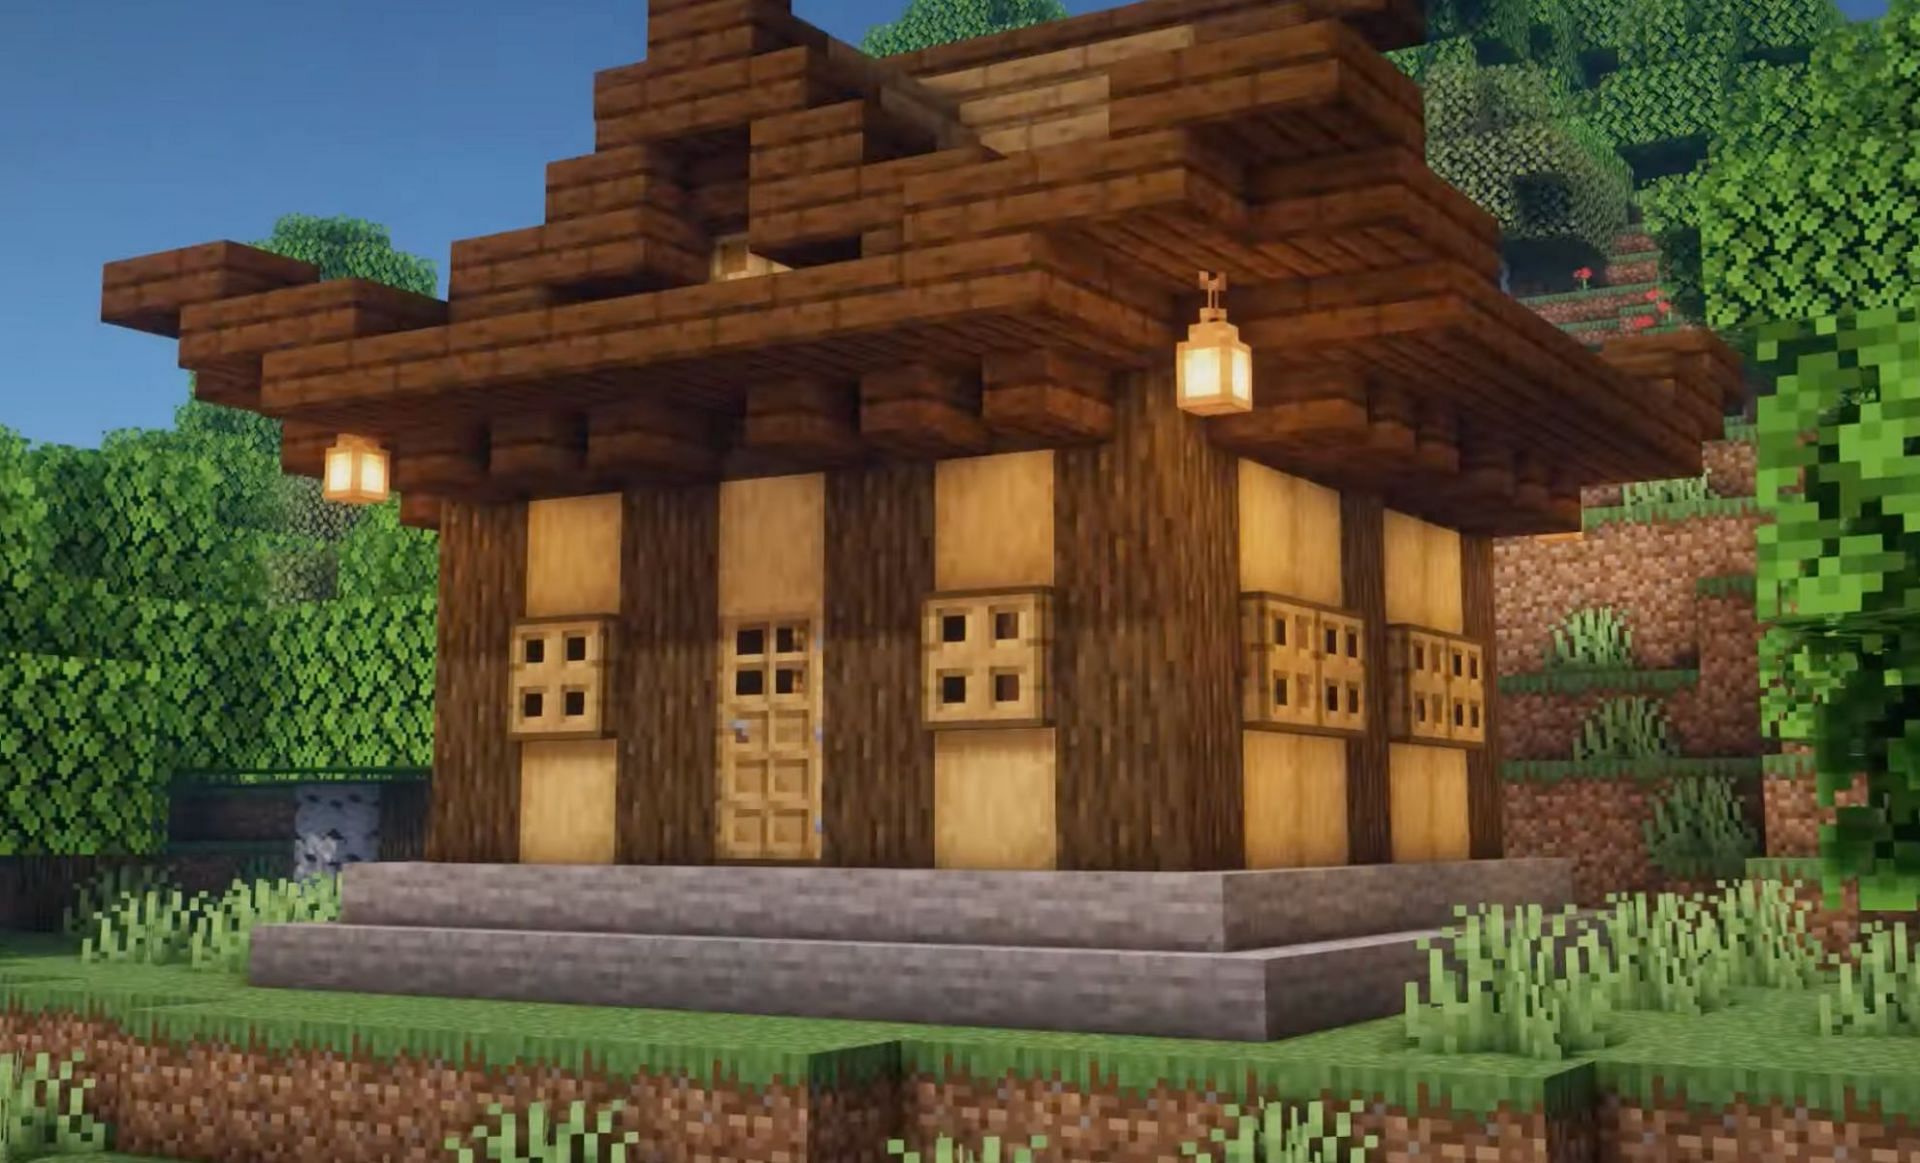
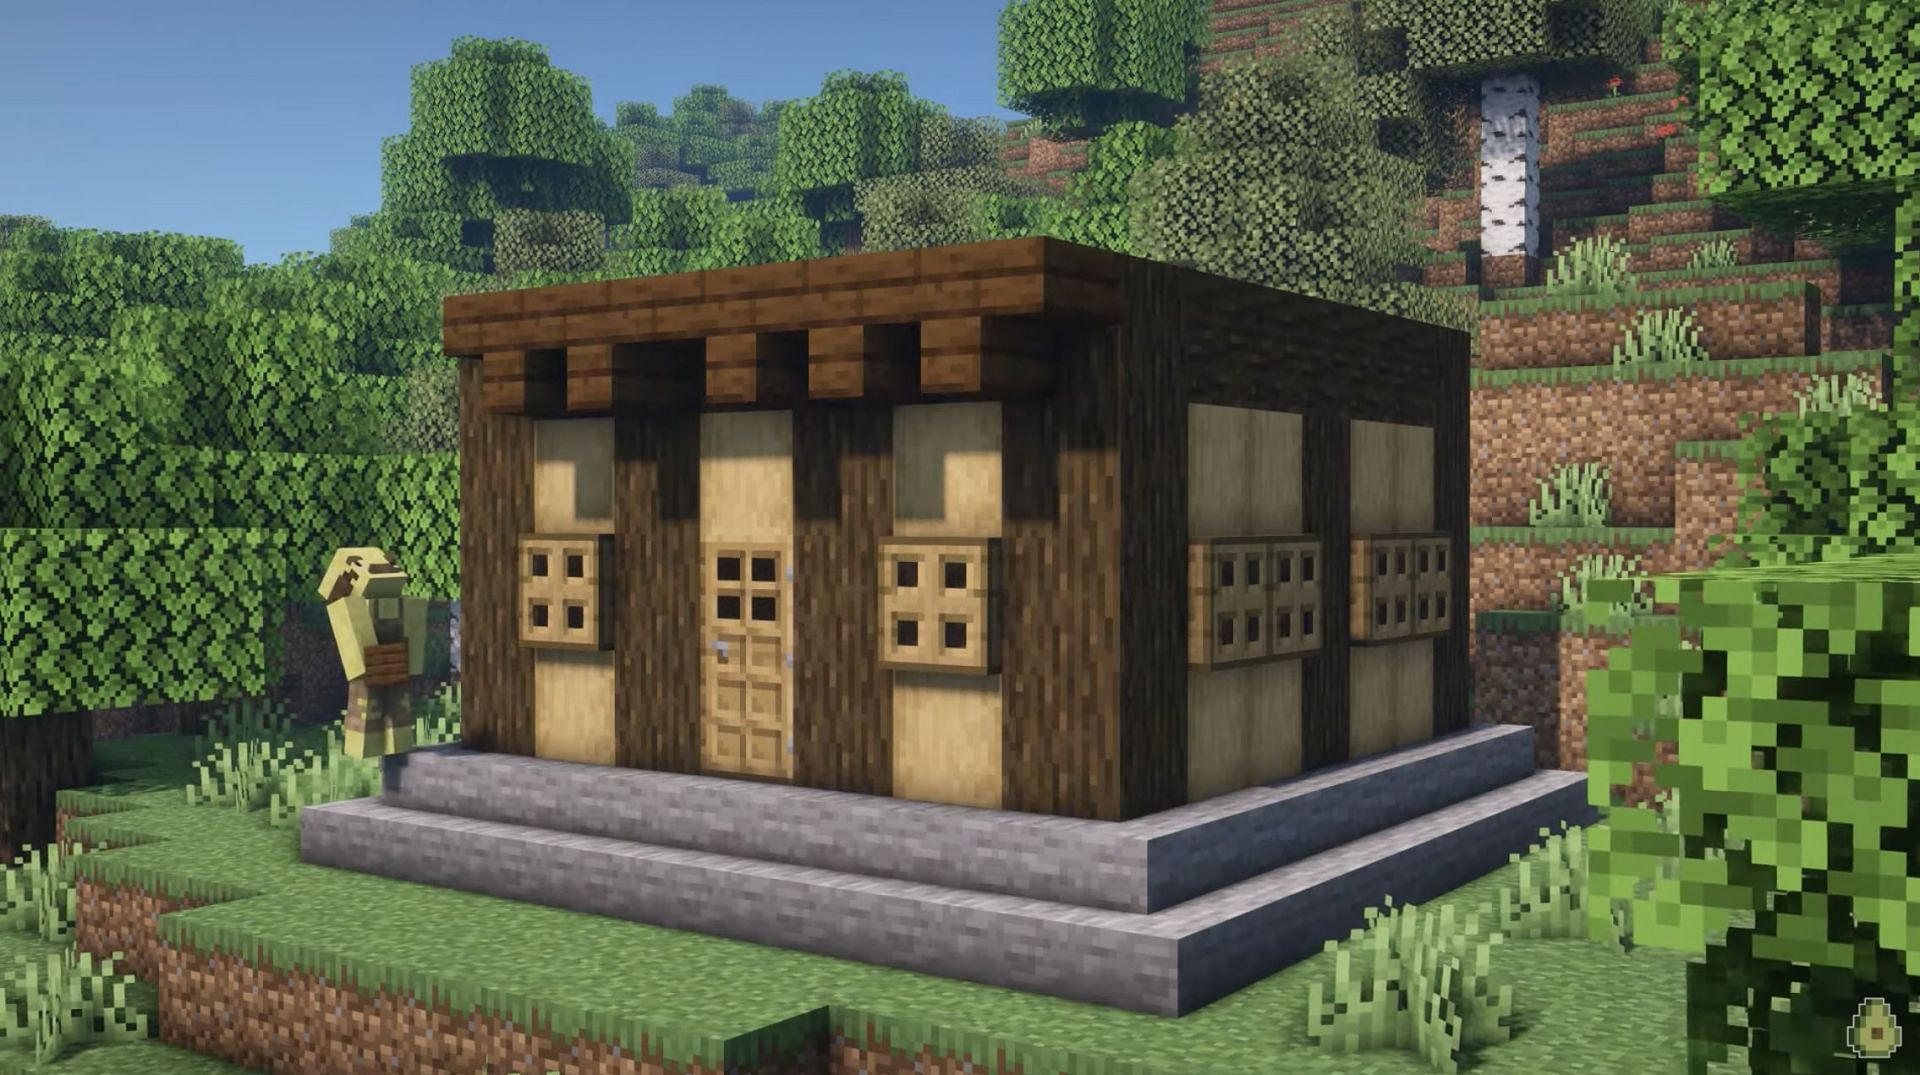
The first step in any build is to set up the base. A house generally has four walls, so gamers can start by doing that. Making them equal in width is vital for the house's dimensions and to ensure the roof doesn't look weird.
The player used stripped logs, regular logs, and planks to build the walls in this video. This can be substituted for whatever blocks Minecraft gamers want to use.
They also used stone stairs around the base to set it above the ground rather than flat. They filled the middle of the walls with dirt and placed trapdoors over them, but any block can conceivably be placed behind the trapdoor.
For the outer line of the roof, gamers can place upside-down stairs in this fashion, allowing them to eventually get the familiar curve on the edges. Crafters can place slabs on the outside for the next step, which can be repeated on all four sides of the house.
On the corner of each wall, players should place one slab on top of the other and one in the middle, connecting them in an "M" fashion. They can then put two stairs facing inward, like this.
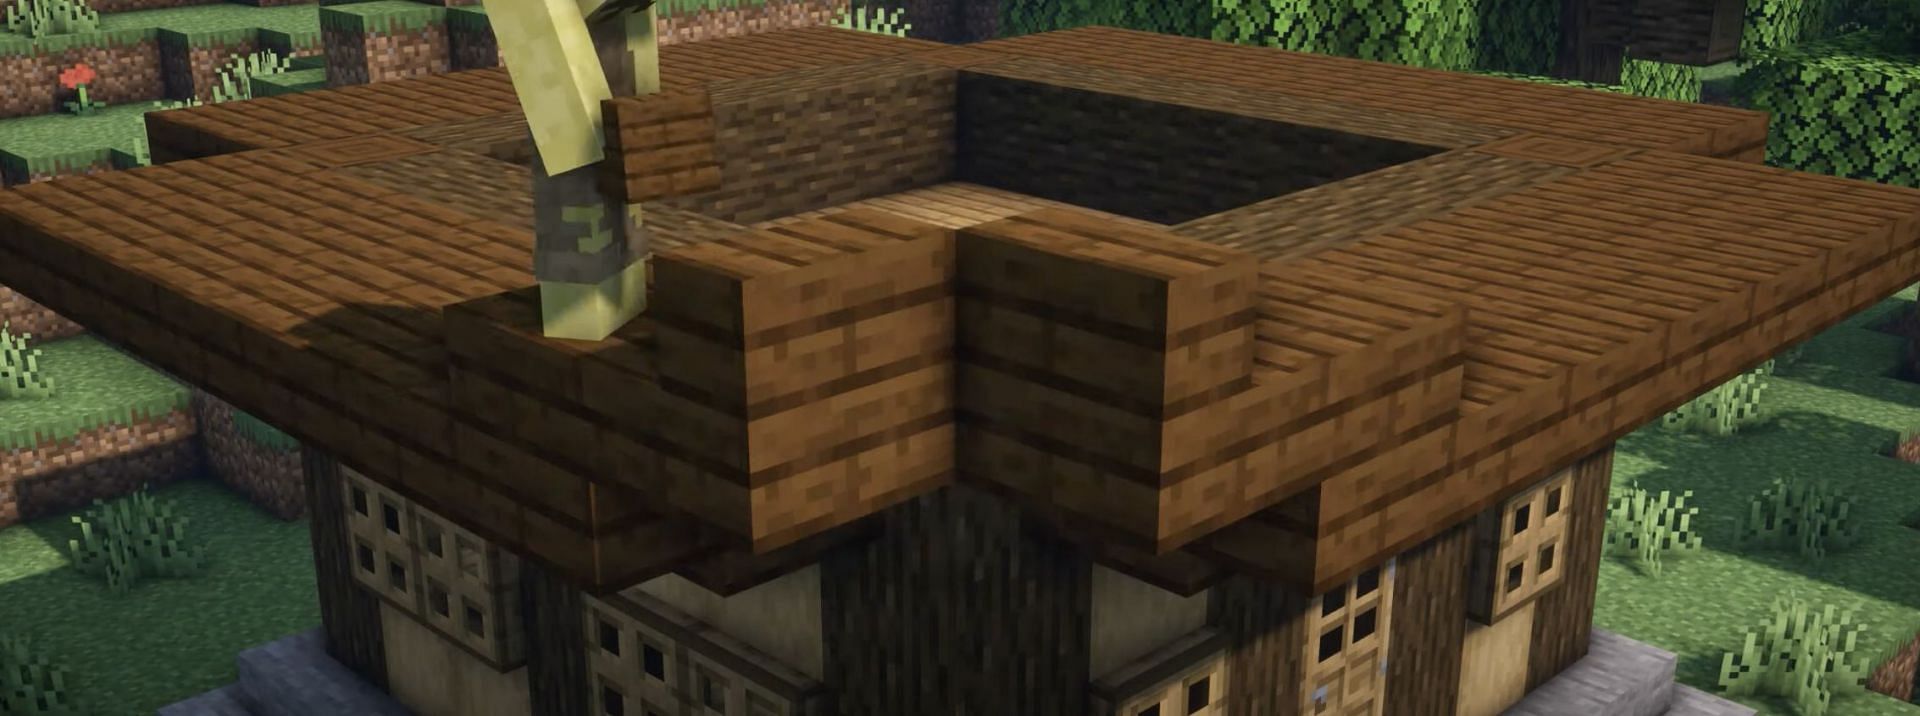
The next step is to place a slab in between those two stairs. Repeat this process on each of the four corners.
The front of the Minecraft roof is one of the most critical parts. Players should connect the corners of the roof with slabs on the inside.
On the inside of the house, there should be wooden blocks placed up so that they're two blocks higher than the current roof level. In the front, players can place slabs and stairs in this fashion.
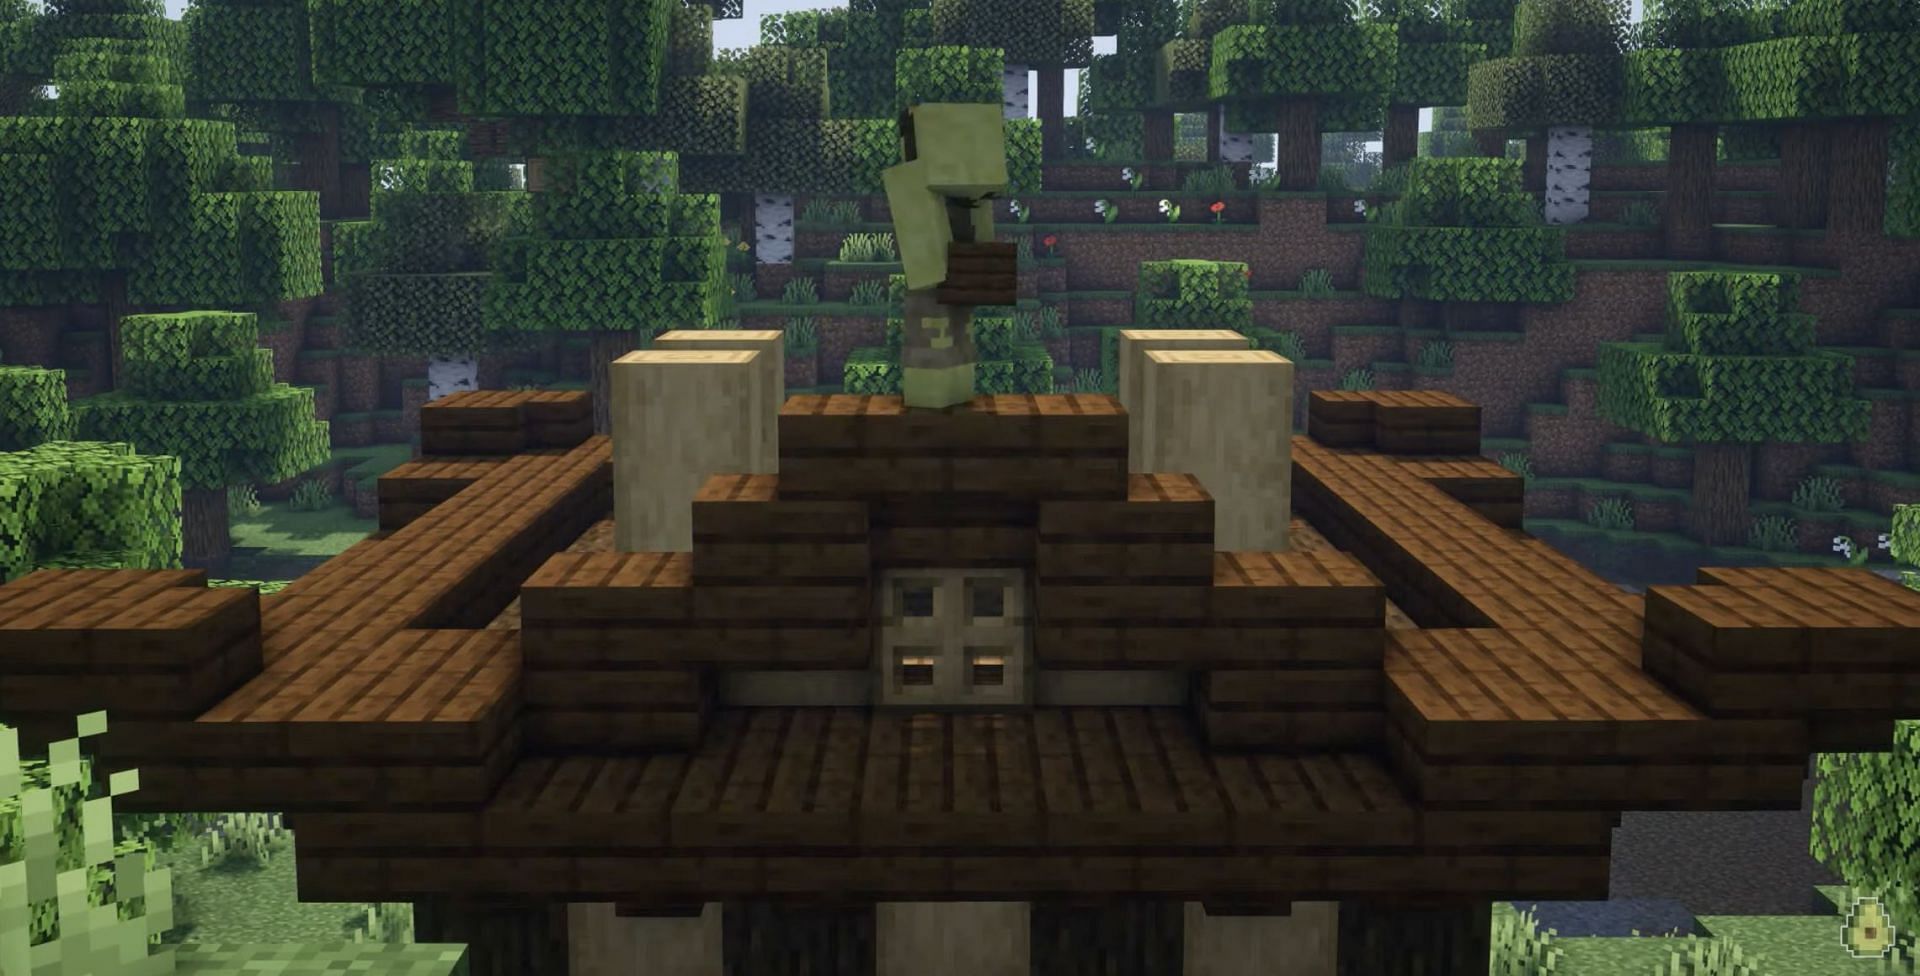
This can be repeated on the back. On the sides, gamers can put stairs leading up into a triangle with one upside-down stair protruding out. The gaps in the roof can be filled with ascending Minecraft stairs, preferably of a different type.
Lanterns are an excellent choice for lighting and decorating a house like this.
Read more: mobs.

Uncover new worlds with our Minecraft Seed Generator!