
'%20x='0'%20y='0'%20height='100%25'%20width='100%25'%20%0A%20%20%20%20%20%20%20%20%20%20xlink%3Ahref='data:image/jpg;base64,/9j/2wBDAAYEBQYFBAYGBQYHBwYIChAKCgkJChQODwwQFxQYGBcUFhYaHSUfGhsjHBYWICwgIyYnKSopGR8tMC0oMCUoKSj/2wBDAQcHBwoIChMKChMoGhYaKCgoKCgoKCgoKCgoKCgoKCgoKCgoKCgoKCgoKCgoKCgoKCgoKCgoKCgoKCgoKCgoKCj/wgARCAAGAAoDASIAAhEBAxEB/8QAFQABAQAAAAAAAAAAAAAAAAAAAQf/2gAIAQEAAAAAnD//xAAUAQEAAAAAAAAAAAAAAAAAAAAF/9oACAECEAAAACf/xAAUAQEAAAAAAAAAAAAAAAAAAAAE/9oACAEDEAAAAEf/xAAgEAABAgUFAAAAAAAAAAAAAAABAAMCBBETIRQxQVFx/9oACAEBAAE/AJV21vD3kEiq1TPLWfAv/8QAFREBAQAAAAAAAAAAAAAAAAAAAAH/2gAIAQIBAT8Ar//EABQRAQAAAAAAAAAAAAAAAAAAAAD/2gAIAQMBAT8Af//Z'%3E%3C/image%3E%3C/svg%3E)
Moving vertically fast can be tricky in Minecraft, which is exactly why many players construct water elevators to compensate. These structures allow players to rise or fall quickly through the use of the game's fluid mechanics.
With a water bucket and a few choice blocks, players can make efficient elevators of any size.

Considering these structures are cheap to make, players can create them at any point, whether they're just starting out in a world or they've been a part of it for years.
Chart New Territories with the ultimate Minecraft Seed Generator!
Below, Minecraft players can find a short guide on how to construct and use a water elevator to suit their needs.
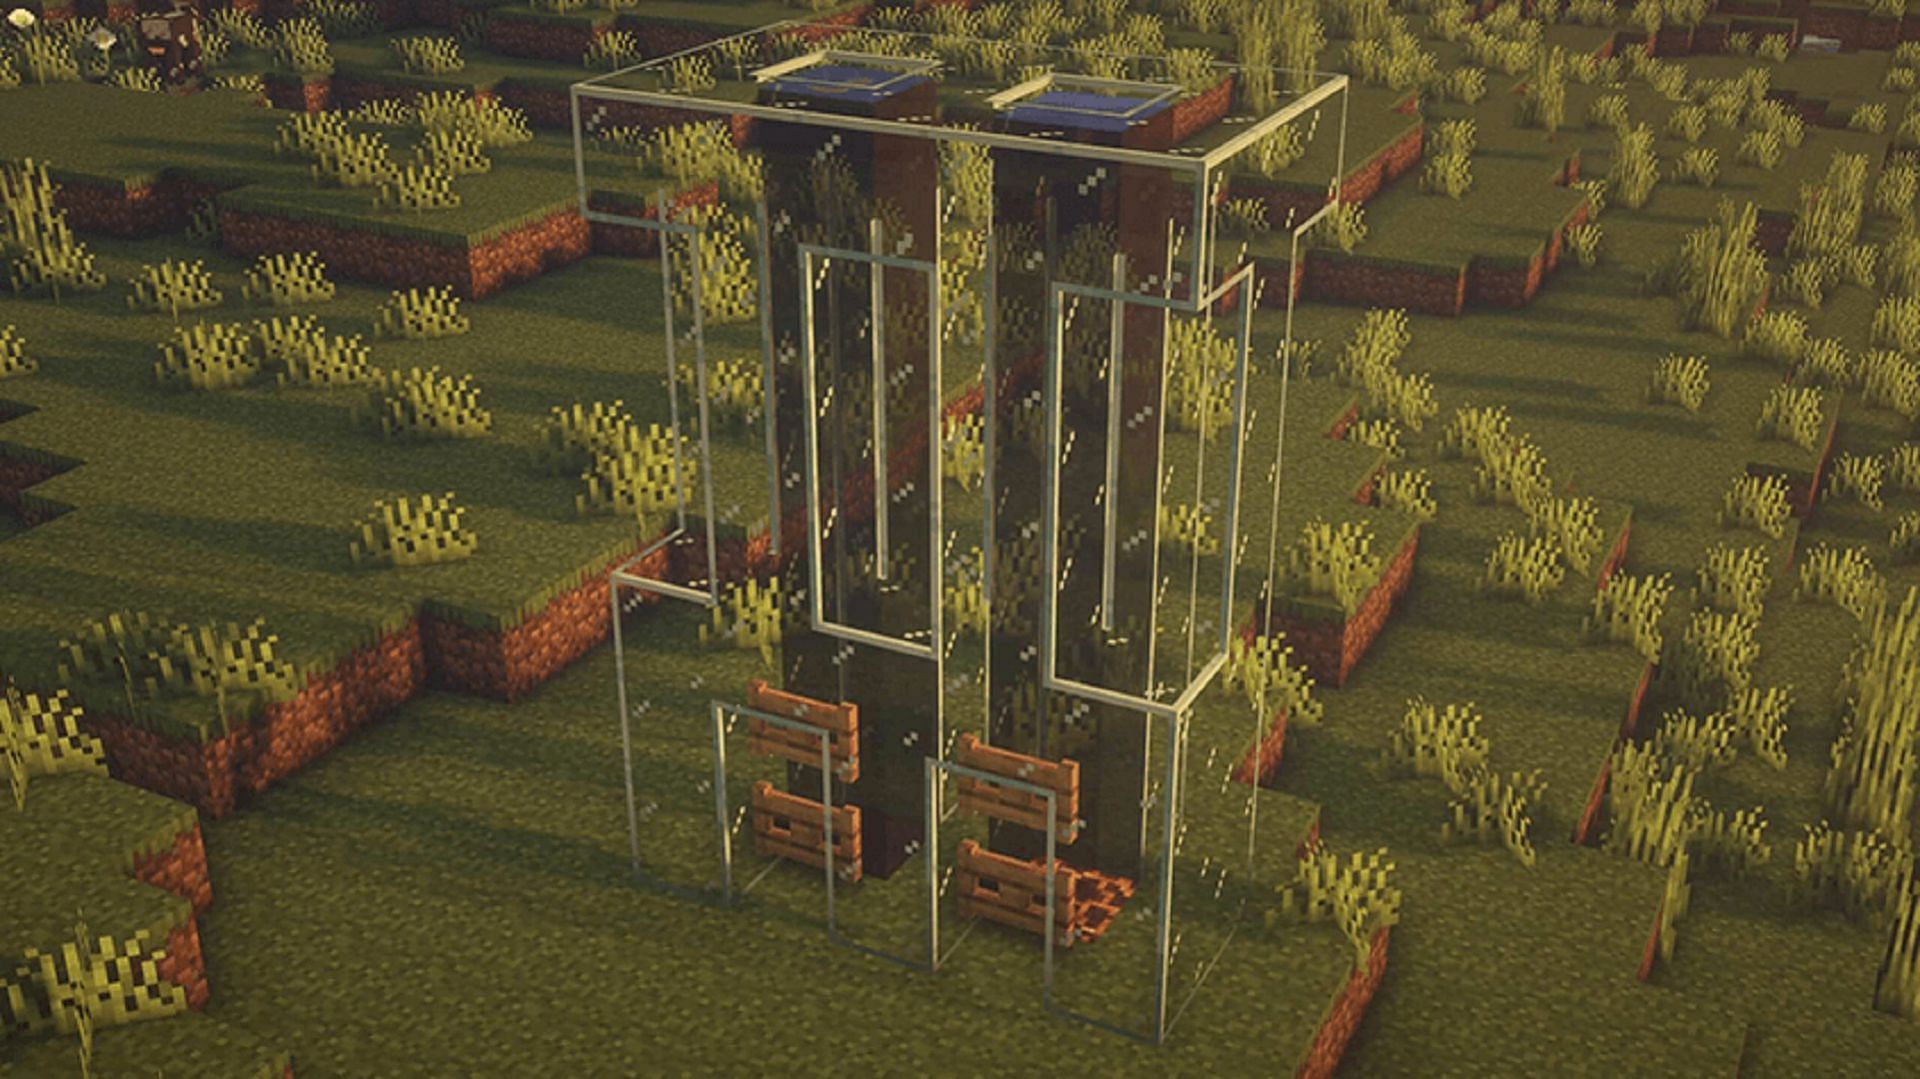
Water elevator is an effective means of reaching high or low-reaching areas quickly in Minecraft
For a basic water elevator in Minecraft, players will need a few materials. Buckets of water are, of course, mandatory. Players will also need building blocks to create the exterior of the elevator. Many players use glass to see through the elevator, but any solid block will do the job just fine.
Players will also need a magma block and a soul sand block in order to expedite the speed of the elevator. A door or an item frame can also be helpful, depending on the design of the elevator itself.
Steps to building a basic water elevator
- Construct three towers of one block of width (One on top and two below and to its sides). This should leave a one-block-wide hole between all three towers. Leave this empty, as this will be where the water will be placed.
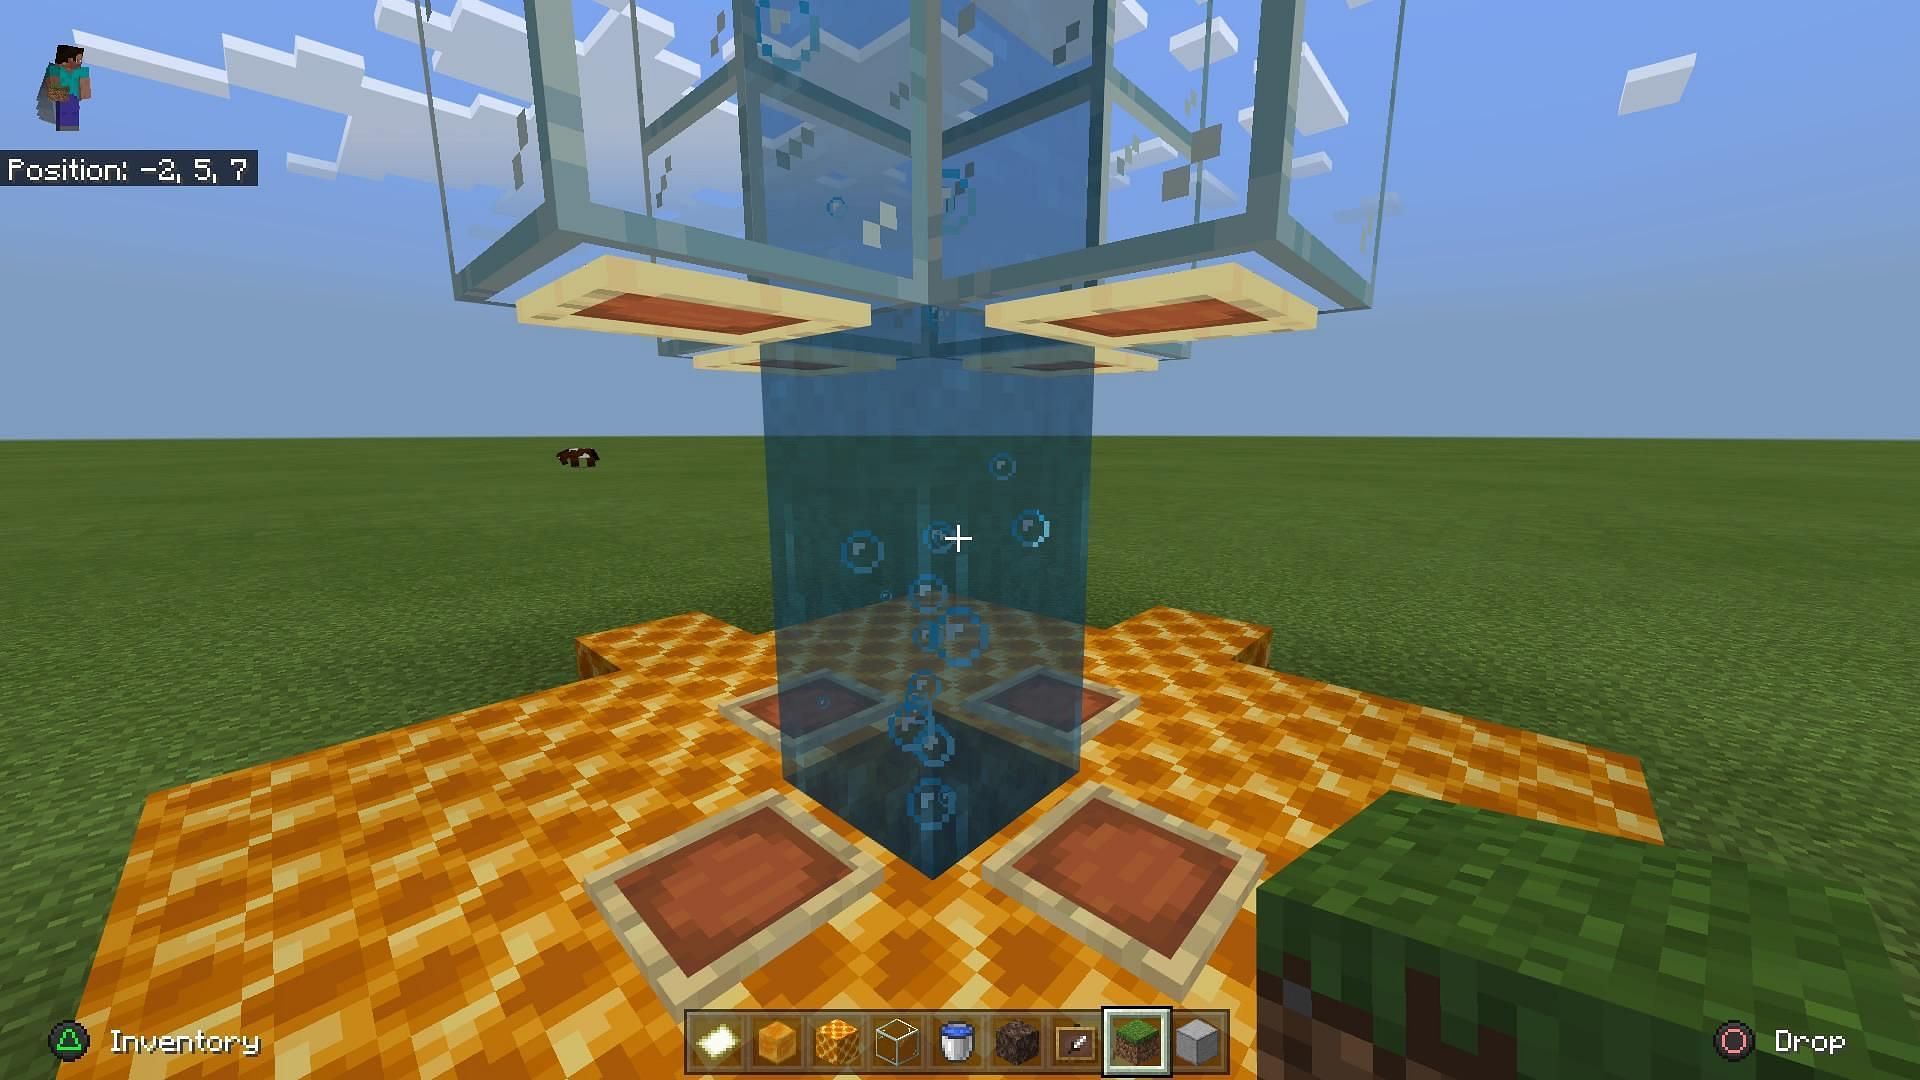
- At the bottom of the tower, players can place a door to the elevator or at least place an item frame at the base. This will prevent the water from leaking from the elevator. It's also possible to dig downward into the central column from Step 1 so that the water can safely fall into the hole.
- Add the fourth tower of blocks, one block wide, above the door or item frame.
- At the top of the structure, place a water bucket into the central column. This will cause the water to flow downward. However, if the door or item frame is placed, the water won't leak and will infinitely flow.
- Follow the steps above to create a second elevator. Once the two are completed, players will want to place a magma block at the bottom of one of the water flows and a block of soul sand below the other. The soul sand will allow players to rise through the water quickly via bubbles. Conversely, Minecraft players will be pulled downwards in the water elevator using the magma block.
This is the basic premise of creating a water elevator system. Players can additionally use signs to mark which direction the elevators go.
To use these elevators, Minecraft players simply need to step inside the water. The soul sand and magma blocks should whisk players either upwards or downwards, depending on which elevator is used.
This makes water elevators an incredibly effective means of reaching high or low-reaching areas quickly without drowning or requiring the construction of a large number of stairs.

Uncover new worlds with our Minecraft Seed Generator!