
'%20x='0'%20y='0'%20height='100%25'%20width='100%25'%20%0A%20%20%20%20%20%20%20%20%20%20xlink%3Ahref='data:image/jpg;base64,/9j/2wBDAAYEBQYFBAYGBQYHBwYIChAKCgkJChQODwwQFxQYGBcUFhYaHSUfGhsjHBYWICwgIyYnKSopGR8tMC0oMCUoKSj/2wBDAQcHBwoIChMKChMoGhYaKCgoKCgoKCgoKCgoKCgoKCgoKCgoKCgoKCgoKCgoKCgoKCgoKCgoKCgoKCgoKCgoKCj/wgARCAAGAAoDASIAAhEBAxEB/8QAFgABAQEAAAAAAAAAAAAAAAAAAAME/8QAFQEBAQAAAAAAAAAAAAAAAAAABAX/2gAMAwEAAhADEAAAAK6iW3//xAAhEAABAgUFAQAAAAAAAAAAAAADAQUAAgQHEgYRExQyof/aAAgBAQABPwB3um5hAYgW9rRRJ6mpst/sU99A9cXLpWimJimSoWZI/8QAGREAAgMBAAAAAAAAAAAAAAAAAQMABBES/9oACAECAQE/AF2nEb1P/8QAFxEBAQEBAAAAAAAAAAAAAAAAAQMAEf/aAAgBAwEBPwCsZjwN/9k='%3E%3C/image%3E%3C/svg%3E)
Minecraft's distinctive blocky and pixelated textures and visuals have become iconic hallmarks of the game. The developers have maintained the same visuals for years, and everybody loves it. However, if the player wishes to enhance the graphics to experience something new and fresh and better utilize their system resources, they can use visual mods.
Among the many available mods, two prominent choices are Iris shaders and Optifine. Each of these mods boasts its unique set of features, with shader support being a shared attribute between them

Install shaders in Minecraft 1.20
Chart New Territories with the ultimate Minecraft Seed Generator!
The highly anticipated Trails & Tales update has just been released, leading to a significant shift in players migrating to the latest version. However, those who have become accustomed to using shaders still desire to experience the game with their preferred visuals intact.
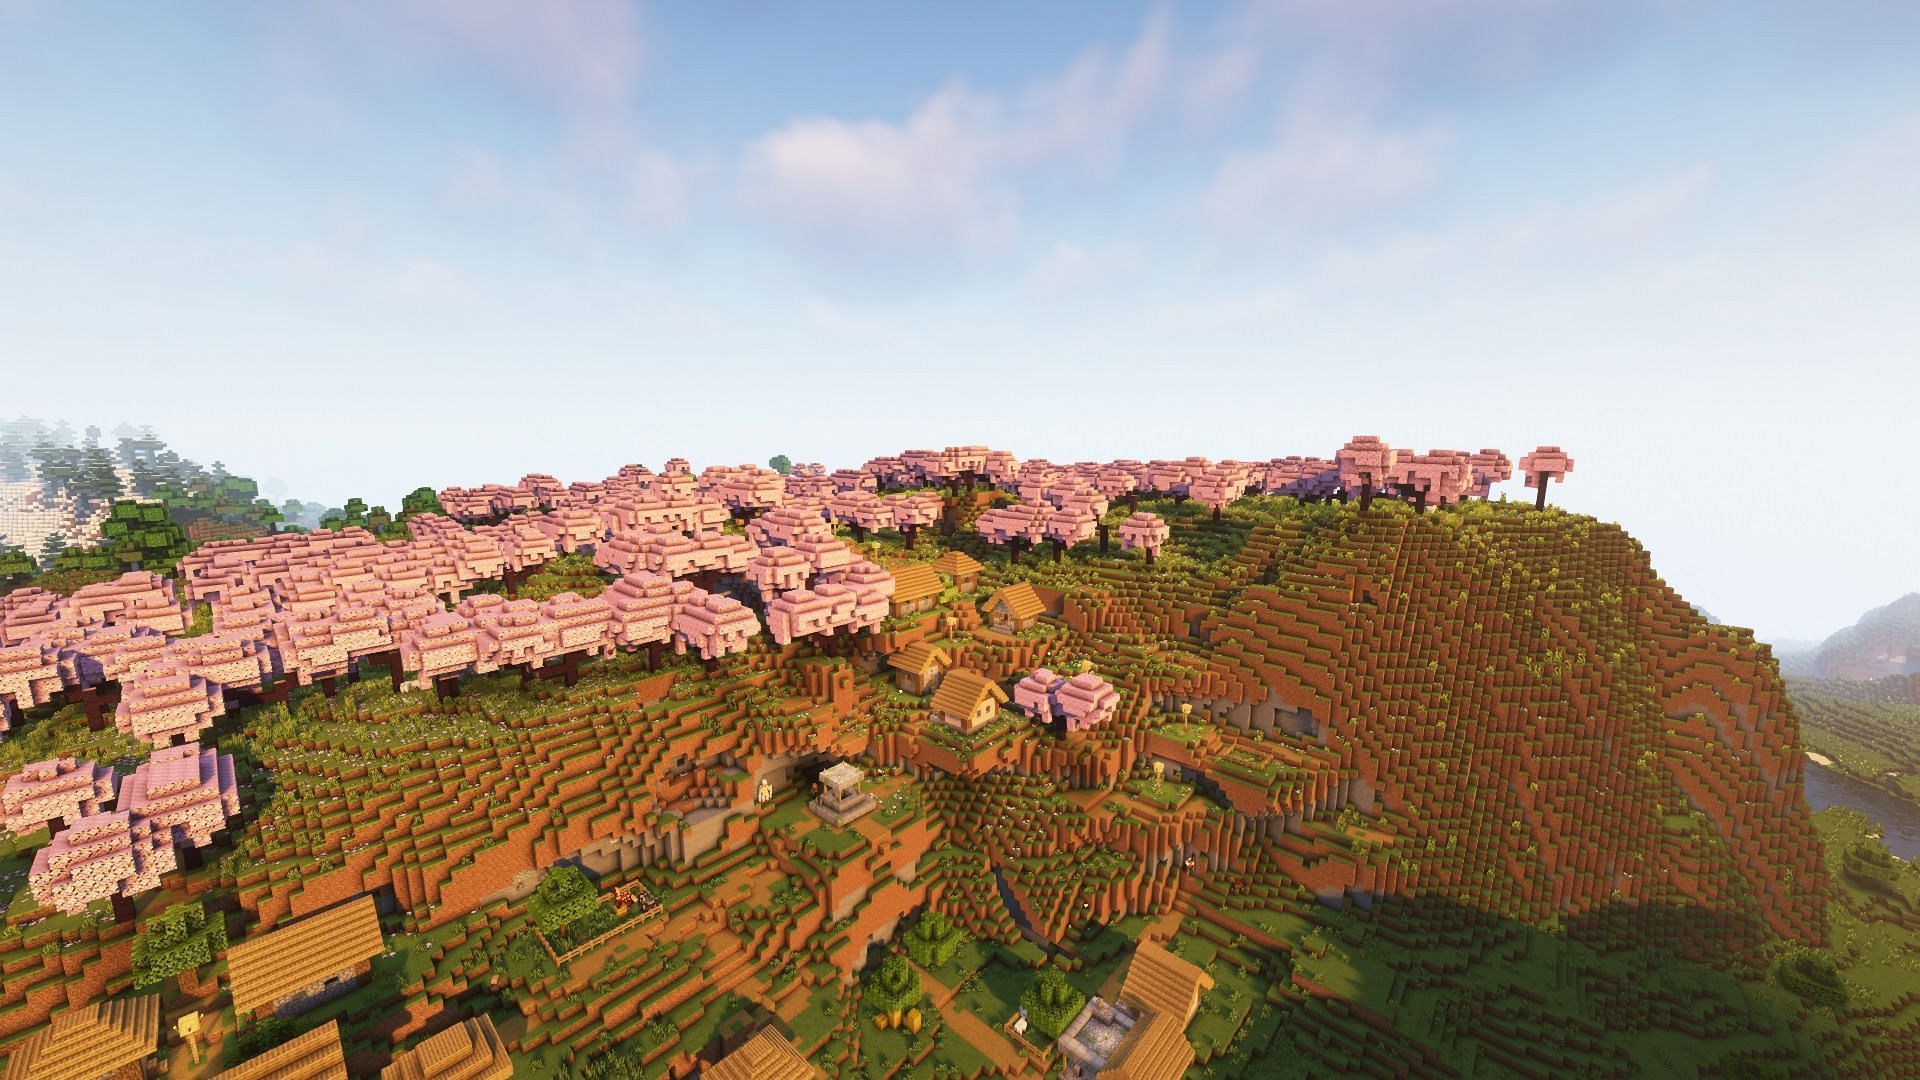
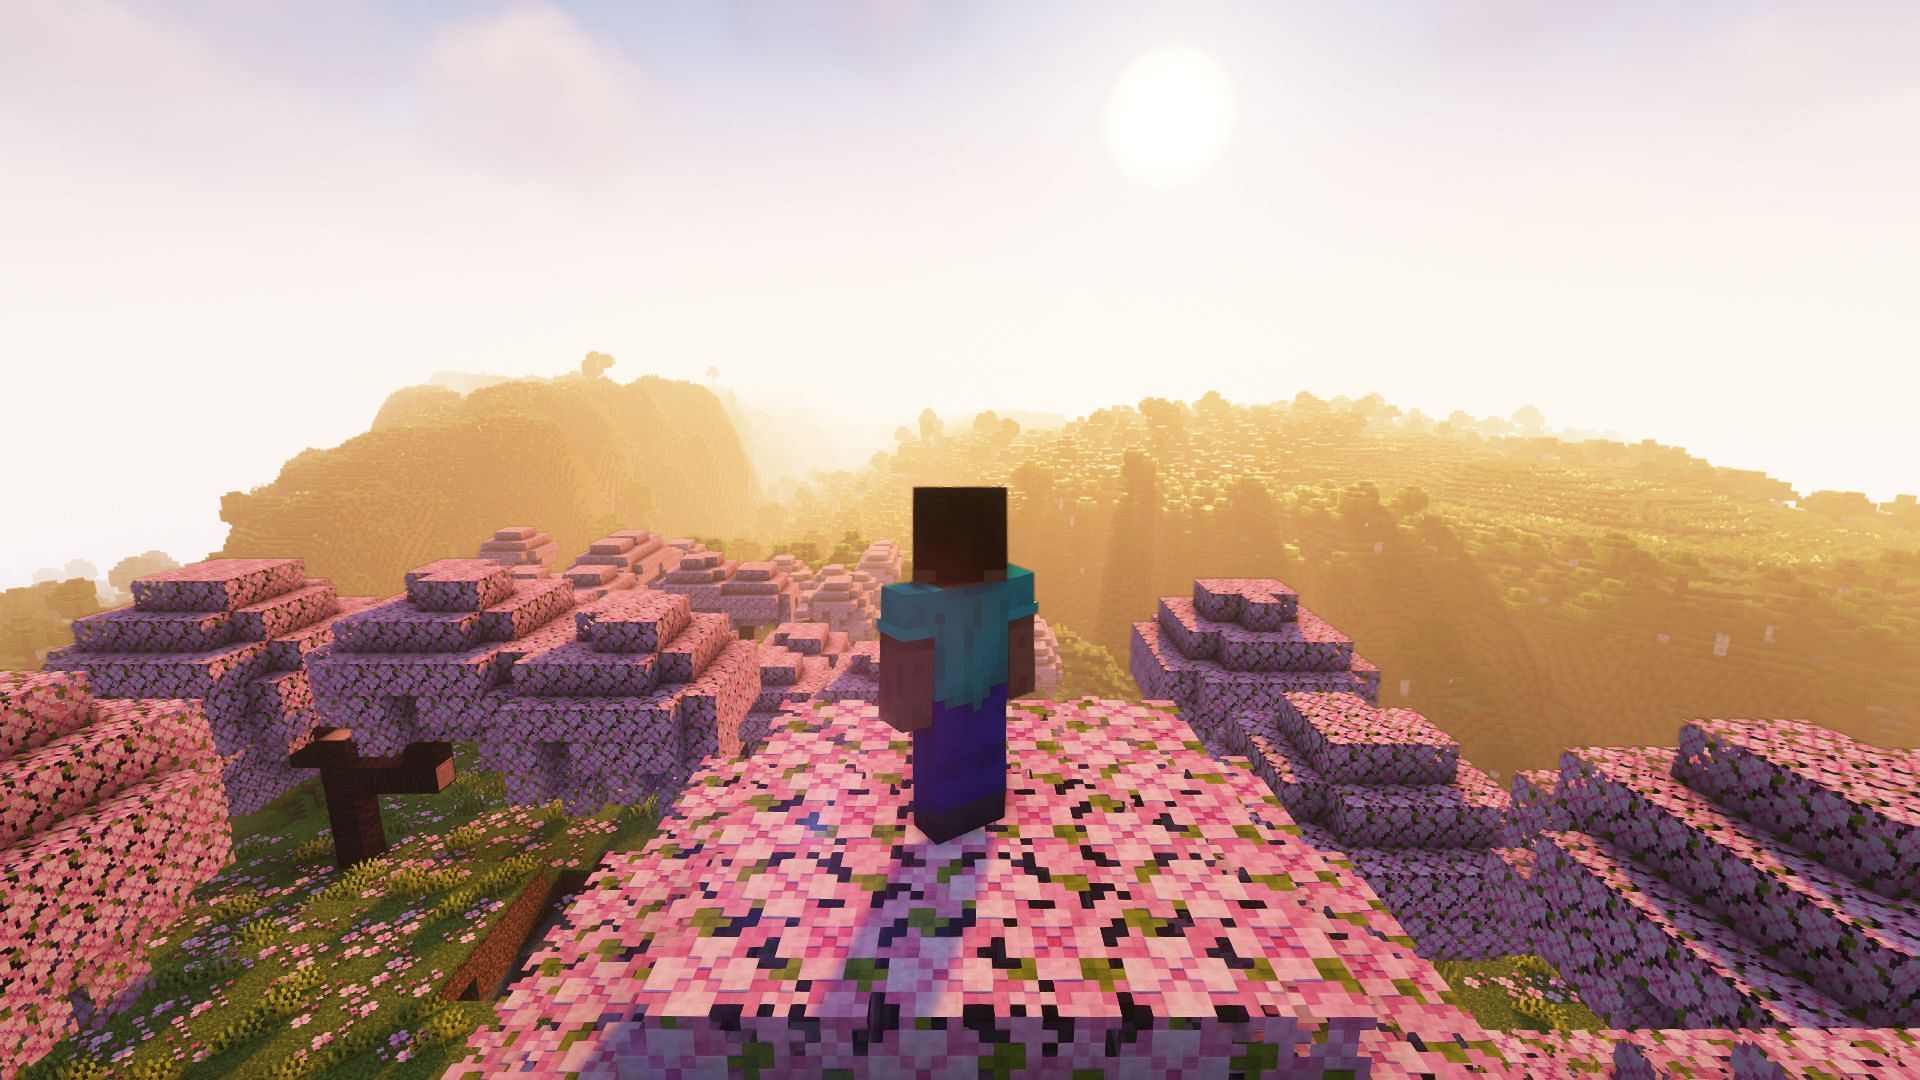
The developers of Iris shaders have already released an updated version of their mod that is fully compatible with the latest Minecraft release. With this, players can experience the cherry groves and hatch the sniffer eggs while being able to customize the visual quality according to their preferences.
How to install
The installation process for Iris shaders is extremely straightforward, as the developers provide a universal jar file on their official website. To install the mod, players can follow the detailed steps below:
Step 1: Visit the official webpage of Iris shaders and download the universal jar installer.
Step 2: Open the downloaded file using Java(TM) Platform Binary SE. Users must download and install the Java Development Toolkit if this option is missing.
Step 3: Once the installer is open, ensure that version 1.20 is selected and verify that the installation location is correct. Then, click on the install button.
The installer will proceed to download the necessary files and create a new installation of Minecraft 1.20 with Fabric and Iris shaders pre-installed. This new installation can be accessed and played directly from the official game launcher.
How to use shaders
With the installation process complete, players are now ready to enjoy and explore the world of Minecraft in a new light. To install a shader, players can follow the steps outlined below:
Step 1: Download a shader of choice from the internet. Some popular options include Complementary shaders, BSL shaders, and SEUS.
Step 2: Move the downloaded .zip file to the game's application data folder. To easily access this folder, press WIN+R and type: '%appdata%/.minecraft/shaderpacks'
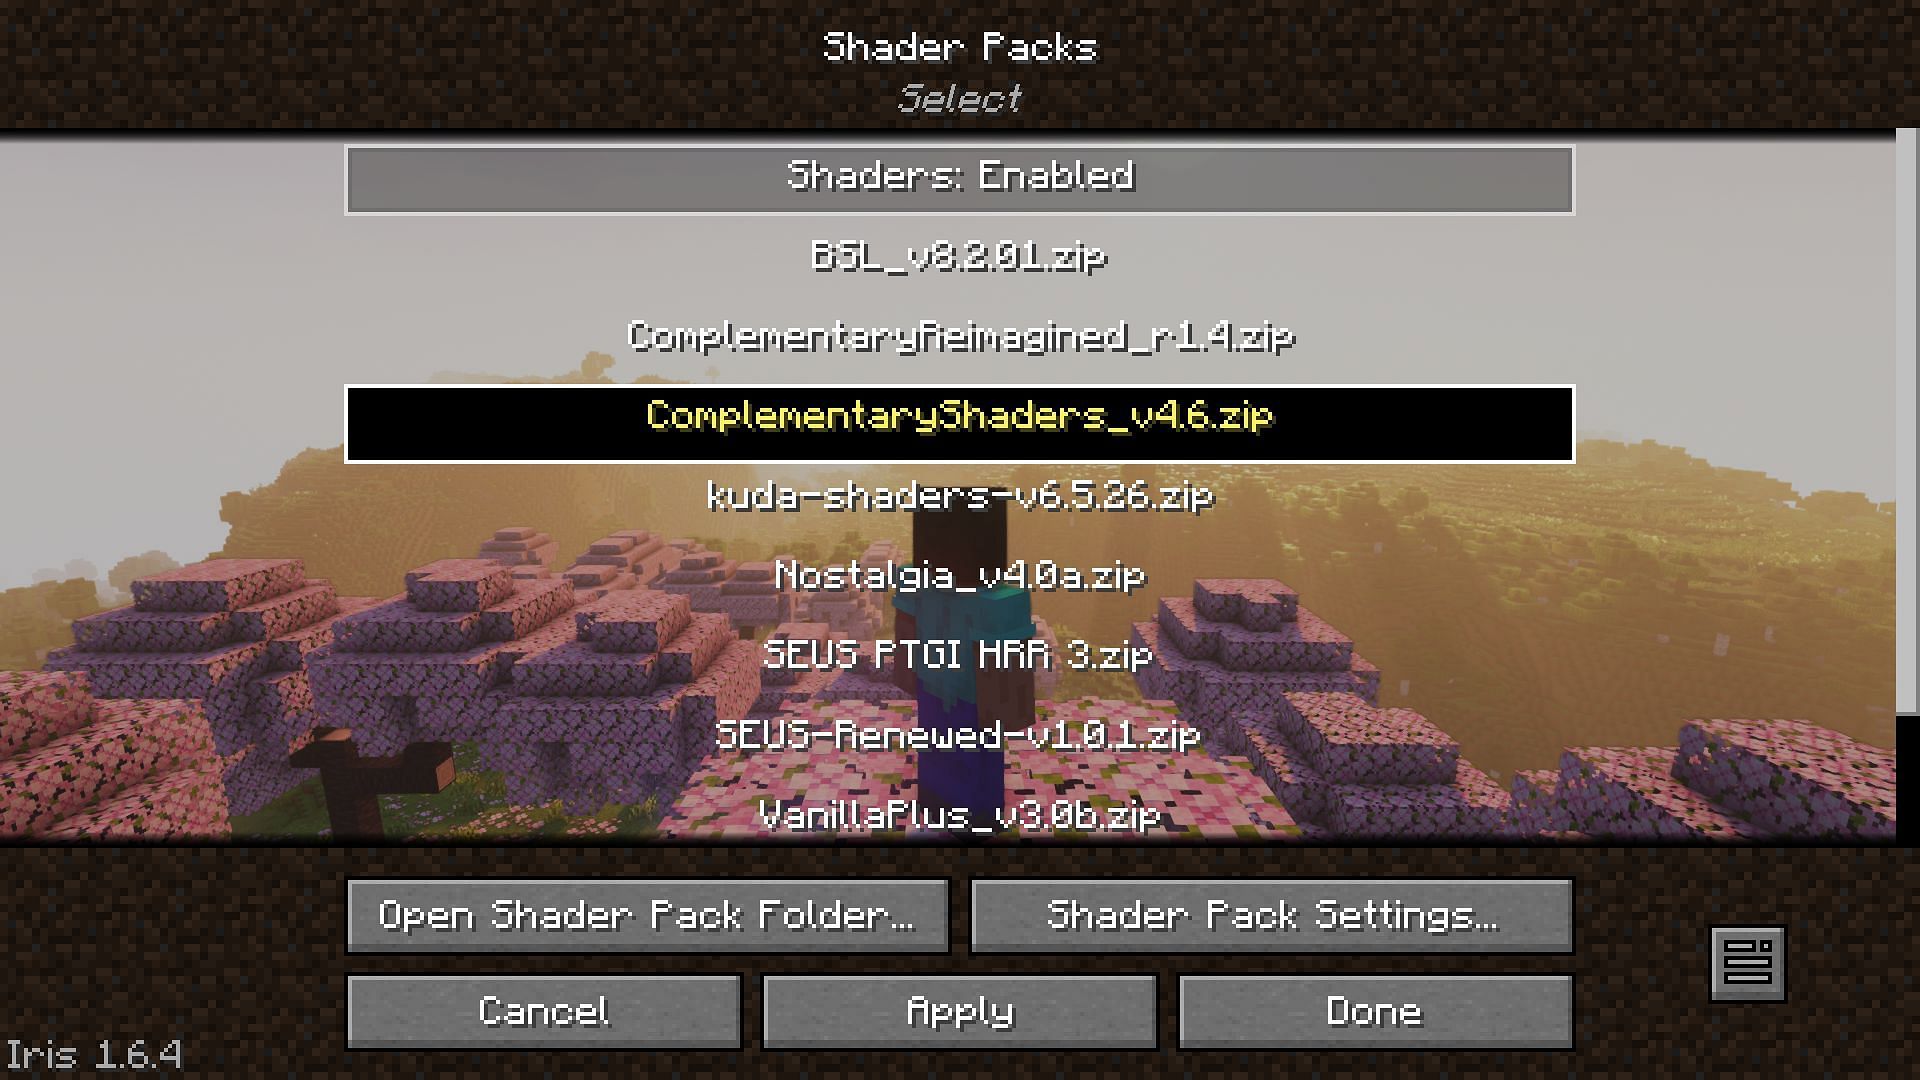
Step 3: Launch the 1.20 Iris installation and navigate to the options menu.
Step 4: Click on the video settings and select the Shader Packs tab.
Step 5: If the shader file is compatible with the game, it will appear in this section. Players can choose the shader to apply it. Additionally, they can adjust the shader pack settings according to their preferences.

Uncover new worlds with our Minecraft Seed Generator!