
'%20x='0'%20y='0'%20height='100%25'%20width='100%25'%20%0A%20%20%20%20%20%20%20%20%20%20xlink%3Ahref='data:image/jpg;base64,/9j/2wBDAAYEBQYFBAYGBQYHBwYIChAKCgkJChQODwwQFxQYGBcUFhYaHSUfGhsjHBYWICwgIyYnKSopGR8tMC0oMCUoKSj/2wBDAQcHBwoIChMKChMoGhYaKCgoKCgoKCgoKCgoKCgoKCgoKCgoKCgoKCgoKCgoKCgoKCgoKCgoKCgoKCgoKCgoKCj/wgARCAAGAAoDASIAAhEBAxEB/8QAFQABAQAAAAAAAAAAAAAAAAAAAAX/xAAVAQEBAAAAAAAAAAAAAAAAAAADBP/aAAwDAQACEAMQAAAAjVhYf//EACAQAAICAQMFAAAAAAAAAAAAAAECAxEEAAUGFSExMsH/2gAIAQEAAT8A4jyHqm4sMdsqOVQFZnZaez60B47al3yJZXC4VgE0TLXzX//EABkRAAIDAQAAAAAAAAAAAAAAAAECAAQRYf/aAAgBAgEBPwCmSzPvJ//EABkRAAEFAAAAAAAAAAAAAAAAAAABAgQRIf/aAAgBAwEBPwCRj6Q//9k='%3E%3C/image%3E%3C/svg%3E)
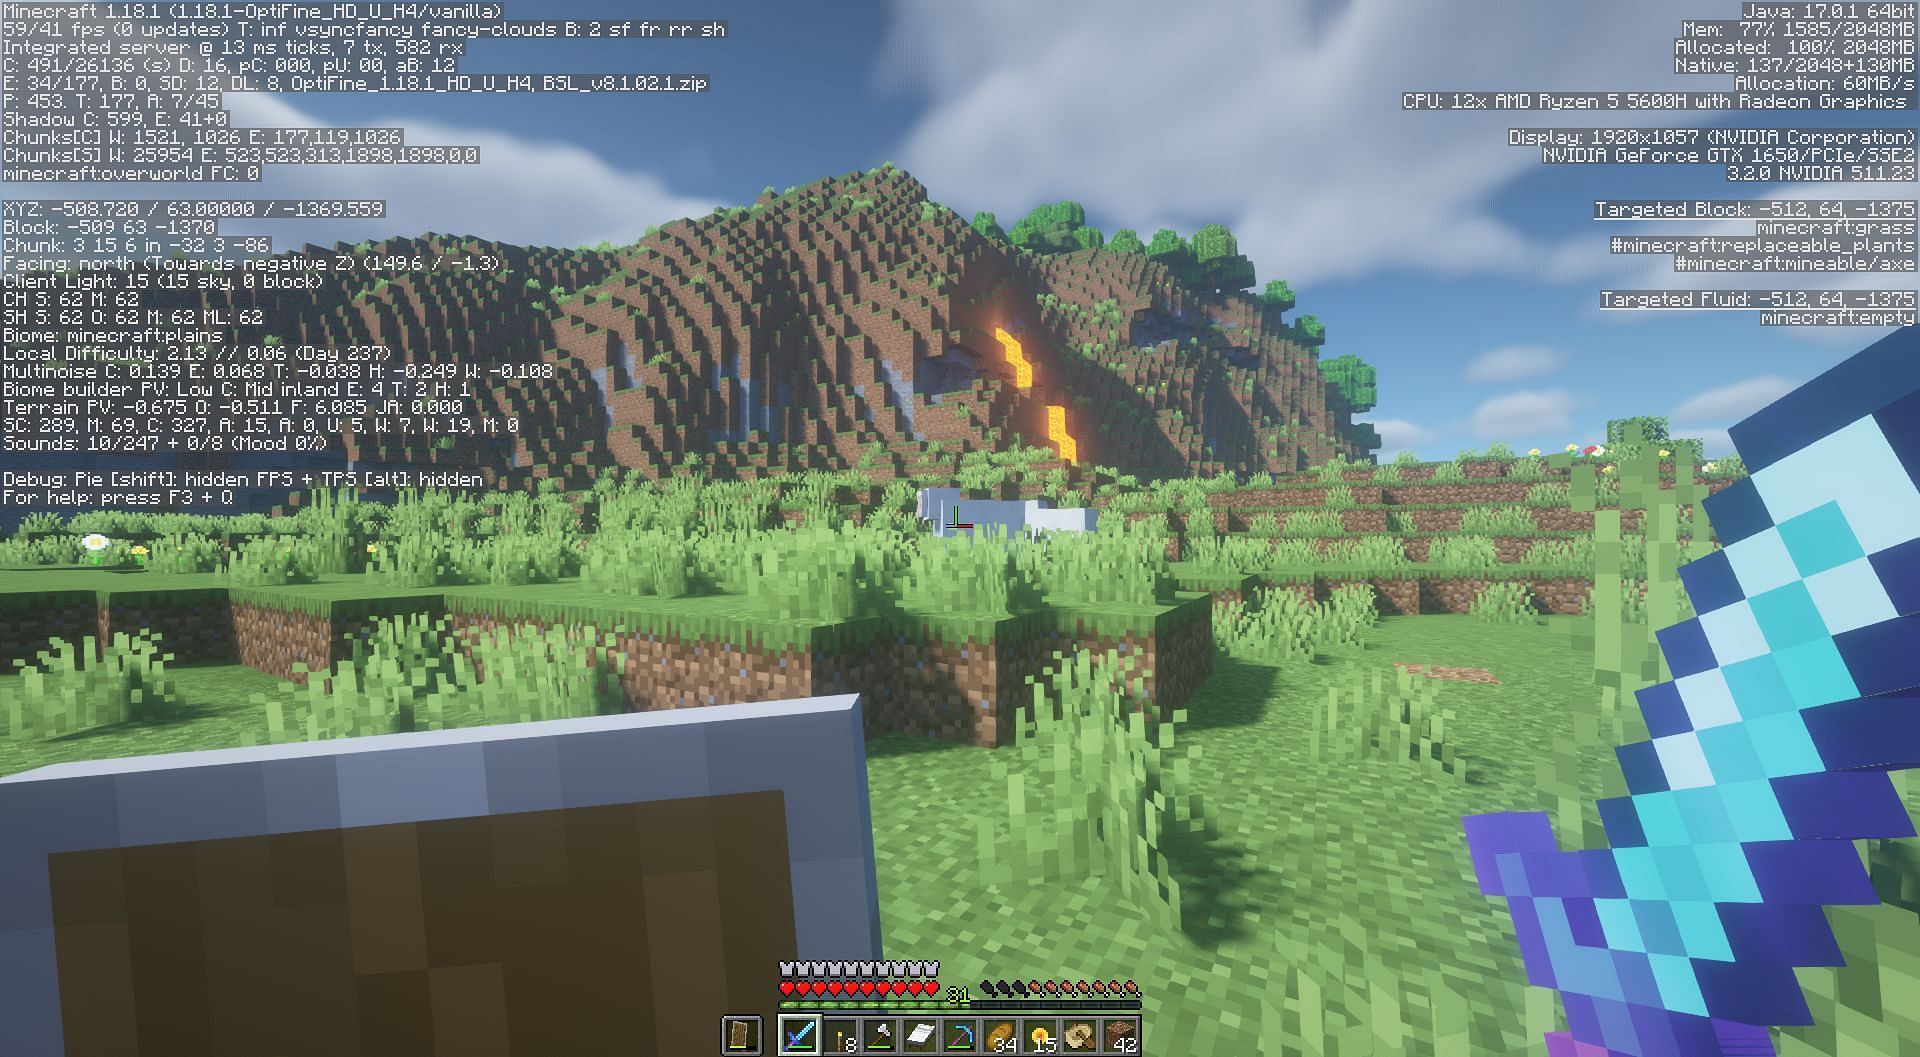
There is a useful screen in Minecraft Java Edition on which players can see several useful pieces of information about the game. It is called a "debug screen" and can be activated by pressing the F3 button. Essentially, it overlays a bunch of data onto the HUD itself.
The information can be quite hard and confusing to see as it is filled with several numeric values and lines that change as the player moves around in their world. If you're new to the game, this guide will help you focus on the important information present on the debug screen and use it efficiently.

All the useful information for beginners on Minecraft's F3 debug screen
First, players will notice that the overlay is split in two rows on either side of the screen. They must first focus on the left side since it has much more information.
Chart New Territories with the ultimate Minecraft Seed Generator!
Left side of the debug screen
1) FPS counter

The first useful information on the top-left side of the debug screen overlay is the FPS counter, which will show the current and average framerate of the game. Since Minecraft already has this useful feature, players will not need any third-party applications to see how smoothly their game is running.
2) Coordinates and direction
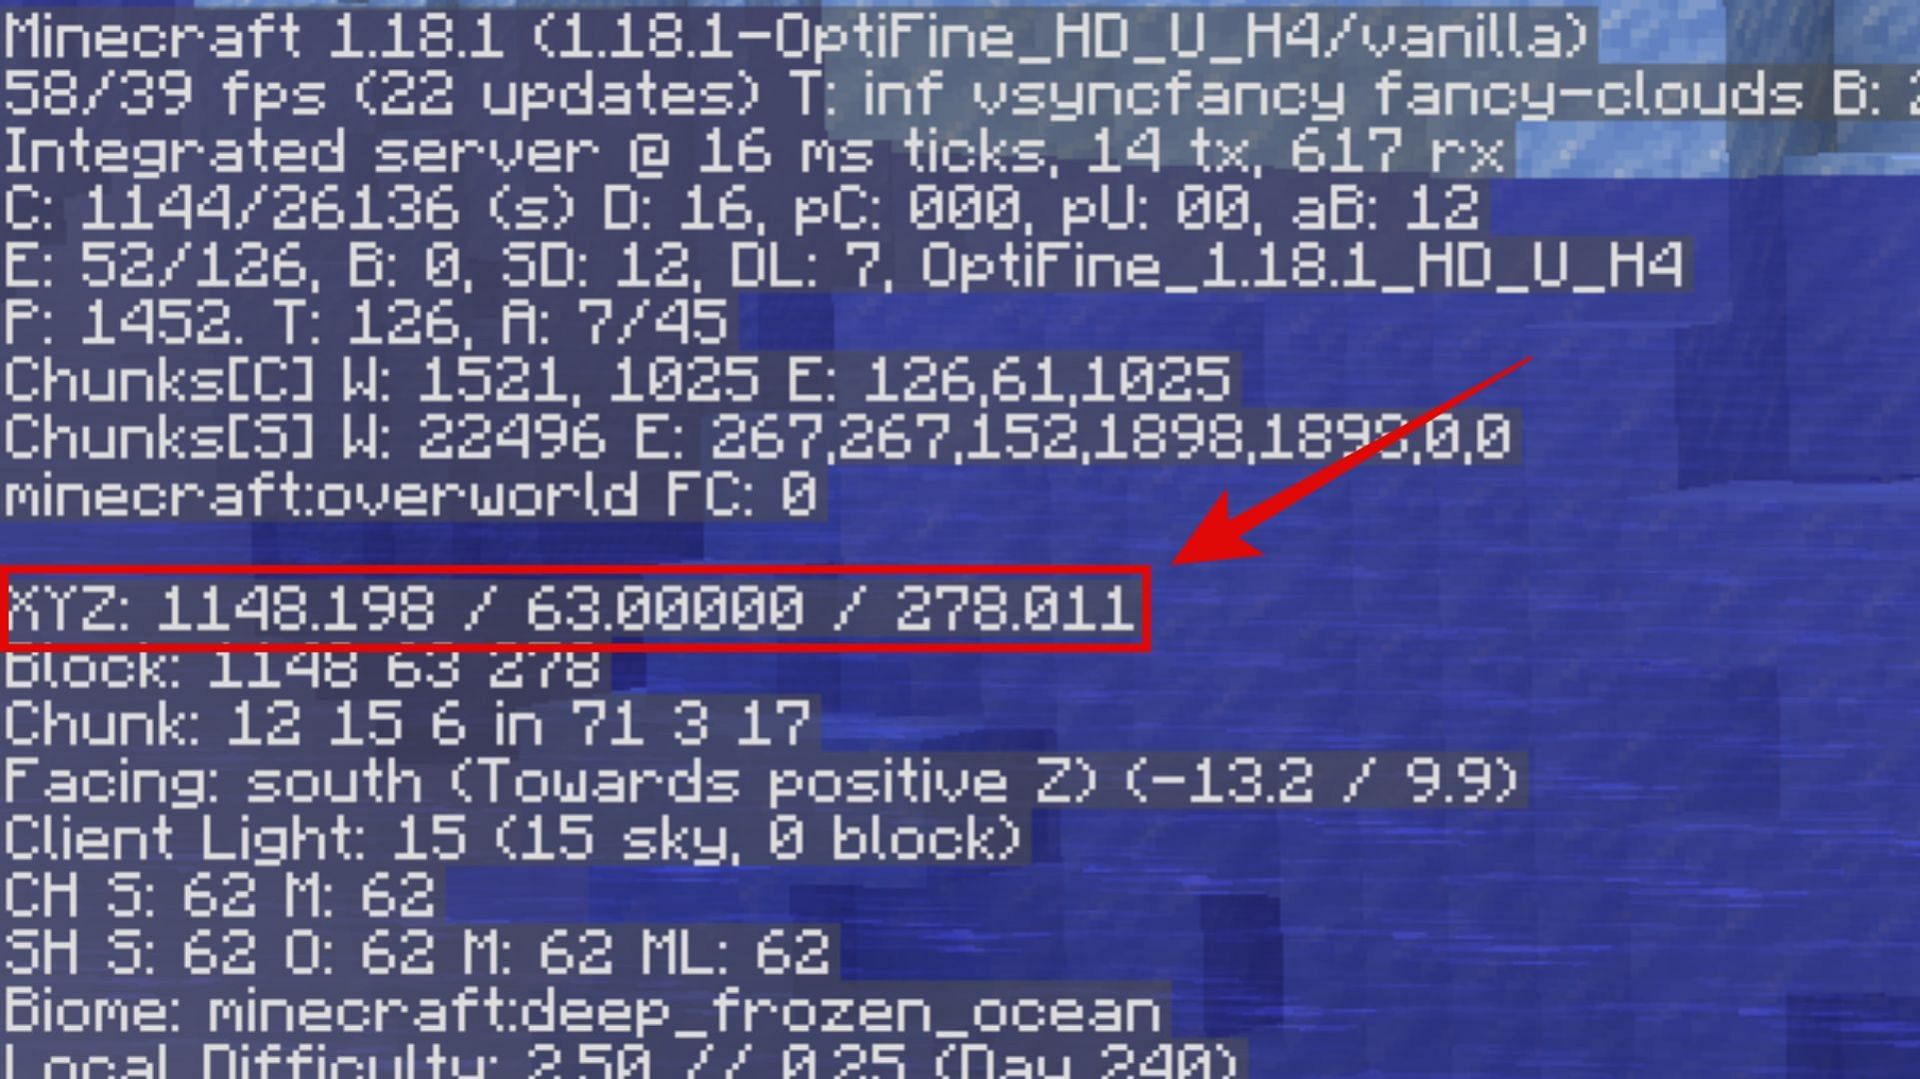
The second chunk of information on the left side will start with "XYZ." This is essentially a player's coordinates in the world, which is arguably the most important piece of information beginners would need while playing.
Since Minecraft doesn't have a map, players can note down the coordinates of different strucutres and their base so that they never get lost.
Additionally, they can also look at which cardinal direction they are looking towards. This information will be presented in two lines below the coordinates starting with "Facing:" followed by the direction.
3) Client light
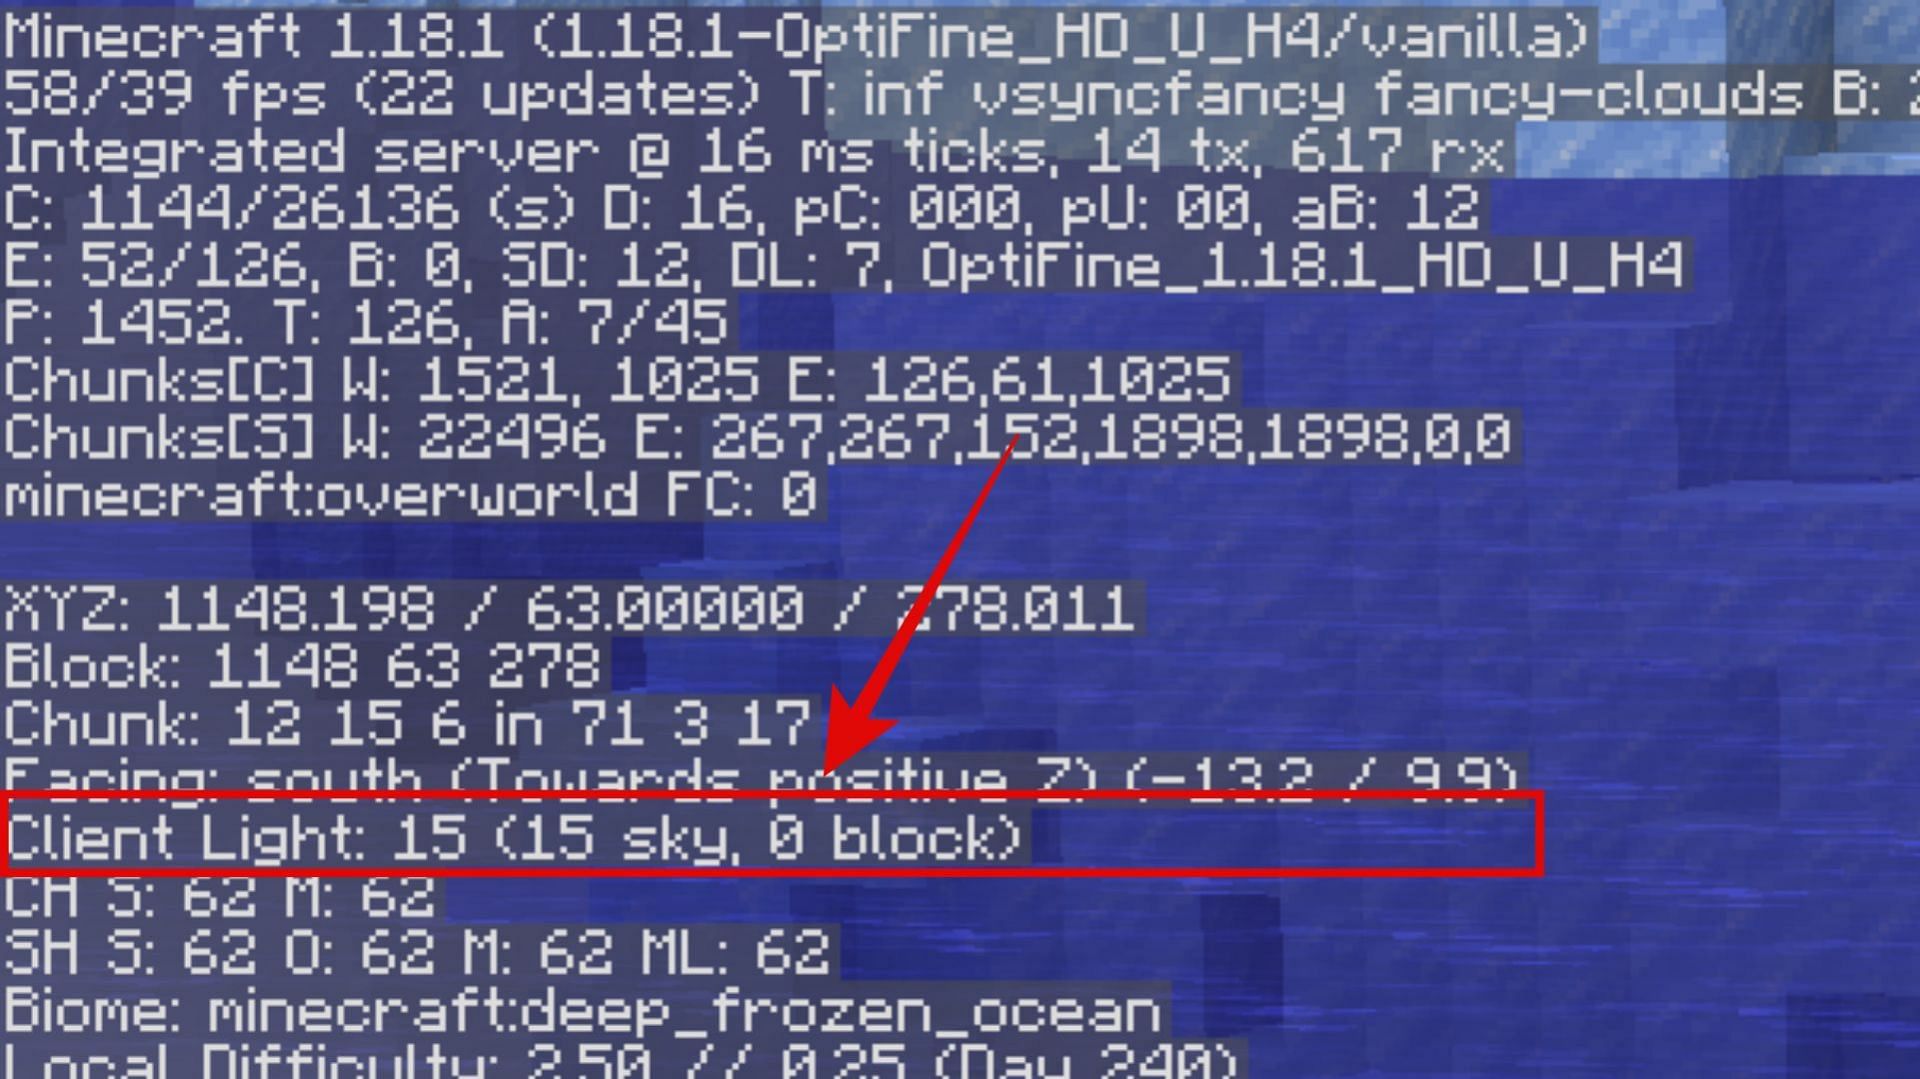
This is the second-most important piece of information for players since it determines the level of light of each block they stand on. This information will be present right below the cardinal directions.
It will start with "Client Light:" followed by a number that will range from 15 to 0, indicating the amount of light level of any block. This is extremely helpful for spawn-proofing an area, especially one that's being used to build a homebase in.
4) Type of biome
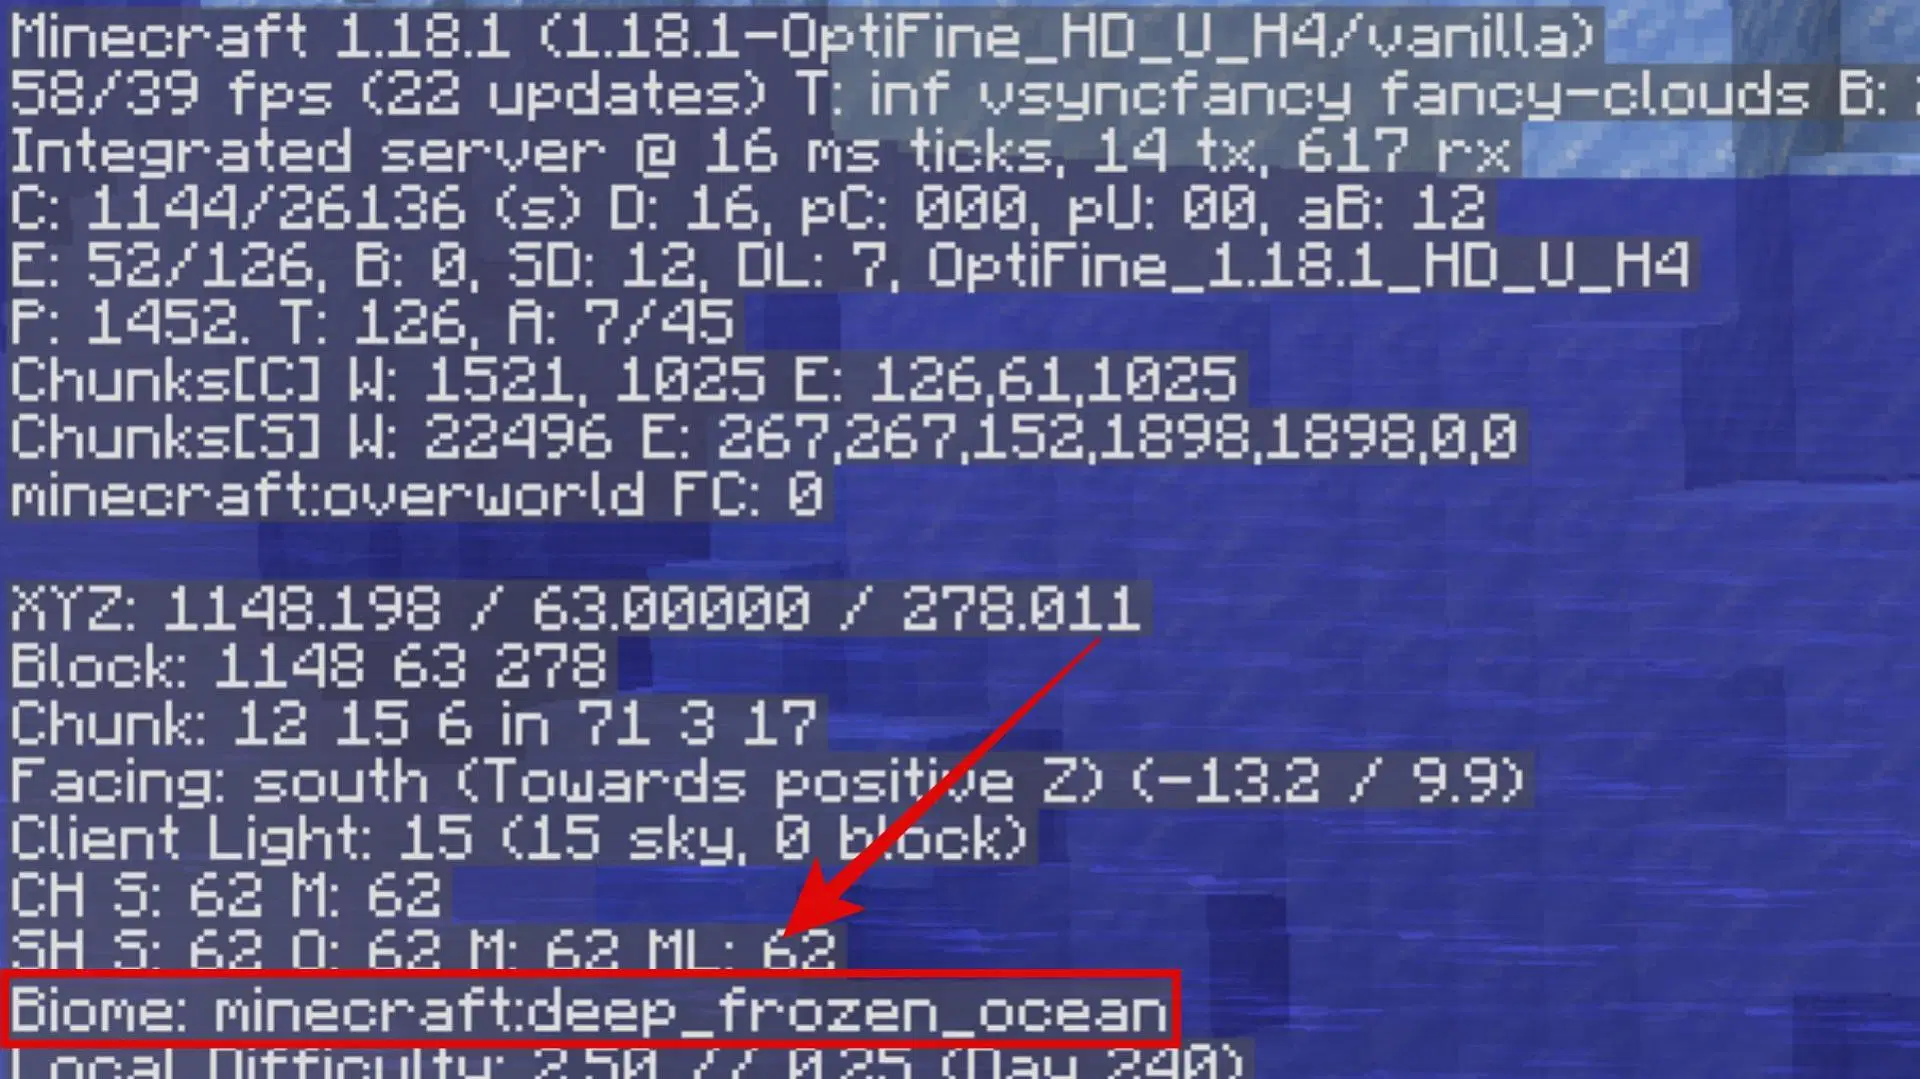
Even though players can simply look around to experience a biome on their own, beginners might not recognize or know which one they are in. In such cases, they can simply check this in the debug screen, where the biome information will be present two lines after the client light information.
Right side of the debug screen
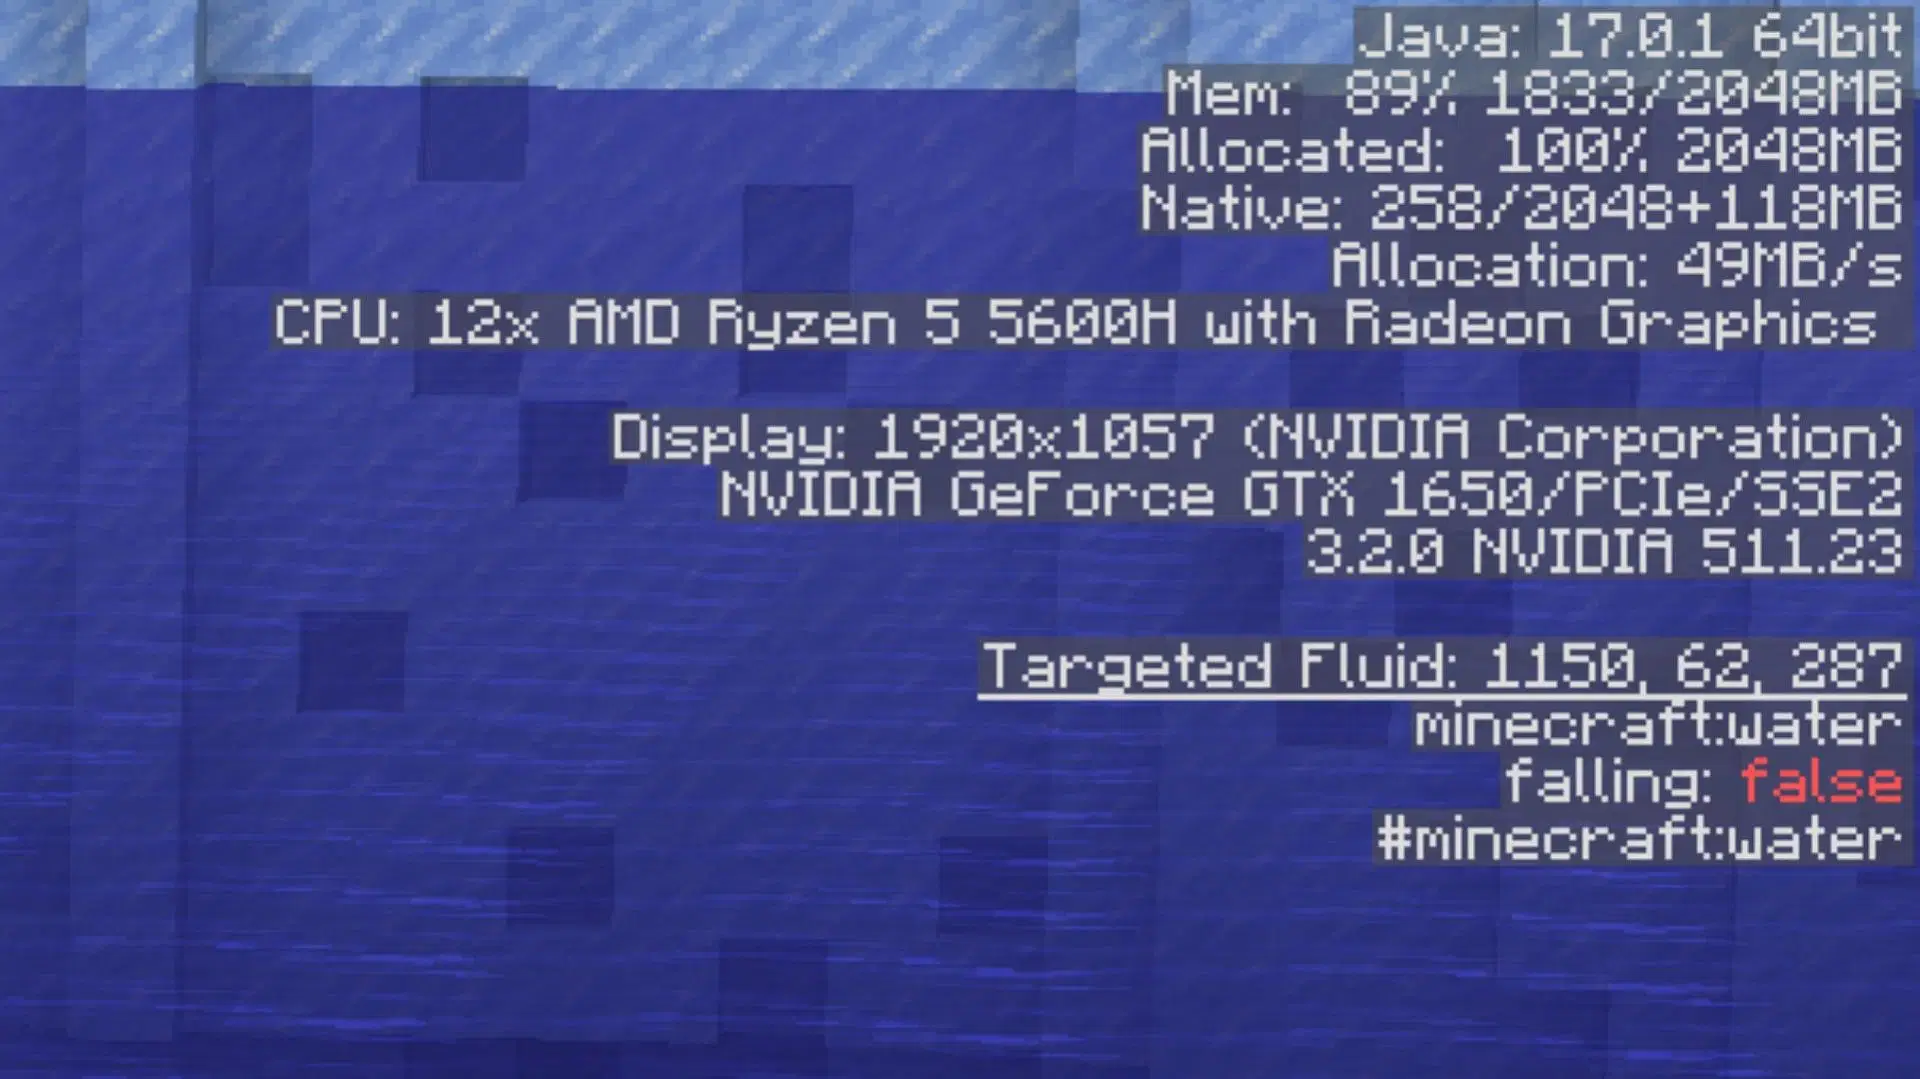
The right side of Minecraft's debug screen does not have much information. It mainly shows the specifications of the device the game is running on and how many resources are being used. Players can see the amount of RAM that the title is consuming, along with the GPU and CPU usage.
Additionally, they can point their crosshairs at any block and look at their NBT values and their different states in Minecraft.

Uncover new worlds with our Minecraft Seed Generator!