
'%20x='0'%20y='0'%20height='100%25'%20width='100%25'%20%0A%20%20%20%20%20%20%20%20%20%20xlink%3Ahref='data:image/jpg;base64,/9j/2wBDAAYEBQYFBAYGBQYHBwYIChAKCgkJChQODwwQFxQYGBcUFhYaHSUfGhsjHBYWICwgIyYnKSopGR8tMC0oMCUoKSj/2wBDAQcHBwoIChMKChMoGhYaKCgoKCgoKCgoKCgoKCgoKCgoKCgoKCgoKCgoKCgoKCgoKCgoKCgoKCgoKCgoKCgoKCj/wgARCAAHAAoDASIAAhEBAxEB/8QAFQABAQAAAAAAAAAAAAAAAAAABAb/2gAIAQEAAAAAgGf/xAAUAQEAAAAAAAAAAAAAAAAAAAAE/9oACAECEAAAAGf/xAAUAQEAAAAAAAAAAAAAAAAAAAAF/9oACAEDEAAAADv/xAAhEAABAwMEAwAAAAAAAAAAAAABAgMEAAYSBRMkMUGD0f/aAAgBAQABPwCHeeswIjcSNMTst9F5sOrSPAyUOqTfNxYjltn0N/K//8QAGREAAgMBAAAAAAAAAAAAAAAAAQIDBDEA/9oACAECAQE/AK9hjM8Rxc7/xAAXEQADAQAAAAAAAAAAAAAAAAAAAQJB/9oACAEDAQE/AKen/9k='%3E%3C/image%3E%3C/svg%3E)
Minecraft Java Edition has a special feature called the debug screen. The Java version of the game is the first iteration of the popular sandbox game. To this day, there are some exclusive features that are only present in this version and give players an edge over those from other versions.
The debug screen essentially has a number of intricate details about the game and the system that it is running on. This feature is primarily for developers that are working on making the game. This screen is activated by pressing the 'F3' button on the keyboard.
The amount of details and written material that shows up on the debug screen can be confusing for many. Here are a few useful things that players should look out for in this menu.

Chart New Territories with the ultimate Minecraft Seed Generator!
Top 5 things like biomes and directions that beginners should look for in Minecraft Java Edition's debug screen
5) Biome
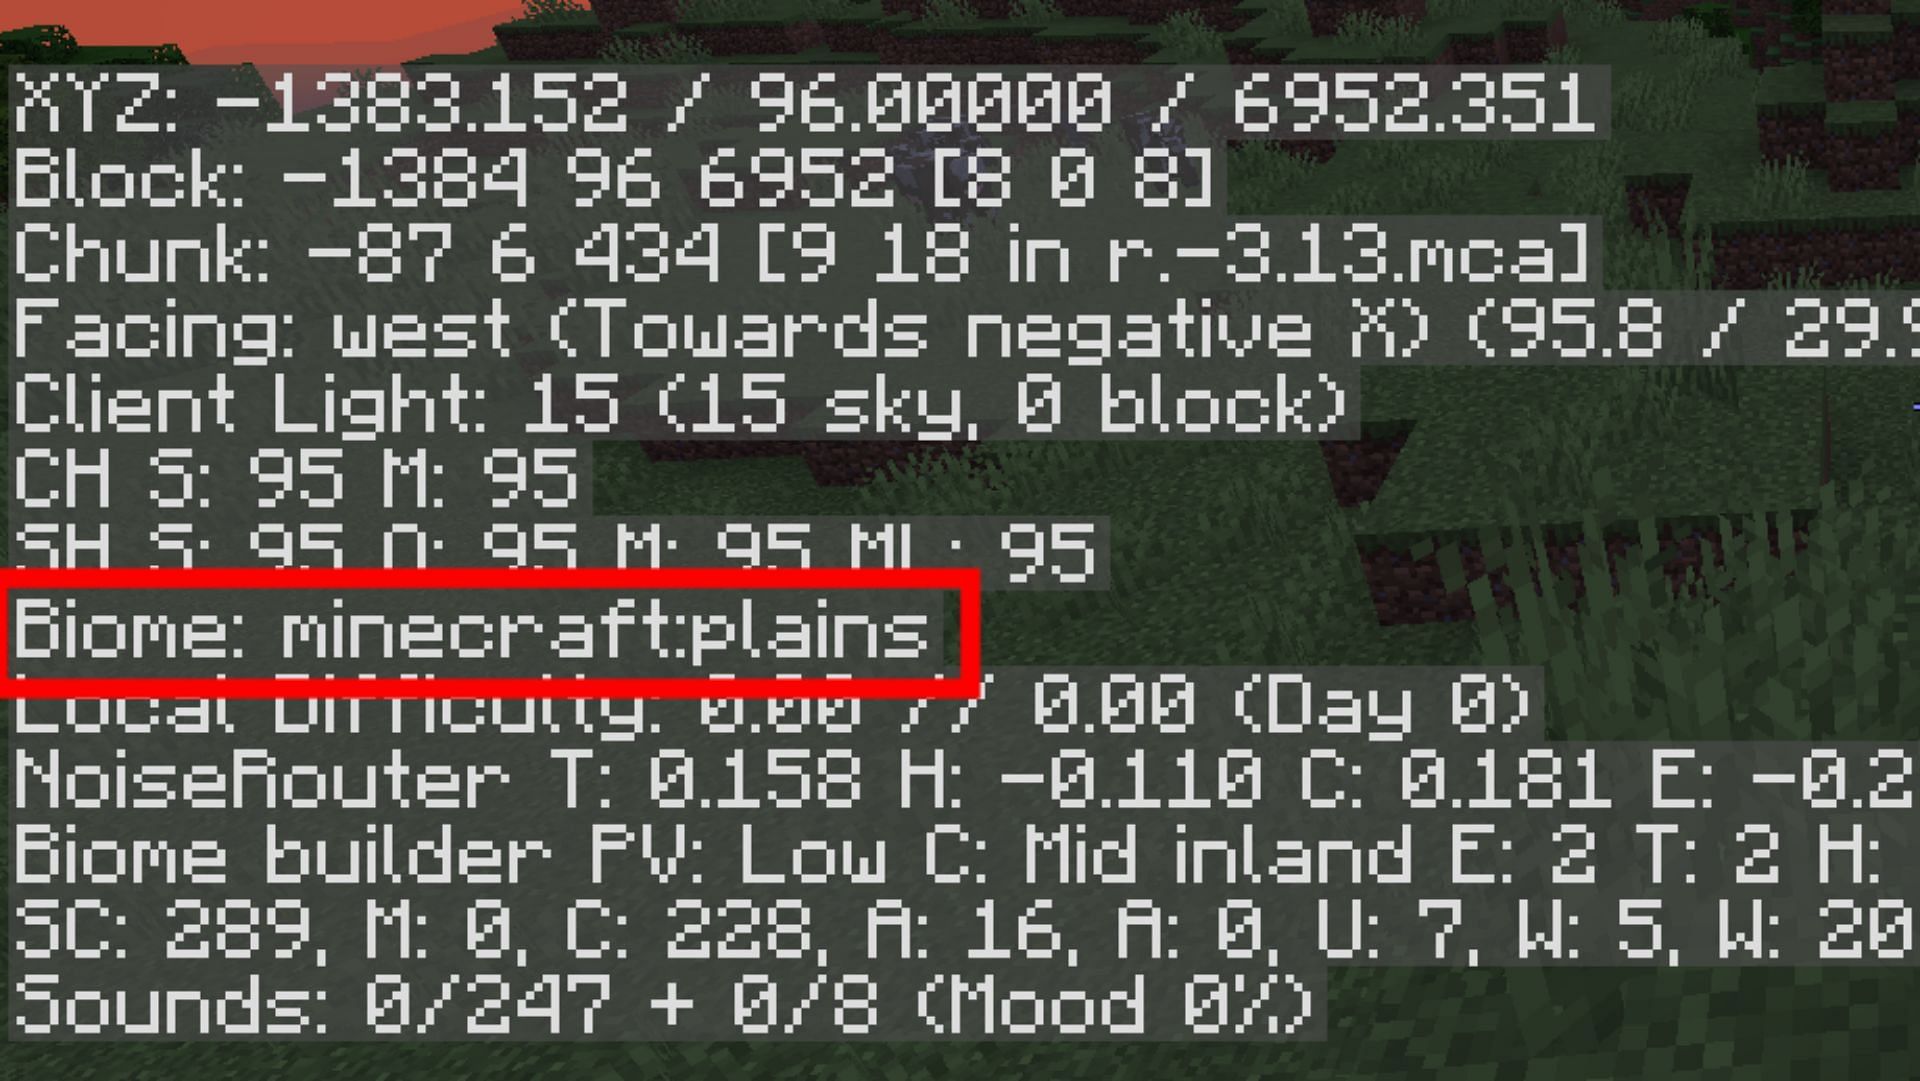
When players are normally playing in the massive block-filled world, they will easily be able to identify the type of biome they are in. Each Biome has a clear look which is quite distinguishable. However, there are instances where players won't be able to tell which biomes they are in.
For example, players won't be able to tell where the biome changes, and when they've stepped into a deep cave system. This is where the debug screen comes in handy. Players can look for 'Biome' on the left hand side of the screen to find the biome they are currently in.
4) FPS
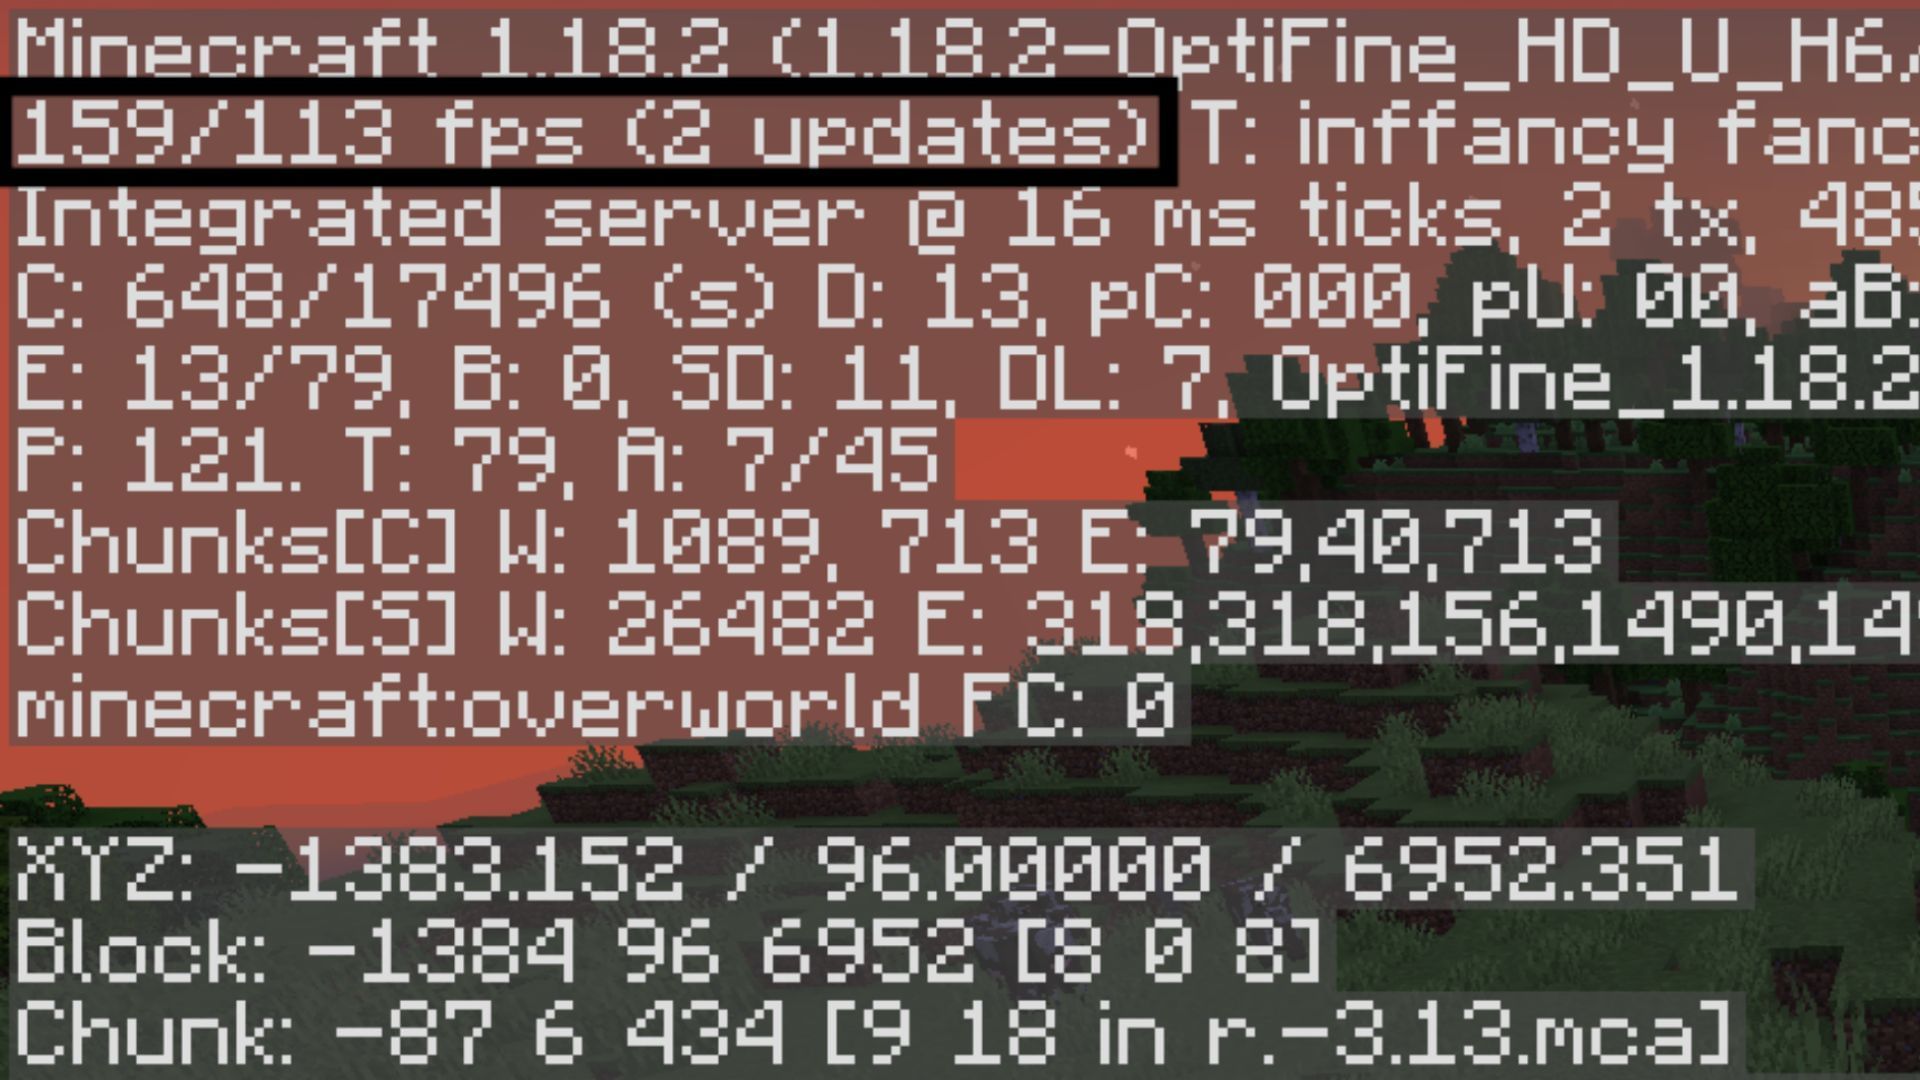
Although there are many third-party apps and mods that can be used to see the FPS (frames per second) on the screen while playing the game normally, it can also be seen through this feature. Players can simply press F3 and find their FPS in the top left corner, right below the version of the game.
3) Facing direction
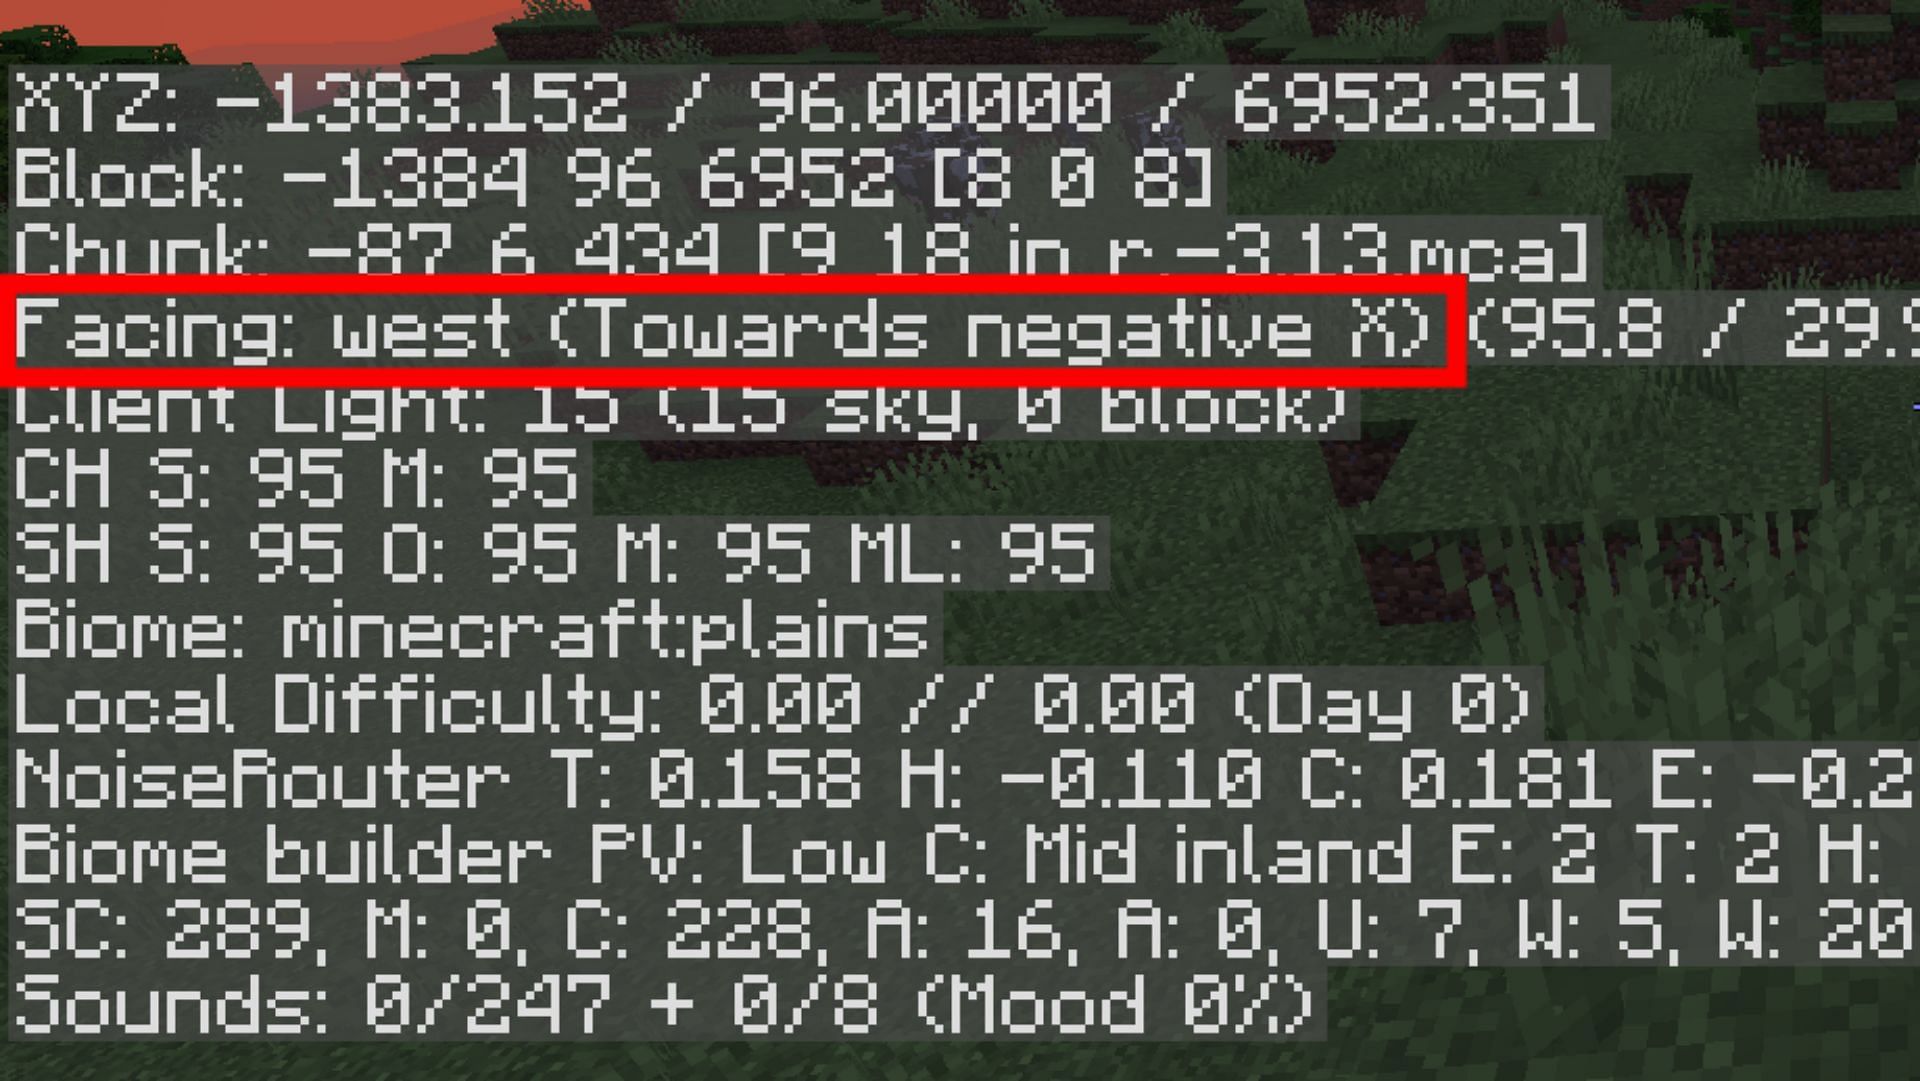
This is a fascinating piece of information that players can gather from this feature. This allows players to know in which direction they are facing, East, West, North, or South.
Whenever players are interacting with a map or are underground without any access to the sky, they can use this to navigate more accurately. This helps with maps as the top of the map signifies north, helping players find treasures or structures quicker.
2) Light Level
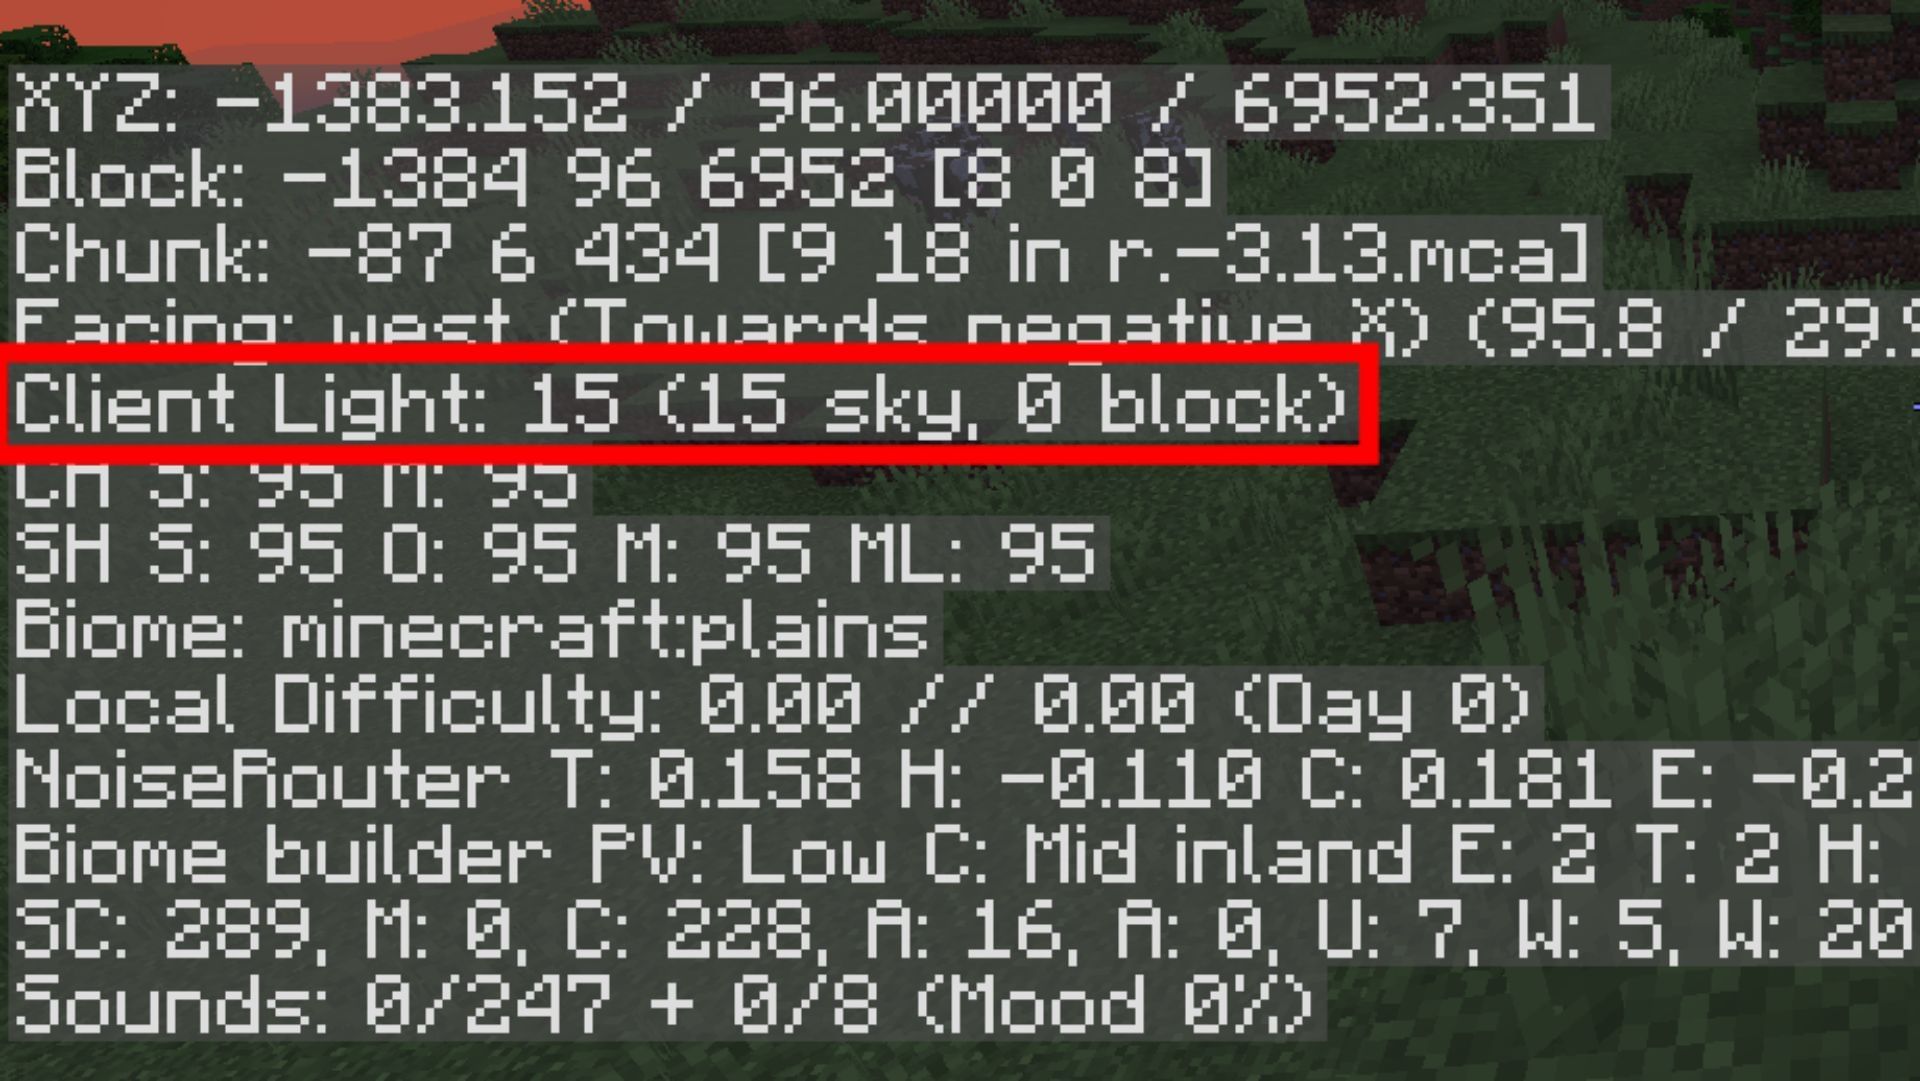
Light plays an important role in the game as it tells players whether hostile mobs can spawn or not. Players usually place torches on spawn-proof structures but are always unsure of some dark areas. By bringing up the debug screen, players can easily look at the light level and confirm the amount of light falling on any particular block.
After the Minecraft Caves and Cliffs update, hostile mobs only spawn at light level 0, making it easier for players to spawn-proof any area with light. They can easily check the levels with this feature.
1) Coordinates

This is arguably the most important piece of information this feature shows. While there are some mods that can directly show players their location, navigating with the help of coordinates always helps players while exploring the world.
With coordinates, they can gauge how far they are from their bases or how deep they are underground. This helps in finding the right level at which diamonds generate, and even helps in other realms like Nether and End.
Note: This article is subjective and solely reflects the opinion of the writer.

Uncover new worlds with our Minecraft Seed Generator!