
'%20x='0'%20y='0'%20height='100%25'%20width='100%25'%20%0A%20%20%20%20%20%20%20%20%20%20xlink%3Ahref='data:image/jpg;base64,/9j/2wBDAAYEBQYFBAYGBQYHBwYIChAKCgkJChQODwwQFxQYGBcUFhYaHSUfGhsjHBYWICwgIyYnKSopGR8tMC0oMCUoKSj/2wBDAQcHBwoIChMKChMoGhYaKCgoKCgoKCgoKCgoKCgoKCgoKCgoKCgoKCgoKCgoKCgoKCgoKCgoKCgoKCgoKCgoKCj/wgARCAAGAAoDASIAAhEBAxEB/8QAFgABAQEAAAAAAAAAAAAAAAAAAAII/8QAFAEBAAAAAAAAAAAAAAAAAAAAAv/aAAwDAQACEAMQAAAAzvIF/8QAHRAAAgEEAwAAAAAAAAAAAAAAAQIRAAMEQRIigf/aAAgBAQABPwCGXFYuxYGOXYjypt6soBoV/8QAFxEAAwEAAAAAAAAAAAAAAAAAAAECEf/aAAgBAgEBPwCVp//EABYRAAMAAAAAAAAAAAAAAAAAAAACIf/aAAgBAwEBPwB4f//Z'%3E%3C/image%3E%3C/svg%3E)
During the Down and Outbound mission of Borderlands 4, you will encounter the dangerous Horace, the Spymaster. Ideally, he will be a source of great information that will be necessary to strike back against the Order, and save the planet of Kairos. Unfortunately, it’s not going to be that easy to learn what he knows. This boss has two phases, and like all BL4 bosses, tends to have a bunch of minions to help him.
Interestingly enough, Horace isn’t even the end of the Down and Outbound mission; there’s more to do after that. That said, he’s still not someone you should overlook, especially in Phase 2, when he gets far more aggressive. Here’s what you need to know about this boss fight in BL4.
Where to find Horace in Borderlands 4
(Fight begins at 36:33)
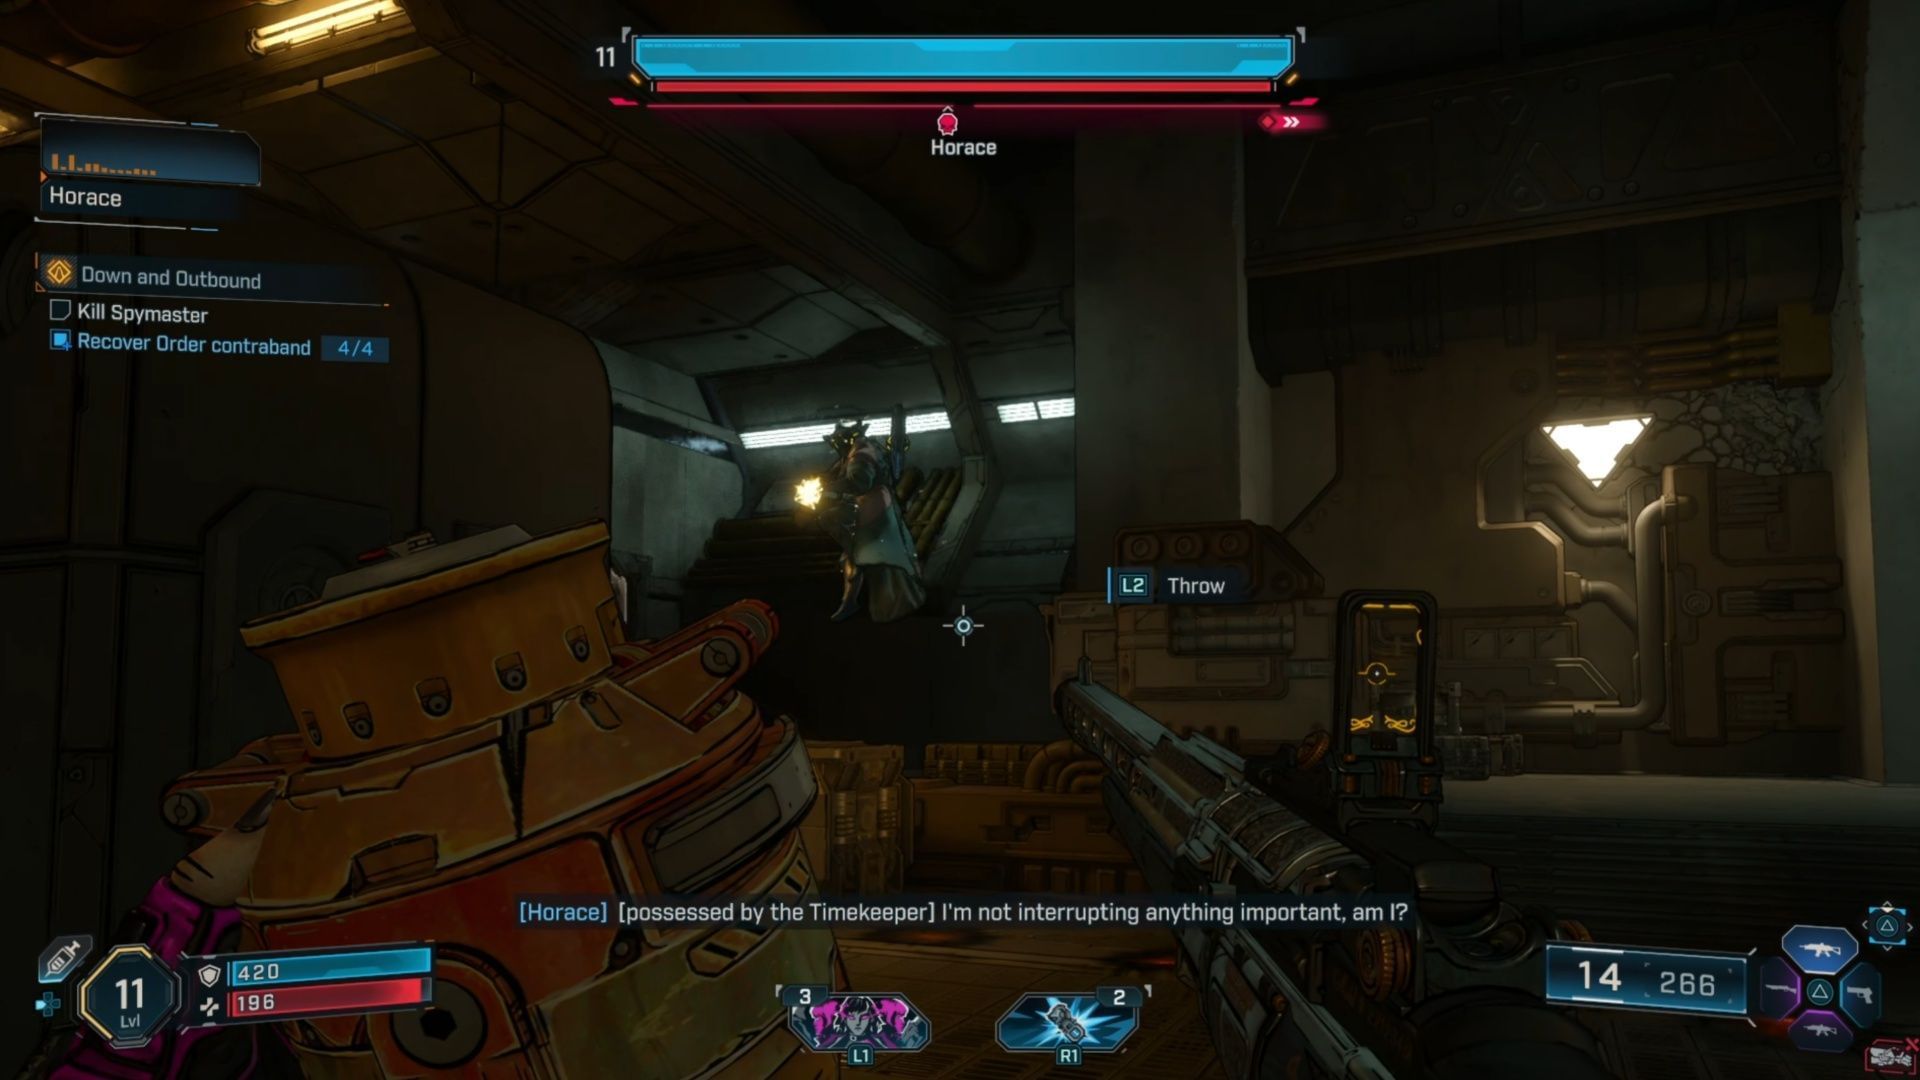
Horace shows up as the boss of Down and Outbound in Borderlands 4, and you’ll find him at the end of the Order Surveillance Center. Thankfully, they aren’t a boss you can avoid fighting, since they are at the end of a fairly lengthy, but linear dungeon.
The only parts that really bear extra exploration are to find the Contraband, but our guide linked above covers where all of those are. When you arrive in his room, he’ll begin the fight almost immediately, so be ready when you drop down into his battle arena.
Horace’s attacks in Borderlands 4
Horace has two very distinct phases in Borderlands 4, and it’s easy to figure out when he transitions. Phase 1 lasts until you break his shields down. To deal with his shields, use Shock damage.
From there, he transitions to Phase 2, and adopts a more melee-oriented style (think Psychos). If you have Ignite damage, it will certainly help. He will remain in the Phase 2 combat mode until you defeat him. There’s no real pattern to his attacks that we saw, so we listed everything he can do in both phases below.
Phase 1 attacks
- Horace fires homing projectiles that move relatively slow.
- Horace fires repeated projectiles in a line towards you.
- When he twirls his spear, he’s going to throw several directly at you.
- He will occasionally fly quickly in a straight line, dropping elemental damage puddles on the ground.
- When you see a triangle over his head, he’s going to fire mechanical projectiles that you can shoot down.
Phase 2 attacks
- Horace can fire a massive amount of yellow projectiles that look like a missile swarm.
- He can use a few scythe swings back-to-back, and then do a jumping scythe attack.
- He can throw his scythe at you, which creates an AOE you need to avoid.
Tips to defeat Horace in Borderlands 4
Phase 1 of the Horace fight in Borderlands 4 isn’t really that complicated. Though he has way more attacks, he’s not really that fast, and acts primarily like a Warden enemy. You’ve no doubt fought plenty of those before.
There’s also quite a lot of cover in this room, so you can easily stand behind stacks of crates or boxes when he fires homing projectiles at you. You can tell these are coming because he fires a ton of projectiles that go up, before arcing down at you.
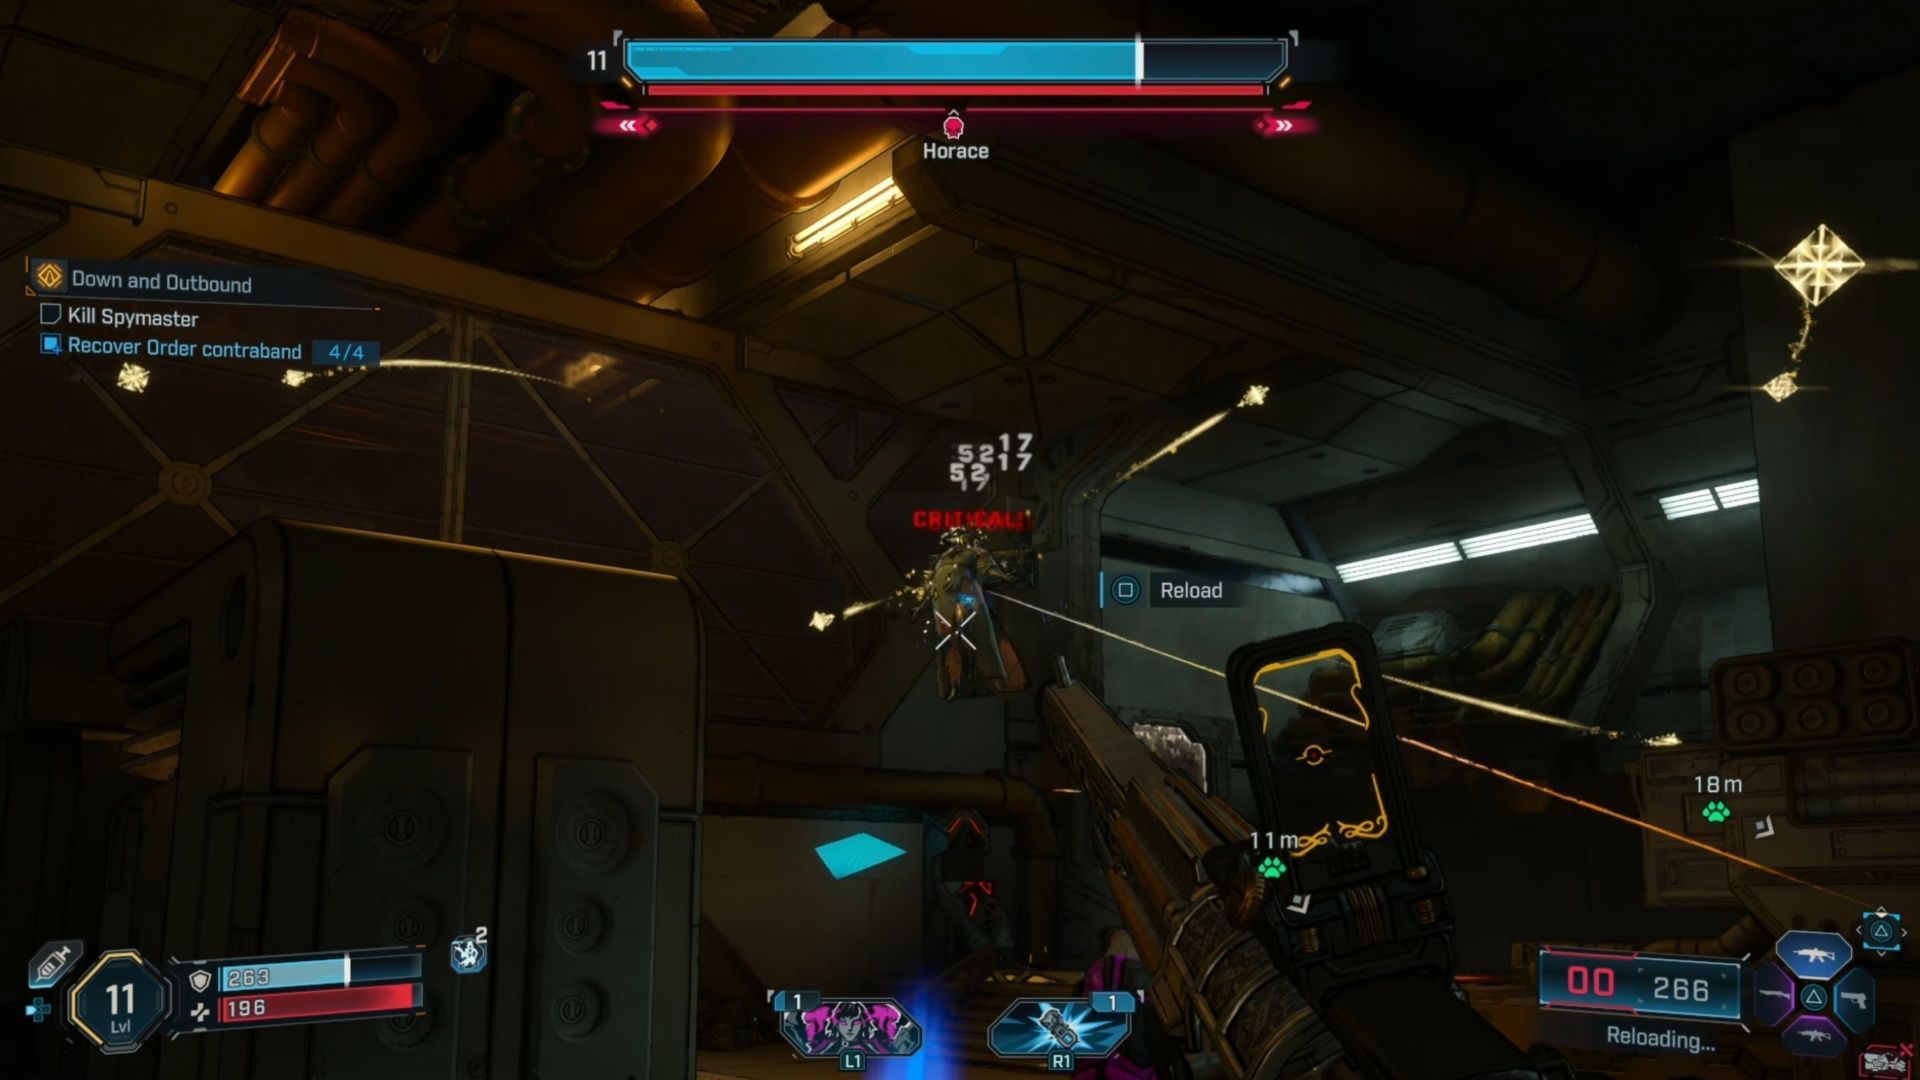
If you’re caught out in the open during the homing projectiles, start strafing in one direction, and then shift, and you’ll typically find yourself safe from those attacks. Occasionally, he’ll also fire a yellow laser right at you, but you can just strafe to get out of the way. The spear throws can be pretty quick, but again, you can just watch for the tell then hide behind cover.
His most useless ability is the elemental damage puddles, because he just flies in a straight line. While the movement is fast, not once was it anywhere near me. I recommend switching to Ordinance that won’t bounce, such as sticky grenades, or any kind of heavy weapon. He floats for phase 1, so those fun, bouncy grenades will almost never hit him.
Once you’ve shredded down his shields, there will be a brief conversation between him and the Timekeeper. Now, the fight really changes. Horace only has a few attacks in Phase 2 of this Borderlands 4 boss fight, but they hurt.
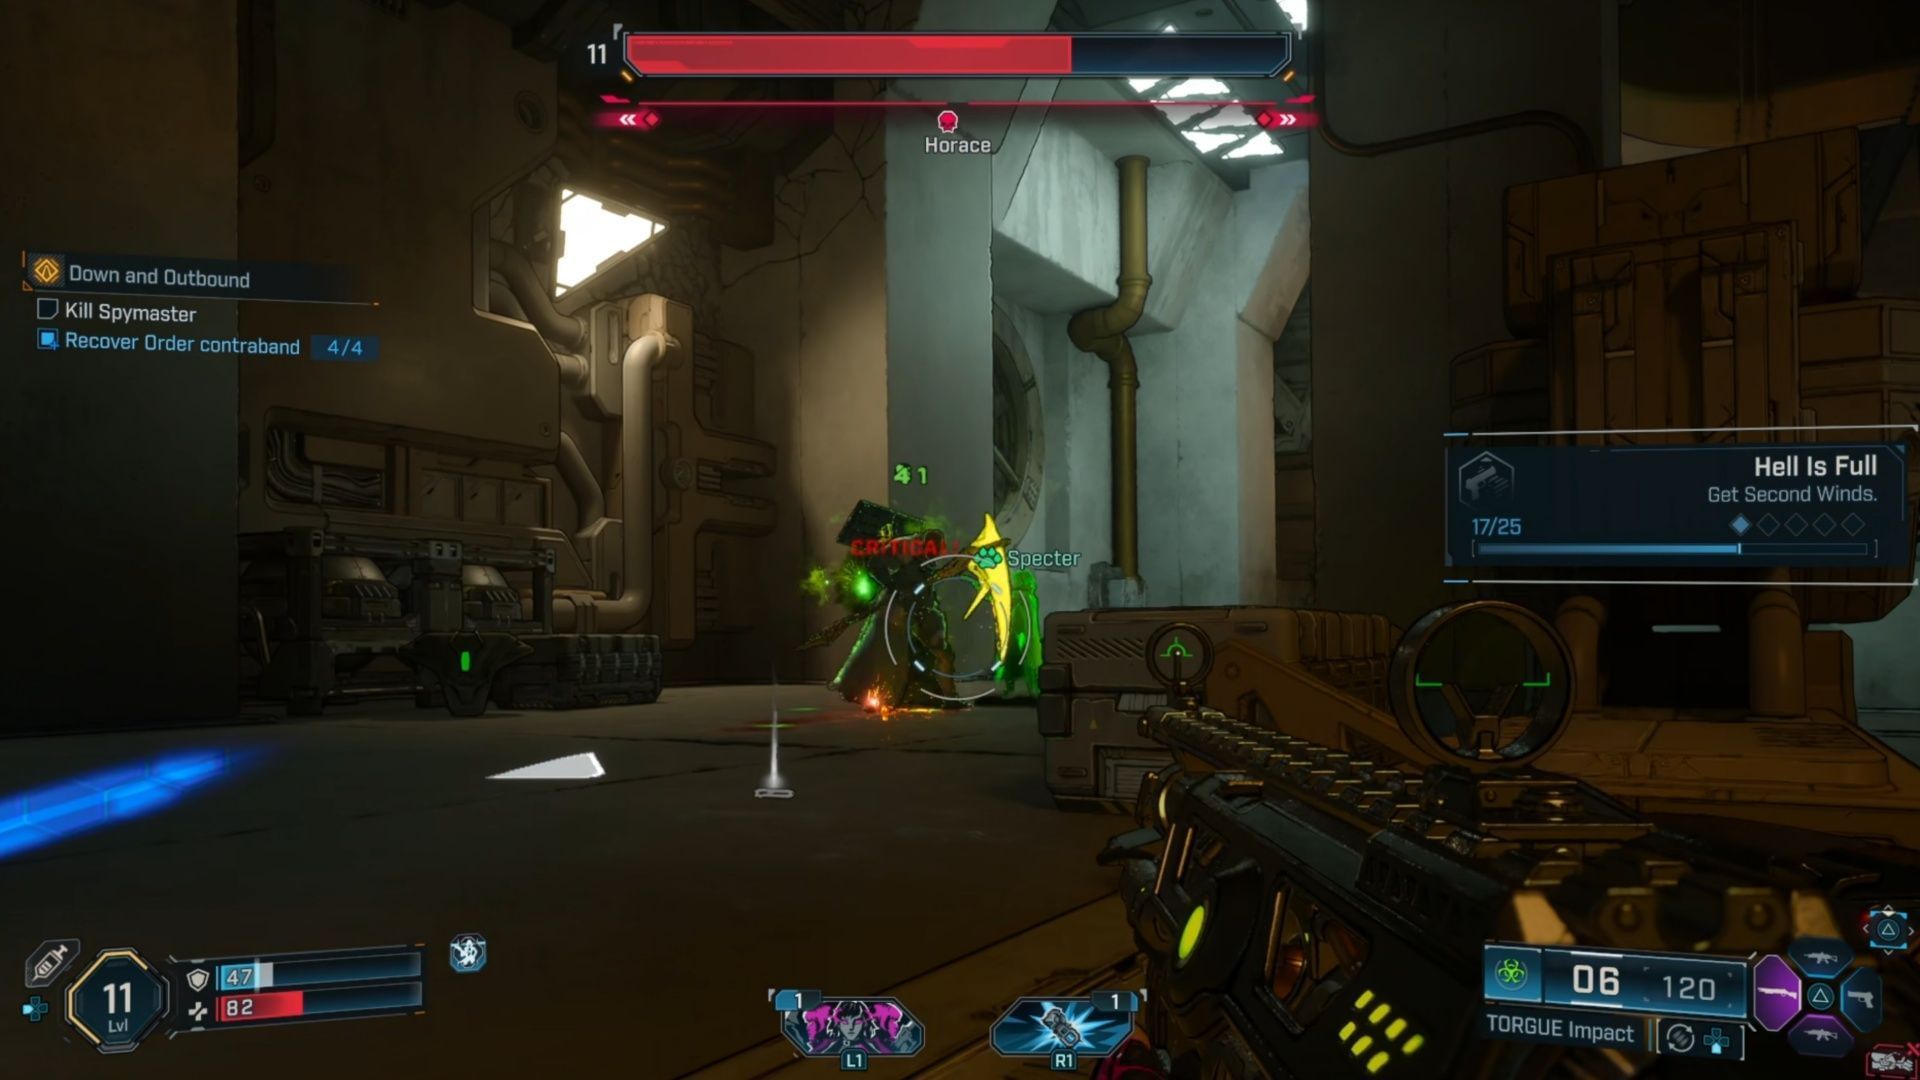
As Vex, Phase 1 was amazingly simple; my Specters kept him busy, and away from me. Phase 2 is way more melee-focused, so unless you’re someone like Amon, who thrives in close-combat, stay back, and away from him as much as you can. Double Jump/glide to safely, dash back, strafe, anything you can.
His projectile swarm in this phase is way more dangerous; when he crouches/hunches, take cover immediately. If you can stay far away, you don’t have to worry as much about his scythe attacks, though he might still tag you with the jumping scythe attack. If he winds his scythe up, he’s going to throw it, so make sure you aren’t standing wherever it lands, to avoid the AOE damage it delivers.
As long as you can stay reasonably far away from him, he’s very easy in Phase 2. If you’re lucky, he might drop a Legendary such as Aegon’s Dream, Peacemaker, or Lucky Clover; all are Legendaries he can potentially drop.
Check out our other Borderlands 4 guides and features
- All Weapon Manufacturers in Borderlands 4
- Who is the villain of Borderlands 4?
- What are Enhancements in Borderlands 4?
- Does Borderlands 4 have co-op and crossplay?
