'%20x='0'%20y='0'%20height='100%25'%20width='100%25'%20%0A%20%20%20%20%20%20%20%20%20%20xlink%3Ahref='data:image/jpg;base64,/9j/2wBDAAYEBQYFBAYGBQYHBwYIChAKCgkJChQODwwQFxQYGBcUFhYaHSUfGhsjHBYWICwgIyYnKSopGR8tMC0oMCUoKSj/2wBDAQcHBwoIChMKChMoGhYaKCgoKCgoKCgoKCgoKCgoKCgoKCgoKCgoKCgoKCgoKCgoKCgoKCgoKCgoKCgoKCgoKCj/wgARCAAHAAoDASIAAhEBAxEB/8QAFgABAQEAAAAAAAAAAAAAAAAAAAQG/8QAFAEBAAAAAAAAAAAAAAAAAAAAAv/aAAwDAQACEAMQAAAAwsIx/8QAIRAAAgEDAwUAAAAAAAAAAAAAAQMCAAYRBBIxExQjMlH/2gAIAQEAAT8Ajfuq7aJ3QUoT3wKVASieMfCMGn32jrM8Y9jyuv/EABYRAAMAAAAAAAAAAAAAAAAAAAABEv/aAAgBAgEBPwCmf//EABURAQEAAAAAAAAAAAAAAAAAAAEA/9oACAEDAQE/AAL/2Q=='%3E%3C/image%3E%3C/svg%3E)
Riot Games introduced a brand new Controller to the Valorant Agent pool with Episode 5 Act 3. The finale of the Episode has brought forth a plethora of changes to the shooter. Among them, Harbor's introduction is the most popular one, and fans are incredibly excited to see how the meta shifts with the Indian Agent's addition.
Harbor is a Controller that can control water, and is essentially a smoker. His abilities somewhat mimic Viper and Phoenix in some terms, but he stands out as none of the utility from his kit deals damage to the enemies. This makes him much more passive and a team-playing Controller like Astra or Omen.
Ever since the Indian Agent stepped foot in the squad, players have been wondering how to get the most out of his kit on certain maps such as Fracture. As the Controller meta is expected to shift, Harbor could bring a generous amount of possibilities to the table.
Unique Harbor ability lineups on Valorant's Fracture
Harbor possesses multiple abilities that can essentially replace traditional smokes like Brimstone's. With that being said, Varun Batra also excels at slowing down the enemy via creating inconveniences for the opposition.
For example, his walls can slow down enemies on contact and his bubble ability, the Cove, can protect him and his teammates from bullets for a short duration.
When it comes to using all these abilities on a map like Fracture, Harbor thrives as he has a lot to offer. It is the most uniquely designed map in Valorant by far. The center spawn for defenders and traversal via ziplines is a fresh concept that no other map has ever seen. Harbor can utilize close spaces on the map to make his kit shine in Valorant.
High Tide
A-site default High Tide
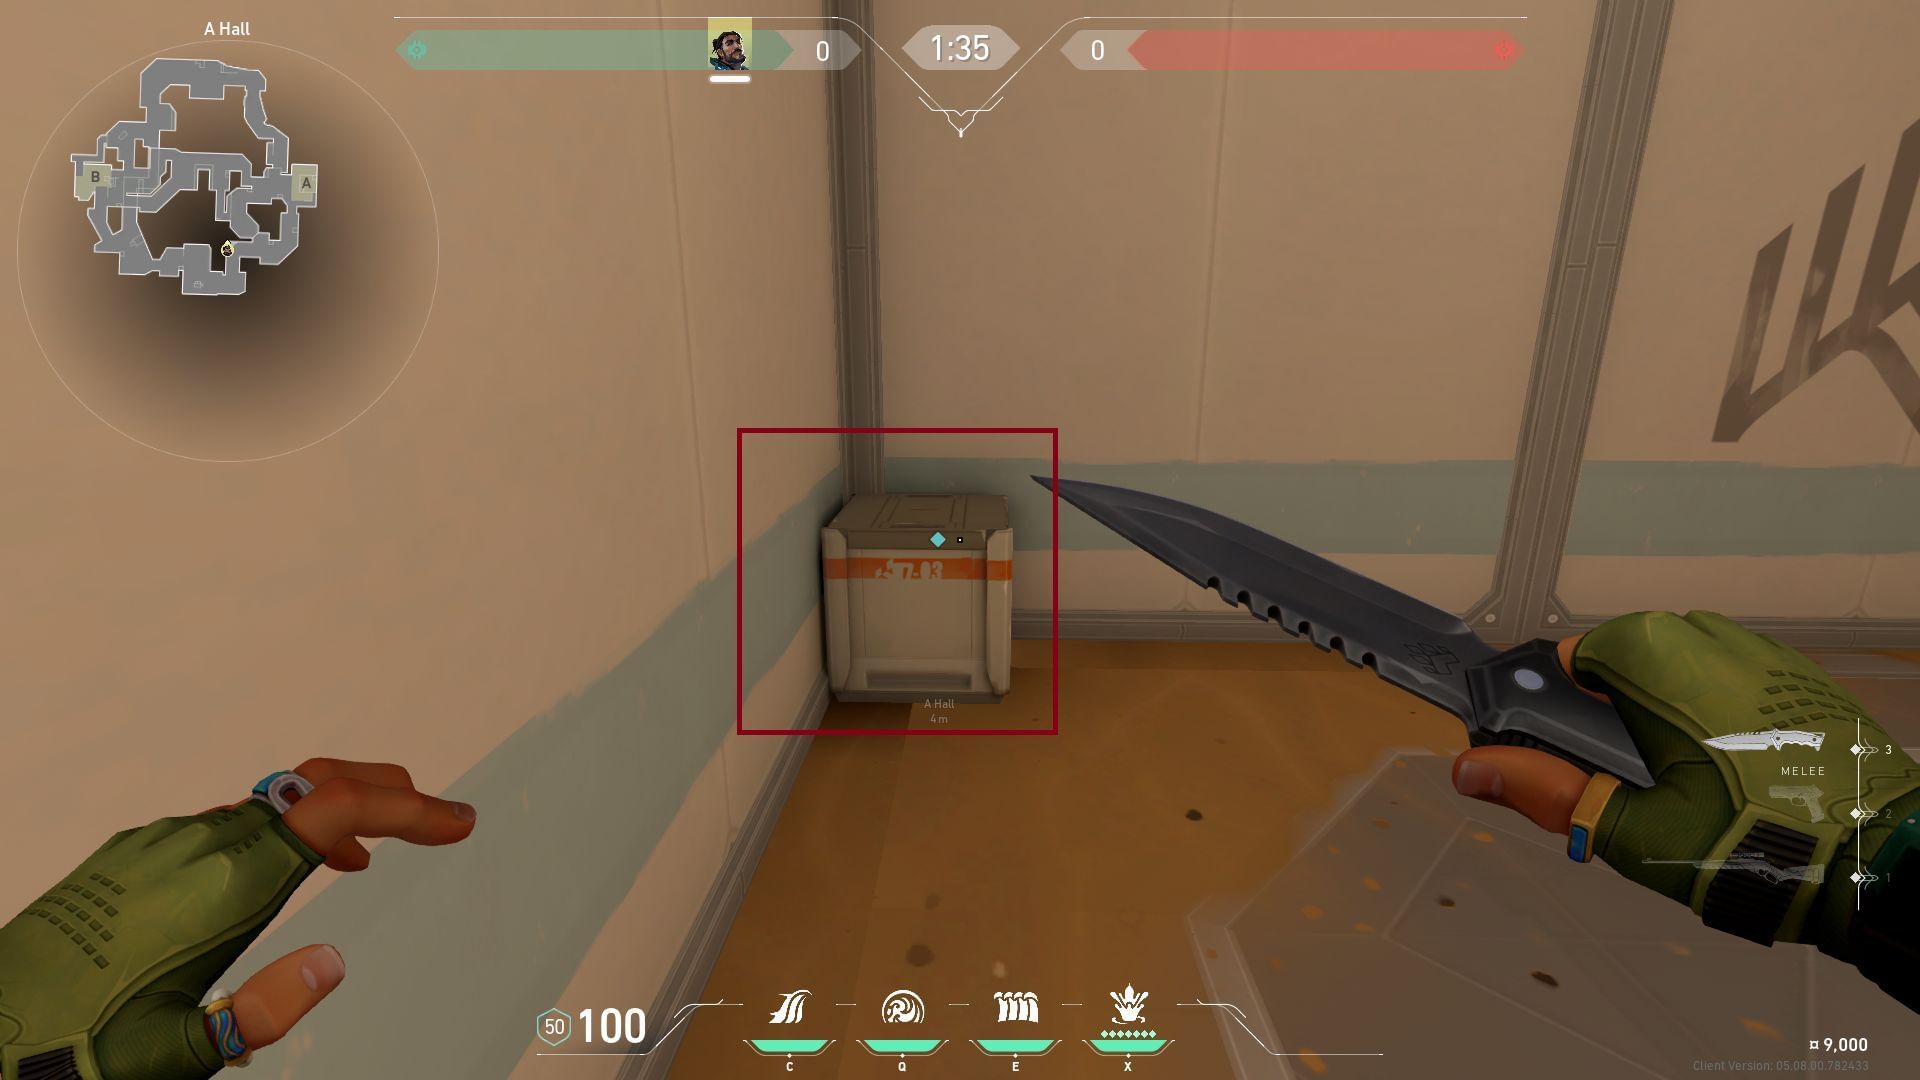
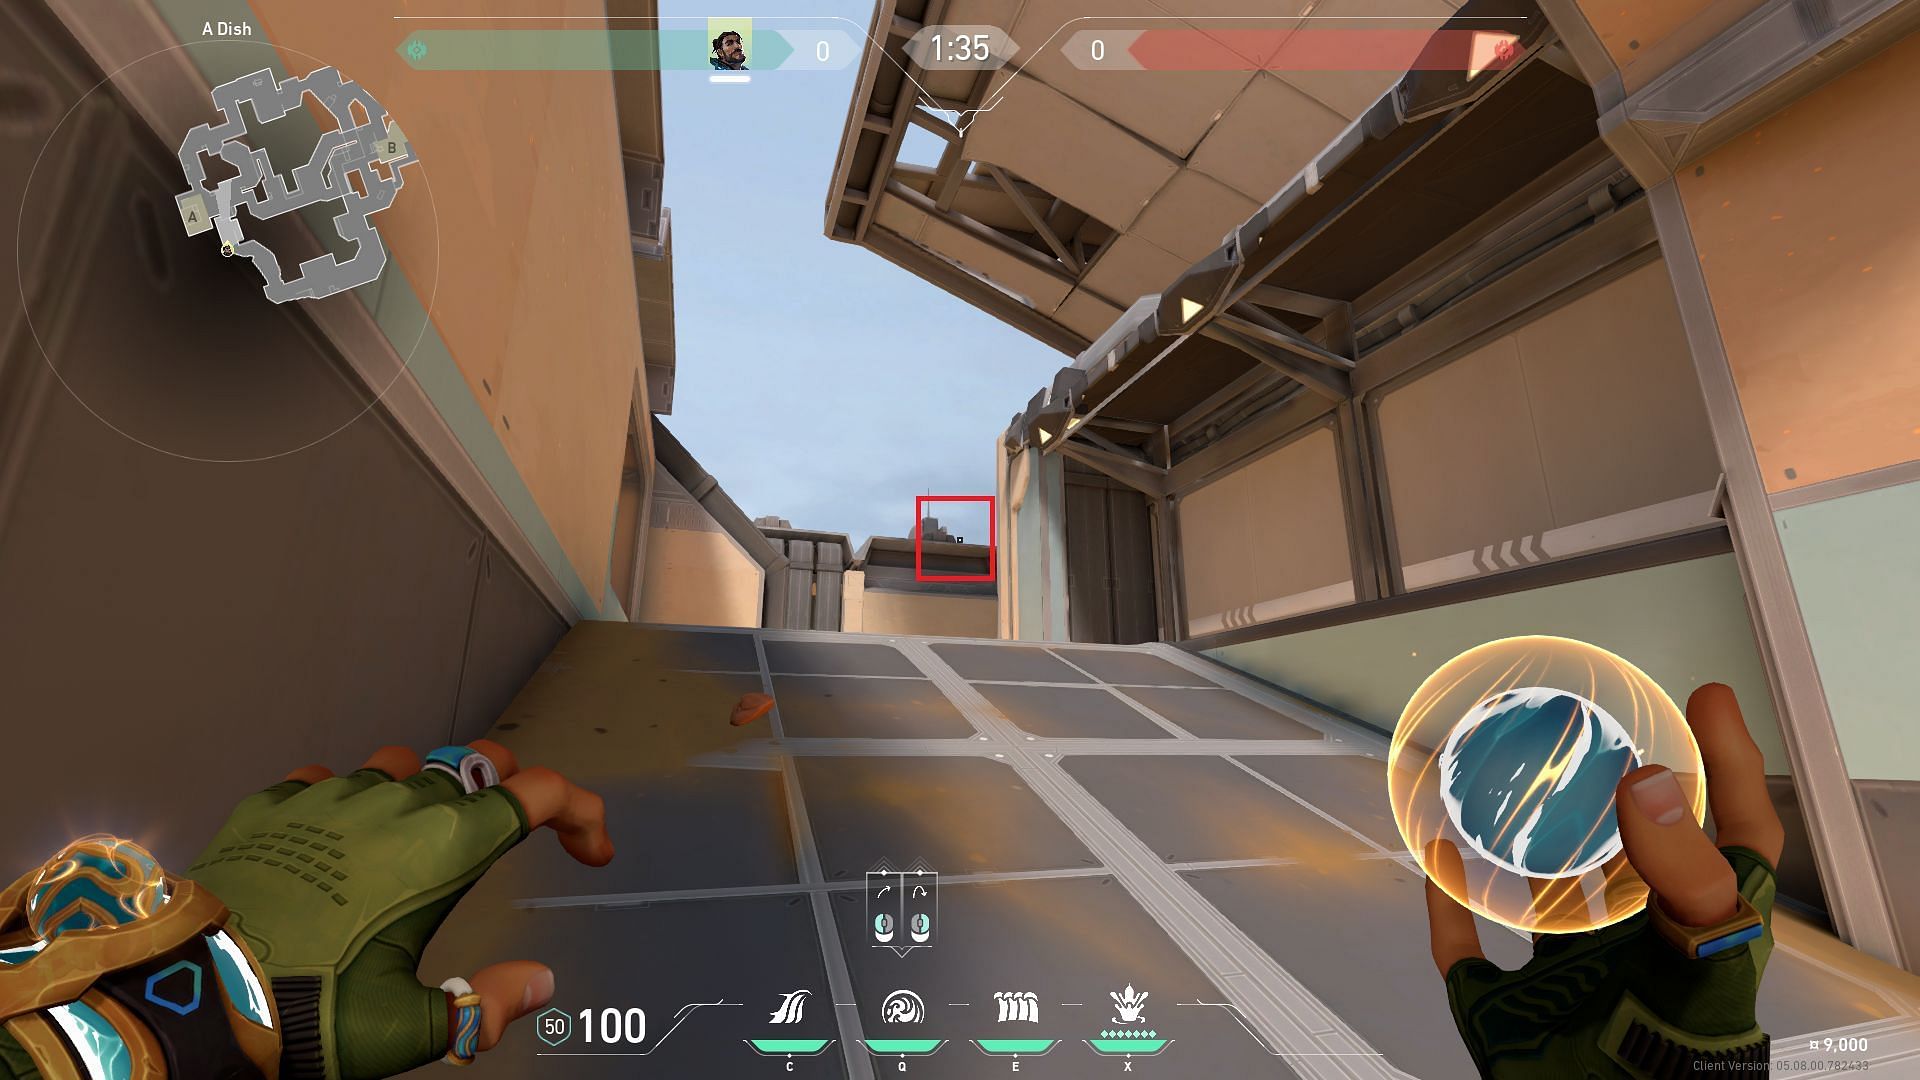
You will have to find the small box right after the A-main ramp and position yourself on top of it to perform this High Tide lineup.
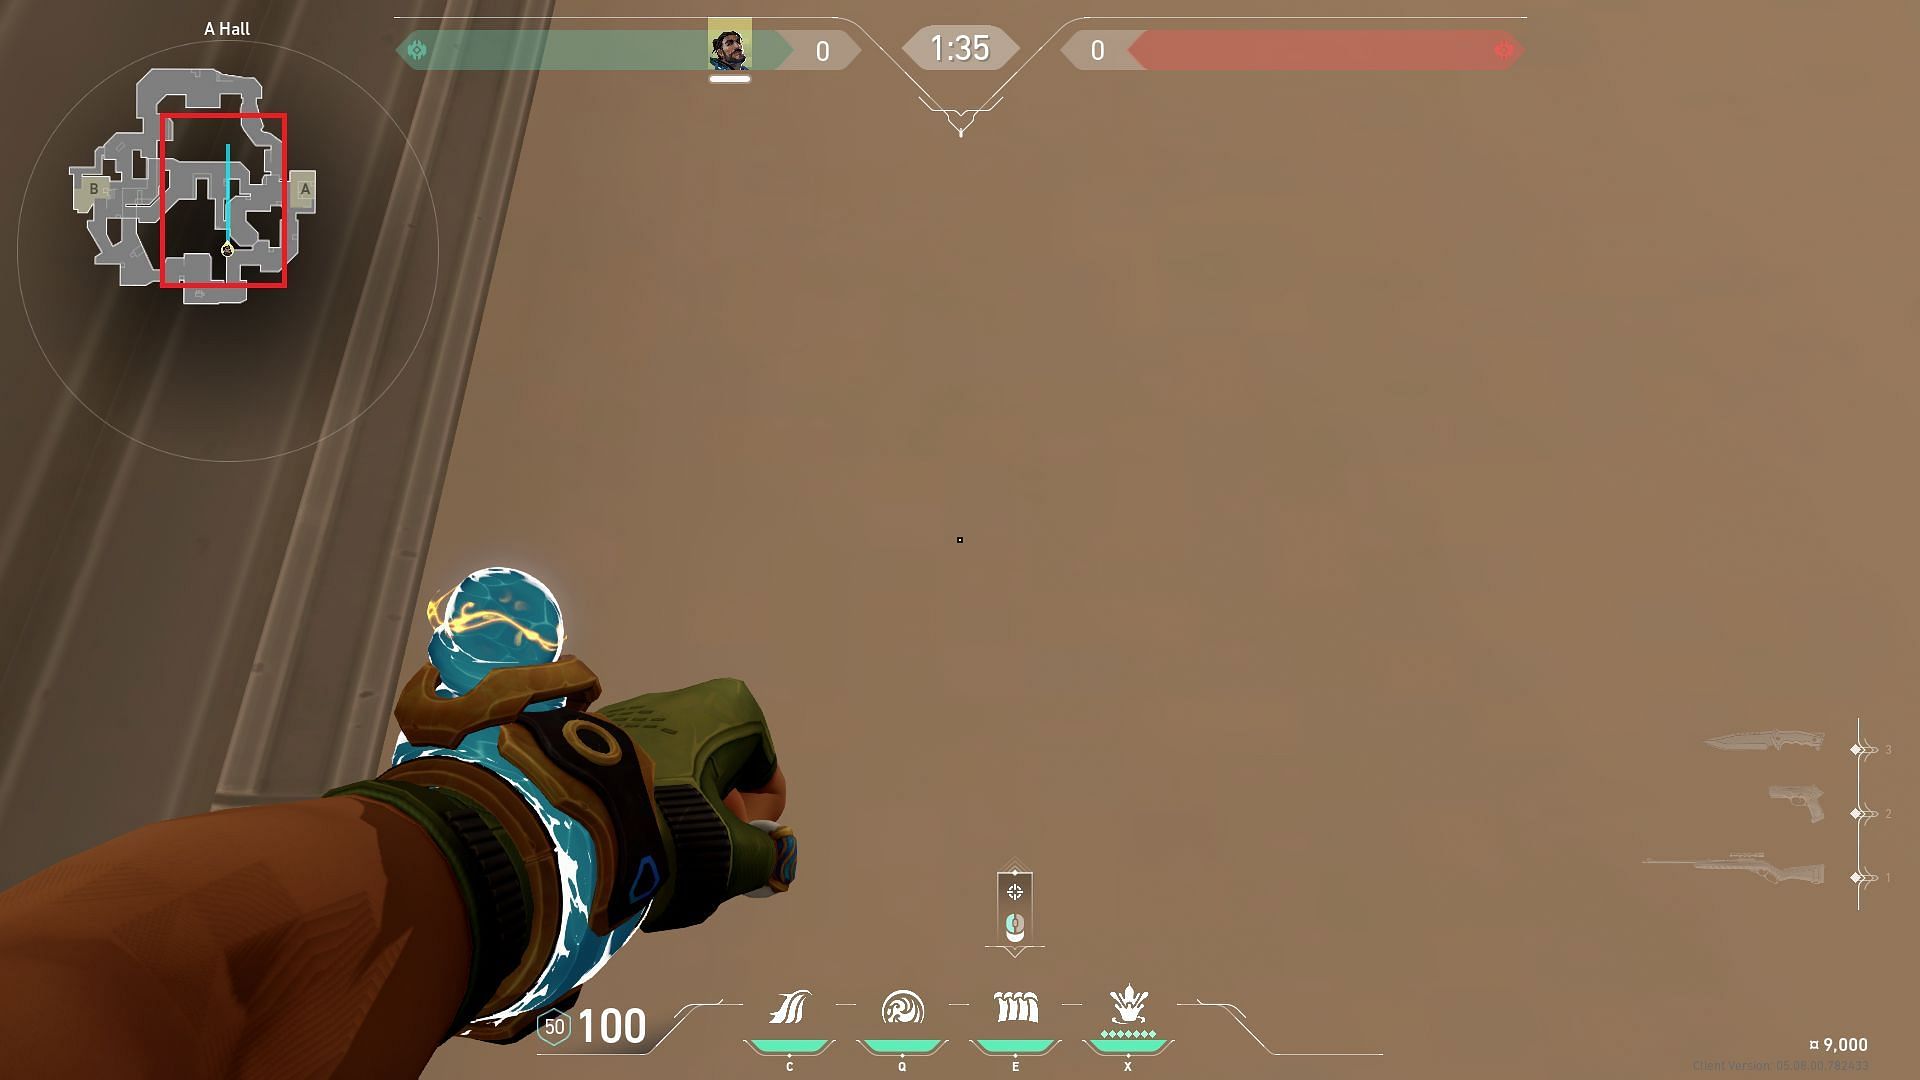
Once there, you can use the map to navigate High Tide so it reaches Ropes and Defender Spawn. Upon reaching the spawn point, you can curve the wall to the right side, looking upwards.
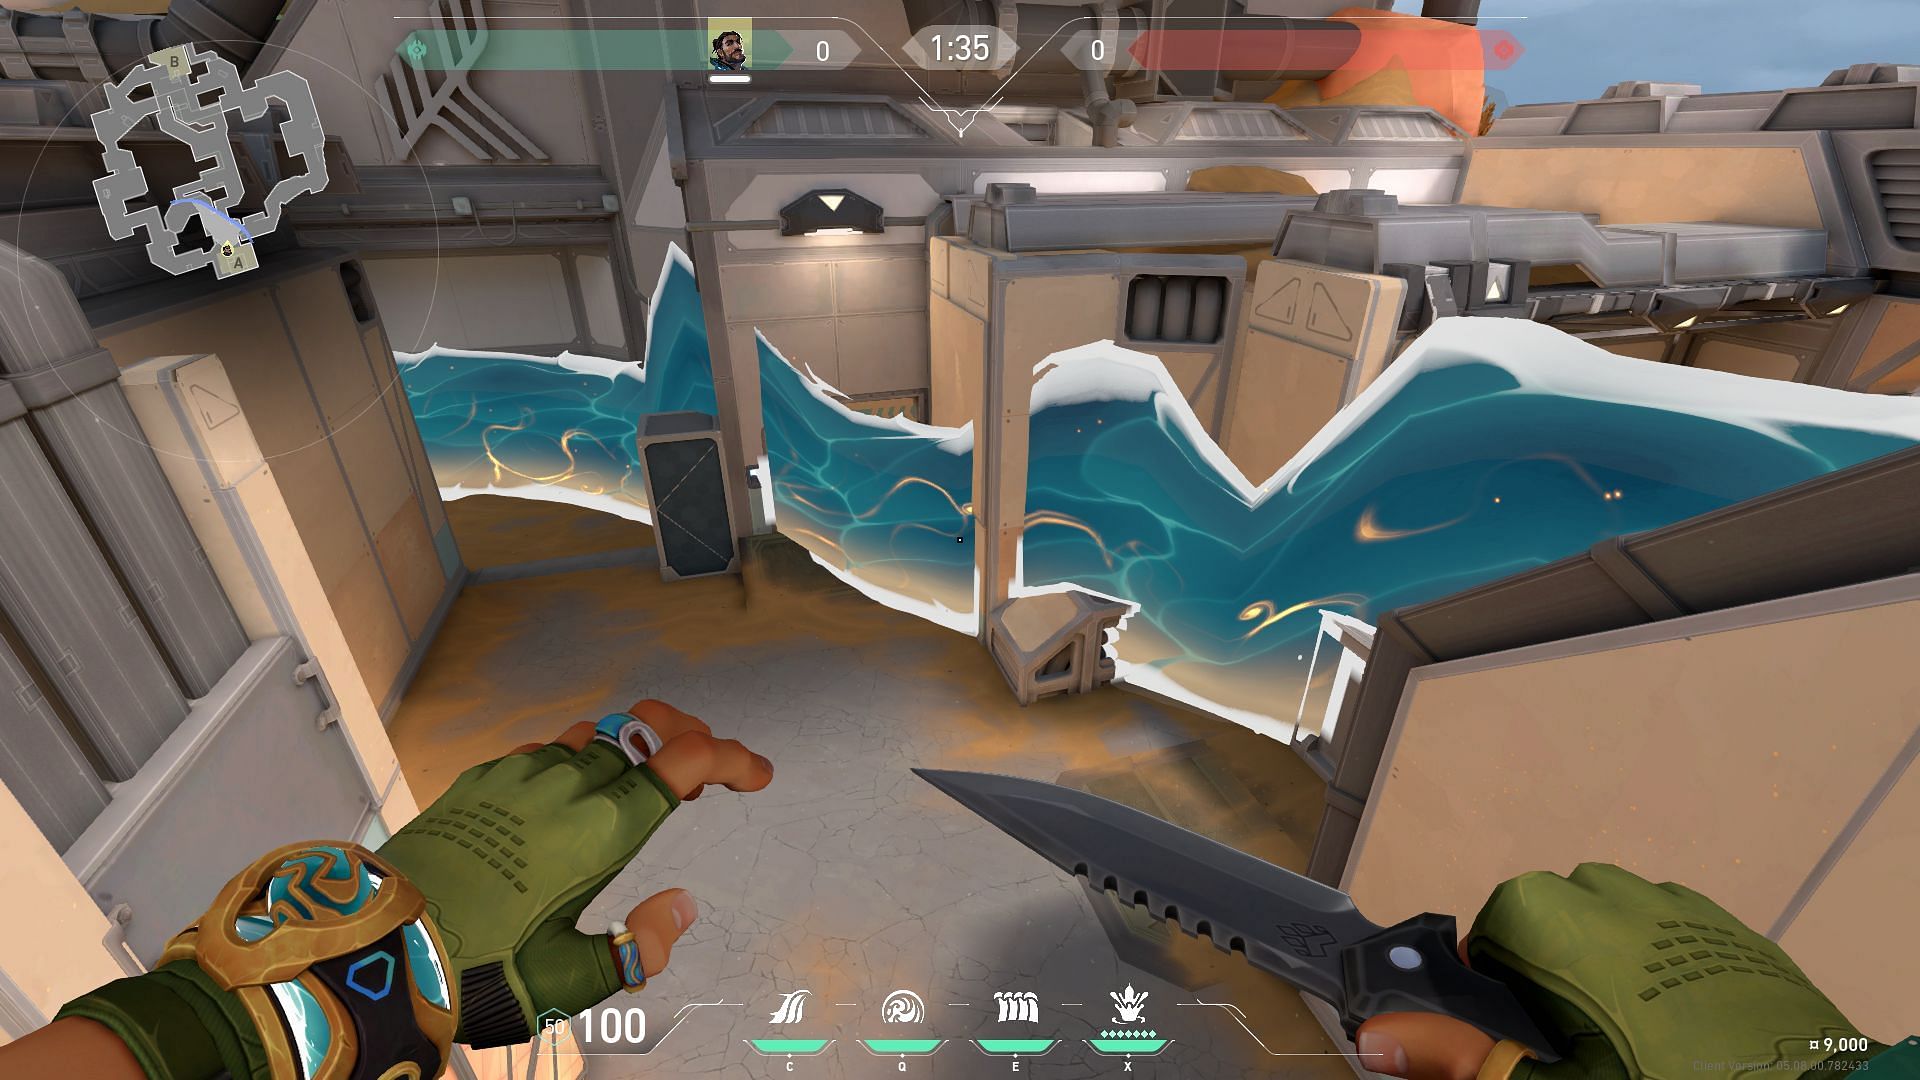
This High Tide will cover Ropes, Drop, and the majority of the Defender Spawn.
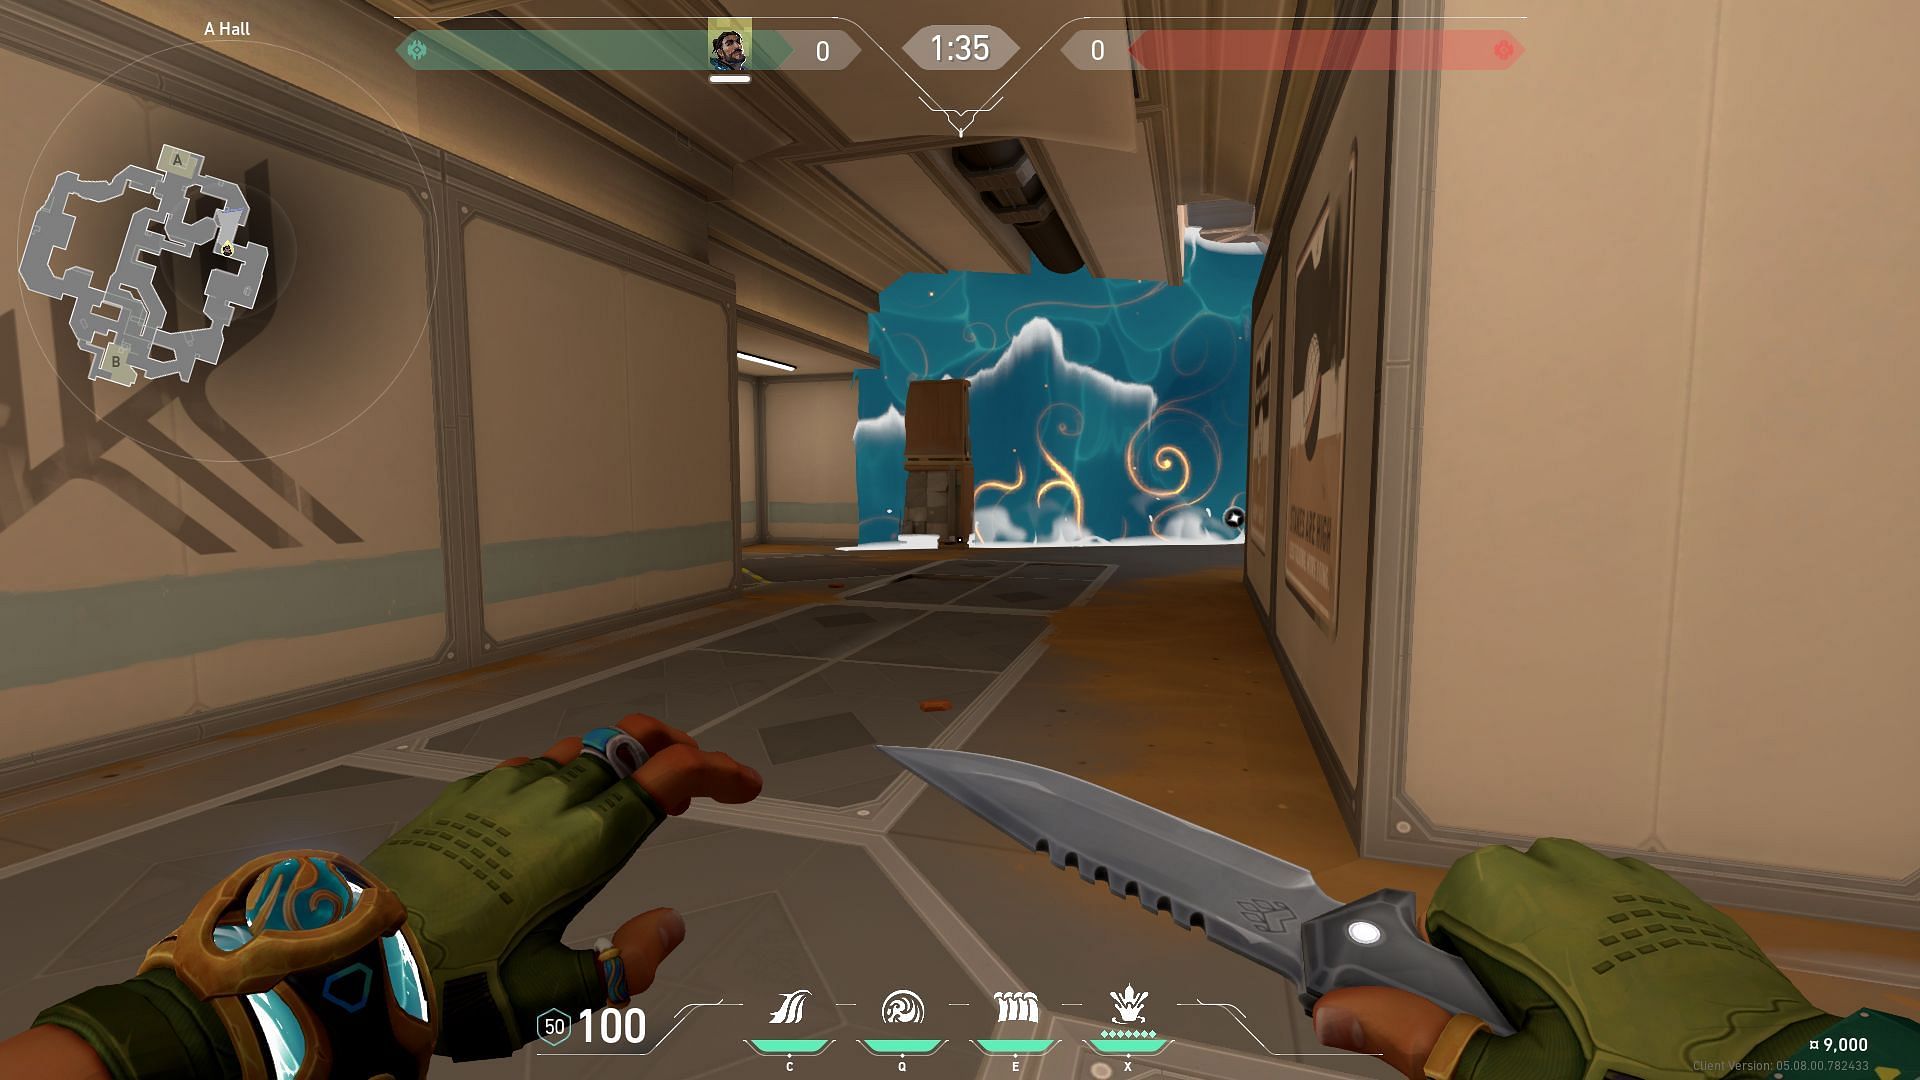
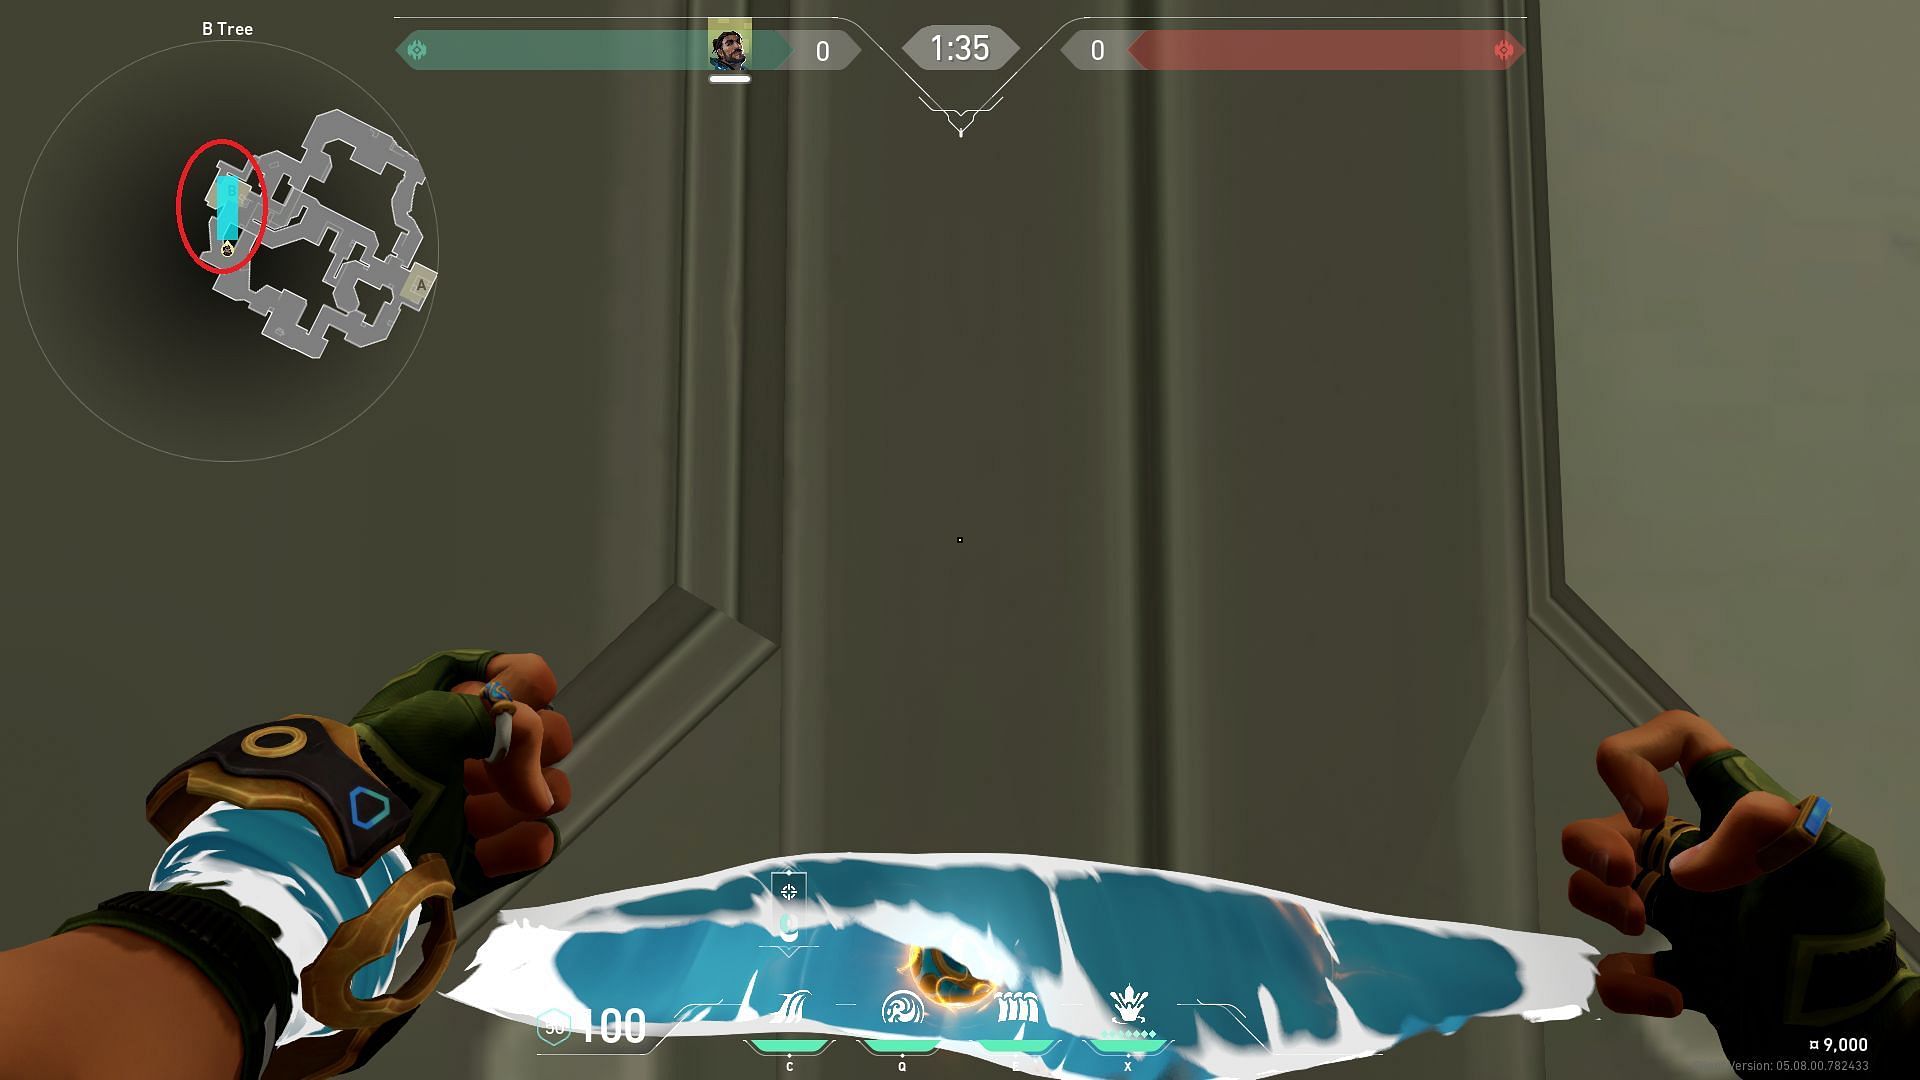
B-site default wall
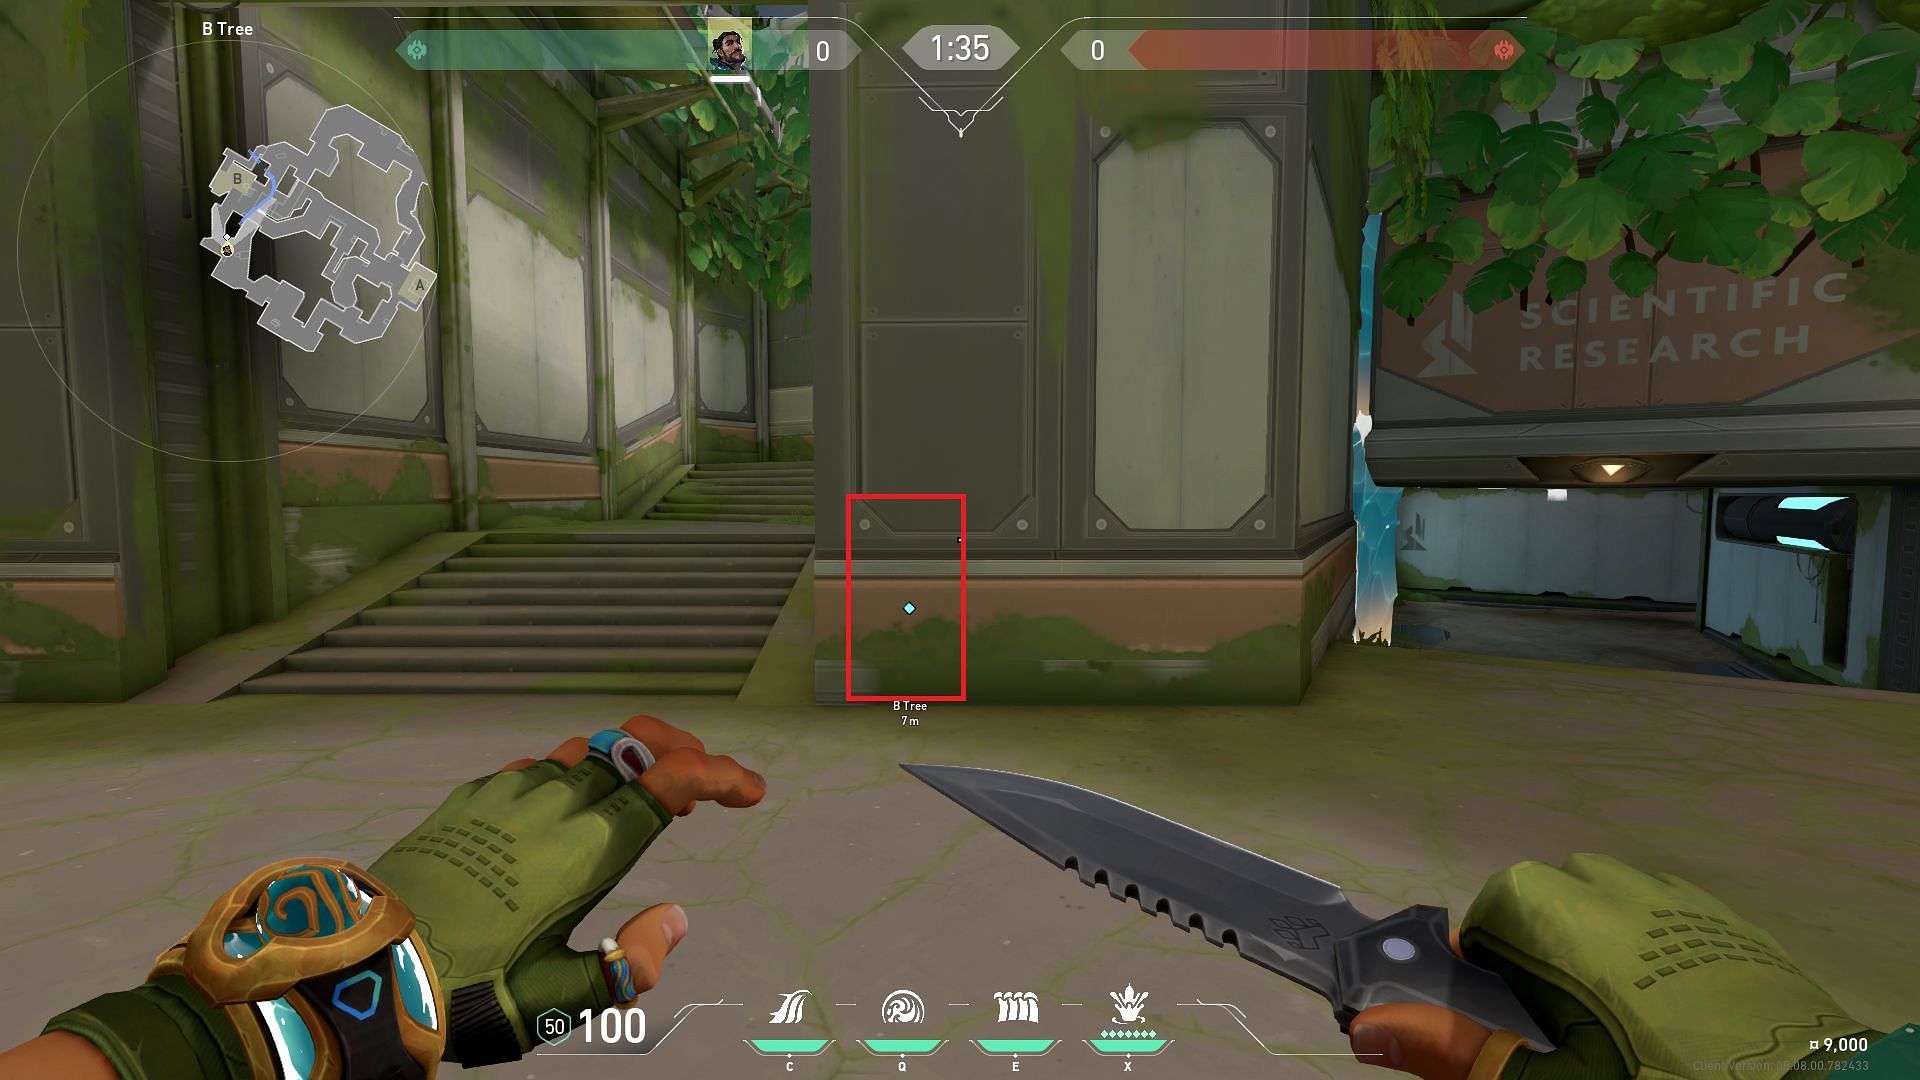
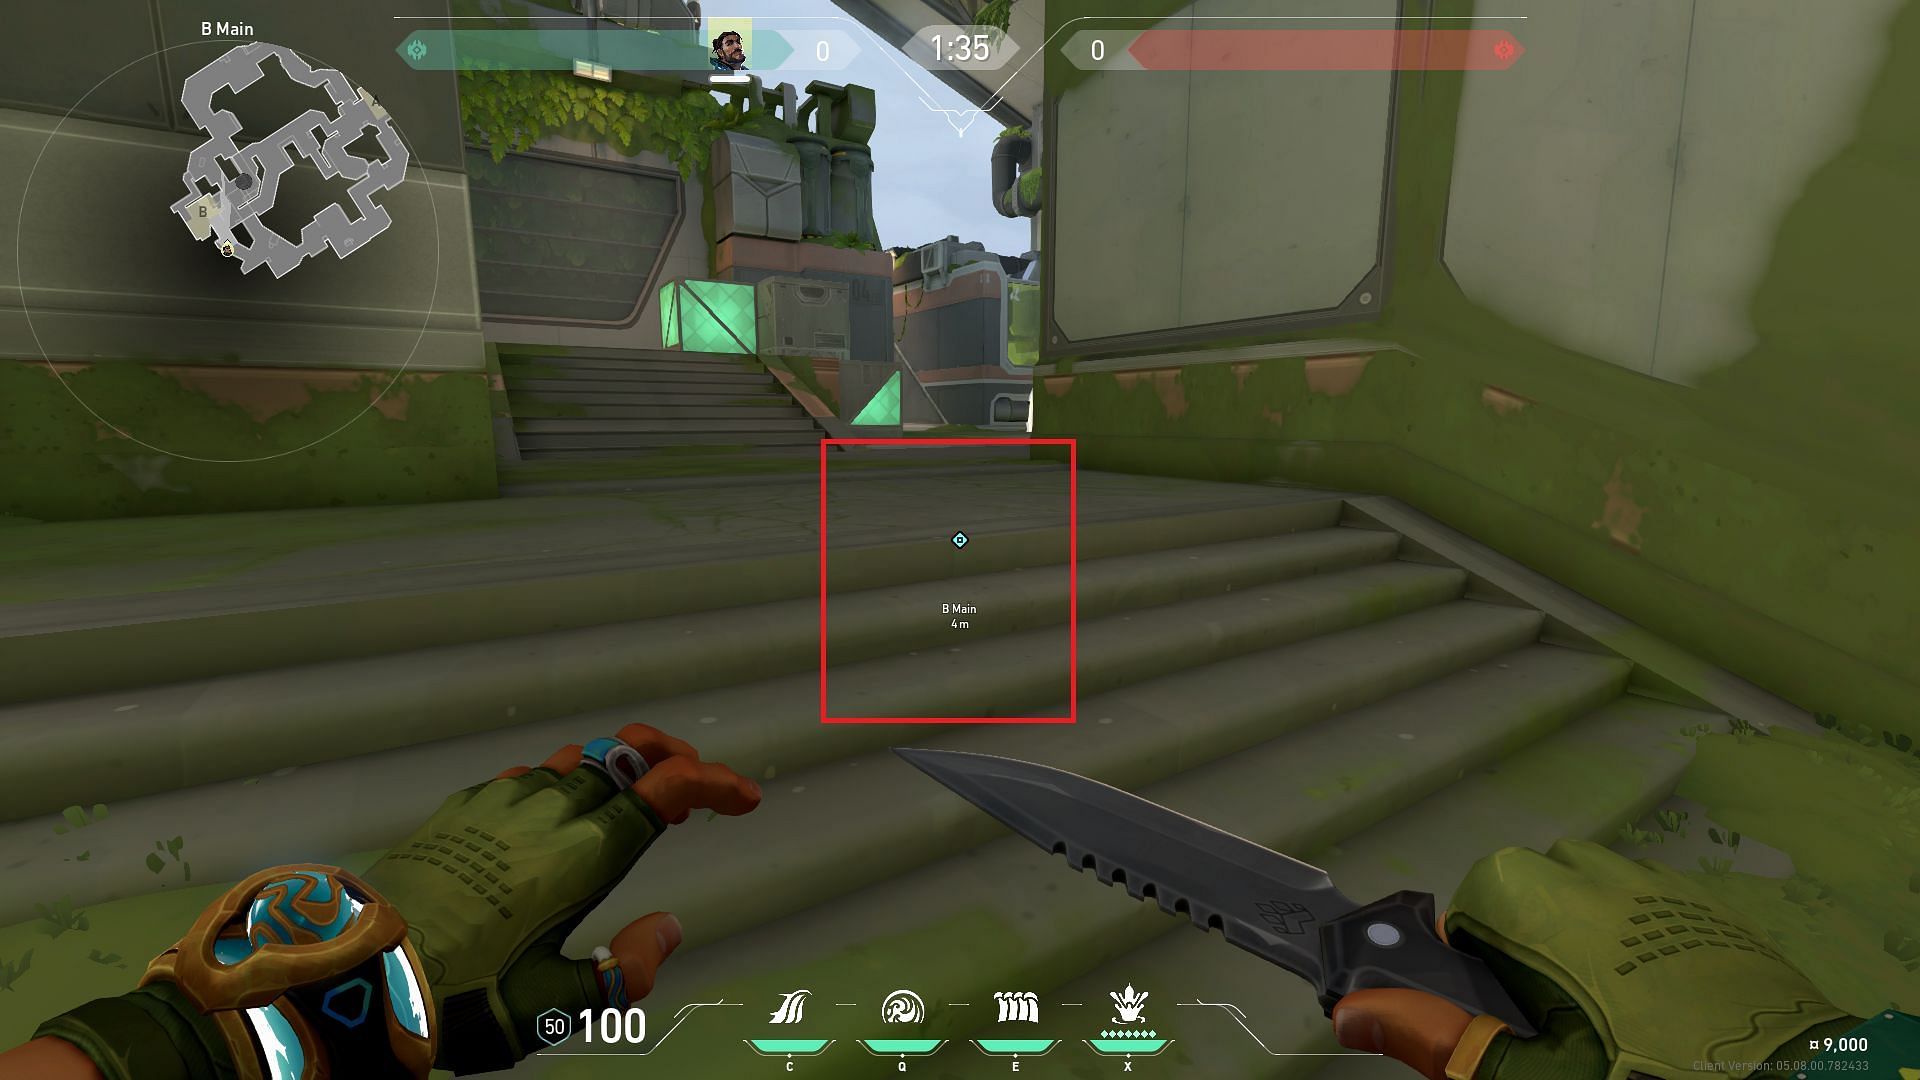
To perform the default wall on the B-site, you can stand near B-main on the marked spot, aligning your body with the wall.
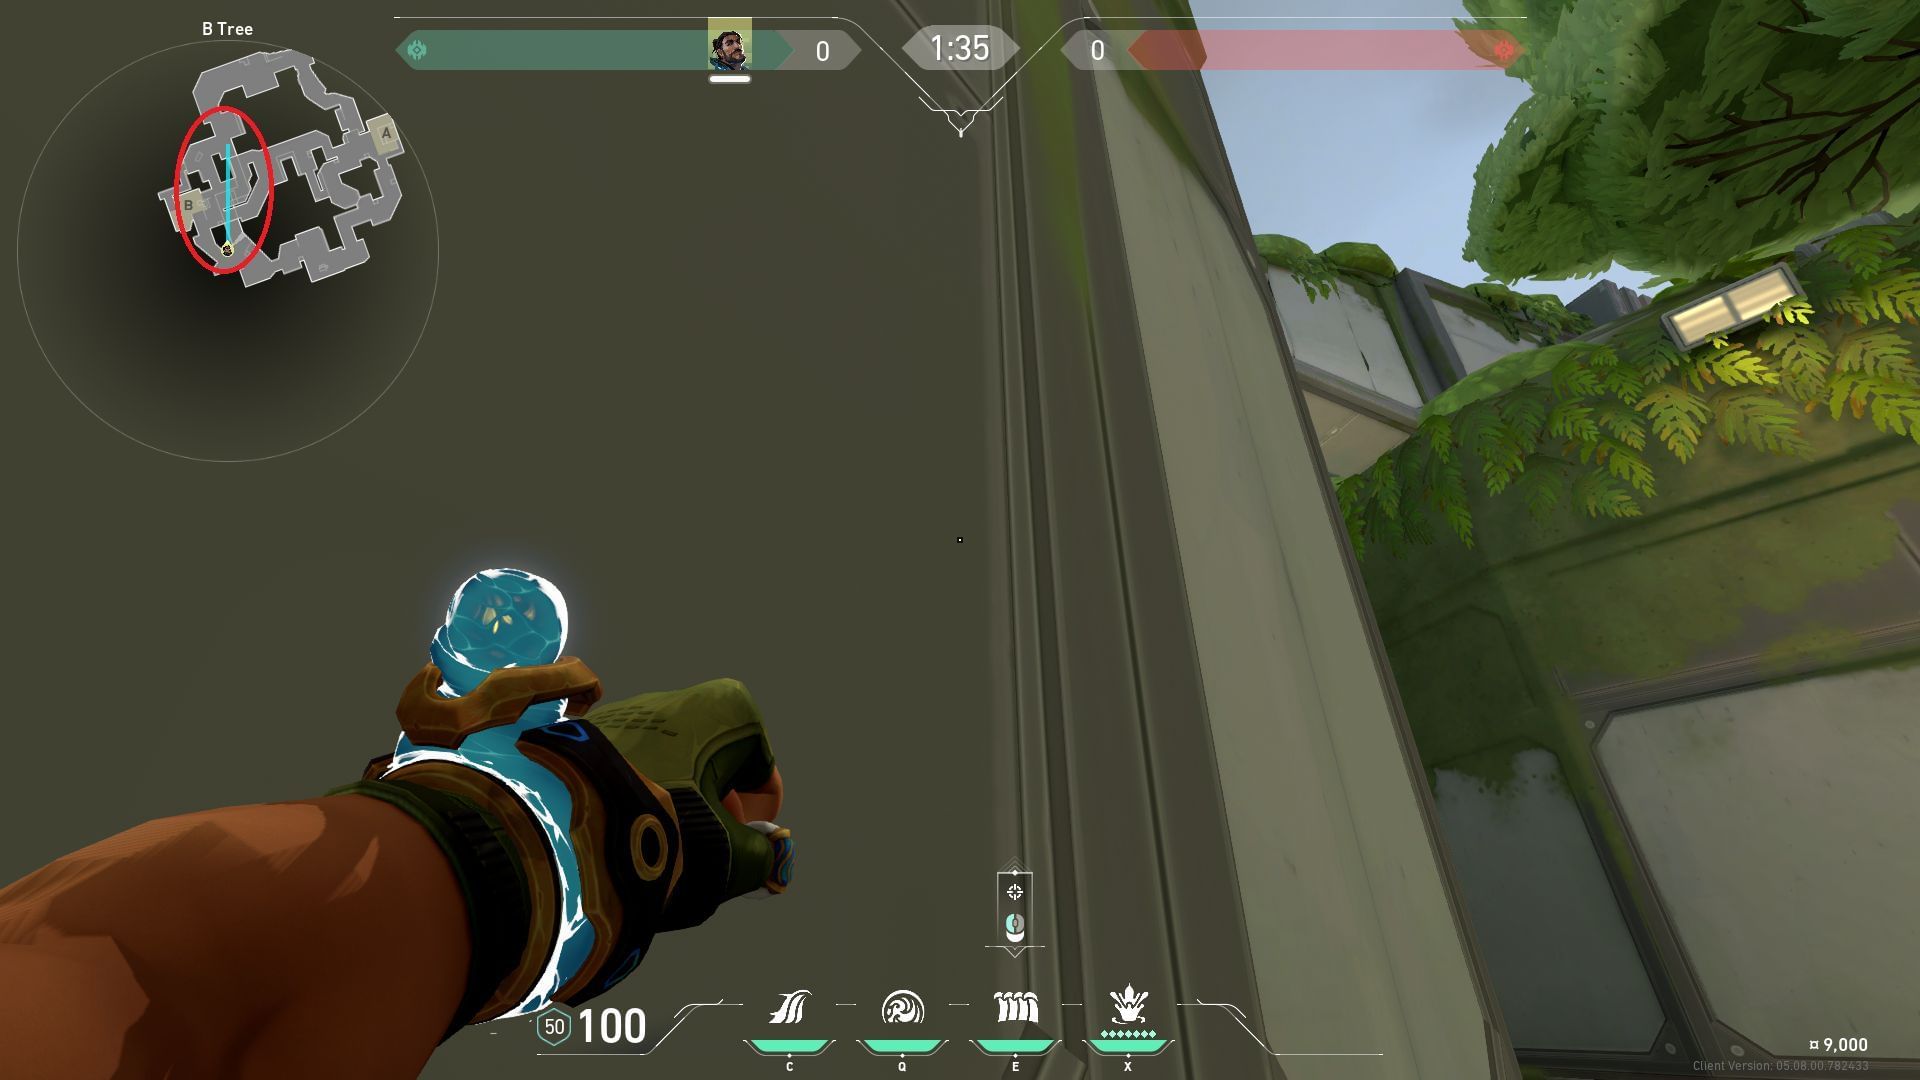
Upon standing, you can use the map so the High Tide reaches Canteen and Generator. Once the wall reaches the latter, you will have to curve the wall to the left side as quickly as possible.
This High Tide lineup can cover the two main angles from Canteen and Generator, and also cover the Arcade area in addition.
Cascade
A-main safe push Cascade
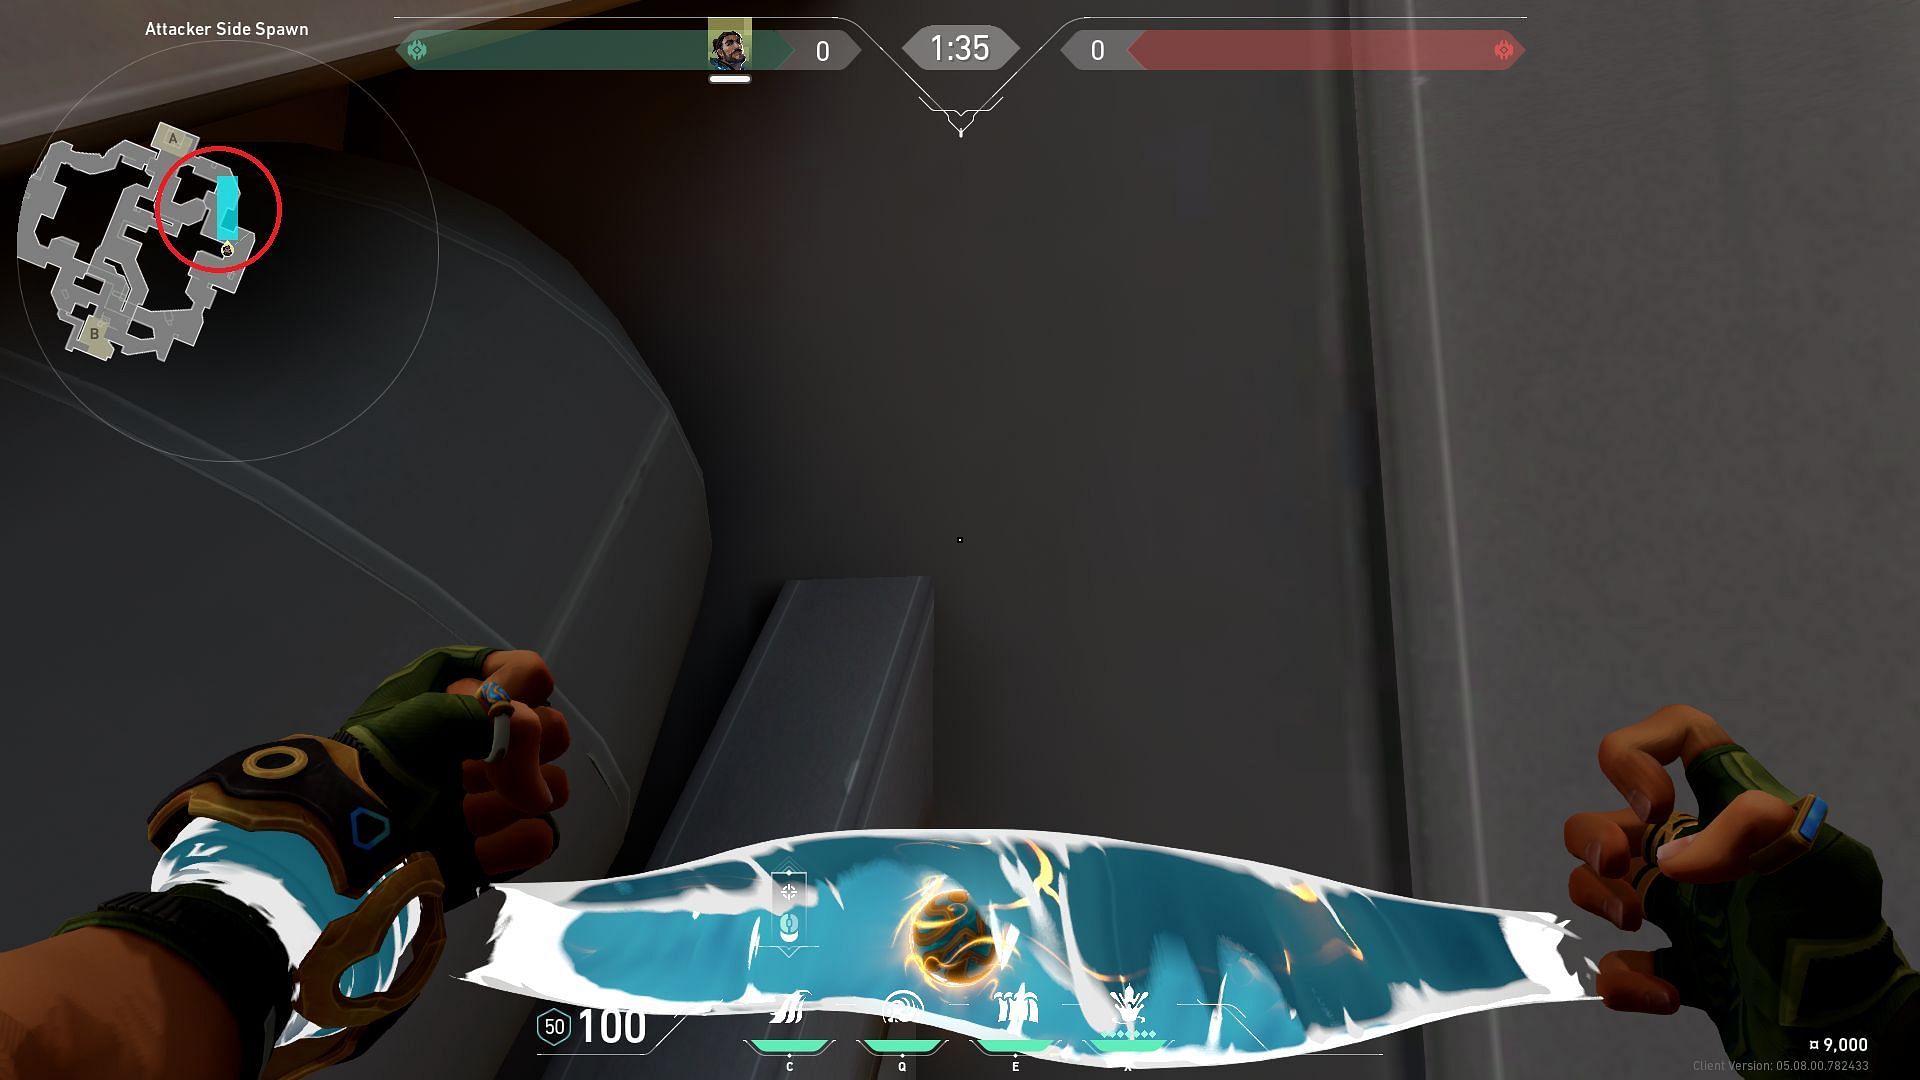
To safely push A-main with the help of Cascade, you will have to line it up from any cover available outside A-main. You can then align the ability with the mini-map so it advances foward.
This Cascade will provide cover for any Agent with an Operator looking for a first pick.
B-main safe push Cascade
In order to safely push B-main with the help of Cascade, you can pick a spot outside the area and use the mini-map to navigate the ability so it reaches the default spot within the site.
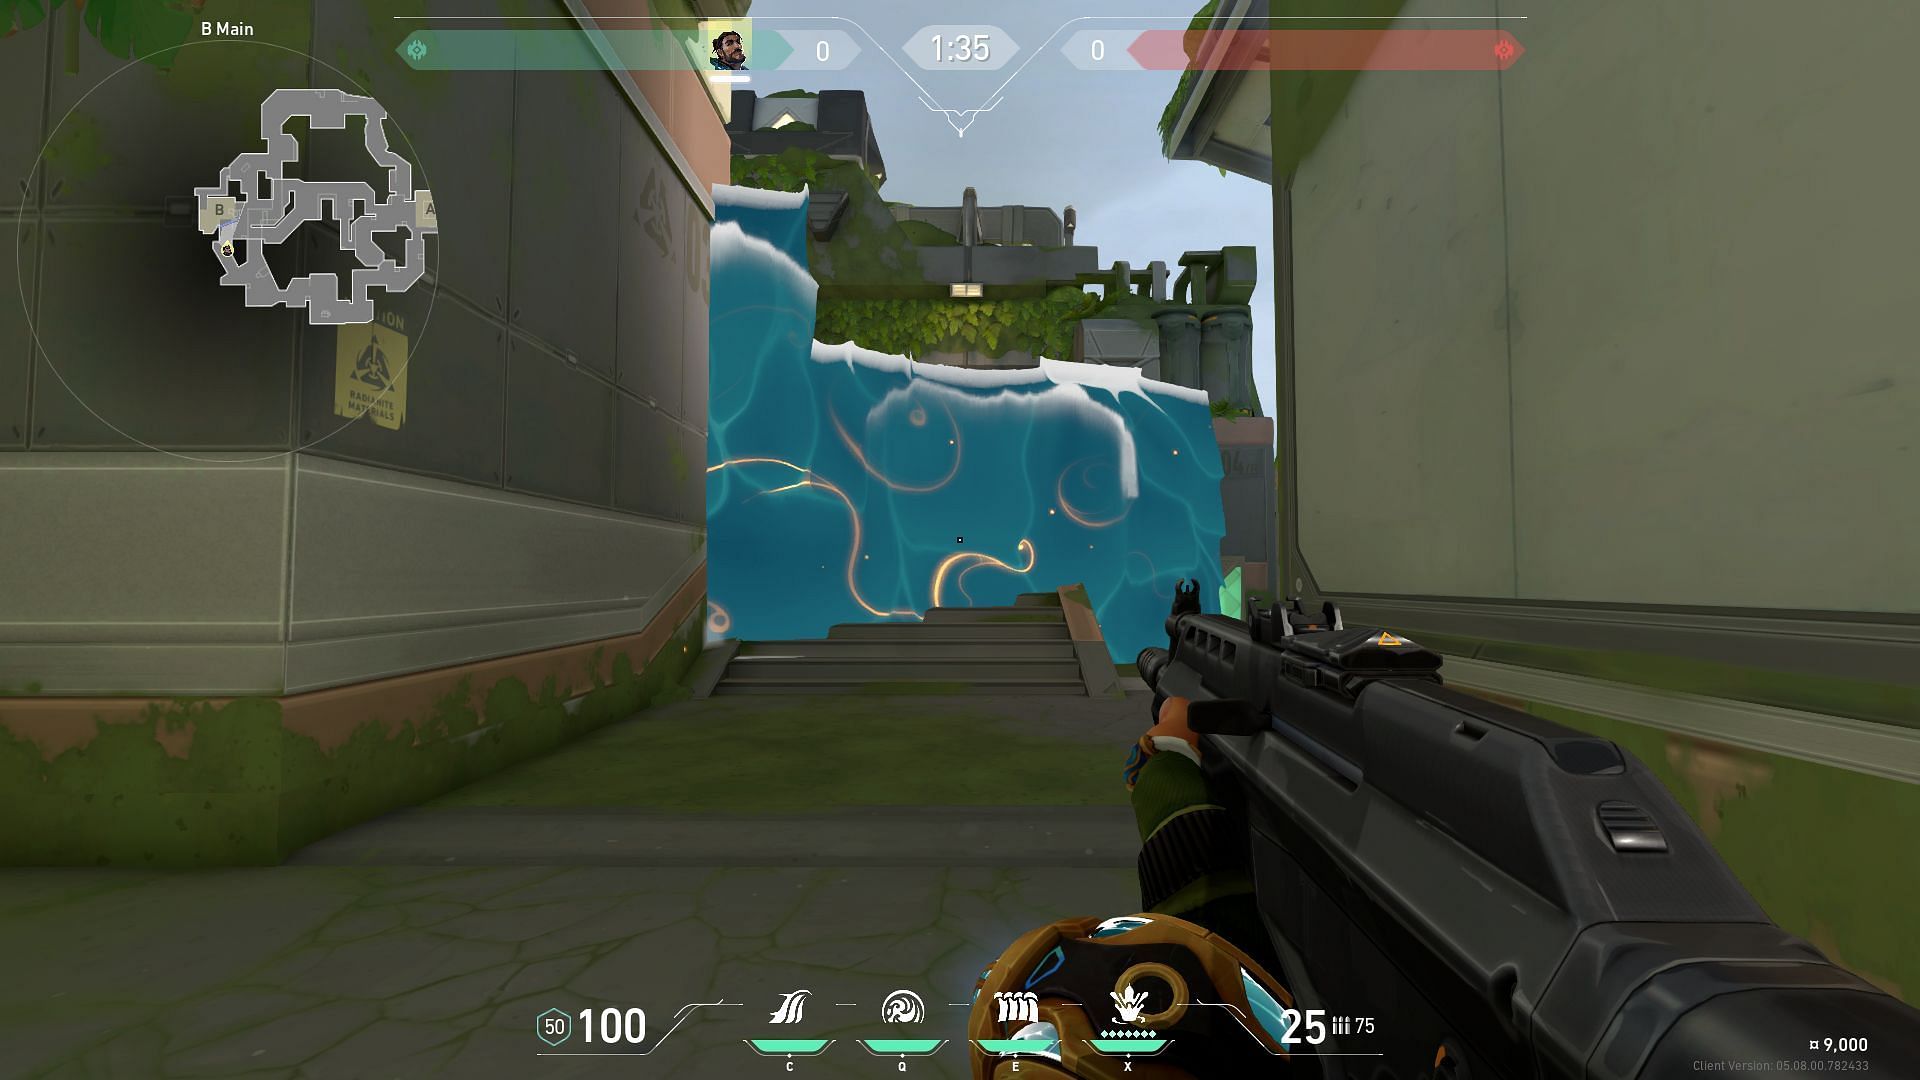
Any Agent holding an angle will be forced to move as there will be no line of sight.
Cove
A-site defender spawn Cove
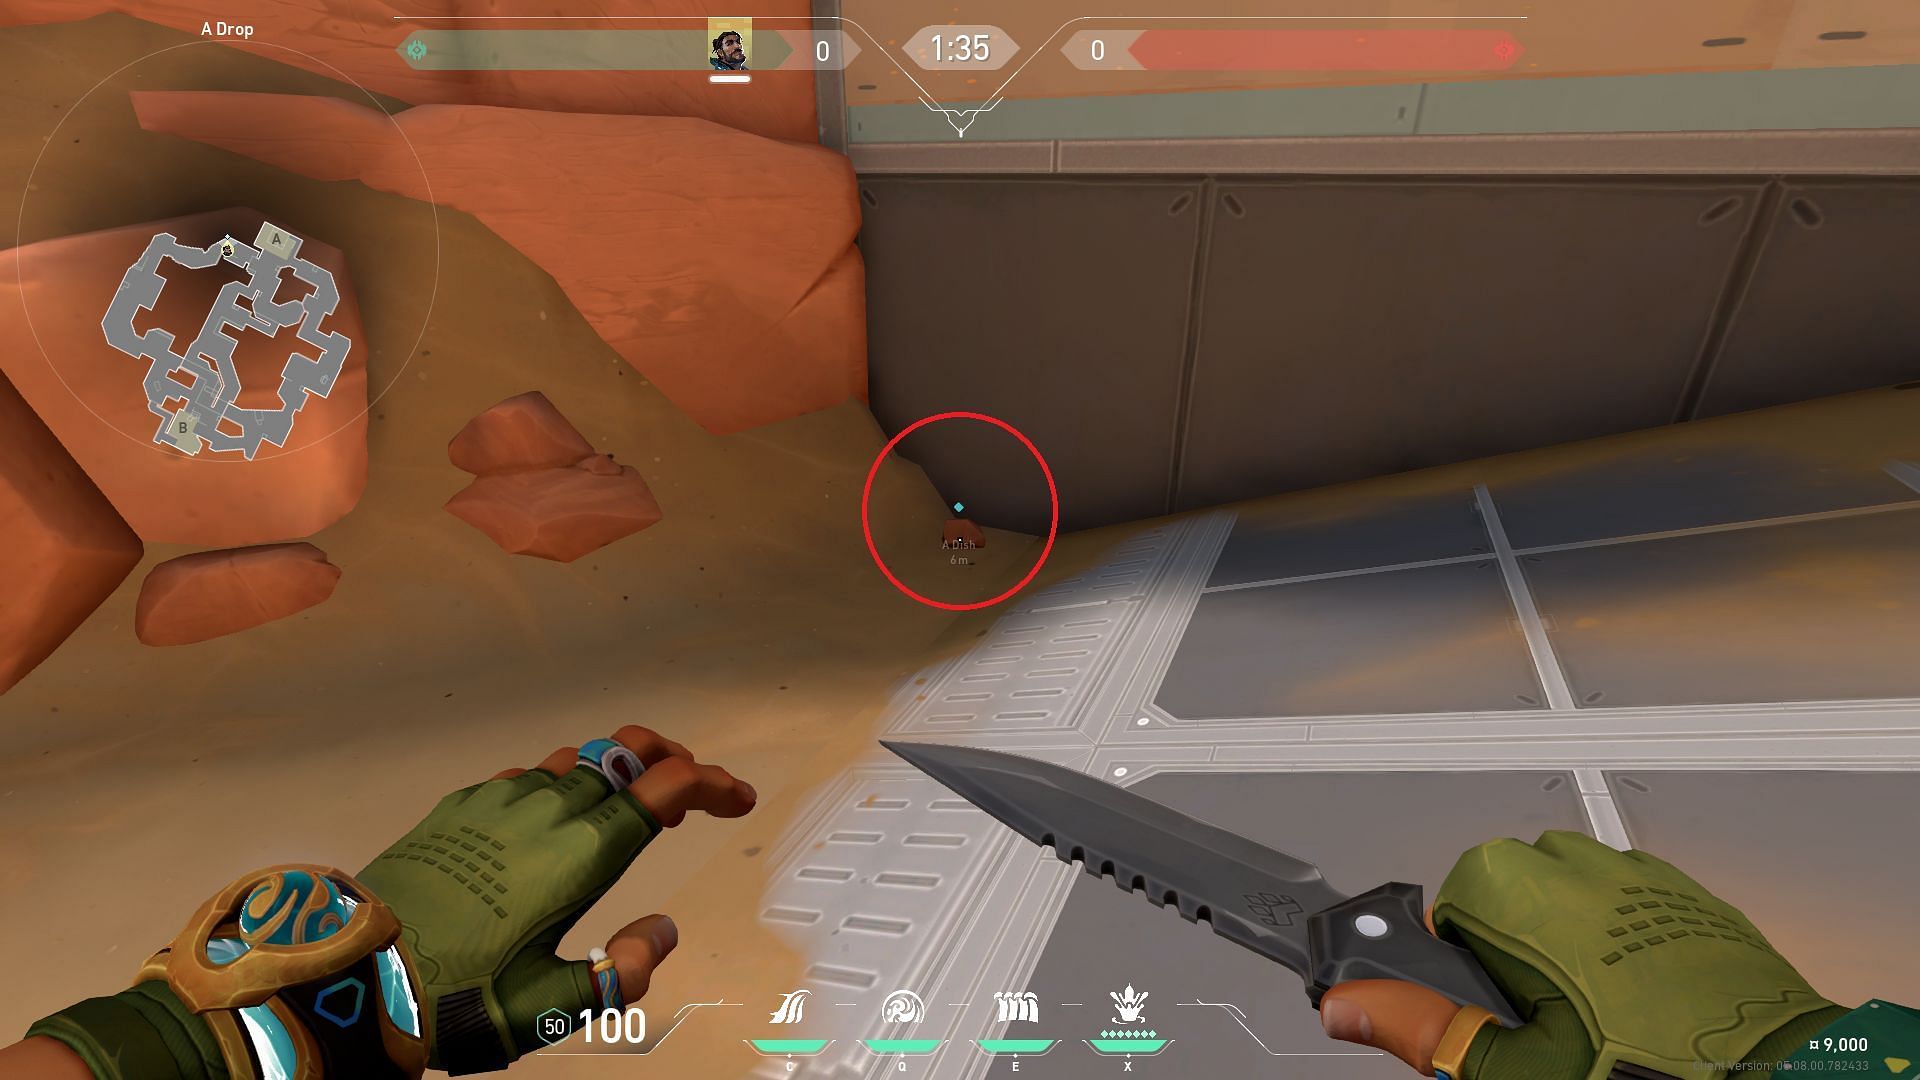
You can stand on the rock as marked in the image to perform the Cove throw for Defender Spawn on A-site.
Once on the spot, you will have to aim near the tower and then slightly down to the right side as shown in the image. Once the crosshair is in position, you will have to perform a walk-throw to land the Cove.
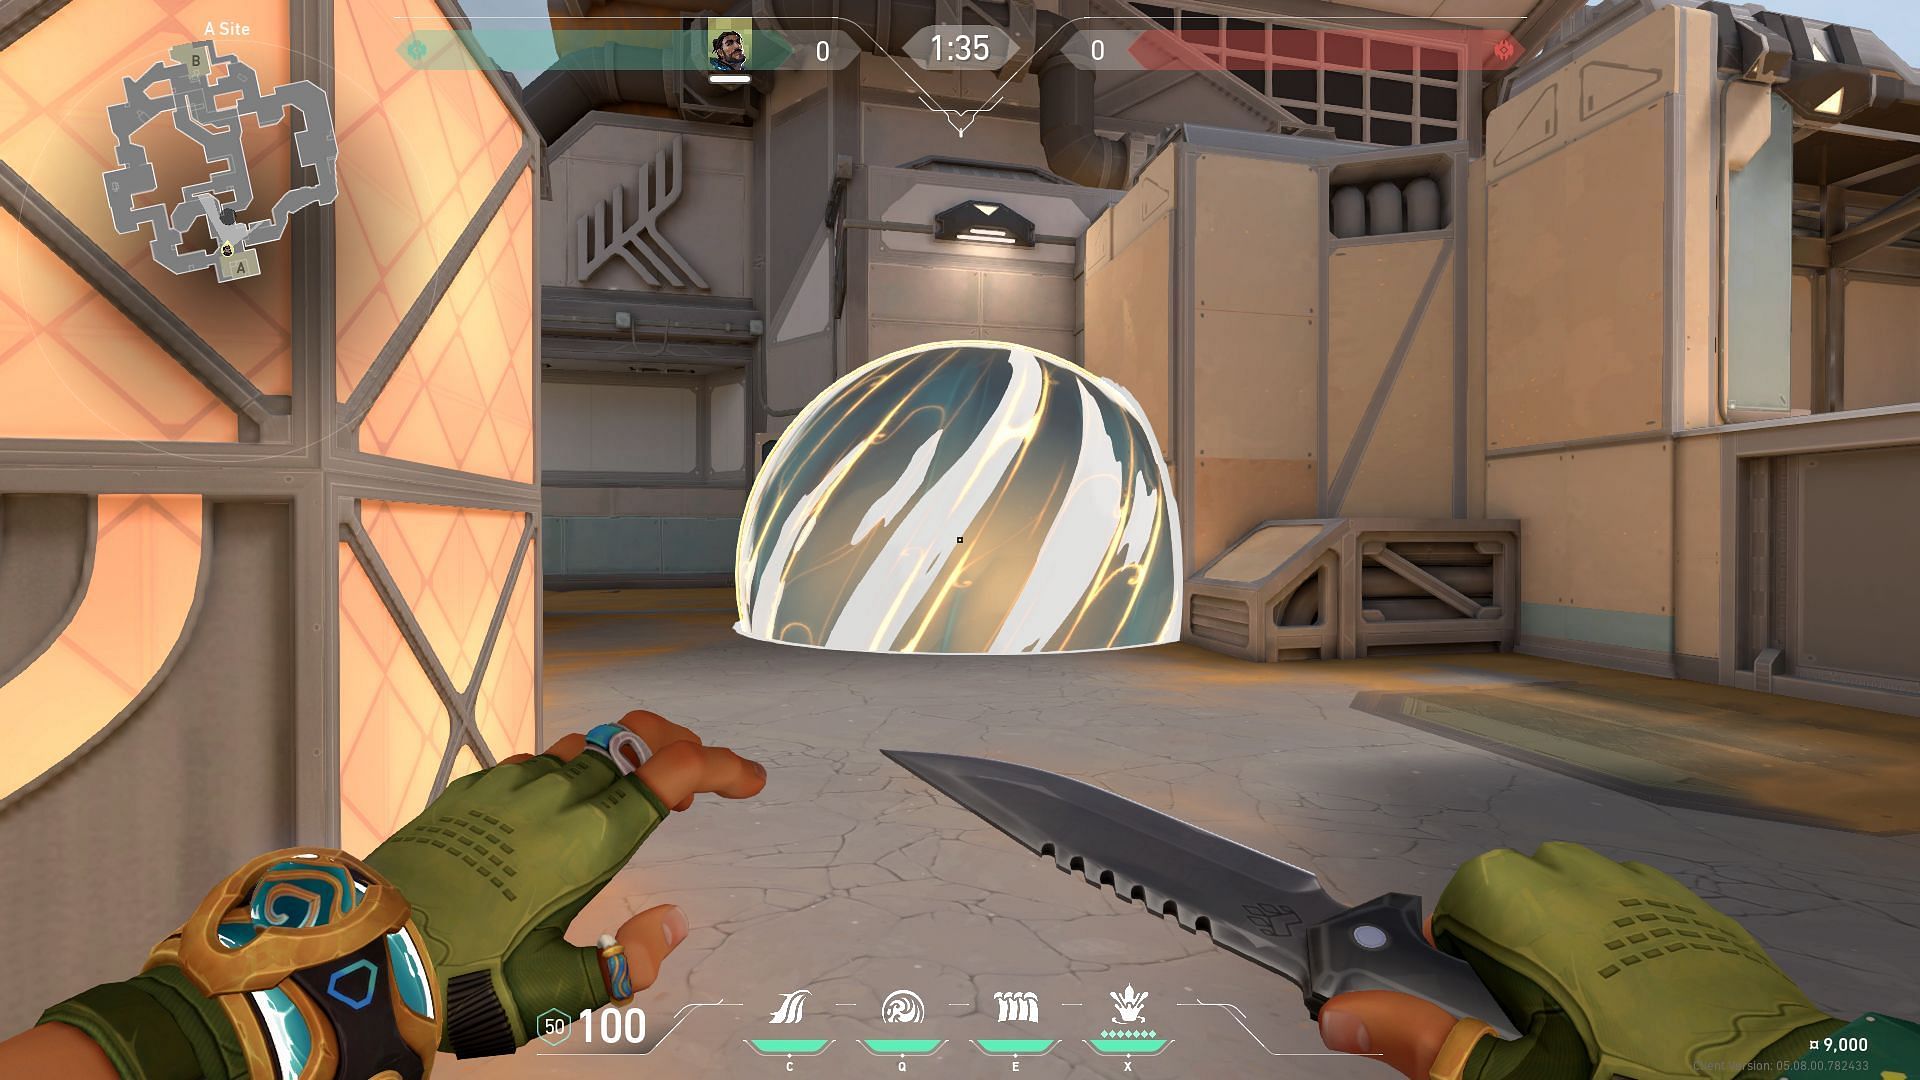
This Cove will land exactly on the entrance of the Spawn, allowing attackers to safely get into site without taking fire.
B-site Generator Cove
You can perform the Cove lineup to the Generator on B-site while pushing into the site. You will have walk up to the top of the stairs in order to perform this.

Upon reaching the top of the stairs, you will have to aim the center of the glass screen near the Generator as shown in the image. No jump-throw is required for this lineup.
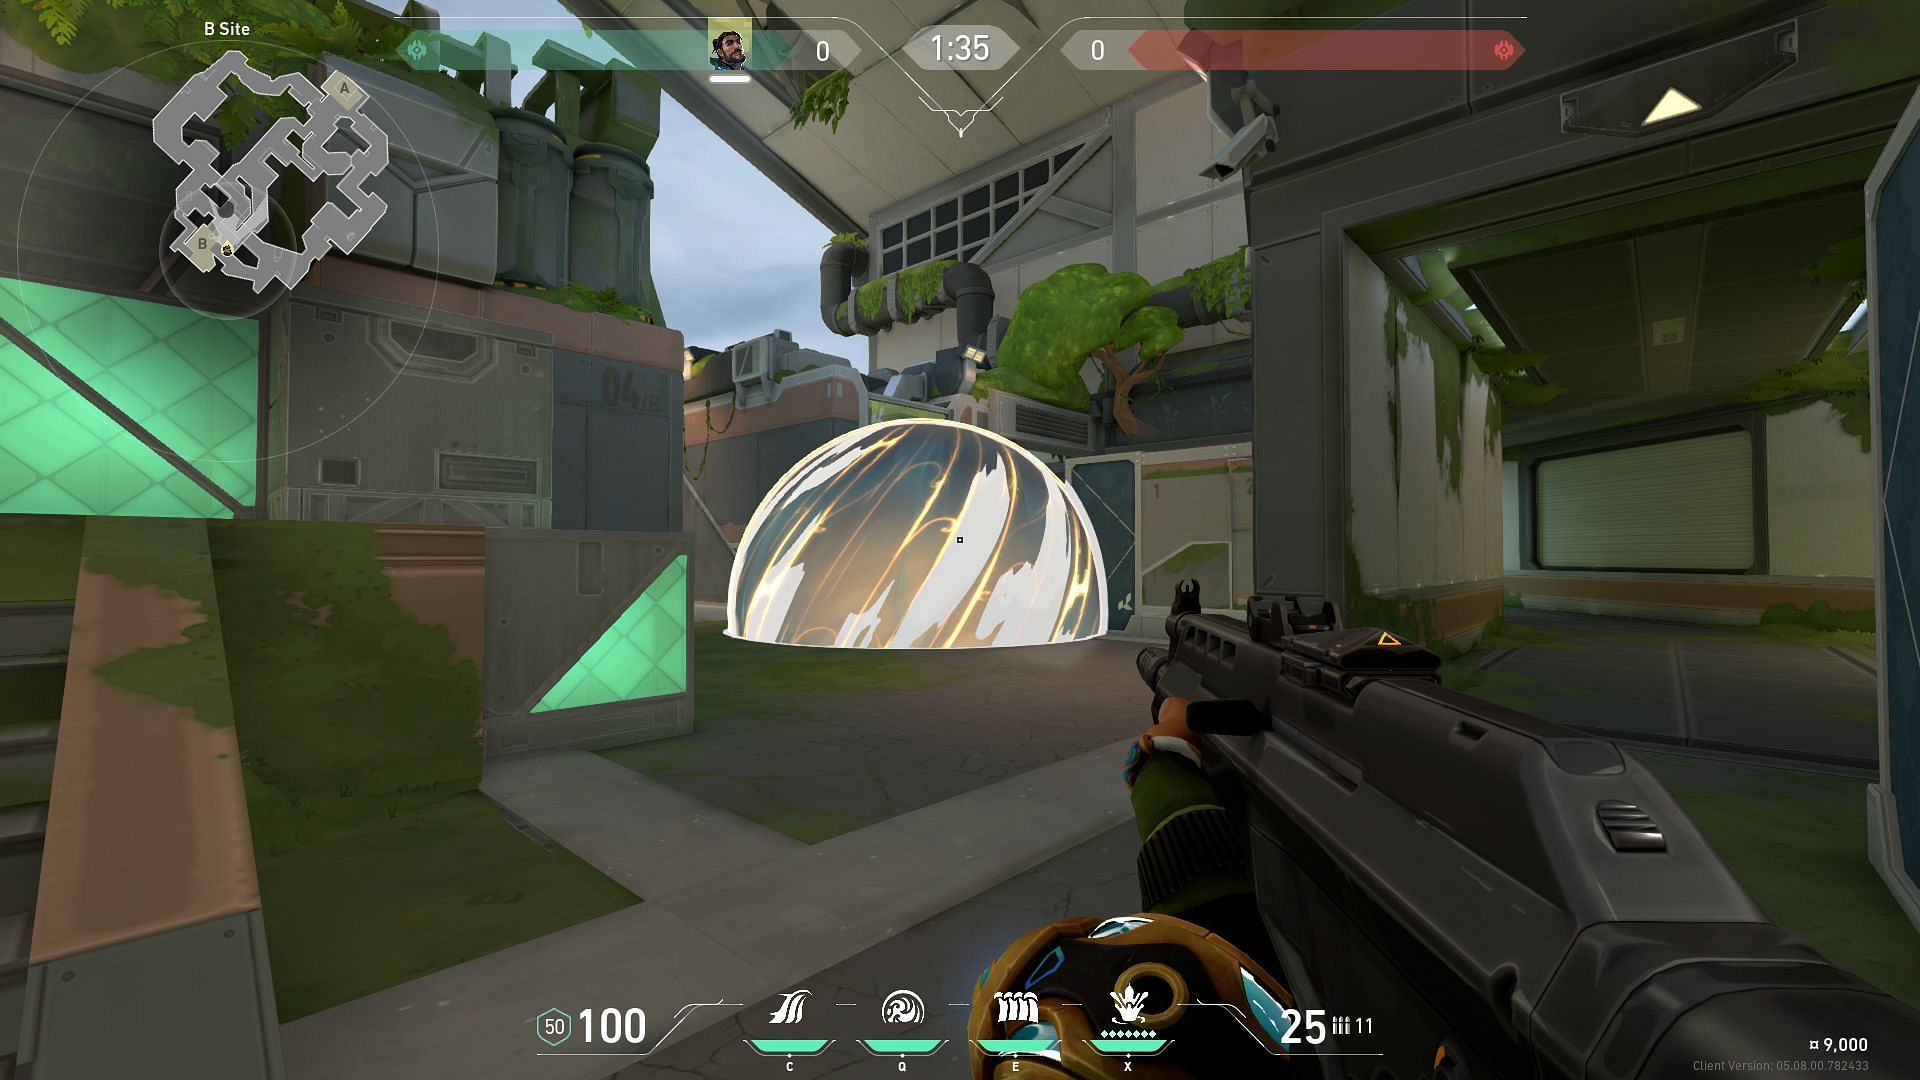
The Cove can cover attackers from the Generator area.