

'%20x='0'%20y='0'%20height='100%25'%20width='100%25'%20%0A%20%20%20%20%20%20%20%20%20%20xlink%3Ahref='data:image/jpg;base64,/9j/2wBDAAYEBQYFBAYGBQYHBwYIChAKCgkJChQODwwQFxQYGBcUFhYaHSUfGhsjHBYWICwgIyYnKSopGR8tMC0oMCUoKSj/2wBDAQcHBwoIChMKChMoGhYaKCgoKCgoKCgoKCgoKCgoKCgoKCgoKCgoKCgoKCgoKCgoKCgoKCgoKCgoKCgoKCgoKCj/wgARCAAGAAoDASIAAhEBAxEB/8QAFgABAQEAAAAAAAAAAAAAAAAAAAQF/8QAFQEBAQAAAAAAAAAAAAAAAAAAAQT/2gAMAwEAAhADEAAAALcYa//EAB8QAAICAQQDAAAAAAAAAAAAAAECAwQFABEiMRITUf/aAAgBAQABPwAWI7hvQtVrVakCvO0MESsG8NwG5dtt9GhmKlcemXHY6SSPgzignIjs96//xAAaEQACAgMAAAAAAAAAAAAAAAABAgADEyKR/9oACAECAQE/AM9pdt26Z//EABgRAAMBAQAAAAAAAAAAAAAAAAECAwAx/9oACAEDAQE/AGmryAI5v//Z'%3E%3C/image%3E%3C/svg%3E)
With episode 1089, One Piece finally started the long-awaited anime adaptation of the Egghead Arc. Even beyond the episode's movie-level cinematic scenes, what hyped everyone was the amazing new intro. Directed by Megumi Ishitani and chanted by Hiroshi Kitadani, the Egghead Arc opening UUUUUS! is an absolute masterpiece.
A jaw-dropping combination of music and visuals, enriched by a vivid color palette, UUUUUS! majestically introduces the new arc. As expected from Ishitani, the Egghead Arc opening is a work of art, packed with easter eggs and details, all of which are brought to life in a stunning succession of incredibly fluid transitions.
The intro contains many heavy spoilers, which might leave anime-only viewers disappointed. Still, it’s hard not to appreciate Ishitani and Toei Animation’s work, and their intention to glorify Eiichiro Oda’s beautiful story. Follow this thread for a detailed explanation of every easter egg featured in the Egghead Arc opening.
Disclaimer: This article contains major spoilers from the One Piece manga up to chapter 1104.
All the spoilers in One Piece's Egghead Arc anime opening explained in detail
Luffy's true dream
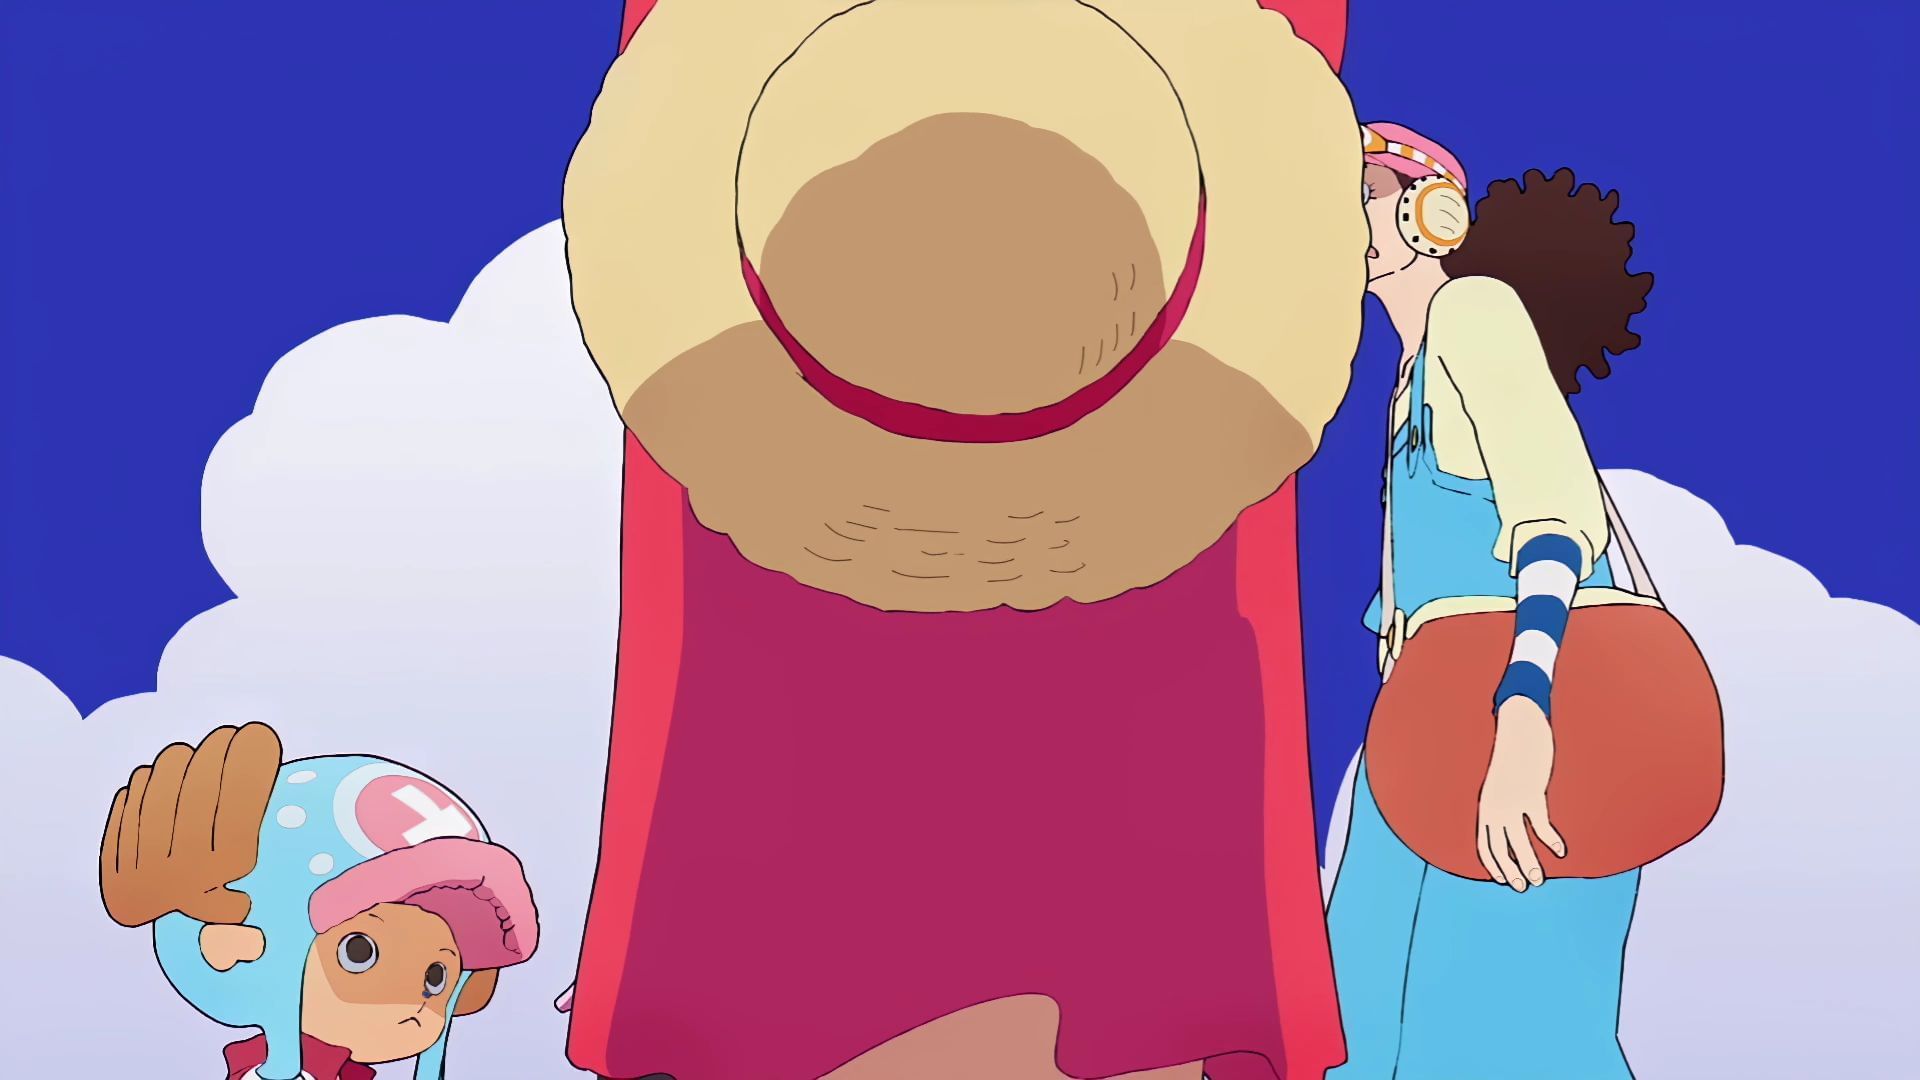
The intro begins with a cut of Luffy on the Thousand Sunny as he declares to his comrades his "true dream" that goes even beyond becoming the Pirate King. Funnily enough, in the top-down shot of the ship sailing, one can see Caribou hiding in his barrel.
A reference to Bon Voyage!
In the next sequence, the Straw Hat Pirates are shown walking together in their brand-new Egghead outfits. This scene is a callback to the franchise's fourth opening, Bon Voyage!, which featured an identical pattern, with the Straw Hats of the time wandering cheerfully.
Exploring Egghead
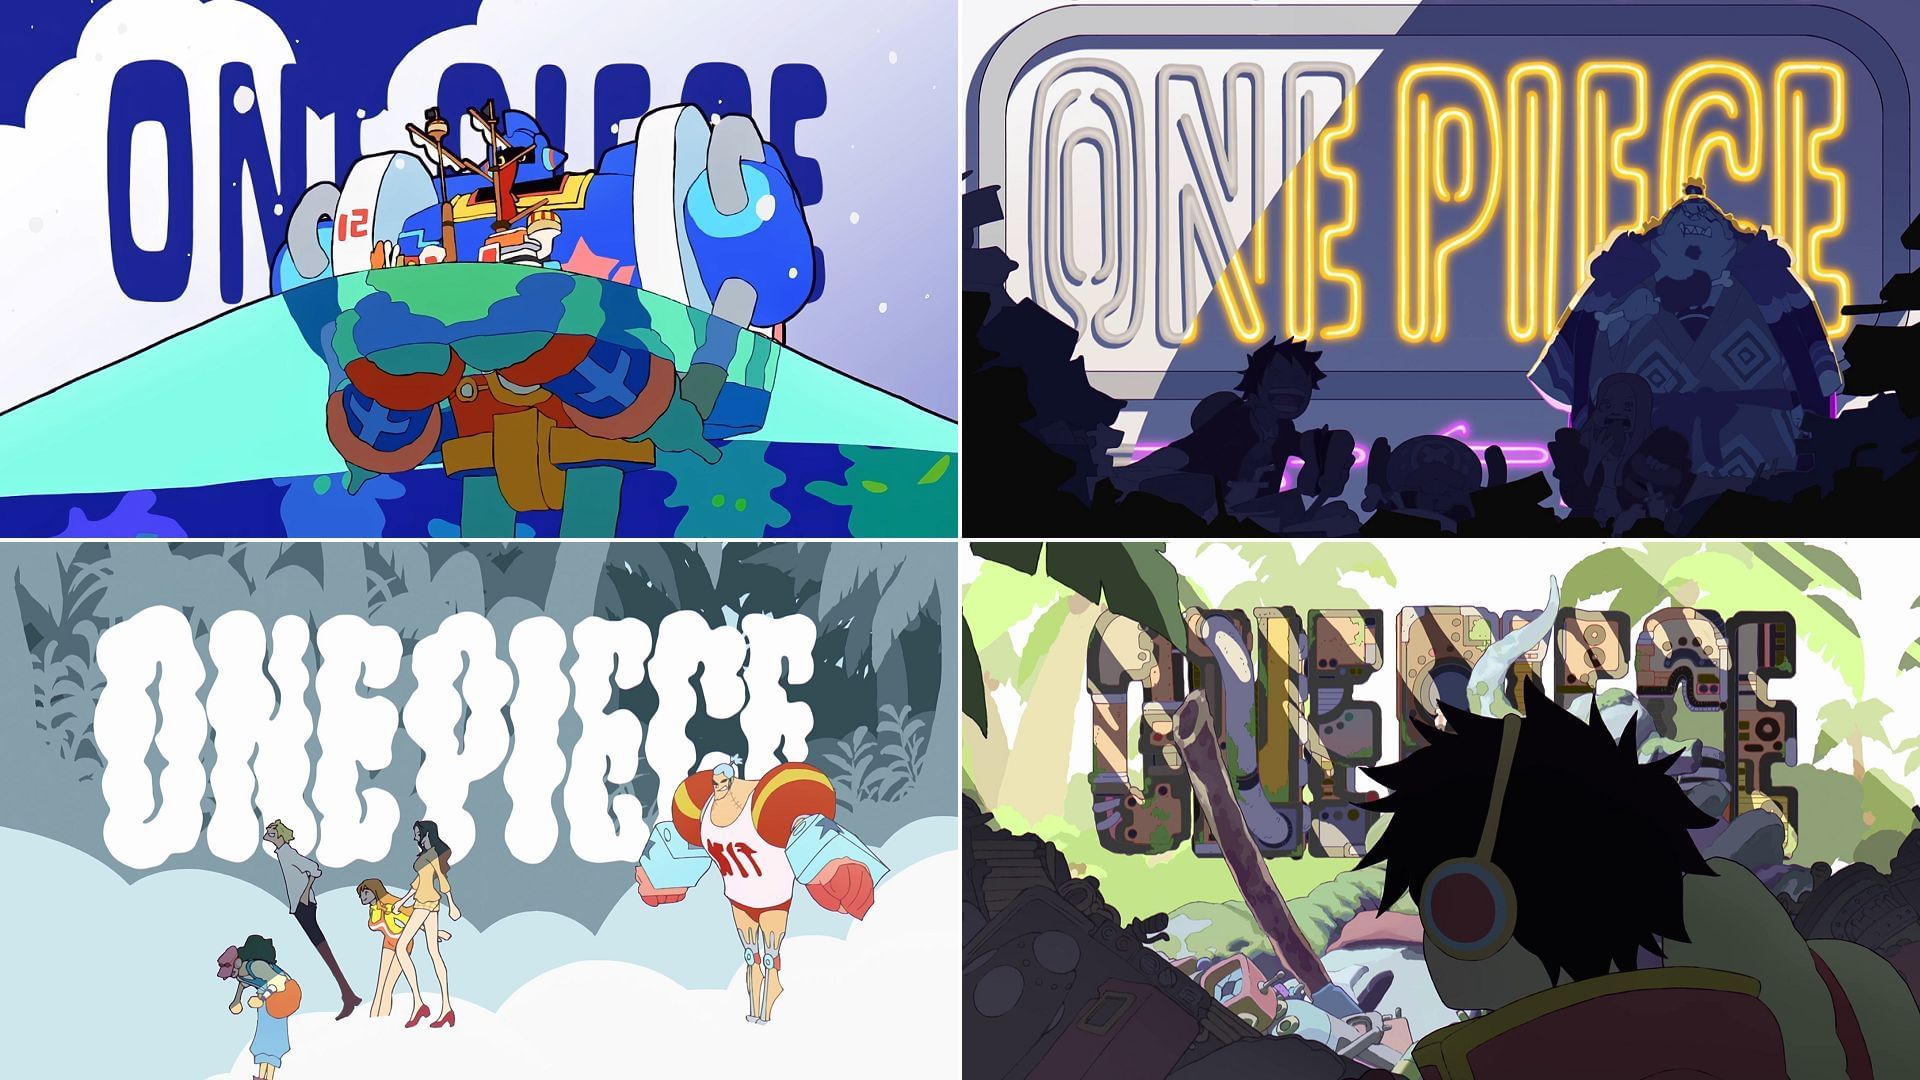
As Luffy messes around with his DOM shoes, he ends up activating them, which sends him flying towards the screen. The smoke Luffy leaves behind serves as a perfect transition for the next sequence, which features several shots of the Egghead Arc’s initial part.
The scenes include the enormous mecha Vegaforce-01 carrying the Thousand Sunny, as well as Luffy, Chopper, and Bonney eating food created by the Automatic Cooking Machine. Franky, Nico Robin, Nami, Sanji, and Usopp can be seen enjoying the cloud-like forest of Egghead. Ultimately, Luffy finds the Iron Giant.
The Vegapunks
The next sequence highlights Vegapunk’s six satellite bodies. Shaka, Lilith, Edison, Pythagoras, Atlas, and York are shown one after another, like in the typical selection screen of a videogame.
The secret mission of the CP0 elite
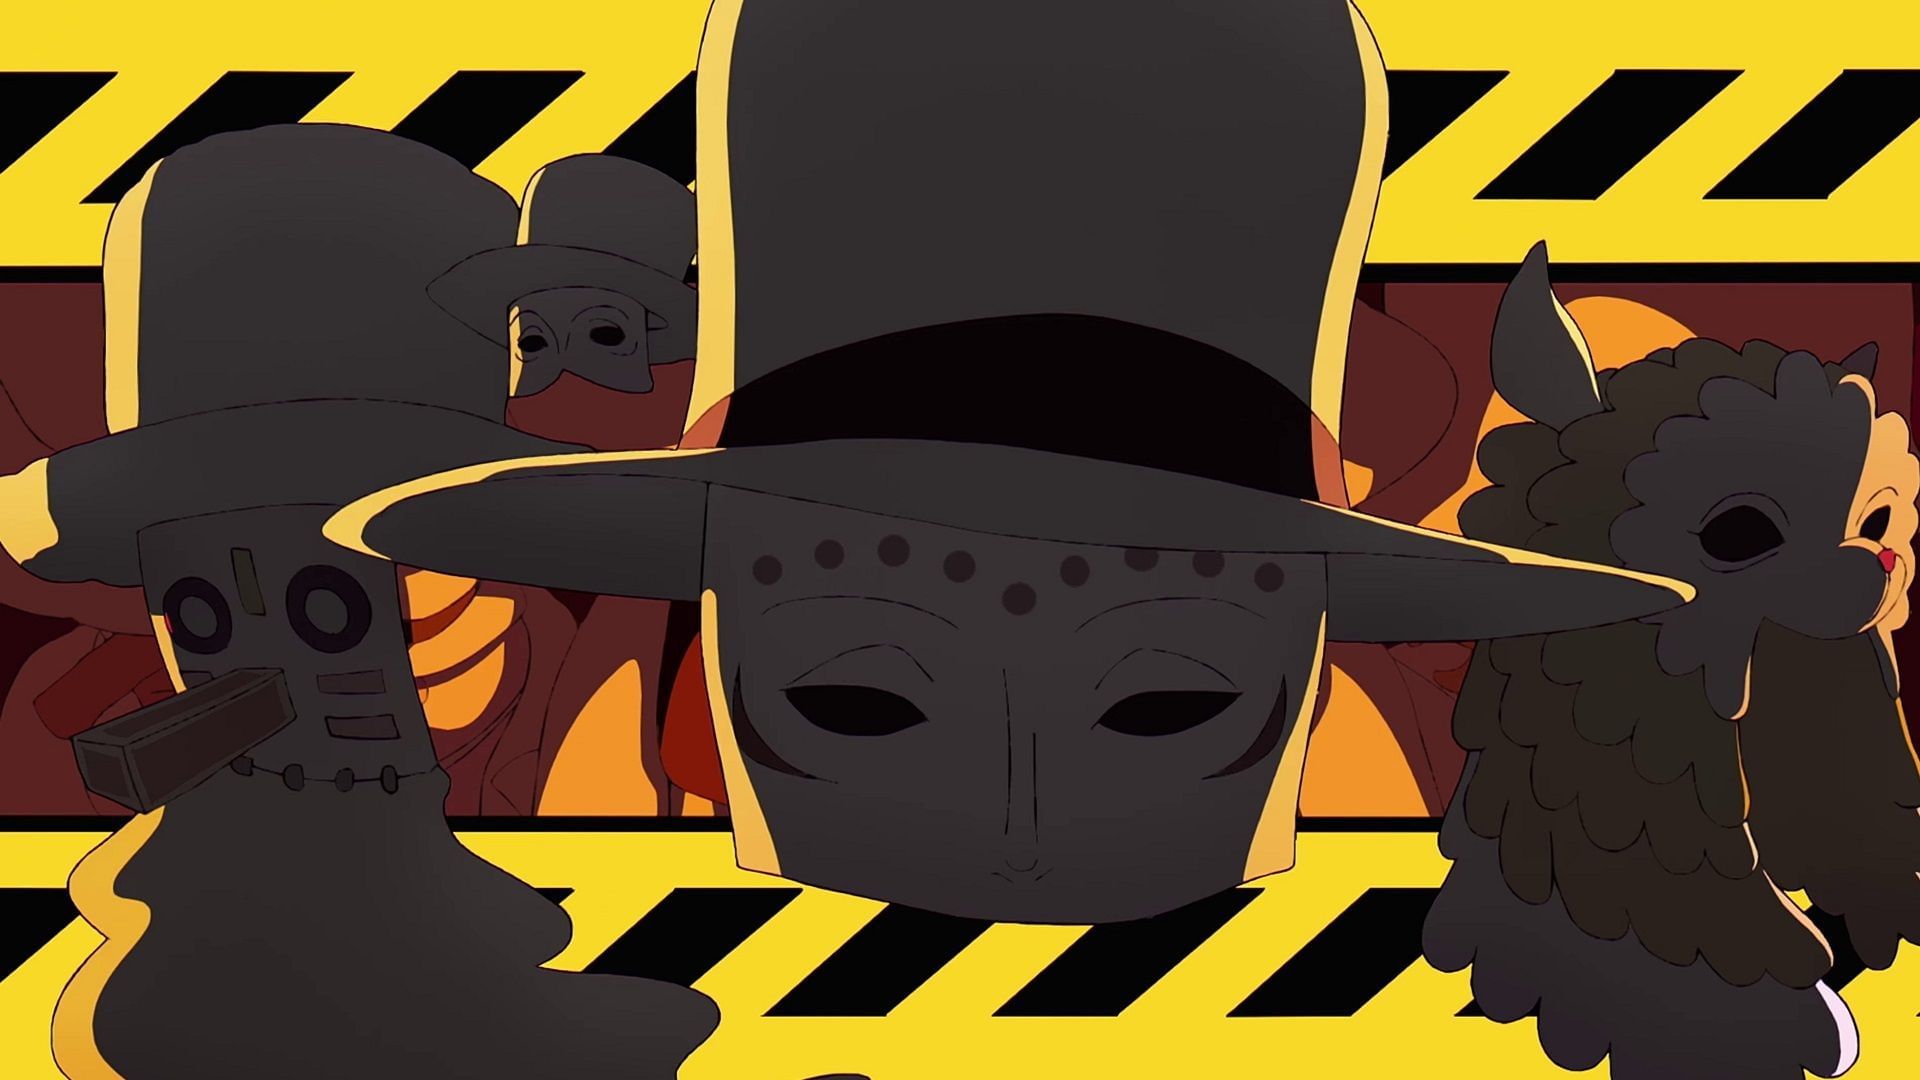
The background changes, revealing Kaku, Rob Lucci, and Stussy. Vegapunk Stella briefly pops up on the screen before disappearing as the masks of the three CP0 elite agents are shown. This sequence hints at the CPO's mission to kill Vegapunk.
Luffy and Zoro's brotherhood
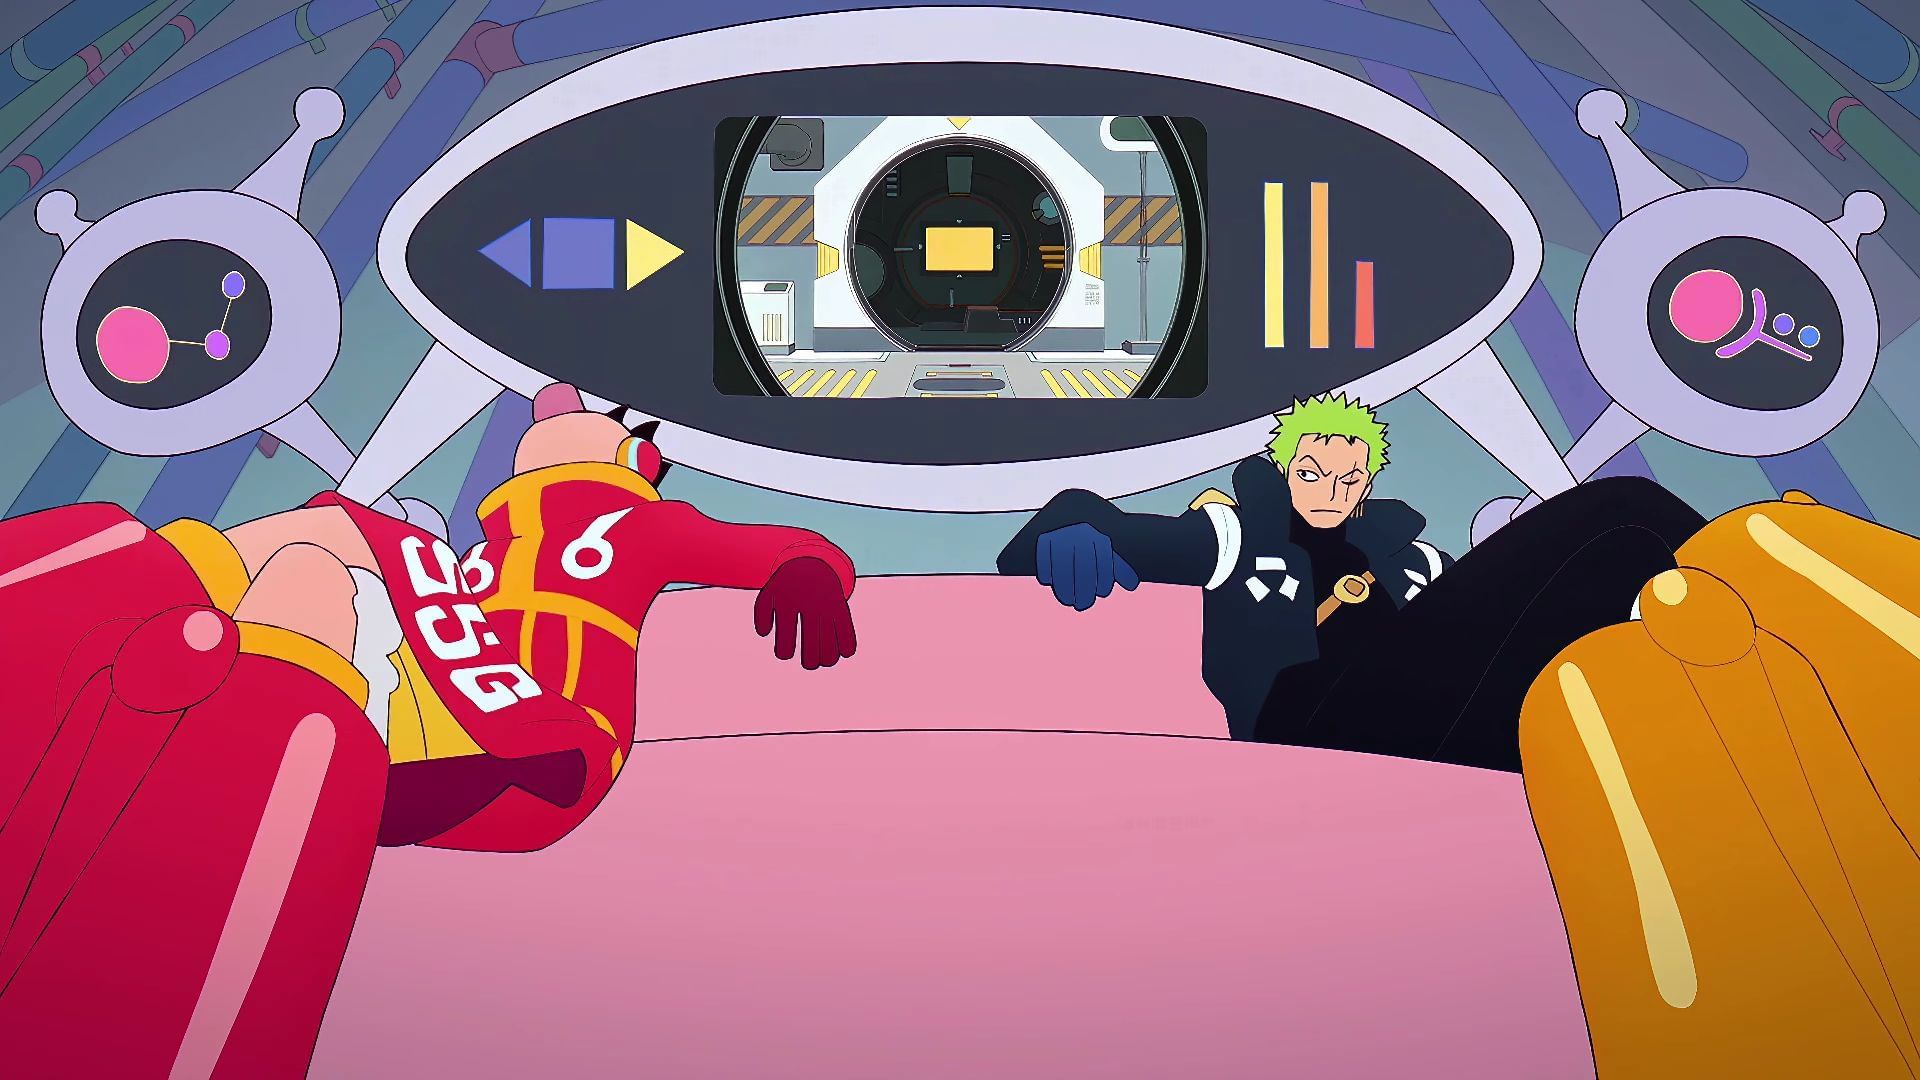
After continuing his exploration with Chopper, Luffy stretches his body, starting a totally new sequence. The shot recalls the scene in which Luffy and Zoro sit on a couch, surveilling the apprehended Lucci and Kaku.
Tired and seemingly almost exhausted, Luffy rests a bit, while Zoro looks at him with a stern gaze. Behind the couch the two Straw Hats are sitting on is a big monitor, which suddenly turns into a hologram.
The magic hologram
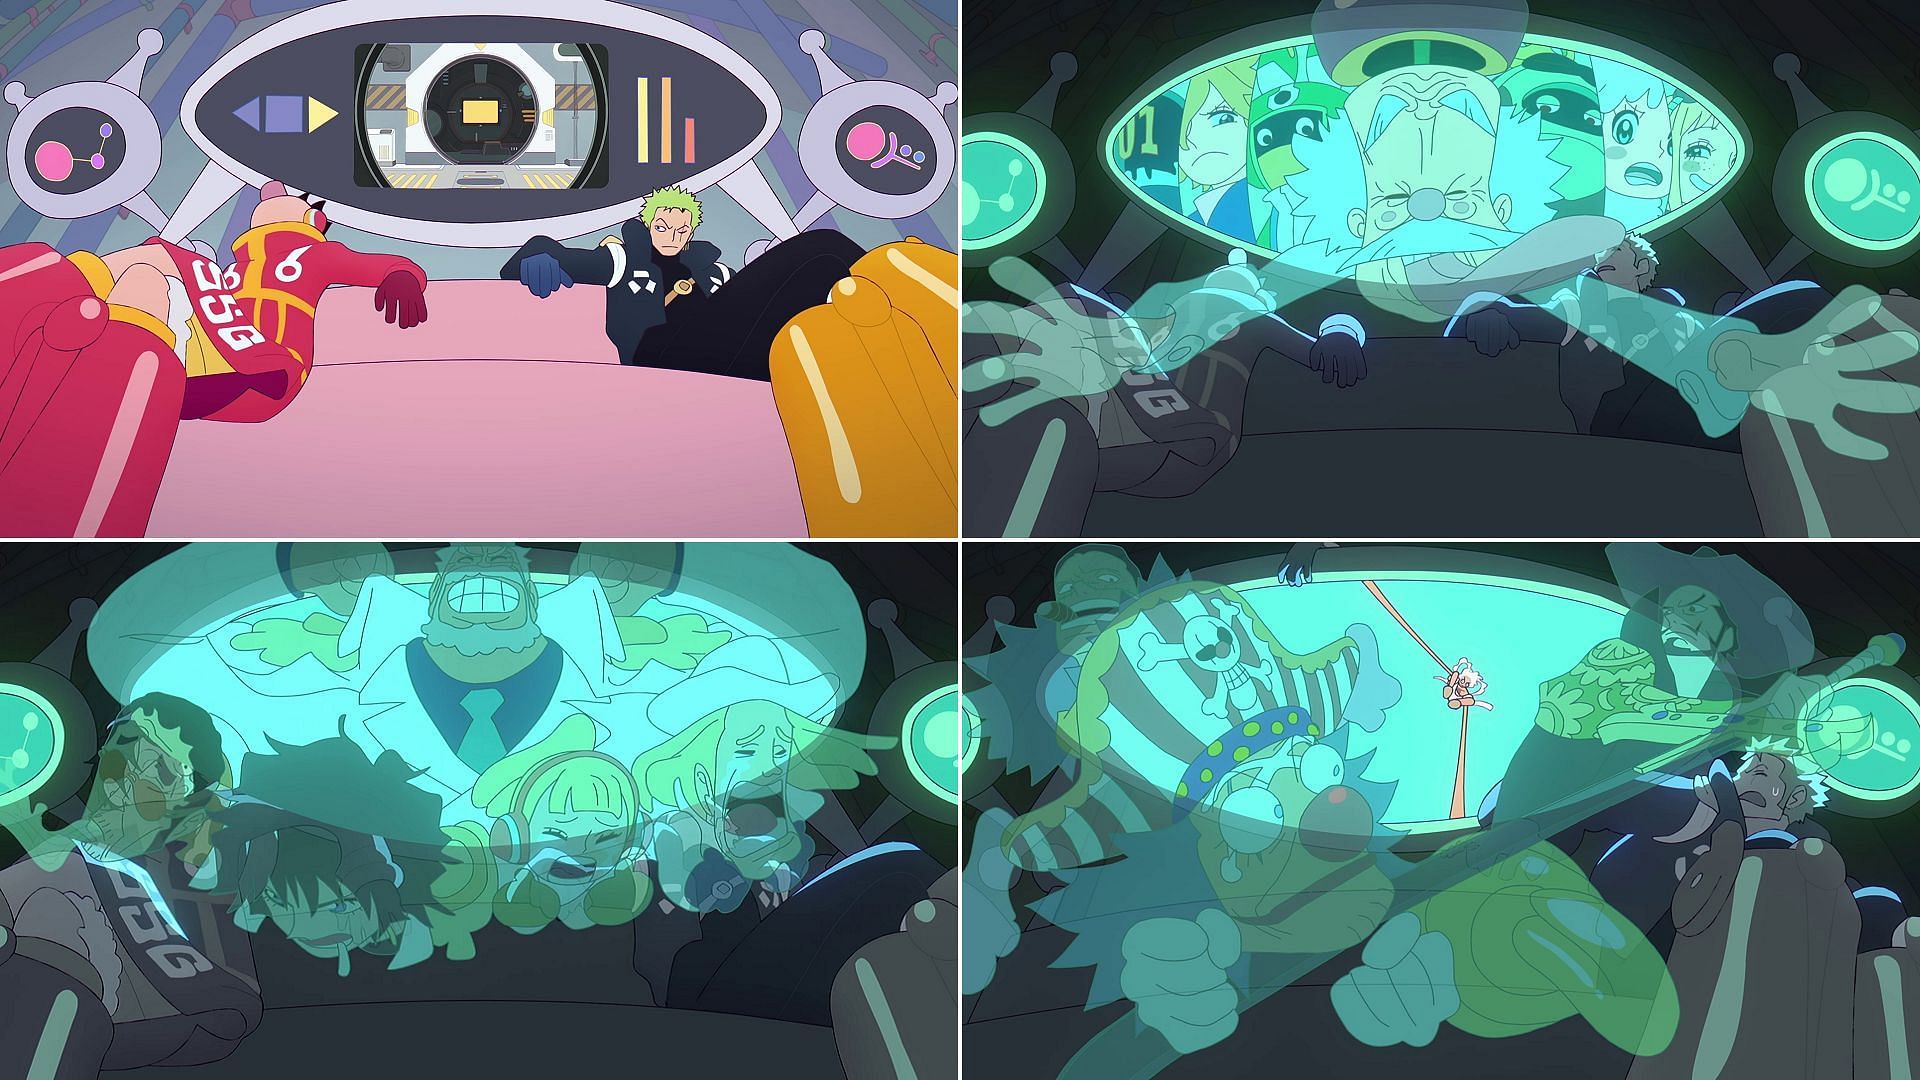
One after another, the holograms show several characters involved in the Egghead Arc, starting with Vegapunk and his satellite bodies. Then it’s the turn of several Marines, including Kizaru, Doll, Hibari, and Helmeppo, with Garp behind them. Finally, the hologram changes into the main members of Cross Guild, with Mihawk threatening a frightened Buggy.
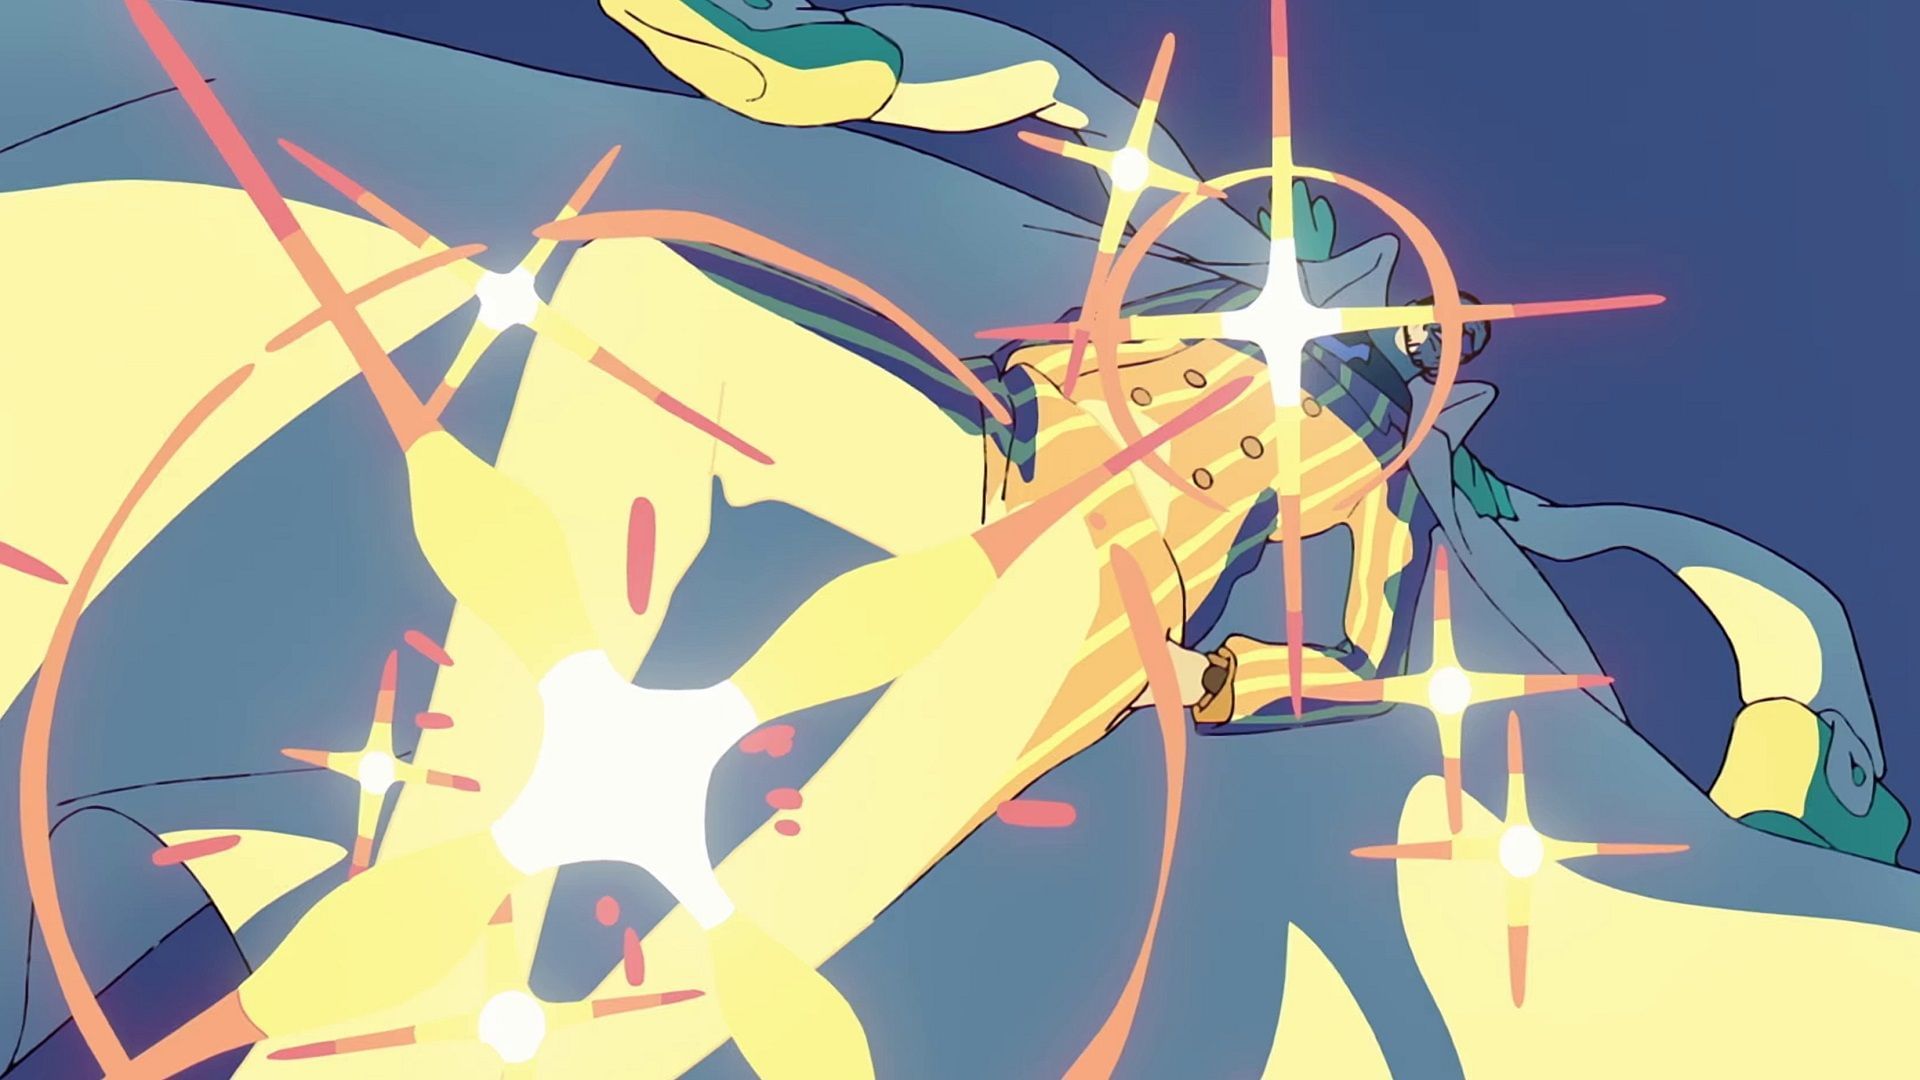
Luffy's reality-warping Gear 5
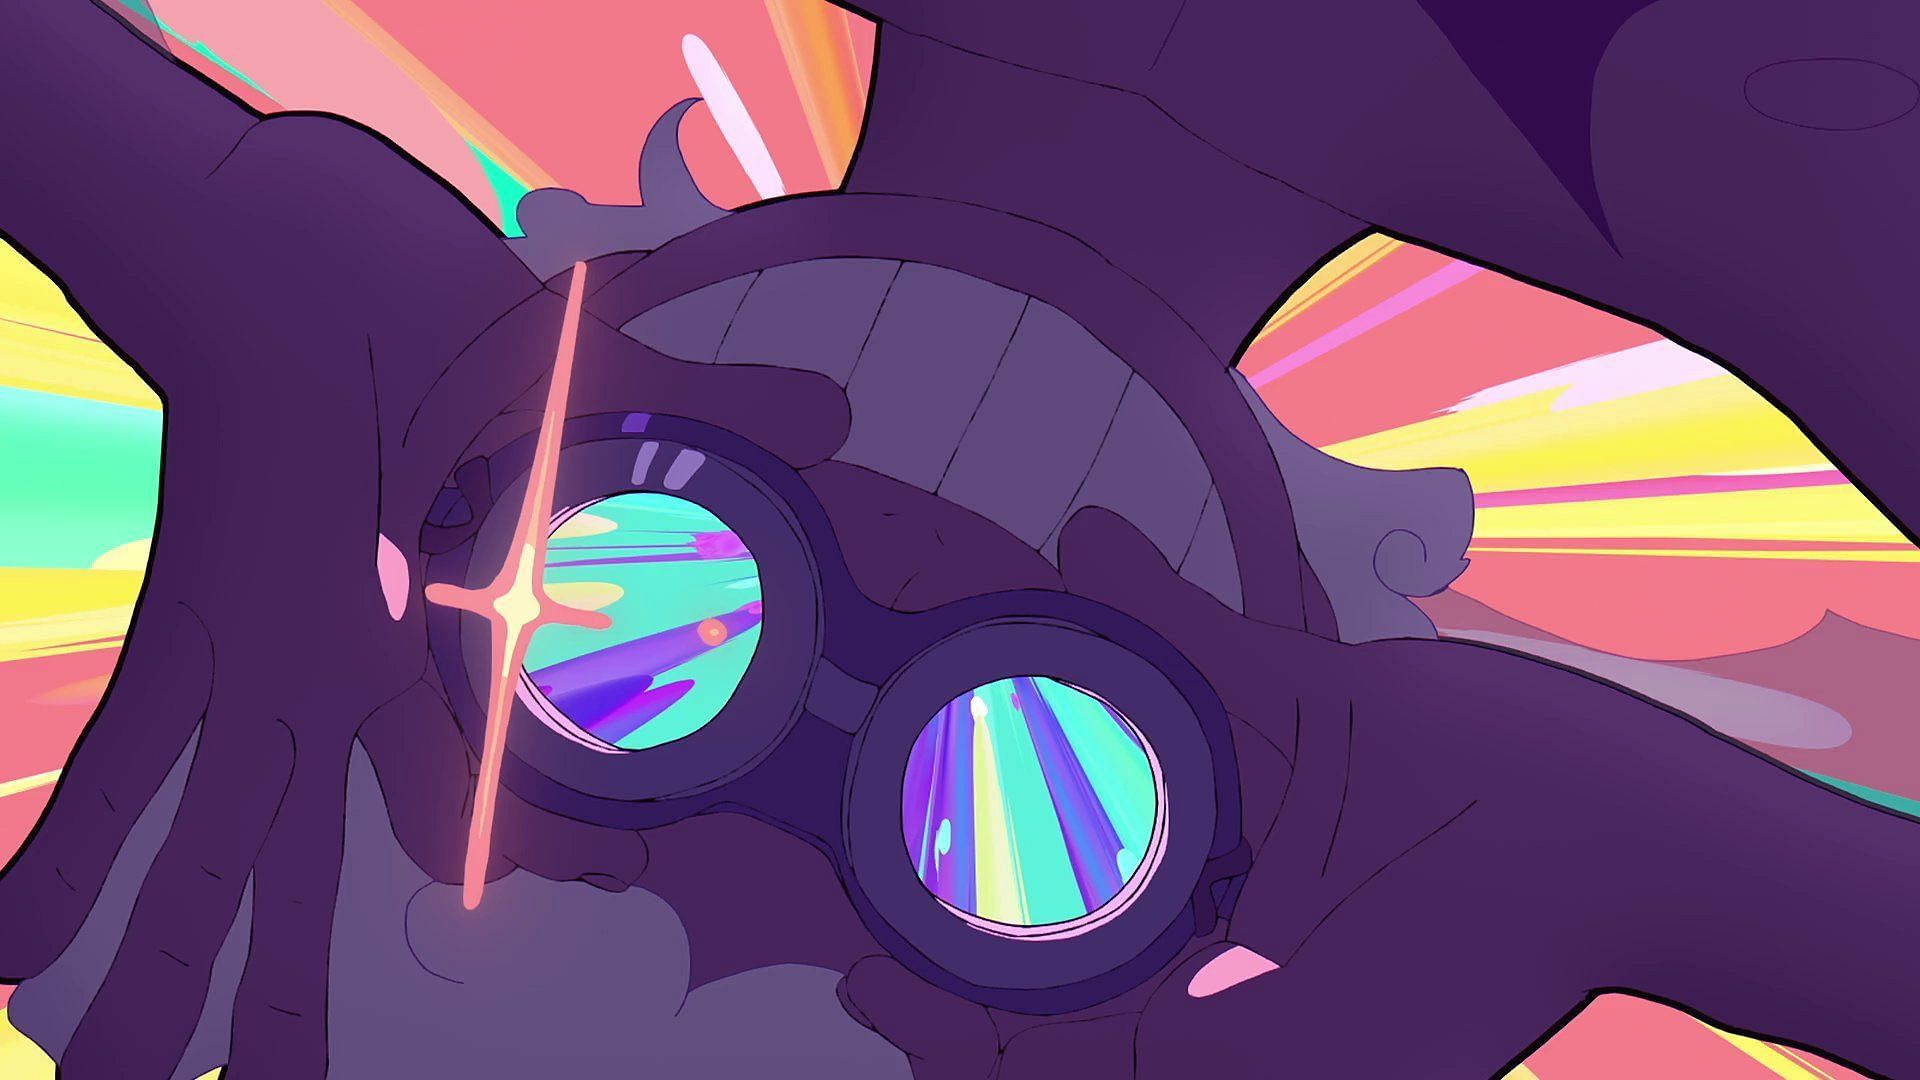
Suddenly, Luffy enters his Gear 5 transformation, generating goggles out of nothingness and putting them on like he did in the fight with Lucci. Luffy also enlarges himself into his giant form, just like he did in his battle against the CP0 agent.
Koby's adventure on Hachinosu
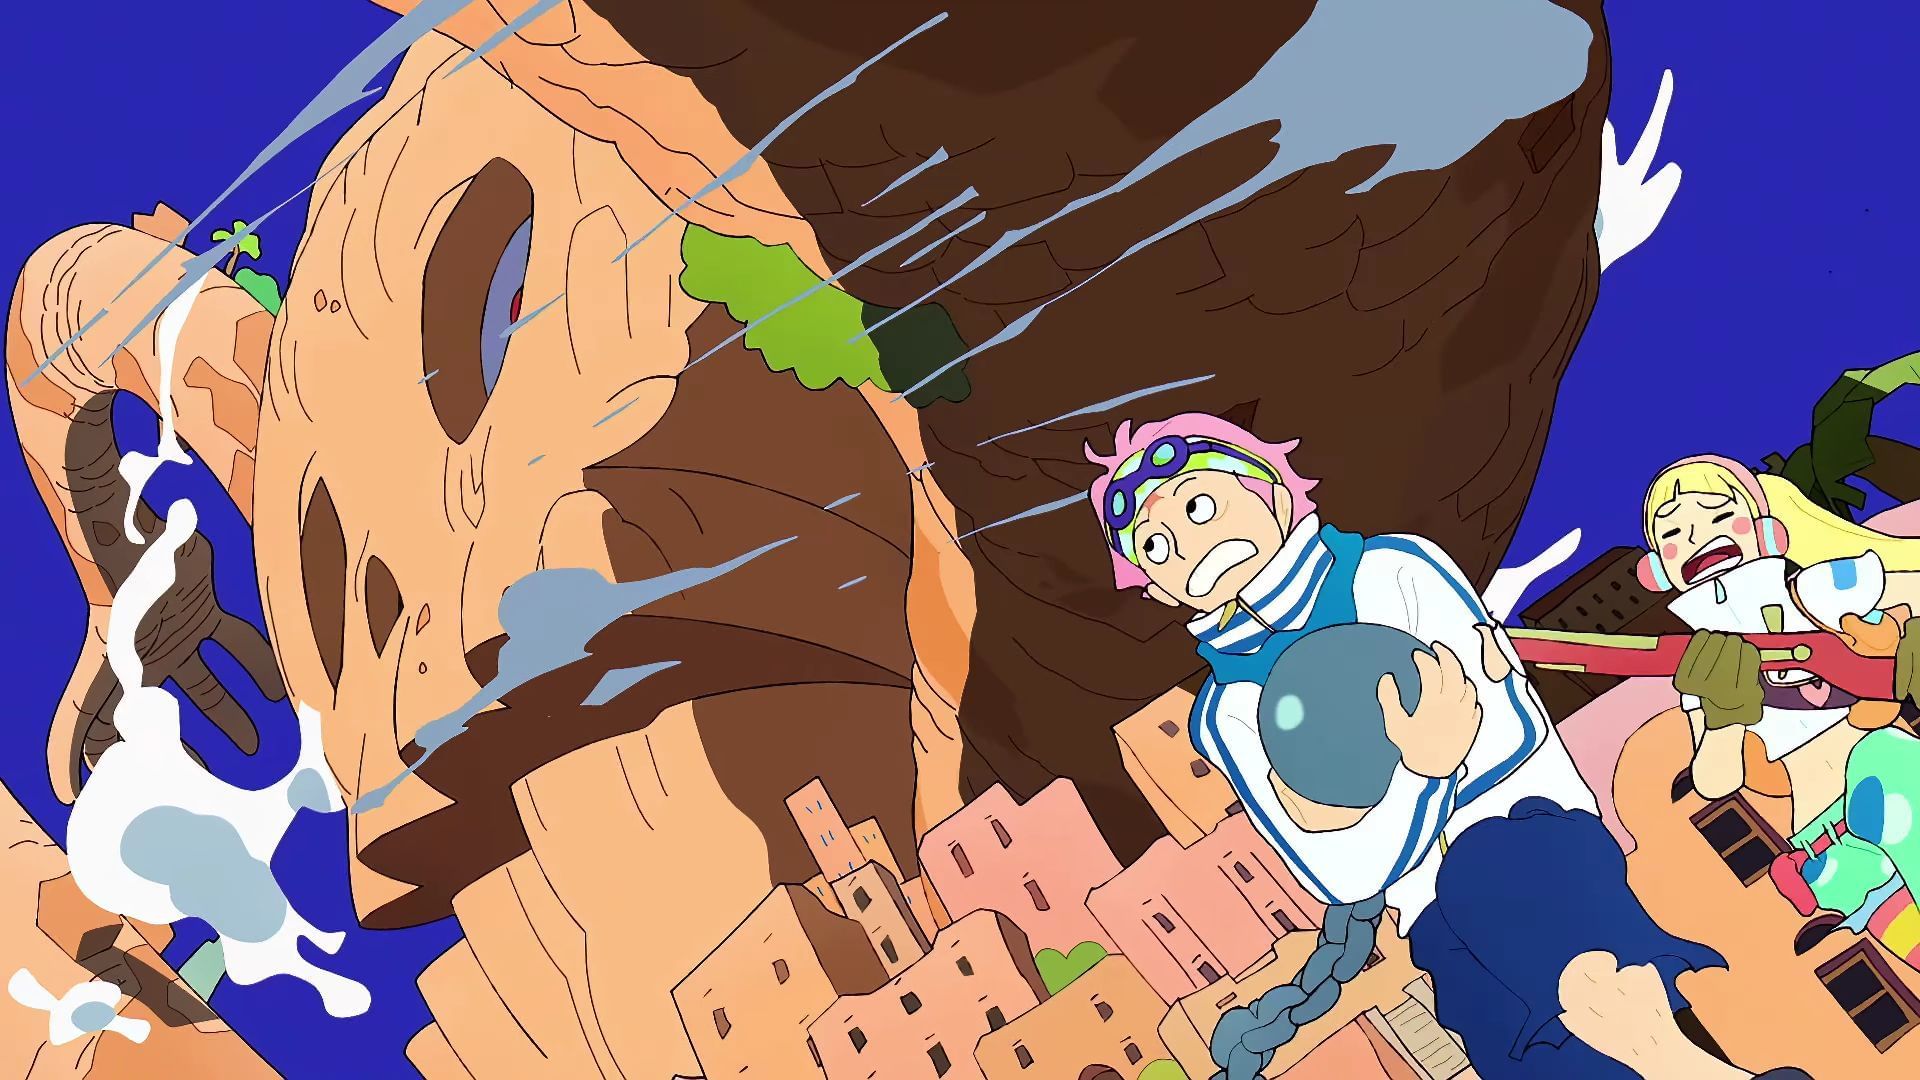
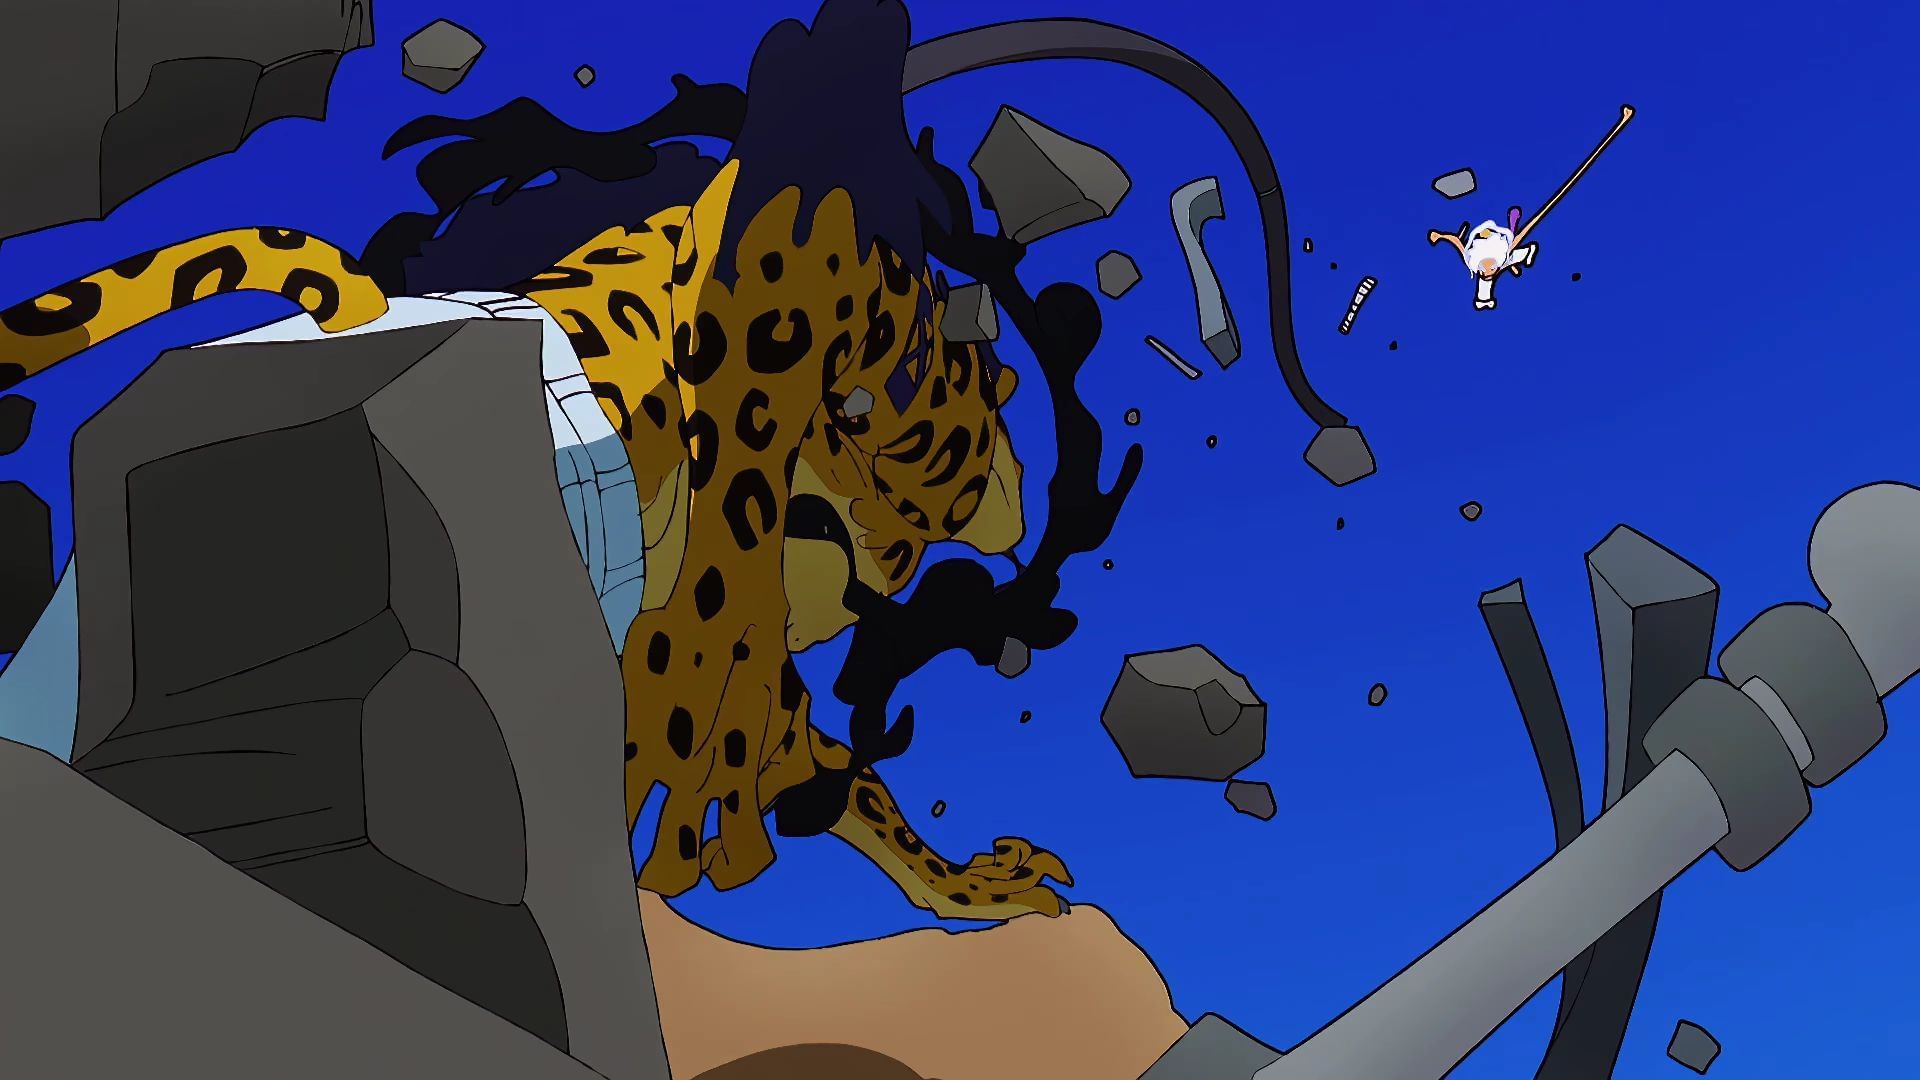
In the next cut, Koby and Hibari are shown running on Hachinosu, trying to escape from Avalo Pizarro, who is using his Devil Fruit powers to manipulate the island, menaciously staring down on the two and targeting them with an enormous arm made of stone.
An overview about Jewelry Bonney
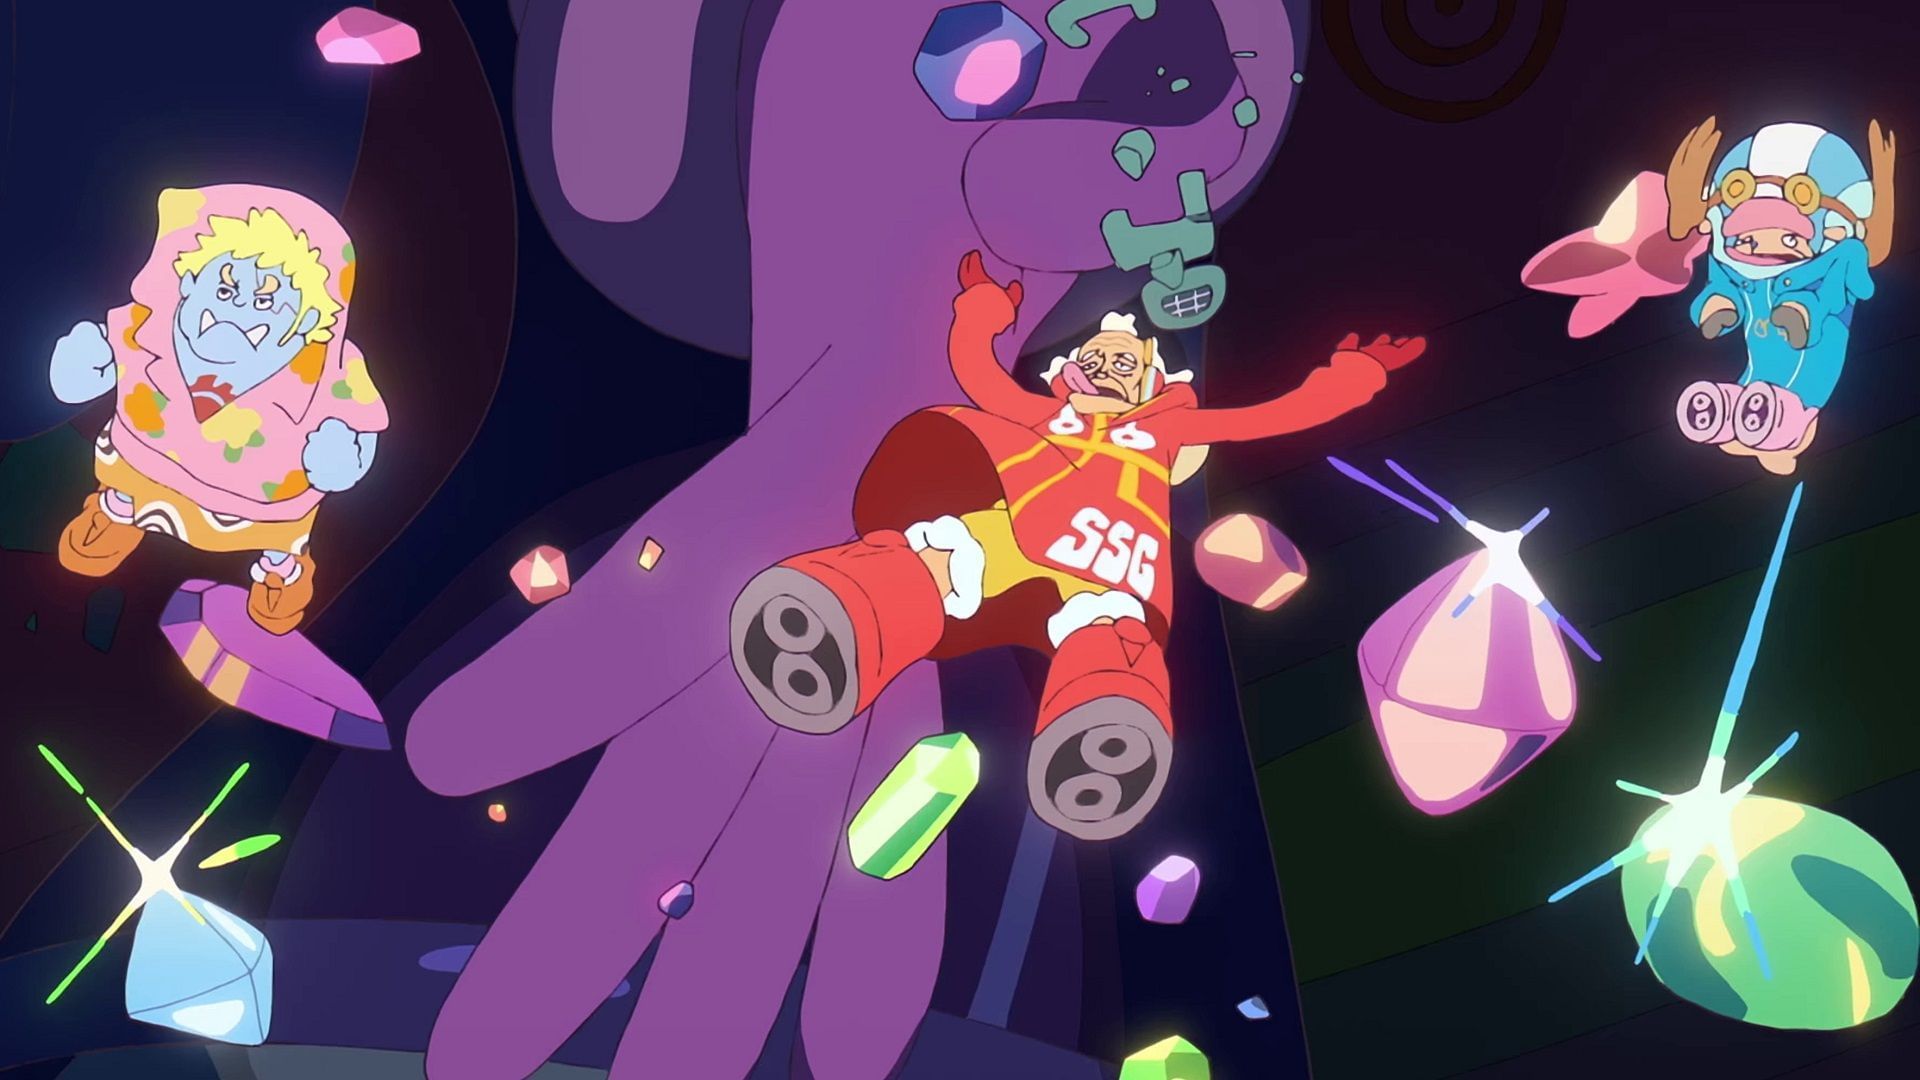
Subsequently, the opening shows the scene where Bonney, in an emotional outburst, uses her Devil Fruit ability to age Luffy, Jinbe, and Chopper, turning their years into jewels that fall around. Looking carefully, in the background it is possible to see Bartholomew Kuma’s symbols, as well as the mark of the Celestial Dragons and Saint Jaygarcia Saturn’s ominous silhouette.
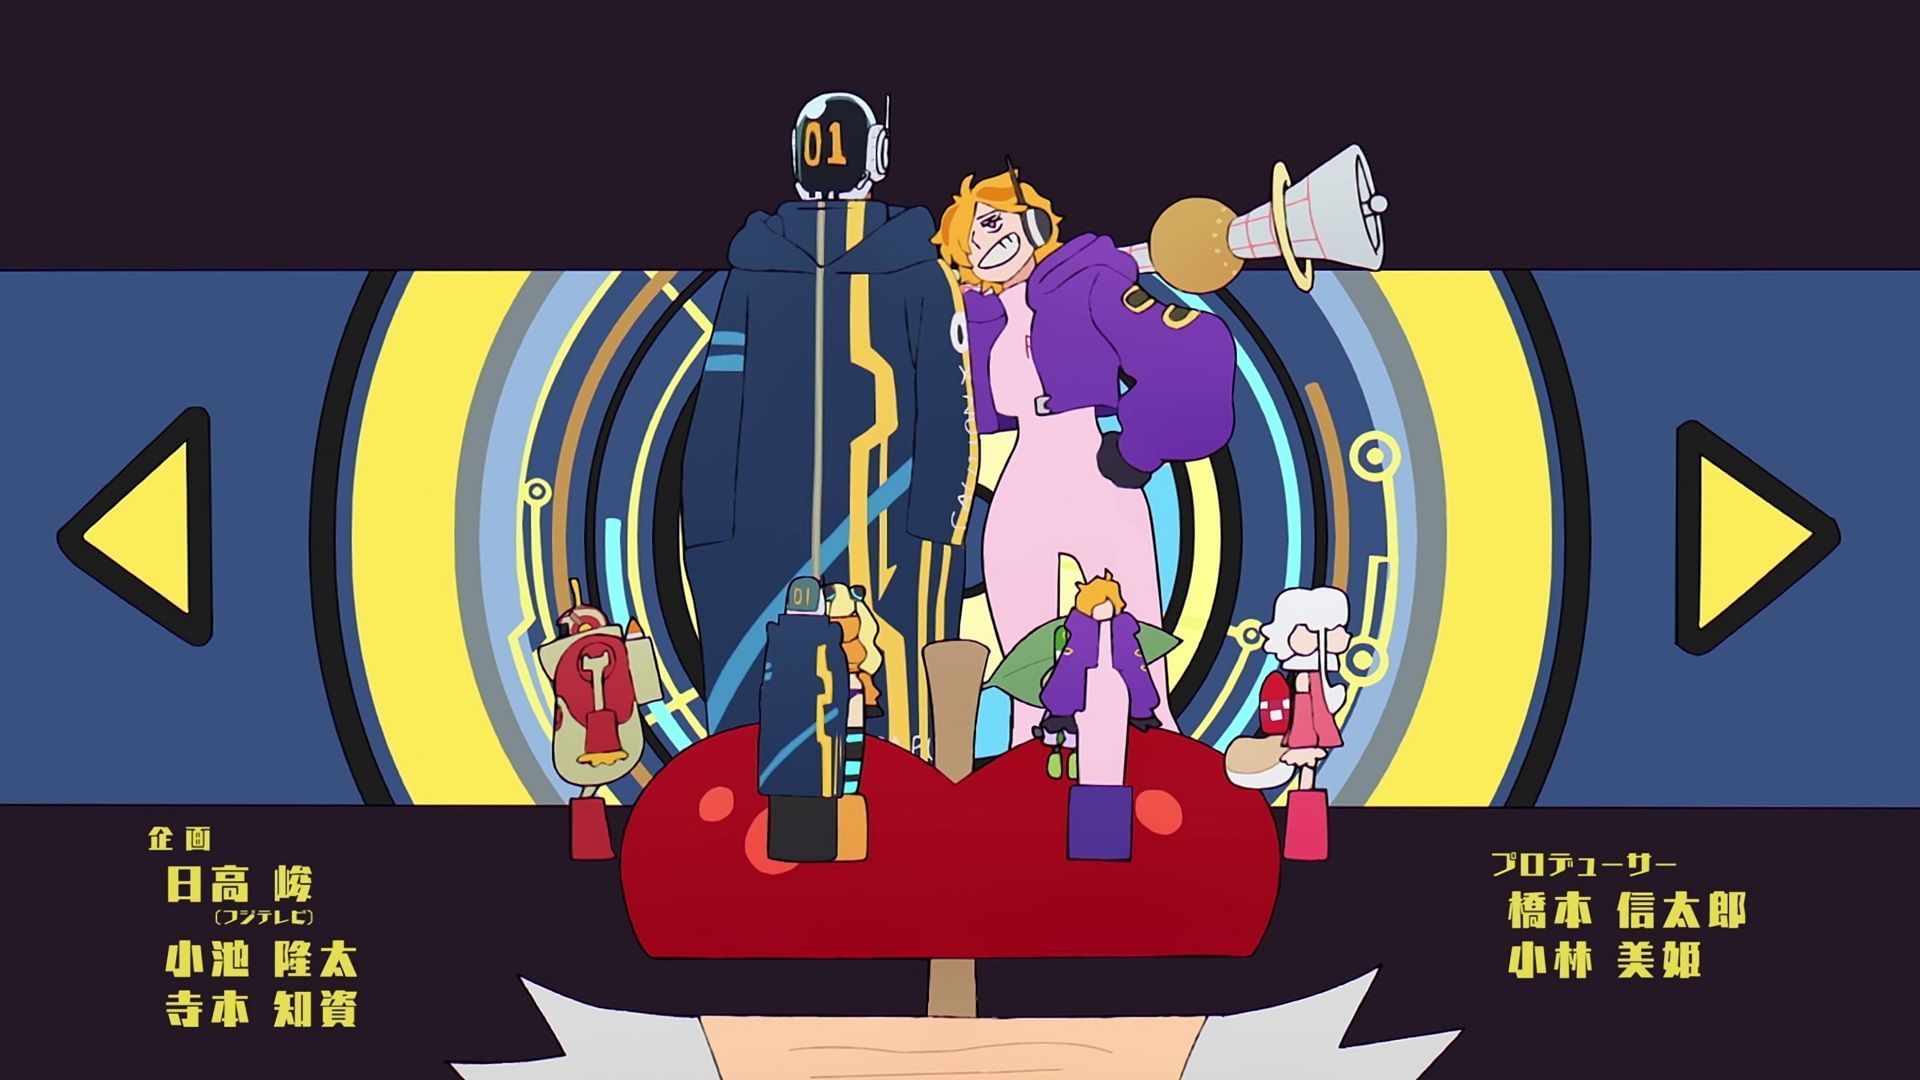
Bepo in trouble
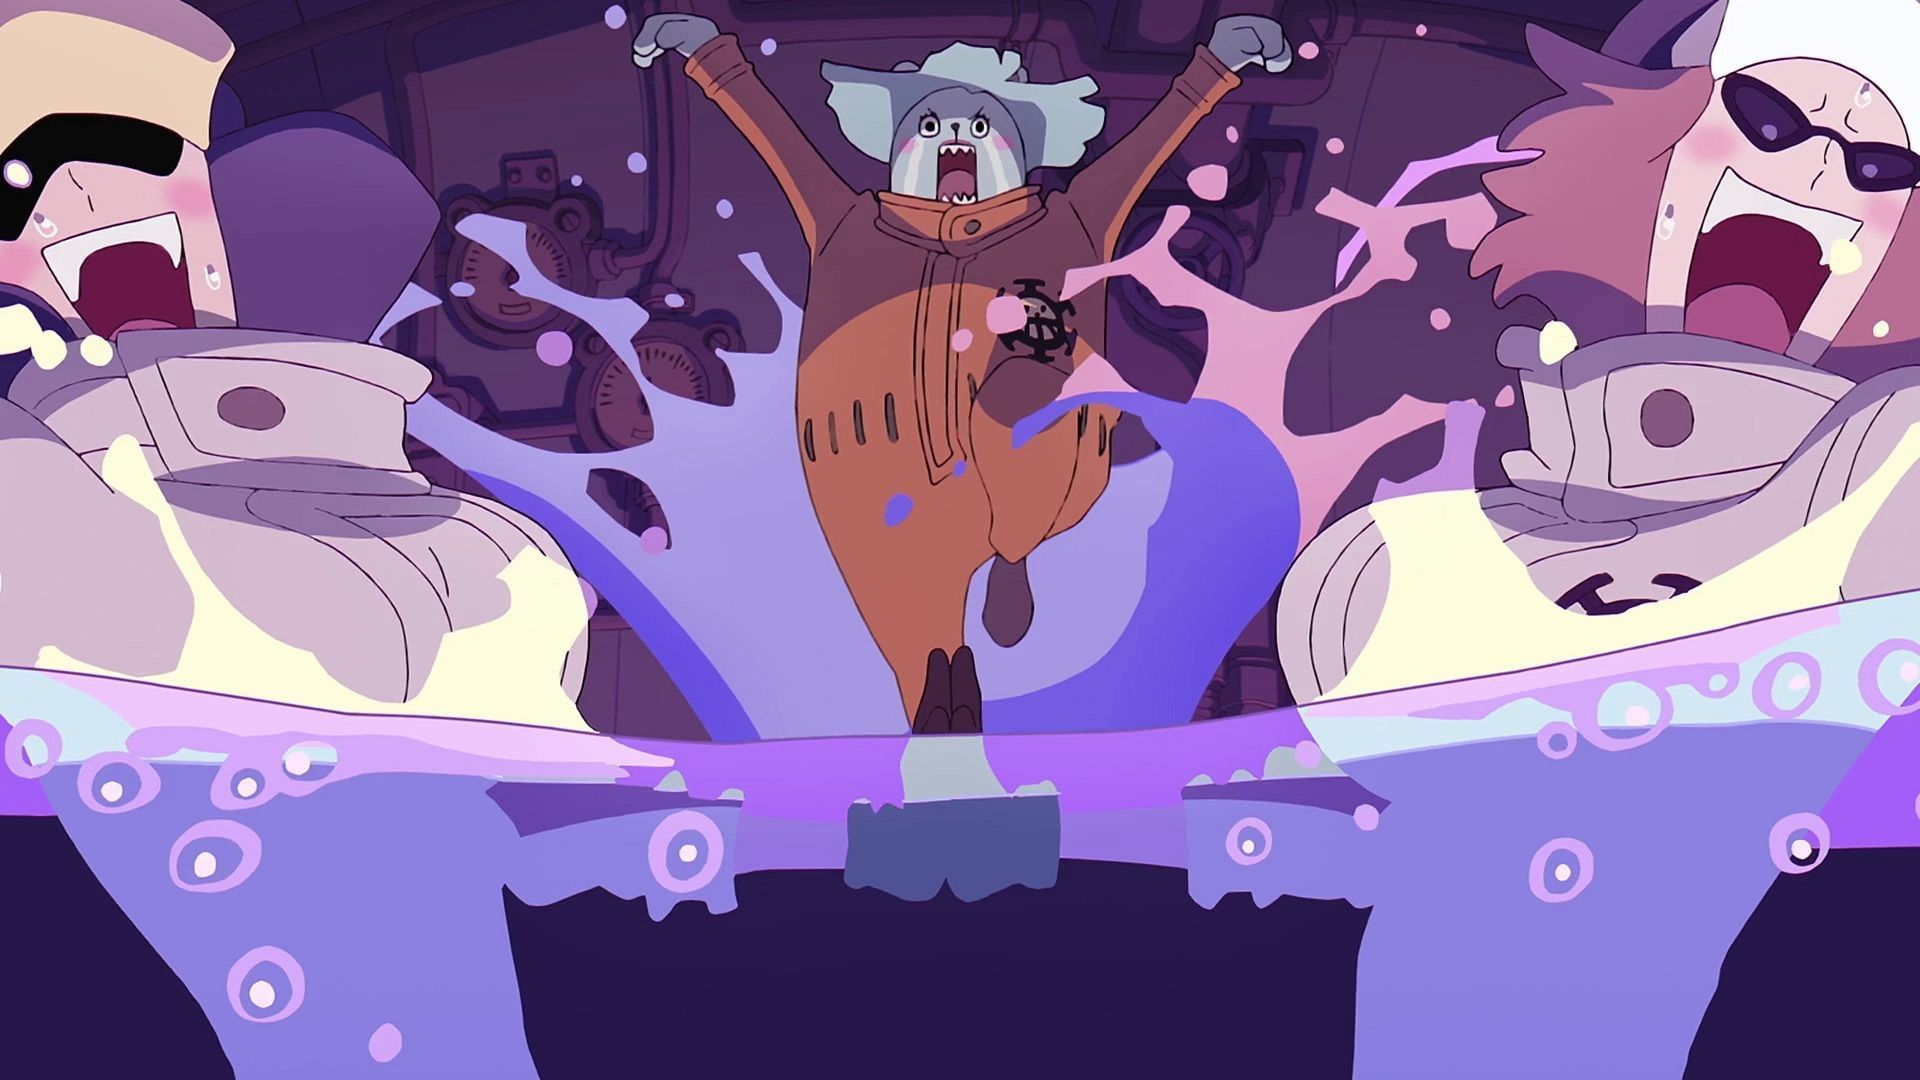
Going on, there’s a shot of Bepo, Shachi, and Penguin. The three members of the Heart Pirates, turned into women due to Doc Q’s Devil Fruit, are trying to escape from the Polar Tang, their submarine, which is taking on water as a result of the Blackbeard Pirates’ attack.
The SWORD officers
The scene changes again, showing Prince Grus, Helmeppo, Kujaku, and Hibari engaged in the battle between SWORD officers and Blackbeard Pirates on Hachinosu. As a result of Hibari’s Flower Bullets, the pirates in the background are neutralized.
Sentomaru and Kizaru's shared background
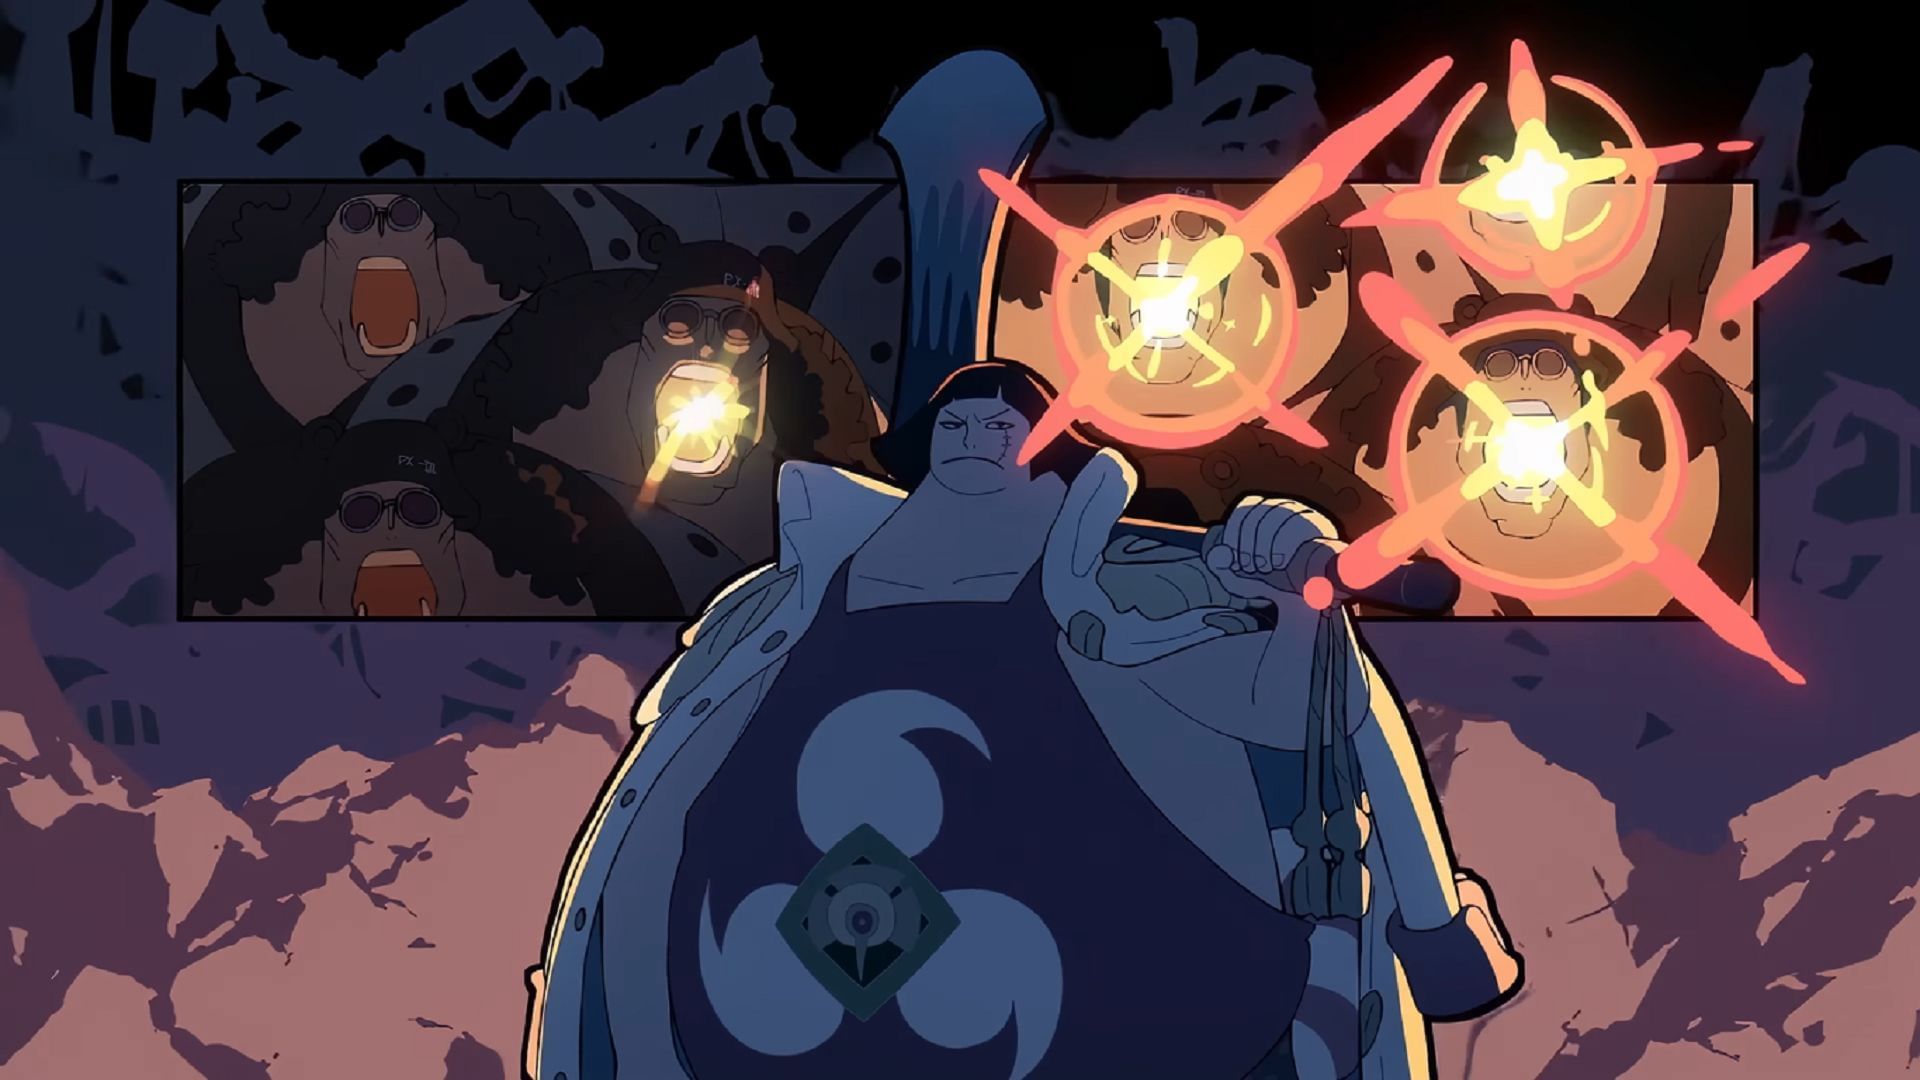
In the following scene, Sentomaru appears in his Marine uniform, surrounded by the Pacifista. The lasers used by the Pacifista cyborgs transition into Kizaru’s body, a clear reference to the Admiral’s Logia Devil Fruit being the source for the lasers themselves.
Next, Kizaru is shown nonchalantly falling into the sea, succeeded by shots of Bartholomew Kuma and Jewelry Bonney. There's also a shot of S-Shark electrocuted by Nami’s lightning technique.
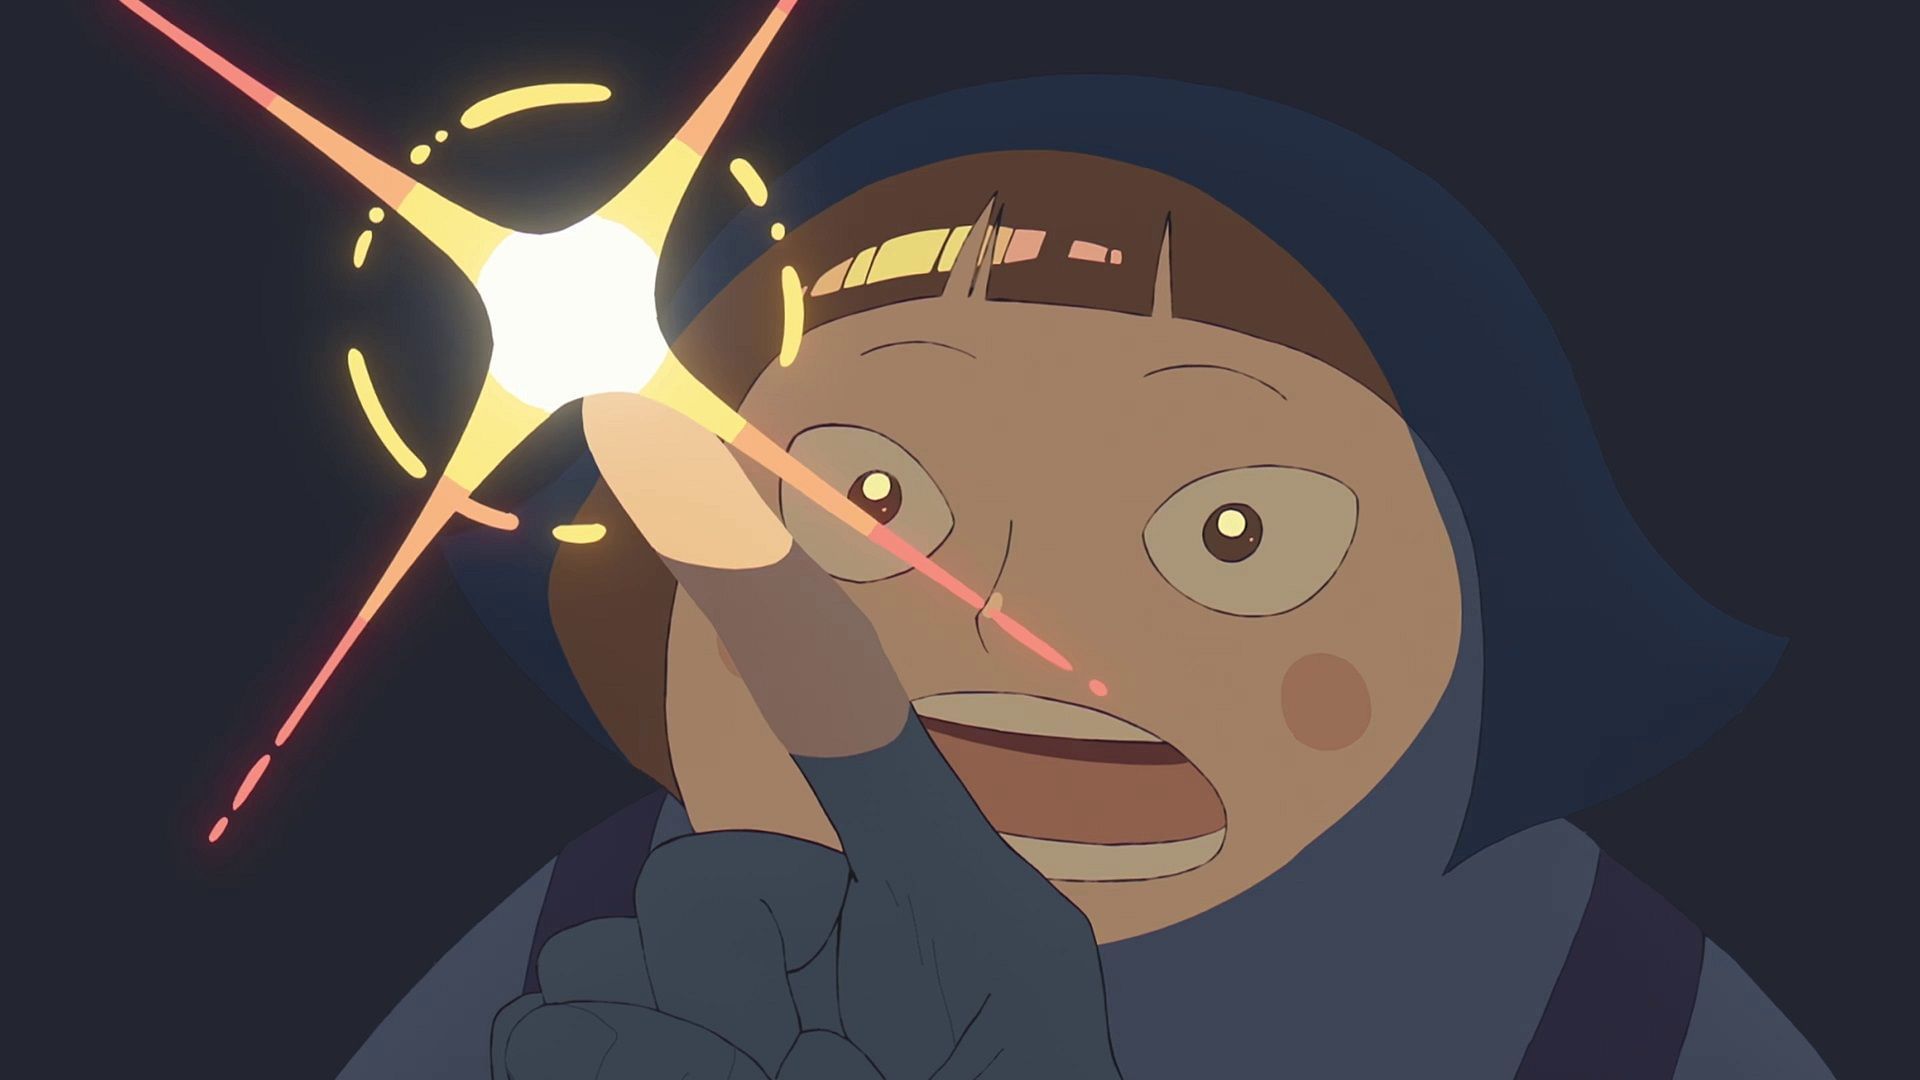
A child Sentomaru is shown thrilled and amazed at the sight of Kizaru using a laser to demonstrate the powers of the Glint-Glint Fruit, but the Admiral’s laser ends up smashing Luffy into Egghead’s Frontier Dome.
The traitor's plot unfolds

In two quick consecutive shots, the opening shows Vegapunk Shaka, framed in the moment when he is about to be shot dead, and someone’s huge hand caressing S-Snake’s head. The hand belongs to Vegapunk York, who is tasking the Seraphim to annihilate anyone on Egghead so that she can continue along with her malicious plan.
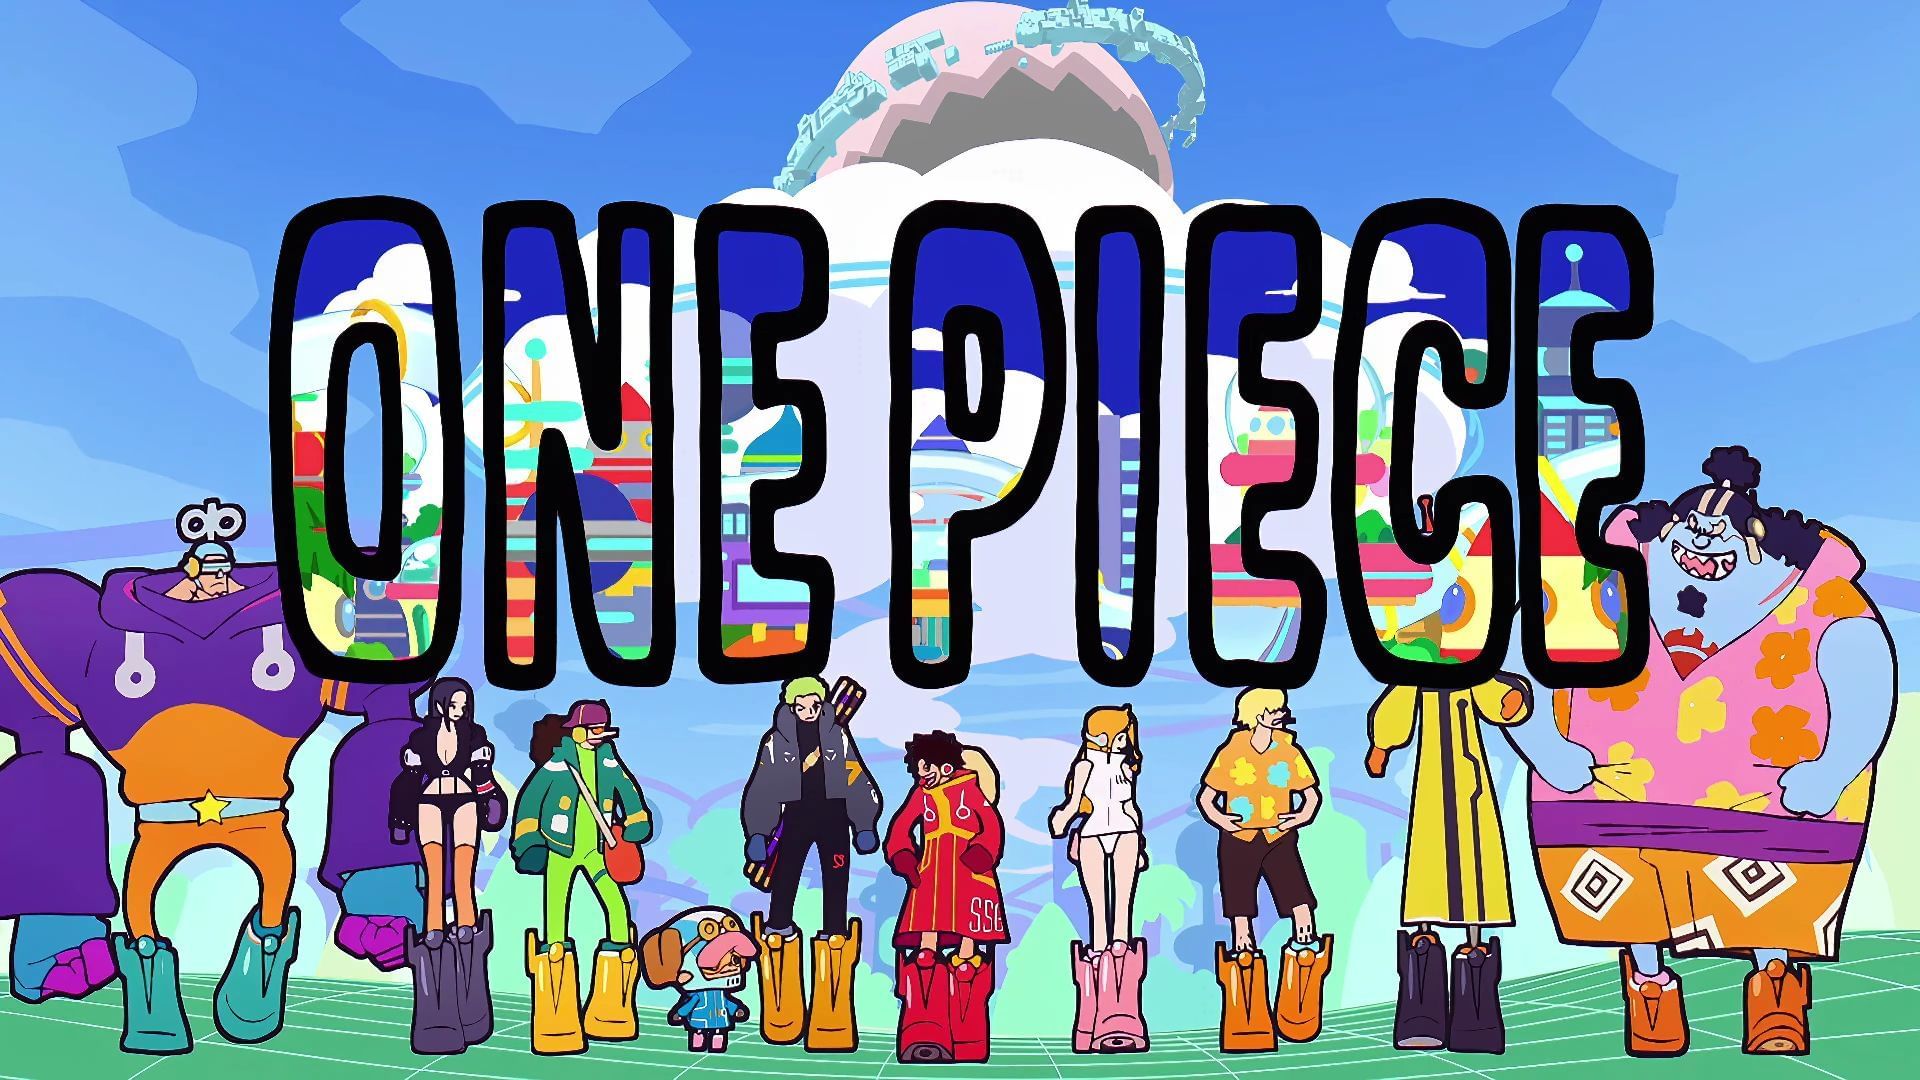
The Straw Hat crew between past and present

Luffy returns to the scene in grand style as he goes through all the various outfits he wore throughout the series. The other Straw Hats add up in three brackets, starting with Zoro and Nami (who, alongside Luffy, create the Original Trio), continuing with Usopp and Sanji to form East Blue Five, going on with Chopper and Nico Robin, as well as Franky and Brook, and finally ending with Jinbe.
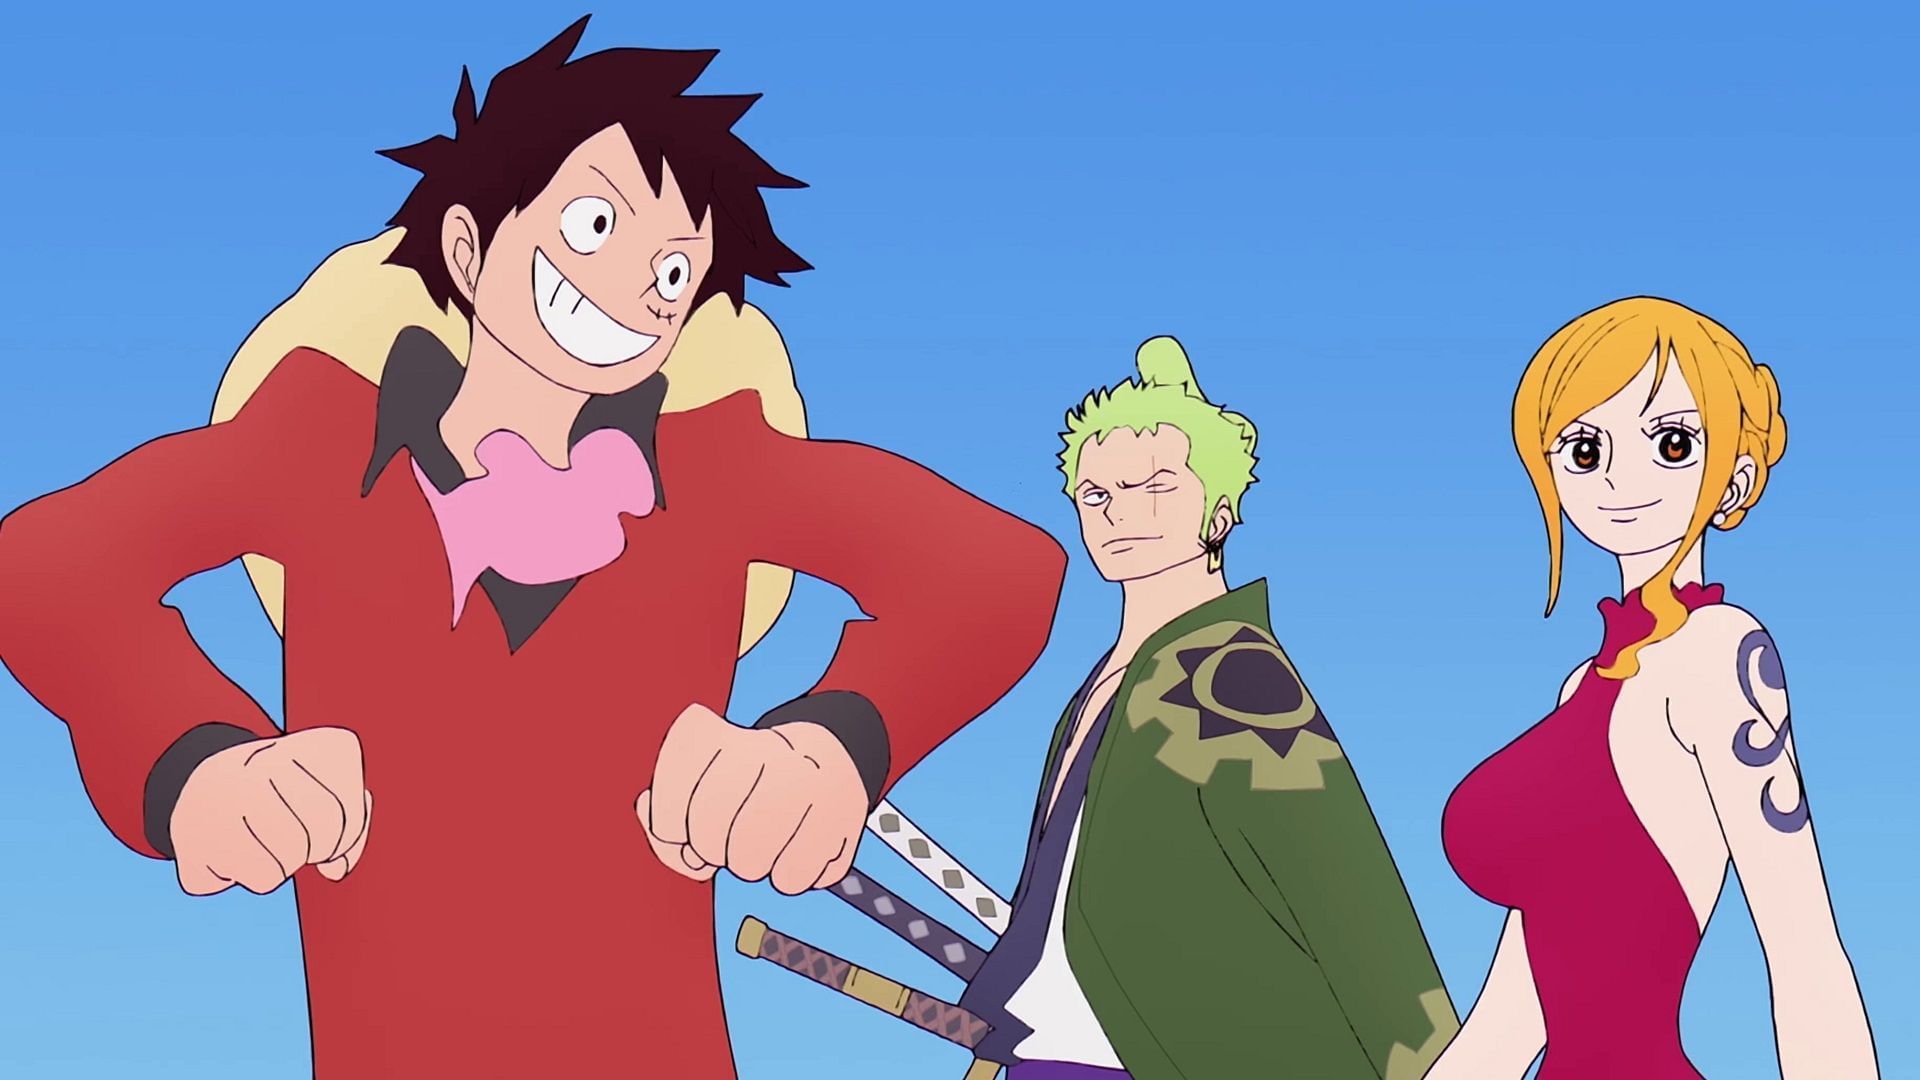
As they pop up on the screen, all the Straw Hat Pirates go through their different outfits, while walking over different grounds representing some of the places they crossed during their journey.
After a major focus on Luffy, Zoro, Nami, and Sanji, all the Straw Hats change into their Egghead outfits and jump toward the island’s futuristic environment.
Luffy vs Lucci
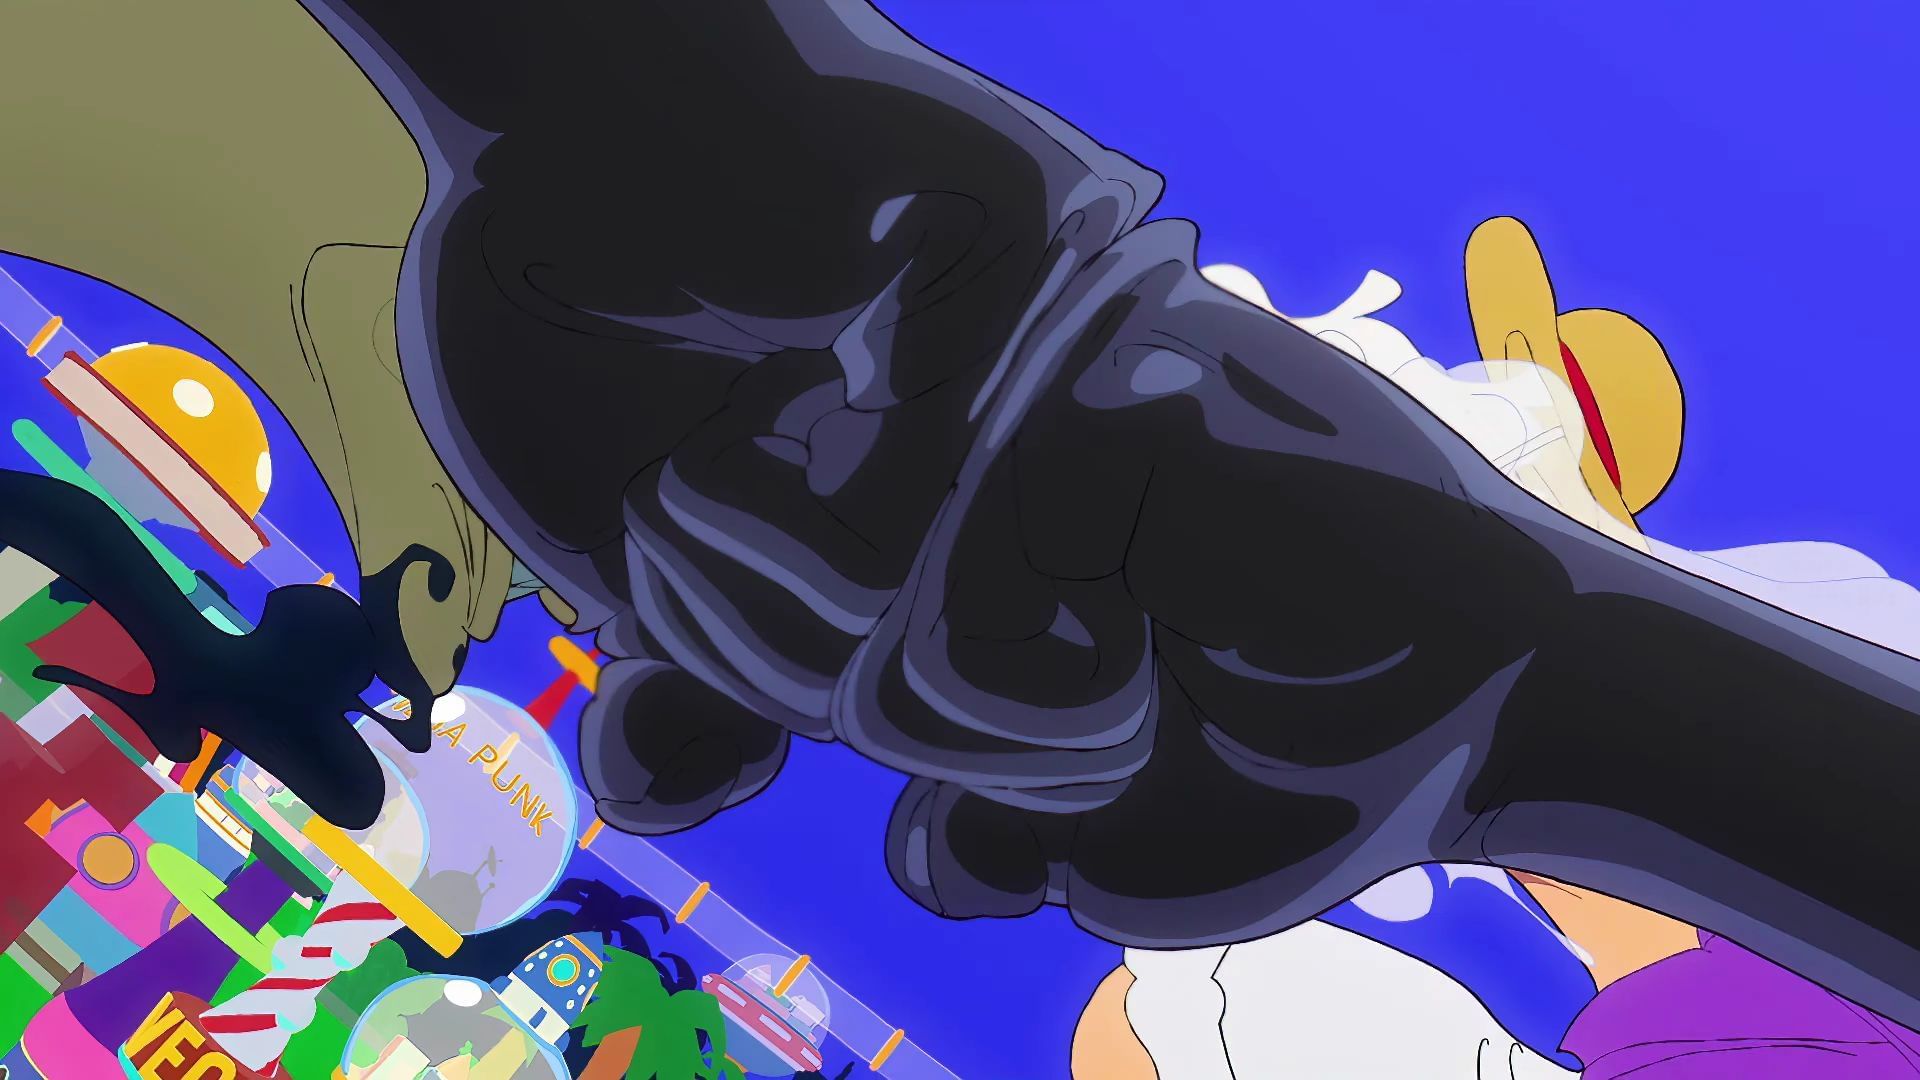
The subsequent part of the opening focuses on some of the fights featured in the Egghead Arc up to a certain point, especially the battle between Luffy and Rob Lucci. In the first cut, Lucci, who is in his Awakened Zoan form, and Luffy, who has entered Gear 5, are about to attack each other.
An arc filled with amazing showdowns
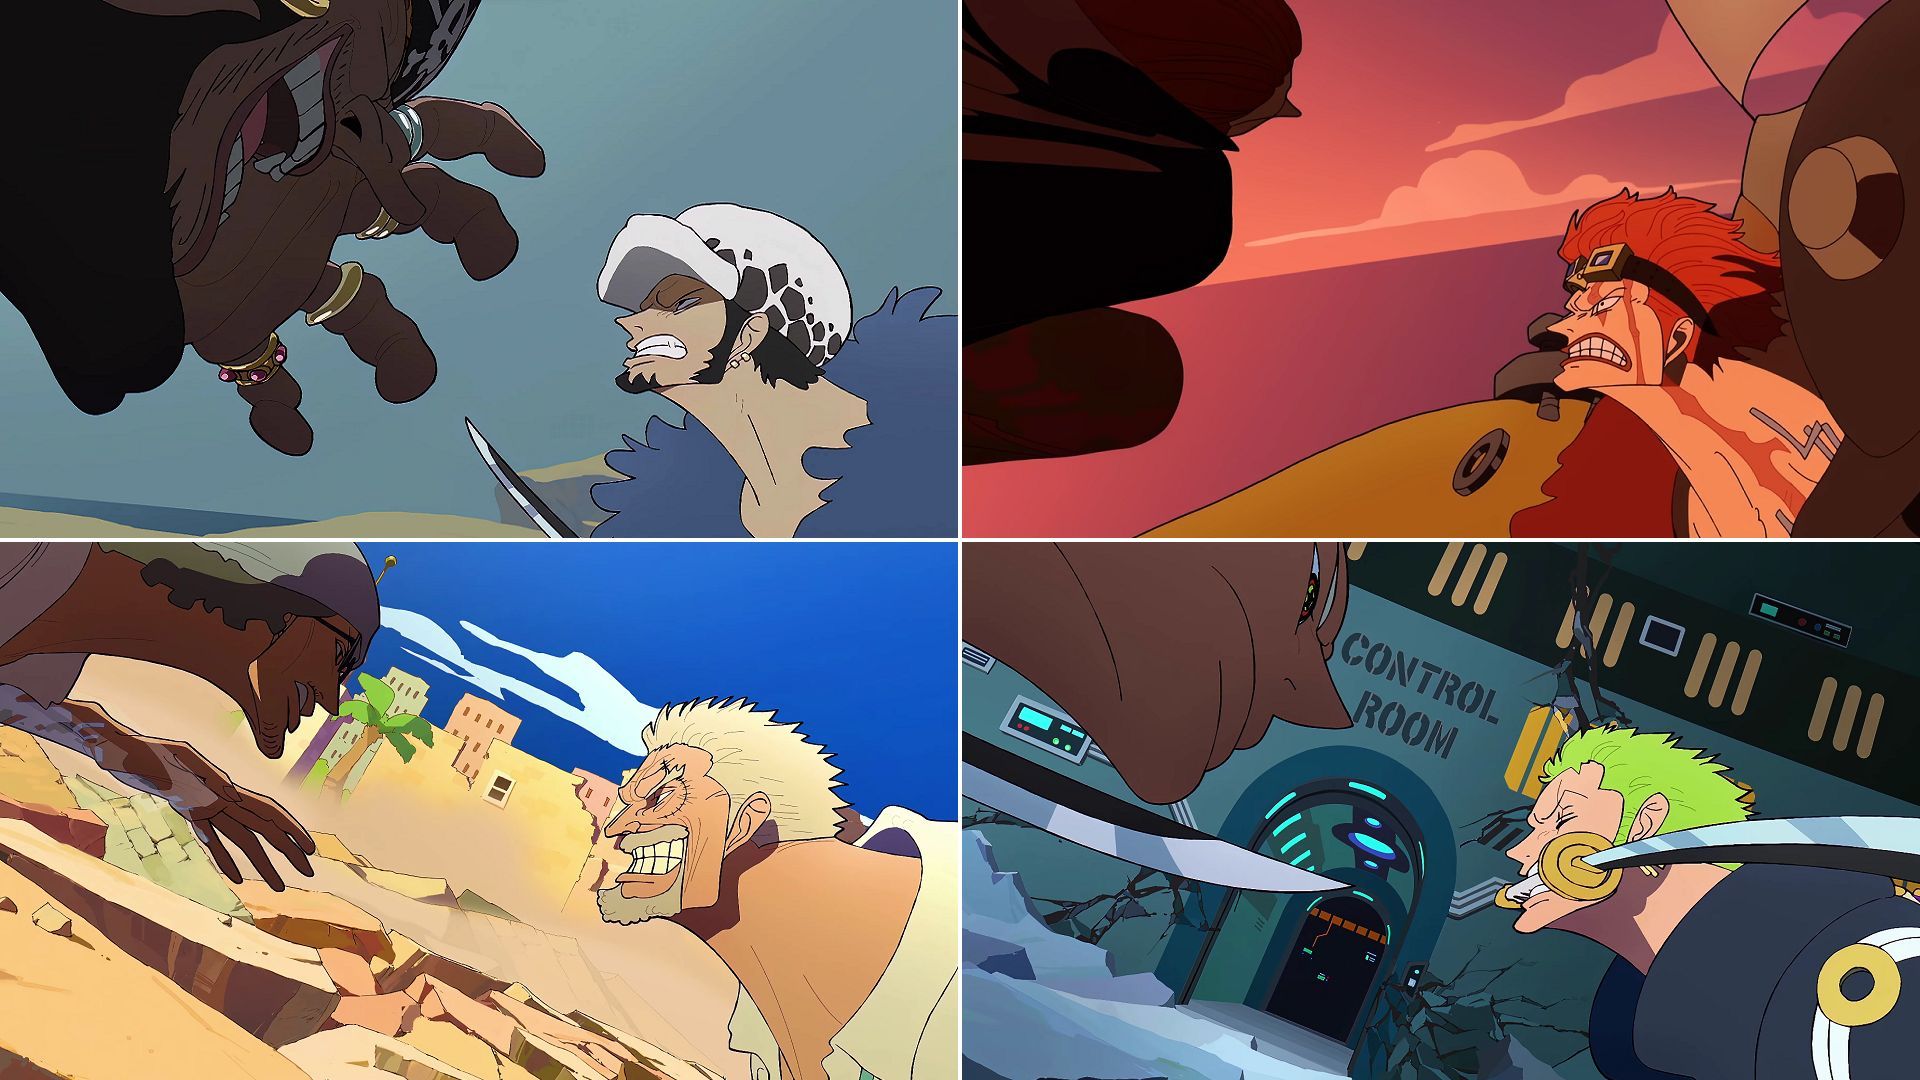
Immediately after, the scene displays cuts of Shanks vs. Eustass Kid, Blackbeard vs. Law, Kuzan vs. Garp, S-Hawk vs. Zoro, and, once again, Lucci vs. Luffy. Despite the grand visual of the sequence, many fans on social networks couldn’t help but joke about the fact that the Kid vs. Shanks shot in the opening lasted more than the entire fight in the manga.
Grievous developments
As Luffy and Lucci clash their Armament Haki-imbued fists, the fire from Luffy's punch turns into Sabo's fire. However, the latter’s flames are swept away by Imu-sama’s devilish arrow, a callback to the events narrated in the flashback of the latest Reverie. A dismayed expression then appears on Sabo’s face.
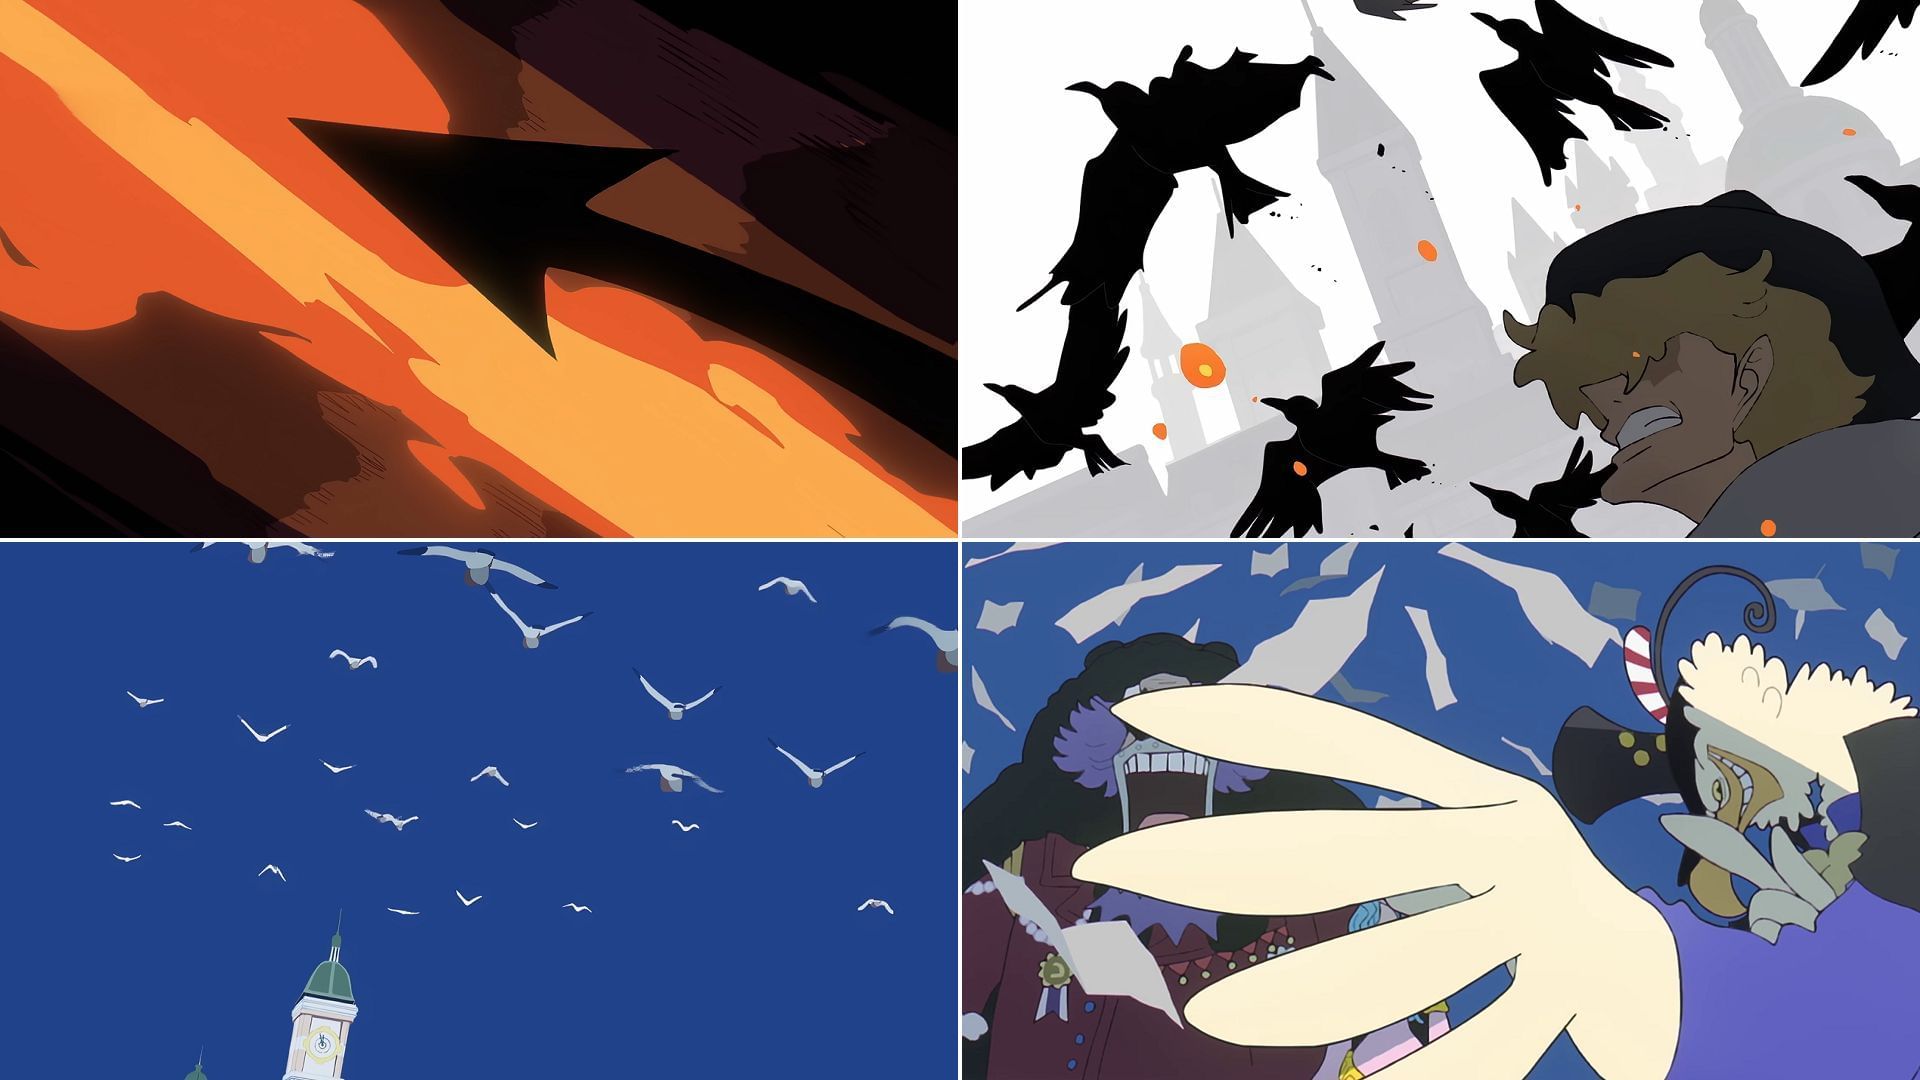
Behind Sabo, Karasu’s black crows soar into the air over Mary Geoise, then transition into white seagulls, the News Coo, reaching Arabasta. Needless to say, the sequence foreshadows the sad news of Nefertari Cobra’s death.
Shortly after, there’s a shot of Morgans, the president of the World Economy News Paper. Morgans is using his massive plumed wing to obscure Wapol and Nefertari Vivi’s faces, which hints at the fact that he is keeping them hidden from the World Government.
The tyranny that torments the world
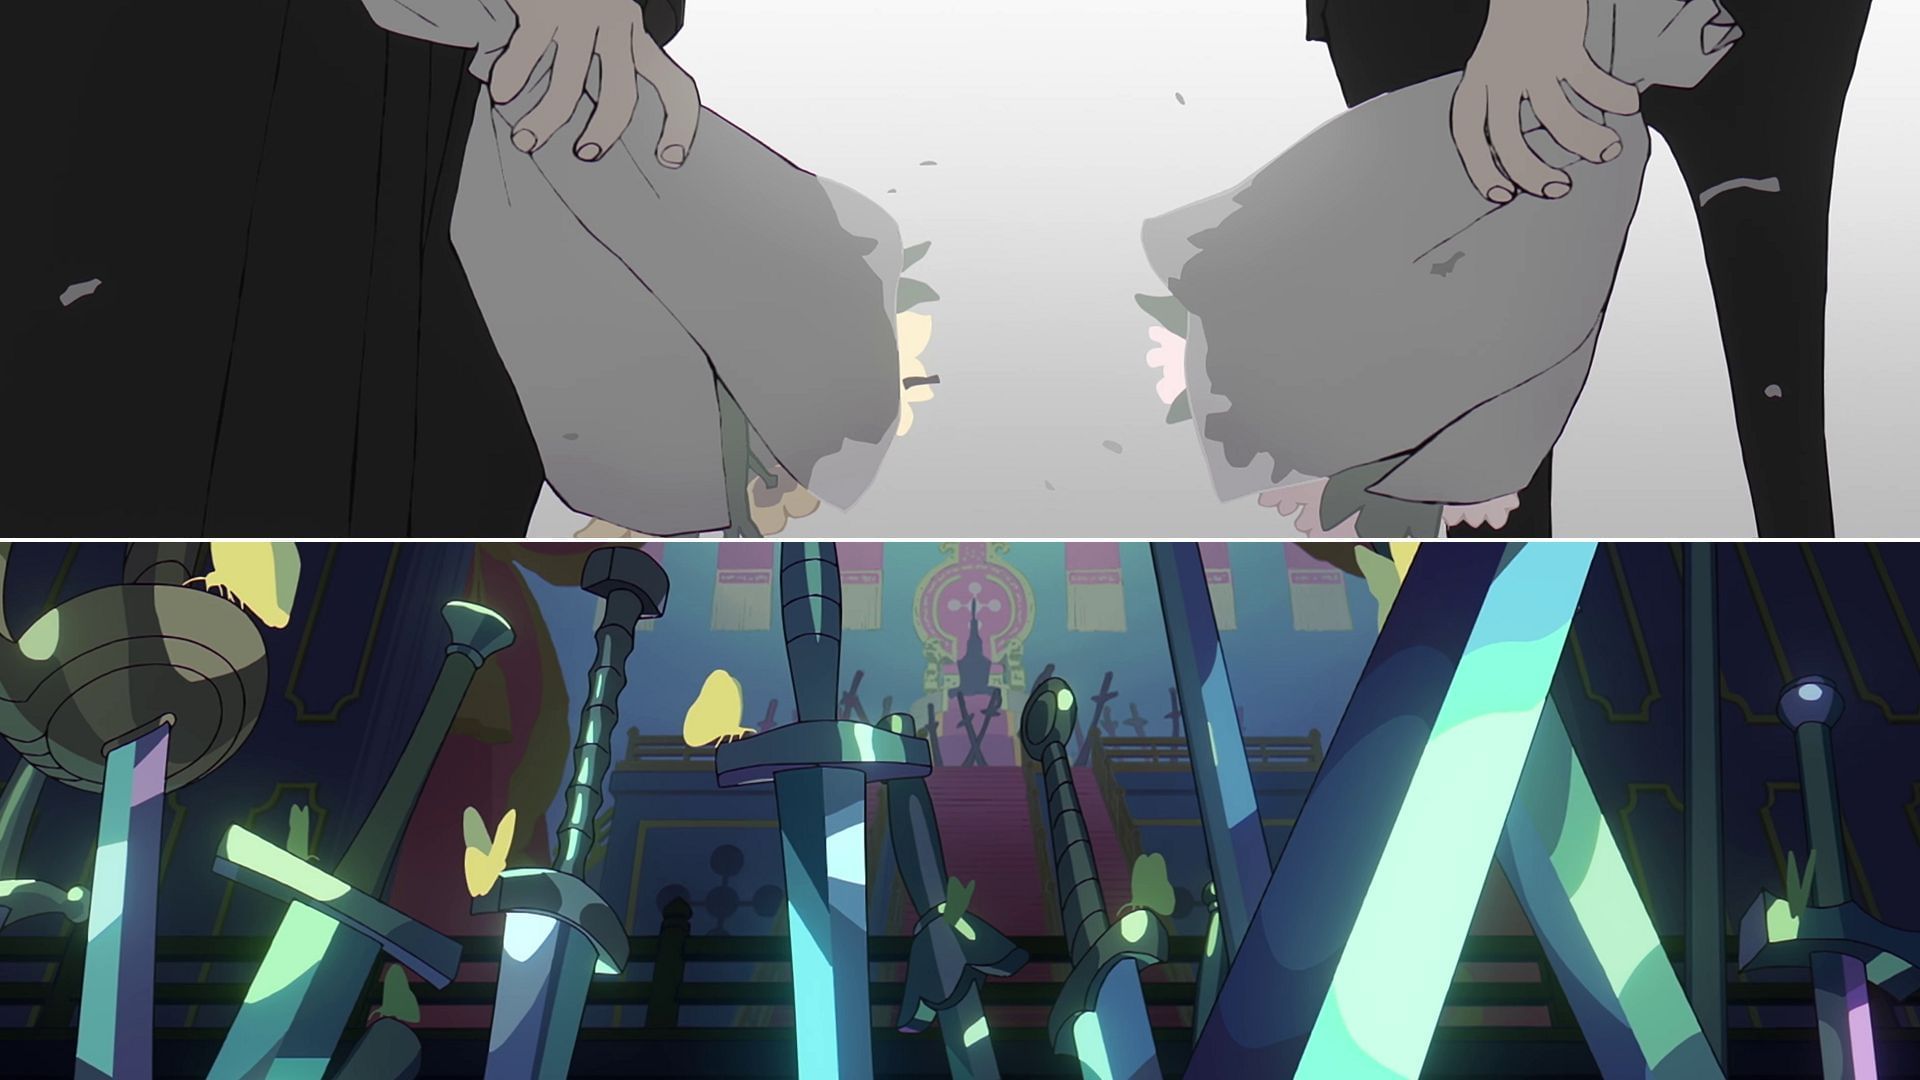
The opening then teases Vegapunk and Dragon’s past meeting, in which the two paid homage to Ohara. Suddenly, the sequence changes into swords and butterflies around Mary Geoise’s Empty Throne, with Imu-sama ominously sitting on it in the background.
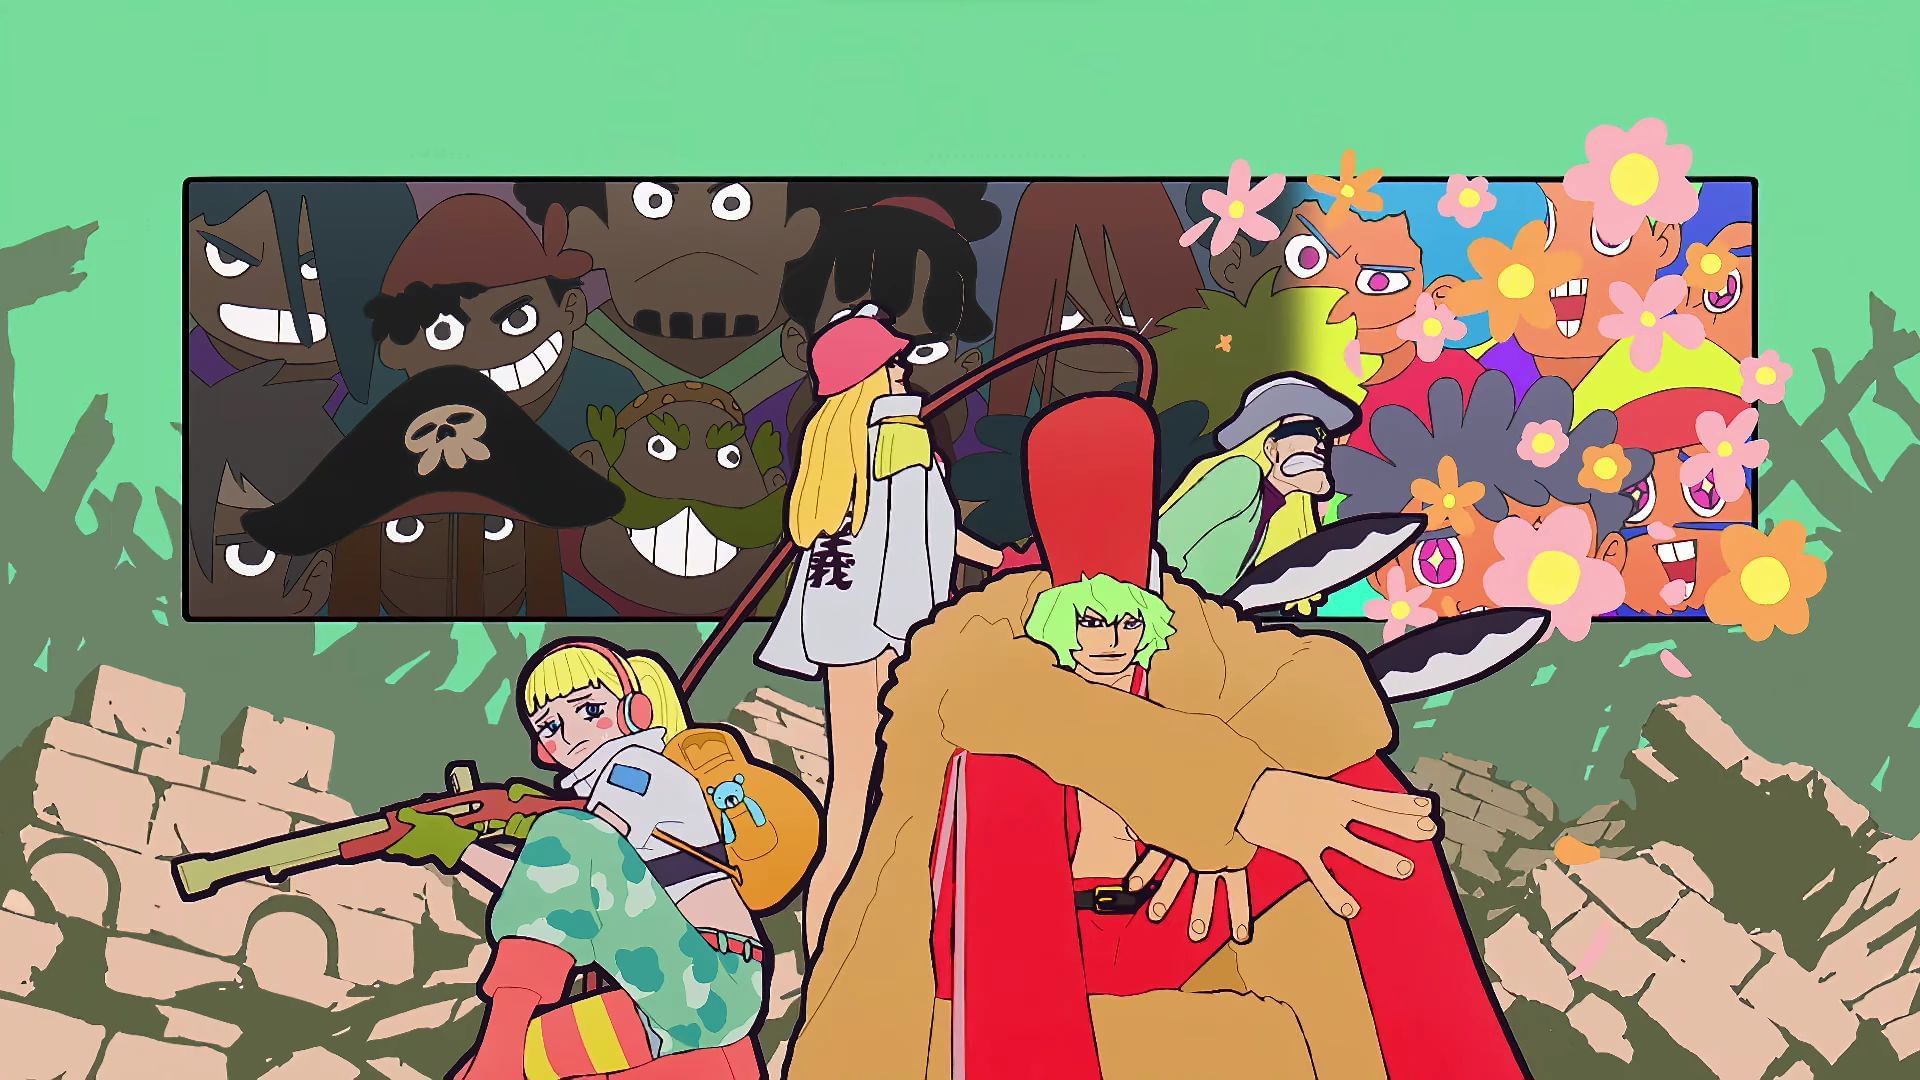
Those who fall, and those who stumble but go ahead
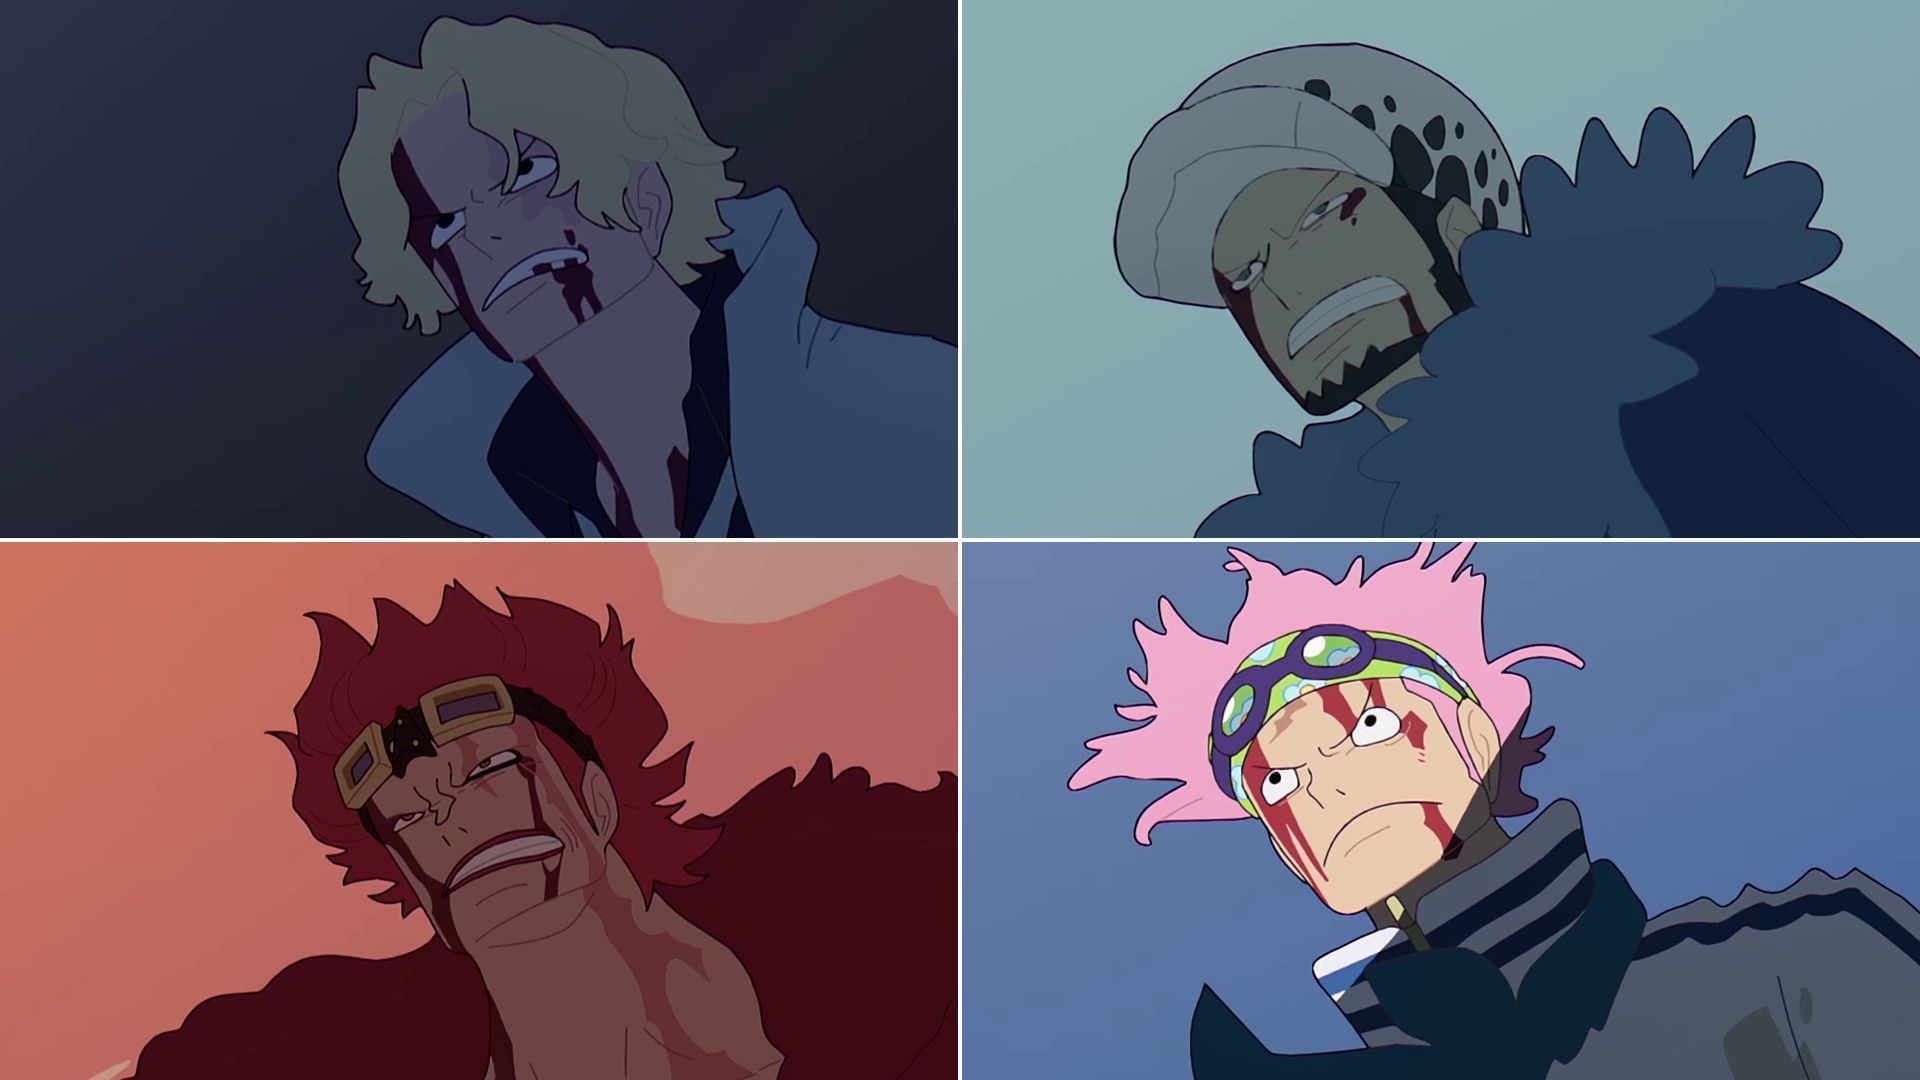
One after another, Sabo, Kid, and Law are shown, all visibly injured and covered in blood, as well as enveloped in a dark background. Koby is depicted in the same way, but he soon manages to stand up and get out of the darkness, which symbolizes that, unlike the others, he was able to fend off his enemies.
Nefertari Vivi and Jewelry Bonney
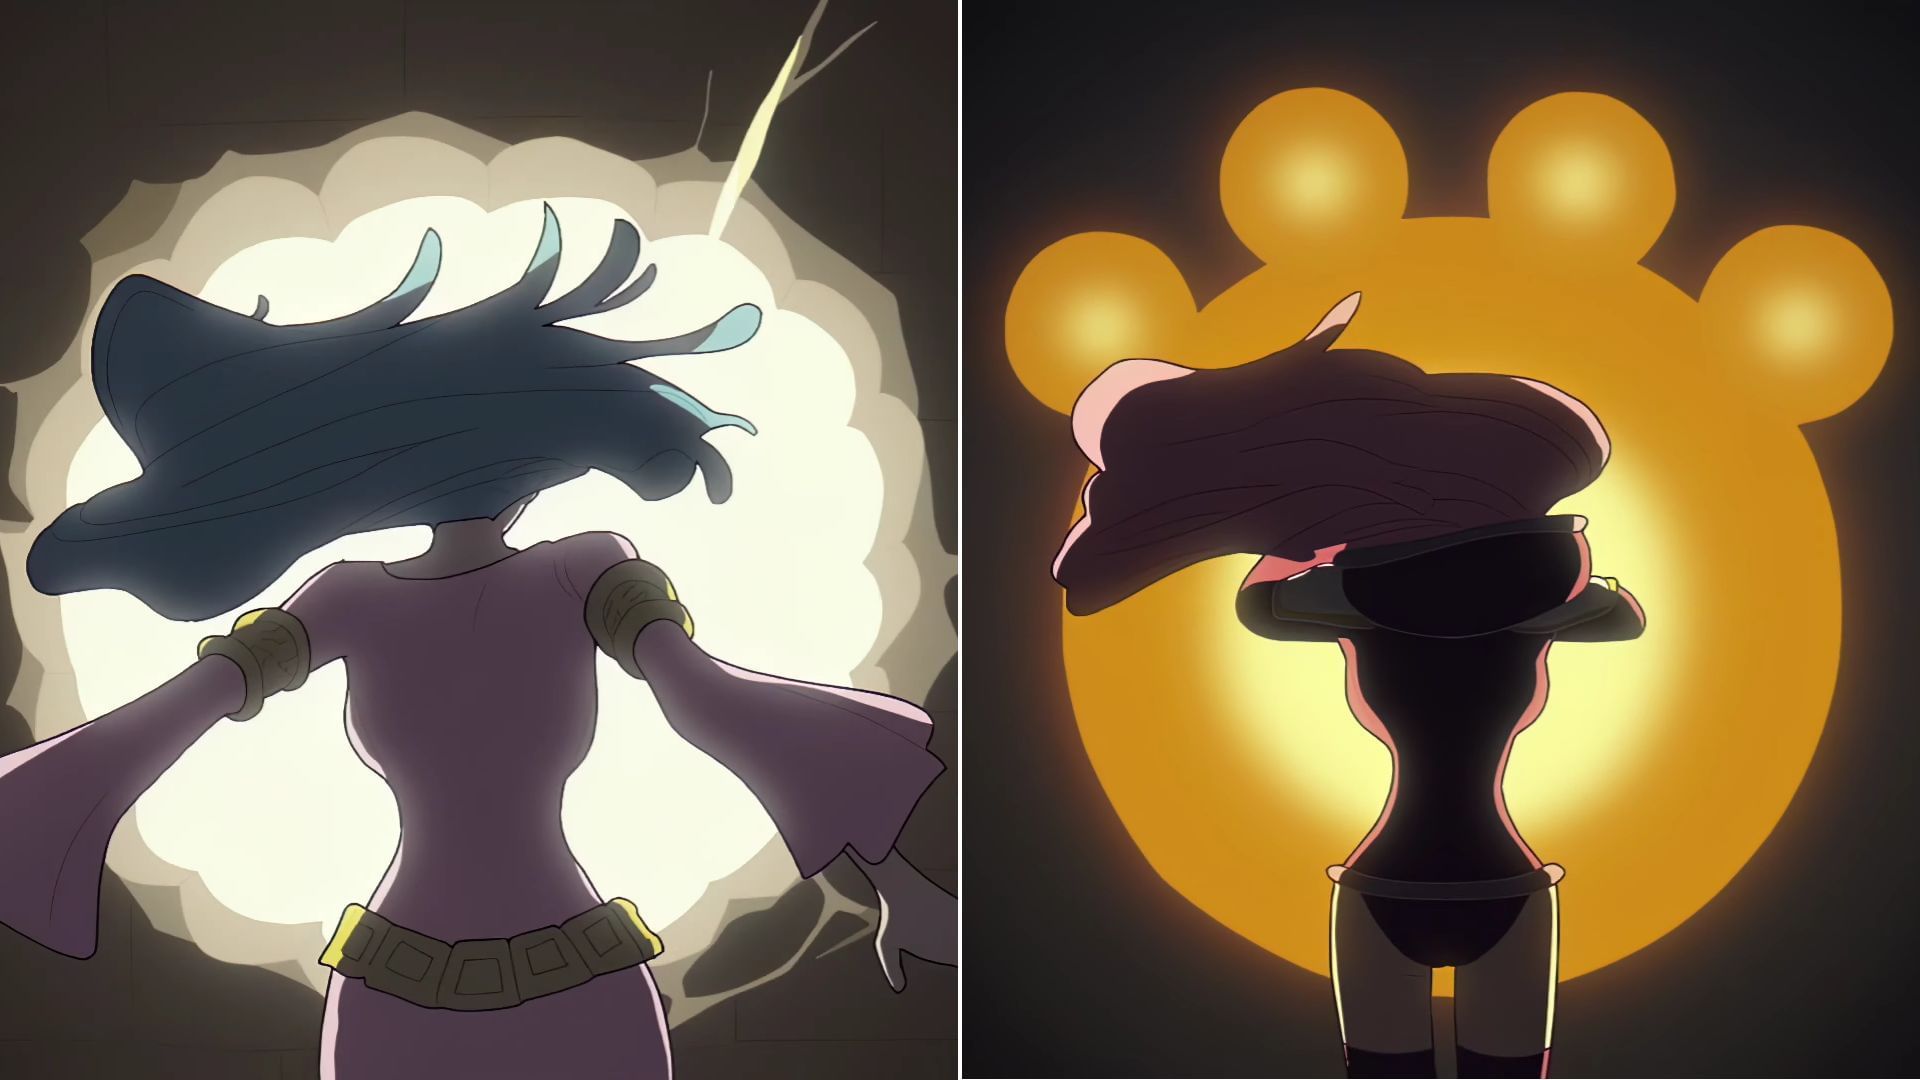
The next cut features Vivi fleeing through an exit, which is the hole Wapol made in the Pangaea Castle’s walls. This hole transitions into the paw-shaped bubble in which Bartholomew Kuma gathered his memories, only for Jewelry Bonney to enter it and learn about his father’s life.
Notably, many fans speculate that this sequence is a hidden foreshadowing of Vivi eventually obtaining Kuma’s Paw-Paw Fruit in the future. An already widespread theory, this intriguing assumption is objectively based on some heavy clues scattered in the One Piece series.
Egghead and the Grand Line
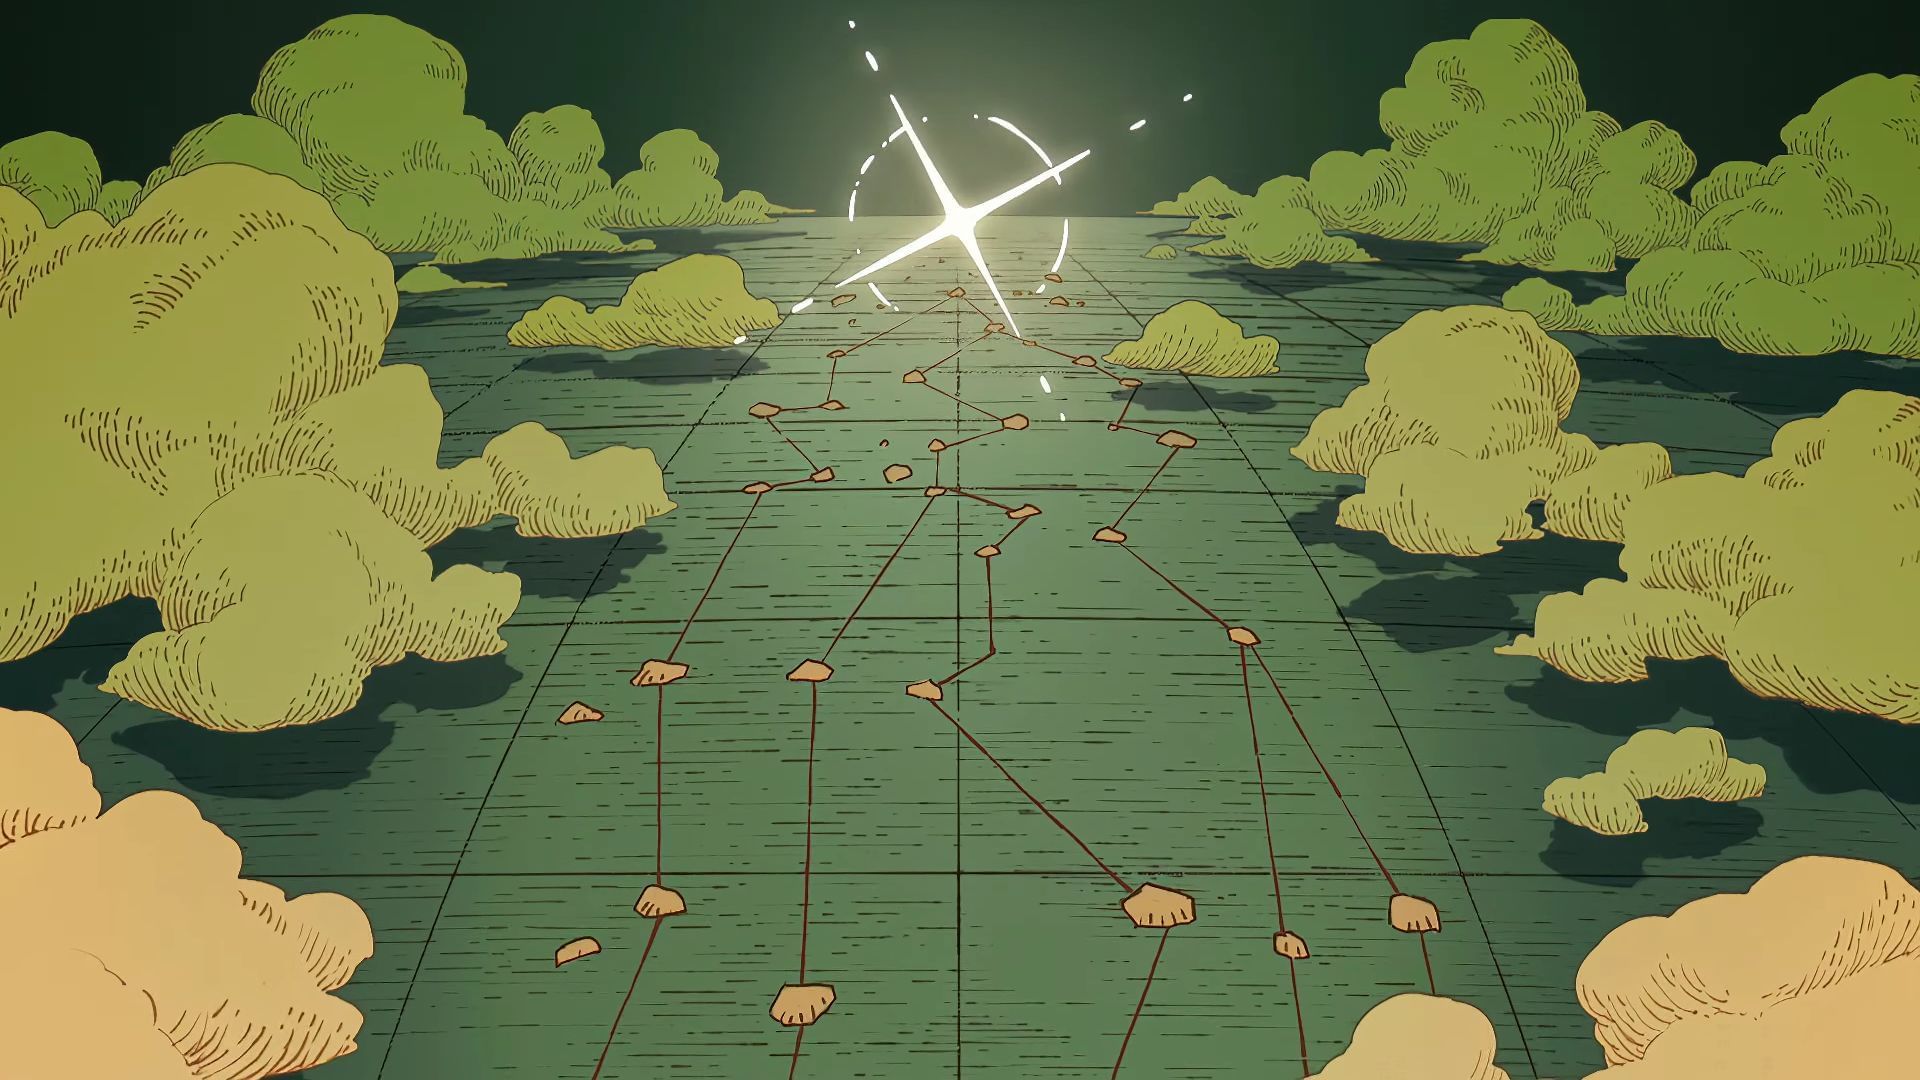
The focus then returns to the Straw Hats, who are shown from above. The camera ascends continuously, up until framing the entire Egghead Island, from which the scene transitions into the various routes originating from the Red Line.
The conclusion
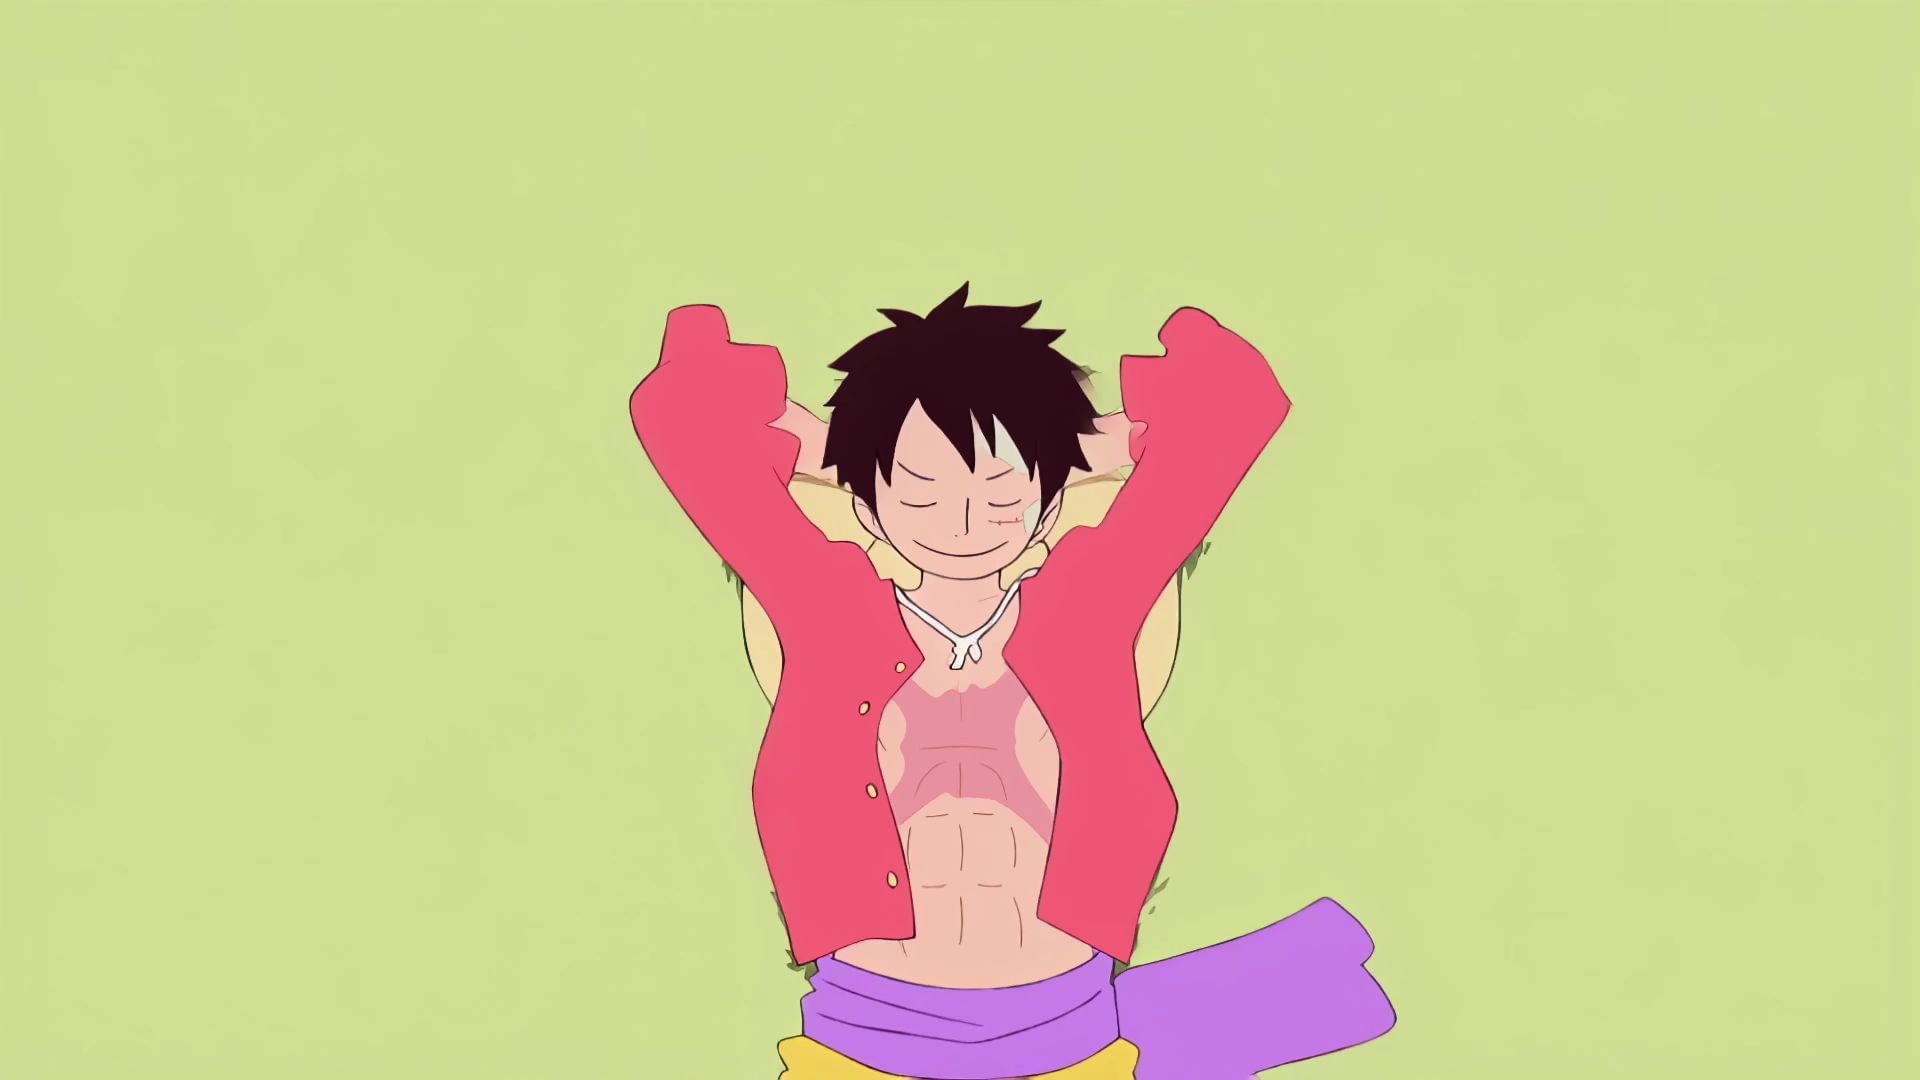
The opening ends by showing Luffy from behind. The last scene of Megumi Ishitani’s masterwork is, curiously, the same where Luffy is describing his true dream to his companions at the very beginning. This shot is just framed from a different angle.
Undoubtedly, that’s a fitting way to conclude an intro that can certainly be regarded among the best openings in the series and in the anime industry in general.
Be sure to keep up with all One Piece anime, manga, and live-action news as 2024 progresses.
