
'%20x='0'%20y='0'%20height='100%25'%20width='100%25'%20%0A%20%20%20%20%20%20%20%20%20%20xlink%3Ahref='data:image/jpg;base64,/9j/2wBDAAYEBQYFBAYGBQYHBwYIChAKCgkJChQODwwQFxQYGBcUFhYaHSUfGhsjHBYWICwgIyYnKSopGR8tMC0oMCUoKSj/2wBDAQcHBwoIChMKChMoGhYaKCgoKCgoKCgoKCgoKCgoKCgoKCgoKCgoKCgoKCgoKCgoKCgoKCgoKCgoKCgoKCgoKCj/wgARCAAGAAoDASIAAhEBAxEB/8QAFQABAQAAAAAAAAAAAAAAAAAAAgf/2gAIAQEAAAAAjZ//xAAUAQEAAAAAAAAAAAAAAAAAAAAE/9oACAECEAAAAH//xAAUAQEAAAAAAAAAAAAAAAAAAAAE/9oACAEDEAAAAC//xAAdEAACAQQDAAAAAAAAAAAAAAABAgMABBIhEUGC/9oACAEBAAE/ALOWIwySKrLhv11RuEYknPk7r//EABcRAAMBAAAAAAAAAAAAAAAAAAABAhL/2gAIAQIBAT8Amnpo/8QAFxEAAwEAAAAAAAAAAAAAAAAAAAECEv/aAAgBAwEBPwCpWUz/2Q=='%3E%3C/image%3E%3C/svg%3E)
Minecraft 1.19 allows you to download and install loads of shaders to completely transform its lighting and shadow engines.
To this day, Mojang has not really upgraded the graphics of the popular sandbox game to make it look modern. Hence, you can always try different texture packs or shaders to change the graphics manually. Shaders can run on Minecraft 1.19 with the help of graphics or performance mods like OptiFine and Iris.
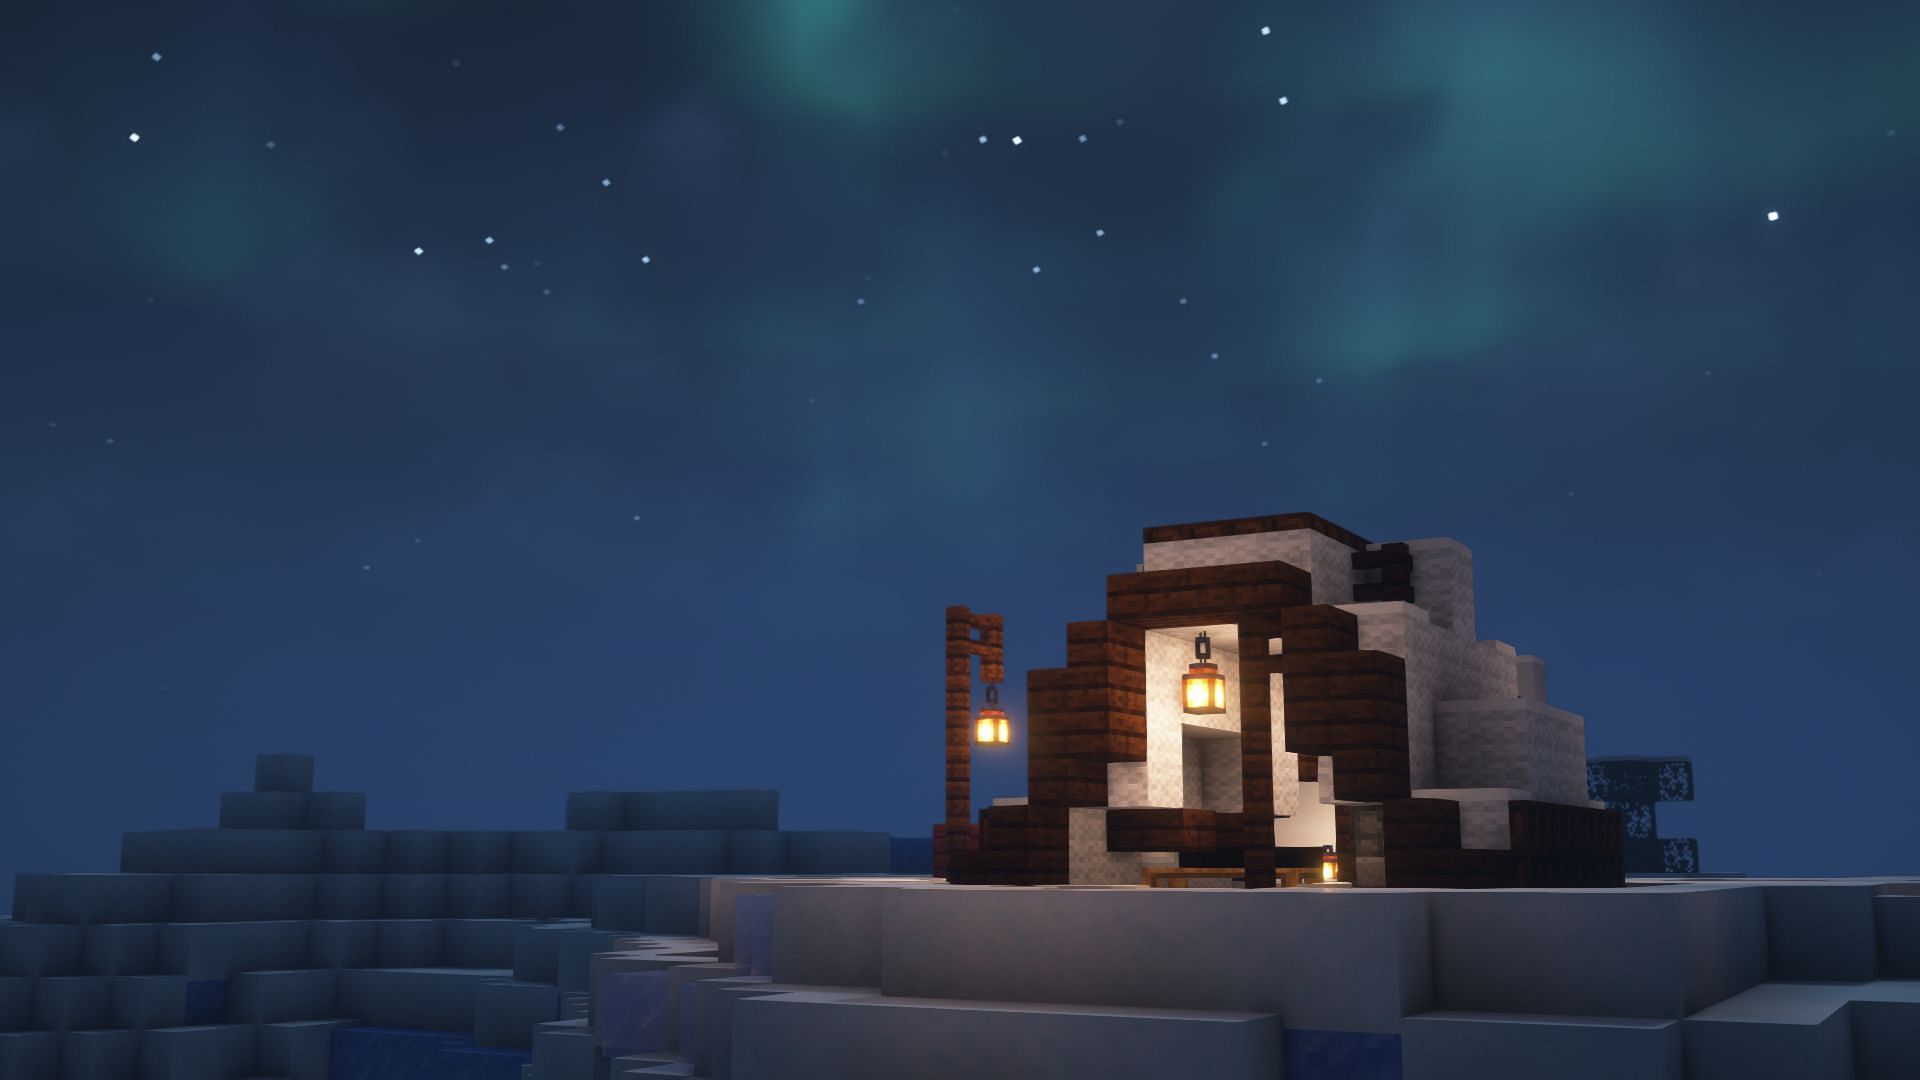
There are a plethora of shaders out there. However, Complementary Shaders is considered one of the very best. It enhances the game's graphics while maintaining its performance. It is extremely easy to download and install these shaders.

Chart New Territories with the ultimate Minecraft Seed Generator!
Steps to download and install Complementary Shaders for Minecraft 1.19
1) Download and install OptiFine or Iris
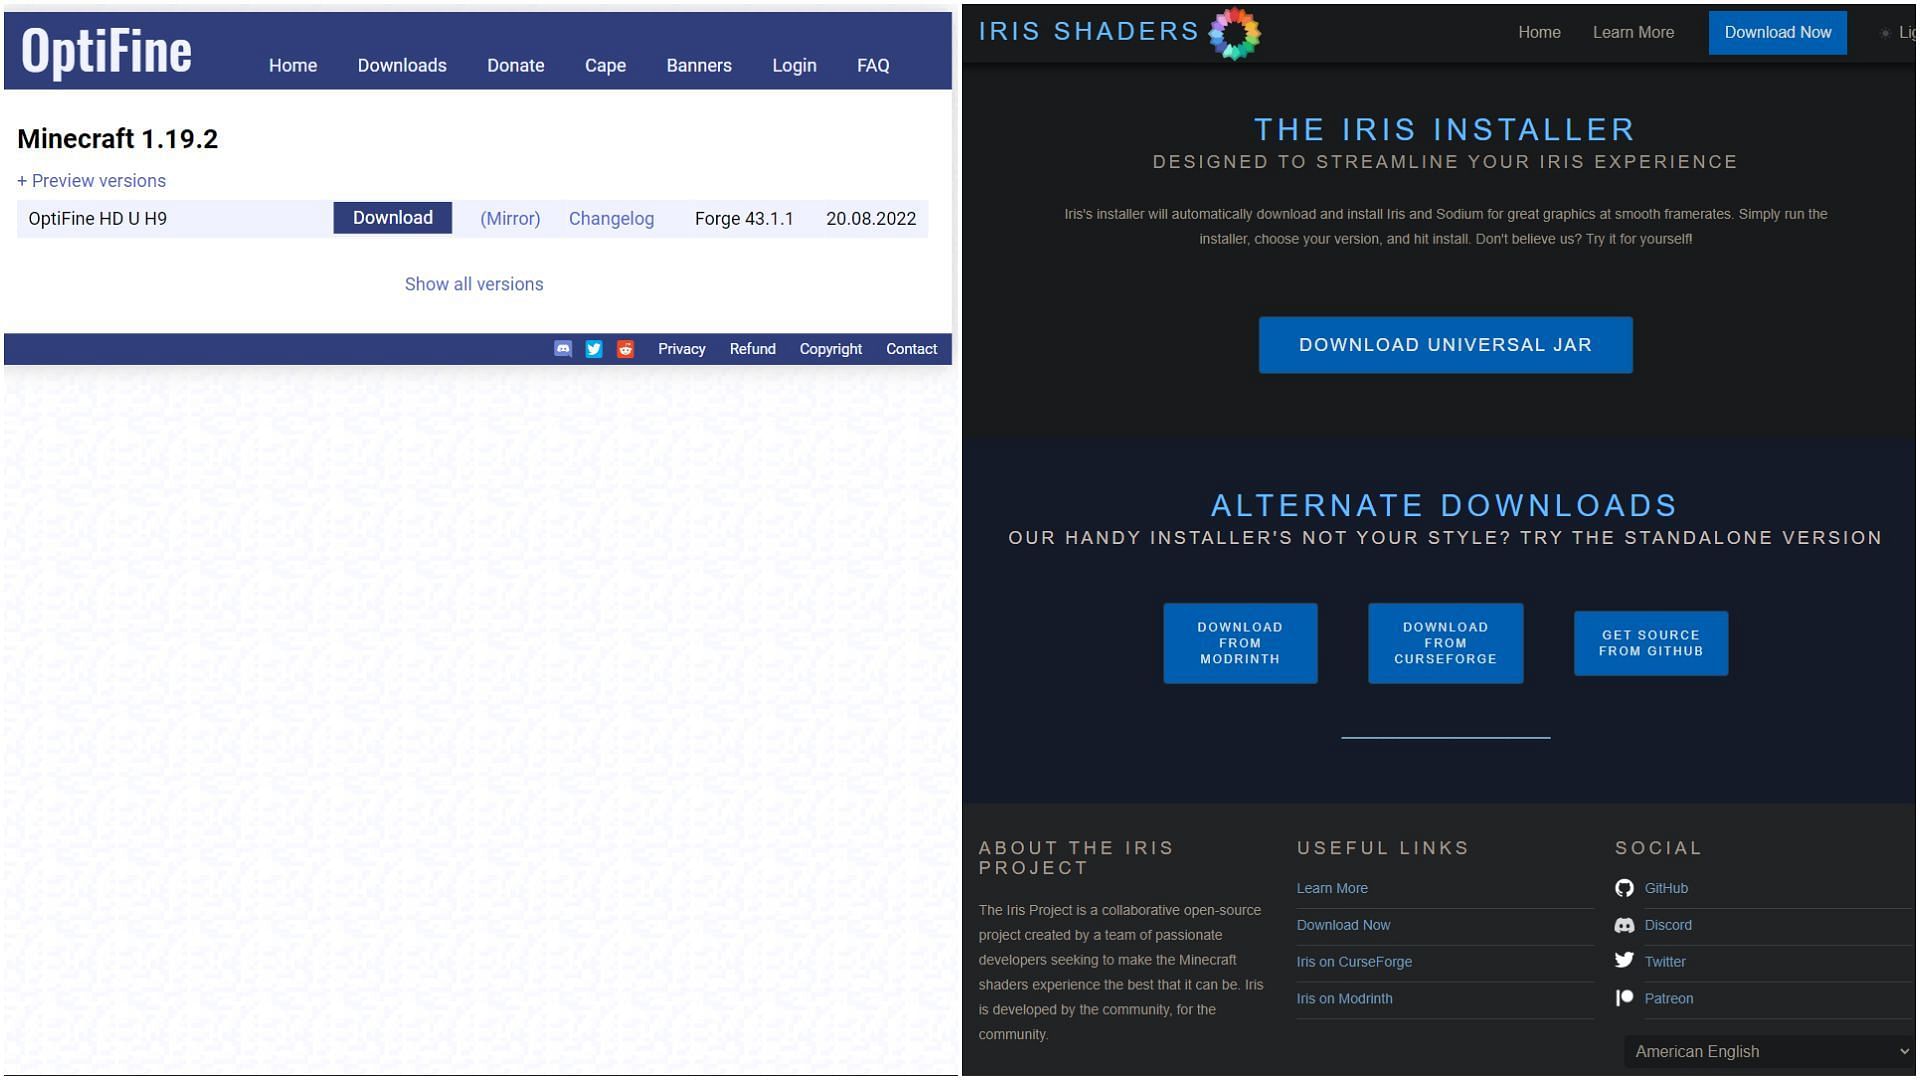
You must first either download OptiFine or Iris and install them to run shaders in the game. Simply search for these mods on the internet and download them from their official sites. Always remember to download the latest mod that is compatible with the 1.19 version.
Once downloaded, these mods can be installed normally by running the downloaded file. OptiFine will normally be installed in the game's directory, while Iris will automatically download Sodium in order to work properly inside the game.
2) Download Complementary Shaders
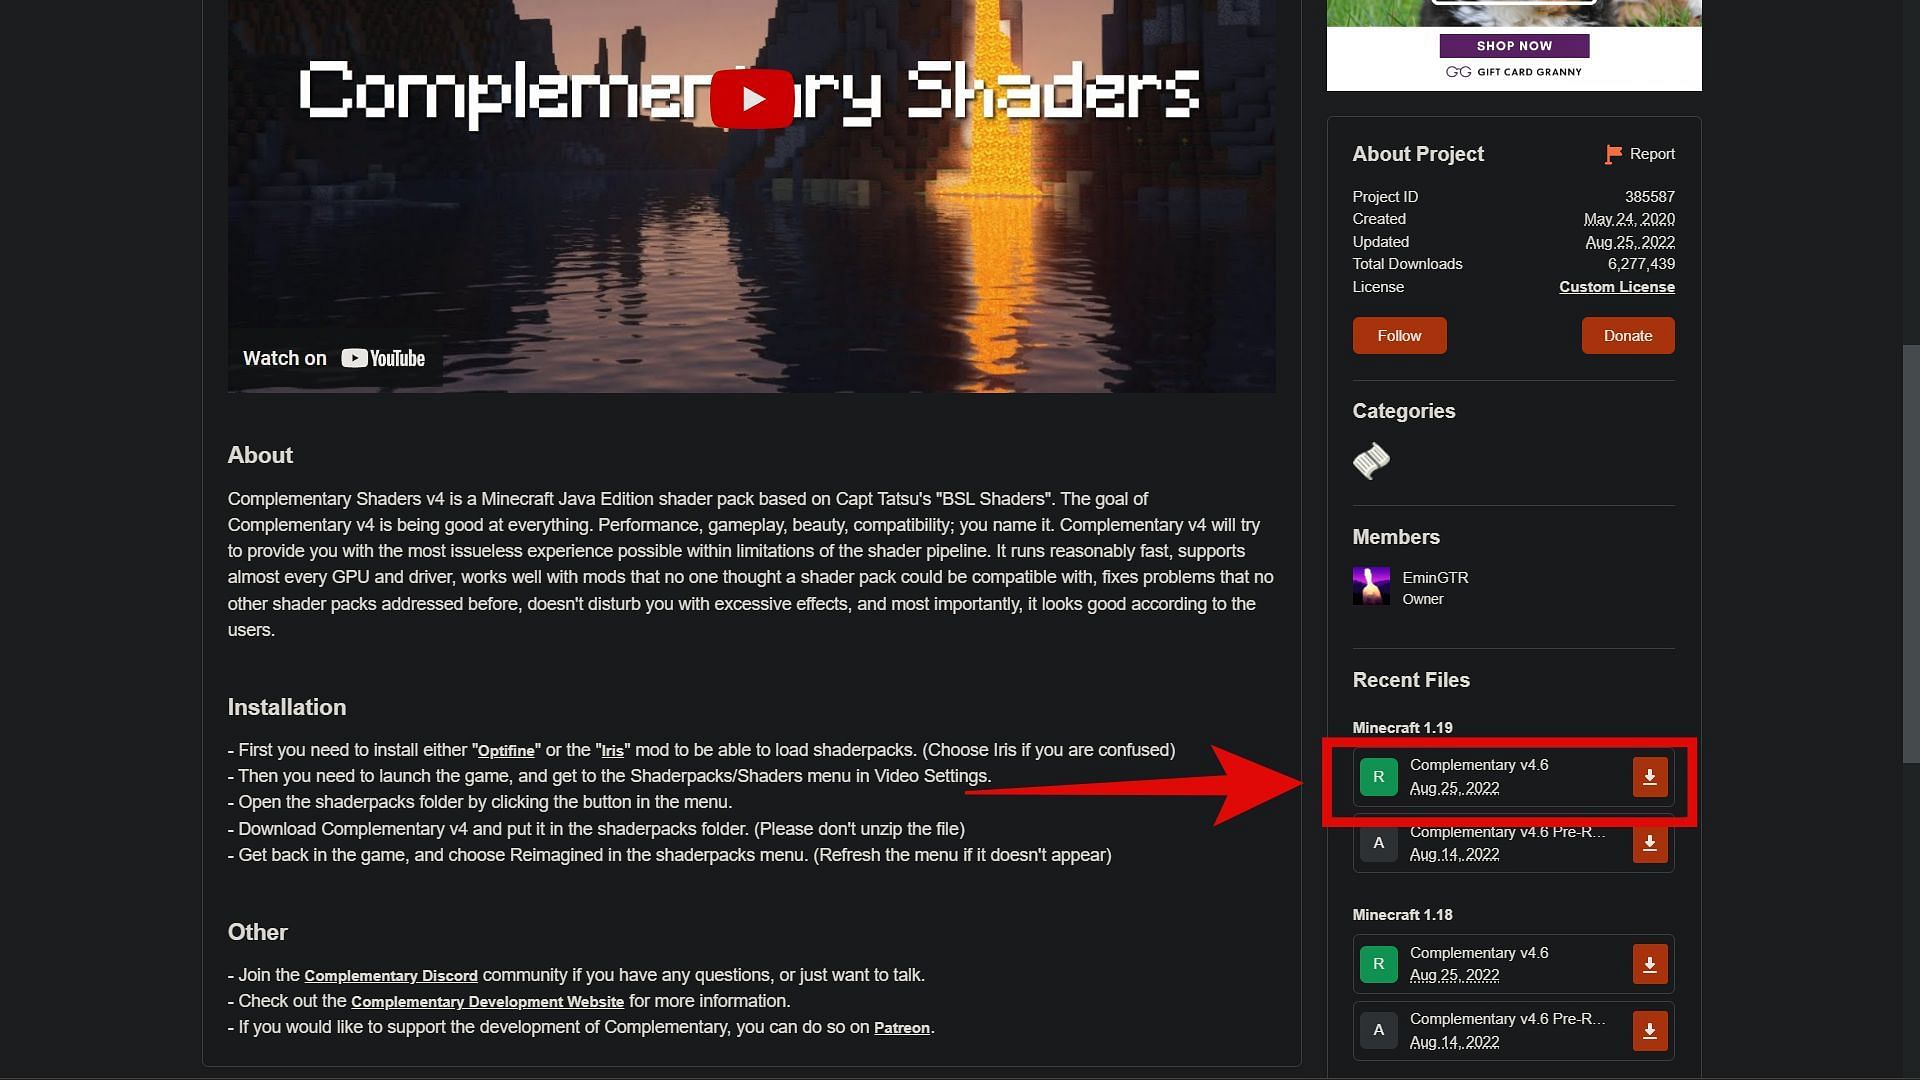
After installing the mods to run the shaders, you can search for Complementary Shaders on the web. Select the CurseForge website since it is the easiest website to navigate through and find the latest version of the shader. You can scroll down to find a list of downloads appearing on the right-hand side of the page.
This is where you will find the latest shader for the 1.19 game version. Simply hit the download button beside it to save the file to the computer.
3) Install
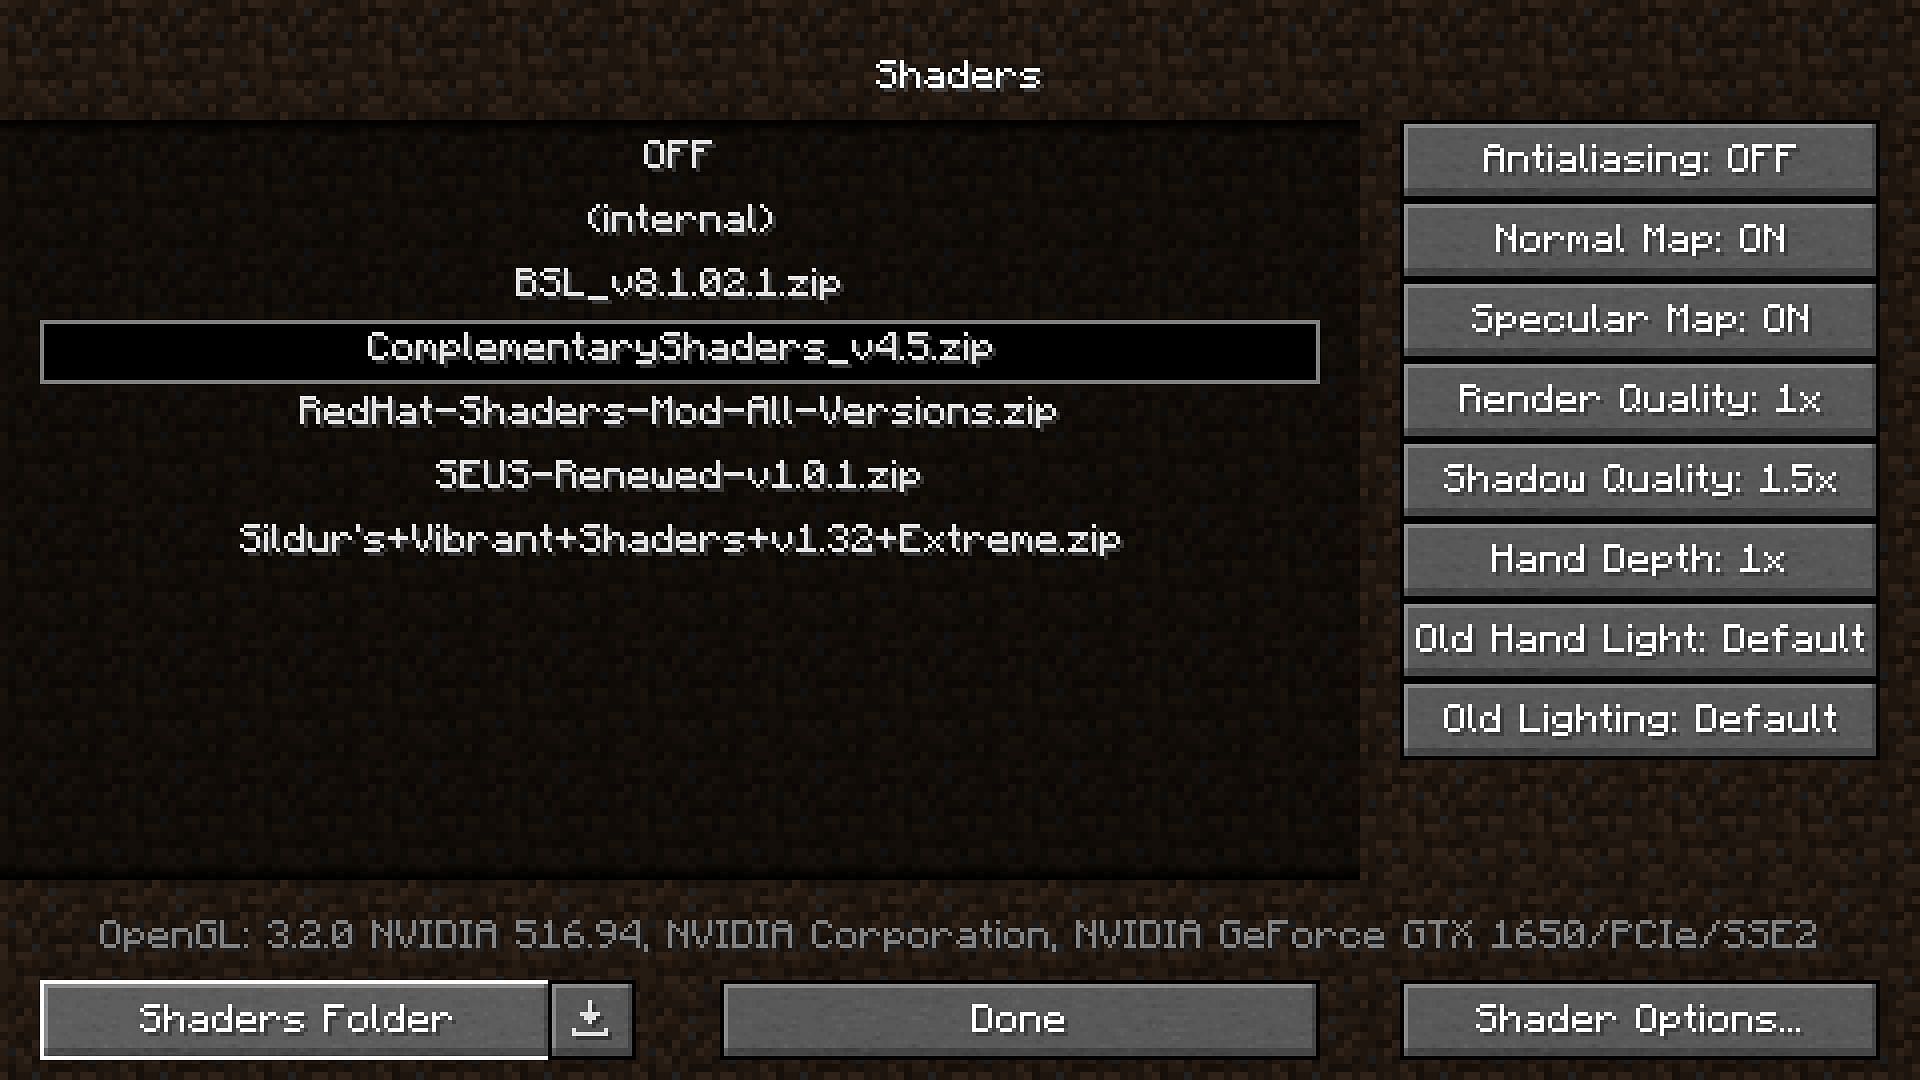
You must now open the modded game version with either OptiFine or Iris. Simply open the official game launcher and search for the OptiFine or Sodium with Iris game version from the list.
Once the game opens, you can head to the video settings, which will look quite different, courtesy of the mods. Here, you must find the 'Shaders' or 'Shader Packs' tab, from where you can open the main folder where all the shaders can be stored for the game.
When the file explorer opens with the 'shaderpacks' folder, you can simply transfer the downloaded shader to the folder. All shaders must be in the '.zip' file, as they were downloaded.
4) Activating and changing shader settings
Finally, when you transfer the shader to the folder, the game will recognize it and allow you to select it.
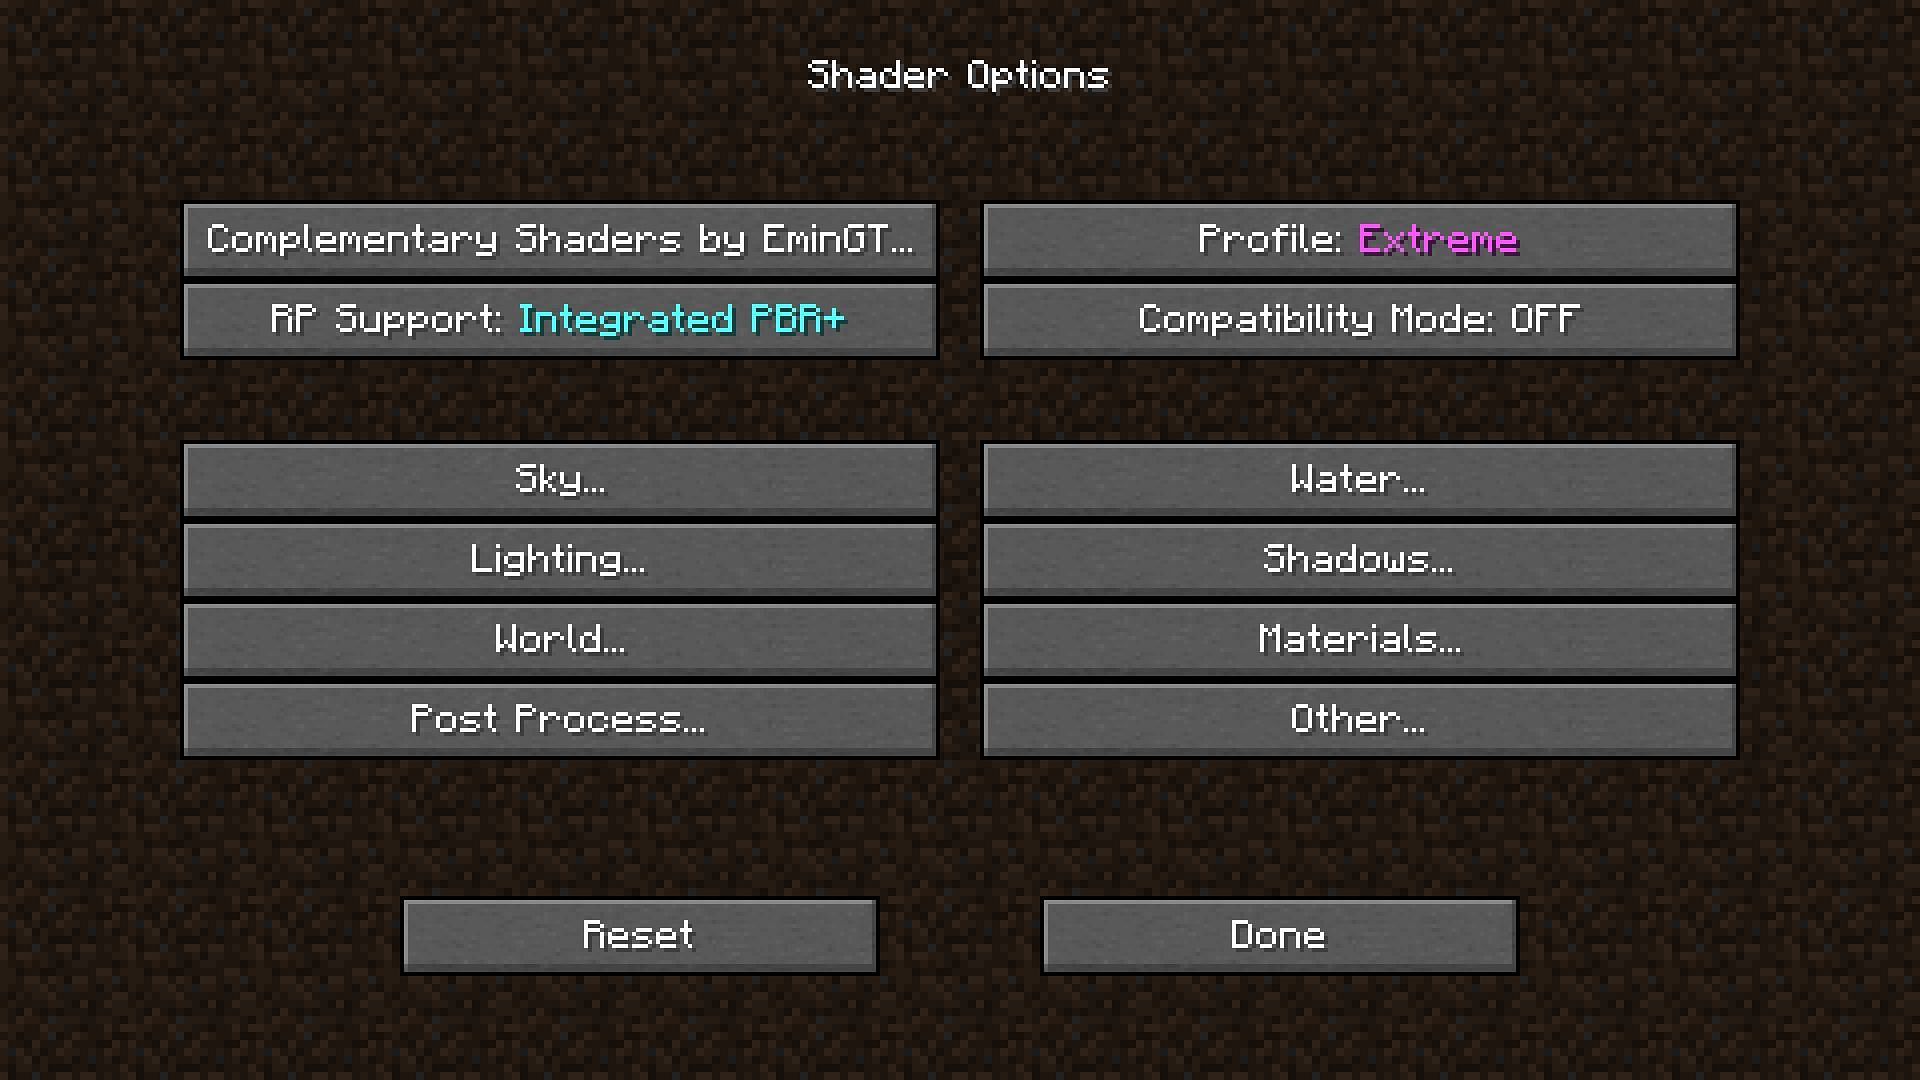
Once selected, you can simply hop into a world and enjoy the beautiful graphical transformation. You can tweak any of the shader's graphical settings by going back to the 'Shaders' tab in the settings.

Uncover new worlds with our Minecraft Seed Generator!