
'%20x='0'%20y='0'%20height='100%25'%20width='100%25'%20%0A%20%20%20%20%20%20%20%20%20%20xlink%3Ahref='data:image/jpg;base64,/9j/2wBDAAYEBQYFBAYGBQYHBwYIChAKCgkJChQODwwQFxQYGBcUFhYaHSUfGhsjHBYWICwgIyYnKSopGR8tMC0oMCUoKSj/2wBDAQcHBwoIChMKChMoGhYaKCgoKCgoKCgoKCgoKCgoKCgoKCgoKCgoKCgoKCgoKCgoKCgoKCgoKCgoKCgoKCgoKCj/wgARCAAHAAoDASIAAhEBAxEB/8QAFQABAQAAAAAAAAAAAAAAAAAABAX/2gAIAQEAAAAAtE//xAAUAQEAAAAAAAAAAAAAAAAAAAAF/9oACAECEAAAAEv/xAAUAQEAAAAAAAAAAAAAAAAAAAAF/9oACAEDEAAAAC//xAAgEAABAwQCAwAAAAAAAAAAAAACAQMEAAUHEiExUmKy/9oACAEBAAE/AG8R2xw2t7pKIAbUeIzIqp+XVLiSCPA3FvX2gMqvzX//xAAXEQEAAwAAAAAAAAAAAAAAAAABAAIx/9oACAECAQE/AChk/8QAFxEAAwEAAAAAAAAAAAAAAAAAAAECA//aAAgBAwEBPwB6Uf/Z'%3E%3C/image%3E%3C/svg%3E)
Sodium and Iris are the only shader software as of yet that can run in Minecraft 1.19. The Wild Update, which was released on June 7, 2022. Millions of players downloaded the update to witness all the exciting new features Mojang had added. Although most players still play the game without any graphical optimizations, several Java Edition players will want the newest shaders to go with the new update.
Graphical optimizations and enhancements are offered by a lot of mods for the game. It is safe to say that graphics are not Minecraft's strongest suit. The game is made up of pixels and blocks, with basic light and shadow quality. This is where Sodium and Iris come in.
Sodium and Iris are great graphical optimization software that not only boost FPS (frames per second) in the game but are able to add shaders to Minecraft 1.19, making the blocky game look much prettier.

Chart New Territories with the ultimate Minecraft Seed Generator!
Step-by-Step guide on how to use Sodium and Iris shaders for Minecraft 1.19
1) Download Iris shaders software
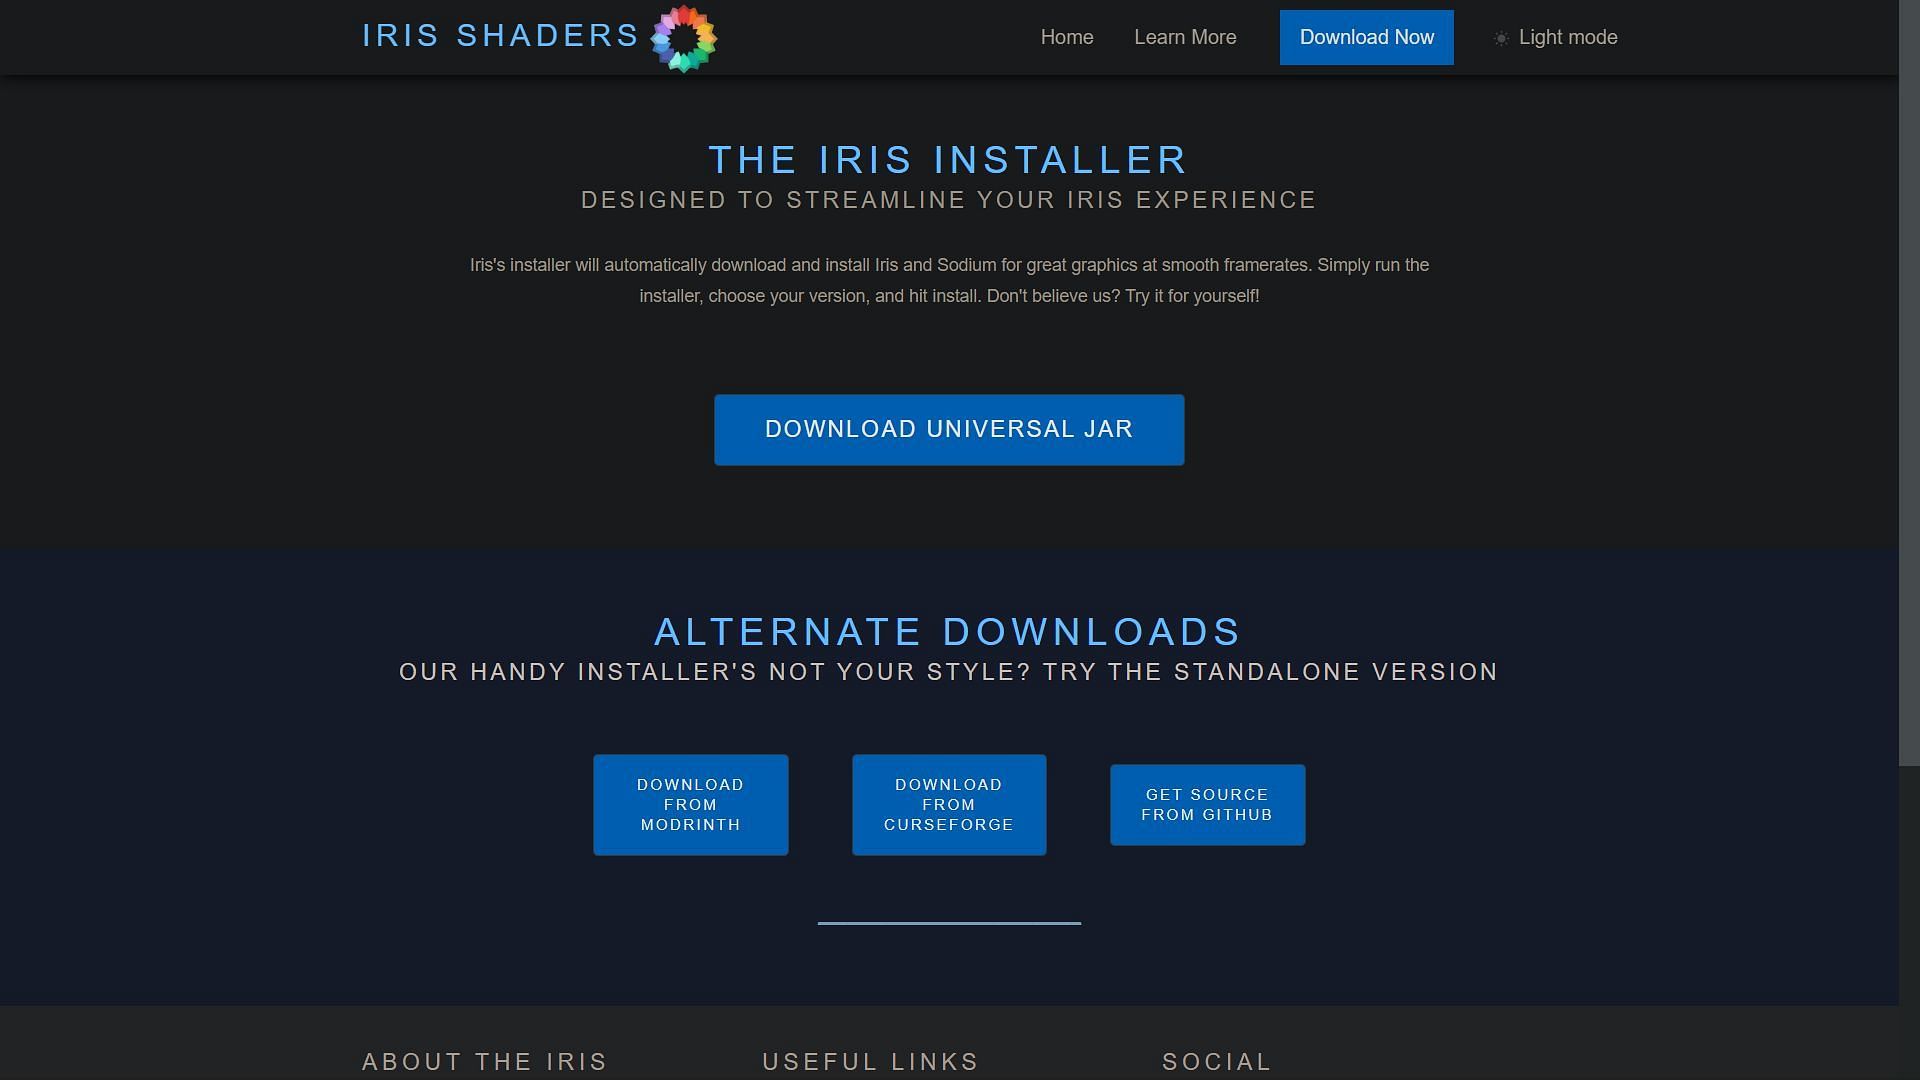
Downloading both the software is quite easy since players only have to download one setup file. Players can visit this site, https://irisshaders.net/download.html, to download the Iris installer file for the latest Minecraft 1.19 version.
One of their strongest competitors, Optifine Mod, is still under development for the latest game version. Hence, Iris, with the Sodium mod, is the best alternative.
2) Download the desired shaders
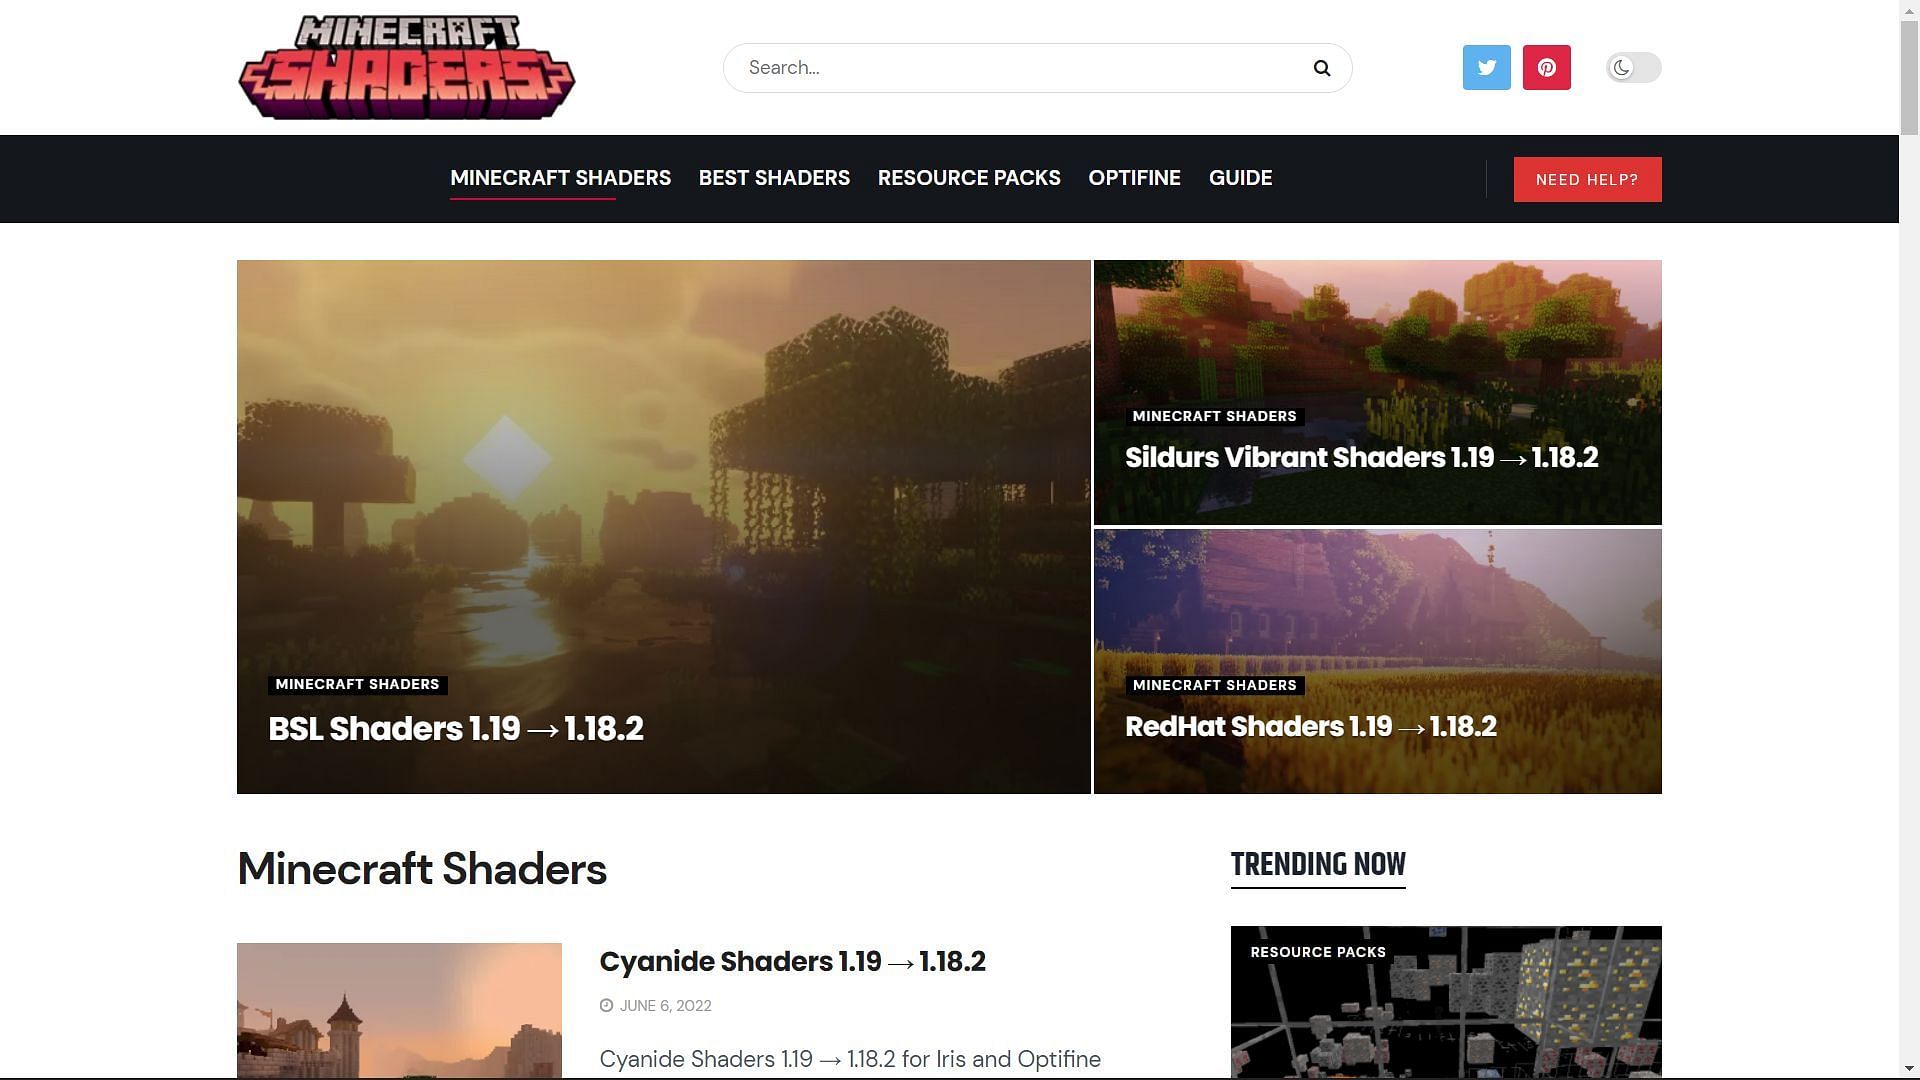
After getting the Iris installer, players can head to this site, https://minecraftshader.com/mc/minecraft-1-19-shaders/, to download their desired shaders. A plethora of them are located all over the internet for players to choose from.
Some shaders are more heavy-duty than others and can require a higher-end PC to run, whereas others are aimed at low-end machines. BSL, SEUS, Sildur, RedHat, etc., are some of the very best out there.
3) Install Iris and Sodium mods
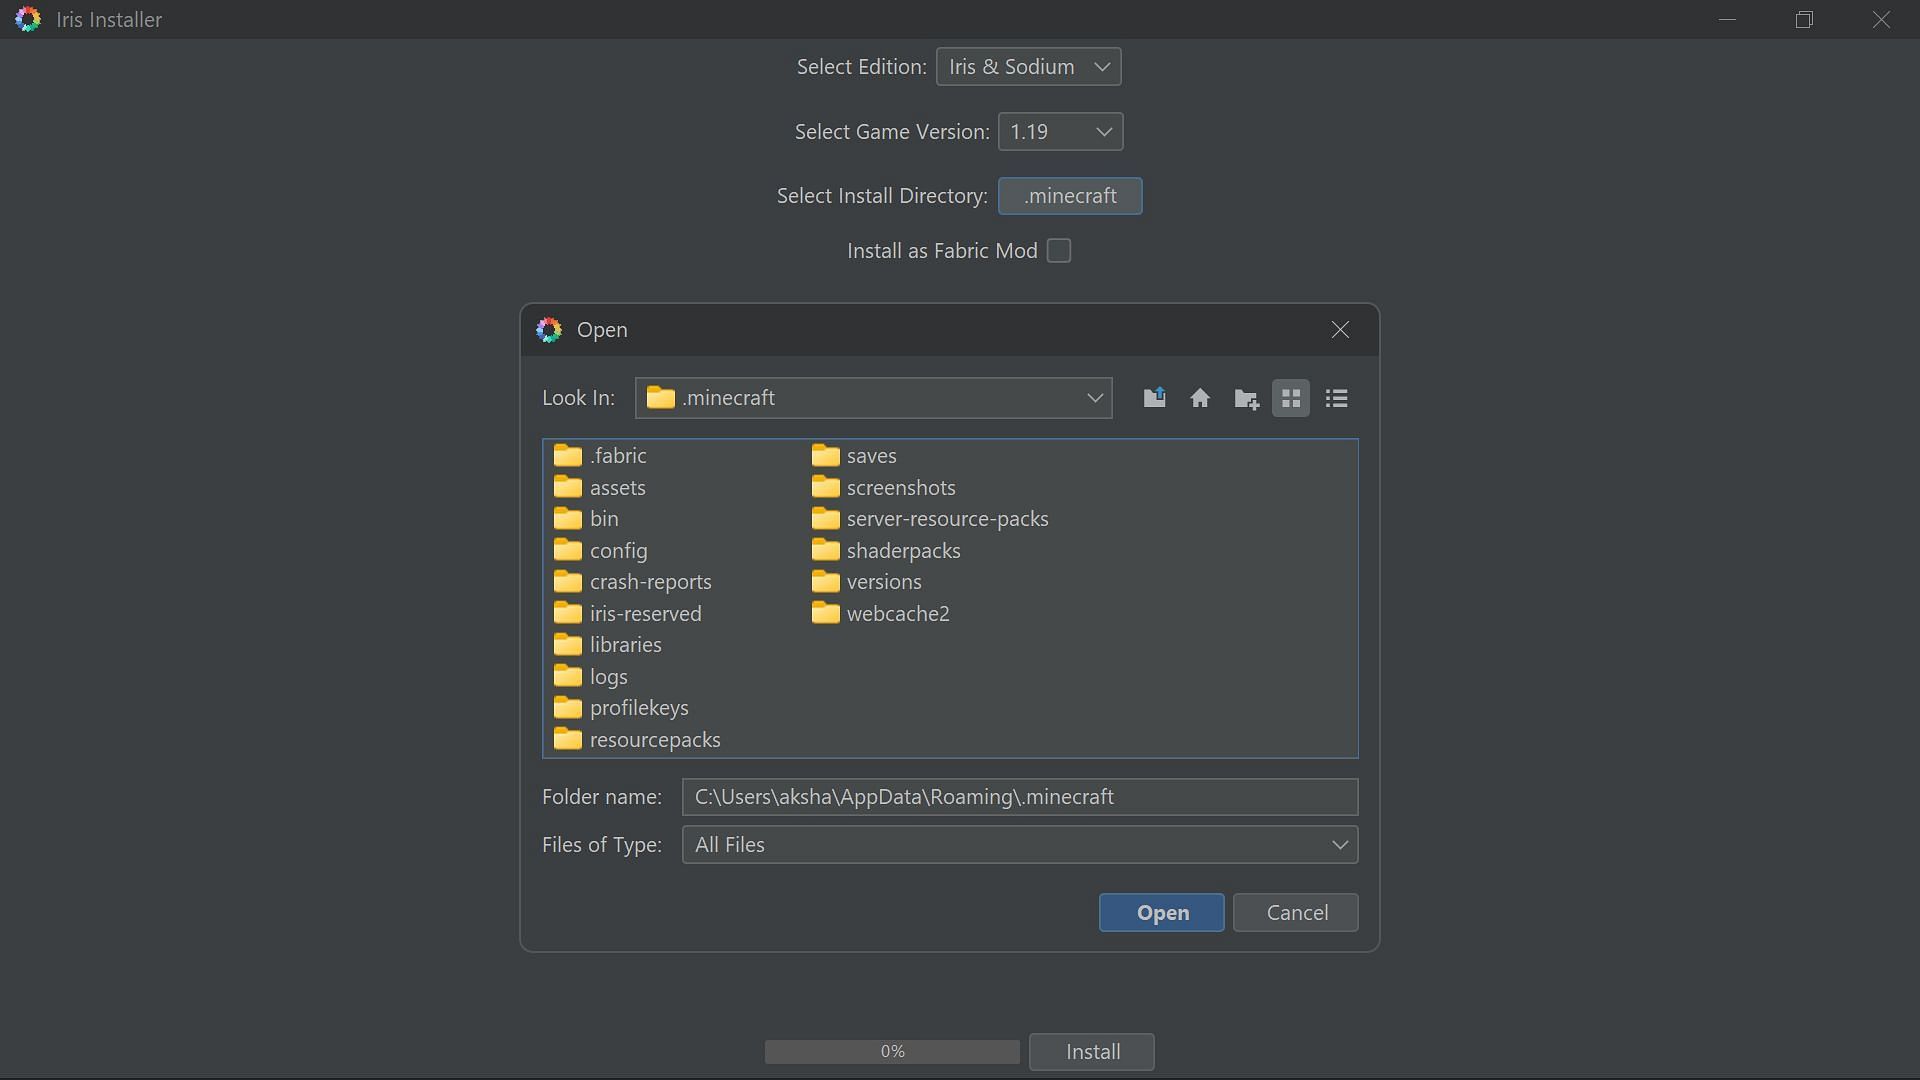
Once players have downloaded the installer file, they can simply run it and check all the settings before hitting Install. Players must first set the edition to Iris & Sodium, then set the game version to 1.19. They will then need to locate the exact game folder where these mods will be installed. Players will always have their game in C:\Users\(PC name)\AppData\Roaming\.minecraft. Finally, the Install as Fabric Mod option should be unchecked.
The installer will download all the necessary mod files and read Installation Successful after a few minutes. At this point, the installer can be closed.
4) Launching modded game version
Once the mods are installed, players can head to the official game launcher on their PC and select the Java Edition tab. They will be able to find the Iris & Sodium for 1.19 as a game version on the drop-down menu. After selecting it, players can simply hit Play.
5) Installing shaders through video settings
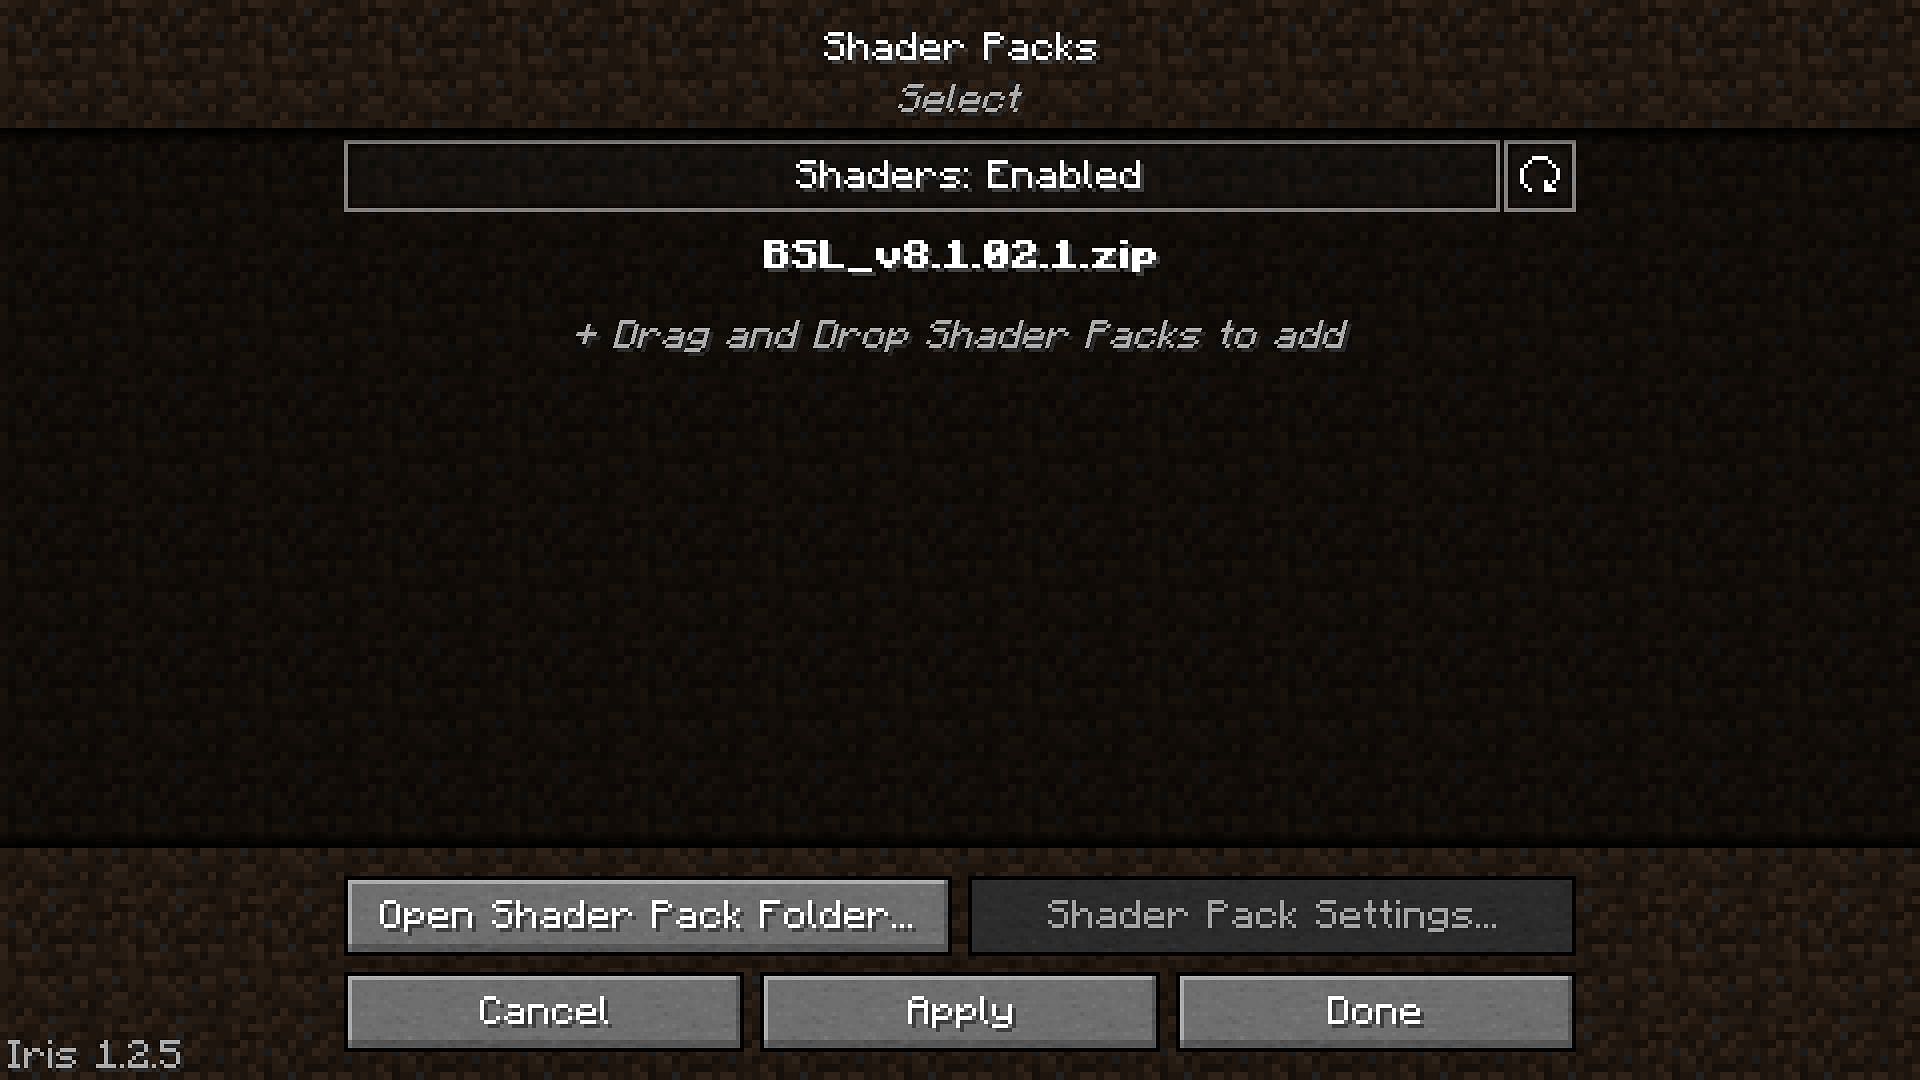
Once players are in the game, they can head to video settings that will look completely different, courtesy of the Sodium mod. Players will find a Shader Packs tab where they can hit the Open Shader Pack Folder. This will open a file explorer folder where they can transfer all the downloaded shaders. Once done, they will show up in the Shaders tab in the game, where players can select and enable them.

Uncover new worlds with our Minecraft Seed Generator!