

'%20x='0'%20y='0'%20height='100%25'%20width='100%25'%20%0A%20%20%20%20%20%20%20%20%20%20xlink%3Ahref='data:image/jpg;base64,/9j/2wBDAAYEBQYFBAYGBQYHBwYIChAKCgkJChQODwwQFxQYGBcUFhYaHSUfGhsjHBYWICwgIyYnKSopGR8tMC0oMCUoKSj/2wBDAQcHBwoIChMKChMoGhYaKCgoKCgoKCgoKCgoKCgoKCgoKCgoKCgoKCgoKCgoKCgoKCgoKCgoKCgoKCgoKCgoKCj/wgARCAAGAAoDASIAAhEBAxEB/8QAFQABAQAAAAAAAAAAAAAAAAAAAAT/xAAVAQEBAAAAAAAAAAAAAAAAAAAEBf/aAAwDAQACEAMQAAAAijJjf//EACIQAAIBAgUFAAAAAAAAAAAAAAEDAgAEBQYHESISFUFC0//aAAgBAQABPwCOoV7iqzcqugtTWMWIduWJq9OM+s+abmbNUGTicfutwduME/Kv/8QAGREAAQUAAAAAAAAAAAAAAAAAAQACAwQh/9oACAECAQE/ABamJ1y//8QAGBEAAgMAAAAAAAAAAAAAAAAAAAEDBFL/2gAIAQMBAT8AdWHJ/9k='%3E%3C/image%3E%3C/svg%3E)
In Minecraft, the possibilities for construction are boundless. From simple and modest buildings such as your basic survival house to huge complex farms that require a lot of materials, engineering, and above all, a considerable investment of time. The Litematica mod will make this task very easy, allowing you to use 3D holograms and blueprints to select and place buildings easily.
This article will give you a step-by-step process of installing the Litematica mod in your system and discuss how you can use this mod in the game.

Litematica mod for Minecraft: Steps to download, install and use
To make the Litematica mod function properly in Minecraft, you must first install Minecraft Fabric and the MaLiLib. Fabric is the mod loader that allows you to install Litematica in Minecraft. Follow the steps given below to download and install the Schematica mod to your system:
Chart New Territories with the ultimate Minecraft Seed Generator!
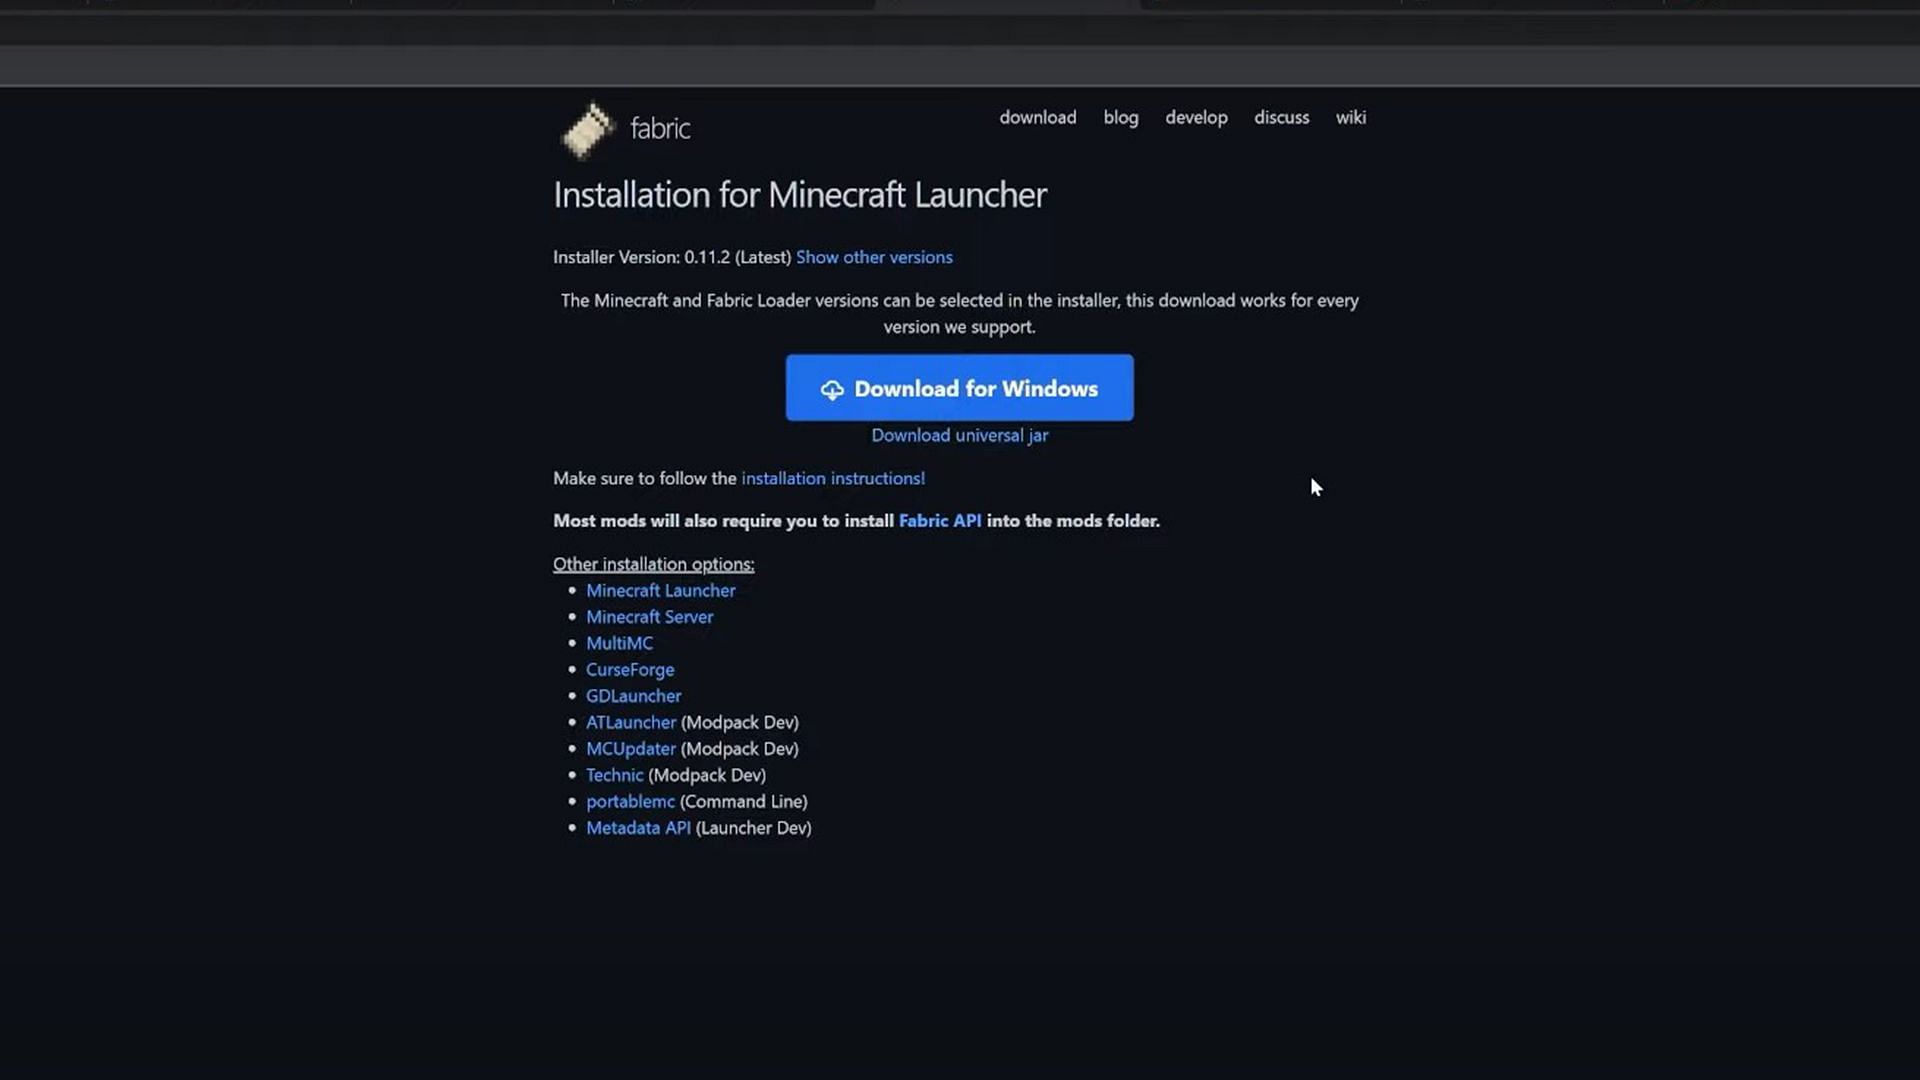
- Go to the official site of Fabric and click on the download Universal jar button. This ensures you have the mod loader and all the other important stuff you need.
- Ensure you have Java 17 installed in your system to install Fabric. If you don't have one, go ahead and install it. Now open the Fabric jar file you downloaded and install it.
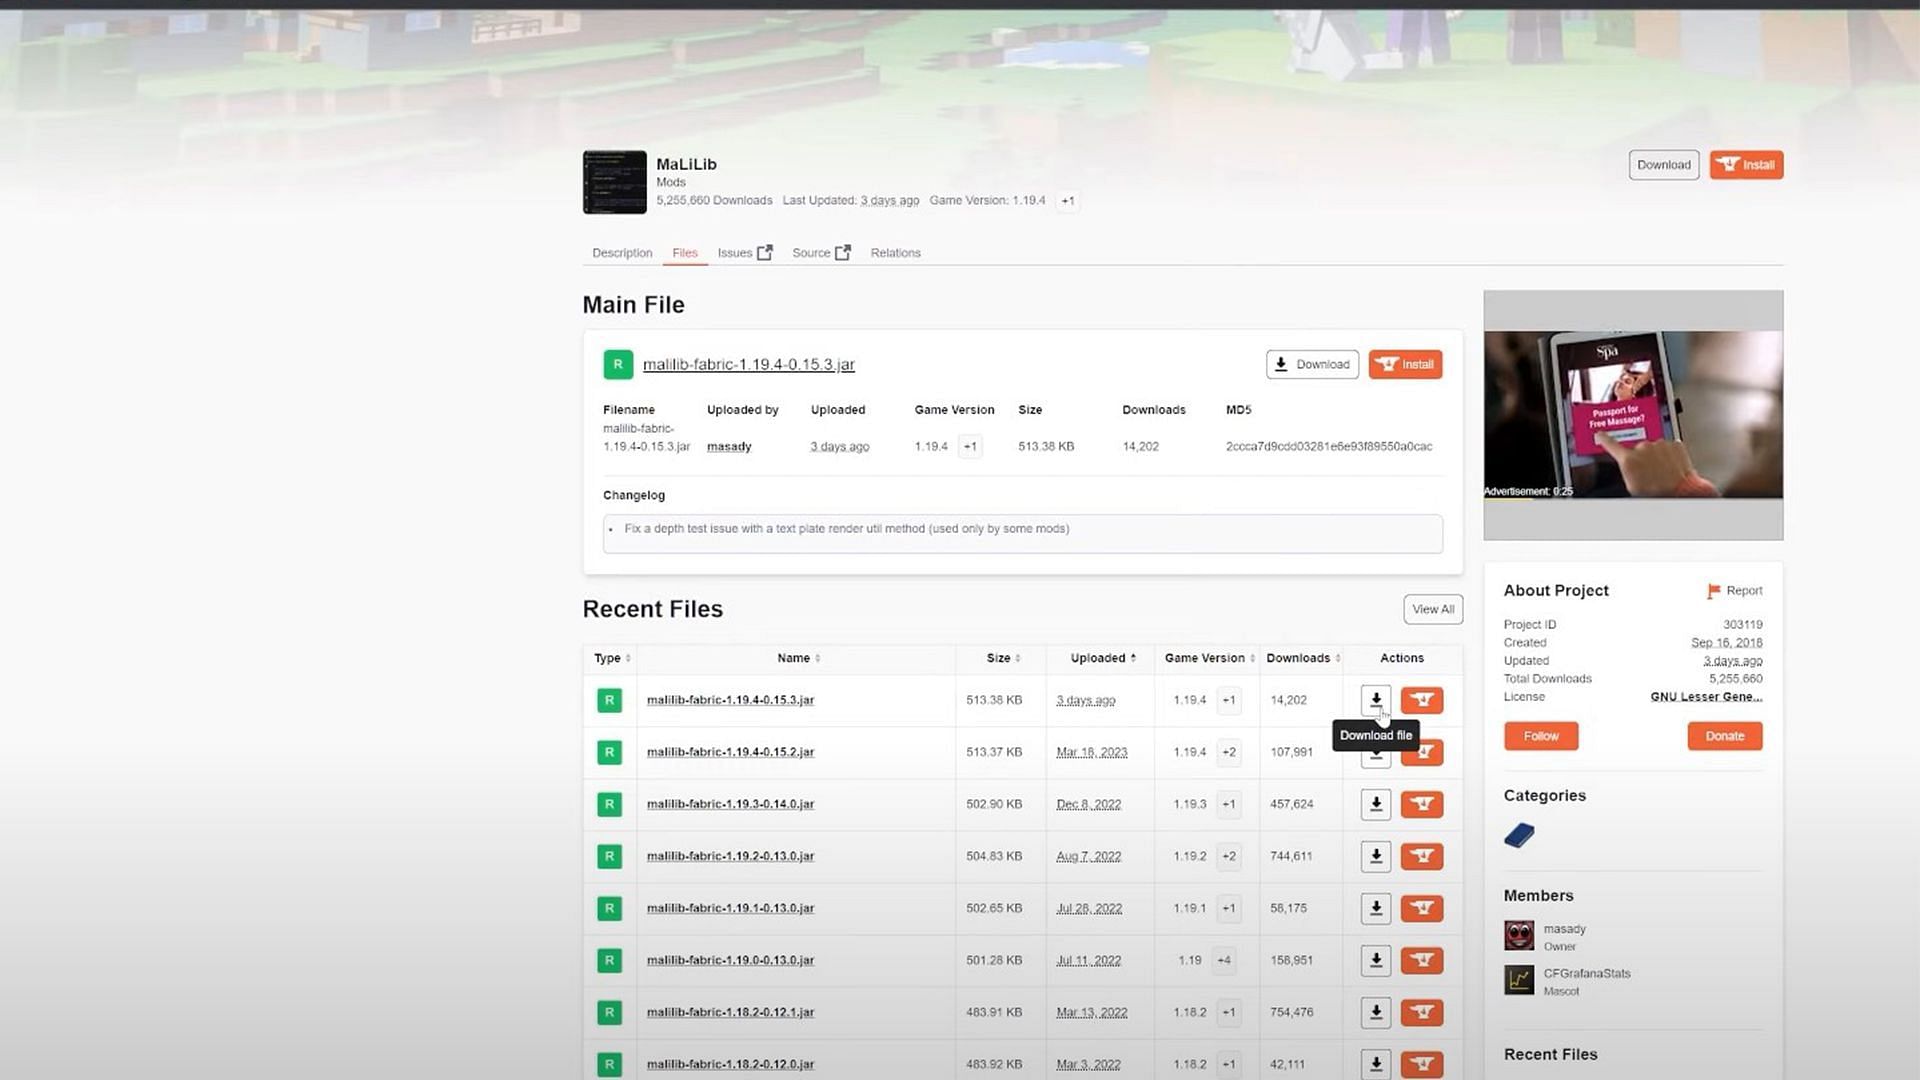
- The next step is to download the MaLiLib library mod from the curseforge site, which is essential for the Litematica mod to work correctly in Minecraft. Make sure you are downloading the same version which you selected while installing Fabric.
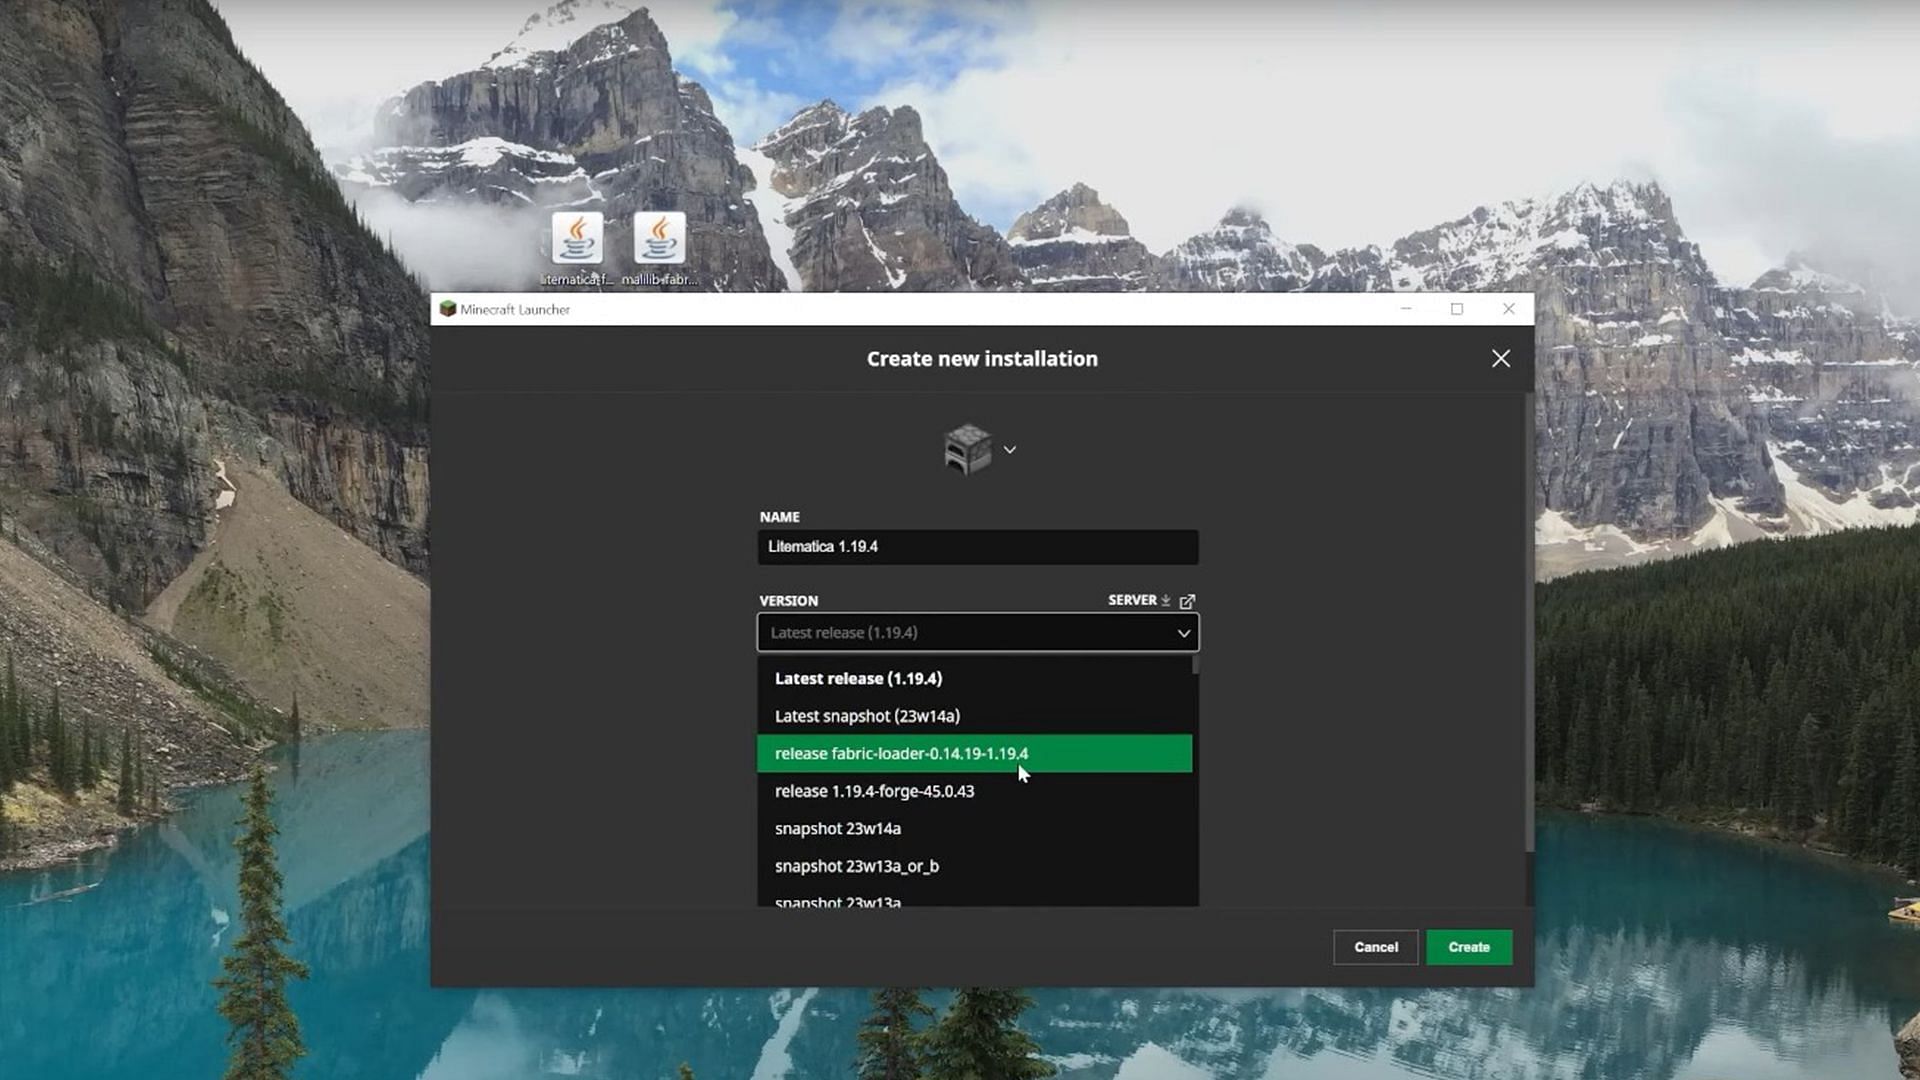
- Open your game's Launcher and go to the Installations tab. Click on New Installation and give all the information as required. Name it, for example, Litematica 1.19.4, and select the fabric version you had installed.
- Click on the folder icon on the right side of the fabric mod or the Litematica mod you created, and it will open the .minecraft folder. Now locate the mods folder and open it. If you don't have one, create a new folder, name it mods, and open it. Drag and drop the two mods you downloaded into this folder.
- Lastly, close the window and click PLAY on the right of Litematica. Create a new world and enjoy the new mod in your game.
Everything that you need to know about the Litematica mod and how to use it
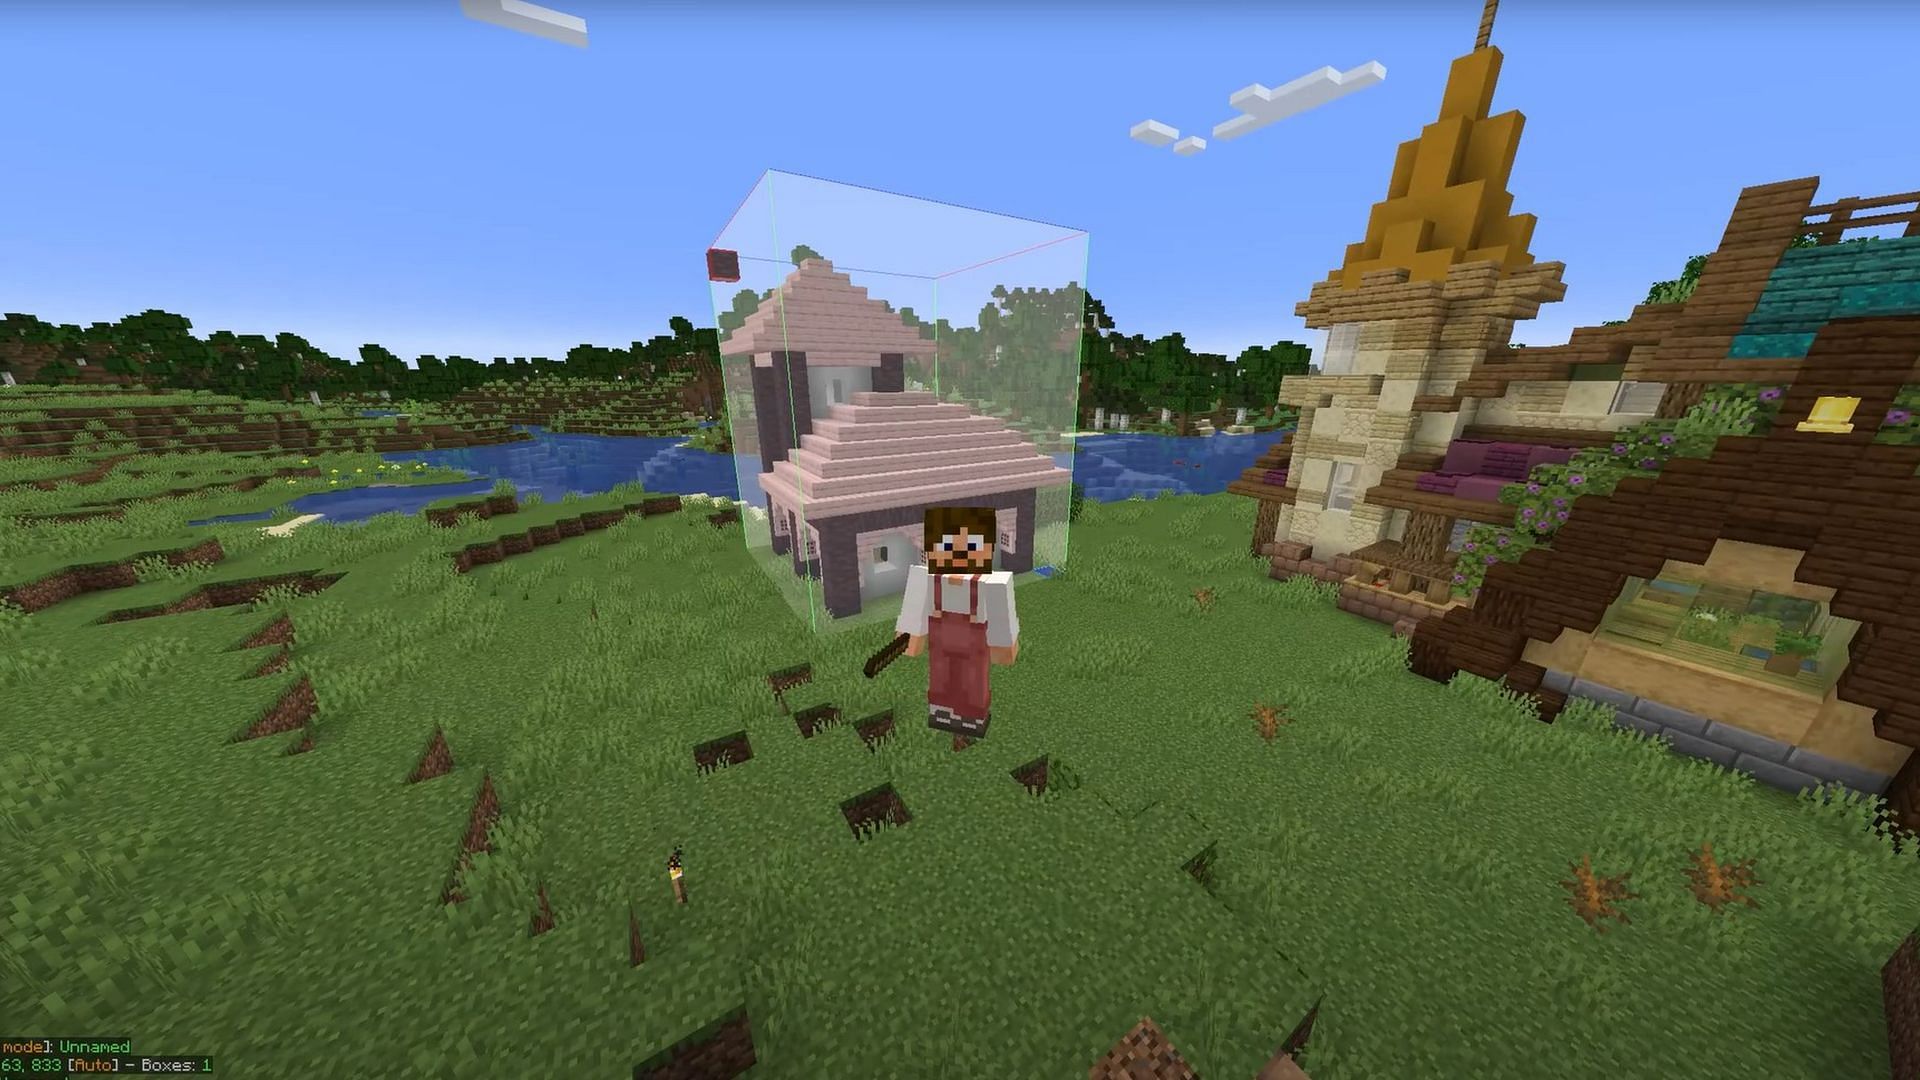
Litematica in Minecraft is a handy mod that allows you to generate 3D blueprints in your world and use the blueprints others have created. These blueprints help you build complex structures such as huge farms or buildings. In this mod, all you need is a stick, and you can use the Ctrl + Scroll option to browse through the little menu on the bottom left corner of your screen.
You can select a whole area by selecting two corner blocks of the area you want. Now you may save this area as a schematic. Press the M key to open the menu and then select Area Editor. You may increase or decrease the size of the area chosen here with greater precision. Give your selection a name, and it gets saved.
You can also place a schematic by going into the menu and clicking the Load Schematic button. Make sure that you have Schematic Placement selected in the bottom left menu. Now, the building may be placed anywhere you want. Litematica is quite helpful when you want to build many structures in your world, and it will do all your work efficiently.

Uncover new worlds with our Minecraft Seed Generator!