

'%20x='0'%20y='0'%20height='100%25'%20width='100%25'%20%0A%20%20%20%20%20%20%20%20%20%20xlink%3Ahref='data:image/jpg;base64,/9j/2wBDAAYEBQYFBAYGBQYHBwYIChAKCgkJChQODwwQFxQYGBcUFhYaHSUfGhsjHBYWICwgIyYnKSopGR8tMC0oMCUoKSj/2wBDAQcHBwoIChMKChMoGhYaKCgoKCgoKCgoKCgoKCgoKCgoKCgoKCgoKCgoKCgoKCgoKCgoKCgoKCgoKCgoKCgoKCj/wgARCAAGAAoDASIAAhEBAxEB/8QAFgABAQEAAAAAAAAAAAAAAAAAAAUH/8QAFQEBAQAAAAAAAAAAAAAAAAAAAgT/2gAMAwEAAhADEAAAAM8rFI//xAAdEAADAAICAwAAAAAAAAAAAAABAgMEBQARBiJR/9oACAEBAAE/APGt1XGwrpmPa9Udg5BXofCvr3zK3m0lk2ml4lUcqCYLz//EABgRAQADAQAAAAAAAAAAAAAAAAIAAQMh/9oACAECAQE/ABsxuhV8n//EABkRAAEFAAAAAAAAAAAAAAAAAAEAAgMEMf/aAAgBAwEBPwCtK4jV/9k='%3E%3C/image%3E%3C/svg%3E)
Minecraft is evolving every day, and new updates constantly arrive to the game to make it look and perform better. However, the game's size keeps increasing with every update, and players who are on weaker systems may eventually begin to face problems when running the game.
In this case, they should consider using a popular mod that has been proven to improve game performance by helping players unlock higher FPS rates in the game. The mod is called Optifine and can be downloaded for free on almost every version of the game.

Optifine HD boosts framerates in the game and adds Dynamic Lights, shaders, newer textures, and particle animations to the game. Installing the mod is a simple process if players wish to optimize Minecraft v1.19.2. Here's a complete step-by-step guide on how you can install Optifine.
Chart New Territories with the ultimate Minecraft Seed Generator!
Installing Optifine to optimize Minecraft v1.19.2
The latest version of Optifine was recently released for Minecraft 1.19.2, and you can download it to improve the performance and graphics of the game. Follow these steps to download the latest version of the mod:
1) Open the Minecraft Launcher and select your version
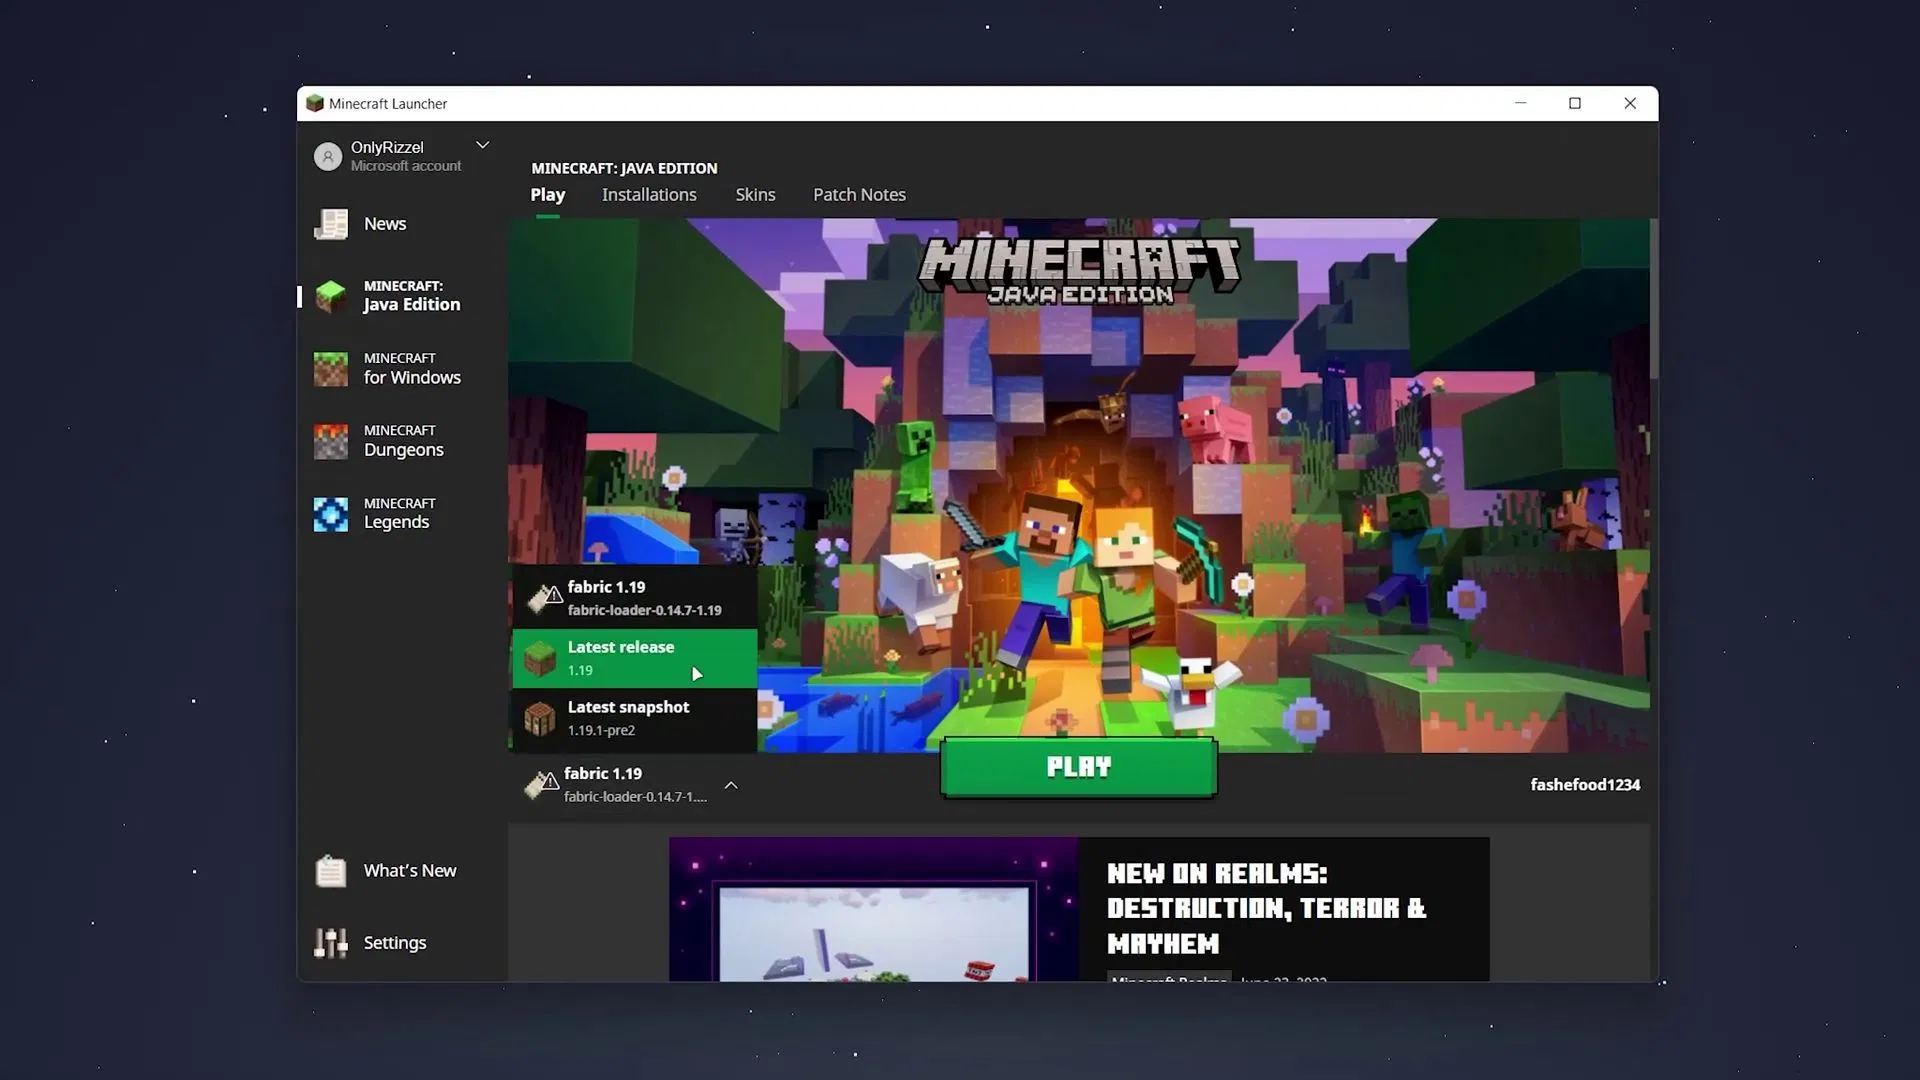
Open Minecraft and choose the version you want to install Optifine for. Start the game and go into the game's main menu. Once you are on the title screen that shows the various game modes, quit the game and head back to the desktop.
This process is necessary as it registers the game files of your current version in the PC's cache memory and the registry editor. This allows the Optifine installer to automatically detect the directory of the game.
2) Download Optifine from the official website
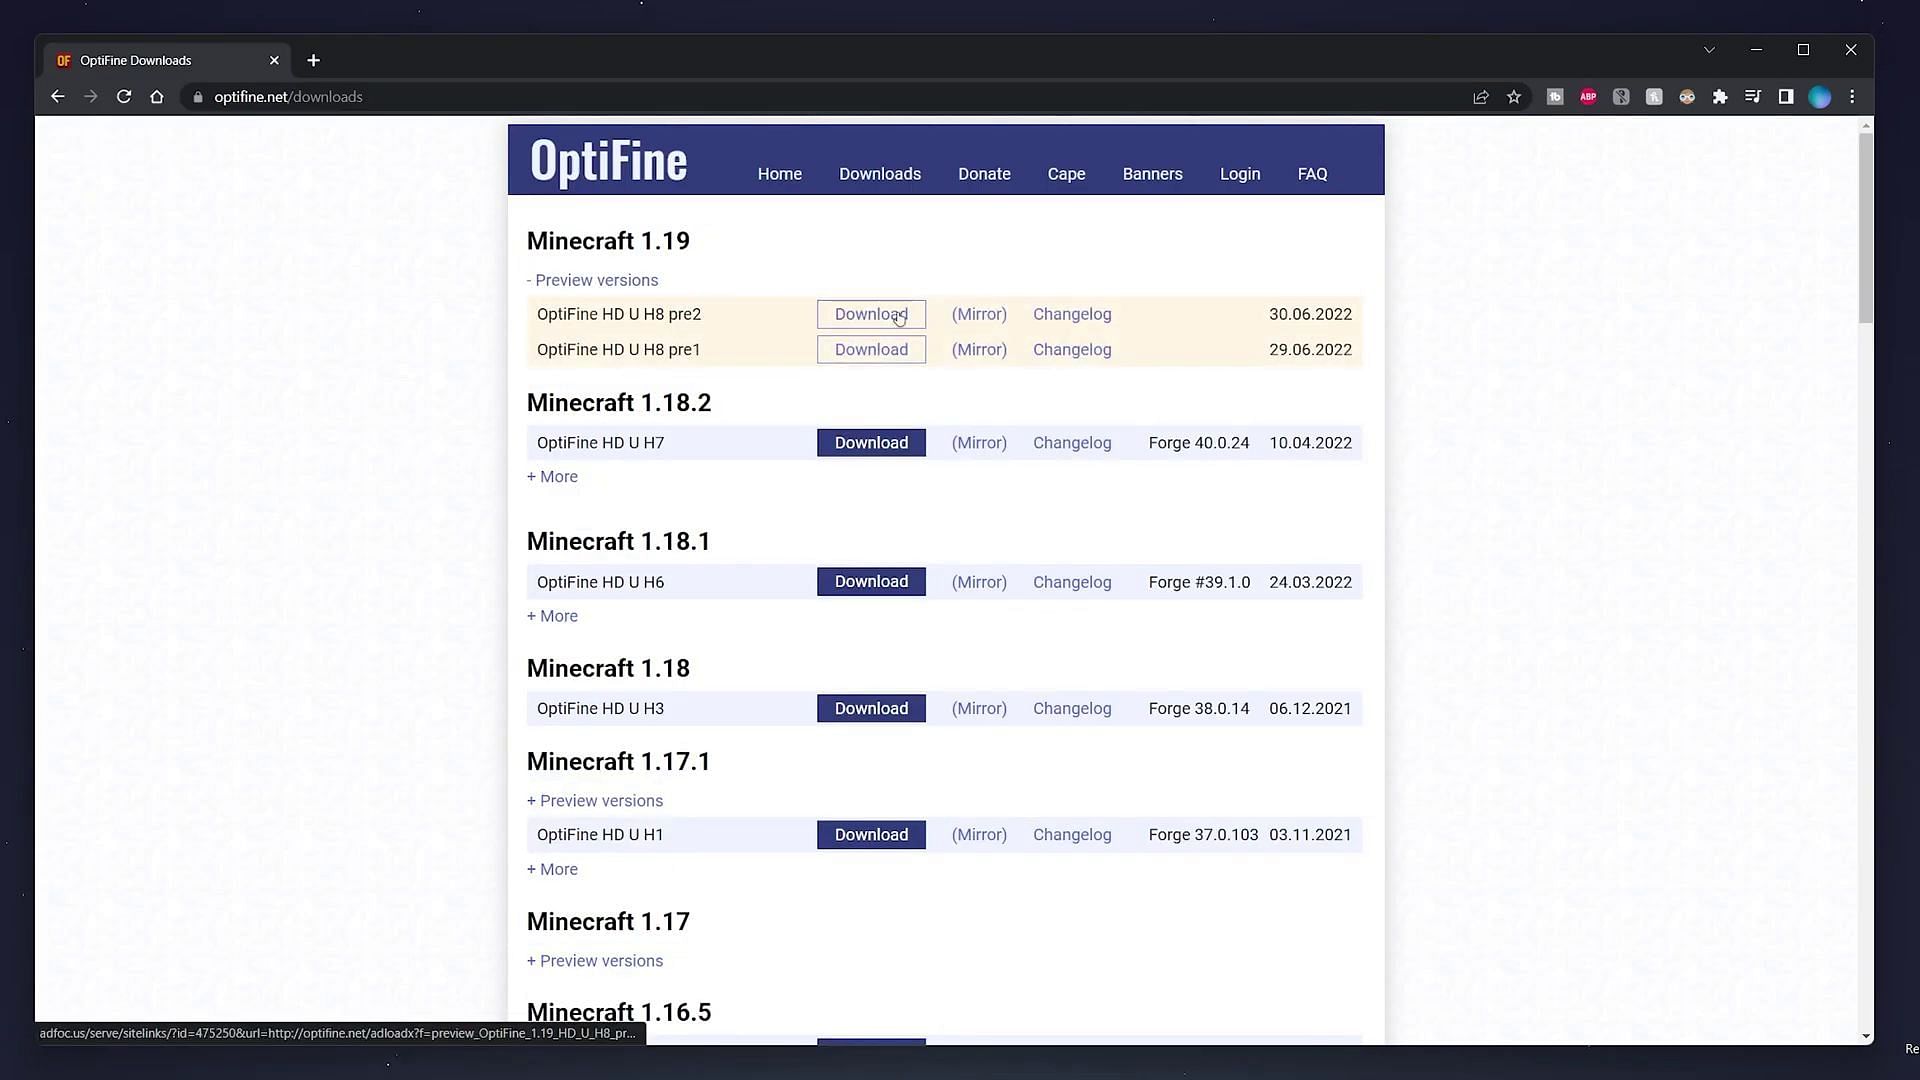
You need to head over to the downloads page of Optifine's official website. This will showcase the different versions of Optifine. Select the version of the game you want to download the mod for. Click the download button, and choose the destination to which you would like to save the executable JAR file that contains the setup for Optifine. Once done, you will be able to see the downloaded file in the folder you chose.
3) Install Optifine on your computer

Navigate to the folder that contains the Optifine setup file. Once you see it, double-click it to open the Java installer. If you have trouble opening the file, you can right-click it, choose to open the file with a specific app, and then select Java Platform SE Binary from the list of apps.
This will open up an installer window where you can choose the directory in which you want to install Optifine. You need to choose the directory that contains the version of the game you want to run the mod on. Once you have selected the directory, you can click on Install. This will successfully install Optifine on your PC.
4) Run Optifine on the Minecraft Launcher
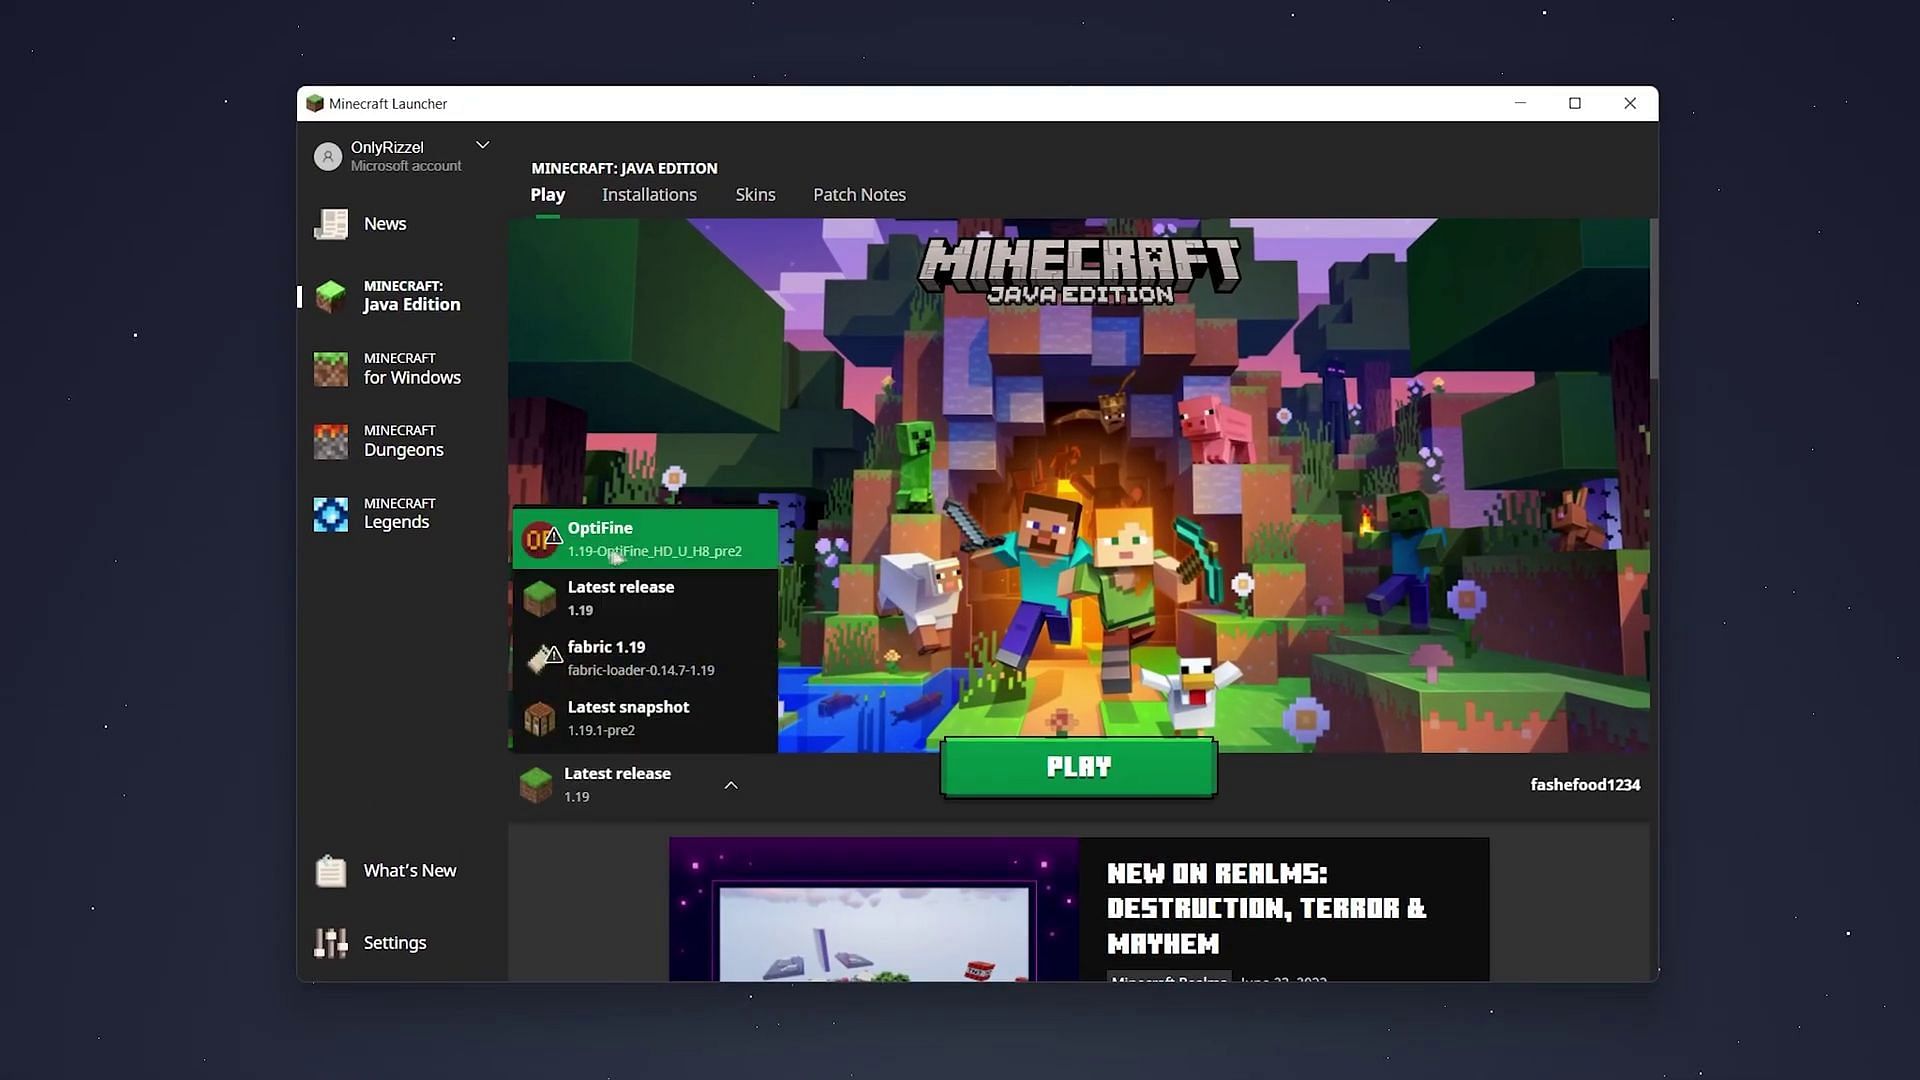
Open the Minecraft Launcher and navigate to the game version tab on the bottom left of your screen. Select Optifine from the drop-down list and click on it. This step enables the Optifine mod for the version of the game you chose while installing it on your PC.
Hit Play to start the game. You will now be able to see the enhanced graphics and FPS settings inside your game that you can customize to your preference.

Uncover new worlds with our Minecraft Seed Generator!