
'%20x='0'%20y='0'%20height='100%25'%20width='100%25'%20%0A%20%20%20%20%20%20%20%20%20%20xlink%3Ahref='data:image/jpg;base64,/9j/2wBDAAYEBQYFBAYGBQYHBwYIChAKCgkJChQODwwQFxQYGBcUFhYaHSUfGhsjHBYWICwgIyYnKSopGR8tMC0oMCUoKSj/2wBDAQcHBwoIChMKChMoGhYaKCgoKCgoKCgoKCgoKCgoKCgoKCgoKCgoKCgoKCgoKCgoKCgoKCgoKCgoKCgoKCgoKCj/wgARCAAHAAoDASIAAhEBAxEB/8QAFAABAAAAAAAAAAAAAAAAAAAABf/aAAgBAQAAAAB9D//EABQBAQAAAAAAAAAAAAAAAAAAAAX/2gAIAQIQAAAAK//EABQBAQAAAAAAAAAAAAAAAAAAAAP/2gAIAQMQAAAAf//EAB8QAAEEAgIDAAAAAAAAAAAAAAIBBAUSAxEABiFRcf/aAAgBAQABPwBzEYIyVFk1j5WUb5ABN536ECXXza5WLg9AYaTbh8K+ge5ap85//8QAGhEAAAcAAAAAAAAAAAAAAAAAAAECERQhsf/aAAgBAgEBPwCQt6PR/8QAGBEAAgMAAAAAAAAAAAAAAAAAAAECA0H/2gAIAQMBAT8AdUdR/9k='%3E%3C/image%3E%3C/svg%3E)
After the release of the Minecraft 1.19 update, many new gamers will be downloading the sandbox title for the first time. Newcomers can get quite overwhelmed and confused by the game's world as it does not offer a map for players to easily navigate. However, gamers can craft in-game locator maps to learn the terrain and biomes once they discover them.
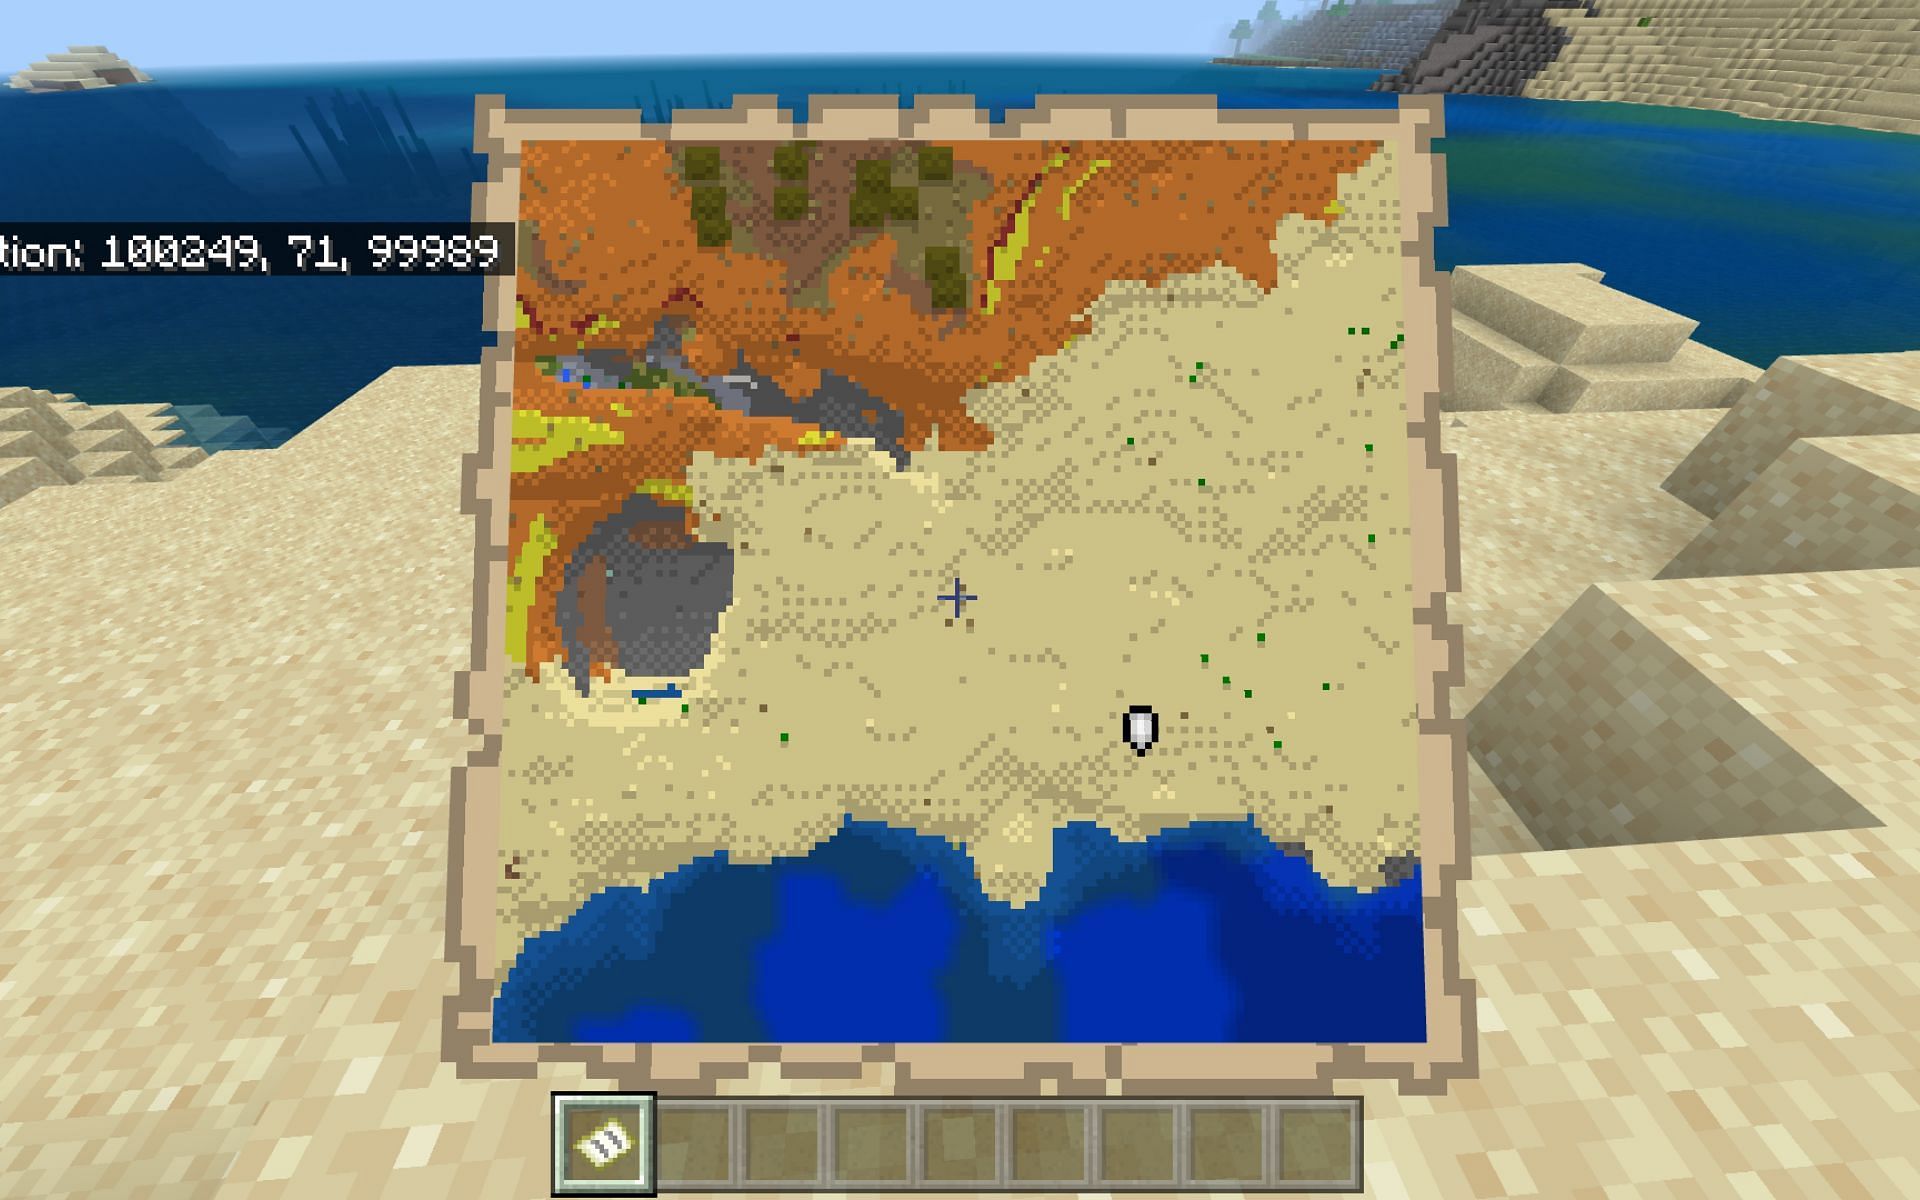
The Minecraft 1.19 update brings new Mangrove Swamp and Deep Dark biomes for players to explore. Even though these in-game maps can only show areas that are on the surface, players can still find the new Mangrove Swamp biome with this. Other than that, these maps are great for getting a top-down view of areas that players have already explored.

Everything to know about locator maps in Minecraft 1.19
Chart New Territories with the ultimate Minecraft Seed Generator!
How to craft a locator map
The locator map is the most basic type of map that indicates where the player is in a particular area. With this, players can see where they are moving on the overworld's surface. There are essentially two ways to make this type of map: from a crafting table or from a cartography table.
Crafting Table recipe
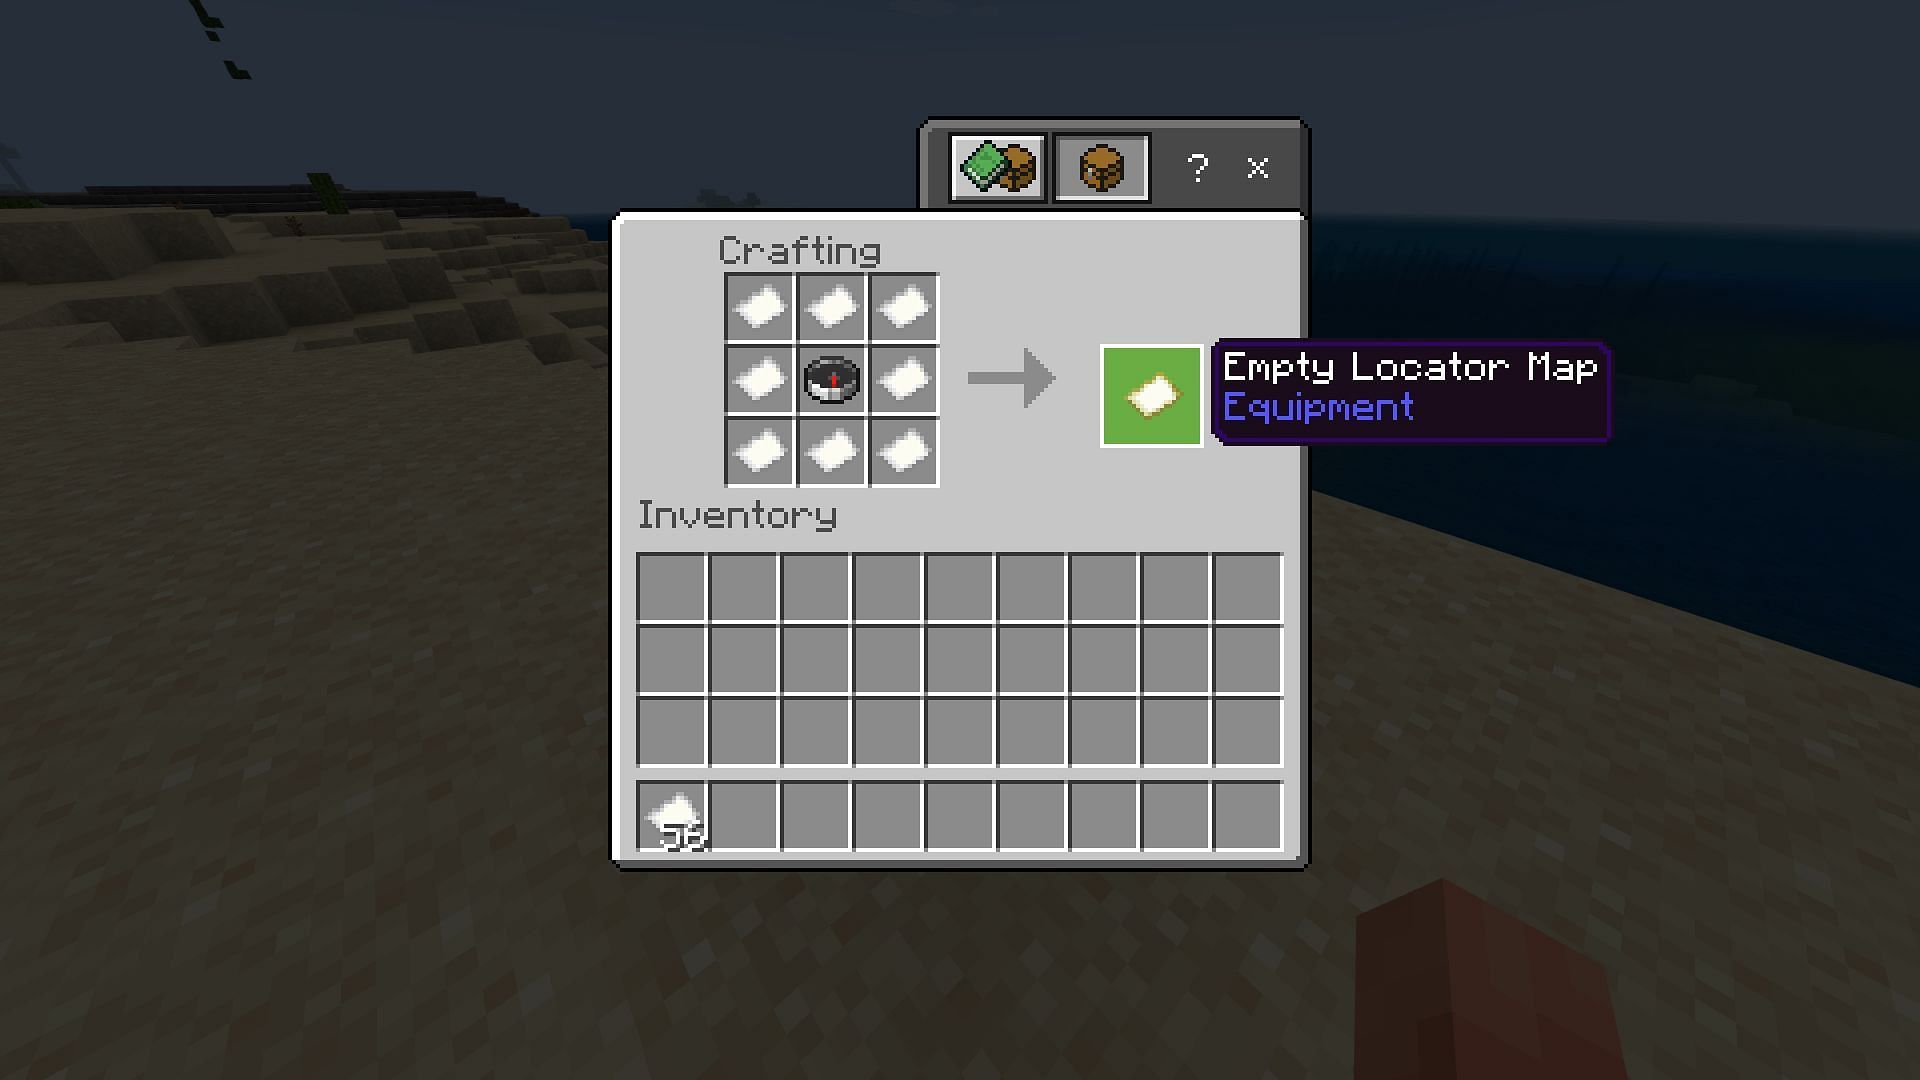
If players are trying to make the map on a crafting table, they will need eight pieces of paper and one compass. A compass can be crafted by combining iron ingots and redstone dust, whereas paper can be crafted with sugarcane. This is a slightly inefficient way to craft a locator map since it requires eight pieces of paper.
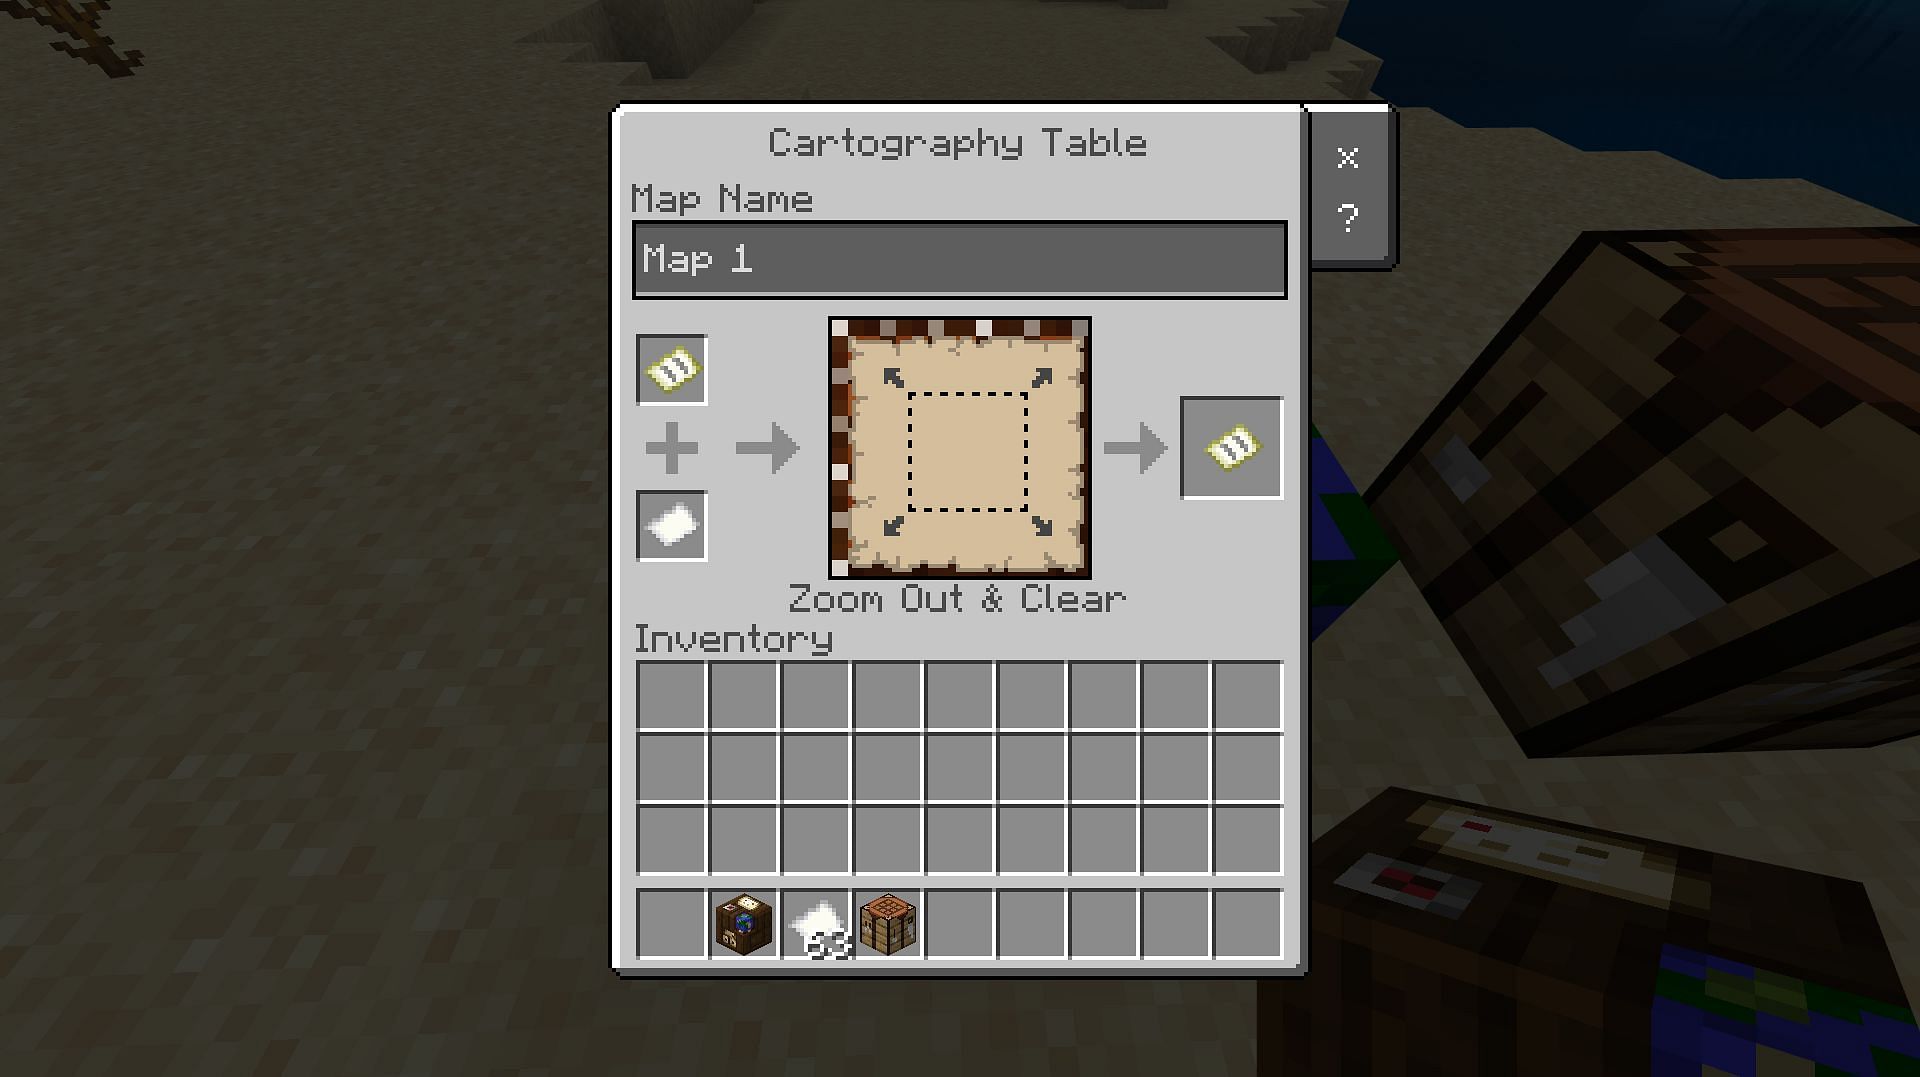
Cartography Table recipe
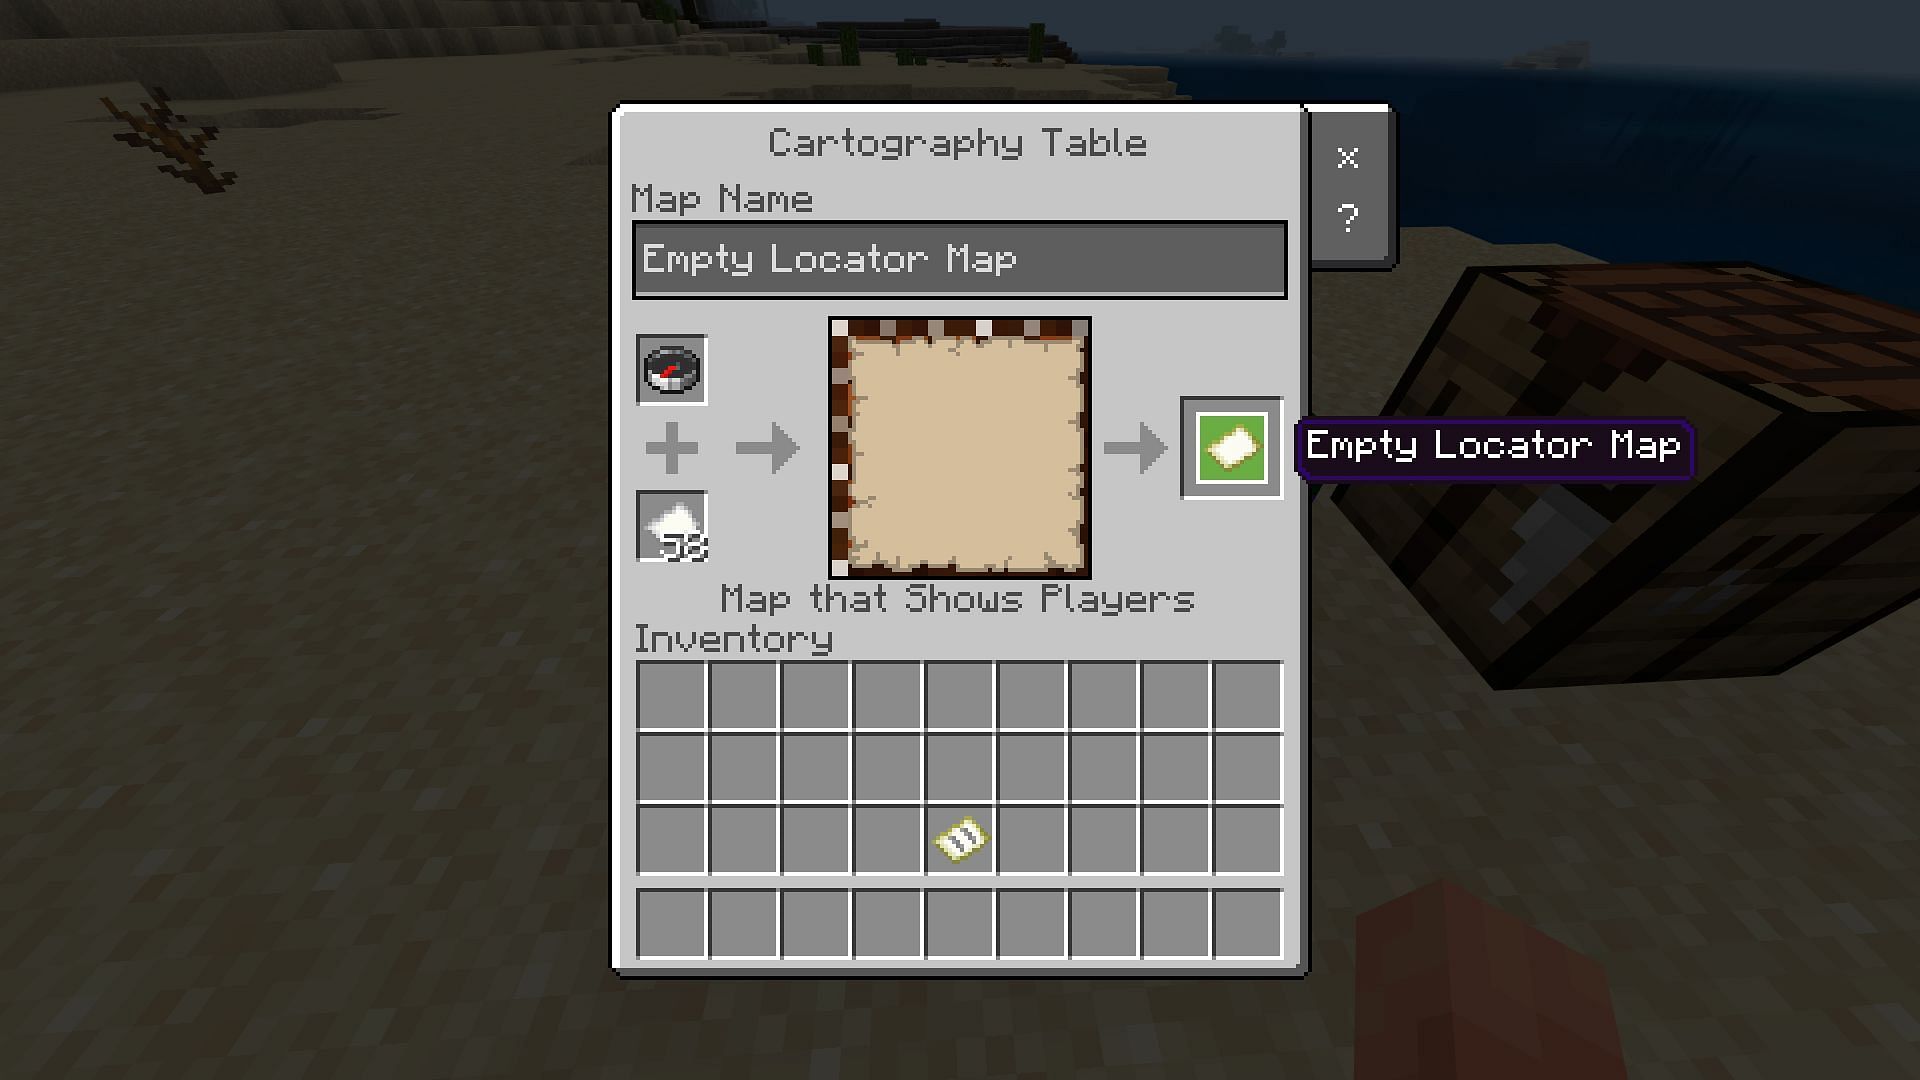
A cartography table can be made by combining two pieces of paper with four wooden planks. This block is specifically made to manage everything related to in-game maps. With this, players can create a locator map with one compass and one paper only.
How to use the locator map
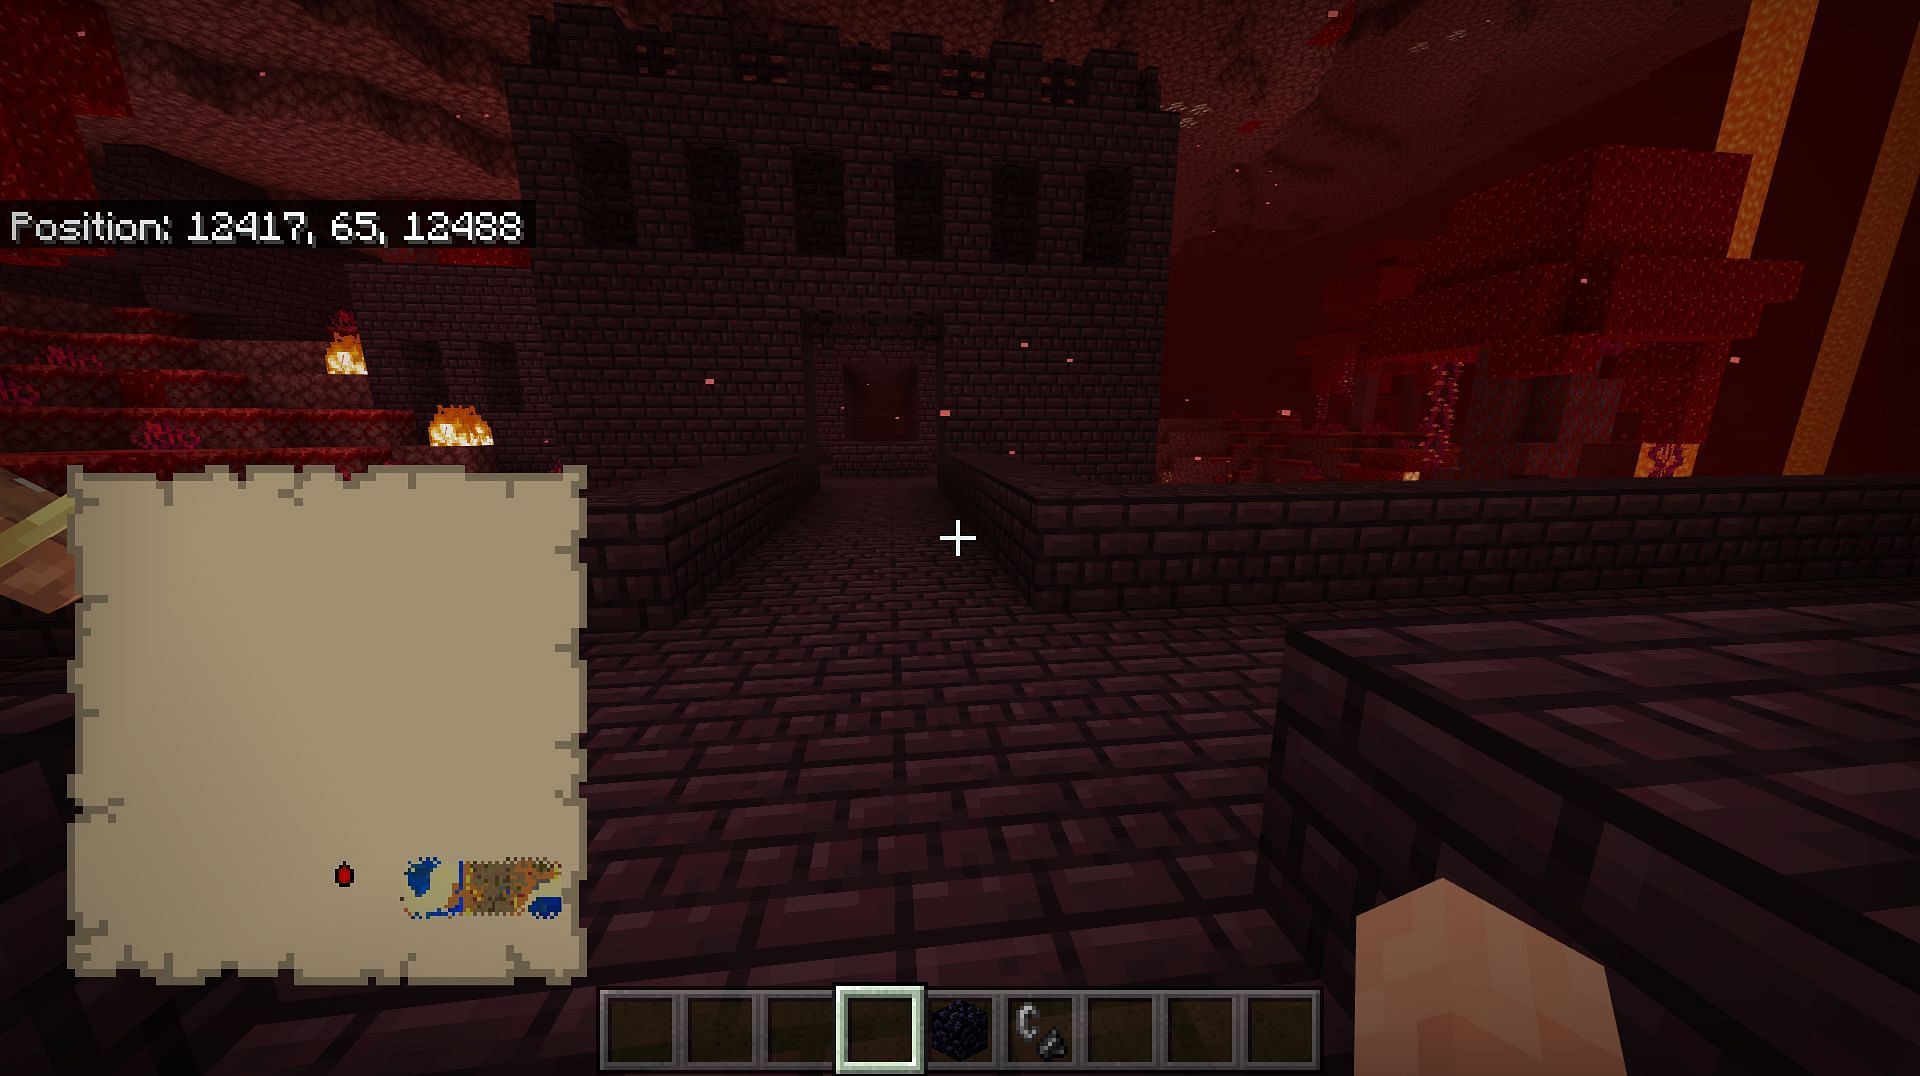
Once a player crafts the locator map, they will obtain an empty one that will not show anything. However, when gamers right-click to use the map, it will essentially activate and start showing the player's pointer and the surrounding biomes. When players move, the pointer in the map will move simultaneously.
With this, players can see different biomes, terrain heights and any type of structure that generates on the surface of the overworld.
Expanding locator map
The first level of the locator map can be quite small, and players can easily complete it by traveling a few blocks. These maps can be expanded with the help of a cartography table. Players can place a level 1 map and add a paper to it to expand it. Once the expanded map loads, players will notice that the map will zoom out and become much larger. Maps can only be zoomed out four times.

Uncover new worlds with our Minecraft Seed Generator!