
'%20x='0'%20y='0'%20height='100%25'%20width='100%25'%20%0A%20%20%20%20%20%20%20%20%20%20xlink%3Ahref='data:image/jpg;base64,/9j/2wBDAAYEBQYFBAYGBQYHBwYIChAKCgkJChQODwwQFxQYGBcUFhYaHSUfGhsjHBYWICwgIyYnKSopGR8tMC0oMCUoKSj/2wBDAQcHBwoIChMKChMoGhYaKCgoKCgoKCgoKCgoKCgoKCgoKCgoKCgoKCgoKCgoKCgoKCgoKCgoKCgoKCgoKCgoKCj/wgARCAAGAAoDASIAAhEBAxEB/8QAFgABAQEAAAAAAAAAAAAAAAAAAAUG/8QAFQEBAQAAAAAAAAAAAAAAAAAAAwT/2gAMAwEAAhADEAAAAMhCJi//xAAfEAACAgEEAwAAAAAAAAAAAAACAwEEBQARExQhMmH/2gAIAQEAAT8A7OPxCQrtxlJz64ByH1VzylPmd99Nx1VrDYIVFCcyUANKNh+e+v/EABYRAAMAAAAAAAAAAAAAAAAAAAABMf/aAAgBAgEBPwB0/8QAFxEBAAMAAAAAAAAAAAAAAAAAAQARIf/aAAgBAwEBPwB1qf/Z'%3E%3C/image%3E%3C/svg%3E)
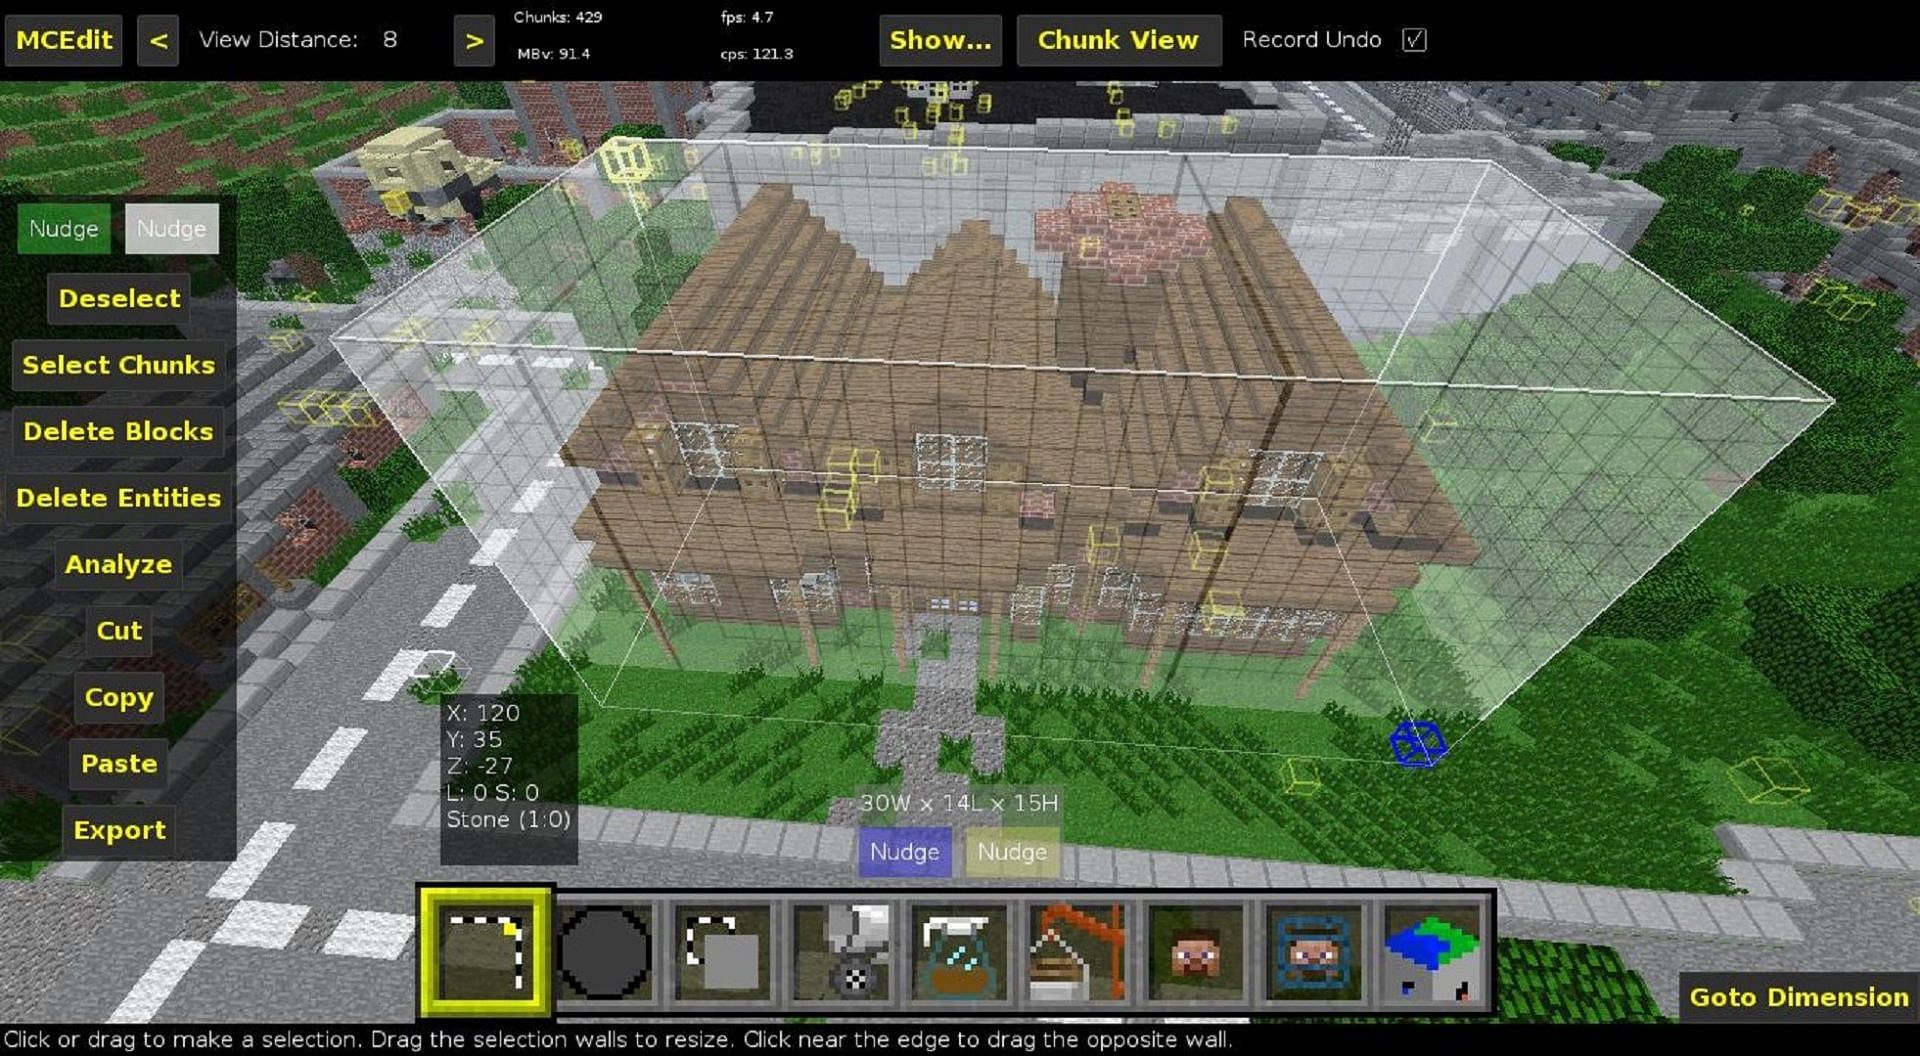
When building a Minecraft world or a multiplayer server, it can be overwhelming to build a large number of structures to be used by other players. It's part of the reason why tools such as WorldEdit and MCedit exist, and aspiring world crafters can utilize these tools to great effect.
One of the best features of these programs is that they can save and import schematics created and shared by other Minecraft players to immediately add structures to the game's environment. With the help of this function, it's relatively easy to create independent structures or entire cities in just a few moments by simply using schematics to import buildings and decorations en masse.

Although using schematics in Minecraft requires a world editing program compatible with the feature, there are several options available to choose from, fortunately.
Chart New Territories with the ultimate Minecraft Seed Generator!
Using Schematics with WorldEdit in Minecraft
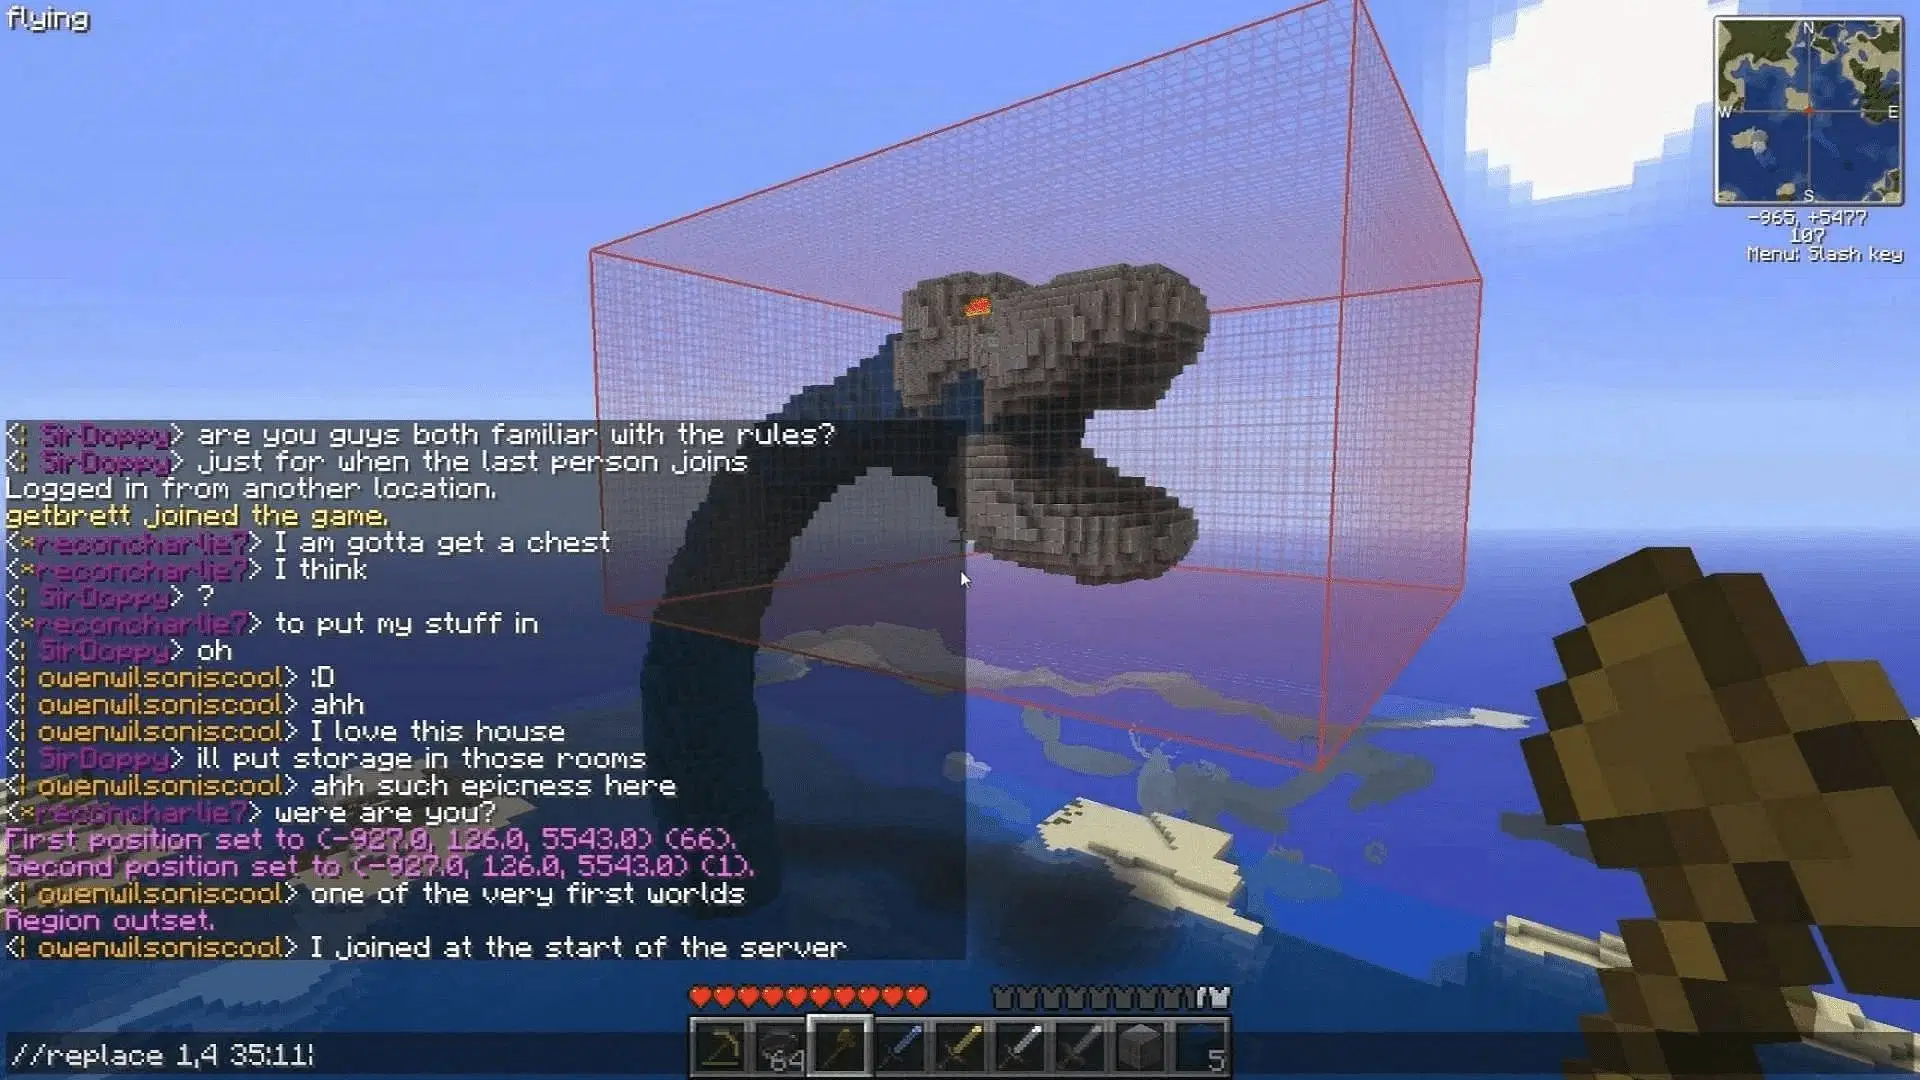
Once a Minecraft player has downloaded WorldEdit, working with structures and schematics isn't a difficult task. Schematics are saved in an independent folder once WorldEdit has been installed, so players can save their own creations as schematics or import those created by their fellow community members. The standard file path of the folder is WorldEdit/schematics, and once that folder exists, players can use commands to import or save structures.
Importing a Schematic file in WorldEdit
- Once you're in your world and WorldEdit has loaded, ensure that the schematic file is in your WorldEdit/schematics folder.
- Open your chat prompt and enter the command "/schem load filename" without quotations. In this syntax, "filename" should be replaced by the schematic file that you wish to import.
- Move yourself to a suitable location and once you've found the right place to place your schematic, enter "//paste" without quotations. The schematic structure will be imported and placed at your location. If you make a mistake, you can enter "//undo" to remove the structure, allowing you to place it again.
Saving a Schematic in WorldEdit
- Activate WorldEdit and equip your wand, which is typically utilized for selecting pinpoint locations.
- With the wand equipped, select a defined area that you wish to form into a schematic. It can be anything you like, from selecting terrain to one of your favorite builds. Make sure that the entire area is within the box-like selection created by your wand.
- Once your structure is within the selection box, enter "/schem save filename" without quotations. Like the import function, "filename" in this syntax is any file name you'd like to save your schematic under.
Once your Minecraft schematic is saved, it will remain in your schematics folder within WorldEdit. You can use this file to import it into your own world or share it online for other players to utilize. There are even entire sites available online, where you can swap schematics with fellow Minecraft fans. As long as you have your WorldEdit schematics file nearby, you can dive right back into the game and import/save them to suit your own requirements.
WorldEdit and MCedit are some of the most incredibly helpful tools in the entire game, allowing Minecraft players to form gorgeously-crafted worlds and servers alongside idealized landscapes and structures to suit their needs. Whether you're playing the game's single-player or multiplayer mode, world editing tools are certainly worth your time.

Uncover new worlds with our Minecraft Seed Generator!