

'%20x='0'%20y='0'%20height='100%25'%20width='100%25'%20%0A%20%20%20%20%20%20%20%20%20%20xlink%3Ahref='data:image/jpg;base64,/9j/2wBDAAYEBQYFBAYGBQYHBwYIChAKCgkJChQODwwQFxQYGBcUFhYaHSUfGhsjHBYWICwgIyYnKSopGR8tMC0oMCUoKSj/2wBDAQcHBwoIChMKChMoGhYaKCgoKCgoKCgoKCgoKCgoKCgoKCgoKCgoKCgoKCgoKCgoKCgoKCgoKCgoKCgoKCgoKCj/wgARCAAHAAoDASIAAhEBAxEB/8QAFQABAQAAAAAAAAAAAAAAAAAABAf/2gAIAQEAAAAAhBv/xAAUAQEAAAAAAAAAAAAAAAAAAAAD/9oACAECEAAAAF//xAAUAQEAAAAAAAAAAAAAAAAAAAAD/9oACAEDEAAAAB//xAAdEAABBAIDAAAAAAAAAAAAAAABAAIDEhEhFDFi/9oACAEBAAE/AGGOKNsgJvY6LdYr2uR5C//EABYRAAMAAAAAAAAAAAAAAAAAAAABEv/aAAgBAgEBPwCEf//EABQRAQAAAAAAAAAAAAAAAAAAAAD/2gAIAQMBAT8Af//Z'%3E%3C/image%3E%3C/svg%3E)
The Minecraft 1.19 update was finally released yesterday, on June 7, 2022. Millions of players were patiently waiting for the next big update to the sandbox game, and it has finally arrived. Players will be able to download the latest update through the game launcher and app stores on different devices. However, many would want to use the latest shaders with the update as well.
Shaders are mods used to enhance the overall graphics of the game. They essentially change lighting, shadows, block movements, water reflections, water visibility, optical effects, and much more in the game. Minecraft will always have the most basic graphics in its vanilla version, even after the Minecraft 1.19 update. Hence, players constantly want to use shaders in the game. Fortunately, the modding community is so quick that players can instantly download updated shaders for the game.

Steps to download shaders for Minecraft 1.19
1) Download Iris Installer and any shader pack
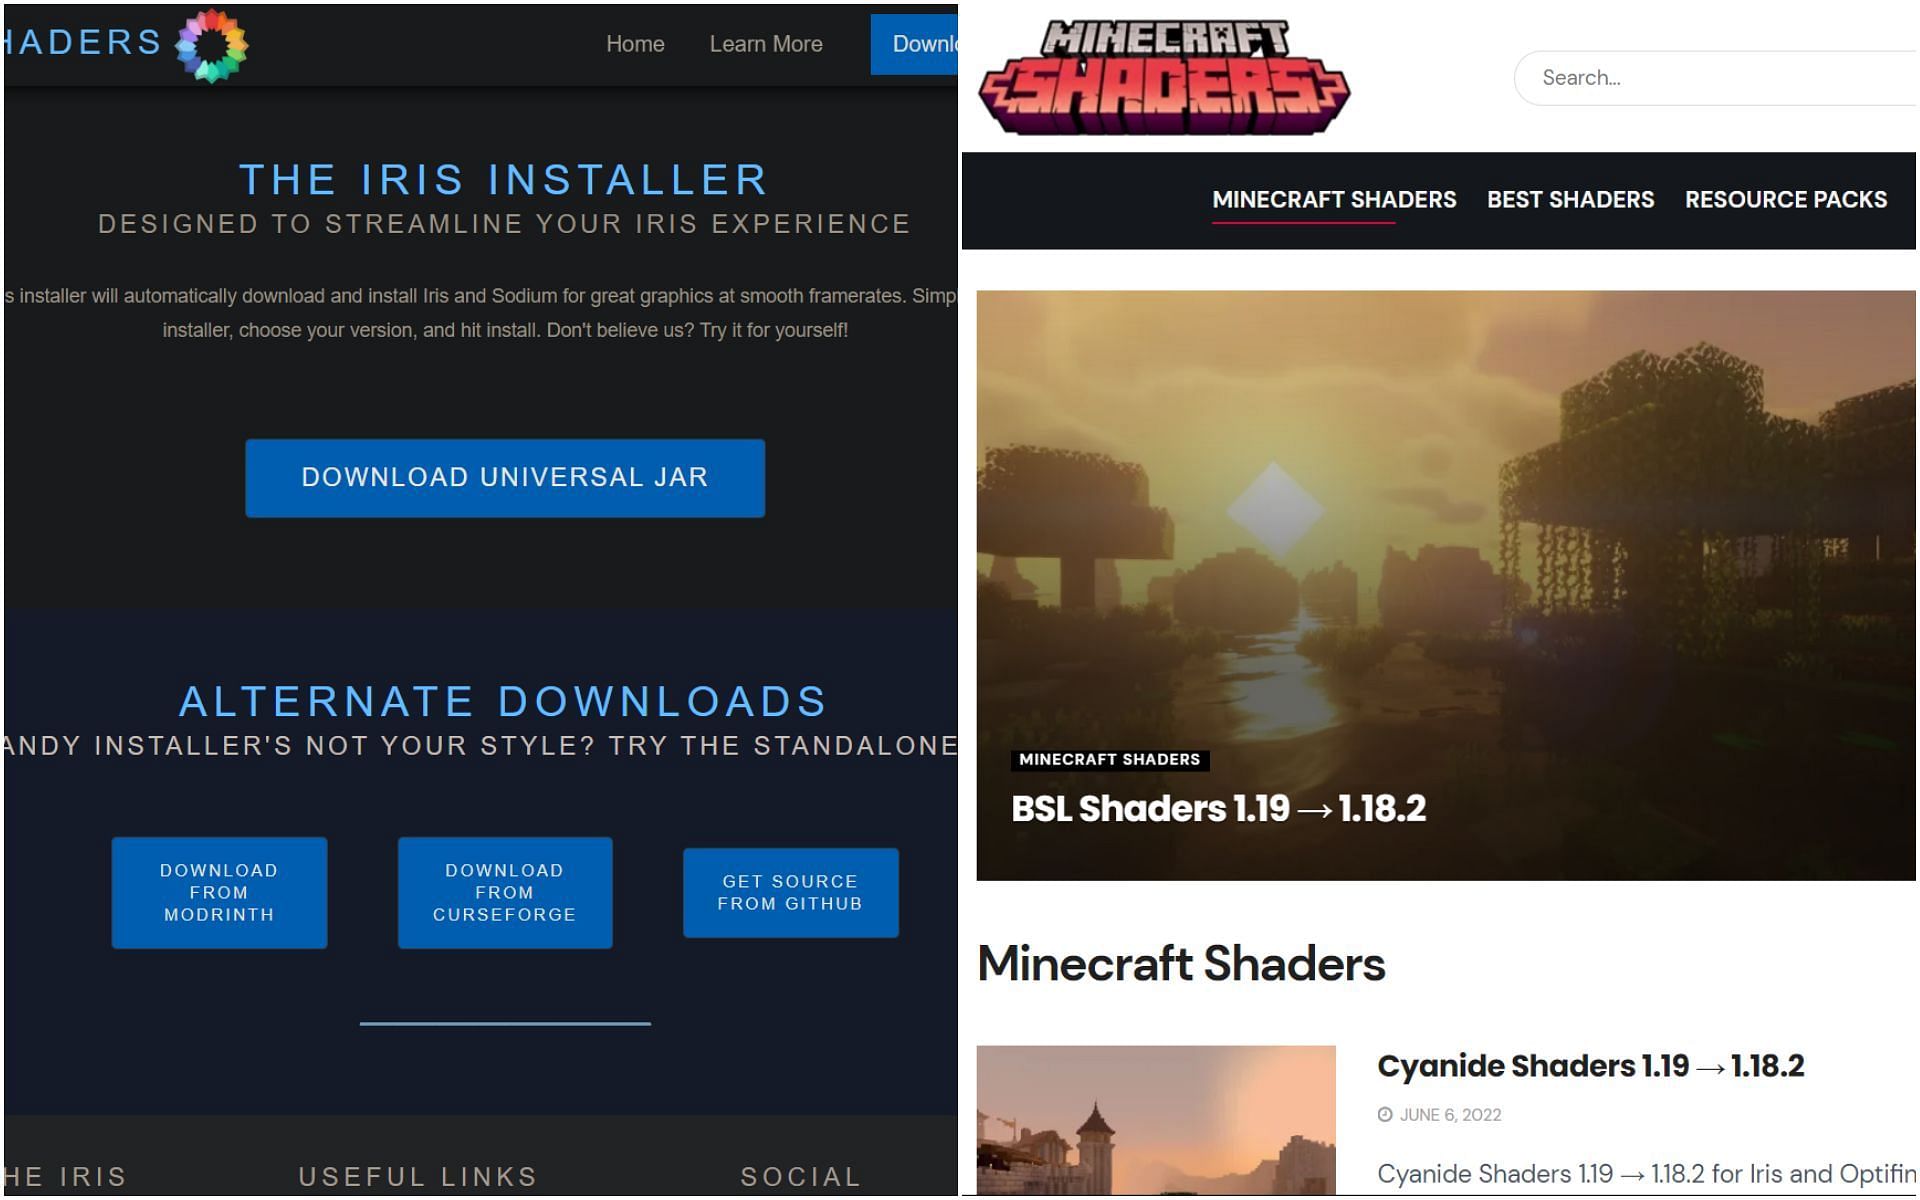
Chart New Territories with the ultimate Minecraft Seed Generator!
Players will first need to download all the necessary files to run shaders in Minecraft 1.19. Since the famous Optifine mod is not yet out for the latest update, players can look for other alternatives like Iris and Sodium. Sodium is a graphical optimization mod that combines with Iris to enable shaders in the game.
Players can head to this site to download the Iris installer and that will automatically install Sodium as well. Next, players can go to this site and choose the shader they want. BSL, Sildur, RedHat, etc. are some of the most famous shaders for the game.
2) Installing Iris and Sodium to the game folder
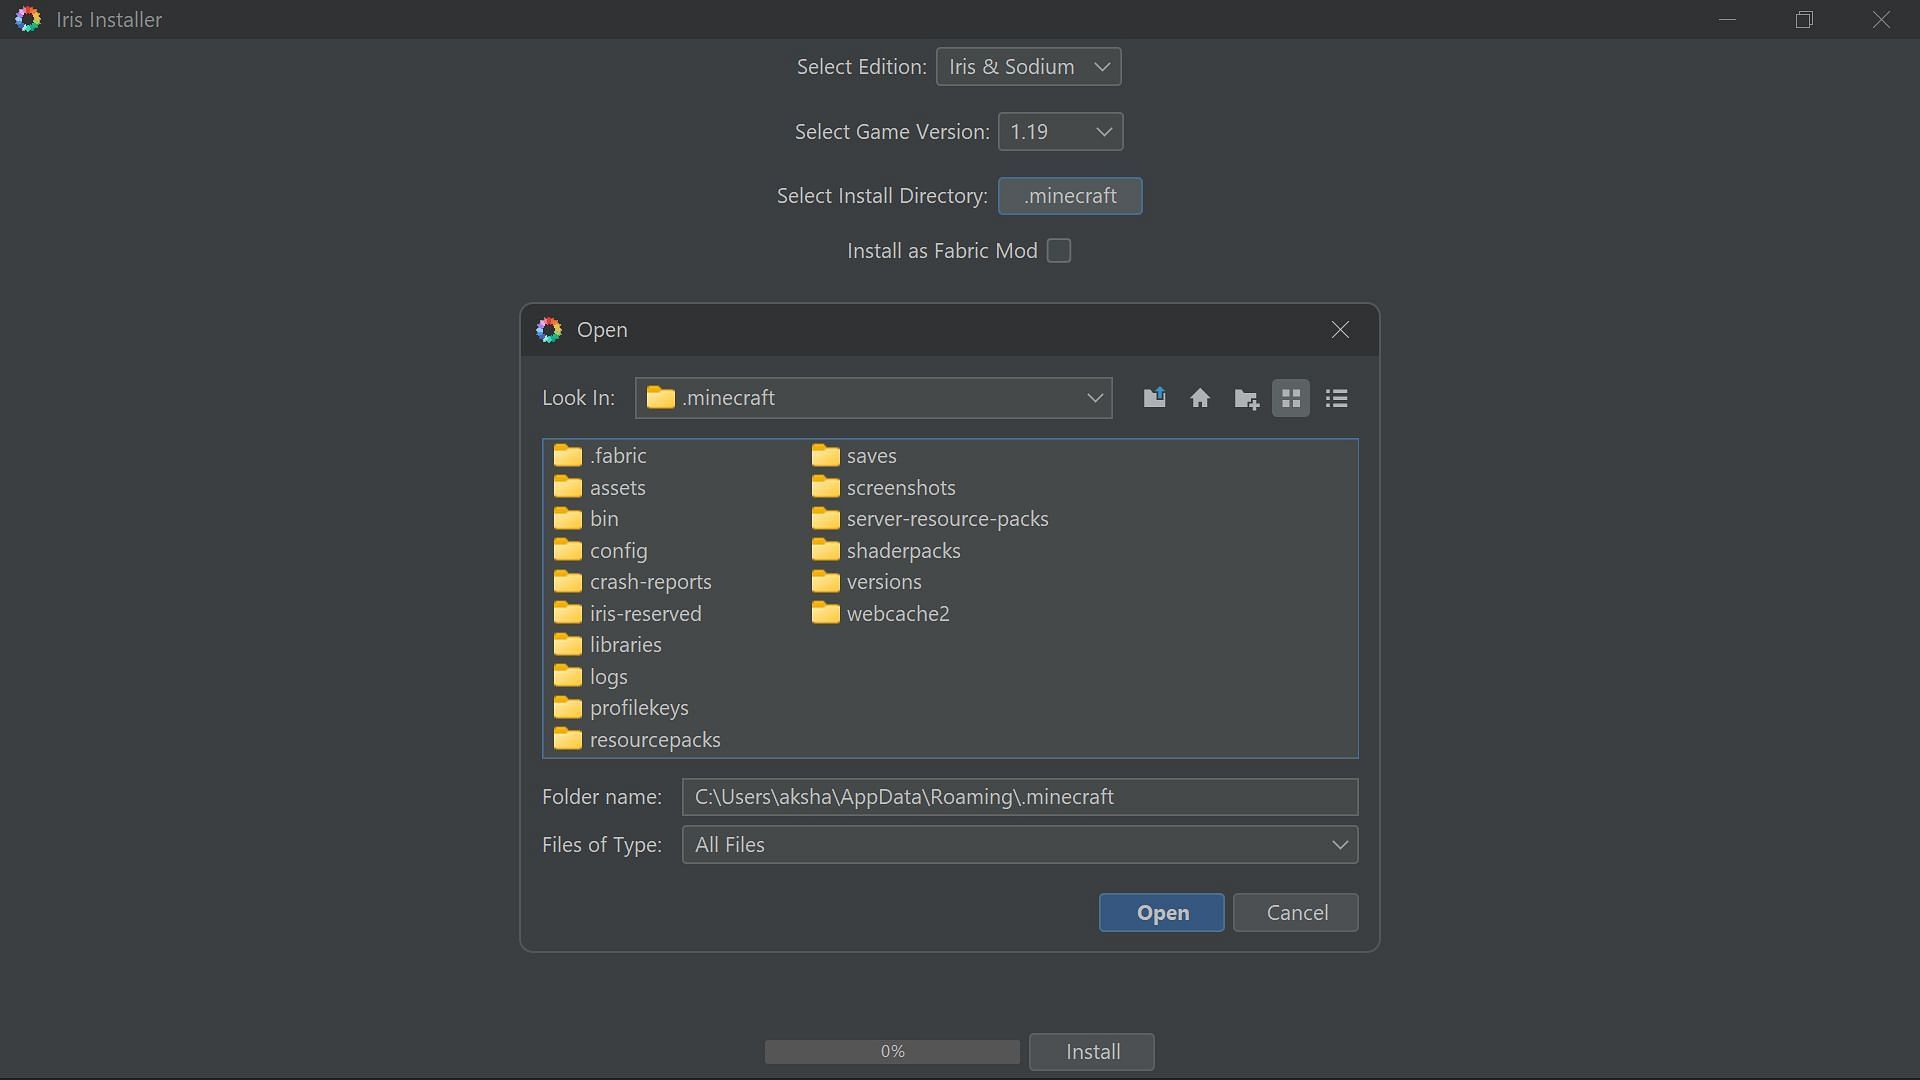
Once players have downloaded all the files, they can open the Iris installer to install all the mods needed to run shaders. A dialog box will open that will have a simple installation process. Here, players can select Minecraft 1.19 version and 'Iris+Sodium' option. Later, they will have to locate the game folder, which will be present in 'C:\Users\(PC name)\AppData\Roaming\.minecraft'. Finally, the 'Install as Fabric Mod' option should be unchecked.
After setting everything up, players can simply hit install. Once the installation is complete, the installer can be closed.
3) Selecting Iris & Sodium version in launcher
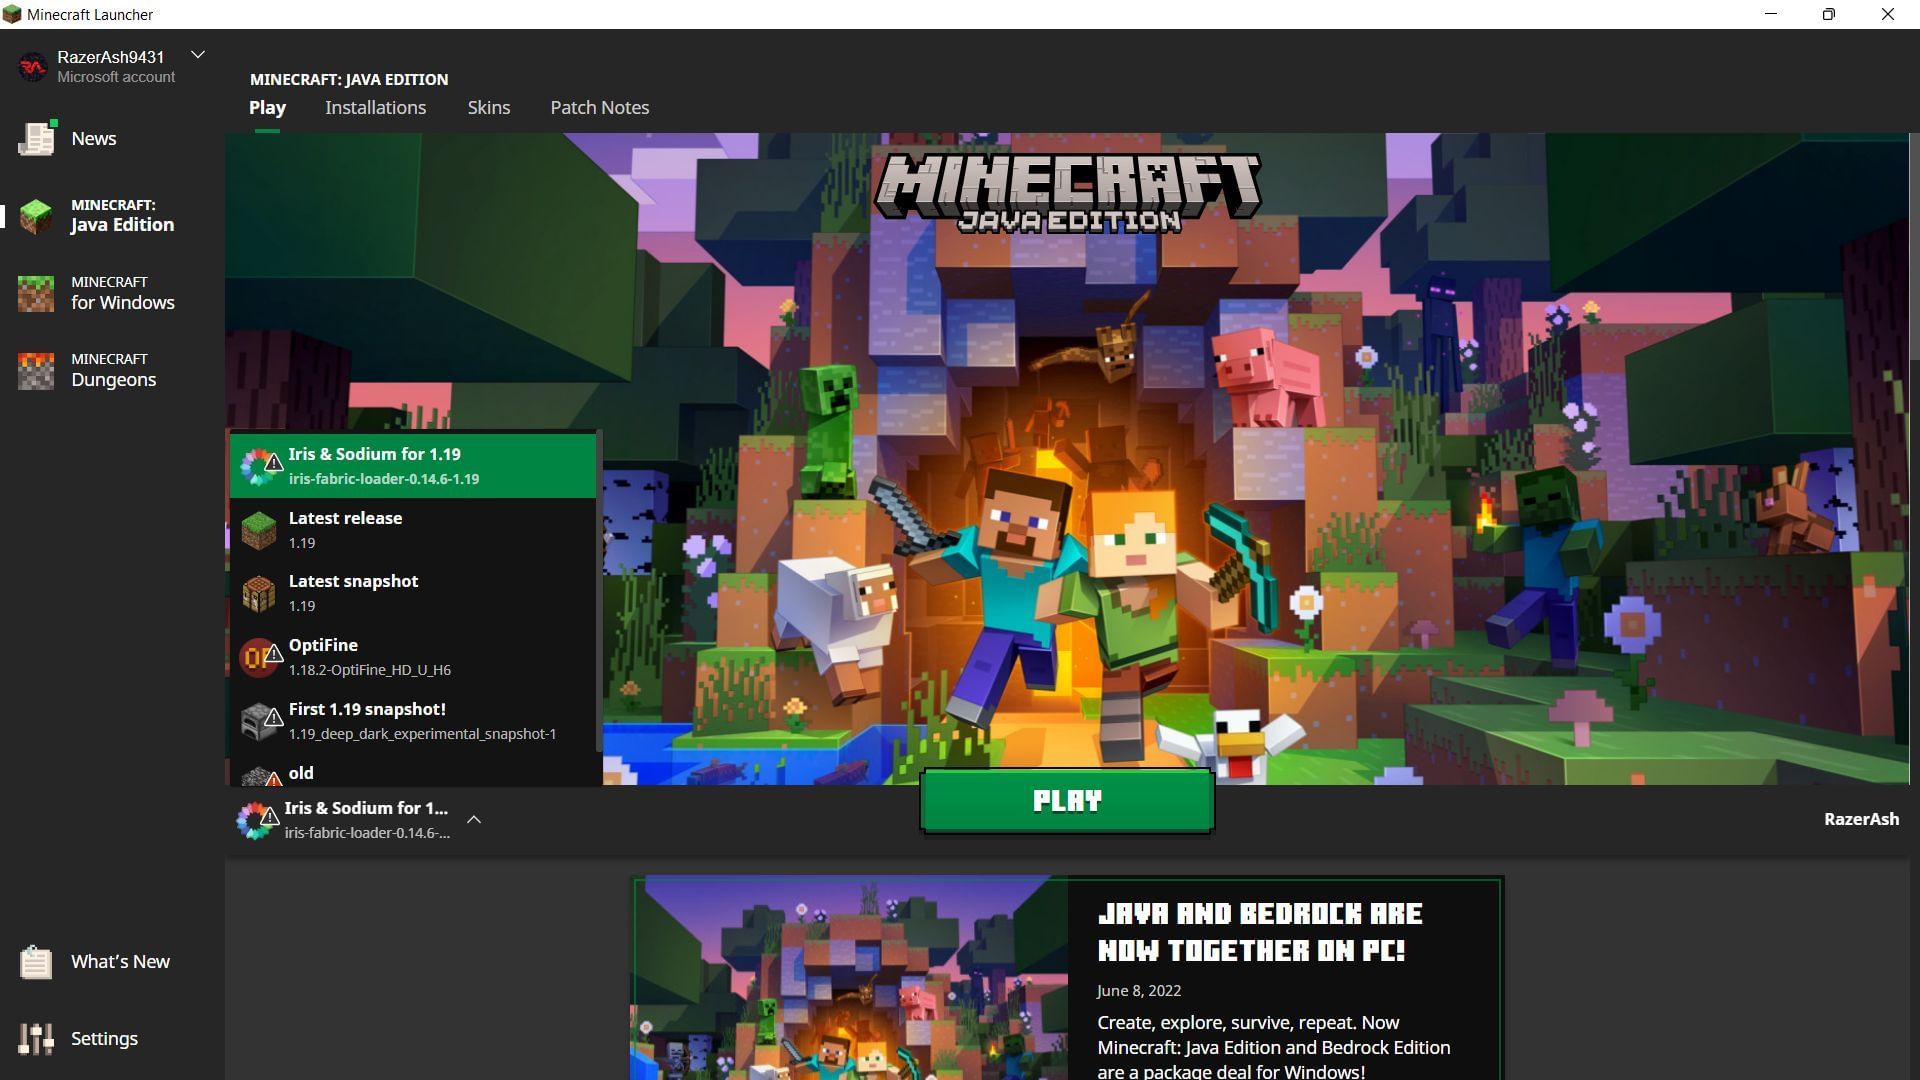
Next, players will have to open the official game launcher and find the new 'Iris & Sodium' Minecraft 1.19 installation under the Java Edition tab. Players will be able to find this in the drop-down version menu. Once players hit play, the launcher might download some extra files required for the modded version to run.
4) Locate Shaders tab and folder
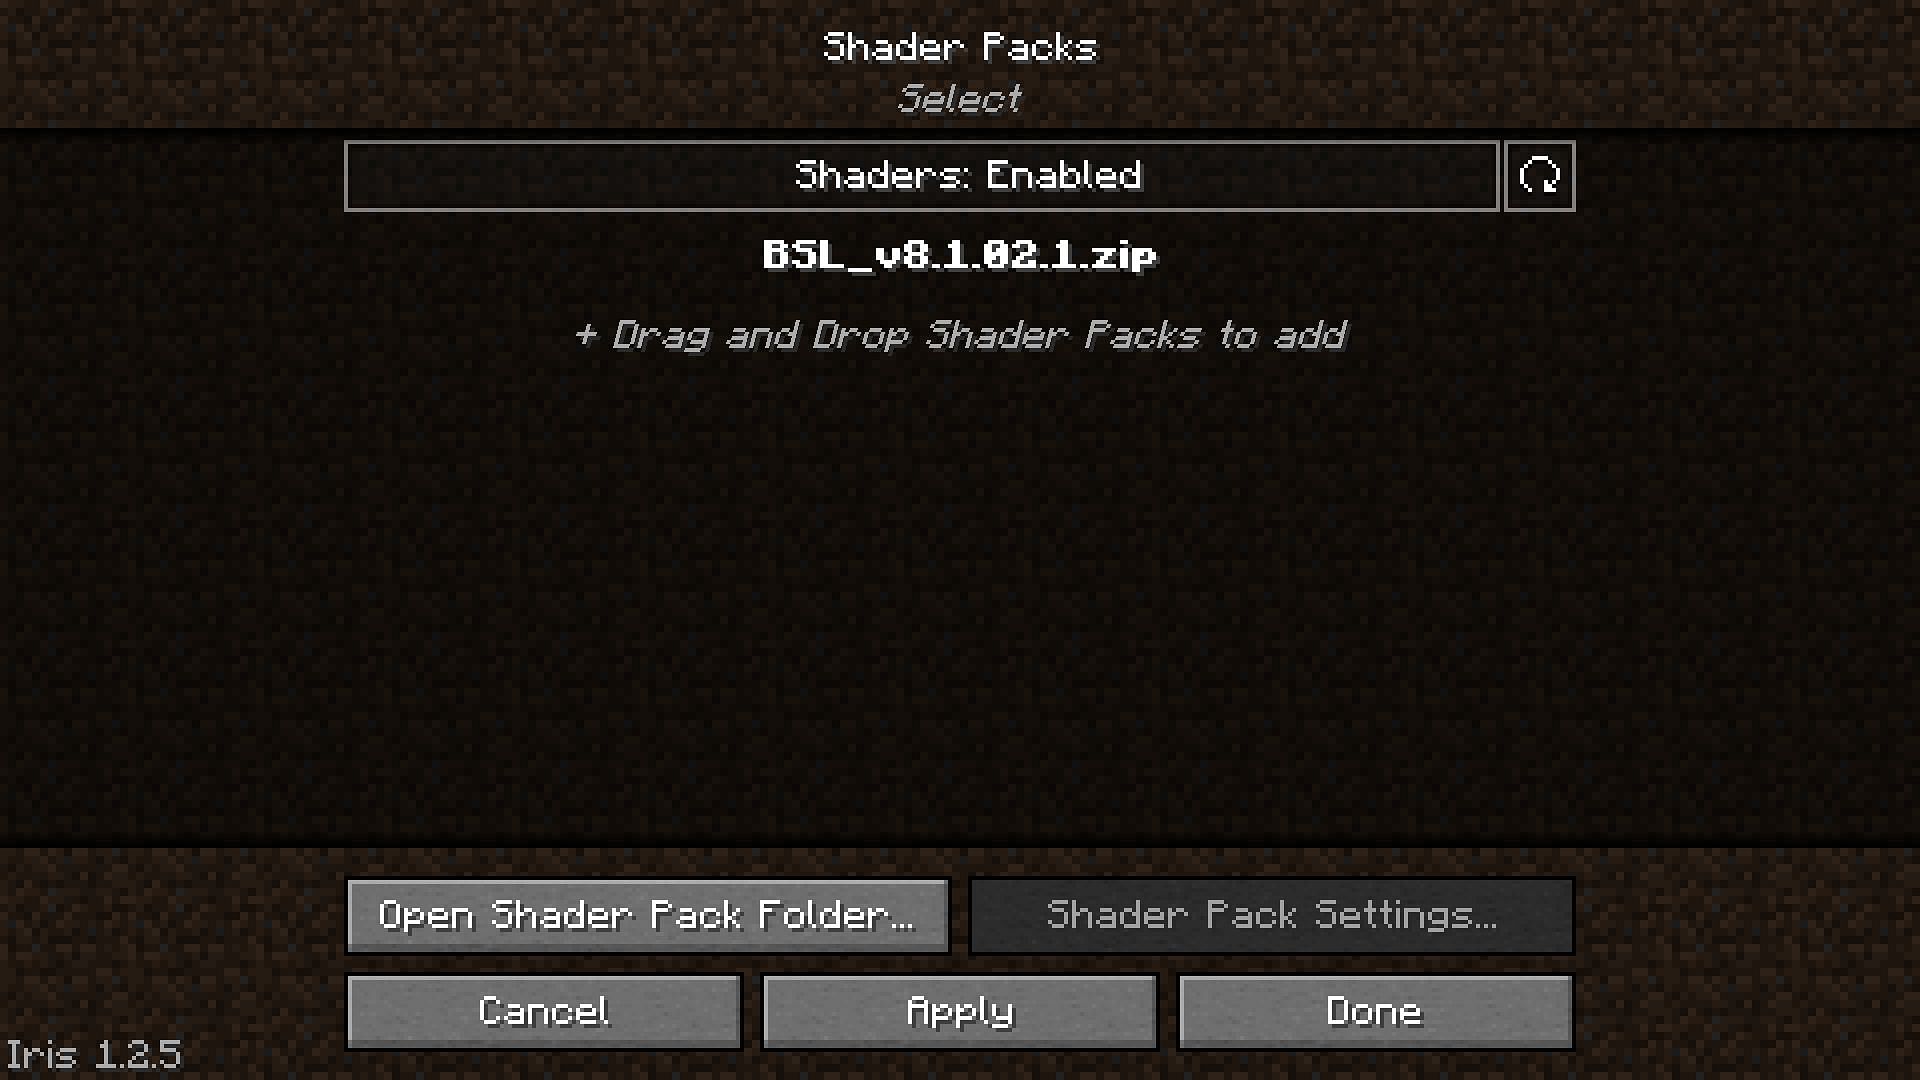
After players successfully enter the game, they can see 'Fabric (Modded)' sign at the bottom left. To install the shaders, players can simply head to 'Settings' and then 'Video Settings.' Here, players will find a completely new UI courtesy of Sodium mod. One of the video settings tabs will read 'Shaders' where players can see the 'Open Shader Pack Folder' button.
Once players open the shader pack folder from the modded Minecraft 1.19, a file explorer folder will open where players can simply drag and drop shaders to add them to the game. There is no need to unzip the compressed shader file. Once done, players can select the shader and enable it from the settings.

Uncover new worlds with our Minecraft Seed Generator!