
'%20x='0'%20y='0'%20height='100%25'%20width='100%25'%20%0A%20%20%20%20%20%20%20%20%20%20xlink%3Ahref='data:image/jpg;base64,/9j/4AAQSkZJRgABAQAAAQABAAD/2wCEAAMDAwMDAwQEBAQFBQUFBQcHBgYHBwsICQgJCAsRCwwLCwwLEQ8SDw4PEg8bFRMTFRsfGhkaHyYiIiYwLTA+PlQBAwMDAwMDBAQEBAUFBQUFBwcGBgcHCwgJCAkICxELDAsLDAsRDxIPDg8SDxsVExMVGx8aGRofJiIiJjAtMD4+VP/AABEIAAUACgMBIgACEQEDEQH/xABhAAEBAQAAAAAAAAAAAAAAAAAABQcQAAIBAwMFAQAAAAAAAAAAAAECEQAEBgMFIRMiMTNBQgEBAQAAAAAAAAAAAAAAAAAAAgQRAAMBAQEBAAAAAAAAAAAAAAECERIAITH/2gAMAwEAAhEDEQA/AMDxHEdxx/b9FLHd10mviOowtyOAsx7PHNXzjNvPeyM36aHEn6YD0pRrQrpoGs0fpA65YkIVbkCwHwE9/9k='%3E%3C/image%3E%3C/svg%3E)
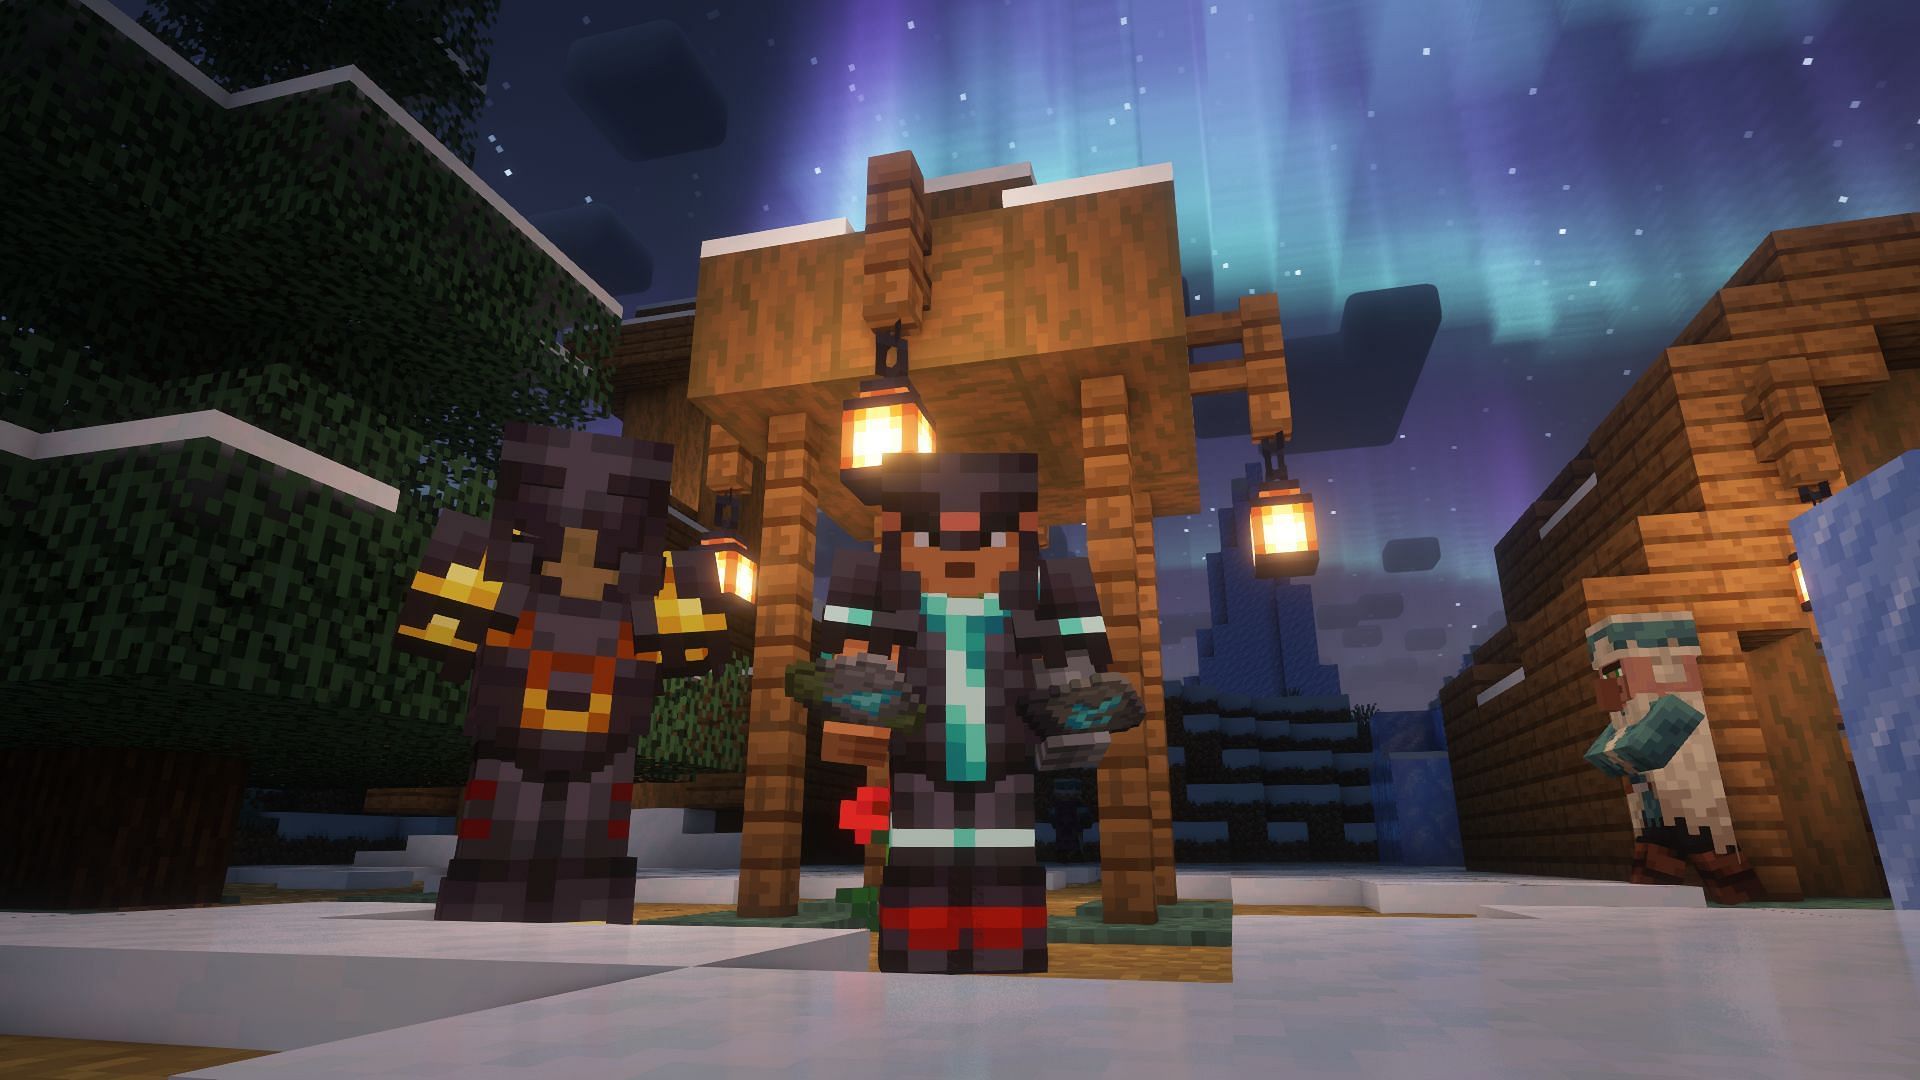
Shaders are arguably one of the best visual mods for Minecraft. Even though Minecraft was released over a decade ago, shaders can still make it look like a modern-day AAA title.
Snapshots are test versions released to let players try new features coming in a future update. Many players want to experience the upcoming features in better quality, and there is no better way than installing shaders.

Shaders for Minecraft 1.20 snapshots
Chart New Territories with the ultimate Minecraft Seed Generator!
Most players know that to install shaders, they need to install Forge or Fabric and then either optifine or iris. Forge and Fabric are mod installers necessary to install other mods.
However, the official game launcher does not allow mods to be installed in snapshots. Therefore, players must install a new launcher to use shaders in the latest snapshots.
Multimc is a popular Minecraft launcher that is safe to use and allows players to install mods even in snapshot versions.
Players need to download and install MultiMC from their official website. Along with this, they will also need to download iris and sodium from the public test build channel in their official discord, and then they can follow the steps mentioned below to play the latest snapshot with shaders:
Step 1: Log in with your Mojang account.
Step 2: Right-click and click on "Create instance."
Step 3: Check the box next to the snapshots option. Select the latest snapshot and write a name for it. Then, press the OK button.
Step 4: Right-click on the instance that was just created and click on "Edit instance." Here, click on install Fabric and select the newest available version.
Step 5: Click "Install mods" on the same page. Here, drag and drop the downloaded Iris shaders and Sodium.
Players can launch this instance from the launcher, and the snapshot will open with Iris installed. The next step is to add shaders to this installation of Minecraft.
These steps will help players install their favorite shaders:
Step 1: Download the latest version of any shader.
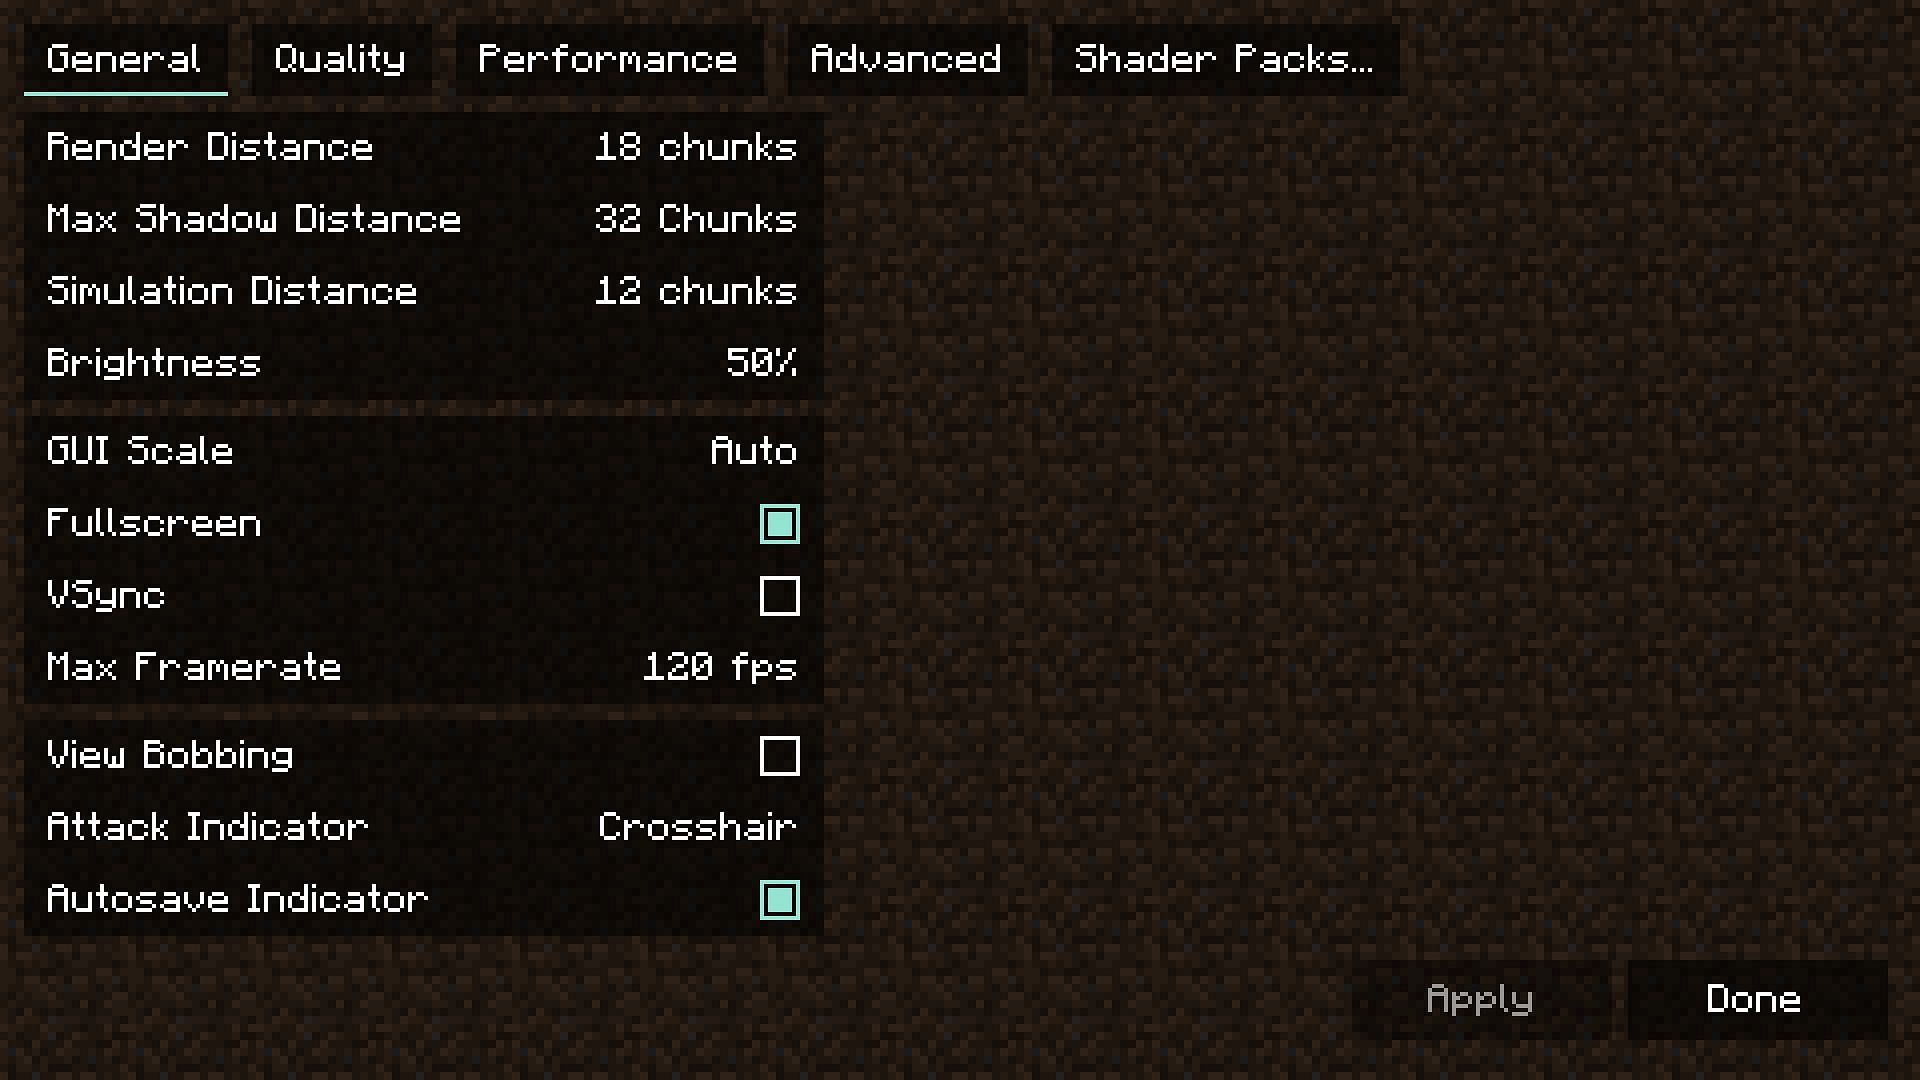
Step 2: Launch the snapshot and navigate to the video settings.
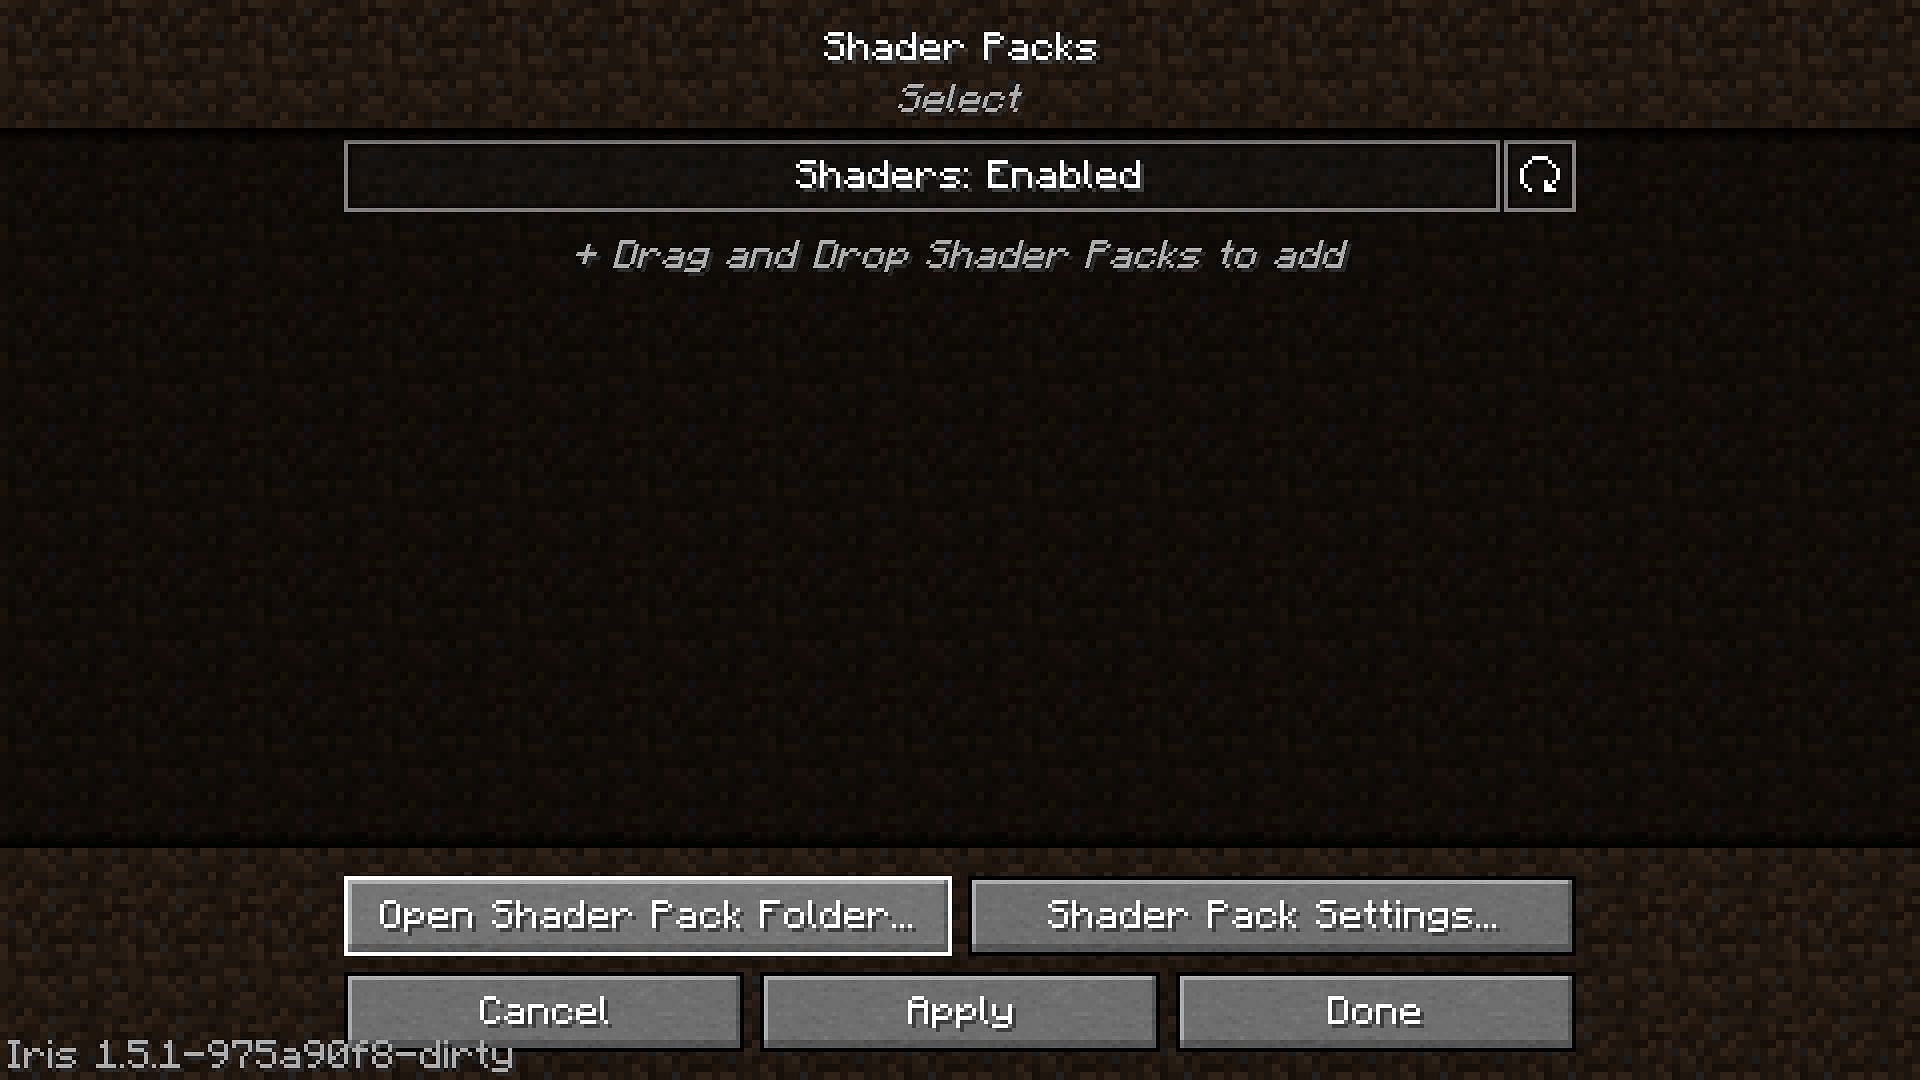
Step 3: Click on the "Open Shader Pack Folder" option under the "Shader Packs" tab.
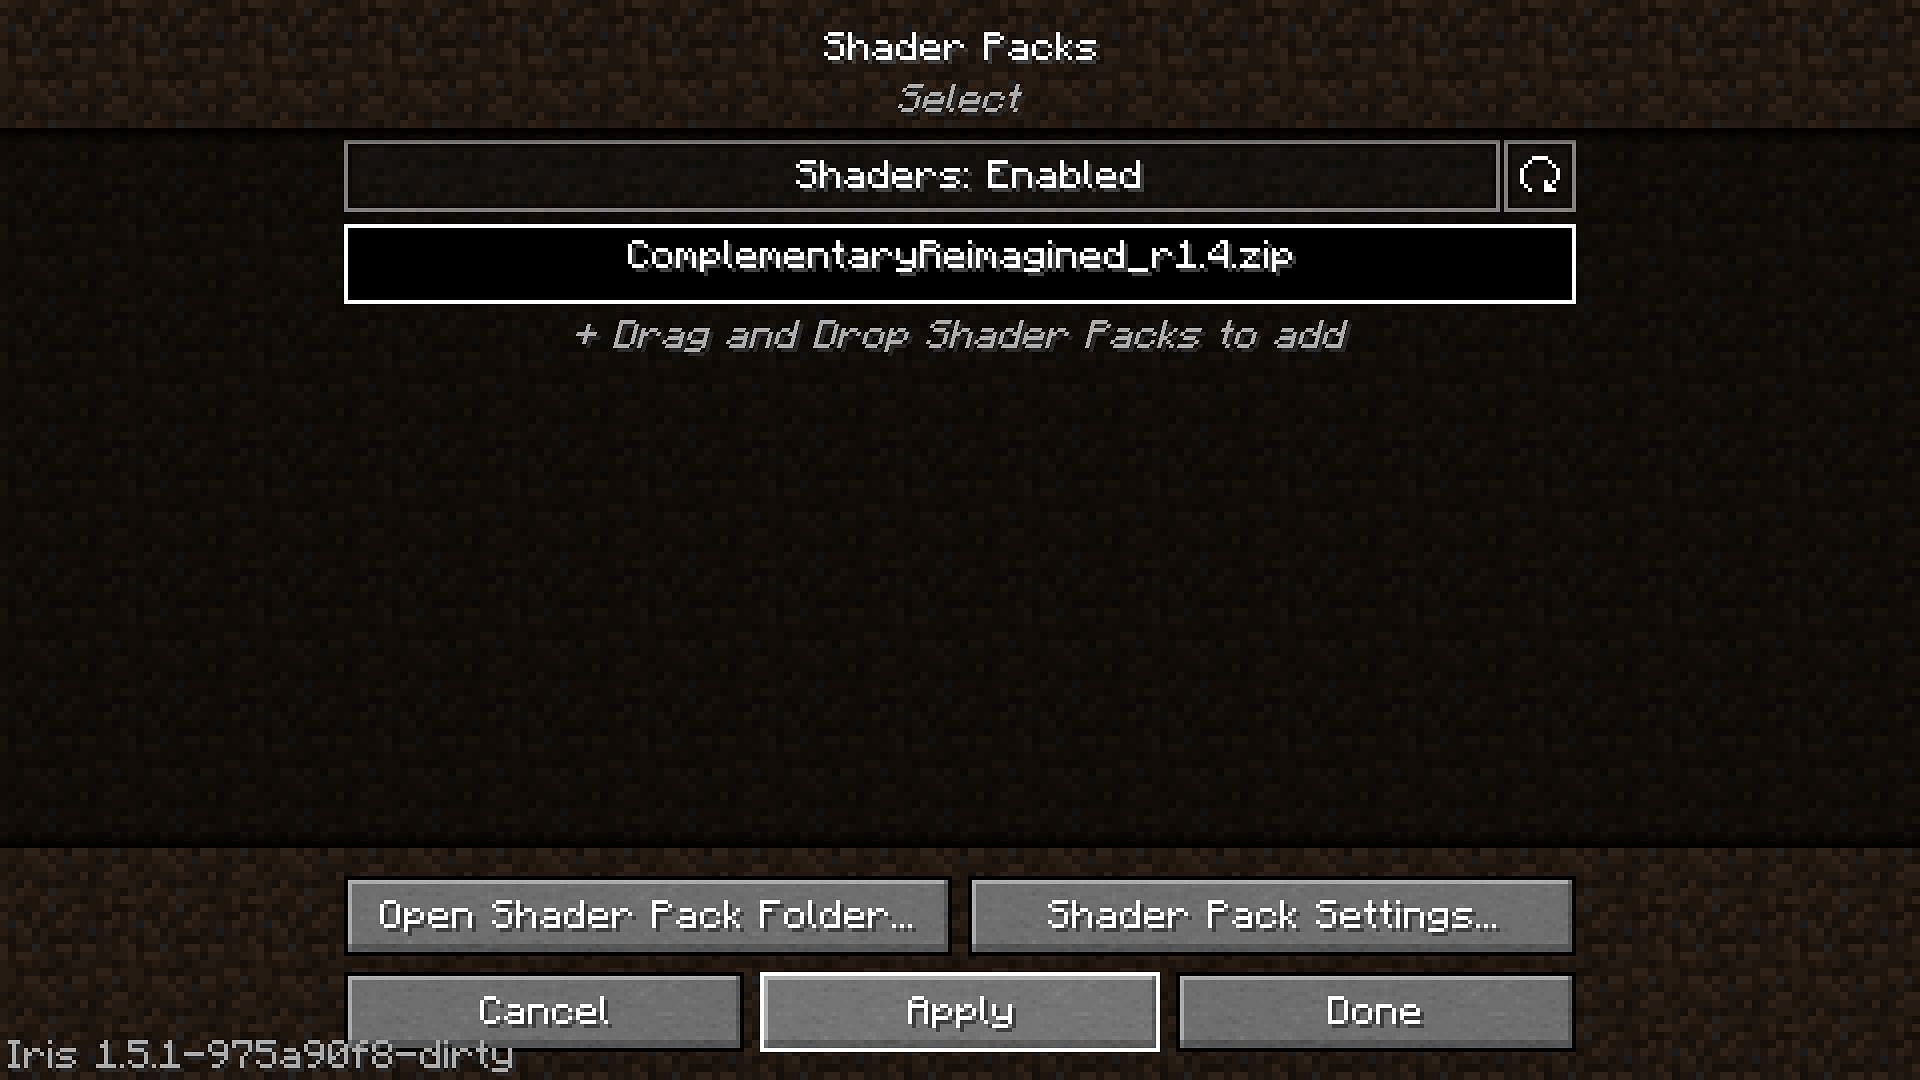
Step 4: Paste the downloaded shader here and selehat shader in Minecraft's shaderpack settings.
Must try Minecraft shaders
Regarding shaders, there are way too many options to choose from. Here are some of the best shaders to try:
- Sildur's Vibrant shaders: As the name suggests, this shader makes everything more colorful and vibrant in Minecraft. The shader introduces several features, such as volumetric lighting, bloom, ambient occlusion, and more.
- SEUS: SEUS is one of the most popular shaders for bringing a realistic feel to the game. Water reflections and clouds are some of the best looking in this shader.
- Complementary shaders: This shader can be considered a light mixture of the other two shaders on this list. It makes the game a bit more vibrant and introduces features that make it more realistic. For players who would like to maintain the blocky feel of the game, there is a variant of this shader named Complementary Reimagined as well.

Uncover new worlds with our Minecraft Seed Generator!