
'%20x='0'%20y='0'%20height='100%25'%20width='100%25'%20%0A%20%20%20%20%20%20%20%20%20%20xlink%3Ahref='data:image/jpg;base64,/9j/2wBDAAYEBQYFBAYGBQYHBwYIChAKCgkJChQODwwQFxQYGBcUFhYaHSUfGhsjHBYWICwgIyYnKSopGR8tMC0oMCUoKSj/2wBDAQcHBwoIChMKChMoGhYaKCgoKCgoKCgoKCgoKCgoKCgoKCgoKCgoKCgoKCgoKCgoKCgoKCgoKCgoKCgoKCgoKCj/wgARCAAHAAoDASIAAhEBAxEB/8QAFQABAQAAAAAAAAAAAAAAAAAABgf/2gAIAQEAAAAAtKL/xAAUAQEAAAAAAAAAAAAAAAAAAAAA/9oACAECEAAAAH//xAAUAQEAAAAAAAAAAAAAAAAAAAAA/9oACAEDEAAAAH//xAAgEAACAgEDBQAAAAAAAAAAAAABAgMEBQASIRETcpHR/9oACAEBAAE/ALWUipR5K5bu9nFQtcM7rvLr1KbCAF8vnPFe7XlgjkjlVkdQysVbketf/8QAFBEBAAAAAAAAAAAAAAAAAAAAAP/aAAgBAgEBPwB//8QAFBEBAAAAAAAAAAAAAAAAAAAAAP/aAAgBAwEBPwB//9k='%3E%3C/image%3E%3C/svg%3E)
If players want to customize their skins in Minecraft 1.19 Java Edition, they can easily do so using a skin maker. Since the Java Edition stays true to the original look and feel of the old sandbox game, it does not offer any skin customization options inside the game like Bedrock Edition. However, this doesn't mean players can only use the classic Steve and Alex skins.
Over the years, millions of Minecrafters have devised different ways to create custom skins and install them in Java Edition. Though Bedrock Edition skin customization offers loads of accessories, there will always be something special about the simple Java Edition skin. Nowadays, it is extremely easy to make a custom skin and install it in Minecraft 1.19 Java Edition with a skin maker.

1) Find a Minecraft 1.19 skin maker website
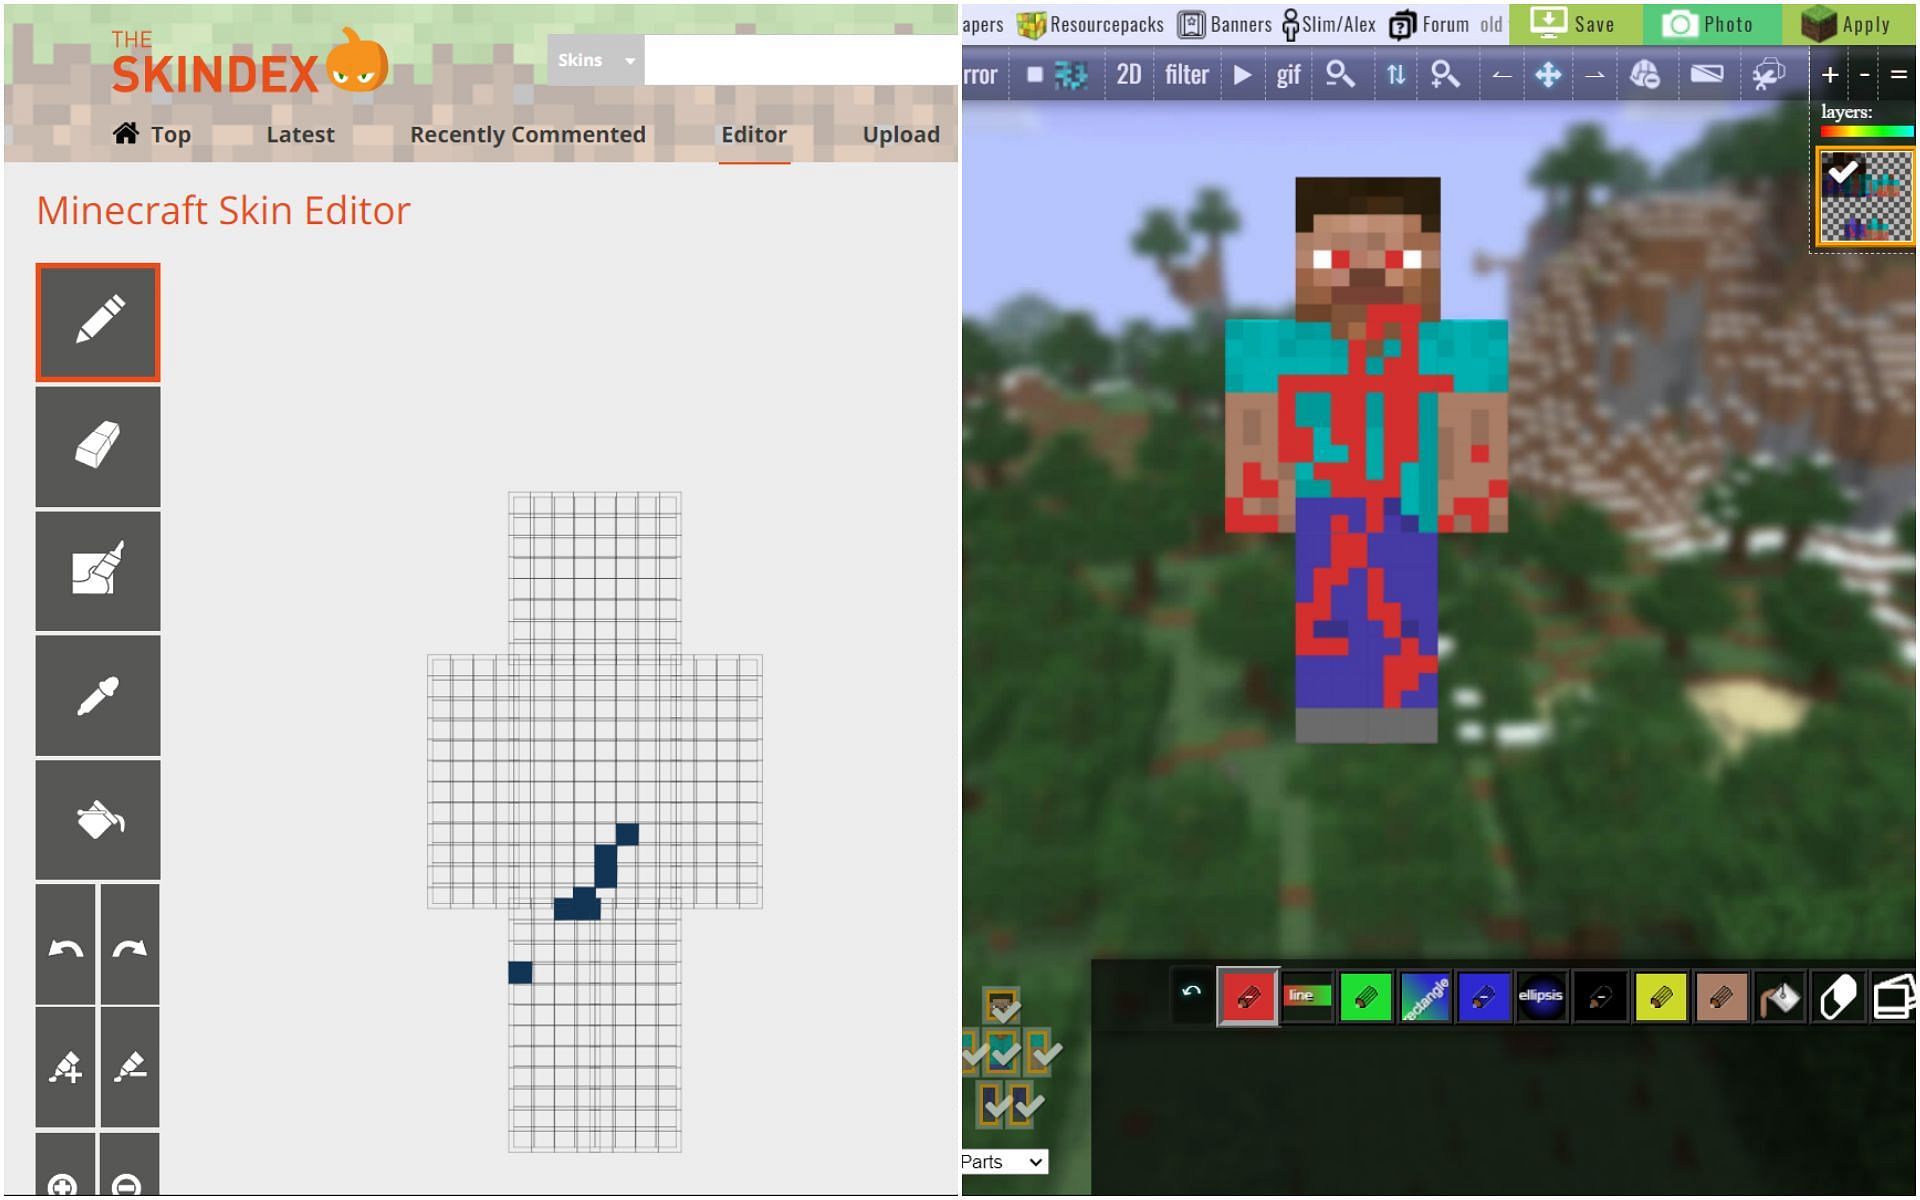
Chart New Territories with the ultimate Minecraft Seed Generator!
Since Minecraft 1.19 Java Edition does not offer any in-game options to customize or create a skin, players will have to go to a suitable website to create the skin online and then download it. The best website to make a skin or completely customize a readymade skin is The Skindex. It allows players to browse through thousands of readymade skins and has an in-built skin maker. Alternatively, players can also go to the Novaskin website.
2) Creating a skin
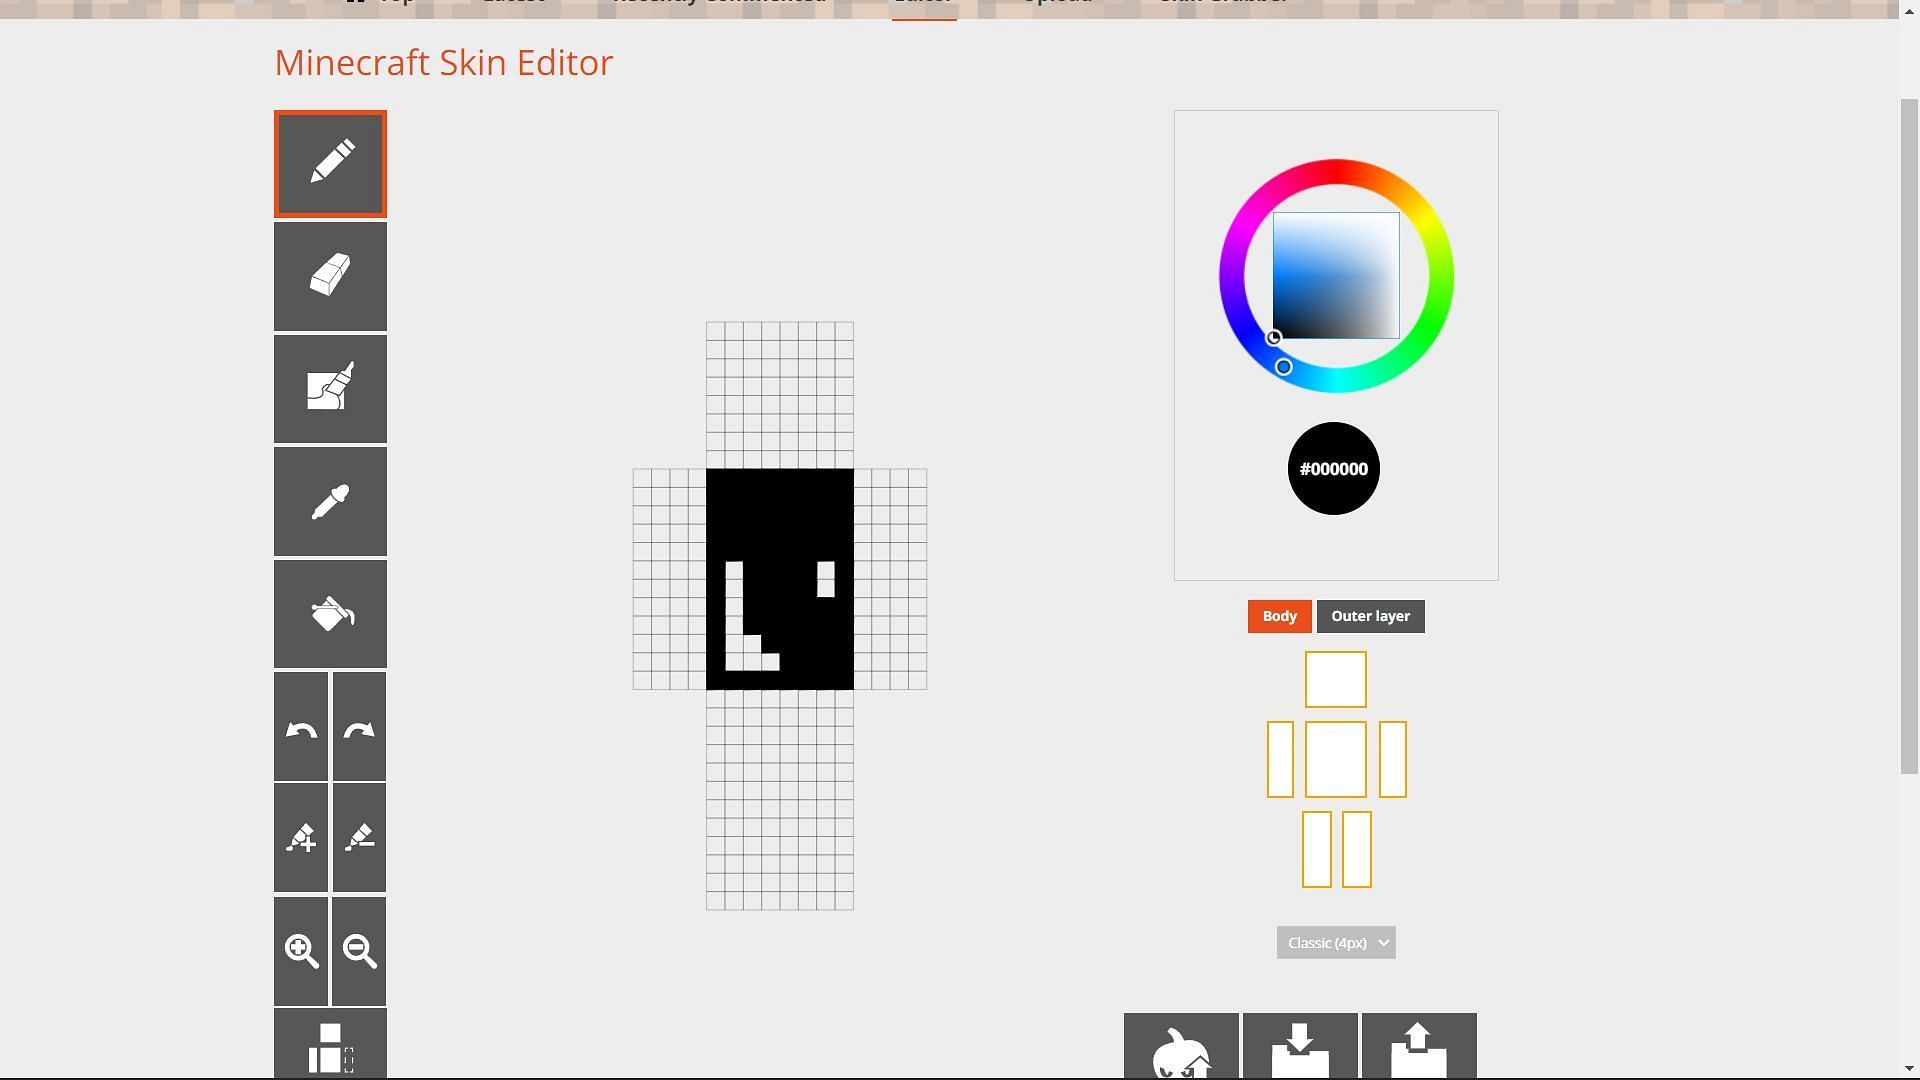
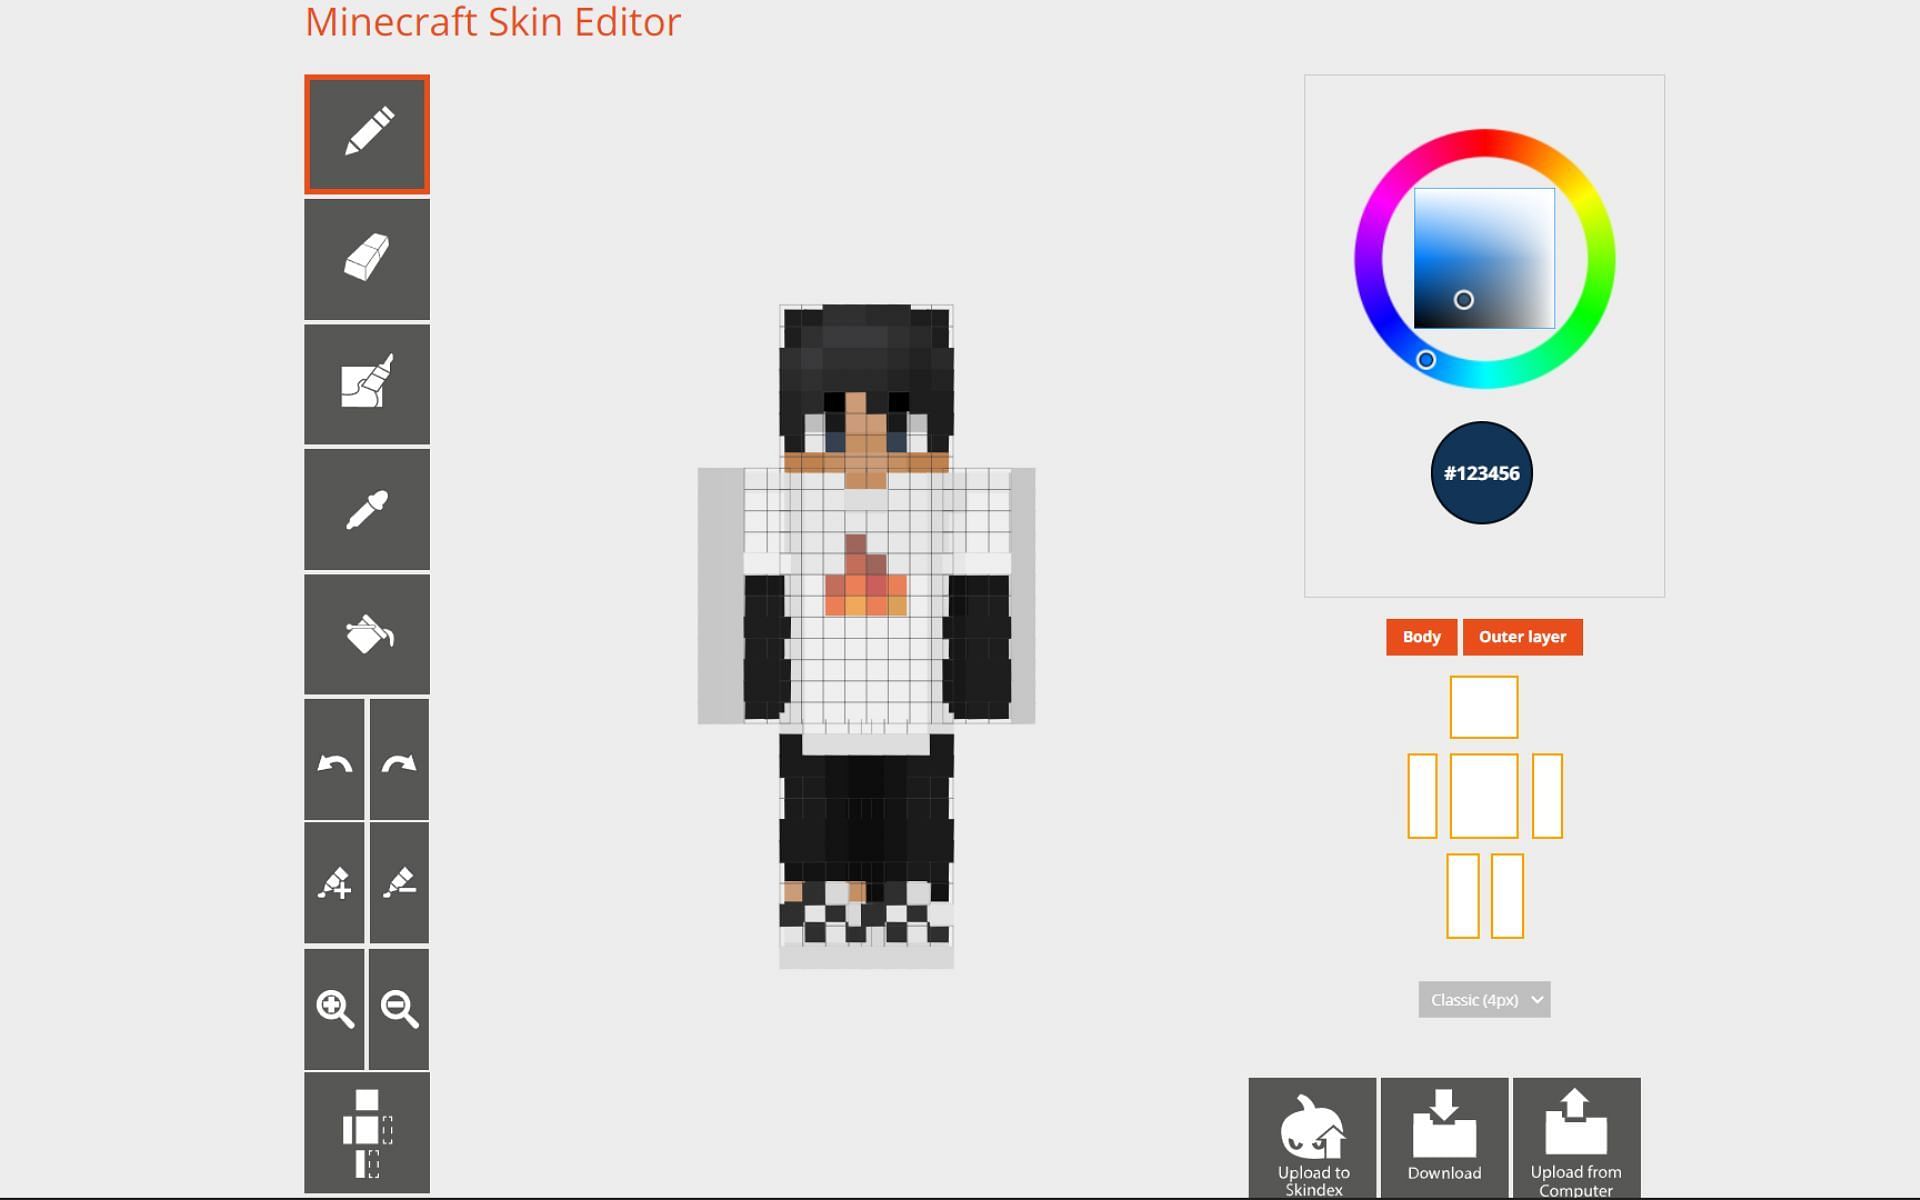
Once players open the website, they will see a complete UI to make the skin from scratch. The left side will contain loads of tools like pencil, eraser, auto-tone, color picker, fill, etc. In the middle, users will see several pixels in the shape of a character.
With the pencil tool, players can fill every pixel manually or even fill an entire facet with the fill tool. Before coloring, players can choose any color from the color picker on the right side.
Players can also select the body and outer layer to color them individually or even obliterate one or the other layer. Users can also choose if they want to create a slim or classic skin from the bottom right corner.
3) Downloading and installing the skin
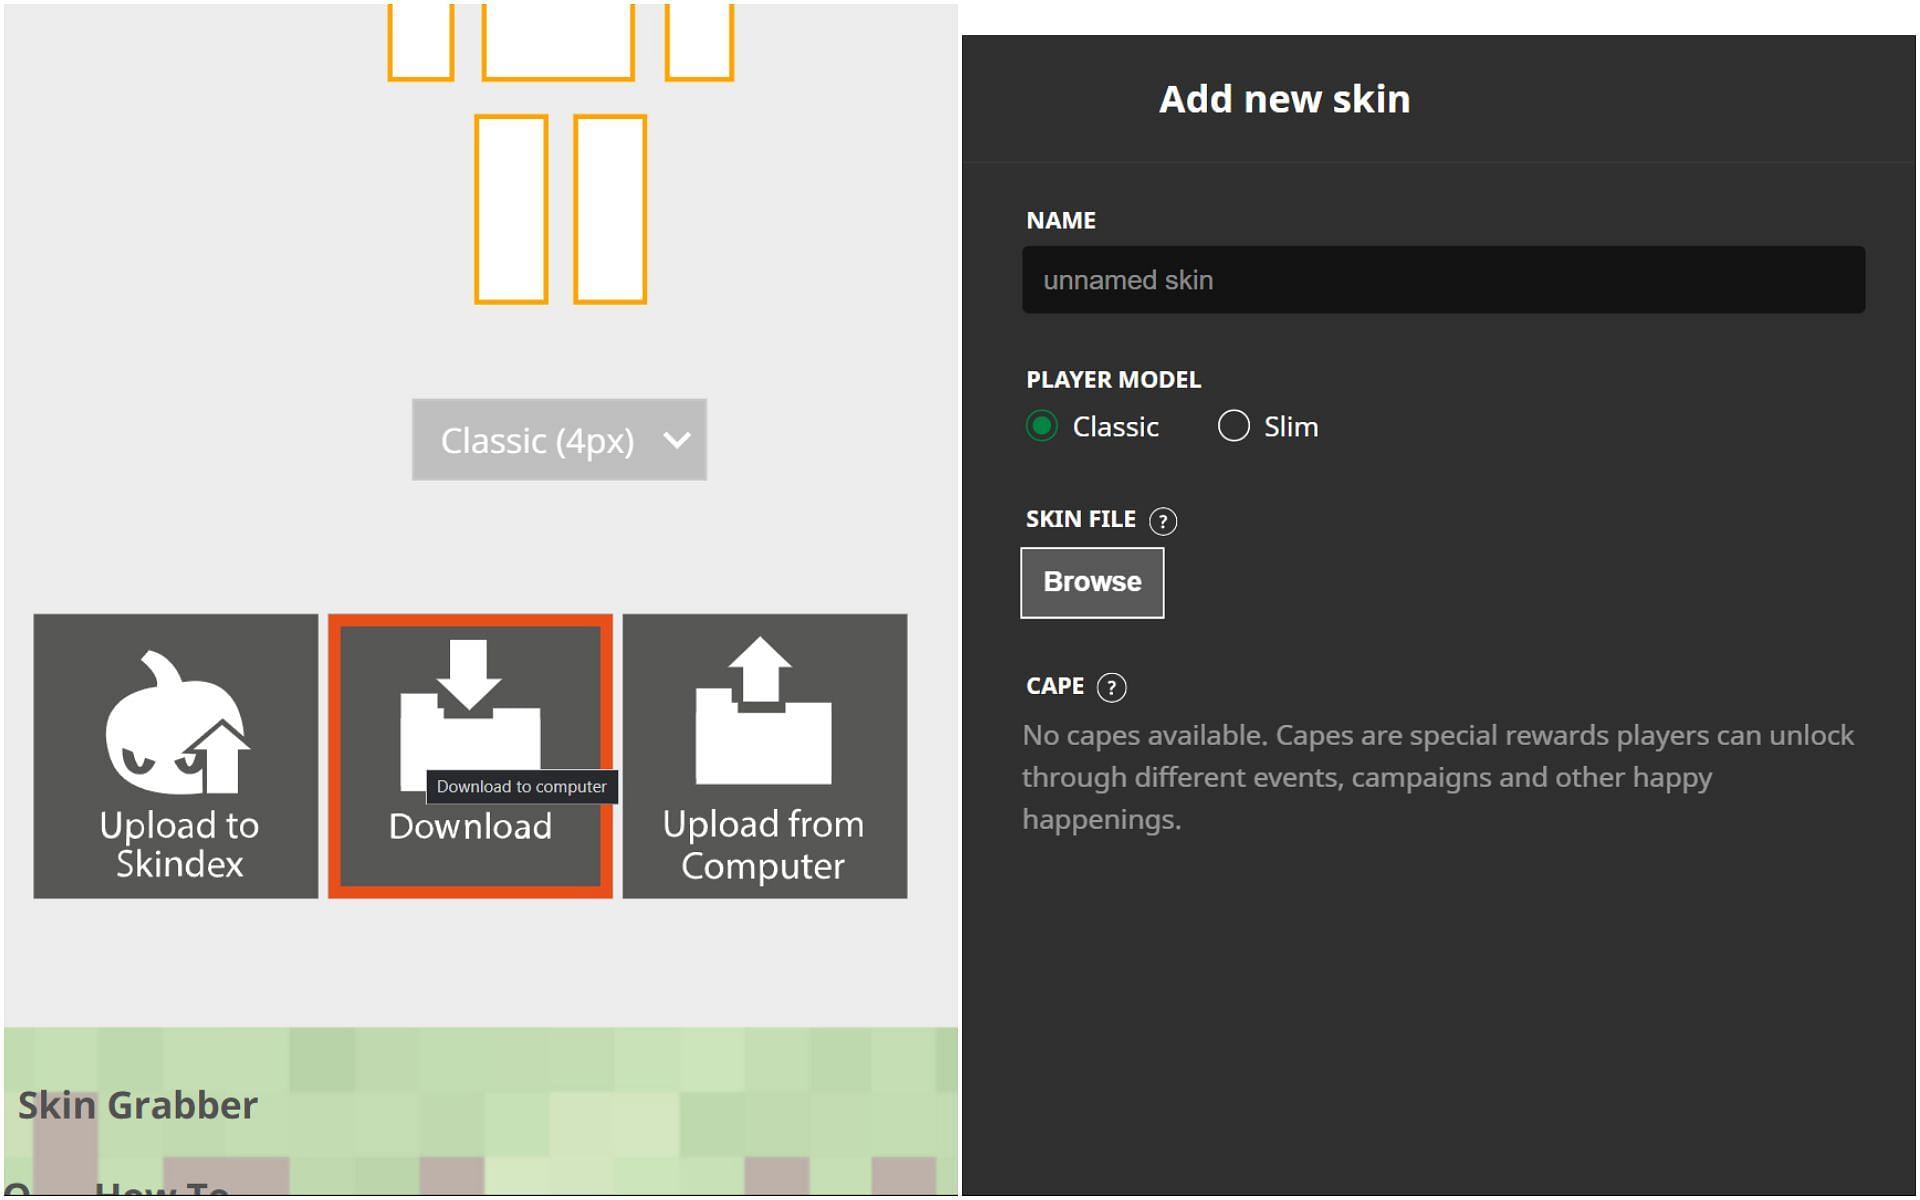
Once the skin is ready, players can hit download in the bottom right corner. This will download a PNG file of the skin, which can be further installed from the official game launcher.
In the official game launcher, users can head to the Java Edition of the game and head to the skins tab. Here, they can see the classic Steve and Alex skin adjacent to the 'New skin' button. Users can head to the new skin screen and browse the computer to select the downloaded skin.

Uncover new worlds with our Minecraft Seed Generator!