
'%20x='0'%20y='0'%20height='100%25'%20width='100%25'%20%0A%20%20%20%20%20%20%20%20%20%20xlink%3Ahref='data:image/jpg;base64,/9j/2wBDAAYEBQYFBAYGBQYHBwYIChAKCgkJChQODwwQFxQYGBcUFhYaHSUfGhsjHBYWICwgIyYnKSopGR8tMC0oMCUoKSj/2wBDAQcHBwoIChMKChMoGhYaKCgoKCgoKCgoKCgoKCgoKCgoKCgoKCgoKCgoKCgoKCgoKCgoKCgoKCgoKCgoKCgoKCj/wgARCAAHAAoDASIAAhEBAxEB/8QAFQABAQAAAAAAAAAAAAAAAAAABgf/2gAIAQEAAAAAoAf/xAAUAQEAAAAAAAAAAAAAAAAAAAAE/9oACAECEAAAAC//xAAUAQEAAAAAAAAAAAAAAAAAAAAD/9oACAEDEAAAAE//xAAhEAAABQQCAwAAAAAAAAAAAAABAwQFEQIGEiIABxMhI//aAAgBAQABPwC/LTbnhqOT20j8Lt9RATdQMCB0nIY3jaONnVVx0NqSlVQgBQBNAGZnZVZR7kcef//EABgRAAIDAAAAAAAAAAAAAAAAAAACAwQR/9oACAECAQE/ALbssmH/xAAXEQEAAwAAAAAAAAAAAAAAAAACAAMR/9oACAEDAQE/AKzpn//Z'%3E%3C/image%3E%3C/svg%3E)
Optifine mod has finally been released for the Minecraft 1.19 update. Since Mojang dropped The Wild Update on June 7, many players wanted to play the game with the famous graphics and performance mod.
Unfortunately, the mod was not ready to support the latest game version. However, the developers have finally released a new updated mod that'll work with the 1.19 version of the game.
Optifine is one of the most famous mods in Minecraft. It greatly enhances the overall graphical performance while keeping the original look of the game intact. It also helps load chunks faster and drastically increases FPS. Players can even download different shaders and install them through the mod.

Chart New Territories with the ultimate Minecraft Seed Generator!
Downloading, installing and using Optifine for Minecraft 1.19 update
How to download the mod?
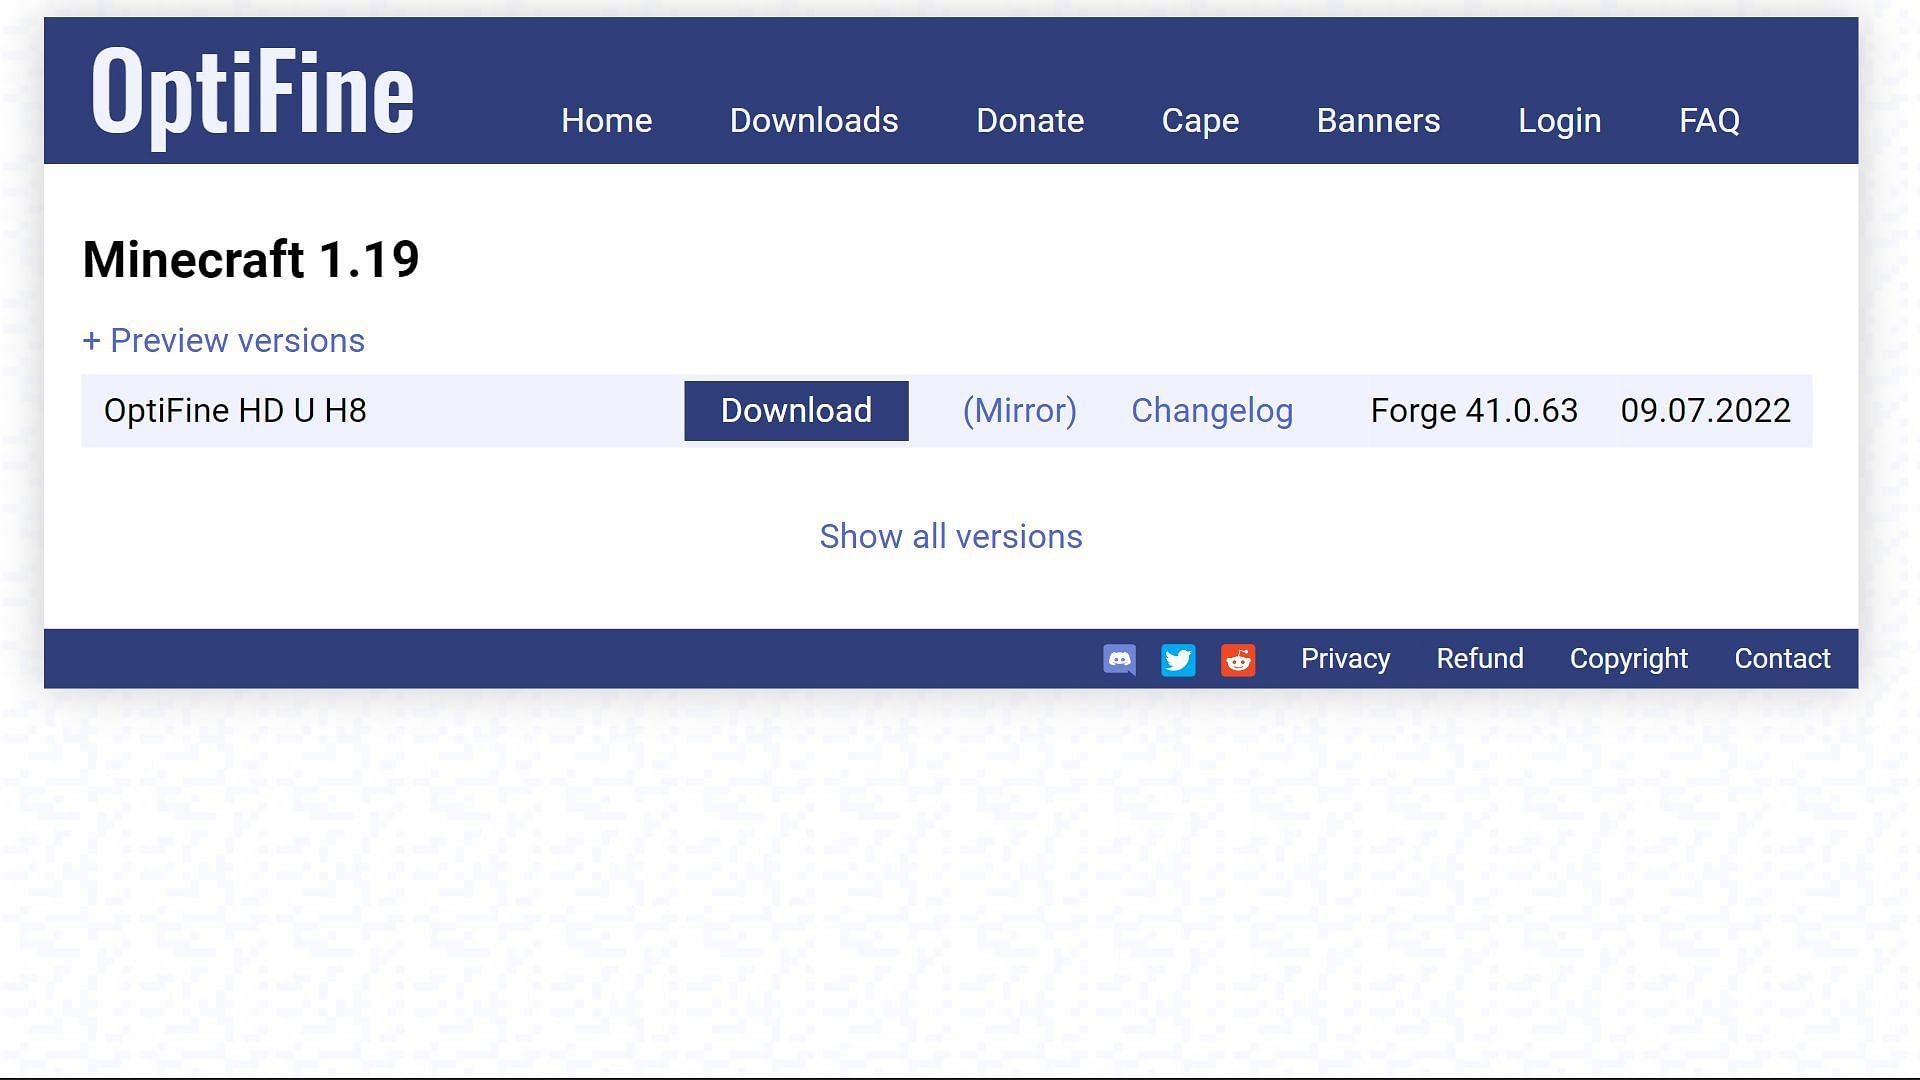
As this mod is extremely famous, it's easily accessible from their official website. Players can head to the website and click on the 'Downloads' tab. There, users will find the latest version of the mod for the Minecraft 1.19 update. The current version as of now will be named 'HD U H8'. As the developers refine the mod, newer versions will be available for download as well.
Players should click '(Mirror)' instead of the 'Download' button, as that'll take them directly to the main download page of the mod. Once the new page loads, players can simply click the 'Download' button to save the .jar file. The file will be 6.41 MB, which is relatively small compared to other mods in the game.
Remember, players must have an updated java software on their PCs to run .jar files.
How to install it?
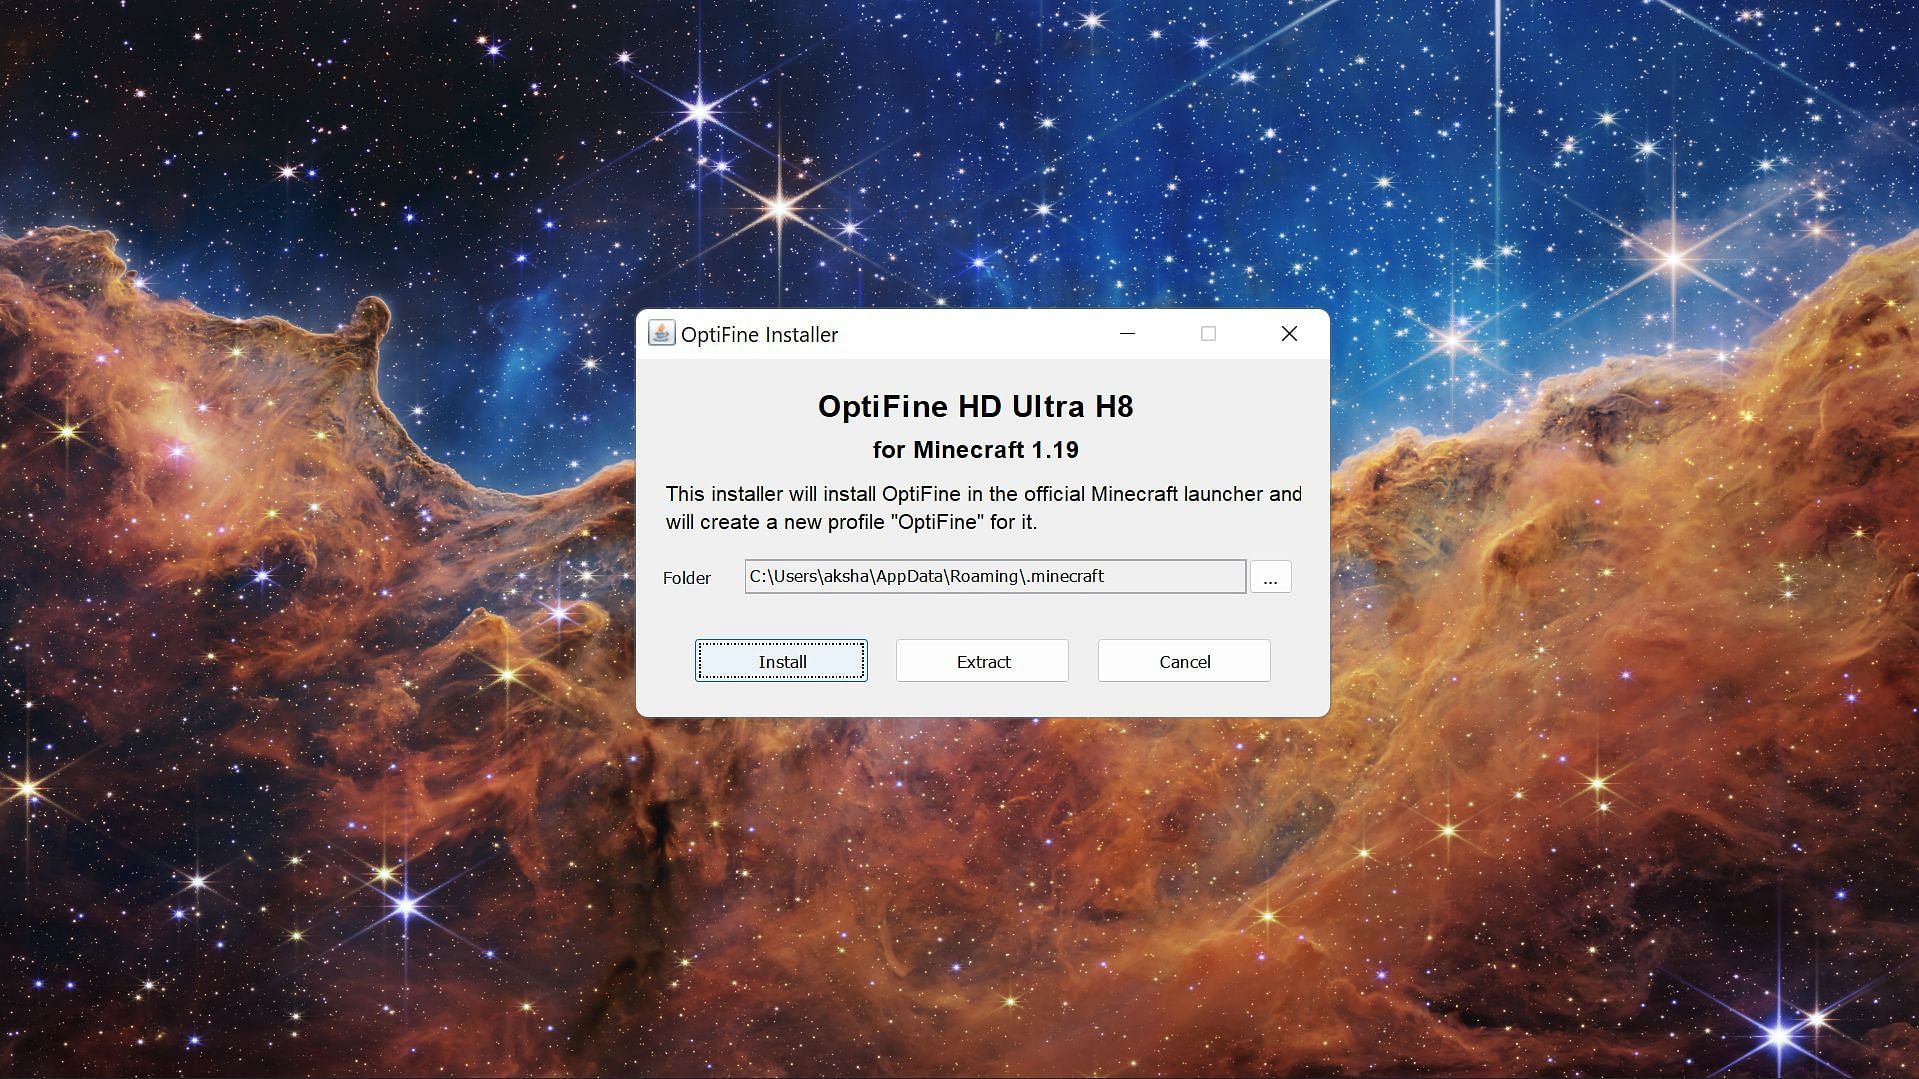
Once the latest mod file is downloaded, players can simply open it. A dialog box will appear where the software will show that the mod will be automatically installed in the main game folder on the computer.
If the file path is correctly targeted to '.minecraft' folder, players can simply press 'Install'. The software will transfer all the necessary mods into the game.
Opening and using the mod
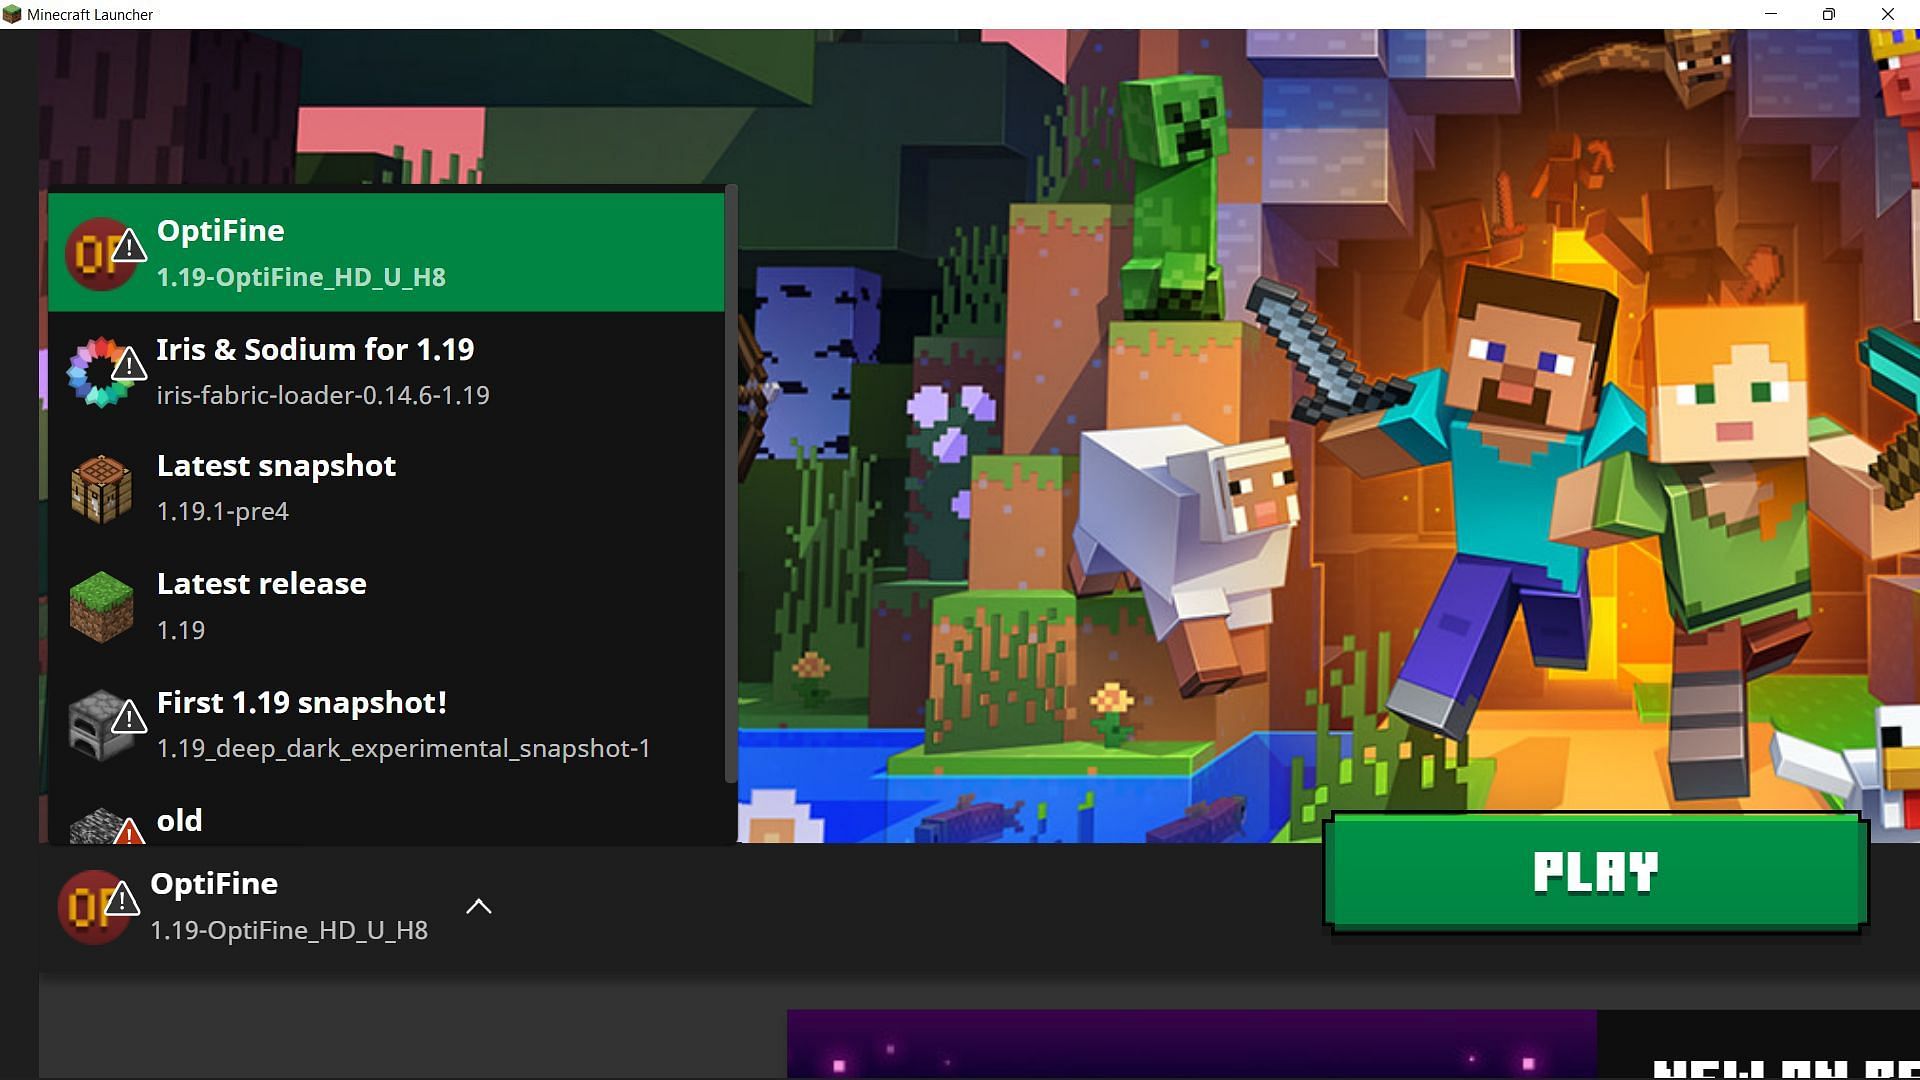
After the mod gets installed, players can open the official game launcher and head to the Java Edition tab.
There, they'll see the Optifine version of the game under the dropdown list of versions installed. If they're unable to find the modded version, they can head to 'Installations' tab and create a new version by searching for 'optifine mod' in the version list.
Once selected, players can simply open the modded Minecraft 1.19 update version and play the game as usual. Those having FPS issues will instantly notice an improvement in performance.
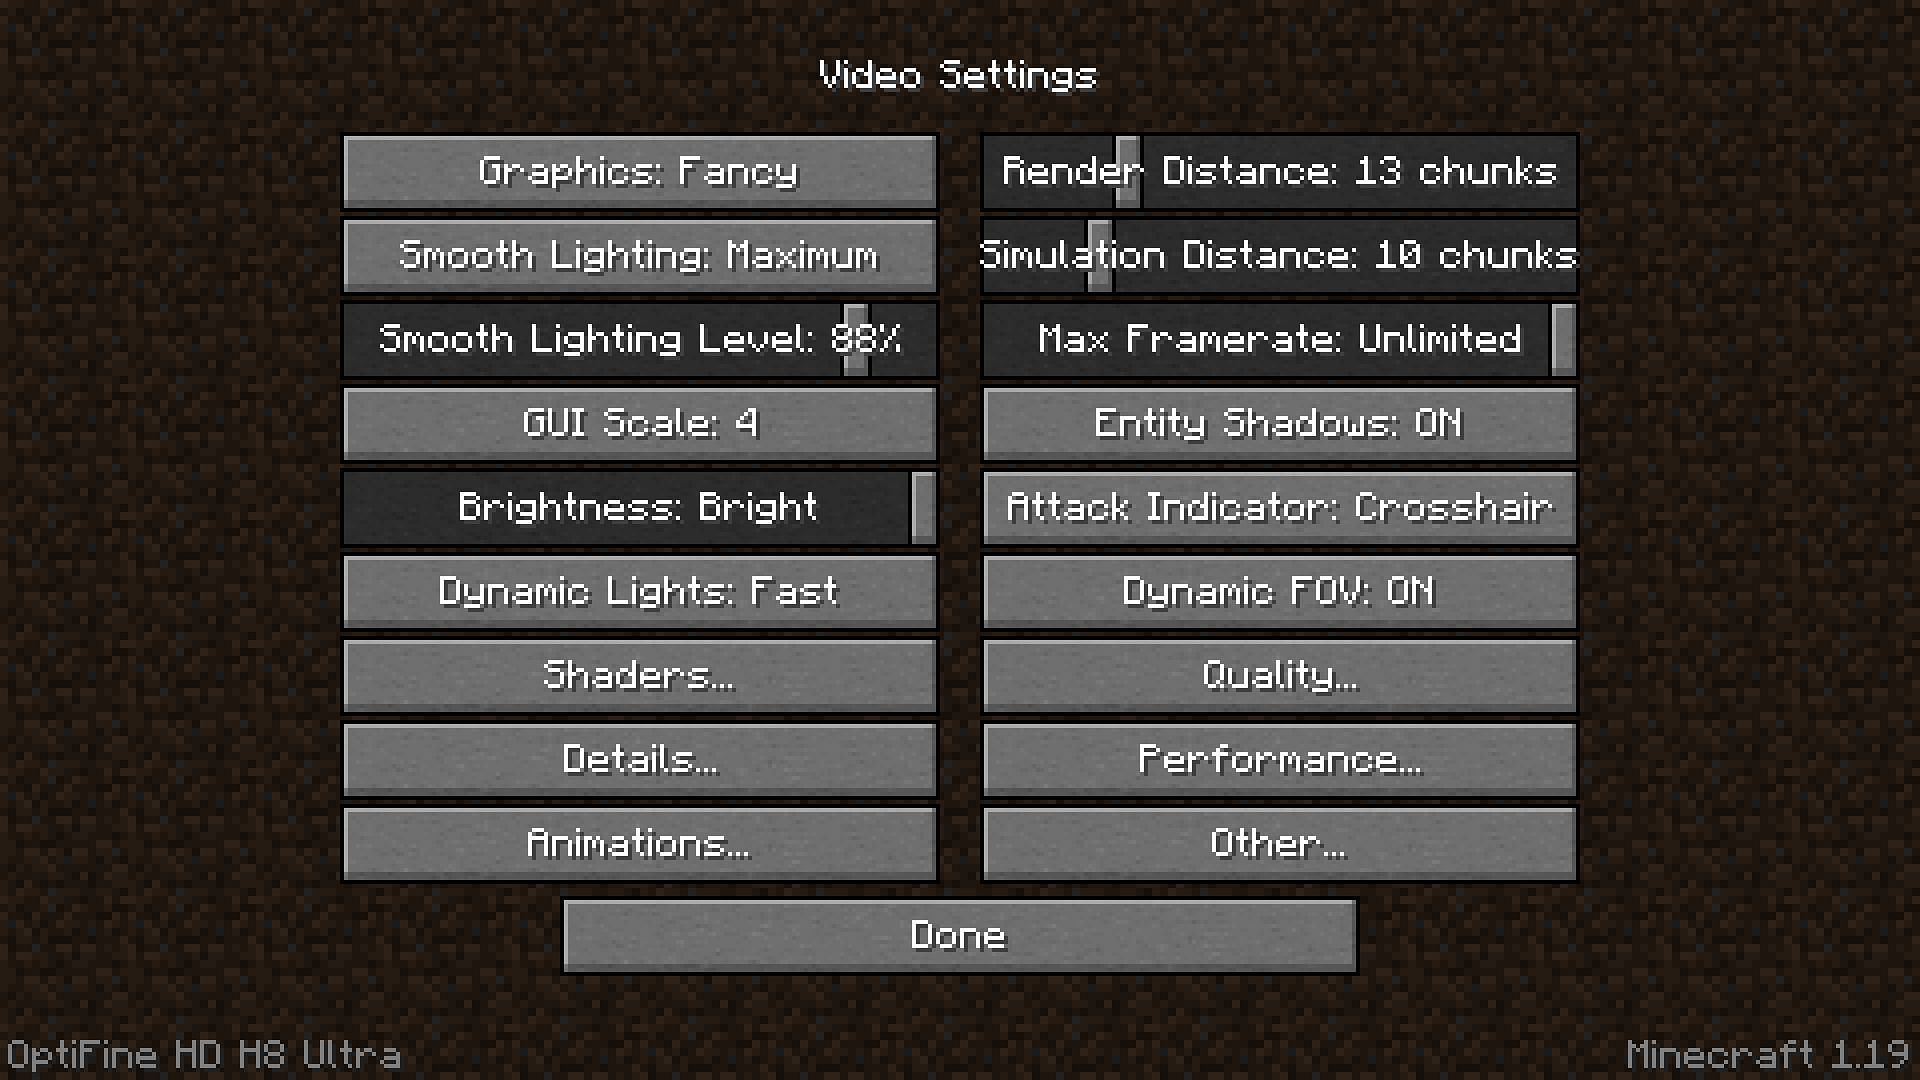
Players can also head to the video settings for additional options and tabs to tweak the graphics and performance of the game.

Uncover new worlds with our Minecraft Seed Generator!