
'%20x='0'%20y='0'%20height='100%25'%20width='100%25'%20%0A%20%20%20%20%20%20%20%20%20%20xlink%3Ahref='data:image/jpg;base64,/9j/2wBDAAYEBQYFBAYGBQYHBwYIChAKCgkJChQODwwQFxQYGBcUFhYaHSUfGhsjHBYWICwgIyYnKSopGR8tMC0oMCUoKSj/2wBDAQcHBwoIChMKChMoGhYaKCgoKCgoKCgoKCgoKCgoKCgoKCgoKCgoKCgoKCgoKCgoKCgoKCgoKCgoKCgoKCgoKCj/wgARCAAGAAoDASIAAhEBAxEB/8QAFgABAQEAAAAAAAAAAAAAAAAAAAUH/8QAFQEBAQAAAAAAAAAAAAAAAAAAAwT/2gAMAwEAAhADEAAAAM4iiwf/xAAdEAACAQQDAAAAAAAAAAAAAAABAgMABBEhBSLh/9oACAEBAAE/AOXItbBruWWWU4C6AGiaaFHYusjYbY6+1//EABYRAQEBAAAAAAAAAAAAAAAAAAEAIf/aAAgBAgEBPwBcv//EABYRAQEBAAAAAAAAAAAAAAAAAAIAAf/aAAgBAwEBPwAnL//Z'%3E%3C/image%3E%3C/svg%3E)
His Vile Sanctum is the final main story mission in Borderlands 4’s Terminus Range area. You’ll pick this quest up immediately upon completing Dark Subject. It’s an incredibly long mission, made harder by the twin sub-bosses just before the final boss of the area, Vile Lictor. If you aren’t paying attention, that fight is going to be miserable, but we’ve defeated him, and are ready to help you take him down once and for all.
You also get a very important storyline swerve at the end of this mission, but we won’t spoil it here. It does get shown in the mission walkthrough video though, so do be aware of spoilers. If you’re looking to wrap up His Vile Sanctum in Borderlands 4, here’s what you need to do.
Complete His Vile Sanctum quest guide for Borderlands 4
Mission Information
- Quest Giver: Defiant Calder
- Location: Belton’s Bane
- Recommended Level: 18-23
- Approximate length of mission: Hour and a half+
(Bulk of mission starts at 45:21)
Mission Steps
- Reach Vile Lictor’s fortress, follow Amara, Kill Orbulus
- Return to Belont’s Bore, follow Defiant Calder, reach Power Substation
- Find Energy Spike, Kill Order Forces, Find Defiant Calder
- Find Energy Spike, Kill Order forces with Bruce
- Find Energy Spike, Follow Bruce
- Destabilize Phase device, Escort Bruce to Limiter A, B, and C (and destroy A, B, and C)
Breach Vile Lictor’s Fortress section
- Huddle near Bruce
- Enter Phase Rift, Find Bruce, Find engineering bay
- Insert Bruce’s control core, destroy barrier
Kill Vile Lictor section
- Destroy Phase barrier
- Destroy Eridian Relics
- Kill Vile Twins
- Continue with Amara, Activate Elevator (Optional Objective: Check on Amara)
- Kill Vile Lictor
- Take Lictor’s Bolt, return to Calder
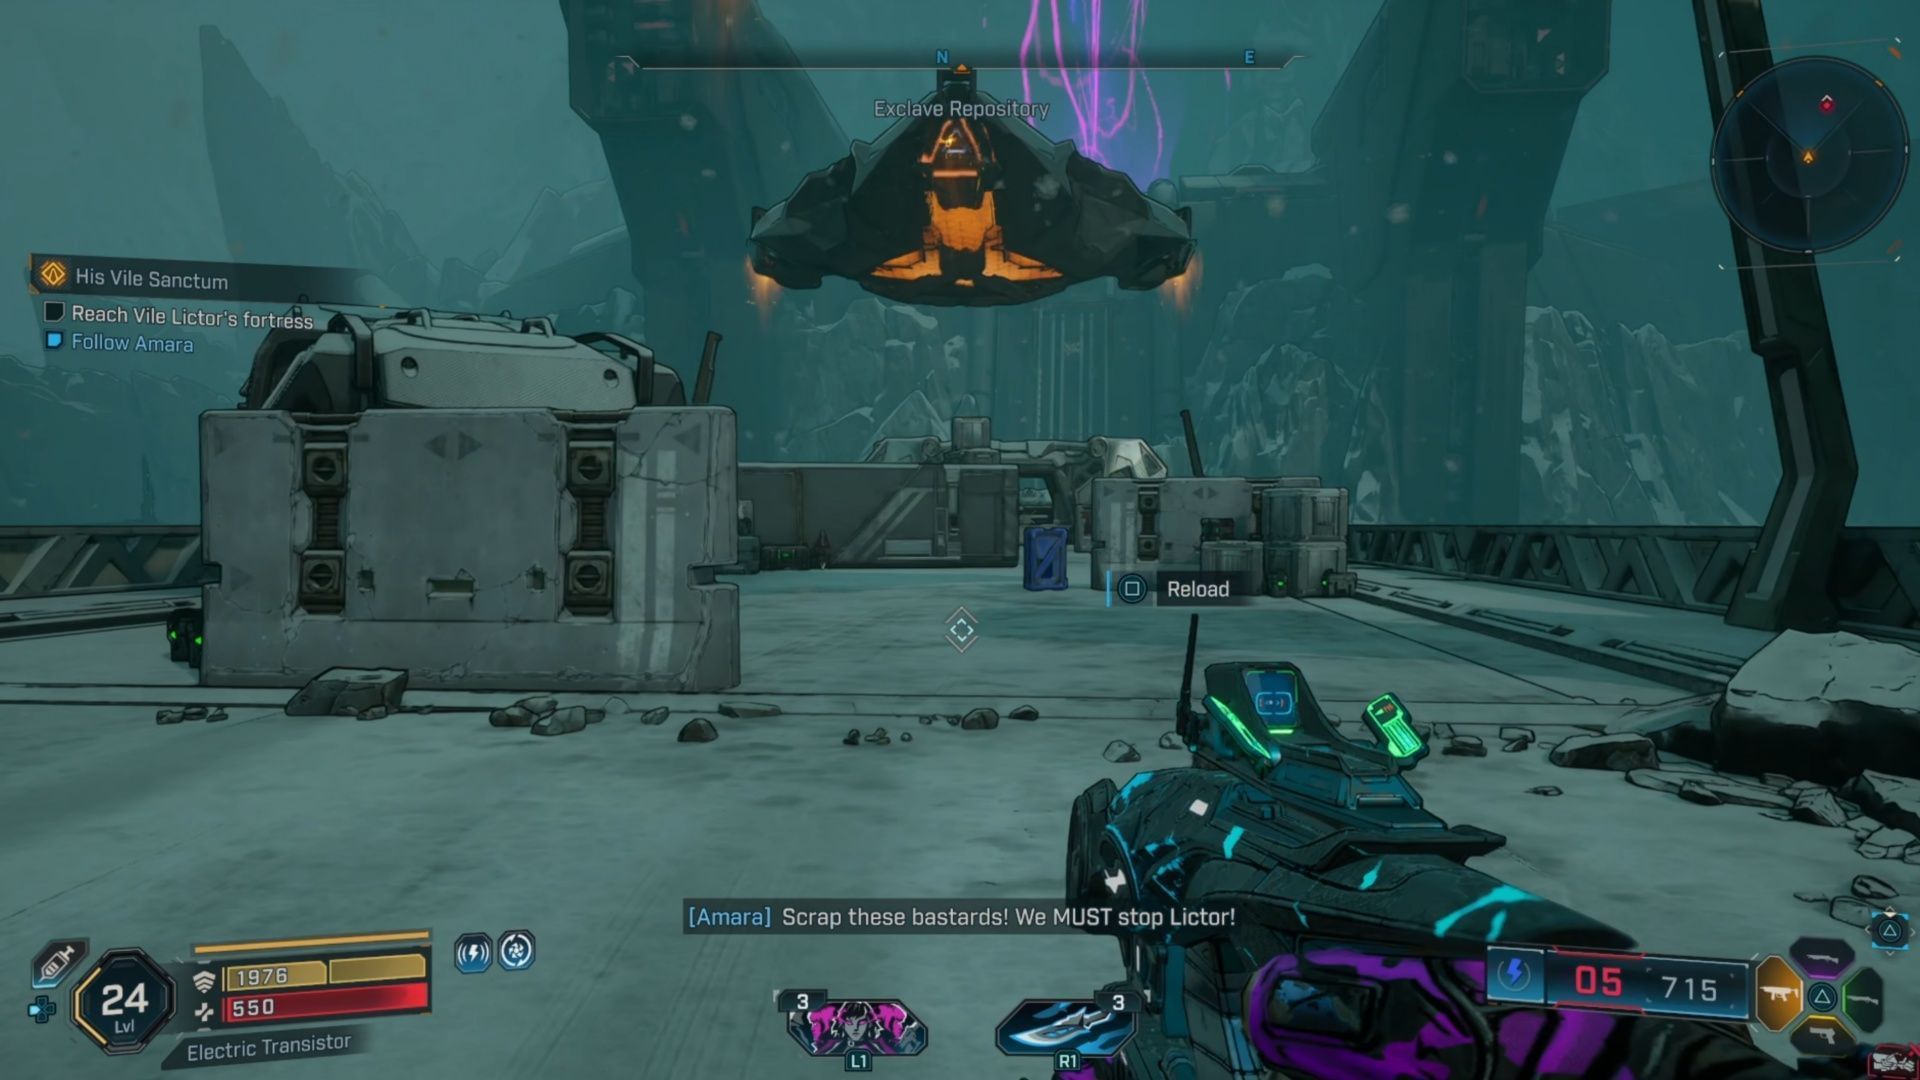
1) Reach Vile Lictor’s fortress, follow Amara, Kill Orbulus

After speaking with Defiant Calder in Borderlands 4’s Bolton’s Bore, you’ll head directly to Vile Lictor’s fortress as a part of His Vile Sanctum. Unfortunately, you’re not going to be able to get very far. There’s a long bridge filled with waves of enemies, so fight your way through them until you reach the end. Following Amara will lead you towards Orbulus, one of Vile Lictor’s lieutenants.
He’s not any more powerful than any ordinary Badass in the game, so he’s an easy win. However, he is a Vile Enemy, so you’re going to need to break his crystal, and then defeat the orbs that spawn. After you break down his shield, he’s a nobody. Sadly, we can’t proceed, so it’s back to Belton’s Bore.
2) Return to Belont’s Bore, follow Defiant Calder, reach Power Substation
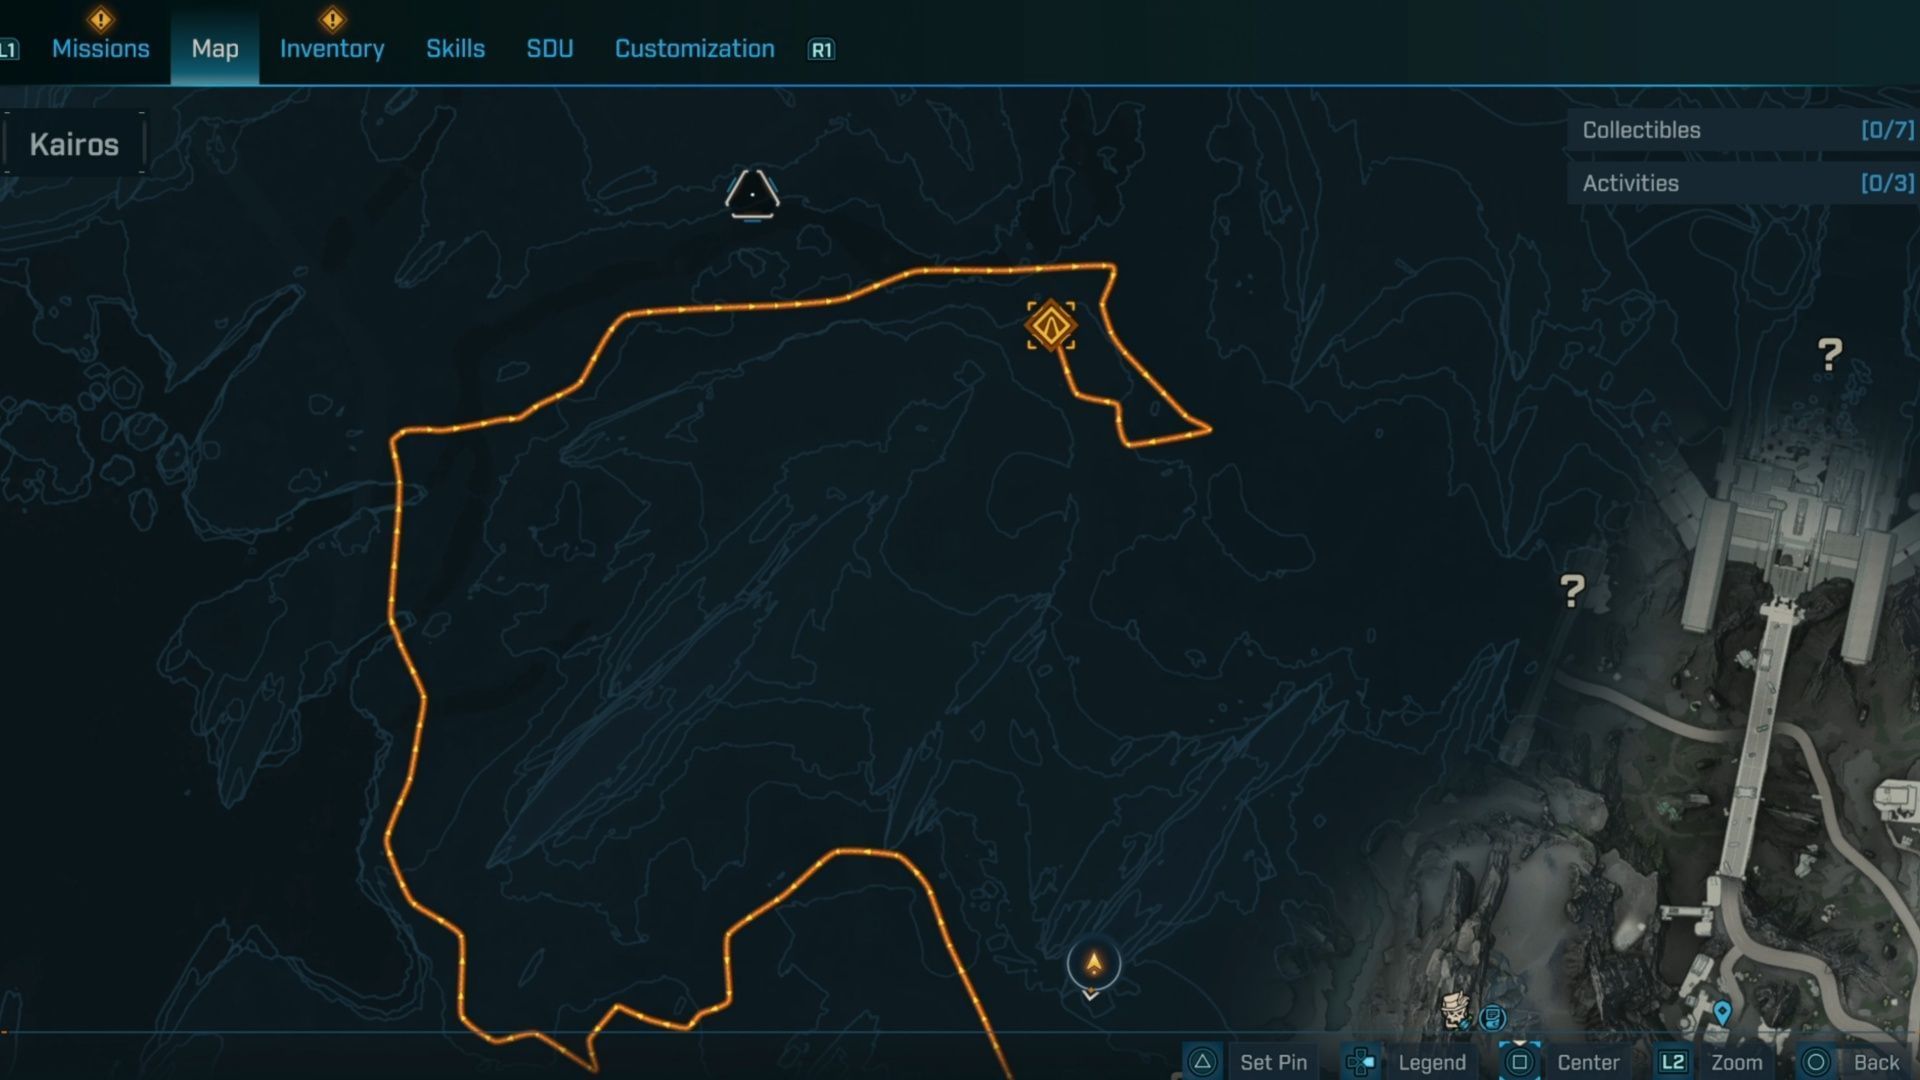
Defiant Calder will sort of convince his colleagues to assist the Vault Hunter, but not without tragedy taking place. There’s a Power Substation that we can assault, and it just might be our way into Vile Lictor’s palace.
Unfortunately, it’s a very long way away from here. I recommend taking your time and picking up the various Points of Interest and collectibles on the way. There’s even a Silo right near the Power Substation. Fight your way up to the Power Substation, and make sure to use the Ammo Refill before you go inside.
3) Find Energy Spike, Kill Order Forces, Find Defiant Calder
Once inside, your next major goal in Borderlands 4 is to find the Energy Spike, which will be deeper in the Power Substation. If you happened to get lucky on the last mission and pick up the Ohm My God weapon, you can shred through the Order Forces in no time at all.
Just deal with them like you always do. There are a few Badasses that can show up, and at least one annoying Bulkhead enemy. Other than that, it’s business as usual. Before you can progress much farther, you’ll get another wave of Order forces, led by a Badass Domination Engine, but it’s not too scary.
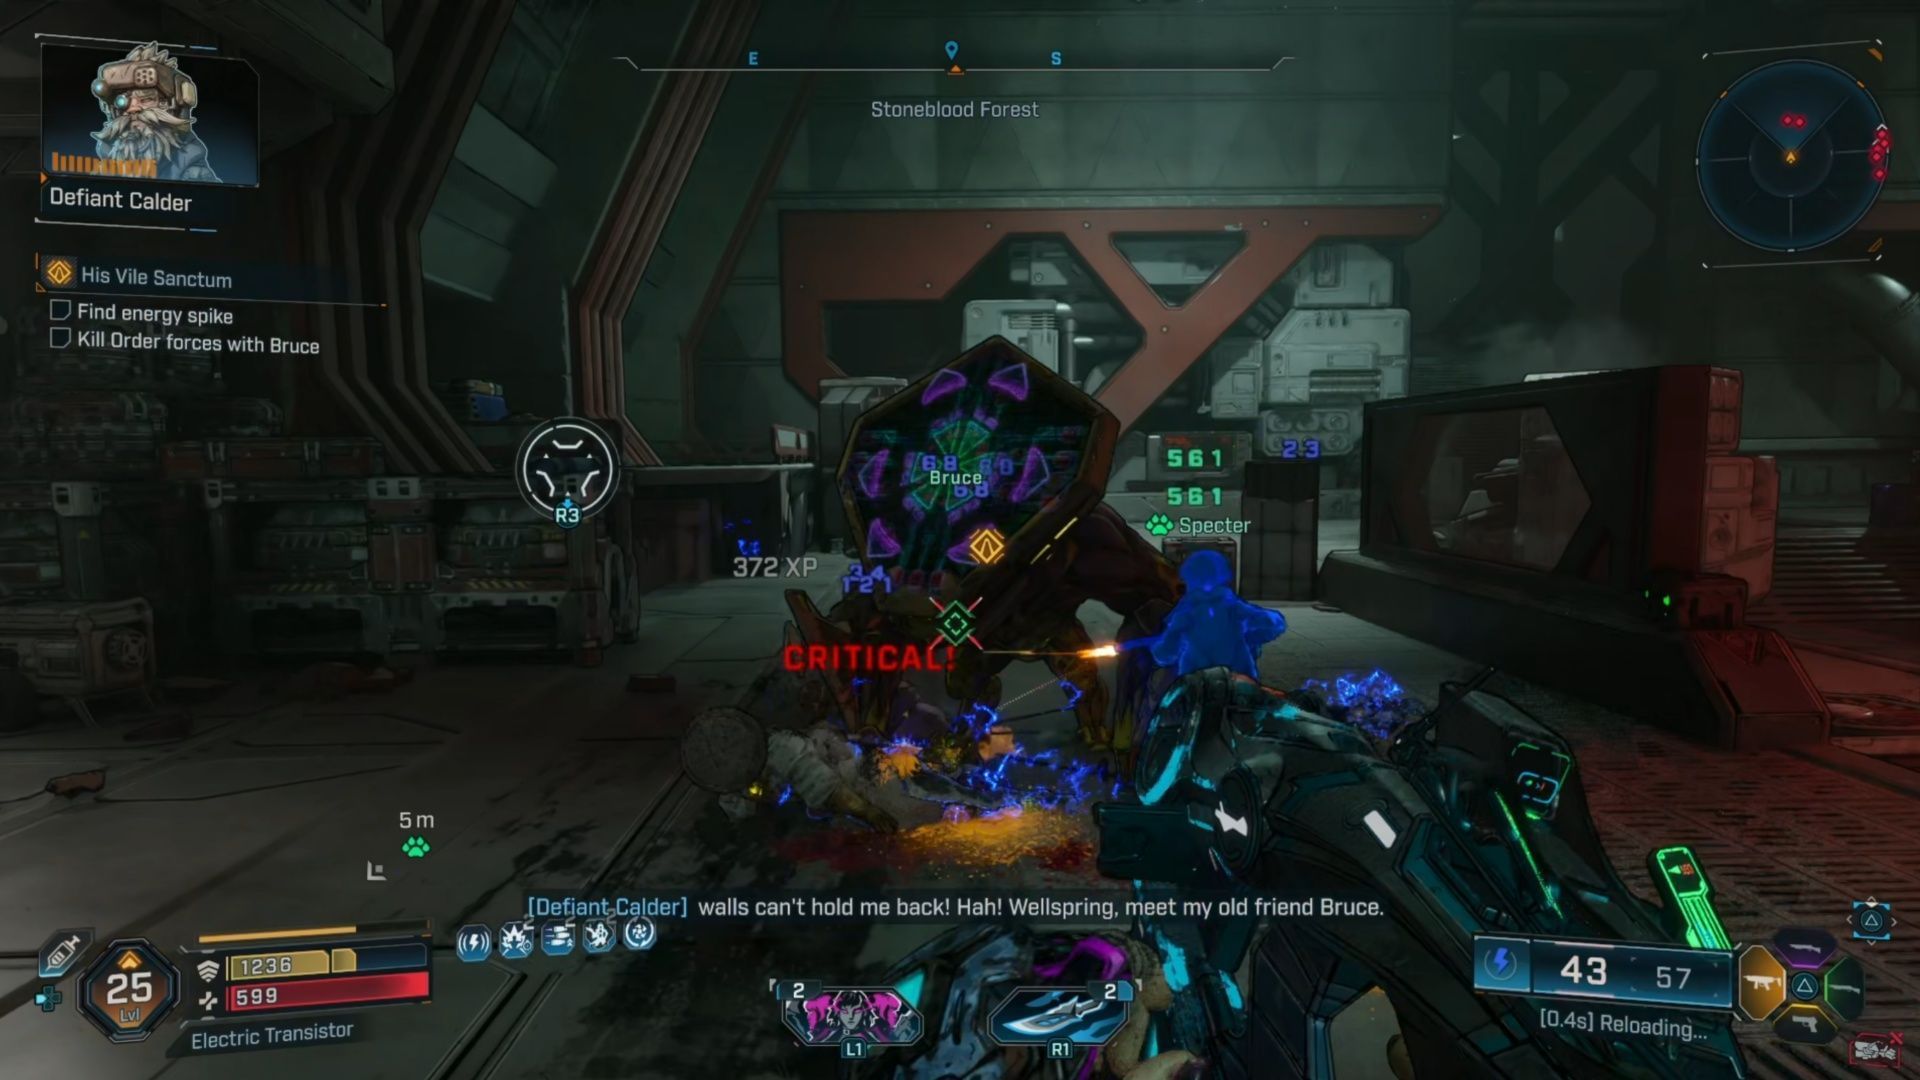
4) Find Energy Spike, Kill Order forces with Bruce
Before too long, you’ll get some help, in the form of the mighty Bruce! This huge monstrosity will start using its attacks to help you fight the Order forces, making things so much easier. Like other allies, Bruce is immune to damage, and uses all of the attacks those Hulkhead monsters did.
It’s nice to know that he cannot die, so you can just smash through this room of Borderlands 4 enemies with complete impunity. Now that you have an ally, make your way through the room, putting down Order forces.
5) Find Energy Spike, Follow Bruce
Once the room is empty, Bruce will run deeper into this Borderlands 4 dungeon, so follow along. It naturally leads to more enemies. Having electric damage weapons will be a real benefit throughout this dungeon, so if you lack one, and pick it up, consider keeping it if the damage is high enough.
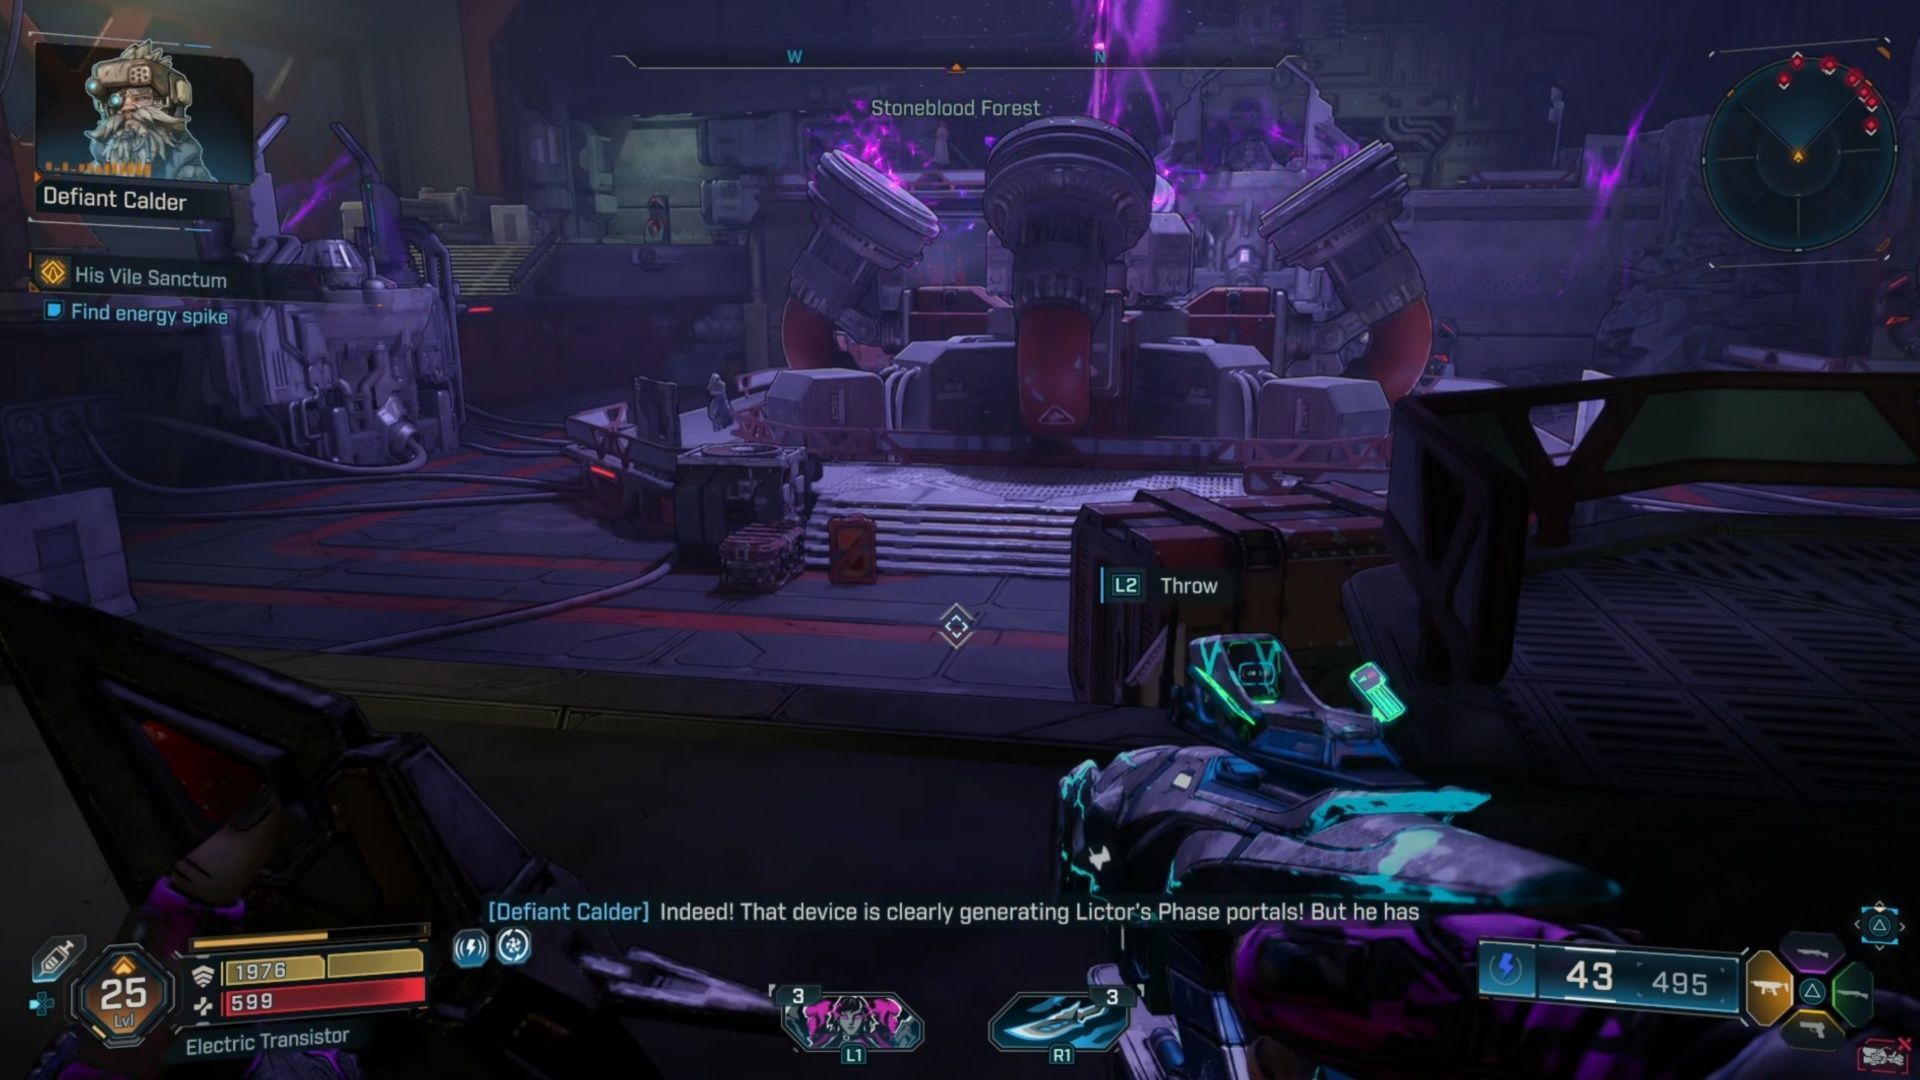
After you clear out the Order forces, you’ll follow Bruce again for this step of Borderlands 4’s His Vile Sanctum mission. Ultimately, it’s going to lead you to a room where there are a trio of Phase Devices that you’re going to want to destroy.
6) Destabilize Phase device, Escort Bruce to Limiter A, B, and C (and destroy A, B, and C)
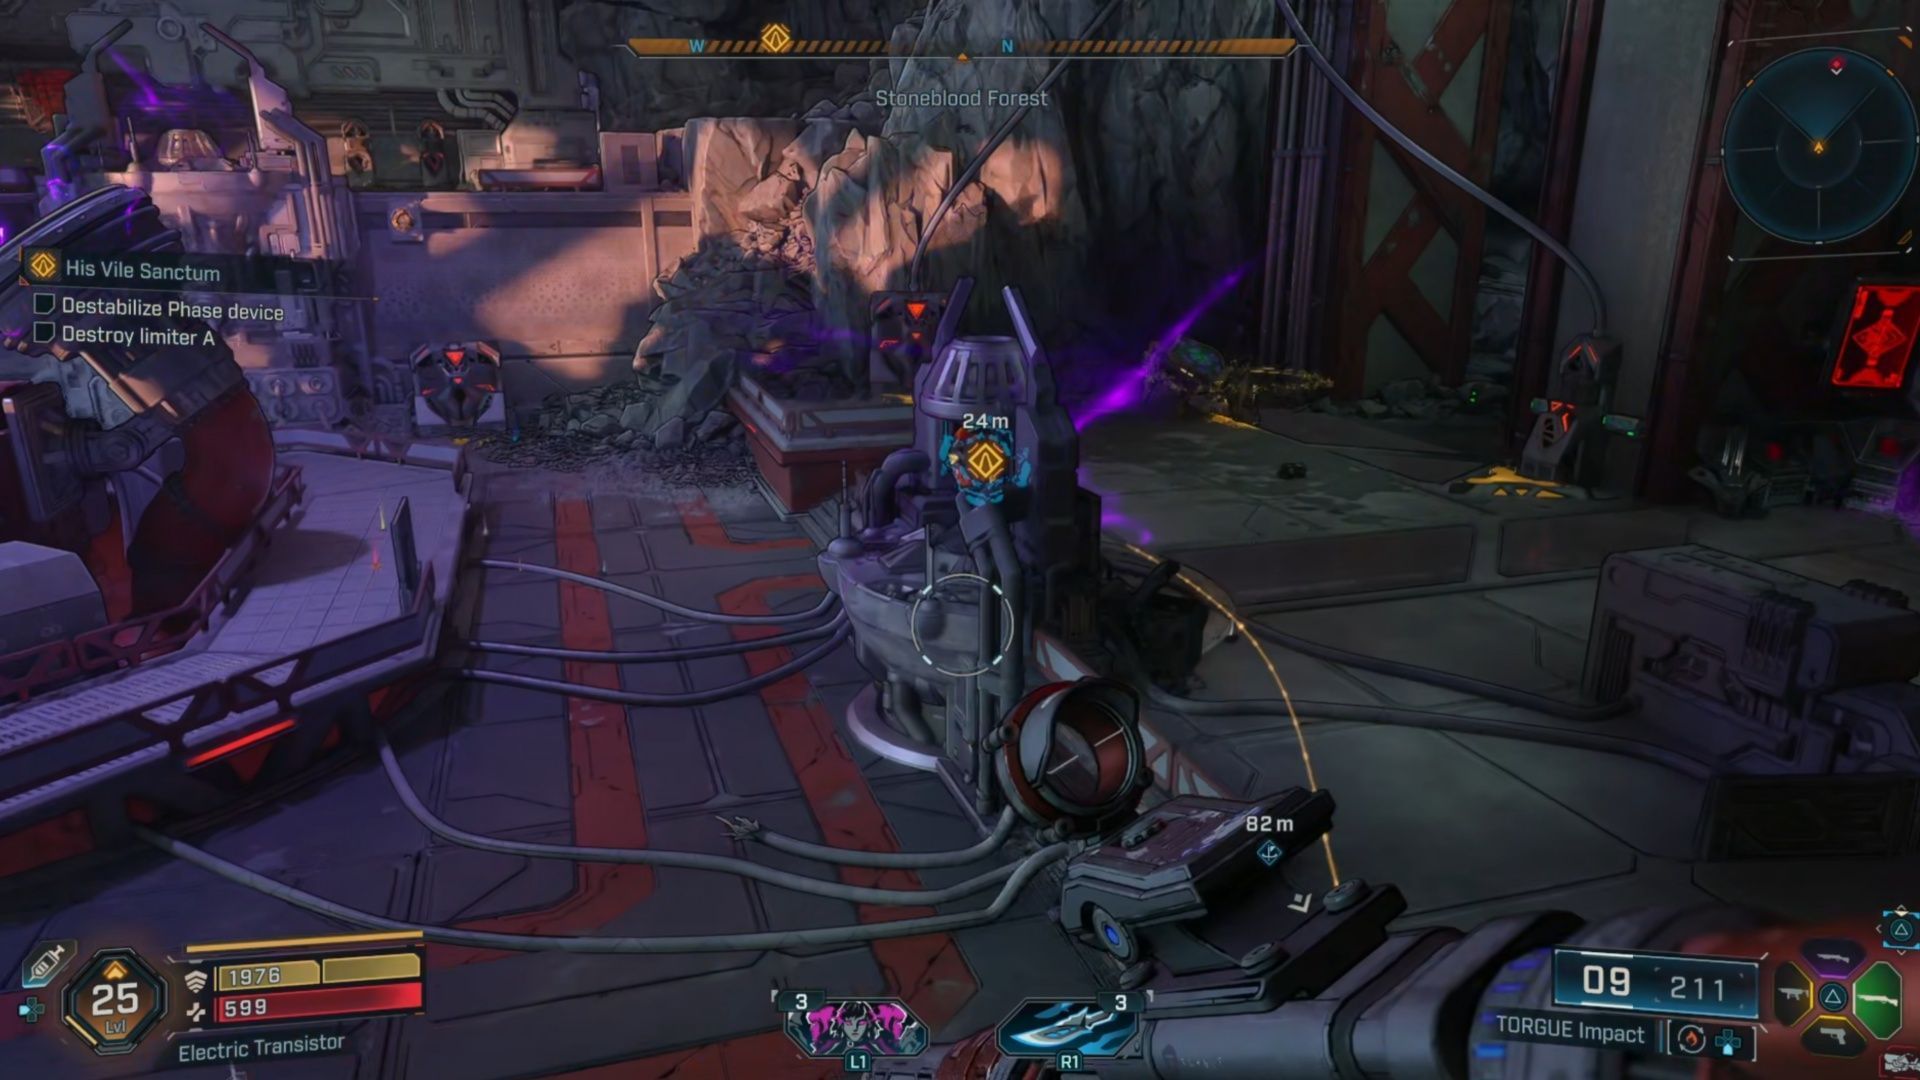
In order to get through this room in Borderlands 4, you need the help of Bruce. Kill enemies while near Bruce, and he’ll start moving towards Phase Limiter A. Once there, he’ll smash the ground, and that brings up the Limiter for you to shoot. This is one of the harder rooms in the area though. Bulkheads, Badasses, Wardens, everything you’ve seen so far from the Order.
The above screenshot shows what the Phase Limiter looks like when it’s time to shoot it. So put a few rounds into the middle of it, and start working towards the other side of the room with Bruce. Phase Limiter B is on the other side. Just make sure you stick with Bruce. Phase Limiter C is above you, at the Grapple Point.
7) Breach Vile Lictor’s Fortress, Huddle near Bruce
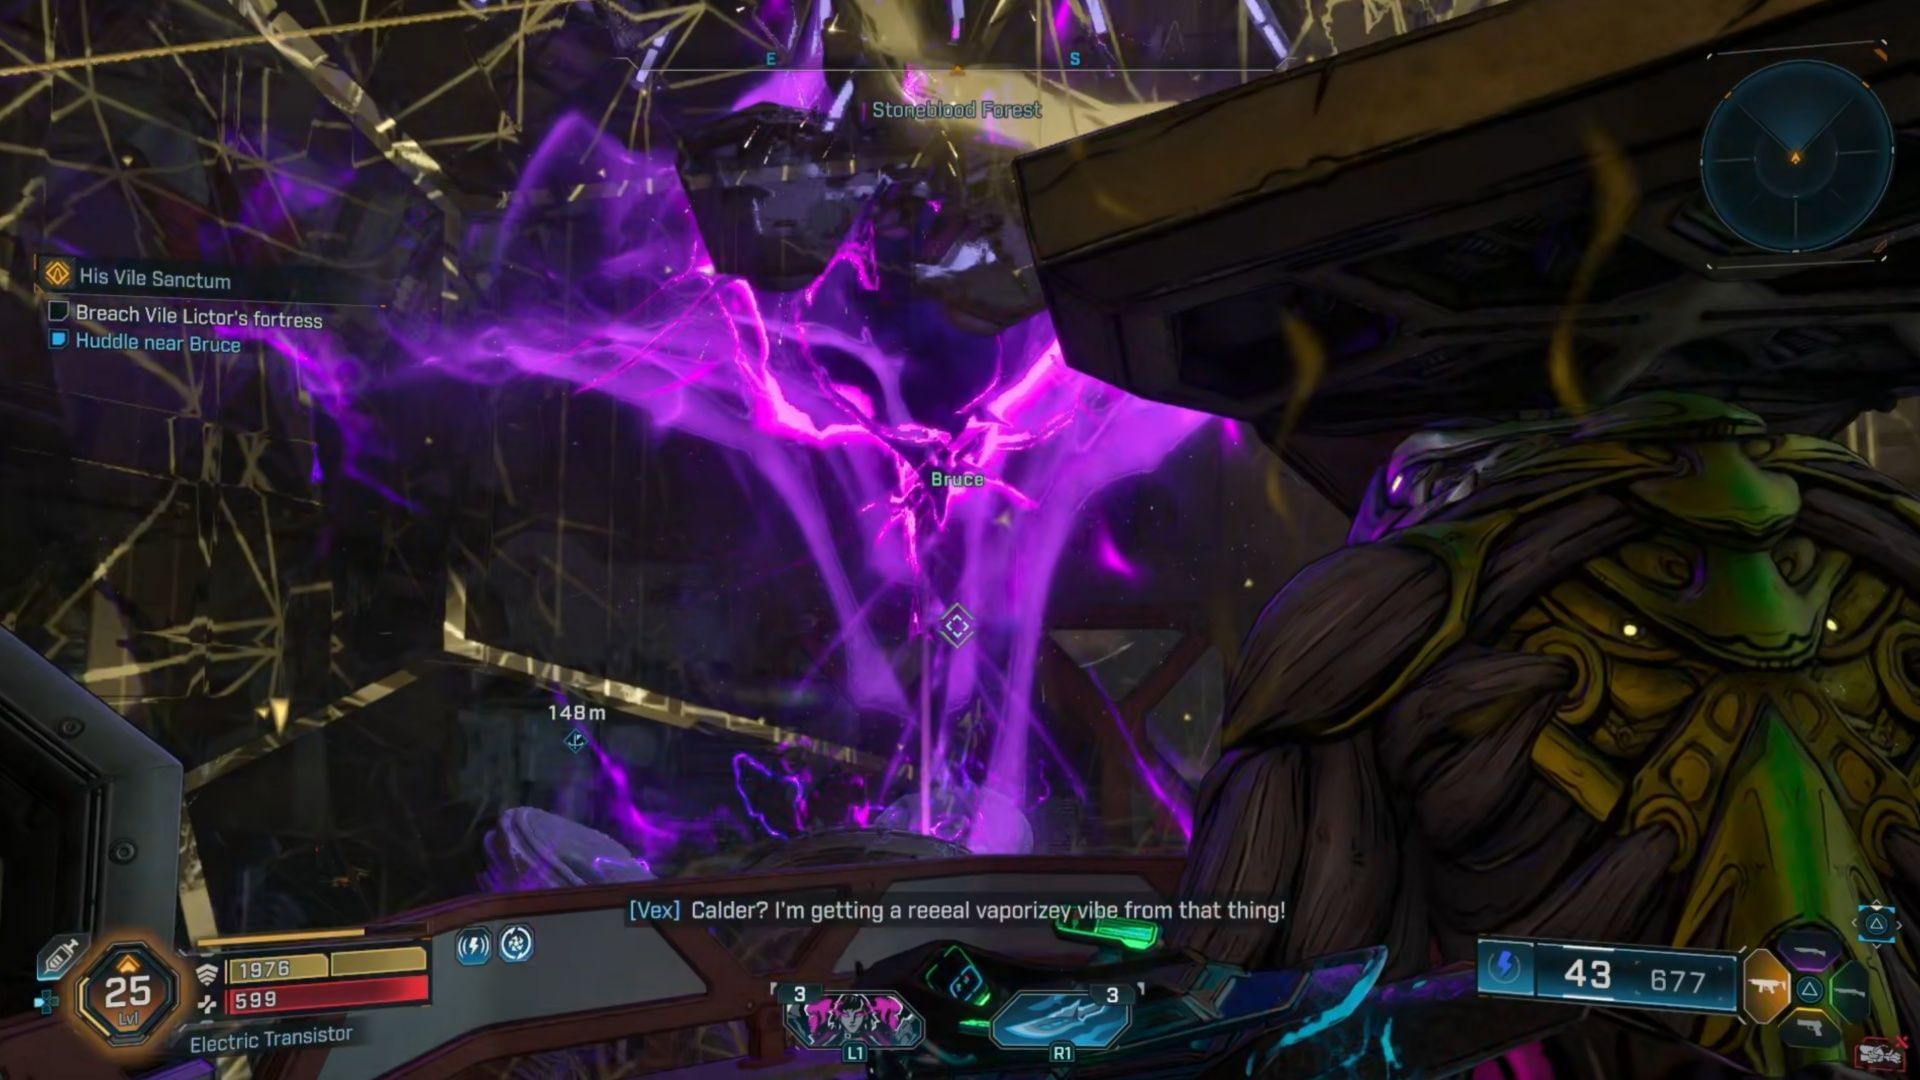
There’s about to be a titanic explosion, as the result of all your meddling, but thankfully, Bruce can tank it for you. Just rush over to where Bruce is and stand next to him to survive this explosive wave of power in Borderlands 4. Why can’t he just stick around the whole game? It would sure solve a lot of problems.
You’re also going to see a large, ominous, purple portal. Go through it, and you’ll find yourself closer to Vile Lictor’s Fortress in no time at all. You’ll still need to find a way in, and as usual, Bruce is going to give you something that will get you through the next several sections of this dungeon. After a little bit of a delay, you’ll be at the next section of Borderlands 4’s His Vile Sanctum mission.
8) 7) Breach Vile Lictor’s Fortress, Enter Phase Rift, Find Bruce, Find engineering bay
You’ll find yourself in a cave full of Creeps, so battle your way through them, until you get to the Phase Rift. It’s a long corridor, this cave, and it’s going to feature several badass Creeps, but they aren’t incredibly powerful. Just keep moving forward, until you see the Phase Rift. If you’ve been into Augur Mines, you’ve seen these after defeating the boss.
This time you’ll land in another technological area, so push your way through the Order forces, and use the next Phase Rift you find. Now you’re outside Vile Lictor’s Fortress, but you still need a way in. Battle your way through Thunderheads and other Order enemies once you get outside of this building, but make sure to top up your ammo before you do.
You also need to find the remains of Bruce while you’re here; his control core is going to help us. The quest marker will guide you right to Bruce’s body, so pick up his Control Core, and use the ECHO Device to guide you to the Engineering Bay.
You can do this while there are still enemies around, so keep that in mind. I recommend fighting everyone before going to the Engineering Bay, though; solid exp, and potential for great loot.
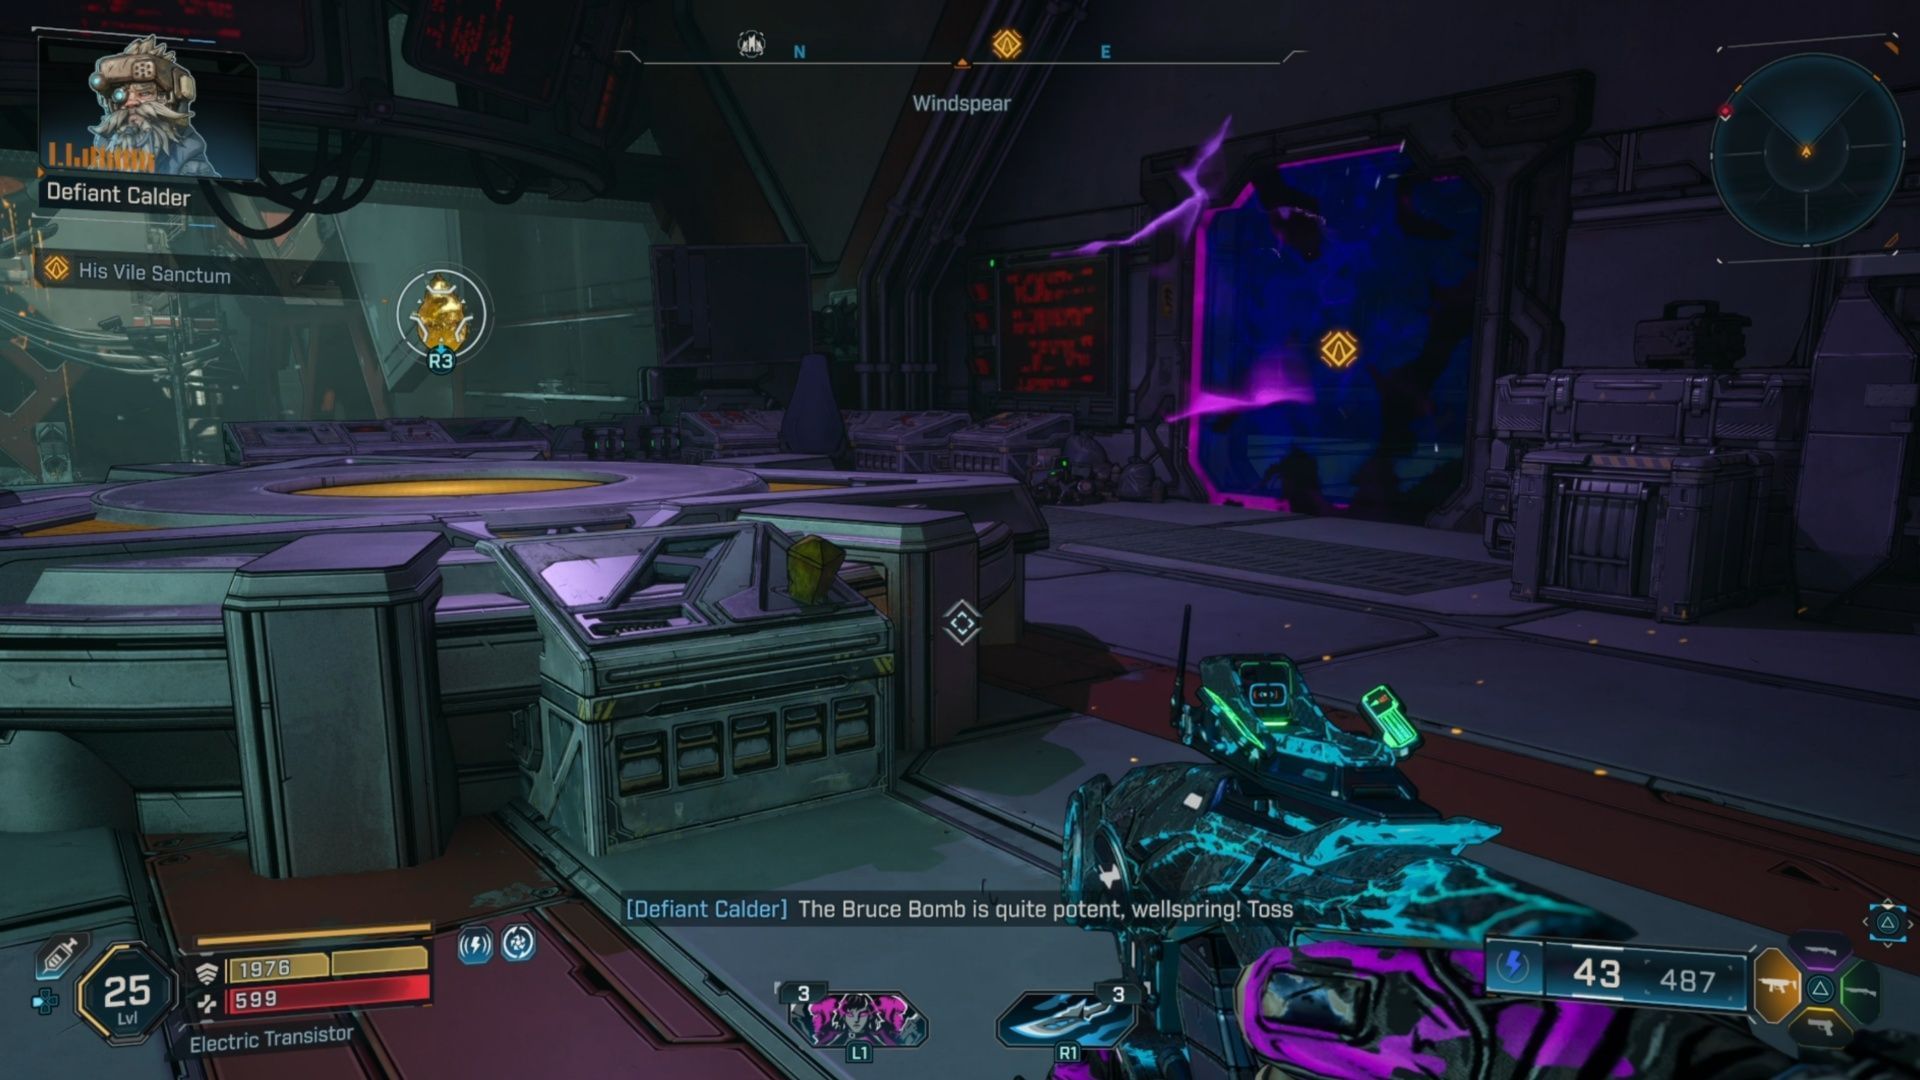
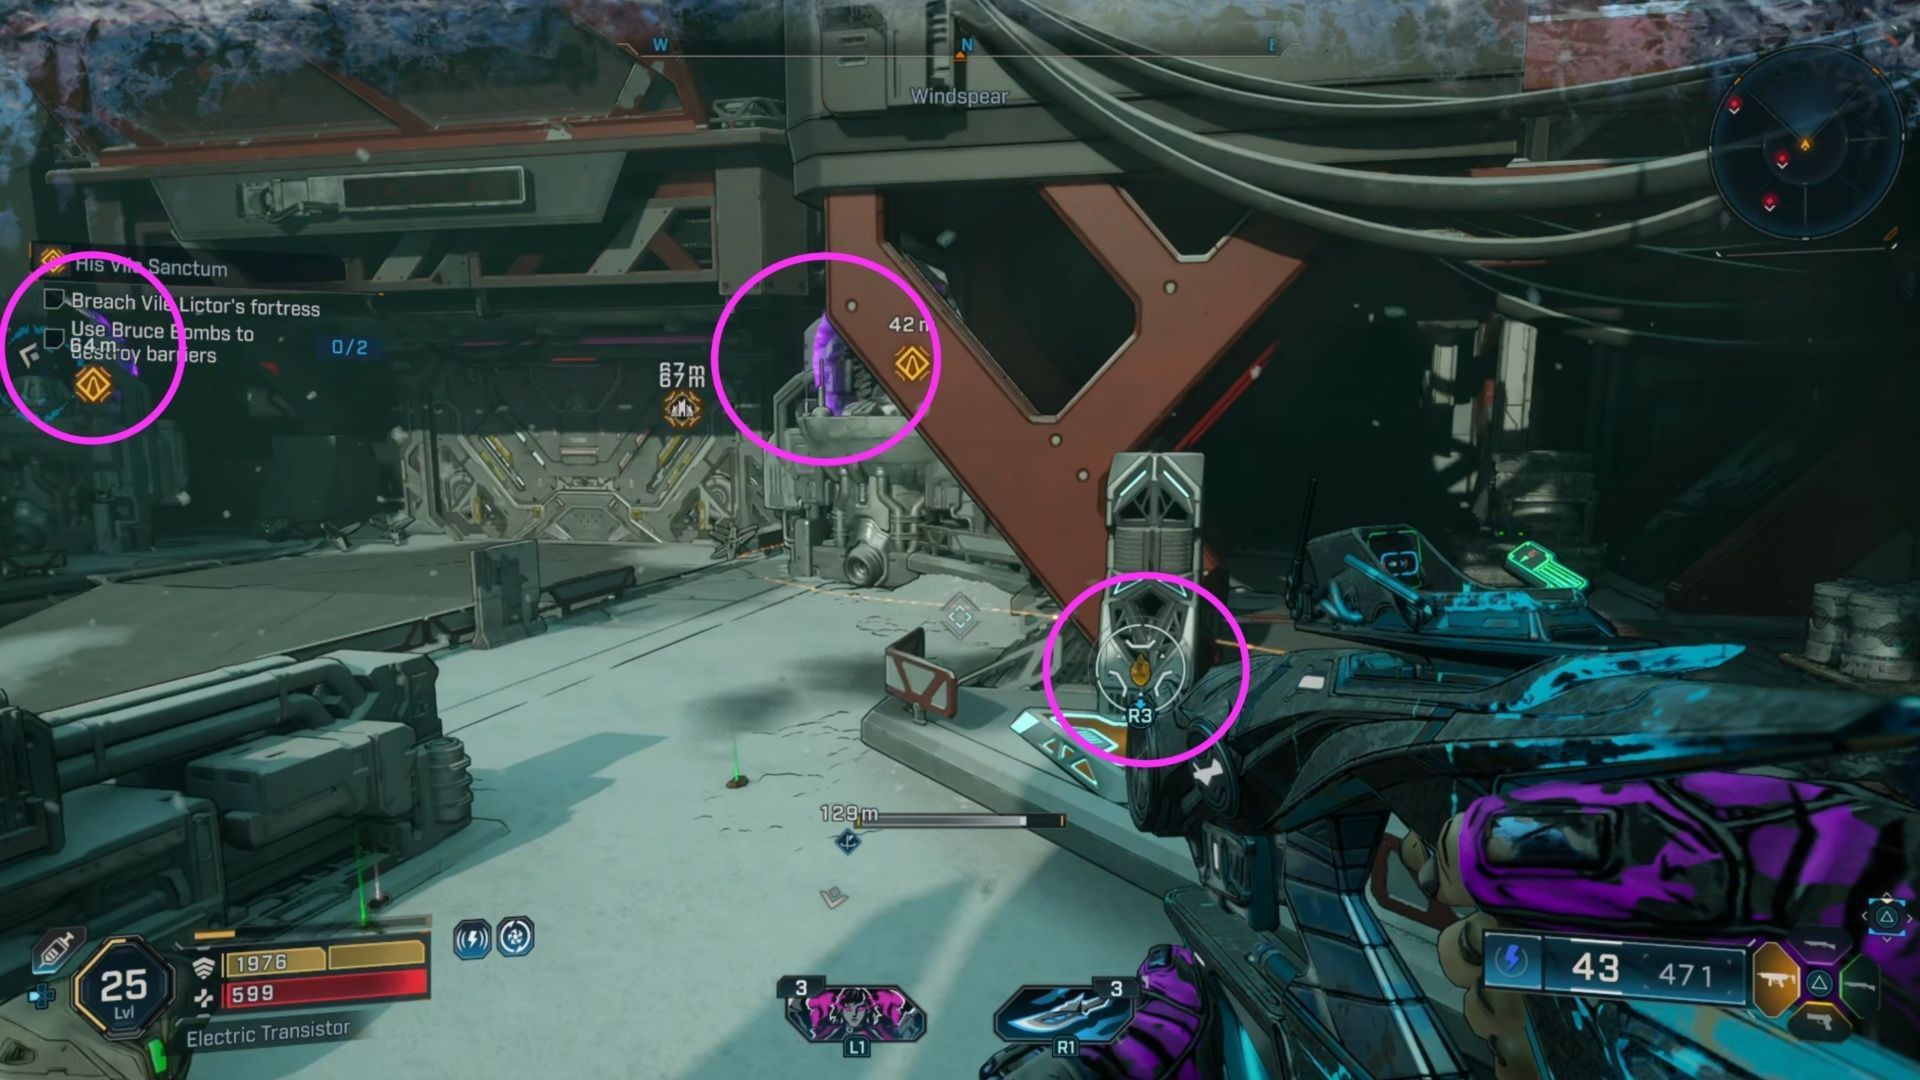
9) 7) Breach Vile Lictor’s Fortress, Insert Bruce’s control core, destroy barrier, use Bruce Bombs to destroy barriers
When you get to the Engineering Bay for Borderlands 4’s His Vile Sanctum mission, slot the core into the machine as Defiant Calder instructs. This will give you access to Bruce Bombs in certain sections of the map. They’ll break down any purple barriers you see. The catch is that if you get hit while carrying one, it seems to go away, and they also are on a timer.
You can see the bomb in the above screenshot, and the purple barrier. Get used to these, because you’re going to see quite a few of them going forward. Break down that first barrier, grab another bomb, and throw it at the purple energy field up ahead that guards a weapon chest, if you are looking for more loot.
Head back outside, and you’ll see another Bruce Bomb generator near the two Barriers you need to break down. Just grapple the Bruce Bomb and throw one at both of the barriers on the left and right side of the gates, then shoot the cores like you did earlier. Now, you can progress to the next section of Borderlands 4.
10) Kill Vile Lictor, Destroy Phase barrier
Now that you’re inside Vile Lictor’s Fortress in Borderlands 4, the primary objective has become Kill Vile Lictor. You’ll need to break down the first Phase Barrier you come across, so you can progress.
You should also take the time to refill your ammo in this room, and sell off any junk weapons and gear you don’t need. You’re going to need every single shell and bullet going forward. The next room will have plenty of Order forces for you to defeat, so take them down. This is a large area riddled with Badasses and annoying enemies though, so take your time and don’t let them surround you.
The next room has a Bruce Bomb you can use, but it’s behind a door you can’t get through. Walk around to the other side of the wall, and you’ll find a grate you can Grapple Down and crawl through. Activate the button in here, grab the Bruce Bomb, and blow up the Phase Barrier to progress through this Borderlands 4 mission.
11) Kill Vile Lictor, Destroy Eridian Relics
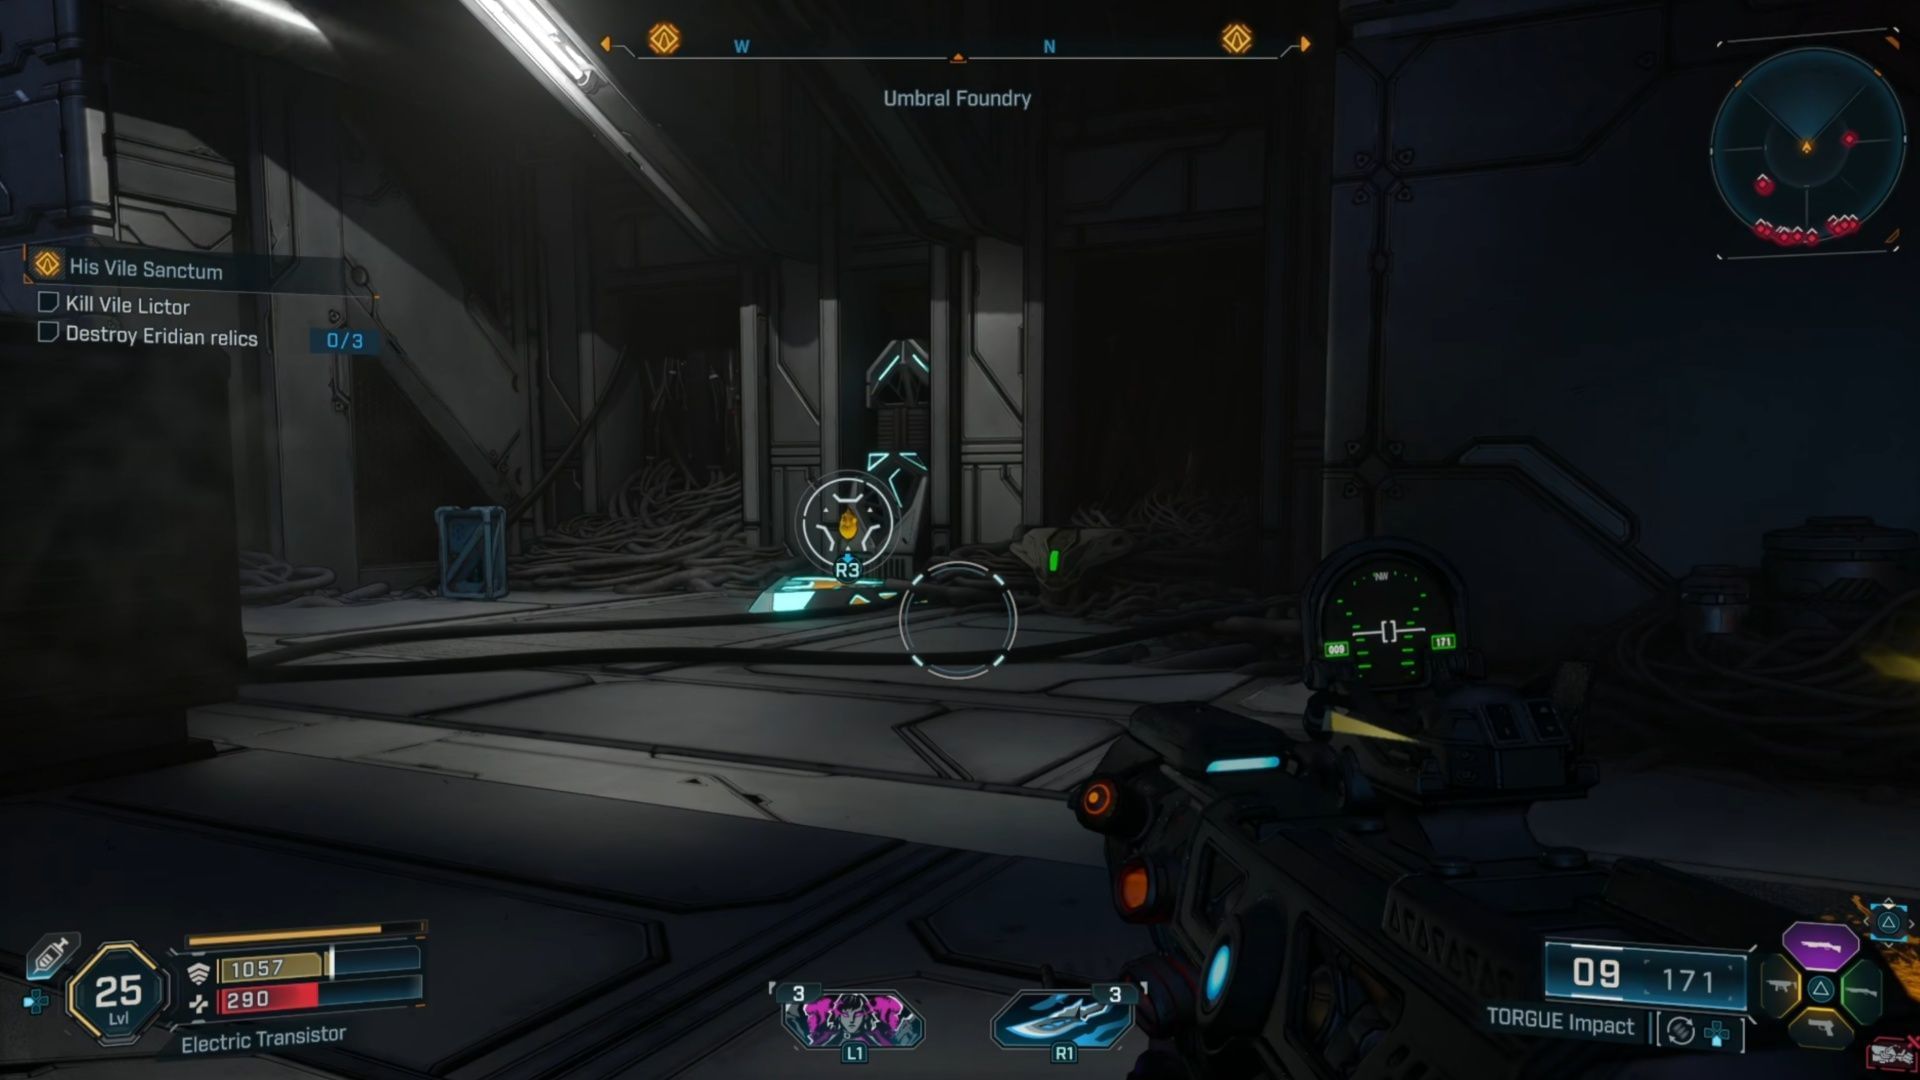
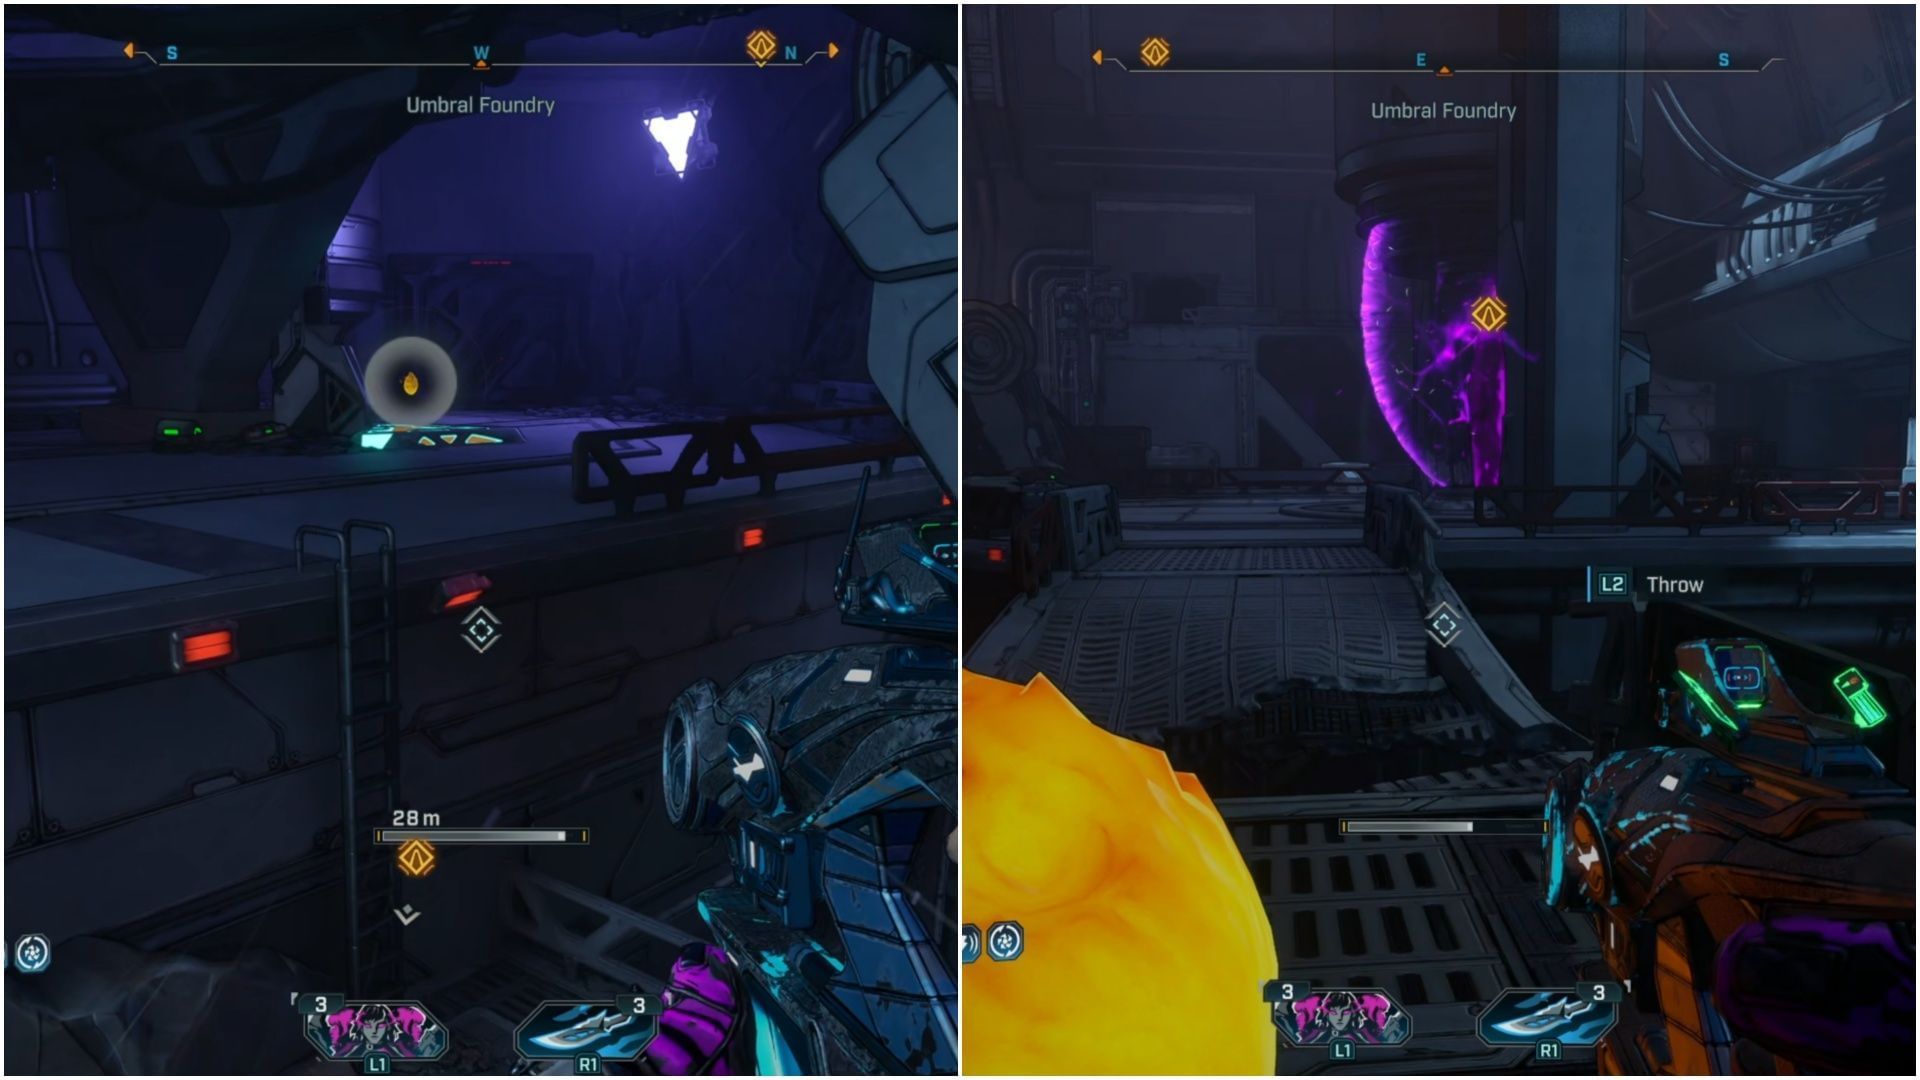
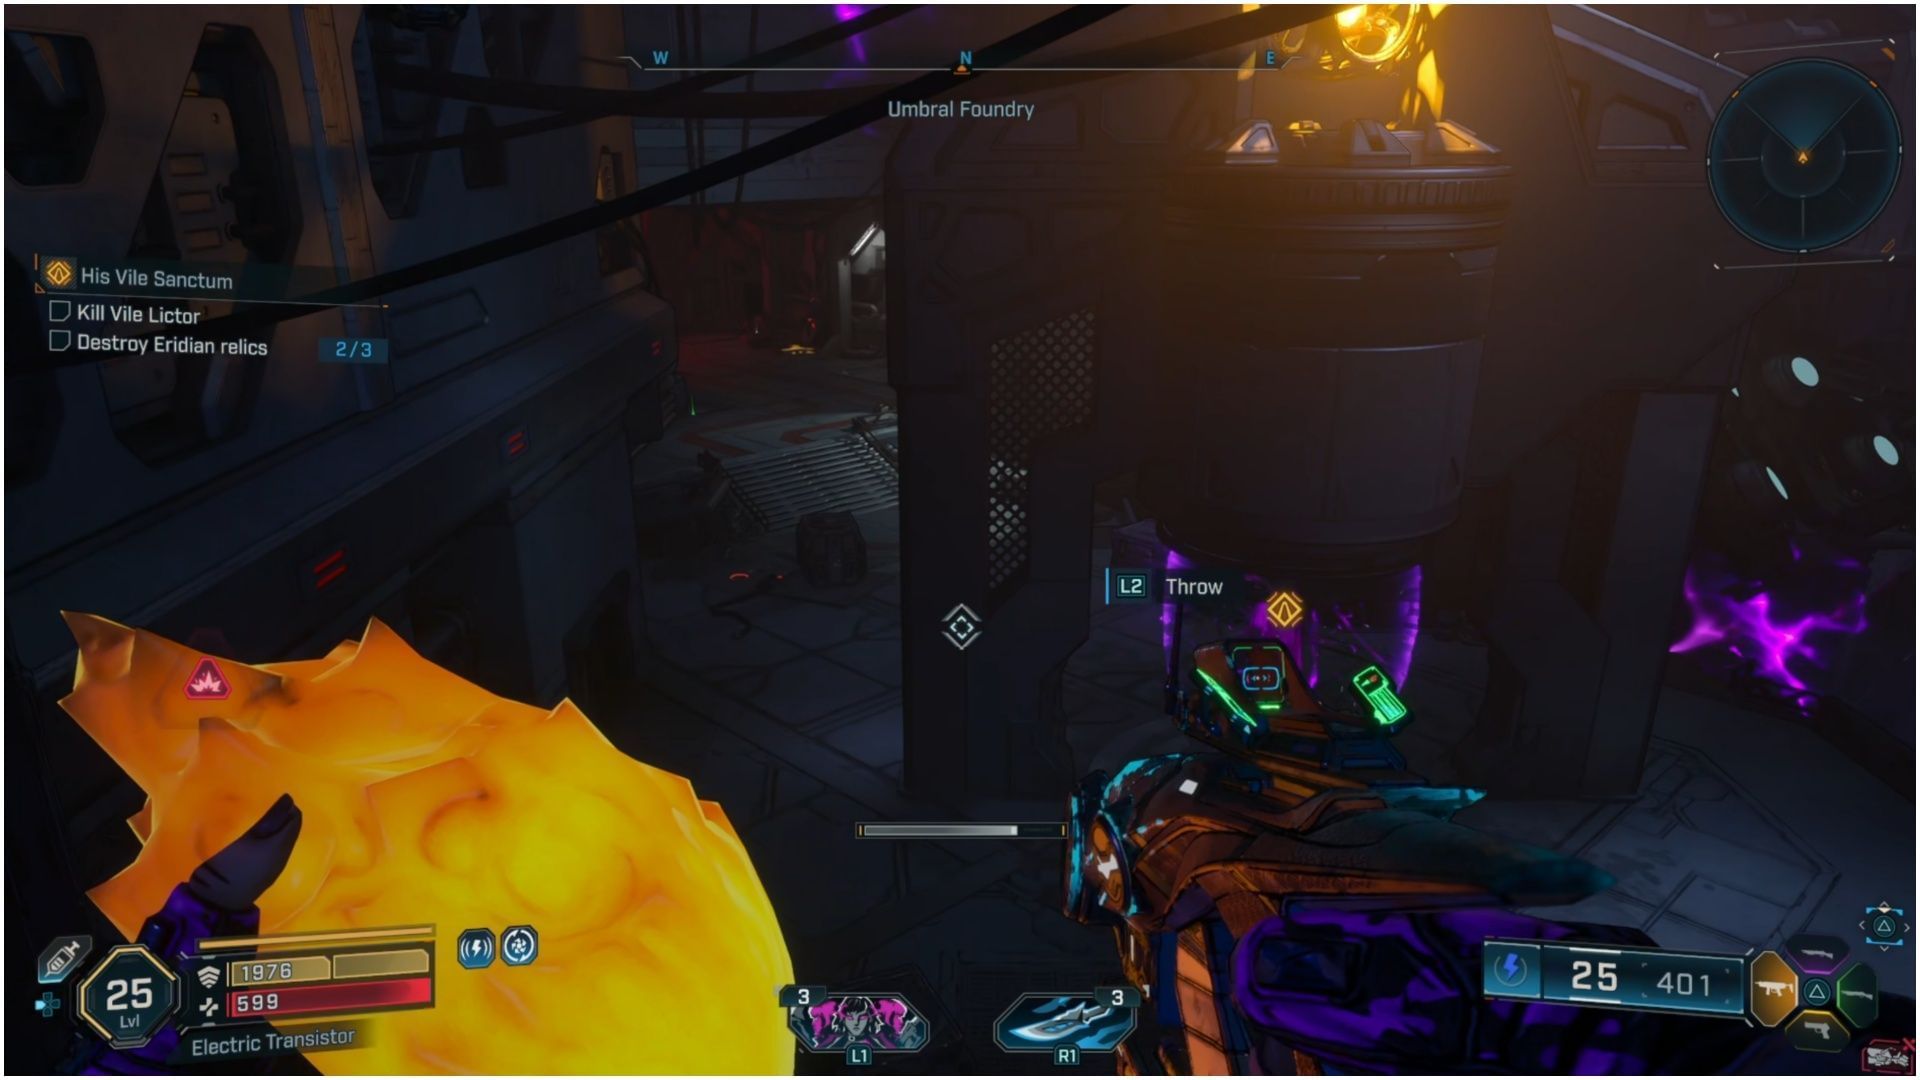
Next up in Borderlands 4 is a gigantic room with enemies that frankly, never seem to go away. It also could be that I kept dying in this room trying to figure out what was going on, though. There are three Eridian Relics behind purple barriers in this room. If you head left when you enter the room, you’ll find a Bruce Bomb generator.
There’s a Purple Barrier to your left, but defeat the enemies before you try and throw the Bruce Bomb at them just in case. You might be able to throw it from a good distance, but if that fails, clear out the enemies around it, then throw. When the barrier’s down, a few shots will stop the Eridian Relic.
On the far right side of the room, you’ll find a broken bridge to jump over, and a ladder to climb; another Bruce Bomb generator can be found here. Turn around from here, and throw it to the Purple Barrier immediately ahead of you, to clear out Eridian Relic #2.
Go back to the platform where the second Bruce Bomb was, and look down from the point you picked it up (facing north on the compass) to find third Eridian Relic for this part of Borderlands 4’s main mission.
12) Kill Vile Lictor, Kill Vile Twins
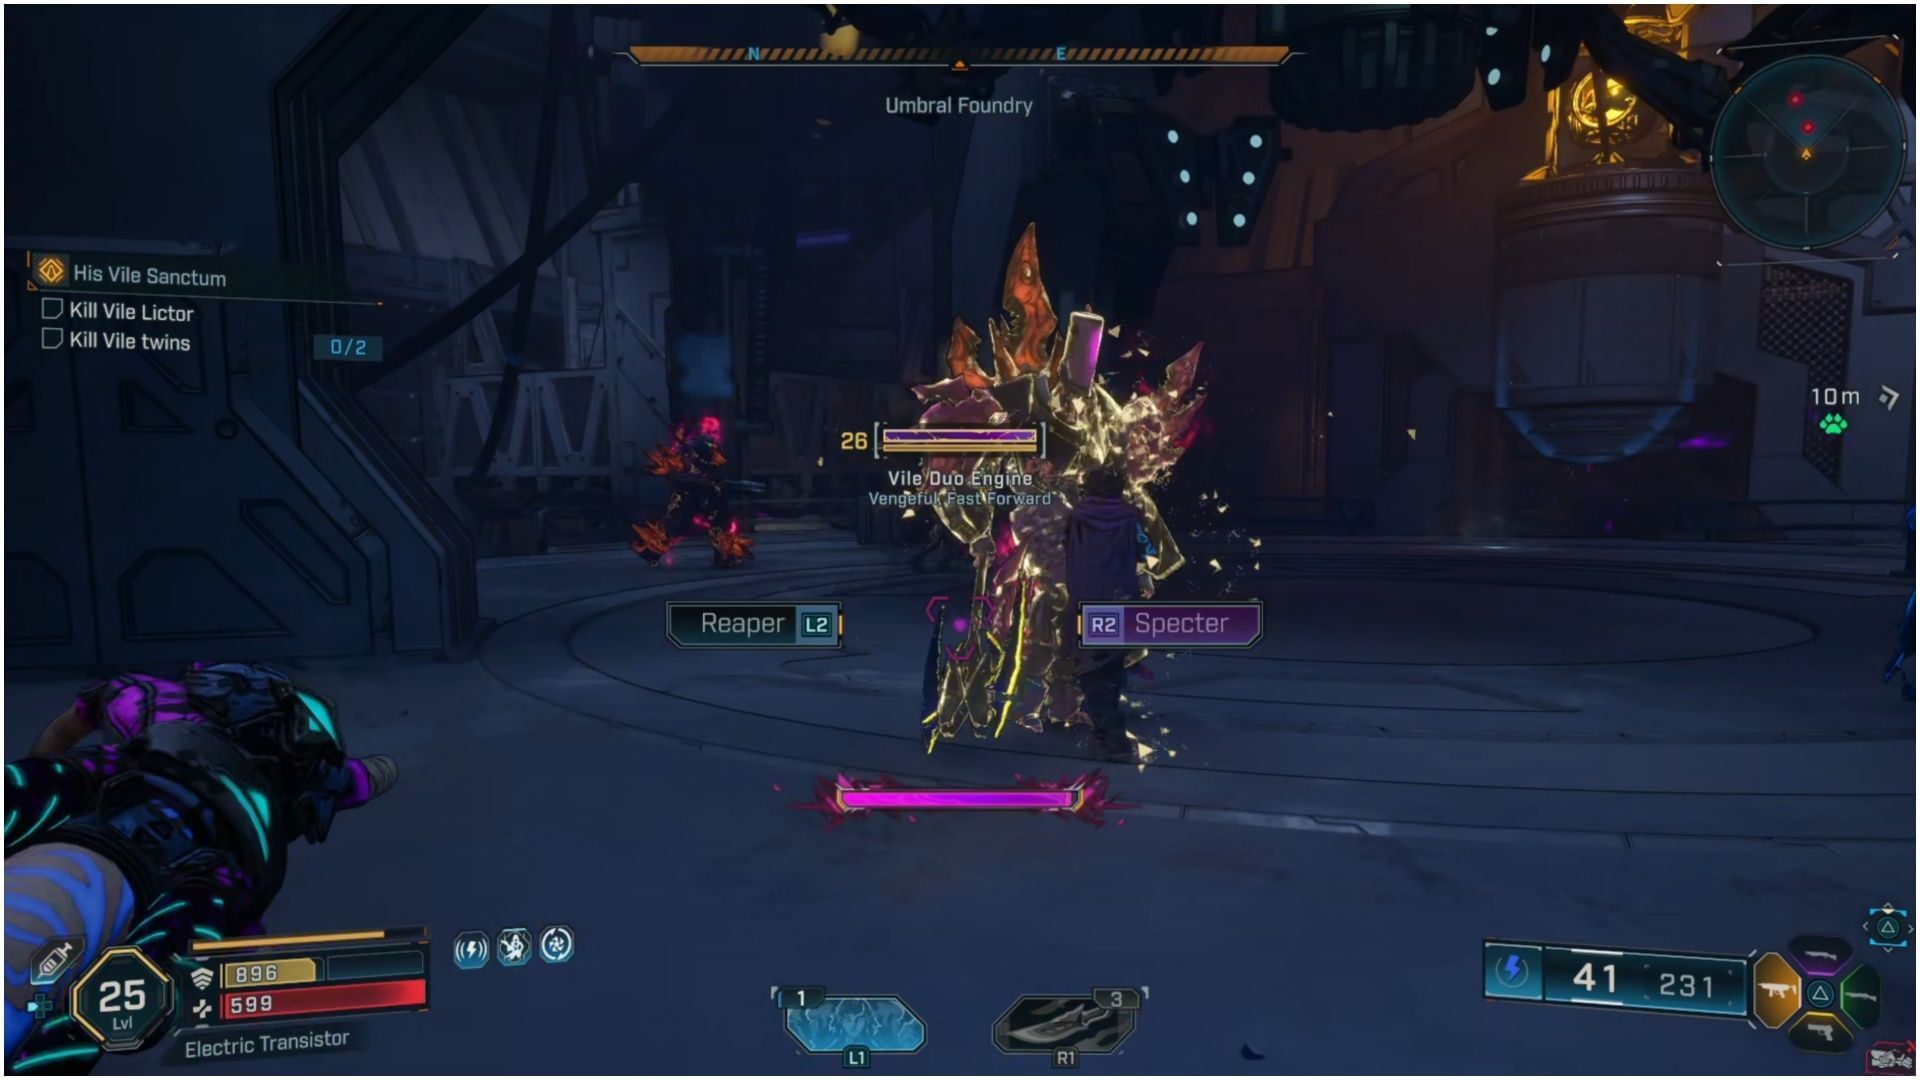
Hop back up on the main platform of this room of Borderlands 4, and Vile Lictor’s henchmen, the Vile Twins will show up. As you can probably predict, they’re also Vile Enemies. They have powerful melee strikes with their axes, Cryo Damage Blasts, and Cryo Ammo.
Focus on one of them at a time, and eliminate their shields, and then the Twin themselves. They aren’t really difficult, since it’s only the two of them and nobody else. If one of them glows gold, they’re going to try and knock you off the platform, but you can glide back into position.
At least you aren’t alone, though; Amara helps you in this battle and can Revive you. Beware of the Vile Twins’ leaping axe attacks and cold blasts, and their powerful knockback blow, you should be just fine.
13) Kill Vile Lictor, Continue with Amara, Activate Elevator (Optional Objective: Check on Amara)
After you beat down the Vile Twins, follow Amara in Borderlands 4, and go to activate the elevator. There are still more enemies ahead, but it’s nothing nearly as bad as the previous rooms were. Head down the elevator, and watch the next cutscene. You can stop to check on Amara, to your right, before heading down to fight Vile Lictor himself.
14) Kill Vile Lictor
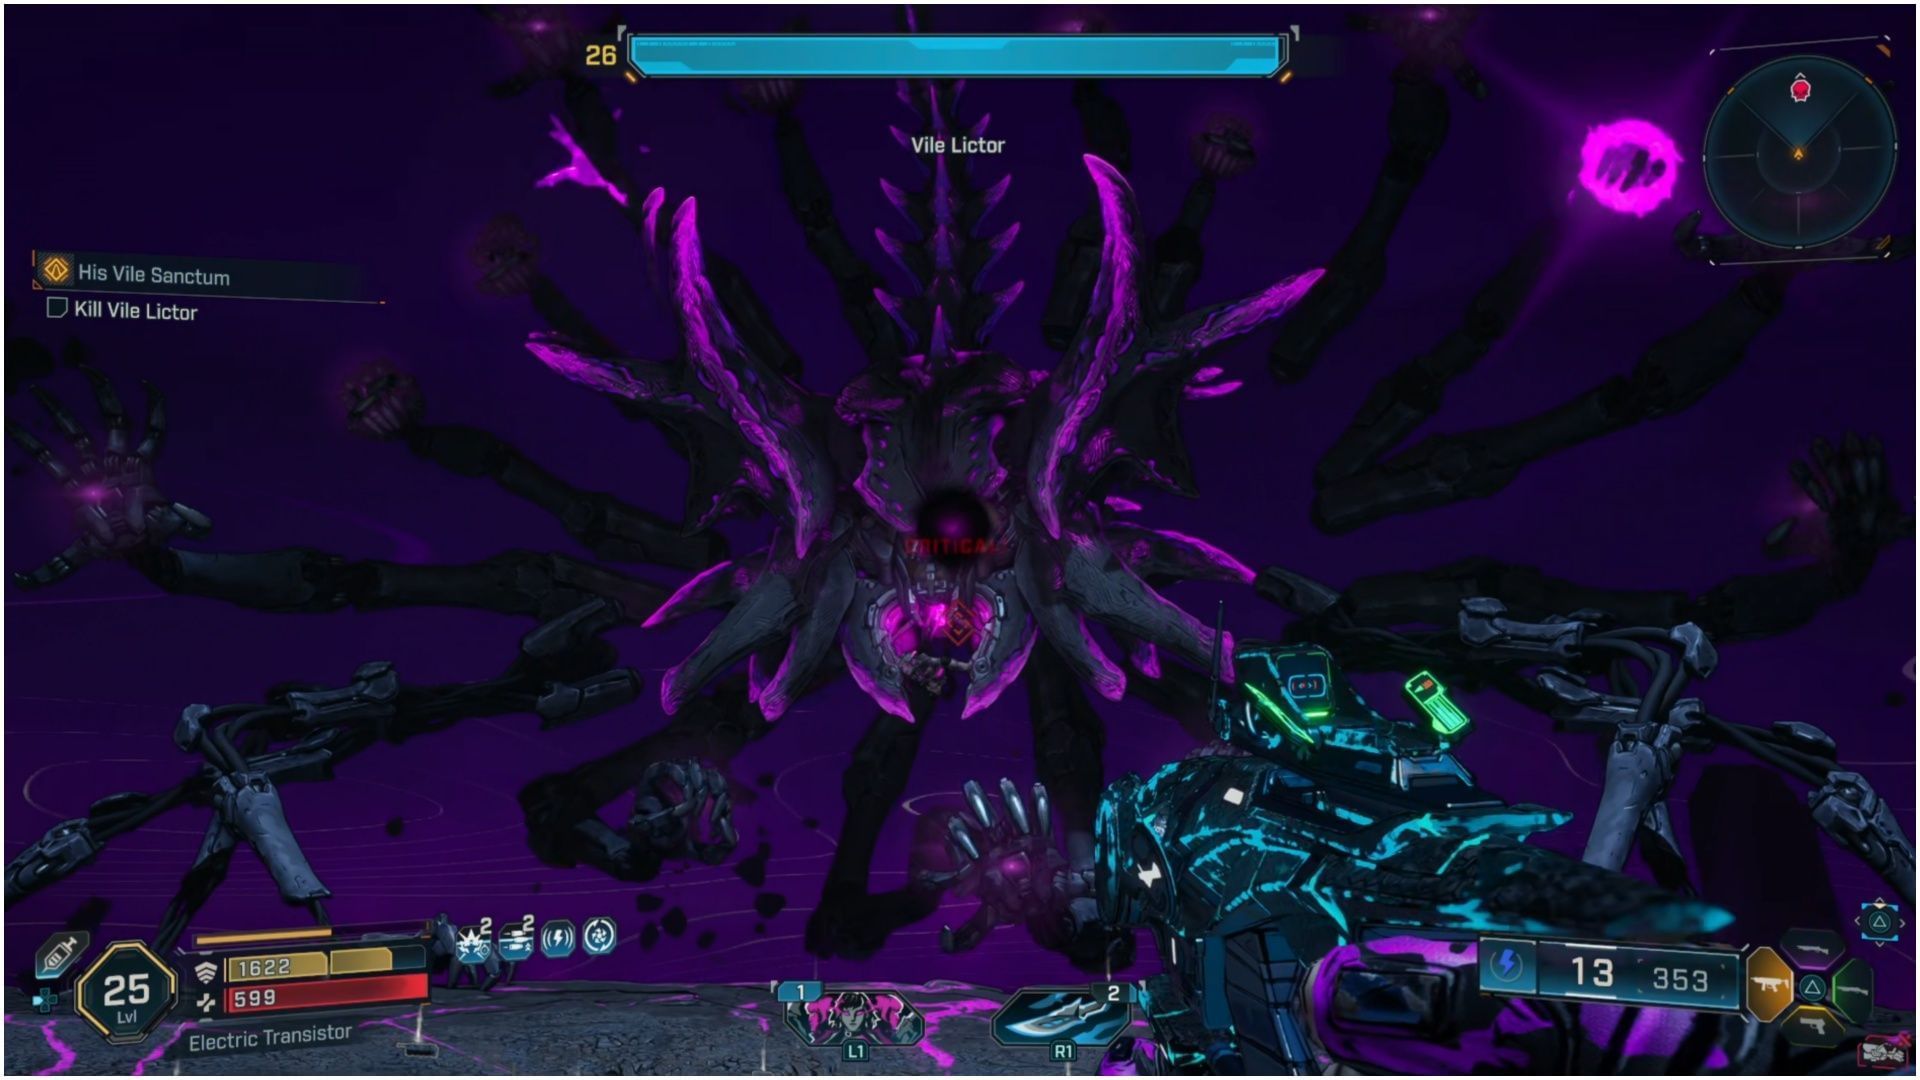
Vile Lictor isn’t a terribly difficult boss, to be honest. Before you can damage him at all, you need to destroy at least one of Lictor’s Limbs. I recommend blowing them all up, because they have low health. The more limbs you break, the more openings you reveal to damage him. As Vex, this just means you summon Specters to open fire.
The Limbs are in the upper left and right of the screen, and have little blue health bars. During this phase he’ll also launch purple energy walls at you, but there are gaps between them, and you can probably jump over them. Having an electrical damage gun will be to your favor here. When he stops taking damage, break more limbs, and resume shooting.
His Limbs can also fire energy claws at you, but they didn’t hit especially hard. Still, try to avoid them if you can. Wear down his first health bar this way, and you’ll have to wait for his brief cutscene to resume battle.

Now he becomes mobile, and crawls around the arena. There’s tons of ammo on the ground too, so thank goodness for that. He can fire lots of energy claws in this phase. When he creates a purple orb in the middle of the ground, look above you for a grapple point, or you’re going to die.
Vile Lictor will probably do this a second time during this Borderlands 4 fight. Just keep chasing him around and shooting him, and he’ll go down in no time in phase 2. You can land a bunch of critical hits when his face opens up, so take those times to really lay in the firepower.
15) Take Lictor’s Bolt, return to Calder
Once Vile Lictor is defeated in, grab the Bolt, and make sure to watch the cutscene that follows. It informs something that could be a problem much later in the game. Return to Calder when you’re ready, and His Vile Sanctum will end in Borderlands 4.
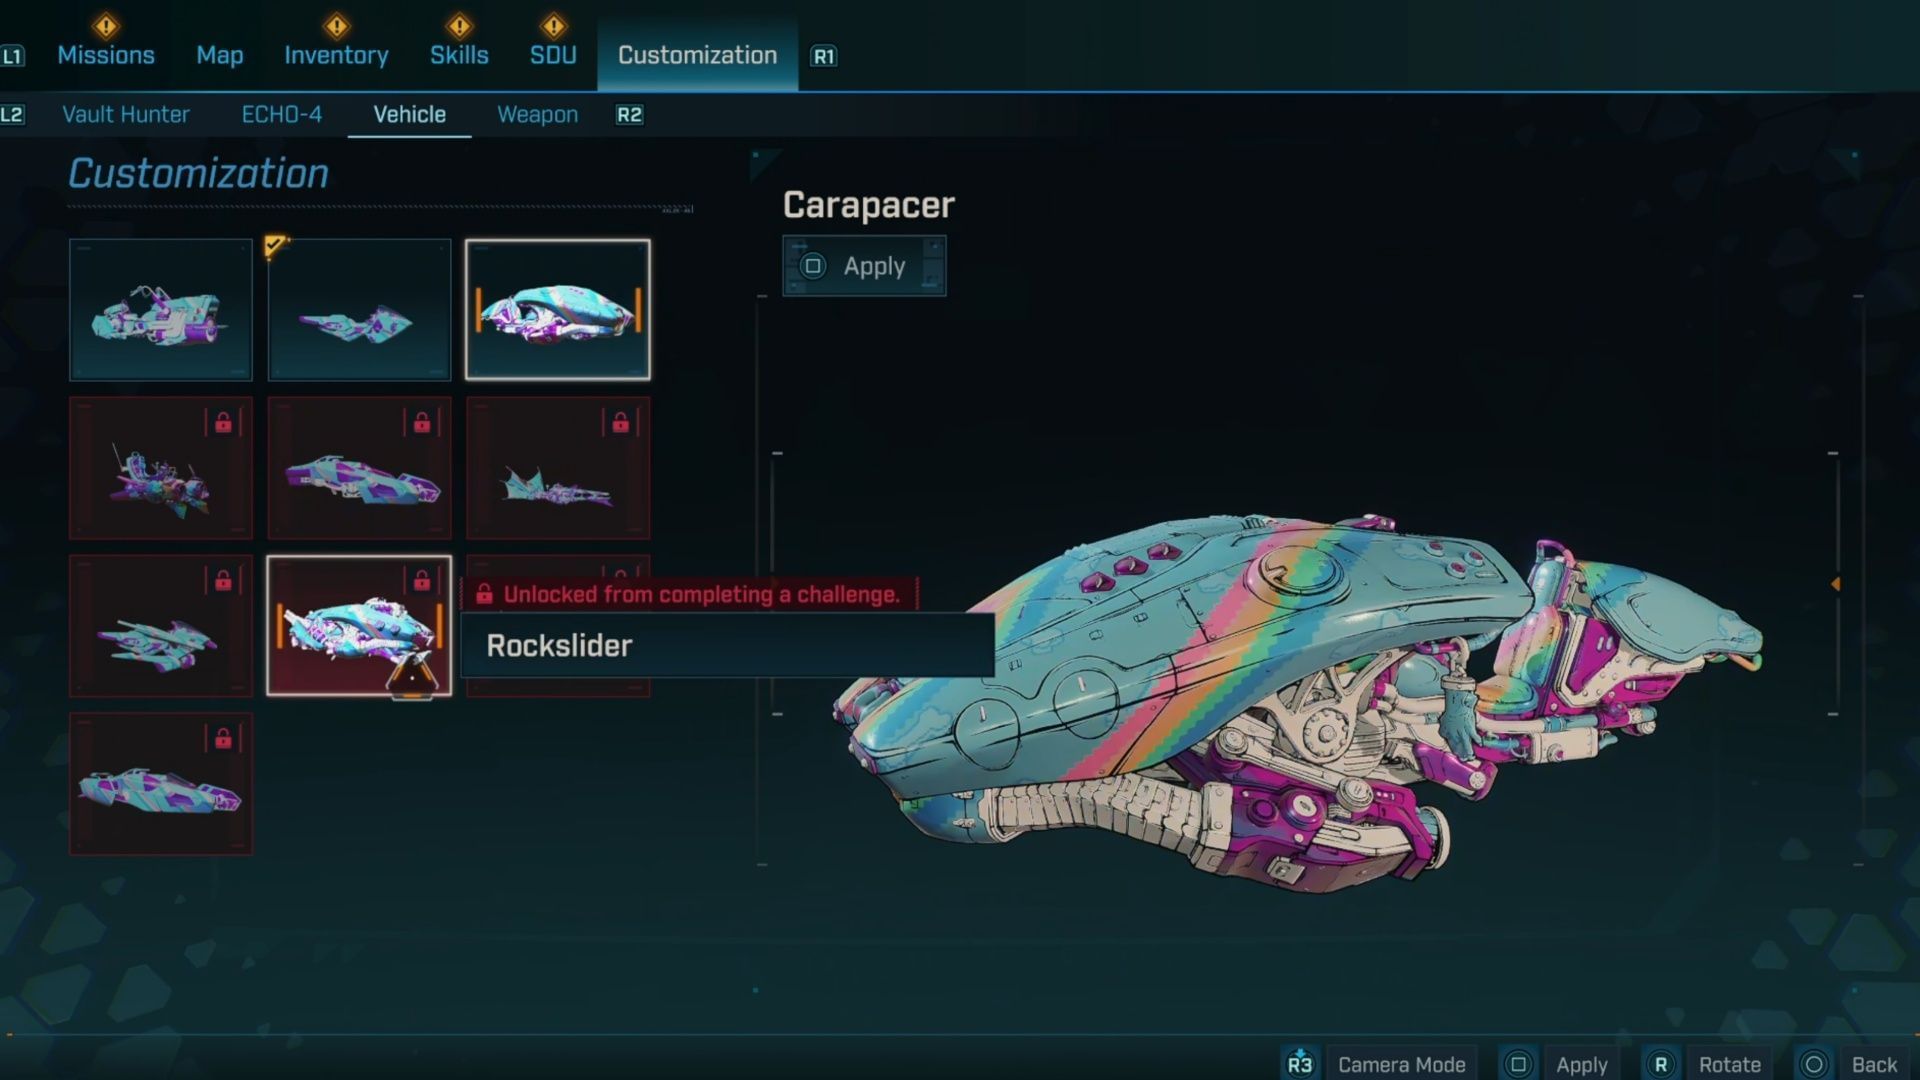
If you haven’t already, you should now head over to Carcadia Burn for the next major story point in Borderlands 4. Your rewards for this mission are Xp, Money, Eridum, a Sniper Rifle, the Armed Collection Vault Hunter Head, and Carapacer Vehicle.
Check out our other Borderlands 4 guides and features
- All Weapon Manufacturers in Borderlands 4
- Who is the villain of Borderlands 4?
- What are Enhancements in Borderlands 4?
- Does Borderlands 4 have co-op and crossplay?
