
'%20x='0'%20y='0'%20height='100%25'%20width='100%25'%20%0A%20%20%20%20%20%20%20%20%20%20xlink%3Ahref='data:image/jpg;base64,/9j/2wBDAAYEBQYFBAYGBQYHBwYIChAKCgkJChQODwwQFxQYGBcUFhYaHSUfGhsjHBYWICwgIyYnKSopGR8tMC0oMCUoKSj/2wBDAQcHBwoIChMKChMoGhYaKCgoKCgoKCgoKCgoKCgoKCgoKCgoKCgoKCgoKCgoKCgoKCgoKCgoKCgoKCgoKCgoKCj/wgARCAAGAAoDASIAAhEBAxEB/8QAFgABAQEAAAAAAAAAAAAAAAAAAAUH/8QAFQEBAQAAAAAAAAAAAAAAAAAAAAP/2gAMAwEAAhADEAAAAM8qlH//xAAcEAACAgMBAQAAAAAAAAAAAAABAgMFAAQRBmH/2gAIAQEAAT8Apbzaq49+0iCPDIESNHXpXjYvrnZQxEvT8TP/xAAYEQADAQEAAAAAAAAAAAAAAAABAhEAA//aAAgBAgEBPwBOrG07/8QAFhEBAQEAAAAAAAAAAAAAAAAAAQAC/9oACAEDAQE/AHBf/9k='%3E%3C/image%3E%3C/svg%3E)
Each region of Borderlands 4 has a variety of activities to take part in, such as Propaganda Speaker. This activity has you deploy your ECHO Device to hack one of the many bullhorns scattered across Kairos. They constantly spew propaganda supporting the current regime, so it’s up to you to put a stop to it, if for no other reason than to cut down on that noise pollution. It also grants one of the highest amounts of SDU tokens out of any activity; at least in Fadefield.
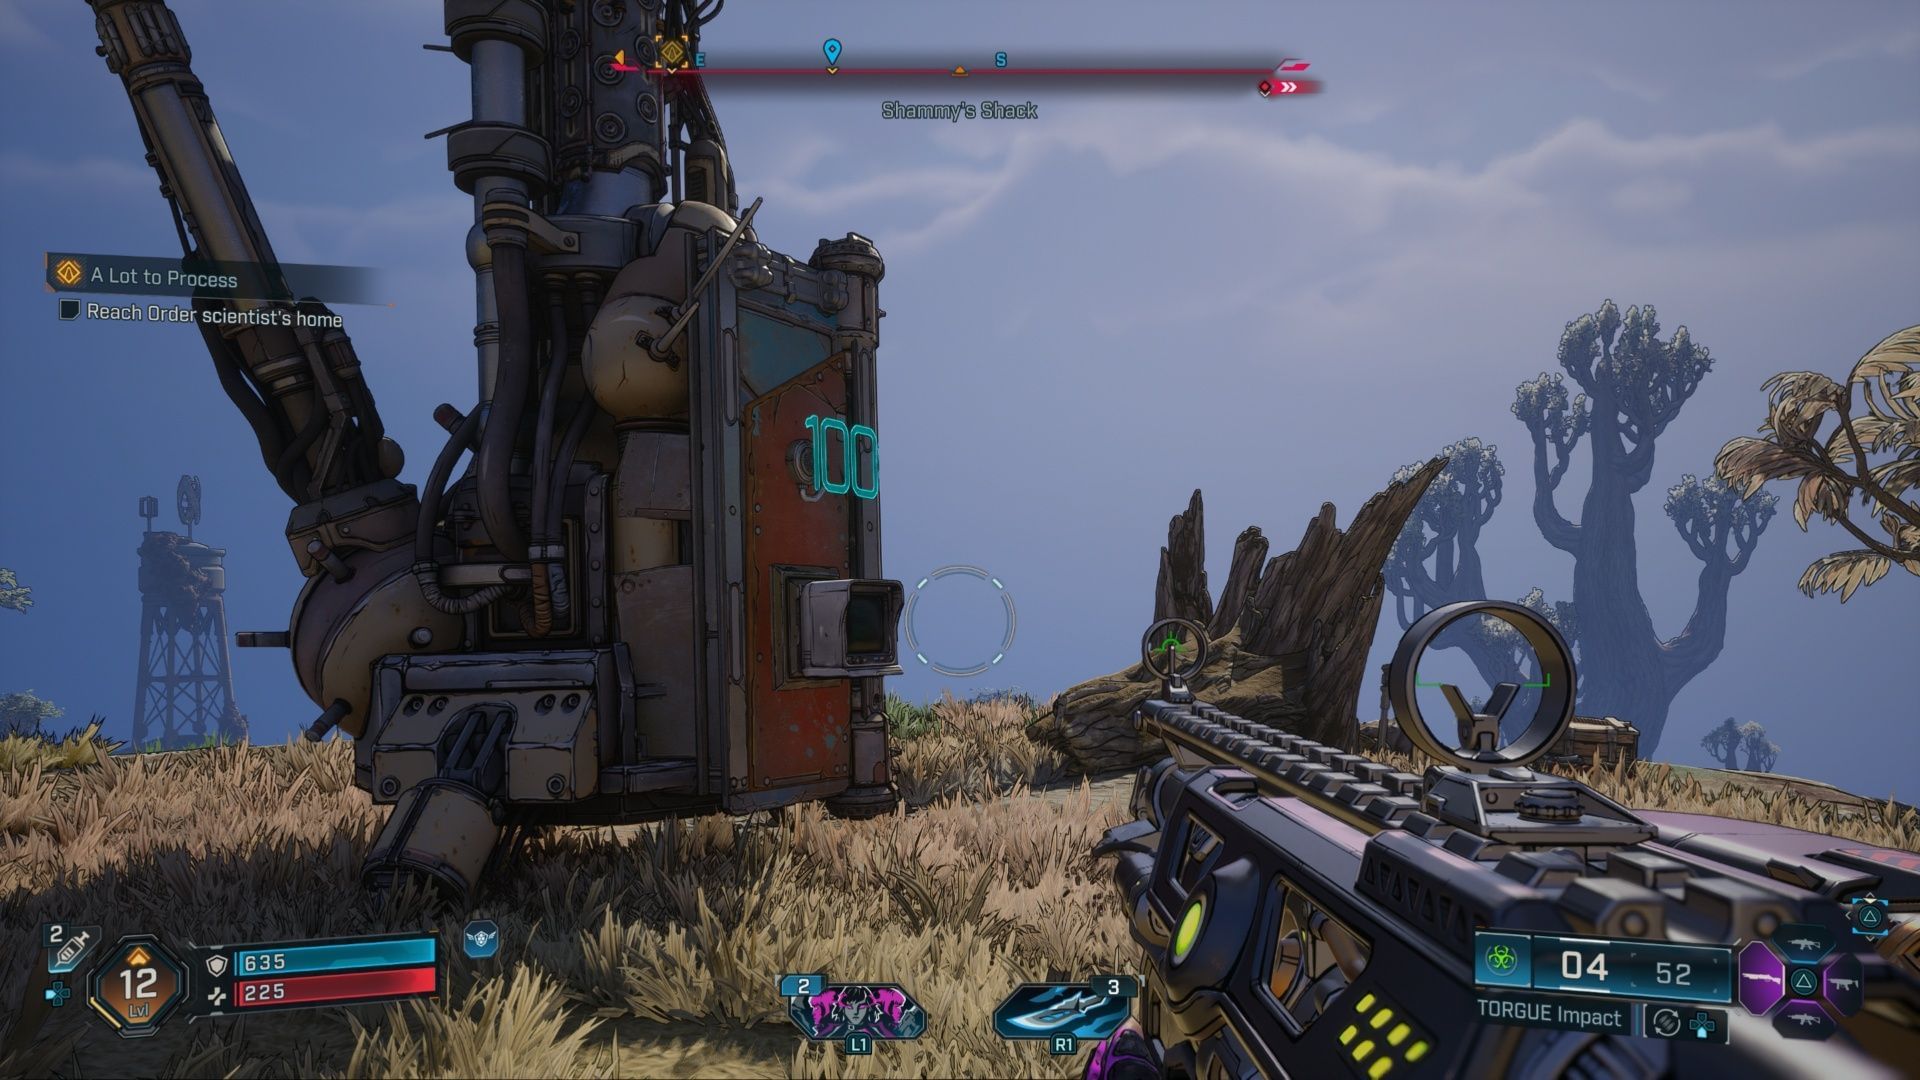
The first time you’ll likely run into this activity is the bullhorn near Shammy’s Shack during the Hangover Helper side mission. It’s a challenging activity where you do battle with some pretty heavy waves of enemies, but it’s worth completing. If you want to know how to take part in Propaganda Speaker activities in Borderlands 4, we’re here to help.
How to take complete the Propaganda Speaker activity in Borderlands 4
Anytime you see a Blue Bullhorn icon, you can take part in the Propaganda Speaker activity in Borderlands 4. If it’s green, you’ve already completed it. When you arrive at the area, interact with the tower; it’ll begin the process of hacking the bullhorn. The tower itself will have a number displayed on it, from 0-100.

At numbers 25, 50, and 75 it will pause. When it reaches 100, the activity is complete. Enemies are going to come in pretty big waves, and once the number stops at the above thresholds, it won’t continue until you’ve killed everyone nearby. The number will be in one of three colors, each with their own meaning:
- Green: The number is going up
- Yellow: The number has frozen
- Red: The number is counting down
If it gets to 0, then Propaganda Speaker resets, and you have to start this Borderlands 4 activity all over. There’s a circle radius around this activity, and if you leave it, the number starts going down. However, that’s also the trick to getting it done faster.
Feel free to seek out and destroy enemies outside of the circle, but don’t spend too long out there. A good way to have a visual representation of what’s nearby is to turn on the 2D Radar (Under the Gameplay tag of your settings). This gives a better picture of what’s near and easy to kill.

If you leave the circle, and come back before it hits 0, the number will quickly rise to where it was before, giving you a second chance to progress. Once you’ve broken past the 25, 50, and 75% thresholds, and reached 100%, the activity ends, and you receive 20 SDU tokens, which is a huge amount.
The enemy waves are going to be strong for this activity though, and you’ll likely see quite a few Badasses among the enemy ranks. It’s important to use any kind of cover you can, and don’t be afraid to take out enemies before they get to you.
If you see them show up in their drill vehicles, just open fire or launch your Ordinance. In my experience, Vex is one of the best for this activity, because she can set up Specters across the area you’re fighting in, clearing enemies much faster.
Check out our other Borderlands 4 guides and features
- All Weapon Manufacturers in Borderlands 4
- Who is the villain of Borderlands 4?
- What are Enhancements in Borderlands 4?
- Does Borderlands 4 have co-op and crossplay?
