
'%20x='0'%20y='0'%20height='100%25'%20width='100%25'%20%0A%20%20%20%20%20%20%20%20%20%20xlink%3Ahref='data:image/jpg;base64,/9j/2wBDAAYEBQYFBAYGBQYHBwYIChAKCgkJChQODwwQFxQYGBcUFhYaHSUfGhsjHBYWICwgIyYnKSopGR8tMC0oMCUoKSj/2wBDAQcHBwoIChMKChMoGhYaKCgoKCgoKCgoKCgoKCgoKCgoKCgoKCgoKCgoKCgoKCgoKCgoKCgoKCgoKCgoKCgoKCj/wgARCAAGAAoDASIAAhEBAxEB/8QAFgABAQEAAAAAAAAAAAAAAAAAAAUH/8QAFQEBAQAAAAAAAAAAAAAAAAAAAwT/2gAMAwEAAhADEAAAAMBmh0f/xAAcEAEAAQUBAQAAAAAAAAAAAAABAwACBBEhBWH/2gAIAQEAAT8Ax/QgtjyTV+pQ1uO17z7wpzS10MoHAGv/xAAWEQADAAAAAAAAAAAAAAAAAAAAAQL/2gAIAQIBAT8AlH//xAAXEQADAQAAAAAAAAAAAAAAAAAAAQIh/9oACAEDAQE/AKen/9k='%3E%3C/image%3E%3C/svg%3E)
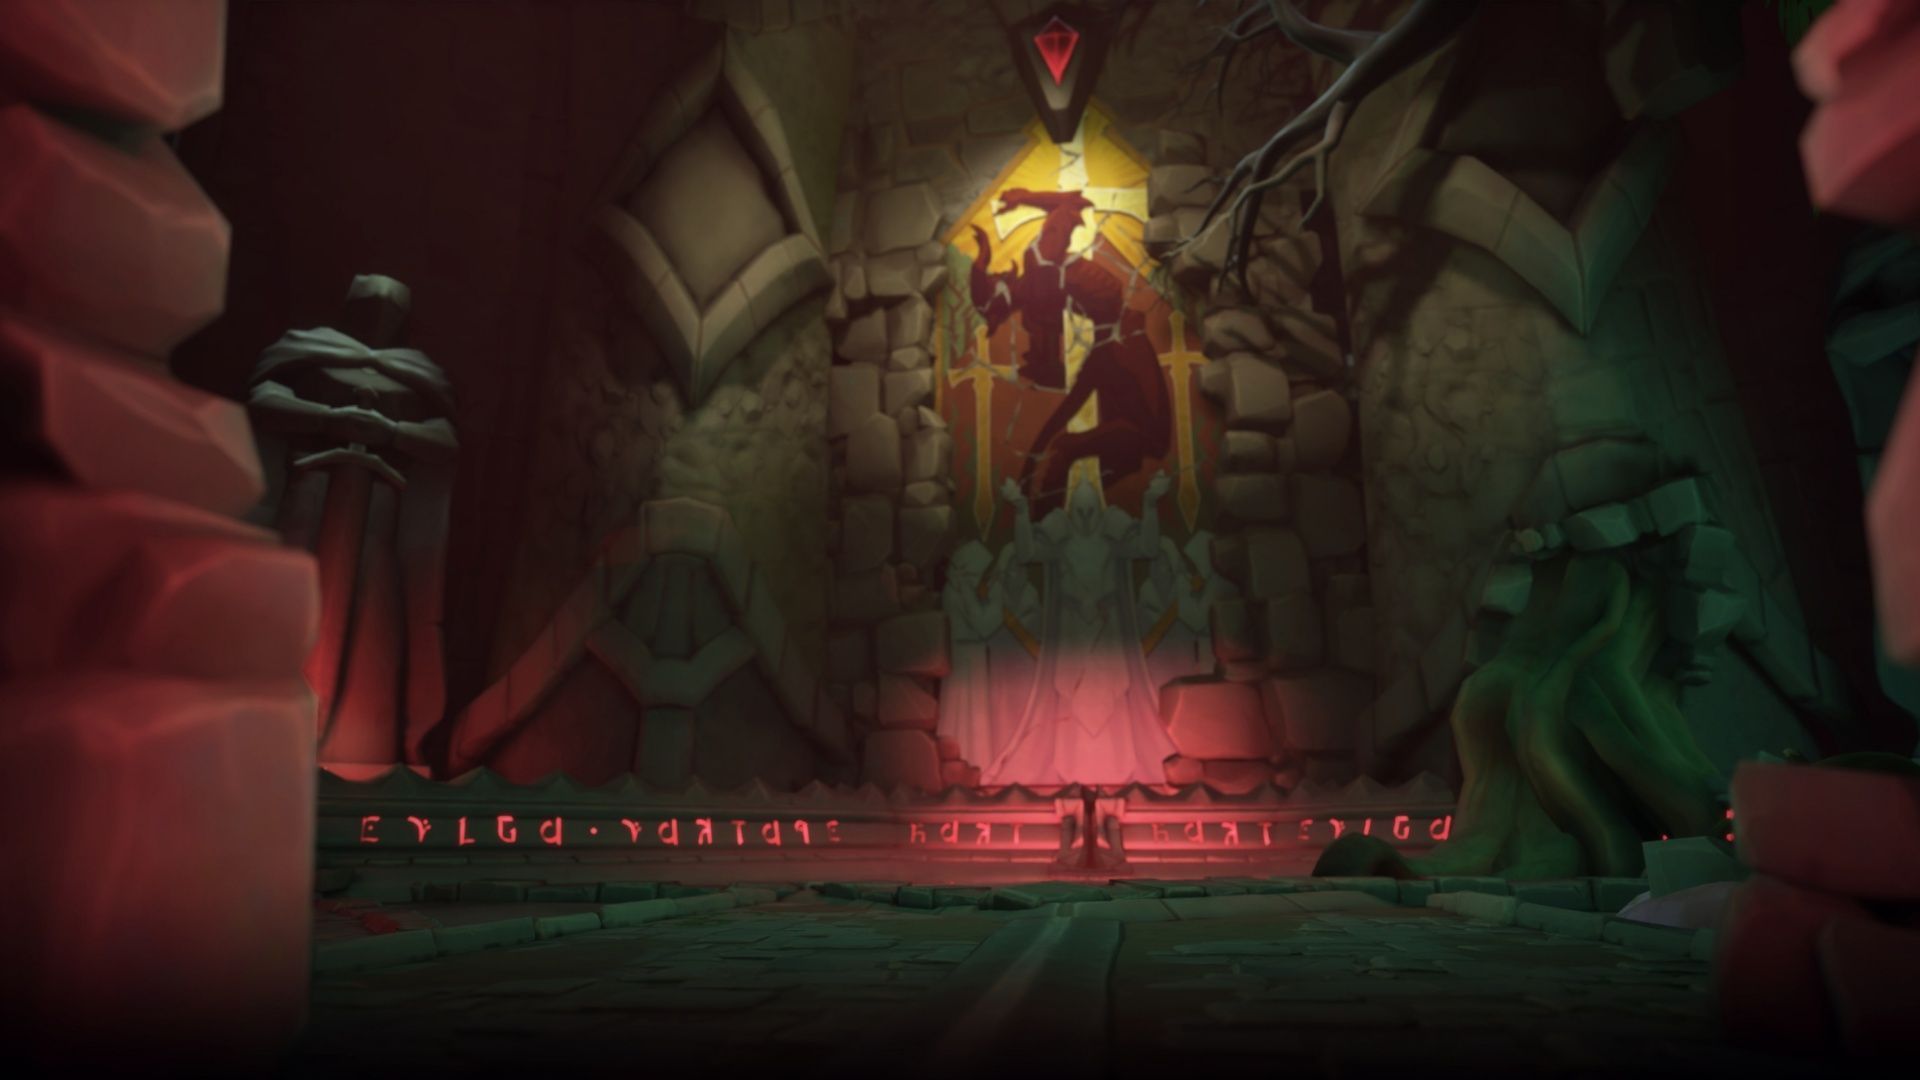
The Heart of Tuzari is one of the more challenging dungeons in Fellowship, due to the nature of navigating the map. While there’s definitely more than one way to route your way through it, your route definitely matters. By lighting braziers, you’ll chart a one-way course through this temple setting, and since you also need to hit a certain Kill Score with a timer, it’s important to not do much, if any backtracking.
With three bosses and lots of trash pulls, The Heart of Tuzari can be a challenging dungeon in Fellowship. However, if you approach it with teamwork, it shouldn’t be too hard to break through to defeat Prophet Ez’rath at the end.
What to know about The Heart of Tuzari dungeon mechanics and trash enemies in Fellowship
The Heart of Tuzari notes
- Kill Score Requirement: 201
- Timer: 28M
- Primary dungeon mechanic: Light braziers to get to pass beyond demon walls
- Bosses: Moar’Gore, Master of Sacrifice, Vun’Kahr, the Thorned, Prophet Ez’rath
While most of The Heart of Tuzari isn’t too overwhelming, the final boss fight versus Prophet Ez’rath can be brutal if you don’t know what he brings to the table. Another thing that can stop people are the Executioner mobs.
They have a stacking debuff, which can really add up if you are fighting too many of them at once. You also have to make sure, as the tank, not to face them towards your allies, so they don’t get hit by it too.
The primary conceit of The Heart of Tuzari in Fellowship is to light the braziers along the path, to bring down the demonic walls. However, this gives you a one-way route through the maps, so it’s important to have a clear idea of where you’re going. That way, you can avoid backtracking and wasting time.
Moar’Gore, Master of Sacrifice’s trash pulls and mechanics in Fellowship’s The Heart of Tuzari
Moar’gore, Master of Sacrifice trash enemies
- Sickle: Throw Dagger is unavoidable and randomly targets allies, so don’t pull too many of these at once.
- Hellcaller: CC their Restore Vitality spell so they don’t heal. Demonic Lash also needs interrupting. Avoid the circles on the ground for Armageddon.
- Mancatcher: Stay within 15 yards or so, because otherwise they Grip, and pull you in.
- Bloodfang Raider: Healers need to be ready to do extra healing due to the Shred ability that will hit the tank.
- Pillager: They have a haste from Blood Frenzy, and gain a health buff when one of them dies. Try to cleave them down at the same time to manage this.
- Ashen Arsonist: Flame Blast is a cone attack, so don’t aim them at the party. Big Oogha Flame puts a DOT on a random player, so CC this if at all possible.
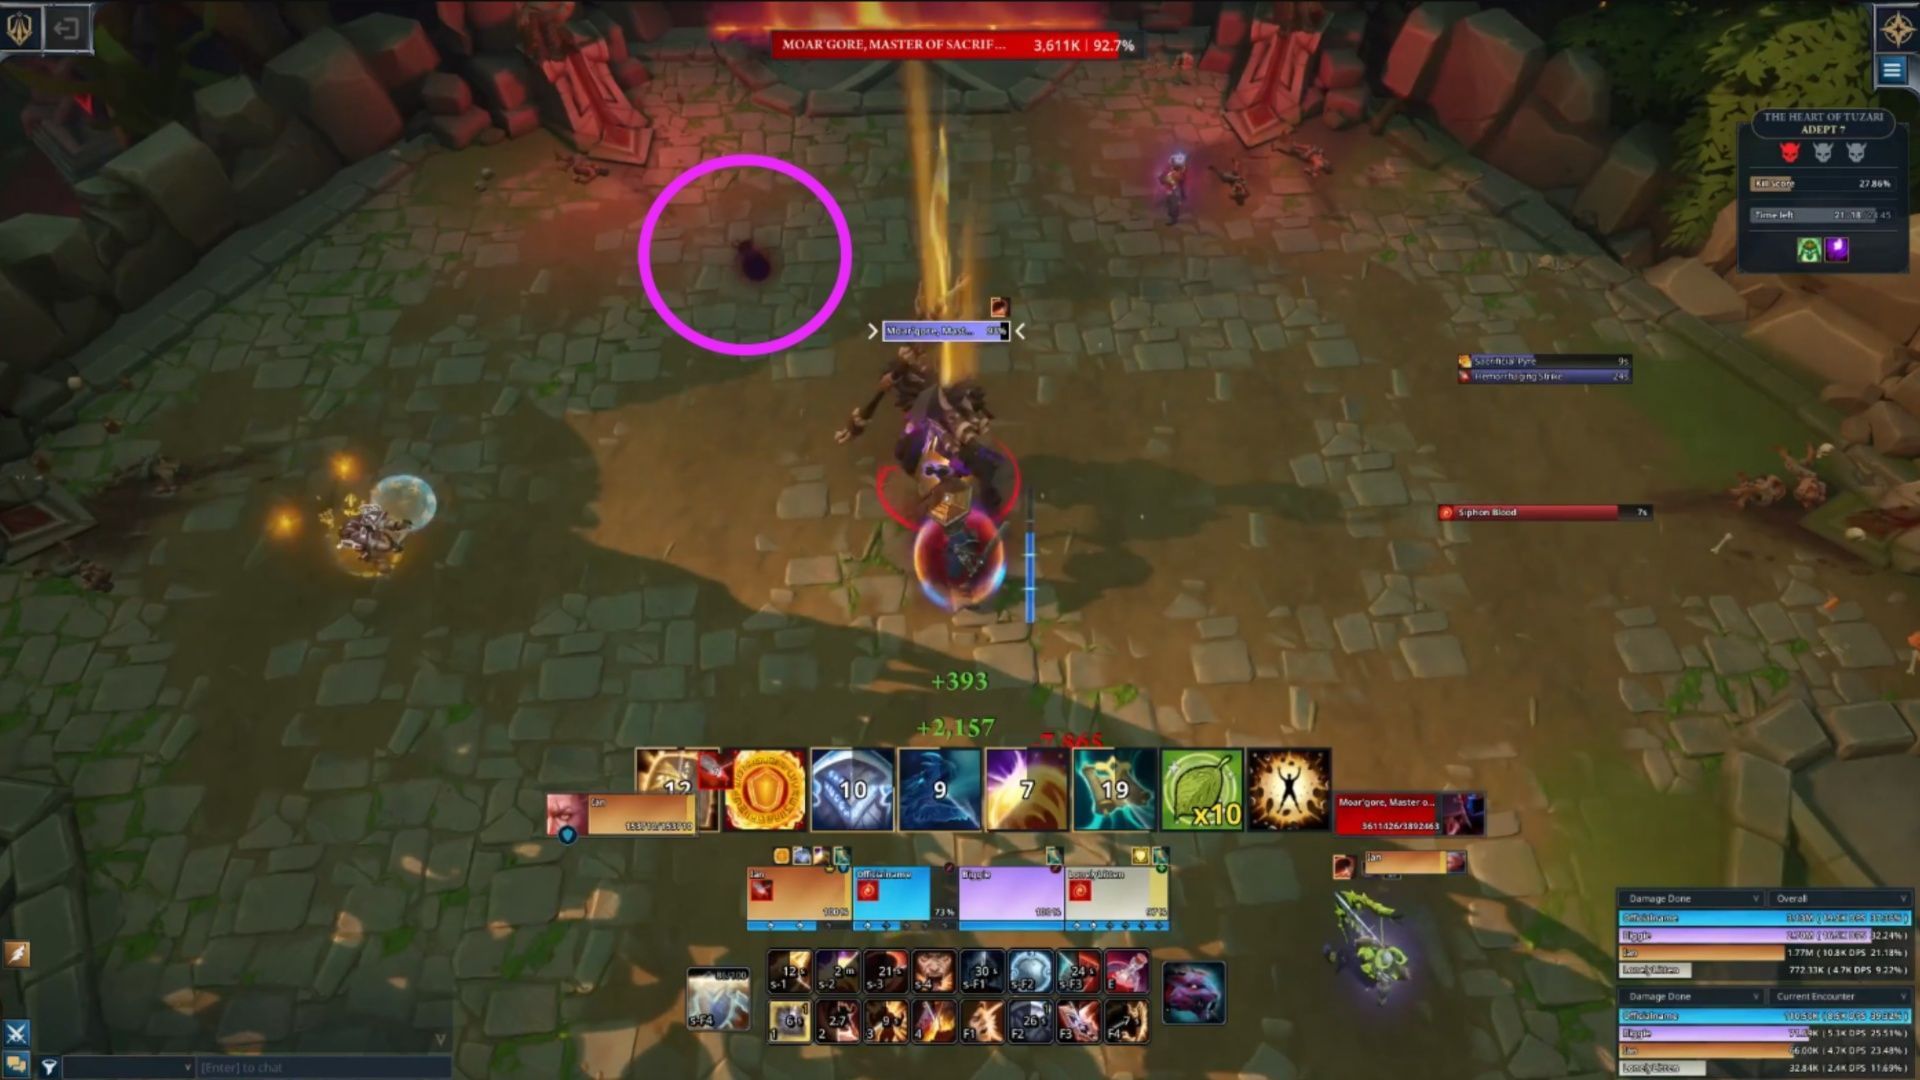
While the trash pulls for the first boss aren’t too bad, Moar’gore, Master of Sacrifice himself can be an interesting boss for Fellowship players that are familiar with World of Warcraft. He’s got three primary abilities, seen below, and to clear one of the debuffs, you’ll briefly need to stand in the fire; you know, the thing we’re always taught not to do.
- Siphon Blood: Channels into three random pillars in the room, which fires an Orb that ricochets around. If one hits the boss, it deals group-wide damage. If one hits a player, they receive a debuff that increases the damage they take by 20% per stack. Sacrificial Pyre flames removes this debuff.
- Siphon Blood enhances when the boss is at under 30% health, making 5 orbs instead of 3.
- Hemorrhaging Strike: Powerful strike that also deals a bleed DOT.
- Sacrificial Pyre: Lights a huge area of the room on fire and applies a DOT to any players that enter the flames afterwards. Clears off Tainted Blood debuff.
Whatever you do in this Fellowship boss fight, make sure the tank is not soaking those Siphon Blood orbs. That will make Hemorrhaging Strike hit harder, and that could be too much to handle.

The rest of the party soaks the orbs, and as long as none of the orbs get through to the boss, the stacking debuff isn’t really an issue. Try not to get more than 4 stacks though. When it’s time for Sacrificial Pyre, avoid the initial explosion, but if you need to clear Tainted Blood, stand in the flames very quickly before the explosion, to clear that off.
After this boss is defeated, you can either go left or right. It appears to be faster and easier to go right, fighting through Lashers, instead of the humanoid enemies on the left.
Vun’kahr, the Thorned Maw trash pulls and mechanics for Fellowship’s The Heart of Tuzari
Vun’kahr, the Thorned Maw trash enemies
- Profane Invoker: Can cast Shadow Bolt on the tank, so CC this. Wither DOTs a player, can be CCed or dispelled.
- Slaughtervine: Won’t do anything until they’re stepped on. They do have a Thorns passive which reflects 10% of damage taken, so be ready with heals, just in case.
- Barbarous Lasher: This cannot be CCed at all. Has a sort of tank buster with Crush Armor, which reduces the tanks armor by 10%. Has a Thorns passive that reflects 25% of damage taken.
- Nightmist Cutthroat: Can teleport for a Backstab, get ready as the tank to reposition.
- Executioner: Can’t be CCed, and hit harder the lower their health gets. Has a Executioner’s Cleave cleave that makes you take 5% more damage (stacks). Don’t pull too many of these at once.
- Initiate: Also does the Throw Dagger attack, so watch out for having too many of these up at once.
- Hulking Bulgore: Can’t be CCed, and have a charge attack, Impale, if attacking them outside of Hulking Bulgore’s range. Stay close, but not too close. Enrages at 50% health, for more damage/haste.
The Vun’kahr boss fight in Fellowship really requires a lot of movement,and honestly, kind of feels like a Final Fantasy XIV boss fight with all the soaking you have to do. It will periodically put marks on the ground, and if a player doesn’t stand in them, it will create a Dormant Slaughtervine. While that doesn’t sound bad, this boss has a power to trigger those Slaughtervines, even if you never step on them.

- Legion of Vun’Kahr: Seedlings spawn on the ground that create Dormant Slaughtervines unless stepped on.
- Raise Terrorvines: Creates Barbed Roots. 40% of damage they take is connected to the boss.
- Fangroot Snap: Tank buster, so make sure to have a defensive cooldown ready.
- Thornmother’s Slumber: The boss takes more damage temporarily, and activates any Dormant Slaughtervines.
Arguably the most important part of this fight is to make sure you don’t leave any potential Dormant Slaughtervines, so always stand on the Legion of Vun’Kahr markings on the ground. This will reduce the potential number of Dormant Slaughtervines that show up when they cast Thornmother’s Slumber. The tankbuster, Fangroot Snap is also a cleave, so melee, make sure to get out of the way.
In addition to all the above movement in this Fellowship boss fight, when Raise Terrorvines is cast, the tank will need to immediately pull the boss to one, to fight them both at the same time. However, two of these spawn at once. The other, you’ll need to prepare some CC/interrupts for, to make sure its Toxic Spore attack immediately stops. Then your team can take care of the other Barbed Root.
Prophet Ez’rath mechanics for Fellowship dungeon The Heart of Tuzari
Thankfully, there aren’t any new enemy types between Vun’kahr and Ez’rath, so just be aware of what you’ve already dealt with between here and there. However, the hardest boss of the dungeon awaits in Fellowship’s The Heart of Tuzari. This is arguably where players stumble the hardest. There are some pretty intense mechanics to keep in mind. Below are all of the bosses' attacks.
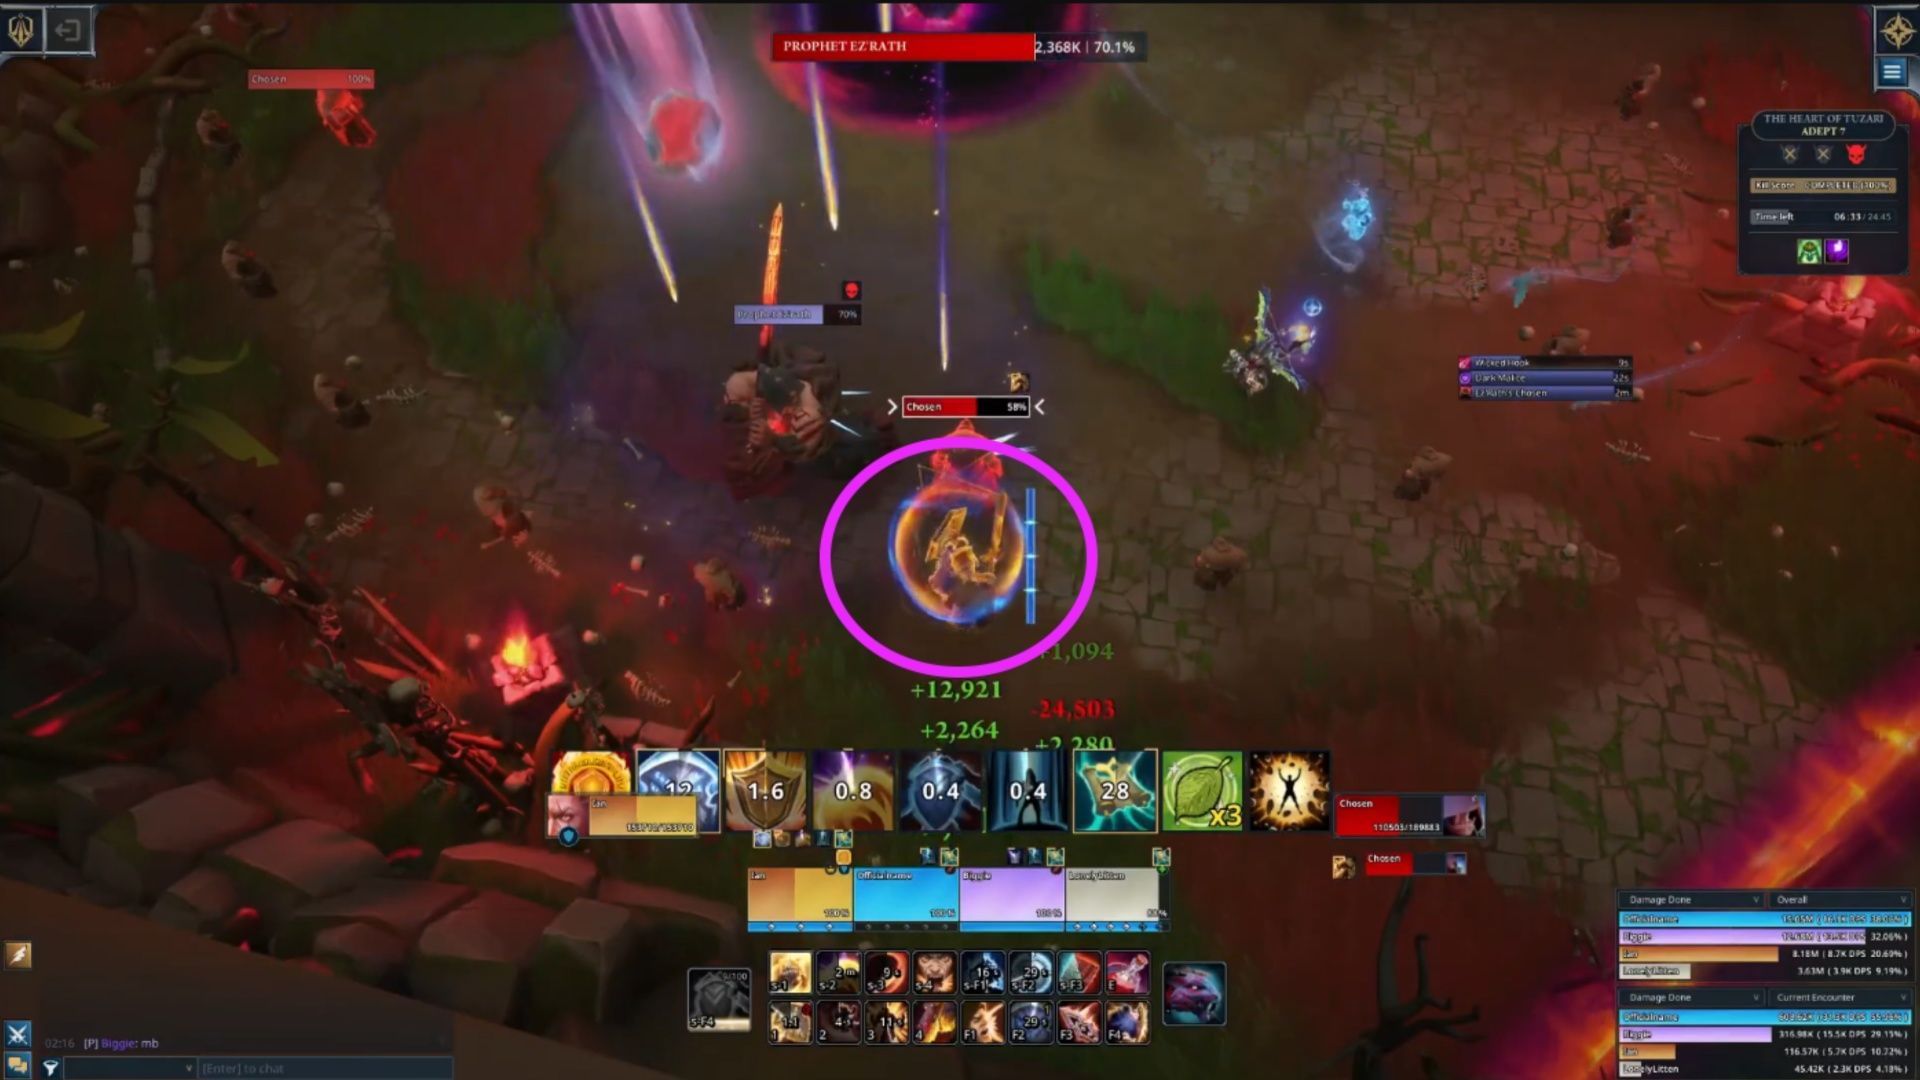
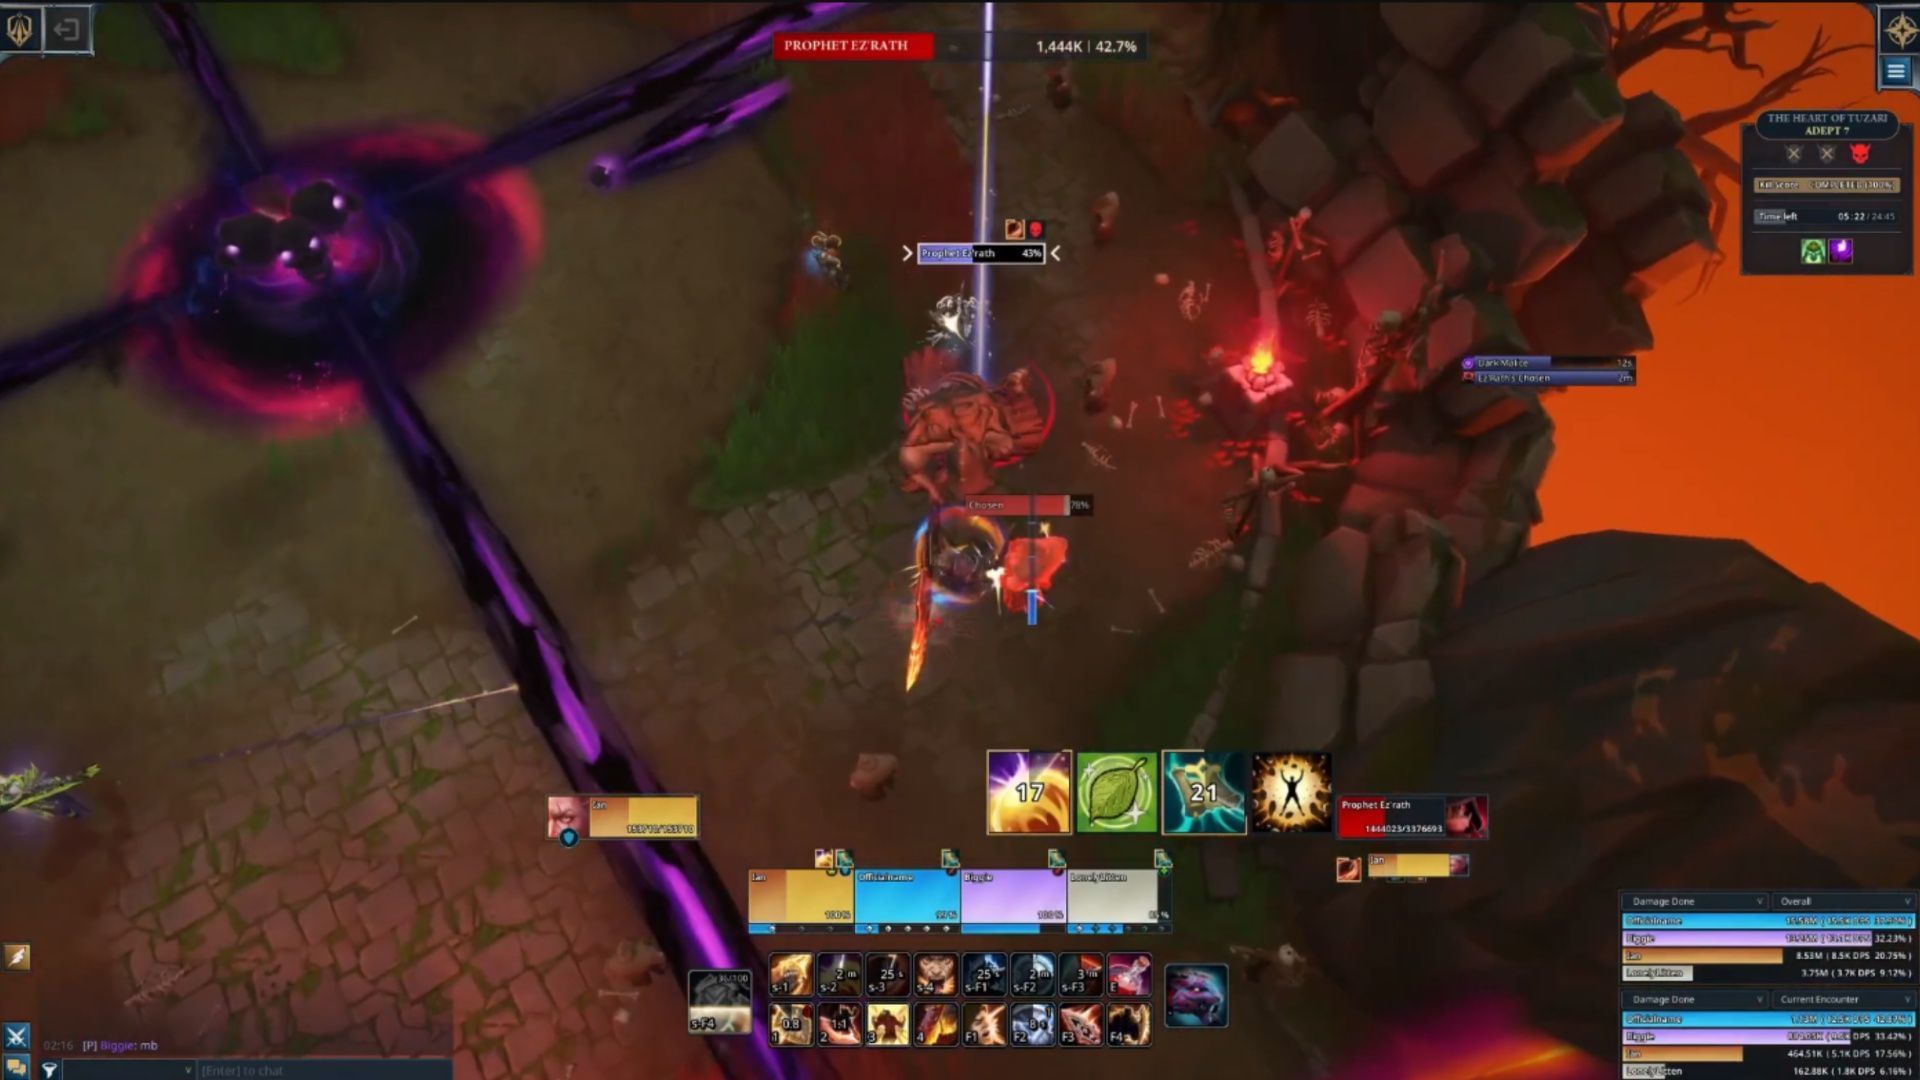
- Dark Malice: Ez’rath creates a circle that deals massive damage to players caught in it after the cast ends.
- Ez’Rath’s Chosen: A sacrifice marches towards the Demonic Pit. If they reach the Pit, a DOT hits the entire party.
- Abyssal Nexus: Four beams fire from the Demonic Pit and rotate. Players who are caught in a beam take a significant amount of damage.
- Wicked Hook: A random player gets hooked, which deals damage and applies a slow. It can also target the sacrifices.
Whatever you do, do not touch the Demonic Pit in the center of the room. It will slow you, and put a 100% damage debuff on you, and you do not want that. Conversely, the tank needs to make certain Prophet Ez’rath doesn’t get into the center, because it will buff his damage.
When Ez’Rath’s Chosen is cast, 4 sacrificial enemies will make their way towards the Pit. If they get there, for each one that makes it, a DOT will hit every player. One stack is fine, but beyond that, you’re likely going to wipe. It’s recommended to have the tank move towards the largest group of these sacrificial enemies, so you can AOE them down. The corpses will also spawn rotating laser beams, so stay mobile to avoid the large amounts of damage.
Dark Malice hurts no matter what, but if you’re in the circle, you can expect to immediately die. Try to stay as close to full health as possible during and after this. You also have to worry about the occasional Wicked Hook, but there are ways to use this to your benefit. If you’re targeted, and sacrifices are up, run behind them, so the boss will hook them and slow them down. Otherwise, the tank should try and take it if possible, while using a cooldown.
Once you get the boss to 50% or less, the Abyssal Nexus beams will trigger, and now it all comes down to a DPS race. The trick is to keep moving to avoid the beams, while also fighting sacrificial targets.
You’re still going to have to deal with Ez’Rath’s Chosen, and the beams make it much harder to get them all. This is where you want to use all of your healing, attack, and defensive buffs, so the boss can be killed before too many DOT stacks trigger.
Potential item drops from Fellowship’s The Heart of Tuzari dungeon
The best part of clearing dungeons in Fellowship is getting better and better gear. Having better gear means you can tackle greater challenges with a bit more surety and safety. Below is a list of everything that can drop in this dungeon:
Loot drops
- Bloodrite Chain (Necklace): Stamina, haste, Expertise
- Blood Ruby Seal (Ring): Stamina, Crit Strike, Haste
- Bloodstone Band (Ring): Stamina, Crit Strike, Haste
- Bloodwarden Lariat (Necklace): Stamina, Expertise, Spirit, Dark Prophecy Set Bonus (2: Your abilities have a chance to increase your Haste by 25% for 20s)
- Bloodwarden Locket (Necklace): Stamina, Expertise, Spirit, Dark Prophecy Set Bonus
- Bloodwarden Talisman (Necklace): Stamina, Expertise, Spirit, Dark Prophecy Set Bonus
- Bracers of Hatred (Wrists Plate): Stamina, Strength, Crit Strike, Expertise
- Demon Claw Ring (Ring): Stamina, Haste, Spirit
- Execration Ring (Ring): Stamina, Haste, Expertise
- Feathered Collar (Necklace): Stamina, Crit Strike, Expertise
- Godbrand Amulet (Necklace): Stamina, Expertise, Spirit, Dark Prophecy Set Bonus
- Godbrand Festoon (Necklace): Stamina, Expertise, Spirit, Dark Prophecy Set Bonus
- Godbrand Pendant (Necklace): Stamina, Expertise, Spirit, Dark Prophecy Set Bonus
- Godbrand Talisman (Necklace): Stamina, Expertise, Spirit, Dark Prophecy Set Bonus
- Godbrand Torc (Necklace): Stamina, Expertise, Spirit, Dark Prophecy Set Bonus
- Hellbinder Pendant (Necklace): Stamina, Expertise, Spirit, Dark Prophecy Set Bonus
- Hellbinder Talisman (Necklace): Stamina, Expertise, Spirit, Dark Prophecy Set Bonus
- Imp Tooth Necklace (Necklace): Stamina, Haste, Spirit
- Infernal Bracers (Wrists Cloth): Stamina, Intellect, Crit Strike, Spirit
- Loop of Shed Demonskin (Ring): Stamina, haste, Spirit
- Oracle Wristwraps (Wrists Cloth): Stamina, Intellect, Crit Strike, Spirit
- Profaned Pendant (Necklace): Stamina, Haste, Spirit
- Ring of Unnatural Fire (Ring): Stamina, Haste, Expertise
- Sacral Vambraces (Wrists Plate): Stamina, Intellect, Crit Strike, Expertise
- Sacrificial Cuffs (Wrists Plate): Stamina, Strength, Crit Strike, Expertise
- Sacrificial Initiate’s Lariat (Necklace): Stamina, Haste, Expertise
- Sickle’s Loop of Ardor (Ring): Stamina, Crit Strike, Haste
- Sulfurized Festoon (Necklace): Stamina, Crit Strike, Expertise
- Warding Amulet (Necklace): Stamina, Haste, Spirit
Check out our other Fellowship guides and features
- Fellowship: Ardeos build guide
- Fellowship: Tariq build and hero guide
- Every mount in Fellowship, and how to unlock them
- Fellowship: Sylvie build and hero guide
