
'%20x='0'%20y='0'%20height='100%25'%20width='100%25'%20%0A%20%20%20%20%20%20%20%20%20%20xlink%3Ahref='data:image/jpg;base64,/9j/4AAQSkZJRgABAQEAYABgAAD//gA7Q1JFQVRPUjogZ2QtanBlZyB2MS4wICh1c2luZyBJSkcgSlBFRyB2ODApLCBxdWFsaXR5ID0gODAK/9sAQwAGBAUGBQQGBgUGBwcGCAoQCgoJCQoUDg8MEBcUGBgXFBYWGh0lHxobIxwWFiAsICMmJykqKRkfLTAtKDAlKCko/9sAQwEHBwcKCAoTCgoTKBoWGigoKCgoKCgoKCgoKCgoKCgoKCgoKCgoKCgoKCgoKCgoKCgoKCgoKCgoKCgoKCgoKCgo/8AAEQgEOAeAAwEiAAIRAQMRAf/EAB8AAAEFAQEBAQEBAAAAAAAAAAABAgMEBQYHCAkKC//EALUQAAIBAwMCBAMFBQQEAAABfQECAwAEEQUSITFBBhNRYQcicRQygZGhCCNCscEVUtHwJDNicoIJChYXGBkaJSYnKCkqNDU2Nzg5OkNERUZHSElKU1RVVldYWVpjZGVmZ2hpanN0dXZ3eHl6g4SFhoeIiYqSk5SVlpeYmZqio6Slpqeoqaqys7S1tre4ubrCw8TFxsfIycrS09TV1tfY2drh4uPk5ebn6Onq8fLz9PX29/j5+v/EAB8BAAMBAQEBAQEBAQEAAAAAAAABAgMEBQYHCAkKC//EALURAAIBAgQEAwQHBQQEAAECdwABAgMRBAUhMQYSQVEHYXETIjKBCBRCkaGxwQkjM1LwFWJy0QoWJDThJfEXGBkaJicoKSo1Njc4OTpDREVGR0hJSlNUVVZXWFlaY2RlZmdoaWpzdHV2d3h5eoKDhIWGh4iJipKTlJWWl5iZmqKjpKWmp6ipqrKztLW2t7i5usLDxMXGx8jJytLT1NXW19jZ2uLj5OXm5+jp6vLz9PX29/j5+v/aAAwDAQACEQMRAD8A4yo8n1p9FanEM3GjcafRQVcZmkpaKkYUUUUAFFPWjFADKfSqtGKBCYp+KXFKq0DEVaeq05VpyrVCuxmKMVLijFSF2R0YqbFGKAIMUYqfZRsFAFdlpmKs7KbigCvimYqxikxQBBilVDU+Keq0Bcr7KFWrGKNlAXZCqU/ZUqrTtu6gCFUqRYqkVKkxVEkXlCnrEKm2U9VoAj2UbKsYpVWmIiVKlVaeq09VoAZilxUmKMUAIq0uKfijFIAWkpVWloEN2f7VLS4pypTsIbihVqRUqSNKLIBqpS7TUuKKBkWKTFTYpKAIsU1lqbFDLQIgamVMy1DigCOhqfTGWgq5G1JSstJQAi06kpaAEaoGqaSoGoAZRRSUgCmU+mUCG1G3zU5qbQUMxQtFMoAnVqetV1p1AE9FQK1SK1AElFJRTFcWkoooBBRRRQFwooooC4lNp9FAXCnrTKetAhy0bRTlooHdjGWmMtSNUbfdpARtUeKfSUFojoqSm4qQEVaXFOooAKKKKAKeuSmLR7tlO1mTZ8v+1XDq3+isv95z+ldR4qm22Num7/WSbtvstcXNnyX5bbj5lqZG1NaFiNju/JatRofLrmb53tmt/JdlZk3NXcaDbjVfDUV0CrTRMYpV/ukUi27GbT6nuLV4tu5W6VVzQA/n+9R/wJqFooAWm05aeq0AMxRwtPaoJKAJmc7dtMku4YPL847fNcIP9rNSWsQu5Alq0bSN/wAs1b5+KrXmnu00TSJ8sThlX9OaAPTm8FWlp8l1qUHnbN3lx8ms77FZRTJBbiRpP4938PPfFY+seLoo7GNf9Tt+VWVfnY9DV3wjd22pb2s5WZo9u5ZFw+T3oMWpWuzptPsUVj8v+78veuhj0WKe3DtH8uz5t3HA9K0IbIfZ1X7rN/erd0/91axfwqo2ru+81UScOuixS4aFPvD/AFdEnh238n5dv8t1ejrZQR+c8MSrJnfUVxYpJsl2bVkT73SgDym40KL/AJaI27hdyrWbqGhRKpZa9I1C3ETfd3VyurbI93+0AtArs42bRIPM3ZZdp+WqcmgiSTdG7dflWt5m2s6/xZqfT7Ir97d8u78vU0rFczOG1TSTaWc0rHdx81cnIhWvRvFWV02RfpXn8lJm0XdXKci1DVyRaj2ipNCqy1HirmwU3YKAJvDcrx6tEq/8tMq35V1/NcloKn+3Lf8A4F/Kuuq47Gc9xuymMtS1E1MzEplPplAxlC5pzULTAWiiigA5pOaWigBM1G1K1JikIZRT6jpFC7jRzS0UwCm7TS0uKAG0LTqSgQ9c06iOnUxC0UUUDCo5Pu1JTJKAK+KTFT4pmKkZHikqXFJQIjooooGN3Gm7jS0mKChlM/4E1SYptADM+7UZPrT8UygLj8n1pd5/vVHRmgCTcaXef7zVFmk30ATbz/eajeahzS5oAn800quarZpc0EljcaXNQ5ozQBLmjfUWaM0ASK9O31DTqAJPNqSOU7qr5p1AFzzaXzarK1SUxEvm0uaiWlzTuBJmjNR0UhE1GaYuaetMYtFFFACYpmKkpKAI8UeVuqWkzSAj8oUeUKlophdkGKNhqaj7tILsgaI0eV8tWKKAuyt5VN8o1boxQF2U2iNM2Vf2VG0QoC5TaKmKhq9sFGwUh3ZU2GlWI1cWIU7YKYXZVWIU7YKsbKVYhRYRXxTMVb2CmMgoAr4pMVKy02gCNqhZqkao8Uhobmms1PpjUFEdJS03FIYykpaSgBajZqfTaBjabipMUmKBDKcq0tC0AJRTsUUANop1FAHo+KKWitTmI8UYqSigBuKXFPxRQMbRTlWnYqRXI6dinYp2KLkjVWnYpVWn0FDMUuKfin4oAaq06lxS4oAFoVaeq0YqiRMUuKfijFADMUYqSigRFim4qfFMxQBEy0mypaVVoGRbDRip8UYoEQYp+KkxS4oAjpVqTZT1SmAirTlQU/FPxSAZilp2KMUANp9JS0ASU9VqOlpiJKWkpaBBRRTqYCqtLinLSrSAMUqrT6KABVp60U6gYbTSYpaTNABTKfmo6QBRSZplMQNUbU+o6AG0NT6ZQBFTKkxTaVyhlFLRQA1qhap2qJlpiI6bT6MUAMxUbVPUbLQBAy1HVjFRstIoiakqTFNxQA2ilxS4qSh1Kq0qrT6okFoopaYhKKWigBKKWigQlFLQtADsU2n0UgGVItJS0wHUU3NGaAHVDJUlRtQBHijFPpKChlFLTqQDaSlam1IDGWhaKNwXczfw/M1BRy/iKUz6hKi/MsQCL9eprIayLWczttWOMb33enTIq3vMkju33nfdu9zVLxRM0Wj7VPzSyhPwUZ4qJG8EcpfS+fdO/wDD91V/ugcV1Hw11AWmtPZyBpI7xNqx/wDTQdK5Cr2i3D2msWE8Z2tFcRt+tSjVrQ9K15PLklXO7bWDW74kZGunVawF+X8qozWw6m07cKbQMcrfNUlQqv3qNxoAkaqOsOY9PuHVtrKBVrmo5EEqssm1l/iWgDN8NxGG+tPs/wAsyzR/XINdl4ilMt0WVNq5NYWmwpYYeH5ZFG3c3Jq6viO31Lyre4K+cp8pZNpw31NSlbcqbu9DmtSBbWVZgu3yhs/PBrufg/Ym58Web/yxSAr/AL2StUvKt/L/AH0EcjL91mXlQa9B+H8UaqjR7Y1/hXtk07a3E6lqfKeoNDF+9eQfu/4v9kHgkVpxwxRworJu2EKu5jUWi3CSrNuRpNp2s390npV6Rx91vm/u7VH4ZqzlLTeVtPnJ/qx/wJh71VWUM0qzMvXai1VZ5FvF8tvlcFfm4DHqKq6xb3DSNul3cfNJQMy9euo1t3aT5ea4fUHRo/mCrsO6tbVvMkhl8xt391f8ayVt/ldWG6RhtVaCDN0e1NzM7yfd52+mTXS29oLKEzt/wH+VJodrHG2xW27M761bpQ1rGrDczZoA8o8dXG6xfcqrzXn02V2s3yt/d/u/WvQ/GGPs8t0wXybaQLFuwRLOemPVE+8f9qvOJG3Mzf3ql7nTT+EY1RtUy0yRaRoRU2nU1vumkBc0X/kMQ/Rv5V1DVzXh3DasXU/djZq6erWxlPcjoxRim1RNxtNxT2qOgYUyn0UAFLSUUALijFPpKQDKZipGpKYDGWm4qWo6QhFWinZoagCKlWnNRQMKFooVaAFWpKYuadTELRQtLigY2m0+igBlOxS1G1AhjVGzU5mqNmqRgzU1qRmpKBhRRRQAUyn0ygAplPplBQjUlOxSYoAZRTqKBjaKdRQA1qKdS4oAMUq06igQ3FOpaKAEpaKKCRVpy01aKAJlp1NWigQ6nZqOjNAEmamWqtTRvTQE9Likpc0wHYoxTc0ZpAOxTcUU9aADZSrEKctOzTEN2CjyhUlFAEPkUzYf7tWtwooC5WVDSstT0YoHch27aTFPamNQAcUxqGpKAClpKXd81ADlWjFOVaKQCYp9Np1MQYpjLUlMoAiZKiZKstUbUhlZkqFlq5IvytVdqAIWWmMtWKjpDK7LSYqZlpGWgq5XxSbKmxRigCuy0mKnZabiiwyLFJipqbikBHRTqdigBlGKfim0ANam0+koA9JpcU7FLirOQZihVp+KXFIoSkxTqeqUAR4oqXFGKAIsU9VqTFKq0wE2UYp1GKokTFPxS0/FADMUuKdilxQIFWlxT1WpFSmBFilxUuKMUARYoxUuyjFAiHFGKmxSYoGQYoxU+yjZQBFRU2yk8qkBHin4p2KdTAaq07FOVadigBlLin0uKBEdFPxRQAzFPpcU9VoAZinYp2KdiiwDKKfTaYhKKWkqbjHq1SK1QZp60xFhWqRagjapFoAlp1MWn0hjGplOamUwDNFFFIBjLTac1NpiCoae1MoAdTaM1HmgY6So6WmUhjqKFoagBjUlK1JQAyjFFFMQmKZipKTFAyFlqOrGKjZaBEVMxUzLRikMjxTcVNim4oASiilpgFFOooAbRRTsUCBaWlopAJRS1HQA+iiigAWihaKAFoop1ADGqKpWqOgYUUUuKYxKKWigRG1NpzVHSGNqnrEvlaXcN/ewi/jV6sXxRL+5toP7xL1LKjuYitXKeIrs3NxEi/diQ/qc100ijyZfMlZV2Hcy87QK4iR/Mkd/7x/Ss2dKQyprf5biH/rov86hq3pqebqEC/7YZvoKRoegao3mfNu7/erOokm3UVRkhtFO3Cm0DChaKOKAHVm6ldS2jQ+SnmNI+3bWhmnKgbK0AR68yfYbpLdmbbHXMtF5sNtbwjczuPu+ldN5KK3+1ViztIFk/cxxq2NrbVqWtSk7IZeSjayK/wAvFdp8GbW9gvHl1aaf+9FAzcL7msbTdKEtxErbetegaGiR71Z/3ij5apGE5K1jubO9kX5VCrGorUjmkW1fyx5nR/wNc5a3SSqqfKrN8tdHauZLUJGu3kK0nZaozLum3Ectuj3Ee7d8y/7JqteLtkZd33hVmxtHtlRLo/K2W3L0YVaWKKTyv++dv92mM4/UNPdlDrtX+JlrEZTEu5RubOxq7+4tI5GV2f8Aefd2+4rn9WRF3JGNq4pCMXSfLW6lf7zMfu/3scVqTRRXemys0bMu/wCTb/Ft64PpXMwxOt027cq/drpY7p4rGFGjWNVG3byKCTyj4pQ+Xawsv3c15lI1et/FQiXSZHwvyyCvH5Pl3VLOiD0JVpjVGstOZvmWkajG/iqJm+U/SpW+amYpMDa0XTX03VHt5HVmW2WX5Wz9+t2sDwqp+0XbSFv9WtdFirWxjLcjplPam4qhDWqCrDLTPKNAEarRipliNM2GkAzFOpcUlAwoo2mm4oAGpKKKYCUUUUCGqtFOoagY3FGKfRQAzFFSYpKACiiigBVp1NWnNQAyiiigCOmM1SNUdICNqjapGptIZHTafikoAKa1FJQAUUUUAFFFFABSNS0UAJTMVJTKChMUtGKdQAUUtFABRRRQSFFFFABRRQtAD6KKWgBVp1NWnUAMpKWkoAKkjplPoAsK4pd9V1padxEm+nq4qCnw0XAsrT1ojWn4pgNp1Kq0uKBAtOoooAKKKKBMKKKKAsRtTKe1DLQMhakqRlpMUDGUq0/FC0AG80ZpKXFIAzT6ZilzQIazmm7jQ1JTGIzmm76RmpGpCBmqOiikUMamNT2pjUANqOnNSUAJRRRQUNpKWkoASm06m0hiUtJRQAUynZozQBHRTqbSA9RVKXFSYorQ5CPFGKkoxQBHinKtOxTqAGqtOxS0VQCYpaKetADcU7FLSrQIFWn4oWpMUwI8U9VpcVIq0AIq1Iq0uKVVoAbtFLilxUmKBCKtDIKfRiiwEapQqVKq0KtAEeykxU2KbiiwEbLTKnZabQBFilxUlGKAI8UYqTFGKAExS0Yp1AIZRT6KAGVItJRTEOopKKAFVaMULRQA3FGKkopAR4oVakZaKABacrU2igCVWp+ahWnNQA5qSo6VaABqTNDUxmoQDqYzUmabTAdmo806o6Q0GabmhqZQNIXNJSYpaAsJS0lLSAKKKKYCYptOzRSAbRTqFoAbTcVJTaBEWKKkZajpgMop9JQAzFGKfRSAbRTqKAG0Yp2KdimA2ipMU3FADabT8UlABRSqtLigBuKbU2KXYKAIMU+n4oZaAI2puKey0UAR4padRQBC1JUrLUeKQxrUypKMUwI65LxRLu1pYv8AnlCq/i3Ndiq/Mq153fTfadWvJ925WlO38OKhmtPVlbVn2aXcbW++Vi9+TXJt96tjXLja1un93Lt+PArFrF7nVFaBW54ft90Mlwy/N9xP61h812kKCCzhhUfcjC00DY1V+apKZuFIzjdVEkq0tRq275qNw/vLQBJUdNaZPus6037RAv8Ay0j/AO+qBE6qafGpVqqfbrb/AJ7LQ2p23G2WgC4rfM1aOno8e5sfern/AO1rONg3m1ct/EdmqnazNQJpnYRxCJl8v5Wro7eF2YNnbXnVn4nsNu6abc1dBY+MLZfKX+Lhf9Ynzf8Aj1MylFnoOm+buRsq26uw0uV41Rlbd/s15Na+MomZX+zM21N/+sQ7RnH96tKHxwIl+aym3cfdkjx7dTTI17Hr9vcRt+4mbbs+ZPxq3cWpij82NN24D5VrxyHx2nyy3A2wxHa375Mt6Cuh0/4laGtvtbUY4/7vmMMqaYanZXEp3I7LuWT+Jfas3UoRK3/TTndXPyeOvDy7ZY9WhVVG75mqS3+IWgSea630Lb/ux7sbsUgLF1abpNq7flqOZNsZVmZeD+tSW/iXR7uQLHIu7/a9+auSTW88gSMx7f4WpgeU+NELaHeKy/dT+Rrx24z5le/+OrQR2d8u370JVfxrwe4T5d3tUM1pbFdW+apdu5WqJV+Wnqx21KNhq5oozQrfNuWkBveE4isl83meYuI1V1XhjjJxW9isLwm3/H0v3txVq6CtY7GMtyPFGKkzRTJImWm4qfik2ikBDijFTbKNlAFfFNxU+yjZQBAy01Vqwy03FAFdlqPFWmWmbKBleipdlNpjGUU/FNxQAlKtC06gAprU6mUgCiiimAq1Iy01akagCChqXFJQAxqjqao8UmIjpmKlpKQyBqbUzLTaBkOKMU/FJigBlFPooAZT1oooAKKWkoAbikp9FADKKfTcUAJRRRQAUUU+gBuKMU6igAooooAKWkp2KAHUUyigB9GKZRQA+mUUUAKtPqOn0AOqaGoamh+9QIuQ07FEf3akpiEWilp1AhlGKfRQA2inUtAEdJTs0lACU1qc1FAxtNxUlN/ioATFGKVnFJvFACbRS4pm+jfTGDLTadmo6QCUjUtJTAjxRS0xmpCG02jNNkakUDNUdNZqSgAaimUUFDqZRmigAzSZoplAC0UZooYxKKKKQDKKdiloAjoqSigD1SikWlrU5BKXFFFMAoopaBaiUtGKfikAxafiin0ANxT1pKctMQKtSLSU9aBjlUU9VpF+7TqQh9LRRTECrTsULTqYCKtPWiigB2KdihaFpAGKZilpzUAR01lqSjFAEOKXFSYooAjxS4p9PxQBHiipMUtAEeKSpaNlAEVFSYoxQBHRTqbQAUUUUAFLSUUALRRRQAUUUtACUUUlAC0UUlADc0NTWpaAGUjUUNSGhKZS0lADKKdQ1A7jKKXFGKYCUU+igQYplPoxSGR02psVG1ABRRRQAU2n0UAR0ypsVHimAykpaKBCUUtFABS0Yp60ACrS4p1LQOwmKMVJRikBGy1HirDfdqHFMAVadilWloGNxRinYpMUgExTakptAiPFGKdRTEQzSpFC0szbY0+9XN3Wu3LSDyfLjjzuX5Q/HuaXxNfBrgWsf+rixu/2nrEWaPztu9d1c86r2R1UqStdlqbxVqNpceVdQW0y43K20pVi38ZQbh9ss5I1/wCekbb9v4Vl6pEJ7N9v3ozu/KsSoU5WNHSieqxvHLGksLq0cgDJIvIYGn1yfgG9P7/TZD939/D/ALIJ5FdhXQndXOOcXGVitdS/ZrO4n/55Rs/5DivMLWJ2jG75WrtPH19/Z/h//ankEW3+8B1ry6bU7iTcvyr/AMBqZM3orS4utf8AIUlX/nnhfyFU6T+ItS1m9zct6XafabjdvVViAf5v4ua3mS4kZvMuG/3Y4wK5q3u57ZXW3fy9+N21R2oa7uZPvTzN/wACppgdPHZbvmkluW24+63qccUSafG0jMrzeXj7rTY5rlGeRvvOzf8AAjSbA1FwsdbJb2W37v3fl+a4+9VaRdLXd/qf++q5tUFGKAsdLb3Wjxtvk8lv9naTUi6hpQztMar/ANccfia5ejFFwsdXJrGlNDCkY+6Sz/uR83pj6U6PXdLVZV2SfvMfMsPpXLW7eXIr/wB2tTR4vll3f8BqXIahd2NO313S4rjc0MjKv96EGrC+INHkmDTQ7Y8/8+oPFUWiDQmqUMQ+3P8A7KCkqhboWOp/4SPwzFC21I5JM/LusgKnt9e8HS4a8t4l/wB23rnPKRv4F/75pPIj/uL/AN80e2E6HmdjDrHgKWTZJFaLGv8AE1qRuq4t38OPMCyJYMuPlZYSK4FoY/7i1G1pGy/Mi0e2XVC9h5nptqvw3nZNz6XtYf8ALRiNtaK6D8NrllVZtLjbHzNHe4rx37DH/F/6DTfskH8UatVe1QfV33PX28C+Fp962cyyRqN3mR3ofdRJ8OdK2/ubiZl/2WD14+1lbN/yzWkWEw/NDNNGy/dZZDTVVC+ry7npV54CNk22O8kVeW8zoOKSHQdTjZXj1dl/2vMrztbvUFXaup3+3+79oek/tLV4s7dTu9v+9mjnQnh5HoutafrEdv8A6Rqkk0P3vlauDvoZVmkVXVqjh8R6x93+05G/2ZFD1FdXV/LIZZhBJu+b5VxQ5IUackQqx/u0bh+tRtdhW23ELLuH8LVMt1A0IWORd3/TTigBv/AqKdsH9z/gUbVCqf3X/wC+qAN7wnLt1CVP78f8q6SuN8Pv5WuWqt8vmHZu/wB4V2jLVx2MZbkdPWkxTlpkiYpaKmxQAxVoxUlFMRFRipcUqrQBD5VM8o1bxTWWgLlJlpmKuMtQstDGV8UzFT4pmKQXZGy/LUeKsYqPFAyKlqTFMxQMjpKk2mmNTASiiigBVap/vVFinLSEOZajxU1JigCvijFTstNxTGQ4pmKnZaZigCBlpuKmZajpAR4puKmxTcUgIcUYqTFGKBkeKTFS4pMUAJRilxRigBmKSpcUmKAIqKdijFADaKXFJQAUUUUAFFFFAC0UUUAFFFFAC5pKKKACiiigBKKWigAWn0ylWgB1Sw/eqPFSR/K1AjRt/mWpqgs2+Wre0VQhlGKfQy0hDKKWo2oAGYU1pRVWRzUO80DsXN9OVg1Ud5q1C1MCeiikpAhjNUe8LSSfeqvM38NAErSimeaKrUlAy5vFG8VUVqfmgLFrcOPpTc1Dvp1MCSmU+mtQIb92oZGp0zVVkapGh++o2akptAwpuaKKCgooooAKKMUYoAKbijFOoAbijFPooAZRT8UYoGMxRT8UUAMoxUlFAj0xWp9RK9KrVocpJS03NGaAHUUlLmgRJRSK1FAD6KbTqYhaWm0tAEi0q1GrU9aBk606oqXNAE2adUVLQImoplFMRJmjNR5paAJFY0/NQK1GaAJ6M1ErU7fSAfRSbhRmgBafTKVmoAdRTM0uaAH0UmaWkMWiinUwG0U6m0AJimYqSjFAEdJin4ptAhKMUtPxQBHT1WlooATFGKWigBlFPooAjplSNSUAMqNqe1MxQBHmjNPxSYpDGUU+o6AG0UUUDH0UyigB9JS0UCCkoamUALSUuajpgOooopDHU7FNopgFNaiikA2mstSUYoAhxT1Wn4paYDKfRilpAIq1JRRTAKKKKBBUeKkopMCOlWjFFMofTKKKQgptOoZaAG1BeXAsrG4uG/5Zjd/vHtVjFc940uPKt7e3/vkyt9F4qG7K5cVzSSOXZizDcfm5Zvx5NNhVGV/kX5qrM5WM/wB5v5mhWdfvL/8AYn3rlO4vw/NuRjurFaLazLWtG+1g1RzRFpnagCDQ5vsWvWE+fl80RP8AR+K9NZfmZa8tuoitvK3935l/CvUY5RPDHOrbllRX/wC+hmt6L0sc1eKvc5j4kaeb3w208f8ArLN/N/A8GvI819BthlZWCsrDaytzuzxXlnjHwmdK33unhpNOY8r/ABW+fX2qpJhRmlozj6KKKzOgKKKKACn0yhaAHrRT6bigdwahadTdu1mWgCRlH8/yPNa2ivuhrM2ebs2t82zb+XNWdLm23Cr/AMs5B8v1qJbFxepsNjy2qnb4a+l+lW93zFaz7dv+JhLWaNWadDU3NPqCyLFKzfLSstGKoRGzVE1Tshao/KNAFWTO2od71da3O2o2t3/u1SJK6u9Tqu6jyitSRrQAxbeNWZlVakxS02RtsZb23UIDLvmDSGqdSTNu/wCBEt+JqOtEc71ZNp8RlvIYlZl8yQLuVueTT1u5Y9ysVkVTt+Zat+F0EniLTV/6bD8hVC8iMV1NE38EjL+Rqyepbhvo/ODN+5kUhk2/wkV2ug6qdSjlSTy/Oi+bdHxuFecbgtdl4H0+4gaa8mRo4ZE2KrLy/Oc01ciaVjpqdTloqzAaq06nUUwBaWiiqELRQq0UAGaSn4oxQBHimMtSUVIyuy0zFWtopuyiwJlbFM2GreKTFAXRV2mkxVjFMZaQyHFM2VY2GkxQMq+VSbDVnFJigCDYadUuKTFAAtLSqtOoEMxTMVNTaBkTLTNlT4pGWgCpRip8VHimBGy0xlqfFNxSGR4qNlqekamBDSVJik2GkFxlFP2Gl2UWC4xVoZamVaGWiwXK+Kbip9lGz5aAK9MxU7LUeKQxmKMU6igBuKSlxRigBKKXFGKAEopcUYoASin0UAFFFLigBKKXFGKAEoWnLRQIKctNpy0AXLNttaCtuWsy3atOH7tUSSU2nVHmkArVWuGqSRqqTMWagEVpGqOpMUzFBSEq5bt92qmKlVitCBltmqNmqJmpaYgqvN96rFV5F+ZqTGRNTM09qjpDHK1OVqaq06gBc1KtQ1NChoETU1qkqNlqhFOSoWqab71V6koKSjFGKChKKMUq0AJiiloxQAlKq0KtPoAbinUtFACUUtFACUU7FGKAG0U7FGKAG0U7FOxQB6BRTKK0OUlVqdmoKXNSUT5pVeoc07NBJPmlzVfNPzVAS5ozUatRmgRJmpKhVqcrUATU5WqLNGaYiyrU+qytTt9AE6tT1qDfS76VhlhWoZqiVqfvFMQ6im5ozQAtGaZSUDJVanb6gWpKVwJM0u41HmimIm3ml31BTtxoCxKrU+oM0uaBFpWpVaoFenK4oAmozUeafQAtOzTKTNADqKbmloAXFJS5pKADFLRRQNBRRSUAFJStUdAh+abSUUAJRRTKACiikoAbRTWajNAC1HS5ptQUNp9MozVAOprLRuFJQAtDMaSimAZpKWikAlFLRQAxafSqtJigAopcUYpgFCrT6XFAhuKMU7FFIBuKMU6imAlFLiigBKKKKACmVJRSASilopgJRRRQAUUtJSASiiipGFee+MLrz9enRfmWACL8uTXoDSiNS7f8swX/ACryGa6eWZ5WPzOS3581FTaxvQWtx27c2+nwyycrIm1f9lqr7yu3b61IrjcFZvmasDqLsP8Acb+H5quMpbP4LVWH/WM394CtaxTzIZP9nFRIootCW3V2HhlzL4d09m/hi2/ipxXONEF/4Ditzwbj+wyn/PO4mT9c1pQephiNrmw1DKGV1ZdysCrK3IYHjkU+ha6zjPLfG/g46b5l/o6M1hgtLF1MH+KVwy19GV5r428F+V5l/osP7n70tov8Huvt7VlKPVHTSq9JHn1FFFQbhRRRQA9W21I1R/xVJUgItSqnmK395aiXFOVirfLQMSNtuNvysv3aNwVnVW+XO5P9nuKfMu7a61Hwyna33fu/SgZtWtx5sYZv9Z/FVaNgupP/ALWKoWspjk3e21v9oVNcNuuElVvlwKm2pqpXRux1LVOGX+VW1rPY1RJijyqeuGqyqptoGVo4t1SeUKsUUCKjJVeRauSZ2mq1MCDZuqJk21cpjL8tAipVHUJgq7d1XLh/KhLV1ngXRvIt21K6iVprlP3PmLnZH6/jVwi2zGtUUEeaqksrfu4ZpP8AdjJqxHpuoSbvLsLlv4v9Sa9o5/hbbUUzGt+Q4vbnm3h3RNUj1qznms5oY45N7SSccCtXUvCRvtUubprtYYZX3bVj5rr8VCy1SQvaO90Y2m+H9P01t6x+dMv8c3P5CtHcamamU7Ett7keKey07FFAhqrTsU5Vp2KAG4ptSU3FUA2n0mKKkBVooWn7RQAyin0ygAoxRS0ARstJUtIy0ARbRTMVJRQBEy0zZVimYoGV8UYqfFJigZDikxVjFJikBBilxUmKdimBHimYqfFNxSAhxTWX5asbBUci0wK9JipcUmKQyPFIy1LRQBXxTGWrGKayUAQUYqTZRspjI8U/ZUipTsUCuRbKNlT4oxSAg2Uxlq1ioWWmFyuy1FirDLSYpDK+Kbip8UzFICLFGKkZaSgBmKMU/FGKBjMUYp+KMUAMxRin4p2KBEdOxTlSn7KAI8UYqfFGKdgINlGKsYpMUWAgxT1WpMUqrupgJCp3Vq26/LVKOLbV6Ftq0iWPZdqmqzVNM/y1WoAGqtJ96rFRstAyvijFSYoxTGQ4p2KkxTcUAJRRRQAVBJ96pmqFvvUgI6bUlFIBmKVVp1FAAq1ZWoKczmmBLSN92mb6gkc80ARTN81RVJTcUhjabUmKSgBlFPoVaAEop2KMUANpafRQAyin0UAFFOVadigCOipMUYoAZijFPooAMUYpyrRQI7eiiiqMgooooAKWm0tBItOzTaKCiRaetMWpFoAFWn0UVRIUUUUCFzUmaip60AOzTs1HiloAkVjT81DTqYiZWp2agWpKAJKSmUtIY6pFqGnrQBJRRRTEKtJRRQAUtNzS5oAfmioc0ZoAsZp6uarZpVegCzuNOzVffRvoEWM05Wqtmn76ALGaWq2acrUAT0VHSUAS0majooAdmkqPNGaAH03NNzTaAH0UyjNADqYzUmaY1IYUUlLQAlNopKBi02nUmKAEoxS4paAEpKdTqAG0lLT8UAR0tPxRQAlLRUi0xEdLT8UUAMxUirSVLGvy0CI8UYqam4pgRUU9lptADcUuKWikO4mKMUtFAXExTJnSCGSWRtqxjc1SVy3xE1M6boK7f9ZK/wAtJ6Djq7EGoeNo7GbZNp0zLjcrRzCpLPx7ok/yzG5t2/6aQ5/UZrzp7ibUNJtZZD5lx8ys3G5tpqh5BVg22s+ZnR7FHumn31tqVv5+nzLcQ79u6PPymp5GEa7pHWP/AHmxXiFrfXlir/YbqaFZSPNWNsB6nZ3nbfI/mbv4mYndQ6gvYX6nsq3Vt/z923/f4U9ZYpF3RzQyf7rA14uqBf4I/wDvmjan8MMa/wC7xS9sH1fzPa1R/wCJG21HXjkN1d22Gt7m5h/u7ZnrQtfFWt2jf8ff2pf7tyu/9RihVUwdCSR3niqY23hnUXX7zRiJfq5xXlXm7a6HxJ4qGs6GlmtpJb3Hmh3+bKMF9K5bnaqsqrv/AIv7tZzd2a0ouK1LEb/xfxNViNg3/Avm/EViySyKxTNXNPl8zKyfeUfLU2NLm3bttxzXQaCpkZ/+uYbbXNw/Nt/Cun8Htu1Bl/vQSfptqJLQstSW43GrXhP93/acX925H5FKuSW5bG35qg0VRHrGpp/eSKX+lLDv3jOurwNenUU5a7zgG0bTu3KdrU+jFAHHeKvA1nq2bjT2js9Q/KOU+/oa8s1PTbvS7p7XUIJIbhf4W9PUHuK+hcVU1fS7LVrX7PqMCzR9Ubo6H1U9jUOKZrCs46M+fMUYrq/FHgnUNG33Fr/p2nr/AMtF++g/2hXKbht3LWWp1Jp7C09aZT1+7QMav3qkVkX5mqLNKqhqYx7TFtv91aI/3bKzfLSqgb71XLqWO5VGjTy2T5W77vekIrX0IimVoW3RyYdG/p9aJog0fmw/db7y/wB00iv5a7JF/ctQuYPnX5oWoAtW8v7xWWr8c21qx5kMarPbt8rf+O1JHcBv9lv7tZOJupI3YZt3y1bjlrno5irVYW6P96psanRRyjbUivHXPLdH+9Ui3ppiNiRkqnIv8S1Qa73Un2ssu2gC5vFDOKzmmqvqF66RlYz82NzNSSuS3Y2/DumHXtZ2yK39n2vzTejnslemtWf4X0+LT/DtlBCNu6MSy/7TsK0mrthFRR5dSbnK7K7LUMi/NVmo2X5qozuV8VEy1aZaiZakq5WxTNlW8UzFA9CvilxU2KMUAR4pafRVCGYoxUlGKBkW00bDUtFSIi2mlxUmKKBjMVHtNT0lAEOKKkxRigCNaKey0YoAZikxUuKMVQEOKbipsU2gCKipabipAZRT8UYoAjxRipcUYoAixSqtSYoxQBFimMtWMUxloHcrbKZsq1imbKB3K+KTFWNlN2UAV8UmKsMlM2GkBDijFSbDSqhoC7I8UtSYopgR4p2KdinbKQEeKZip9lMxQBWkSo9lWWX5qZQMrMtJUrLTMUxkeKbsqbFGKAIsUYqXFGKQEWKMVLijFAEeynYqTFLigBirTsU5Vp9MCPZRsqWjFAEarRsqZVooAgxSqu2pKKQh0dWVb5arLUitQIdI1R07NNzQAlIy0uaSgBmKTFOpMUDEpuKkooAbimMtS1E1AyOomqWmNQIiamVJTaRQ2inUUCHUlMooGPZqgZvmpzNTKAEplPooAZin0uKSgBlPoxS0AJRS0YoASipFWjFADcUYqTFGKAG0q0+jFAhtFOxRigBtFOxSqtACKtLilxTqYHY0UUUzIKKKKAClpKWgAp1FFBI6pFptKrUAPWlqOpKoAoopaBBUlNWnUAFFOooAbTqKWmAlOpKKBD1qSoVp+aAH05Vpq1JmkMWkpaSmAUtFFABTGqZVpjJSERUUrKaTaaBhRmm0UAPzT81DT6AJaM02ii4ElLmo6TNFxFjfS5qvmn76dwsSZptR5ozRcCSjcKjpKQEmaZuNIrUlAC5pM0U2gYb6M02m0CH5ozUWaM0wJs0ZqLNLmgCbNFQ76dmkA6nZqPNFAyRabRTloAWlxQtSYpiG4pcUtOxRYLjMUuKeq0/FAiNqMU5qiZqYD6Xd8tQb6M0rgTZqSq6tS76YEtJimZp2aAChqKKAG0U6lxQAyvJvi9emTXLeyX7sEQZvq1euRruZVr598WXv9oeJtTuv4XuGx9F4FZ1Njegveua2k2+7w3C+3955jMtR+SW3f7WK29LhK+D7NtvzNVFV+Xf/AN81mb31M2S1do/uVNYoJI/KztkX/wAeFW1/iX+Fv4anhtUnV0+XzM7vmbHPse1KUW0OLIPsx9KPs5qzHLJAsizbmji+V2biSLP94enuvy1px24kXcpVt38S81g20zRWMJrf2qH7PXRNa1Xa3pcxRgNb+1RzW5+zv/s/Mv4VuyKkf3qozf6S3kRj7x+b/ZFXEhmPcIGun+WhYgskTL6j9a6Cay3TMzDbu/urVC6tNsJf+783b61q1oSmSwt8v4iun8E/NrSRL/FBN/KuShbctdh8P/m8TWy43bvMXb9UrGWxaOyWI7hWfDF5Xia73feezVvxD84rp/s4Vt2f9la5bXpTbePtEXd8s8EsTL2bjIrDDv8AeCrfCaVFSUleoeeJS0U+jYQ371FOplACLXL+IvBum6wHktwtjfHq8a/I/wDvLXU1HilZFptbHjXiXwlL4f02G4u72CSaWTYsESnt1O41zv3vu12fxQu/tPiKKzjb5bOIK3++3Jrk9v3qxe52Qu1dkSp8u6lVasMnyrt9N1JsNBYxakhiLNSbTVixYLNQJjpLcNH81UmSW2kZNv3vvLXU3UQktU21VvLX7TYtcfdkTCenNArnOrKYm3R+tTbbe5ZVU+TJUbOJWXzB8395f4qdJaH70bxyf7vVqgY+S1uYFXcnmL/s1Gsvy0i3FzAu1XkXil+1I2zzIV+X+7/FQWpND/No82mN9nk/iZafstv+e3y0rFe0Y3zaer7qgZovm2hm4pPNfbtWiwe0ZYkcxr81UmUt8v8AE5C0tW9Hi83WLCJf4riJdv41SRm5Npnu2zy40T+6Av5DFJUszfvD9TUddR5pHiomWrFRMtAyCo2Wp8UxlqCyKmVPimMtAEVDLUmKMUAMoxT9lNxQA2inUlFiRjUm4Uxm+ao6CifcKXNVmpVoAsU2haKEMXFFGKXFArjaKkxRii4XGUlSU1loAioan4oxQPQjxRipMU3FADcU7FSYp+KAIsU3FT4oxQK5BikxVjFJigZBikxVjZQsRoAq7KTZVvyjTfKNUBV2UbKteV7UmypDQqbKTFWcUmwVQFbFGKs+UKTZQO7Keyl8qp8UYqQuQ7KNlSUUAR4qPFT0MvytQBSb71RstTNUdIZFimMtTUUx3I1WlVafS4pAR4oxUmKKBEWyjFS0UDIsUuKfiloAjxRipKKAEpaMUUAFFLSUBcKFoxT6BDadS4ooASmU+mUAFJS0lMLDaTFLSZpDFopNwozQAtRNS5prNQMjopaKYEdMqSkpCGUYp60+gCHFNZasVG1A0QYpKkoxSGR4pcU+loAjxRipKTFAhmKTFSYpcUAR4oxUmKXFADcUuKeq0uKYDKKmxRiiwiGn4pcU7FMBmKMUuKMUAGyjFOozQAtFFKtAzrsU3FT4pMVRkMxRipMUYqQI8UYqXFJVEkeKfTaKkodRTaKAJKcq0xaerVRItLSUUwFp2aZRmgRJS1FUitSAfRTaM0CHUU2imA6lzTKfQA9WqTNQrTs0ASq1PqDNPpDJaKRaWmIetLUdFAElMxRT6AIsU3FWKbigZBijFSUUCGYp9LRikA2jFLRQAyn0UUAFFFJQwClxRRQAUxqfSUAMzTGp7UxqYxuabmikoELmm0U3NADs0uaZSUgJM0K1Mp1MCTNKrVFTqBk61JVZWqRWoAlqWq6tT6BE9FR5pc0xEtIz1HSZoAVnqJmoplIYtFFFBQb6M0lFArEitT81BSrQIsZoqKlzQBNSrTFanrTEVNauxp+i6jef88oGb8ccV85/8sTXtfxUuxbeDXi3fNdTJF+A5NeLqpaRFX+IisJ7nVh17p6zb2Lx+G9PZUb/AFIZlrJktSrHzCv+19c13WoL9mtbeJl+7bqu2sG4iSRflG6hApXOZ8k7nVvu5qLa8Uw27dv/AKEK34bUK3zJ/wCPfhUNxZJt/cn7v3qAuZ2rSyNYxXsPy3lid0Un94dwfY1Y0W4iWSVIT5du4WeFd33d46Vdt0STzbe4RZI3Qq+6sqbTLZV2qsyrH8q/NwoqJR5kaxmkdCyjnaVapFtPPZ1hVWZULMtctb6L5sn7u8aP/ZaOtD+zLuyjWWG8j67V2ySJWLoPoWpoytkt3q0tuzbY0G5271oxqFURKkcar/dqtbxXceoXcrbfMl+Vv9nHNbViiSTD5fmx8yr/ABVvGNkZSlqUbiJ2bcvzLWfdQuyzbj95DXVf2bLJj7O22qbWT7VW4+ZsFd2372aolSRxdq3y12nw9bb4qsP9p2X80auKtW+Wux+Hqn/hLNLX/pqf5NXPPY6Eep7RufdXG+PiLbxF4Sn/AIvtWz8DXdTLXm3xcHkf2Bcfw/bA7Vz0PjCesTqmX5moxU0y/vn+ppteoecR0Zqvq2oW+l6fJeXTMsMf8K4JYk4wK4W4+JccUh8vTo9v+1NSuuo4xctj0Kkrgrf4m2TNtm0+b/gMwq9eeO7NbVXs7WZrhvurcLhKfNEr2UjqLy5t7O3e4vJlht0/5aSV574k8a3F2zQaPutbX7rS/wDLR/8ACuf1TUrzVrjz9QmaaT+H0T6AdKqrF8vzVnKfRHRCilqyqsVSKAsc7fxcKv41cjiDUxog14kW7aq/faoNSBlHkouPmiyjUjRFqs3UQgbcsiybhuZlqJnC/e+7QANb/wCj71qpDnzK0bVw9vKq1R+7lqANixu0Vn8z7uyqV1dyywukfyw5qnGzyMFX1rQWItvX7v8Ad/2aZNiDVNHudPWBbyFoWnjE6K3B2HpmqVurspVf4a9C8aXA1nQ9H1H7s0Vv5D/Nk5U4ribOLbeRfwqx2tSGndXKkjyx/KzNtzUfmoqurR7mb7rVu3lrtmZJE27fzyaz5rWPdUlGa2yjalXZLSP+Hduqky+WzLQA3ikp+4U2goSrOky+Tq1hP/cuI2/Wq+KTlfu/ezuX8KpEvVH0LIv7x/7uTUVZXh/xHZa/Dutz5d5jc9s3VT6j1Fa2K3POaaY2mstSUlUIgxSVPio8UhjKZU2KbigCGipcUmygZHTcVJihVoAib5ajYhVZmKqv95sYrG8QeJbDTd0SzLJcY+7HztrzjWtTn1S6aWZ5Nq/djZvu1F7Gsabkd7feJdPguGi3yTSL97y1yKS18QWc94beRZoZFO394teabRXXaLDHPr3h5mVpGltw0sbc7tu4Z/FalSbLdNI7JqctQaa3+hquWbaWX5vY8A/SrGKu5kSrTqYtTxruagBcUuKkVKkVKCCHZRsqzsFHlVQXK2ym7Kt7KTZQFypilxVrZRsqbBoVdlIqVZVKdsosBBspVSp9lPVKoCvspdlWPKNPWI0CuVPKoWKrnlU9YqAuVFipdlXlipWhoAz2iNJsNXvKqNk20AUmSomWrjLUDLQMr4pirVhkpNhqSrkWKYy7an2GmMtAFdqY33amkWoZKoZFT8UuKkxUgR4qOT7pqwy1BJQBVZaZU7LUNBRHSYqSkoAYtPxSqtPxSAjxRUmKNlAEOKMVPspNlAEOKMVNsNGygCHFFSYooAbRS0lABRTaKAHUq0ynrQA9aKVWoagCKm0+koAZRRRQAymtUlNxQMjVaKkxSYoAiplPb71RtTGLTM0NUdAiTNNzTaSkBJRTKKAH0ykpaBiUtCrTsUCCijFKq0DuJilVKfilxTAjxS4p+KMUAJihVqRVpyrQBGq07FSYooAjxRipcUYoERYoapcUxloGRUUuKNpoASilxRigBKKeq0uKAO0op+KMVRzjKKKKACkpaSmMbRiiikA3FFOakoASilooC4+m06m0AOooplMB9OWkpVpAFOzS4oxQIM0UUtACUuaKKAHUtMp9MQq1JTVp1ADqkWmU9aQ2LRTKKYWH09abTtpoAbUlCrQq0CCjFOxRSAZiiloxTATFM2mpKKQEe00bDU1GKYEO00YqZVoZaAIaKfikxQAykpaRqAGNTGanNULUADNTWoooAZRS0UgG0q0uKdQA2in4oxTAKKMUuKAHKtOoWnqtAwValxSUtAhKKKRqAFpGpmaTNAxaKTNFADqKbmikA6im0zNAElFR5pdwoC5NS1Fvpd9AE60tQb6dmmI86+Ml3um0yzz/AKpGlZfduBXEaDbm51rT7X/nrcRq351q/ES7+2+LL1lb5YiIF+iCp/hjafafGlj/AHbbMrVg9ztj7sD2DXIk85mUfKwHy1zskQ+bmuj8SNtZdvp92sLbu3Mqbt38LUzBFPa65b738NSQ+XI0qL8zL821s/MD6Ut1CW2bv4X3L6rgdCag2yq1xu+8r/LQMS4tfKXzd27+CsqZTJvZR90ndW6zmWYr8vmLjd/tetUJIklZ2j+62KBlG32L8v3dtWpH3L99vmG5t1NVH8xWwu2pfspZnZjuVf4dp6Ux3KbL/dVv9r/aNaMMUjQ/uY18xctu/u+1R2tr8plh+aOtC1yu5V20hE/lHbumVvlA+61WFgLKif3j8u5u9StMfJVVVfufd69KsKxjkRmC/K6tuWgk8bjX99MmfuySfzrtvhqu7xtov/Xx/wC02rjZl26hef8AXaVf/H67L4YuF8caP/s3H/tNqwlsda6Hrs0W6SVvvLkV5j8dPl0nSf8AZua9XZhIvWvJfj15i2OlK3/PRq5KHxlMtXXjvw5A237e0zf9MISazpPiNpyr+5sL2Rf9qQJXk1upaZdtXmi8ubZv+avSc2Y+wR0/ibxK+vtbJ9l+zxwFm/1m/cWGKLHxPPptjDa2drpcOxNu77IHdvck1z8dvu+ZfmarMKpu3Mv+z+NTdl+zVuUvaprd5qiqt0sDQ53fLbxp09SKyWSTzGbZ/wCPVM0QXcy/dqRcbaRS0II1LVK0qK22mxrSzYWP5v4qAHzTRqqxQvuZhuaT+7RDEixv8yrtH/fVVNnlxhl/4EtSNayQ2sdwoby2JX5f4SPWmIl2Bm6VH5Q27G+7ToZg3yt8rVZZHXDNQBTtUeC6Kx/MrVFHbm5kLsPvGtRbcxRyysVWNcbvXk4wKhtVLfNb/MrfM0dArjZrXyIwyp8tFnfRxXCNNCskf8S7ufqK3NDu7eSQwXUyw8fL5y/Lk+tGvaCkEjxTReSyH5p423xtnpRYnmSdiNri3voYkX5dpO2si4h8j/Wf6tj96q91p93aN8v+rx96PkUR30vlrFN8y/7VA/Q6m61Wy1fSYUmhW11iIKnmL0uB0yaw7rTbiKPzZE2rjd2qvI0E67Y9y7fu7v4ahhvp5IxFHu8zO3bu+8aWgybyo44y7Mvy/Kq92qleWUiw/aJh5O4/6tutWYbiSNjLD5ckyn/XtyiH/ZHrVZkknZmy0m4/NJJyWpgUtsa/d+aod53LU1xbmBtrfNULUih1MpaFWgB0bvDMksLtHMh3LJG2CteheH/iAvliDXYpGP3ftUS/e92Fee03FNOxMoKW57dD4i0Odh5OrWjN/tNs/nitSHE8bPbvHMv96Ns/yr582hvvVPa3E9lL5tnPLbyf3oWwatTMXh10Z75imstea6T8Q9QtofK1K3jvv7sn+rfPv61qx/Eiz/5baVc/8BmFPnRk6MkdpiiuMvPiLZfY5vsdrP8AavuxLMo2fU4qjY+Pb1FC3kNlcdG+XMbU+dB7GR32KbisC18Z6ZKv+kJND/ebhxUl14y0eLKwme4bH/LOPC/mcUXQvZyNvhVLN91fvM1cF4u8XxyQyWWjybmfKyz9No9FqDxJ4lfWIVt4fMs7X+Nd2Xl+uK5nbbx/Lt3f8CqHNbI2p0bayM7bt3UVdZ4F+7HGtQtMP4f6VB0EGx5GCxjczfKq+5OK7PR7tbH7XqSpu2wfYrT0bbtDmues4C2mzXpbDNMLWJf7pZeT+C1t+Lohpv2PSFVV+zRLv2tkMX5qkZS1djpPDdxBc6TD5Lr5nLPH0KljmtZYq8wtZTFIHjLKy/dZWrq9L8RXEUa/bIftVv8A89V4eqTM3B9DplSrUabay7PXdMn+7c+S3/TZSlbEbJIqsrqyt/ErZFUjJprcMVIq0yrEK/NVEAqUYqfFKyUxFbFGyrGynbKQFZUpfKq1spfKpgVlipfKq2sVHlUagVPKpViq55VO8qkBU2U9UqysNSLDTArrFUiw1OqVMqUAU2ipNlX9lNaKgCiyGoJEFaDJUTRUAZLIab5VXmiprJQBRZBTdgq60VM8o0DKMiGo2iNXZEqNl20guZky1WxVyRC2aZ5JqS0Vo1+ap8VIsXzU7yqAK9RMhq/sqGRdtAFKRKj8qrbLTdgoGU2ipPKNXGSjZQMrLEad5Rq0qU7FUIreVSYqzimbKAuQ4p2Kk2U3FSBHimMtSUMtAyDFNxUzLUdAxuKZUlMqgG02n0lQA2n0lOoAKGoopgNptOptIAop1FAEdFOptABRRRTGQstRNU9QstAxuKZipKKAIsUYqXFGKQiLFGKlxRQBBijFTYoxTAaq06lpaBjcUqrS4p6rQAirTsU9VqTFIREqUvlVPiloEV9m2lxU2KMUBcZijFPxRigBuKMU/FGKAI8UjLUlMoAjxRipKXFAETJQsVT4p2ygCHFGKmZKbsoHdnYUUUVoYEeKbipsUUgIcUbTU2KMUwuQUlTbd1JsoAioqTZTdlAEVPxUmyl2UgI6Kk2Uu0UARYpdpqbFGKYEOKetSYoxQAlGKcq1Iq0ARYoxUu0UUgI8UYqTFGKYEeKMVPikxQAxakVaRakWgAxTsUi1Iq0AMxRtNSUYoEIq0/FKq1JigQzFJipaMUARYpcVNspdlAEGKdiplSjFAEOym7KtbKZigCvijFS4o2UAR0mKlxSYoAjxTKmxUbLQBHio2WpsU1lpMZAy1Ey1ZaomWmBXxRUjLTMUAJRS0UALQq06lWgAVaMUtFAxFp9R5o30CJFpy1FmnrQMlpaarUtAhM0xmoZqZQAlFJijFAxaKKZQBJRUeaGagBzOKZmkamZoAkozTKKBEmacrVDT6AJ6ZNcC2hlnY7ViQv8A980ysLxxei08M3X96fEH4Mcmk9C4q7seR3EpnmeVjuaQl2+rc16P8EbUrdalqOPuYirzRW3MWr3H4S2Mdp4RSWRtvm/vW/GsVudVR2idFrSRSsr7vvVkKka7k+bdW7fLFLCW3/drFmiTcWXdtqjmRmXkUbKiq3zLlqoceSyr/rN+7/exzWlNFGzBmrPunSNdqrSKJo1j87fna2Sm76DrVa4uxBI8ExhWZT8yswyufakjl3Rv9Nvy+9cT40tPP1aG4k/1k8fzN/eIoLSud5aoJGR40Vt/y7o2yG71emtZFYNHGzV4+ulXC/NDJIv+0uamjbVLRWlh1aePYN3+sNK43A9ftbTdC+7arcu+3jmo1iT5XZWXaf8AvmotPivVt7Jr2ZpJvs6ea/8AeJrVby2t32jdwNrd6ozGLFHtZvmaRR81TQqJ8v8Aw5HpnIpsLHzim3crfwt7dM0jXQX5cK26gk8iulEerX6/N8txIv4ZrrPhmx/4TbS/9ly35RtXH6lKG1q/Zf4riTbu+tdb8Mcr420xf+mh+b8GrnnszthseyeanyNu3RsN34V5Z8fs/wBn6Nu+b99JXrd0oVT8vzf415T8fMf2bo/+zcSfyrjo/GimeSaem5i1aSxbl3fxVT0tdytWlt+WvRER7D/C22l3FZFZvu4qXFNZaAHKoZf9qhVqKPP3fYLu/GkZ3aQfLtpAOZhE3TzKi5kkZmqWRCsm323UUxCbP7tTxrth2fw02HG6nfdZdtAELW452/K1Pt/Pjbb91v8Aa5T04qzGyLMPMX5aLy7ku2jST/UrQLcuRqNZuHaZYbWxsYh+43csQP1Jb5jTWt4lVUh+XbiqNxa3NlGtwse23f7vzctViF45fuuu7I/4EKYvQLi3MvzTDb02ybc/n6VCt9eWlvJZw3LfZZCGaNW3o1aq3EkDI0J2stZ91deZvfy16/MyrigXqRf2nIrFtm7f8rbar3F8k7PuhVf92mfu13MtS+UGj2xt8y/w/wB6lcrYz9w3fuVbzP4f9qntamKTczbmb7+2rcOYbj7recwCptWrFvC8kzyyLJt+837s0hkCxCZVWP5Y8VIyeRCy1PZ77TzIlltpFY71bzMFfYVTurgyM24/e/urTEZt4wb71UZFdW24rYm+8y26fN/CzVXW32/e/wB73pXKM371FX/JTcdy0nkp6VNyinRVpofl/wBmovKqiSDFOqRV+9RsLUAR0qqWqVYv4mq1bpEzIy/ez92gCrHC7f3ad9latL7P5isyjbTfK2/eoAzfK2/dNPaWddqM8iqv3au7BUe91b7u6hiKbJJt+V2kX/eqJquqpkb5dqtSbCjMsybqBmfSVoeTbt91pFpjWibf3b7qANXS7YzaTo8G7/j61Fm/Ly1qTxc8cvia/aH/AFaynbWl4PtTc+KPDtg21YYrfz/m567mNc/eOJ768lXdtaQt83XmqZktyH7tT29xLF/qXZd1Qbd1JSKNDzftdxFFMY7dsbVl28MfetDw3rv9l6p5Uj7rGU7JW6Bf9sCsPduXaw3LUbJtYt95W/8AHaNtRNJ6M9rX/wDZZamh+9XH+BdYF7Z/YpnX7VbAKnzD509vpW5deINL0/5bi7Xd/FHGu81re5yuLTsb2KdXK/8ACe6QsLs0N/8A7K+WBuH51kSfE2PcPJ0mTb/F5k1HMhezkeg4pyrVXRdQttV0+2vbOTdHKhbb3Qjgg1exVIzY3FSKlOVakWmA1Up+0U9VooHYZtFPZRRTGagB9Lio6lWkwCpFpqrUlABQ1LSUxEbLULLVio5KQyvspuwVM1JTEV2iFMaIVbxUElAFKaqclW7j5qq4pDK+ynMvy1ZVDSYoHcqYp+KsrFT44fm+agCrsFRSRbq0vKSmNEKAMryRTvJFX2iH92mbRQFyn5FH2erdGKAuVfK20myrDUjLQMqMtR4qzItR4qSiFlqFlq0y1Gy0AV2Wo6sNTdm6gZCy1Gy1NtK0jKWoHcr4oxU+ym4oC6IsUmKm2UbKB3K+KeqVJ5VPVdq0AM2Uxkq1im4oFcq7KXZU+wU3FA7kOKMVKyUMtICvikxUrLTMUAR4pMVPio6YEbVGy1LSUhkOKbipqbTGMVaGWn0UAR0YpcU+kBHim4qbFNxQIjp1OVKcqUxkdKtSbKeqUhXBVpy0Yp1Ahy07FCrTqAG7KXZUqsKNwoERbKTFSswqPNMYyihqSgBKbUlJikAi07FCrUmKdgEVafilVakVaBEeKZip1WjaKAOkxRipcUYqzIjxRUlFAiNaKkooGR0lSUmKAQyin4oxQIbin4op9IBmKTFOooATFLinUtMYzZSYqTFFIBMUYpaetAEarTlWn0q0ANxTcVMuKMUwI6Kl2CkxQFyCnrS4pdpoASp6jxUirQIVVp9Kq0YoEJS0qrT1WgBFpVWlp1Awp1FNoAXFPpmaWgB1R06igBtLijNJQA3FGKdTc0ANxTMUrNSUCGYqNqkzUTNQAymtS0xmoGRtSUM1RswoGFFR76TNAiTNLvqDNIzUAWPNFG/3qpuNG80DLW4UZqBWozQFiwrVIrVWVqkVqAJlapM1EtSrSATFJsNWFWjFAirim4q5sFR7KYFfFNxU+KZigZDRUuKZigCOkp+KMUhDaSn4puKABafTKfTAWuF+KF38tnZr/CDKy/oK7xV3V4742vRf69ctGf3anYn0Ws5uyNqKvIwoYjPJFEv3pXCr+NfSGlxRafpdvFu8uPYNrbcivB/CNkb3xBbJj/VEO1e8MrrZ/N8sagL8tQi63Yivpv4VdfmH8P8AFWTcM8cgaR2an3SlZl/hVvlX/Z5qK+SRYd0jfMpqiEVdo3bc9qytQbdvVT83P3W7dCKs/vGjCq25az7hArMsx/kefrSZSIdz7drfM2ay/FH+usm/2z+orch0+9n3LDZ3My/3o4zS3ngrxBqUMPk2axsrh2+0TBKlzitzRRdzo/Aumi78I+eyK22SVa8x1KLdptw2770bbvzr3j4f2p0bwvFYasu26SeV2WPDjDehrzLVPButtp80UdpHI2JF+WQVhCSu2aSTsdhqkXlXS+W3/LONvbOKz4b0NCPOTy7j7rf7WPSuj1q3823jZV+by1X3XArk7hE2qin5v4q6FNNHOk2y5NeyeZuZl3KP4az/ALWImdpG3KxP/ATVNpRBN83t/wDrNSaldxRw7tytuB/d+9A+VHCao3/E8vW/h881u+CdTttJ8SaVf30iw2sVwPNlbPyghhXO6gxk1K4lk+8+H/OsnUrjzJPKVvlj/wDHjWT3OhPQ+l4/GHhu5+7rtk3I/ixXm3xy1OzvodGSxuYbhd8r7oWyteS8f3afGtRGklK42zY0tB9nq7iqtmpihVa0bWIyt8p29F+atyWMjidpNir82KtXFjJp/ltdeX5nDbd3r6itTVrKXQv3V9H5d4wH7huqg9/asS+vXu7hXmO5sD5vpQwTKUkp84N/dO6nKvmR7l+9gVOyBmqvC3lTf7LuN9IYRuW+VmqVl+Wq8iBWVv4dg/Wn7/71MGPh+Zlqzt6bR8tRRr81SSXA3M38Kjb+NADLpk4X+KkjyqioY13Mzf3qscfd/hoQE0cRuZP3jM3H3W5qrMnlSFoVWrELGOTctEn97+KmSOVhJGG3NUEyFZNrLtqWHT5b5Z2tf9cg3bePmrY8I6npcmoWlh4mj22K3C+a3QxfX2oBtLYwltJJW2Qp/tbm4Cj3JqpdP5TKsL7t2P8AgVdR4+1LSLnVHt/DcbLp8A8ppen2h1PUDsKwvJ2xr5g+ZqVhp3RQXeu1qsLdXCr+7kanxom75qkVArNtpO49CzazSq00sY86Nhtmj4yw9jVaZI5I99q7SL975uqmpFuPL3+X8u4BW/2hVaTLSNKrbW/vUveDQkhiFEkIb7zfepbW6RpFW6Ty9v3ZY/4qsTRGL/aalYLlezsXubz7PC8e7G7czVLaxWcUzrfPIsag/wCrX58j0rU1i0TRJl+yzrJM0fzbWztNYdvCWzKqM3O3zGzihoFIz5v3Vw7x7vJbO6otiN838NbepQ2/2WOW3+WT7rxtzzWYqbdzr/wJf71AESpHzuX5qPkq4qRyrvj/AOBL/dqvIm1qBke0fw1YtYv9IXd/CKhWrSr5cLvQykNhu3iZmjG6Pf8A6tvfjIqeRhL8y1AqmNWVhuajzX3CXH3f/HvrQiWDUjIW+7Vj91LC08a7ZP4o2/mKRV3N8vy/8BqriKjRf3lpjMNv3t1aUnmStsmm+XA+XbgfUgVXW1RZN0zbl/hX+9UjKLSpUbMfm3VpSMNv7mJVrPmXr9KoR6L8O7eBvE15dXDtt07QGnVV/iIjrzyH/j3b+8xr0zwCka+KrtZGVVn0Cf8AW3zivM4f9WKozjqwXP3qeyD7y0vLfKv3aev3RQUR5ozStD8xZajpCBkDNuX5WpI77ytyMu1Voj+ZttRTIGWkNMW6uvNVV3fu1O7d03GoKdt20tvBJPcRQW6eZNK4SKP+87cCgo29HnvNI0l9Vs7iSFllVU/uO/f64Va9wt3eW1t5ZEWOSSJXaNf4SwzXkt1CdQ8QaT4cs3WSz04iDcq8MRzLJXr7fMxatoHHWeolSK1R1HvrRmJdVqKrRuamzU2GFJRRQAVJSU1qAJlalzVfNSK1AEuadTM0jNQA6opGpGeoJpRQA9n201Wqsz0qy0xFxWqrcNStKFWqcj7qBoZTtopm4Um8UgJFxS7QzVG0opFegCxinKtV/NqwrfLTAGWm7RUlNoAhZagarrLUSwjdQBWoq15QpPKFAFTZUbLV/ZUEkVAFVkqFkNW8UxlpFJlXaaYy1b2U1kqQuUsUKlWdlGygorbKNlWMUYoApslIyVZZajxQBUxTqsYpmwVQyKmqtTMooxQA1VoxU1GKAIMUYqfFNxQBXZajarEnyrVZqkZHRS0NQMSomqSoGoASiim4oBCNRS4ooGJikxTqcq0AMpcU7FGKAuNxTsU7FOpCG4pNpqTFPoAhxT8U/FOVaAI8U7ZUmKXFMBMUypKY1ADc0u4UykoAfmm0lJQAtC0Usf3qAJFWkxT6KAG4p60ynrQIetOWos09WNULUkzTM0yjcKAOuzRUdGaZkKzUK1R0UASZpmaKbQA7caKbRQA5Wp2ajpuaAJ9wo3CoM0ZoAnzSqwqKigCelqDNOzQMmpKRWopAOp9RZpytQA+iiimIKlWoqVaAJKKKKBBin4oWn4oAYq1Iq0qqKeq0ACrS06haABVpcUtOWkMZilp1FADaTFSZplABRRRTARaWiigBtNqSm0AMpjNUjVHQIjZjUbMamaoWWgBGeo80rVCzUDQ5mqJmpGao2agBWcVAzUNUTUhi5ozTcUuKBj6KZRQAtJRT1WgQUMtSKtLsoAjXNSLmpFSjFMB8dSLTFWp1WgBy1JTVWpVWgQlNxUlNpgMZajxUlI1ICBlpMVJRSGR4puypKKYEWKXZUlCrSAr7Keq1LinYoEZuqXX2LTbm43fcQ7f9onivD7jLXTbm3V6p8SLsQaSkG75pX3fgteV2sUl3ceVH/rHIVf8AZzWczpoKyud/8KdKMl0brZ8ud34DgV6rIp5VlXa3zLVLwbog03Q02qqswCrWhN5bNtYfMpH/ANYiiK0IqO8ihdW48sM3y7fm3dTWS3myXGxYvM3Y2+rGt2O1kuZvIjfbGv3pK07PT4LH54f9Z/z0bk4PWsKleMC6dJyMCz8KP52+4l8uHP8Aq15OK0dP02wgvJUt7SGPyCVaST55HJGcjPQVeZ7mS+iaz2ta+Wyv5ykJv7H3qrefZrKTazx3kkpVbrzGxsP8B2DoK43WlPc6VBIddagjbEhdZFZyvrx71ctWf7OrSK25fl+Zsniqt8tx5fkWKwQw/wAUrZQL+VV2X5Zmk1SFpmDL5dvCOpGCM80t0WbCxBpEX+8R81ZsNw/9jresrSXDx7tsa53HOBgVDC221g23l7Cyxx/KsfCnHQcUiuIIYkh1Jo1QDYskeahAFnqb/aliuotqsm5p24VCB0qS8tbC7m+aGGTgfMvG0VUV7y7vJF/c33kRj5VURhsnjHuFWrFxZRzx7vKa1427VblcVotHoBzXiLw4JY2XTX/fN8yxyVxF9p95pd0tvqFvJDM3zLu6MM9j3rvme8ihtdSXz5vNy/3s/u84HGMDP3q62SGz1LS0S6hWa1nTcsci1qq7juZuFz508SbIJkeNdv8ACu5smub/AO+v++a9s8UeAZ41e60PdcR53NbN/rF9l9a4P7NFKrpMn3flP+z2IxXRFqeqJ1jocmqH/gOfmrTs9Nknk2wq23/0GtjS4Yra+fS7pNyykvFJx3HSn2LGC6eCRmVsfI30qw5iS+0mWKzeWPa3lYVo+/4VDpN7LprPcQpGyshX5uiE9SKv3Wt3Pls0c8O7YY/9XgsCMVibnkZFbasa0wV+pPM897MXZ5ppJTueRmyXPuasw6eV+aRv9pak09Y921l3N95d3Rvr7VMzSNuZV2r+fXmgRQkxtO1qrtCVZt1asMP7tZZBtVnH5DqaI4TI0jr/AAJuosO5ir+73RXC/u9nyN/ewcipY4h53lMPmbKrWr9hjvYZYvMjVlO1WZeWPUVmq7xSFbj5ZIpA272PBoGncs+UYWdJt237rfL90jg1SuIvmP8AdydrdN1Xb64eSZFxt+T5/m+9iksUiZvKmfbu+79aVw6FRV21PGtaP9lboWlh+aNQKrbHj3Iu3dx8rUxXIVYqxpNpbNSyKNoZfvY+ap41EcIlk+7QM3fCNpHpd5Y65q3/ACB1n8qba3OHHpXPeJJrbW9elXQbOSG1V28lZGy7JnqaXVtauNQjt7Vl8m3i/wBVErHC+5q54buItNW6aZGkkaMeVtXvmgi1ncwbVTaXipcW+5lPzRyfdauom0q3vfCcms2cs0nlTiCWPb9zIzWBfKbln877rHdu7qc5qO1vTYxzwXXnNZv8vmx5AY9RkUDZO0O2FJf71RqwVW+XbV2a4jvoUS3RVjjFULq3lgZVuImjZhuXd/EDQA6NEnuN2PLj4bbyRTriILGdq1Hbt5e//aqbcF092+bzFP8Ad+6DSbLKi4ZdrVYW6C2bwSHb02yVU2llXdUjJtqdbgakOkySWck6vtVfm293p91q8kmkxacsUaxxn7y9fxqtpupS6fJtZd1u3ytH/d9xRdLFIqy25+Vv4aol3M+Rju2tVds1cZfu1DIlBREqlW3qfmokZJW+7talprLuWgdyNqsyIG8qD5dq/wB7+Go7NC0jM3+rWnwsZJHlb5o6TKG8q3zfwnb+FIy/N8p/wqfYNpaoFU7tv3aCbgrI1SwsYGVo2WRf7rUnlbaRV207CLKzWUm/7Q01m38O350qWOwlePfCY7iHG7dC2do9TiqLN/s0yNTFJ5sLSQyL/FG2DS16iaJ5k/iqrMvytVxdTlb/AI+o1uP727g4+tR7rOdW8ktG2Pmjkpgdt4LtE/thb24uY4beDRJJW3fxEwMuBXnn3oYm9g1el+B5vMs7/wDdRyR23h7dKsi53c4/9mrz+OFGUbTt/wB7im1oZxK8Pys26pGpzRFWK42t96iNh92goRW+Xb7VGy7WpZFFFqhubqOD7qsdzN2RByTQA7mGzml+75qbF/rVBWKtuqzfXX2mZdy7YUGyJf7qCq0ij7y0hkcjV0vhmJtM0u58QycTKxtdP7Fp26yD2RaydA0efXdYhsLV1jZ+Xlb7sUa8vIfYLXQXAHiTxBYaXpf+j6Wube0X+JYk5dz7n71NCk+h1Pwr0fyrGbVpl+a5zFD6+WOpH+81dzSW8UcFvFFCixwxoERV42haVq1RxTd3cikaos0M1Qs1UxFiNvmqwrVSjfa1W4/moETZopFpdwoAdUMjU+Rxtqmz0AS76kV6q1ItAFxWoamQtSs1LYZHI21apzPU8z/eqlI1AIaz7acr1XZvmpuaBlhm+aomY0lFMQ3NNzTqjakMdml31HS0ATK25qmWq8a/NU+aYidadUa/dp9AxVp9R5ooESM1R0UUALio2qRm3VE1AEe0VA1TM1R0AR4ptSYpuKQDaSn4oVaBkOKiarbVXZaAIKMVIq0jLQMhptSMtNxUlDabUnFG0UBcbTlWkqRaADFIyipMVHJQBTm+ZqhZasN8zVHigZDimtU9RUDI6hkWrDVHSGR4pMVLikxQAzFFPxRigCPFPxTsU7FADFWjFPVaKABVpdlC0tMAxTsU2nrQITFCrTqFWgBMUYp+KKAGfdpKkxQy0AV2ptT4pGQUDIaKkxRigBtC0u0UygCTNGajooAkzRmo6KAJM07NQ0UBYk3Cm76ZTKAO3plJRVmA9aWmLT80DGUlSUi0AMpKkxTaBDabipKdikMhxRiptlGKBENOqTZTlSmBFin4p2yn7KBkdLT9lLsFAEdOzRijFIBytTs1HTqYD6Wm0UATK1C1Gq0+gQ9WqRaYtPWmIlWnqtMp6tSGhcUtGadSAbTqKbQAU2lzSUwHU6mZooAWiim0AFFFFADWajNJJUbUCHtTKYzGo95oAmqOmM9MZ6BkcjHdUTU9qbSGR7TTWQ1YptAit5RpnlVcoxQBT2GjZVrFGKYyrso2VaxTGQ0ARbRS0/ZS4oARVqSmUUBckpaj3GnZoActSK1Qq1SLSAmWp1aqitUivTET5pKarU6mAyo6kplIEJTKfiikAUm01JihVNFgGUVJilxTAjop9R6hdR2NjcXkn3YIy9AHlnxMvRNqksWflgxF/jTvhnpQnuDdTQ7l+6m6sj+z7nWdS3SMyx53SycfMTzgV6p4XtI7G1ighH3fl2r/AAisep1O0Y2Ott5XijVdy9P4ai2ptaW4dY4UP+s/ibtge9Lat58nlL6fNV68W3trdLiRV222XRf7p6ZA9fSsa1fkXKhUafM7shuJoF0fz7GWONuFi3L95+yEe9Ra1LcWmm/arhY2kUrstuocnqOOsnoKfb2lxaSNetbR/bGct5fU26HnA9z3oheD7Yl5GGvtYlz9n3fds4zxhR293+8a861mdxD9glnuJrrULuaxt7mNd1nDIBJx/wA9H52E+i1aXTbeSzeztYYbGxdwz7Vw74OQak8kRyN8yzXGNy/3PXgVDqGoCLTXnj8tpm+5EzEFn7pgd6BFGOK2u2+0LC011HL5Usc0m8Lg4IA6YrWs0ntptqwwW8K5+XcCc564WueWaRdSm8vbZrdkeUsy+Y+VHJwOma0YbcNv+1apNcSMB8sLeX06DCVTshFvQ2K2PlZXbBLNFt2ndhX9TUrf3WVazfs8CzPFNp88kfmFrdo1PTG47jn+9UmpXcE6hboanb7SH8yOEjb9cUmMLjTZGkd7NofmIbyJOBkccEVUvlu2WaJZfL6RPu5+8OStSafFfxQxtDebpm3boLnDtjPH/jtS3F15UJW6h8nbJ+9k6j5hkE003cCvqmFaNYfljXCpu6qBwMVqWOZLesPUpS0MbK25cbty9GFaVjdR22jvdXEiwwxR+bLKzcYqpbCI/E2ux6Boc15MvzY2wxd3kPSvFI5ri7kmuLx/MuJXLyt/eJrQ1bVp/FetS3mGjtYhttYuu0epHqaoSRCK6mRf4TtrsoU+SJhKXQr+Kov3MFxH8skWPyrTktYtQ8J2urRyRrIv7iaLuzg9R/wH5qivlElrtb5tw2tWb4TuhY6s2m3krLp918j/AOzngGtiVoQ+V83y1M0Lx53J2q/qFpJpOpTWcw/fQH6bh1BFWbe0ivrc3EcyrGvy98qemDQXzaXMmxd1ZUZvmz8n1roLU+eruzKv+z1NYl1aFf725X2/pnNamm3e1hK3r831FGwnqrmi1uOV2Kqr8ir/AHajh/cSKqj9400e70wvar8aSzqrR/u153SN0+XrisS+uDtmijXa3H/AUHv6mmZ7srK3l680UK/Ks5Vf9rceDVjxVaQWkgRX3SSxhn/2M8FOKp2cotGjvWVf3Z2pu9exqvve9ut0ztuZ9zN7mgvW9yp5pij/ANKZvlxt/kasSRCSEq23zP8AZ6NU0y+Z80nzSN96qqoYsbfmhUbWj9vapLuW7W9njbasm3pu/wBqrszx3rF4w0cn/oJ9RWOqpIrvT/NktJkf23q394Uh2RbW3Mjf3VplxLv+991f/HqsalqCXNnBFYpIsbIHde7SYwfwrLbzFt9zeyv/ALPanqJW6l2+00WXluz+ZuQOzbfuhvuZq5Jbj7OLpSzbcK3+zU1je21zprWuoL/qINkTL/F6E/SszT7640uYqw/cyp8ytzuQ/wAqBasfIvmLvVdtNtYjJY3jeTJJDsG7a33T70TYtJm8uTdC4+VuzA+vvW99n0+DwX58crTXUrlJVbhE9B71SJbOMs3e2UeW3y4210M0p12xT7rXFsmz7uCyL0FYtihXYy/NtI+9zWpfWkmkXgvLHd5PDNH7UDdrmb5L7tudvFSapKfOktY5N0PDfdxuNdVa63pk+kyytp+6+X5ftLSY2hj3HqK5CO3eSR/mZlY/NJt4Wk0EZNvURW/d7mFO37v4flpsilZGRqXaV+7S2LF/3vmqNcxt8rVb+9CFqu1ACq3mKy0TRPBIqybfmAao9m6rkdwkkLQXXyrn/W7c7aAKMmJP4ahq5cWskDKzD5f7396ofkZt7fKqn71AEcn7mHaq7Wf5WkX+GoVQxtuj+Vv4Wp7ZkYsv3sfL81CtSGLDL826T5f9pa0lQ/Zdv7vr95evNZ9OjleJt0bUxEyrTfKNPhdJdqqvzVoR2nmfKv3v4lpk3sZTJTeVrYm0yRo0aHayt8q1mslDQXKrRbvu/exVaRQytWgrJt+alsYU+0NO21obYeb/ALLPn5B+LUWHfQ6/wSxXw74zuvmja20mCz/MrXHNlV211+qySaX4CtLHO258Q3BvJv8Ar2j6fgzVyTfNTM0RsvR8/wCzUcmVapPu0TMKRRXmceW+4d9qrUl1CbKN7dt32pgPNZf4R2SpNLaOKR7y4XdDbfcX+/P2A/8AQjViztTqDQz3GoQLJdGXc03VSozlv96gDFVRJTWU7UVVZpHwqqq5Ldqm2hVZvuqv3mrp9GhXw3plt4hvHX+1rn5tLtOrKOn2hgf/AByhK4NkuqIvhLRZ9BU7dUvoxLqsq4PlIORbj6fxVxK3c8d4l1bv5NxGQ0TLxsweMU68mMkzLIWkm3lnkZs7jmo1Wk2NJI958J69Fr+ji6+VbpPluov7r/4GtOZzXhvhfWJ9E1RLqH5o/uyxdnj9K9mhuIru3juLWTzLeUbkb+8DWqd0clWHKxzNUbNT2plUZhG1XLWqa1at/vUxlqinKtNagkjkaqzVLI26q7LSGGamVqgpVoQFpXoaWoKYzU7gPZ6rSNQzfNUbUANakWiikAq09VpKcrUwBlqNlqRmqNqAExRSZpu40gJFan5qLcabmgC4rijzRVXNLvoAuK1P3CqKvT1c0wLeaWqnmmnK5oAs1G1M3GkZ6QA1R0M/y1FvpgSUxqTNDNSAM0VCzULLQMmZqjalpjNQAlJim76dmgZGy0ypGYbars1SUK1GaizS5oCxJmnrUVSxtQBYWq83epGl+WqzMWqiSOm4p3LUVJZCy1Gy1Oy1E1AELUKtPxRiiwyOjFSYpcUDIsUYqXFJsNArjKKkxRsoAiplT7KTyjQMjpVpfKNPVKBXEpyqadinUAN5paXFGKAuJRRRVCCiikagAzQ1MpGepGFMZqRmpmaBj80ykpuaLgPopmaM0ASUjNSUUgDNGaKKACiiigDsKKWitDASlpKWgYtFJmigLC0bhTaKBEtJmo6KBkm8UbhTKKAJVYU+oFqSgRMtLUStTs0DH0VHvpM0gHZpKjZqTfTAmpKjV6VXFAE1LUatS76QE9LUWaVWpiLC1Iq1XVqkV6BE6rT1Wo1apFagYq1JTFp9IAoxS06gRC1NqZlqNqYyOiiigAozRmkoAVqM0lMZqBD2ao6ShmoAa33ahapM0ykMioqXbupmKBkeKMVJRTAjxSMtS0lAiDFOxUmKKQyPFGKkooAjxS0+igBmKZipqMUAQ4pGT+7U6rS4oArbDRsNWaTFAFfFOxUmKcq0ARrTlqRUFOVKAGrUlNp1MkSkxTqKAExRS0UDBafihVp9MQyin7T/AA1k6trtnpbbJG866/hto+v4+lK40mzU/hP/AI8zNgY9zXH+LNTt9UhXTrGXzI/MDTSRqcMB0Aqlqlxf6vj7dMsdr95baHgfj61Xt0RV2fxfdWocjWEFuW9NtY/LbyRtXH/fVdJp6mCPdu3ViWP3flrf0VBc30KZ+7+9Zf7wWs5Oyuy93Y6mziS2hZ2H7xvneiGLbcJcXUytDAnmxblA2v2dvovSrDN822uf1K7eS8mtbiDdY2oW6uPm4lQf6uP2y3zH/Zrym3OVztSSVka9xdvFJAlvE001ydsUe7h3Izkn0FRspsYX+xzLM0ZH2pe8pY9gP0qnZymf7Te3SLJqV0NiW3nYKQdTj3b7xqZpjHeQ3kaKupSbotNjb+EAYkuJPZf4aLDEXUrie6jt9NijkkkjLy7uBZ4OP3h7k9gtX7e0jtGaVWaS8Y7mnkXli3UD0FV7e1CslvazTRxwAtNI3O8vzv8Ady3T0qv4q8R2mgW8e6Hzr6fP2Wzjblvdj6e9Fm3ZAWNkccjNNtjWPDM0nCKfWuf1H4heHdOL21nO10w+XyrCDK1wd/JPrVybnxPeM6bvks48rDH7Y71Zt8JHtsbLyYV+XdJhAvvit/ZK2pNzoT8SLiRc2vhnUHX/AGmAqJvid9njd77w9qEK/wATLIKzoXnkhkVryNY8fdjjzWT4gZ5tHmgW6hk6feXZu5yR9RVKMb2sK7O+0zxz4a15Uj+1LHcY+WK7Xyzz6PXQXiyx2/8Ao586OT+Fm+8PY1843Gk/u2atHQfEet+G1EVnI01j/FbTfMn4elU8Ot4iuereVEqzNb/u9o+aDt9SK8+8aeKTrMsOkWbbdLtj8xVv9e+f5CpfE3jAarpsdto6TwySj975i4KDugNcxa2RgmG7+LFXTp9WJyN7QXkts/ZSytsKsy46UxkPmSbm7mrGg485lb5lwWb8KfqSBb65ZW3Lv+9/eFdBzt+8LtLY+X+ALXL6xD8yv/EtdZa75LdtrL8uF/SsbVrf76bfu/xUDi9TtPCtofHvhNUVof7a035ZWkbBaOuXZpdE1LbJ8y/xxr/ECeorE0vUr/w7qyajpcrRtj5tvRvY+1dg1pB4p0mXUtH3LrEB3XVk2S7J6x+uPSlYvRPyGXSwNG7q7NCwGz6VkrFJFIy7v3co/l0NWdHuj5LWTSbVc74fmwFcclD7HtU9wwazKMPu/wAX900AjQW6M1nCvyqyp8/+zzWesQlun3fLCqDc397nOKjt3Krsj+63y7v7pqrql2JV+y27boVPzyUAlqV9YvftsmyFFW1QnYq1Jo8Q8x13dt1U/K+ULV+xTa237vG7d34plPY0/ssbQn5VrPuogq71/wDHun4YrakWNmCqPlfDIv8AdpsdvHIvzNu/4D92ghMwbfT57lZpbdZvLgQPKy4ypHeqV00asizbVt2w25einpnHp610OqXwWzSzh+WFR86r1c1laan7x5ZNrbcfXH+zU2NNbXGafMbaSSWFVm3jZ/u1ptY+fZ291ao00c/yuqr9wjsay9aiMmoTPCvkq5G6OPpgVWt9VubSb7QvmQzKNrNG2C+eOPegLXRJCpjk/wBnNXppo5bGNNn75HLLJx0qL+1ReyBt8cjKm1d0YTcP8RUTf6tGhf8AdtnZQw8ynM21trfdY/NXQeFWef7VYTNHtePzV3f7FYjIG+WT7tS6TqR0i4M+3zIVDRNu54YYNC0CS5kX/DtjHqE3kecscn3V3f1PTFdP4ilttI8OrZyFZNSiwrxbh8pNcjbpbxR7tsPlsA3mNzu71M1jA3+kNCu1RvWRpCm/ccce9Vczau9Sja29xfSTfZwu77z/AI10Xhma3+x3NvqUqwq2YvvY2H3qnZ5sY2n091+X5XVl+ZT/ALQNZmoM7SLdb9szOUfa3de5FStynroSXlqftBbO7cB820Co4X+zXEcu3d5bhttR2d6YrjbN91cfK38X41Yvlj853hG6Fj8tMFfZkeoTRz300tunlwyH5VqtipGlLb6jzQUO2/NUS/NIy1Or/KaqyMit5rP93722lcZbjleJdkg3Qt821mxtqnM275VHy/xNt+9TJpnl/wBX93j5utOhQR52j5W/h96Qx0a/LTpEG0fdp0ezy/8Aapyr1amK5VamtmppPvLu+7SSJQBFGx/vVrWeobWVZvlb+9WTijNAHWQ3ccbFW/3t31rLvGDfdT09ttZsN0Y1K7vlb+L+7VzduX5W3bvmanci1mVZsfLurtPAfhV9XuI4rr9zp8ebm9uWXiJAM1z/AIf0yXVtYjit9qspDeZIuUQf32rqvHviiOGz/wCEM8M7vJwIr68Zt0ktNImV27I5nxBqv9v69f6tGnl2bH7PaRf3IE4SsmNd33q0PJ8q3iXZuVf5DtVdk+ZmUfK1A9ir/EVpsMLz723KsMQ3Syf3BT2Q+Y3y1Ys3ijt3s9SEjabKdzeSv7xHHRxQMyLy7MsiqoZbWIbYY2bO0Hkk+5qt95t26rOsae+l33kM6zQsnmwzrnEsZ6HmtDwxoi6stxeX0/2LR7PH2m6/lFH/AHpGpBsrljQbOFYDrWsR+ZpFvJtii73s45EY9v71ZOuahd6hqk95eTK19Odzsq7AnsPTFX/EusG/uIfJt0t4YI/KtLWPpaR/1kP3iaxFTy6G3sCu3dkaxeWtS4qdsbdvtTF+WpGMWuz8B699hm/s66fbZzv8rf8APJzx+Rrjqlj+7VITV1Y91b5aGWvMtH8Z3un7Irr/AEy1X5VWRsSJ9DXoNnex3dnb3EO7yZUDru6rmtE7nJKLiy2tWLf71U1c1Yt5TuqiDQjpJKYr1HJLupiImqOhmptIaCnVHTqBjqKbSNQBE1MxUtRtimIbiilpKACim0UAOprUUlADGpKWnUhjaMU7FKtADMU7FOp1AEeKkVKKlVaYhmw1IqU9Vp+KBkewUxlqfFMZN1Aim1R1ZaI01oTSGQUjZqwyFahZaAK7UVJsprLQMGao2Y0rVG1ACb6ZvNJULNUlEjS1GzVHTZGoGOzT99VqN5oGWlcVMr1RVjUitQKxYZqbmo803cKAJ1pah307NUAVHUjNTakQ2kxT6VaBjFWnYqXFKtUBFsp6pU3FFTcVyHZS4qXFGKLjItlHlVPinKtArlXyqPKq5sprKKAKeynYqw1R0AR4o2UrNtpjPVANpuKfvpM0BYZTGWpqjoC5HTGWp6Yy1JRXakpzUUWGR4pMVJRiiwDMUYp+KMUgGUU+igCOlp1LQAlOpKfTA6yimUtUYDqKbRmmA6im06gApaSloAKFWinrQMXFGKWnKtADFWlxUirQq0ANxRipMUUgIaSntTGagCOkpWaimISilooAVWp280yjFAEiy09XNQ4py0DLCy05XqtT1oEXFlqRXqjmp42oCxcVqer1TVzUiuaALWadvqqrmnbzQBYzUbNTdxpGoAKGplJmgQ/NNzTc0zNAEmaRmpmajZqAHs1GahzSM1Ax+adUOadvNICSio80+mIWiiigAxUbLU1MZaQxmKSloVaACipKjpgGKdsNG+igBuKdsoptADlWlVaZRQA+jFJvpdwoATFGKXNG4UAFLSZooAKWkpaBCUtFFABRSZozQMXNV7zUIrLy1YSSTSkqirjLYqfNc940WWOztL2Fv+Pab5vo3FD2CKuyHWNQ1HzHgupVtV/55WzZ3D3c1zcawRRqsK7ZP/QjmtLxY7yzQXkf+ru4wy1gq48usrs6opJG0rjy3+8zfdqHaPvL/FWUutWllN812rf3ljzmo7jxdZ/uvLtJGZCd0nTcDSHZnT2/nxruZK67wLF5kN7dN91pBEn0XrWNdz6Nqfh6DU/Dsk/lr8t1Fc9YpAK6vwqsdj4RsGmfbH5Xmytt+6WOc1z4l2jZFU9ZGg1wiruhVbhVJ83y2GUArFaI32n2du3yya1cefN22wL/AIItOVSug3bRxrHcajP/AA8cu+0ZHstS3krreardR/L9jto7O3/2XfnNcSR0FzUrK31CbdIvk7R8ki/wAcCqGiyy7obhkmuJNRCweZI2Skan5AOnX75rW8pI98G7zFUeU27PzY4NSW9ojXELbFWO2j2xbf4S3y8ewWpTaGV9Y1KPRtLkuJg0kn3Yo143yHgV5beTXLXDyzH7Rqk+Gdv7o6AD2FdB441PzdWdY/mhsRs2/wB6RjyawbG1nkkdZH/eSjfMy/wp6D/0EVvTTSuxMNFtzJJO23zLhvlluZF4QZ6LXRabokUkzbUaaTn5pG4qtY4kvPssabVUBvl/hAro1ndrdUty0Nvnb56r8zv/AHI/f1NEm2wWgu2z0+ZIJn/eNHv+VSfzAqvdW+mTyfvtKa43H5fM4DH6Gi6spVs5JZk8tl+ZLaNsl36fvHpdPWPbE1rYfvl+7JJJytRYGVZNP0eVmi/sjy/4f3dY83hHTr3e9jcNatyyR3P8SZxvzXRaxYybVn8hbVmO1WjbjJ9TippLK0lmispk+ZXXcsi/cCdQPZmq1OSVxWPKdU0SXSbrbcR7d2GTuHHqDTby1Mdr5sny8hVrt/i54kh02xSxXbNfTnft/uRivKbe+uNQumluJdzfwr2UV10pNx1MpbnQ6TlbpEjXczHb/vZ4q5q0JgunRnVm/wBnkVRs8ecm1dtaGuMPOfbt8v7q/hWpg9ypYt/Du+9S6x83zt8zN81RWf3k/wDHat6gpa3Hyr0O1qYdTEWHdGG2rVCzu7vRLpLizeSPYdyMvVDW1b/6tP7uw/L75qGS0E3ysKRpc1tHX/hL9QmWxaOG+kjkllib/lqQc4HpVf7y/uzI1wo/erJ6/SubWG80S+jvLF5FaIhlZeqEVrSa7HrN1NcahKtveMQySLwOKkrYmkuAu5Y02s1U1wrFfl+WrG29lYtDCsi/3l/iqD93Jny/lkUf99e1GxSRLGu75V+9nbWnaqm0sx2rgbfotZat5e3d8tXIZTJ5vk7VX+9RcTRp/aPL+b2Hy0yS98qzdtv3hWftRf3skvy/wr/eqhJcPc/6zbRcSiDMZZGdv+Ar/d780+F/LbdQ0X7v5fvUxc7du1qCiSZzIrMzfNms+4i8xd3/AC0q+y/LS26brhIpF+VqYGK0LxfN8q7sfKy8NiritHLGyMnlySYV/m4YdiR612VjaafJZzQalH500bjbt5DA8H8qydY8OJaXCJY3Cybow+3d/e9KCefWxkM1/GoaaPdCwKrIy8MBzg/41EtwkqurW0jQsfur87J2xjuKW+bVYPN066kmWFSG8hvf0qWGyvY/I/c+XDL9yTtxSLHWF/FbvGHEWIuE8z/VtxwPatmx12wXUjqOraTbapbrCsH2aZiEiI43kVT8J6fPqmrXOnQtH9n+/LPt4TsPxPYV6Yvhqw0mNHtbNbi6ZNvm7Rvx3OPSoc+ViaT3PL/tA+dIYWjmldtu3LhYDyEBPXFQMm5SzOq7nG9vf0rovHGpefrE0UjeXb2YFuqqoG5zy9c58kbQoybpF/1UH1/jP1p3b1NIpJEUyRtIzzLuj4+XuxY8E0trdfZNu5/lU7vm6N260tvCb1porVvMmYlppeyheKihsYoJnSaH95/F5lMTCbULdmbaiw+ZhdqsSPzqNpZVbb9lmVv+mi7KZceWrMkYX5f7q1HHdzzyIl1LJIq/KrM2WUUyfQkVLidlXzfl/wDQfxqu0W1fm+aRsfM3WtOZTaW+5juhnTajbh2PWqiwvJMFkb95/Du/hoC7ZPDD8u3PzNSsgiZlkqxNsWFUVPmX+L+9VZmLNuaiwEEmVxtqe1mG7a38VRtUeKALF4hjbctWFUXNmzZ2sn3Vqss+5VSSnW+V3q1MCtMpWTbTP/iamm+ZqZigLkTVd8Owi91S2spLyGzjnfb59w2I0+pqm1VLjHklcbt1IGdn4g1az0SzudG8O3TXDTnbc3bLgrjsMd6yPDsUdsyf89JCPyNVNTtYfLtr7To9tldruC/88pF4kj/D7w/2abprSbt/8XFMzVrHX3GNyIp+9jb+JxVW8i23EUX3VYfe24FaFmiTRxyyfeQfpU91Cklqizfu9/zI0nH40zO5hLaOsIeT5lz976VNNaW0Wg2l011G1xdXMkH2NV+eBF6SH2NaUK+ZGsX+sj/vLVOXToBD9v1Of7HpJ/1LKoM12Q3KQp3/AN77tAHKs3mRok23y/8Aa/gz6HtR/bF7LpdppcgVrWzkke1X+4W7n1raNkly7N9mWztf4IN29/XMhPU7f+A1DNaIu5lVd2RtpGl09zHjtxGu7duZvvbveo5ITuq+yUjIOdzUiihtCrRCu3dRNLHH/Fuplu8srFIY2kb/AGVyaAEkXbTN9X2sZ1VGvHhs42P3riQfoBk1C0unQSHy/N1CTHy/L5Mf/wAUaAHWtm81ubiZ/s9muN88n8lH8Z9q9U8M3tpeaPA2n/6mOPb5TMHeID+9ivH7q4nu5la6fdt+VFXgIPRR2FS2bTx3CfYfOW6z+6aFjvpp2InG57erVLC3zVTsWeSzgeQr5jRruZcde+KtR1ucZdV6ZJUSsVozQArNUeaSkoAkzSq1MWnUgFzTM0jNTM0xjmamUUlAhtFOplIApM0tFADKKdinYp3GR0+lpKQhFoWhaFoGOVakVaatSrTECpUi0LUlAwVaXYactSqtArjFSjZU2KKYiBk/2ajxVhlpmKQyuyVG0Qq5io2WgCjIlRslXGWoJKQyoyVCy1ZZqgagZXZKjZKsUYoKuVWiqNoqu0xlqRlFkpqpVzFNZaoCDFFSbKMVIXI6KkxRsoAZTqdiigBKVVoxT1WgLDKKk2U5UoAbRmpNlR4oAdmlVqjpaYiaiofNo31JJPT1aod4o80UwJs0M1Q76b5tAErUxsU1XFNZ6ChJKganyPUdABS0mKfiqGNbFJUixFqlWGpArUN92rjQjbVdkoArYpmzdVvyqPKqh3KvlGneUauLFS+VUhcpeVRsq55Jo8k0BcoMlJt/2a0fIpnkUBco4o/4DV7yTTlhoC5R2Gnqhq55Jpfs5/u0Cuay0tItLVGQUUtFAxKfTaKAHUU2kouFh9LTKFphsTK1OVqipVagCwrU+oFqRWoAfRSZozQIa1RstSNSUAQMtPVaWnLQMbijFPpaAI6MVJinYpAQ4oxU+KMUARYoxUqrT8UAQKtSR0/ZS4oC4Uq09UFPxTJCnLSbDS7TQA7NGaYymigB7VHS0UAJTKWigCFmqFmqdlqJlpMaGZo30jU1aBj6Wm0tMB606o1an0CH76N9Q5ozSAnzS1DTlagAoozRTGOzTaKSgAopKWkIKKKKAEpaKKAEpaKKACiiigApaTFFAC0ZqOigZJmhmqLNGaBEmaM1BvFOzQBLmotQhju9Nu4JvlhkiKs3Hy1k6x4g0/S42+1TK0mP9XHya4rVNa1DxFIqxr9l03Pyr/j61LZoot6mjbzPe+D3T5Wa0cN+B9Kx7PZLHMjLu4/nWt4RSCLVn05n3W9zH5TNIvrWXJC9jeXEDDbJE5VlqGbHL2OnxSM6SM26Mlfl4resdPs4JEZrdZF/i8zncKzZke21aT7zLJhl21dW4k/hRqRpujV8NypY32u6d923u7ZpYvqoyBXsVvKbbw3bbYJJNtqvyqv3QI68IVpftTXDfeWMpt/DFe6zSuvh/wDcrGzfZRu8z+EFME1zYnZFUl1G6bZJLDbPcbpmit7dotzfdcoxc0zT7S3ktZVWNljg1GRkWNiA2wqBu9aks31BYbf7CtlNbtHHsaRnQ42d6sWsU9jZ7W2+Y8rSsqsTtLHOBXI9GbFZru7bULe30n7NI375pftGQG2bcgH/AIFWtp9w8liLiaNY5F8zdHG2duwsMj/vmsLTUltNeiVUjaRxM+5pMBQ8i5NakLf8U7Nt/h+0L/u/PJStsB5VdPJd31rFv/18pldvcmtKxZ47eZsfvHO9l6/QVnW6mPULZs/MttI344wAK0YW26lZ27L8tzcRLXoqKUbs5nNuWhqXVqbKOztVlaORzJLcMuMYCZPXsPu/71dBpdxFBDE9wnk3XlhEj28QRn0z+tZV8n2nXLlpJFkj86OJtygfux85QevzVq2rR3Kz3V0V8mJz97+4nOfxbrXHK7Nin4q12w0ax8/UnmXzTtito8eZPj+Qrzy6+JWuSsV0m0sNLt8bVXyfMf8AM1zOvatPr2uXOoXHzM/yxf7Mf8AFSWtk8uF+b5j/AA1006SS1JcrGxD8QPE0TI008F0u8N5TW4xXVL8UdLk029mvLJotYTDRW+7ejuOBh64jVLe3srNn+7Js/wC+a43/AFmXb7zU5U4gnctXU0+pX017fS+ZcTuXdv7xNaNnF5UhWqEafKK19hjkVv7wqluOS0NWxXdIn1+WtTWlG53X/V+Yay9Lb/SIf9k1b1C7O14lb5d+7254rU5n8RTs2/eNzWpdYbS1l+633flU/Q5rDtXTy2+Zd2d33q6Nsy6HN/smmKWjOf3eWsP41eVdq7mrPmU/u60FbcopFMhZZNrbR/vf7X1rF1LT7eRS8aNG2P4a6i3i+ZefvH6fjmq+qPZRw7fvNg+nXpQEXZnI2OoXtiyPazN8rhtvXpxWpN4jeeZJZraFZF+95a43VXa1RY1/h3Vat9PgZW8xd26psacy6j11Kwk+aSNlZqsXU2n+Sm2eTzM7di8bh6k1LD4ctpIUl+Vv73+yKpf2FGy/u4v+A89zgU7MOdDFvbRY1Xy26/e3c49K0/7a8ObbdF029/1g85lmA3VjXmkpbXHlSKyt/tNUdnpSSM/y7VztVqVgujpdUuvDckMSafJqMc2/a/nRh0/MVHpenpcyMtrfwSbk3IqyDLH6NjBrL/sGBl+V2Xp91qj/ALClVd0M/wD30tMLrubuqaPrGl3zJfaRP+7I+Voym78s1SmiMi74bSeNl+8zNvDHPoeQap/2r4j0mTet7d7VP3o5iRxWjb/ELVZZESS2trrkM26EZf60BqJbveySFVt55tv3tq5FV7i9udxWZJFb7v7xcFhXe+H/AIpT2moXL6t4SsrixuXHyxw7PKqG8+JdpfatLLceG7SO1+6kUa5amTd32PP42DfNMsjbfvetaOh6rJaTfZbp1jtZZA7NMuQv+39dtdZdeM9Pl0m7gs9EaFdhRZNw/At71wjTCWZmZp/3ny7vL3nB44FIe+56hoOlWWn2c1xGW8vP2l44+s5IyMZrW1bWB4f0O3e42zapOB+79/8AAUxrLzF0yzkVVhZ1Z1kXP3Erg/i9fPFqTLG/zL5cC/lmsN2WjkNU1A3OtXl1cSR+Y8jN7JnrVNrs+WWt12+Z95v+Wj1T02JJ7j5l+6C33fvVWVdu6rKueg+CViaN1uNsM0vypt6J7UnijT3itd8i/wCkIgZvXZXL6Dey22rKkbf635X/AJjFd3ry+bNMrP8AexAzN/CWoV7iODVC3+zV3/Ro9P8AKa2VrrP+t/uj1Fdbpfh3S47Vrq6u45v7sa9OTjB99tXNS0Xw+um3LWqL5kUmxF3fe7g1pYj2ivY8+WLdMnmfM2flrXW3dt7r5bNjc27FdZ9h8LaXDtm1G0uFkQOjScumR0rAml8N+ZHul+VfvsrUWBO5TtYrSVmS8u1hj/3uc+1P1Sy0yJWktdTWb+8rL96pNUl8JxNvs7i5bcB8tRrqXhaL5fs8k0nHzNTFrfQz4f7O+ZZLhv8AgKmo5lstrNbzTNIo3fNGfmq42vaMt95tvY+XtO5W3E1NdeLtMaPZDp/8h1pOxWph/wAO6rdrKI924bo2G3/dpi69bKrLDbLDuok1WwkYM0a/7u3igepDM4WT5fmqu0p3fLH93/axtqxNcaf9qZo5m24/u5qr/aFvGpaPdu/3cd6QXuIsV3csqR/LuP1qWTT0tN324+Xu/vNVWTUp/L2R7Y/93rVVUnuZPmLSNx8zMTQDudH4FvtPXUJtI1yWOPR9RHlPcsufssn8E4+nep77TLvQNUudO1QbbiCQo7L0YdnBHY1hrpLrD833q2ZL2TVNNh85m+3aegSZuf38C8Bz7p92mQ2dD4duEW8ieT5lUj5f7wzW5dW88Ggq+oXkt15u64uI7nAFrJnCGIiuK0m7SCYeZ80bfXNdnPa37R3DGAQ39nbrcRWkuM28bOuJ5vfcybI6oxaObudQjsZwZYPtMygCKxZsDnvceg9E6mqvnvPdPqOqXS3F83y7mwAiDosY7Cta+8A3GmzTpdP9s1JTulia52q+/wD5aCTjPzVmSaPs5XwzbSSMR80+rq4X8MigtNFK61a3jbd5nyr/AArTI7rUNQV/7P0+eRfu+YsZxx79K0Wt9ftGxZ6PodjztWWFYH6ehkc1m39pq95D/wATbV4GjXHyXOqoQuf9gZpMrToU2tLlZNmoX9lZ9V/eTZ2/UJmkj/seLH2jUru83fw2ltt/V6Yum2MS/vNY0mP/AK5xvJTWXR1X95rFzMv8S29pj9WIpFCx3thAv+i6NHI3Ks17MX698Liqkl7eSw+VJdyLD93y4/kT36Y4q2ZfD6fMsesXHs0kcKt+IzUKatHHn7FpFlH6NKrzsv03UDKFvbmZt0MckzL/AHVJrQXSb/y98lo1vH/FJcMIwv13U2bWNXn/ANZfXKrj7sbeWPphcVntC7NukO7/AGm5oCzNNYrCBt15fed38q0X7x93IAplxqbzbobGBbO1YbWjjYlmGf4nPU1R8ofxNWlpun3N7t+yxL5a/elkYJGv1c0Bp1PVtB1O01TT4nsV8tYkVGgbrFitaOuR8E2lpbTXS2d4t8qoFlnjXEe/Odi564WuszWi2OSoknoSZp1Qq3zLUlUZjsUYpyrTsUDI8UMpqTFFAFfaaGWpaMUwsQYpKsYpmKBEVMqw1Q4oAbRinqtGKAIs0qtUmKNooAizRUuKTaKAGKtKtPooAVVp60zNSUDHLUq1EtSrQBItTx1XVhUyt8tBJJSUUtACMtR7DUrPUbS0AJio2qTeKiklFAEEzVUkapJpfmqFmoGQtUTVOzVDu+akURUU9sUuKkoiZjTGY1LikZKQFdqMVJspdlMZEqmlVam2UqxUCItlLsqfyjRsoC5X2UbKm2mnKlAXZBspcVY2U5YqLBcjVPlpdu2pfKFRtQSRtUNStUTLQURs1R5qRlpu00DG806jZUioaACm1MqCjyhQIr0VY2CnqgoGVsUbDVzyhTlh/wBmgVyj5Rpyxe1XPKp3lGgLlPyqcsVWmiprKaBEe3atJmnspqPZQMVWpjU/ZSbTQSN2U5Vpu009aAF2U9VpFahWoAkxSqtRb6bvNBROy0Mgqurml3n+9VATqv8As07YPSmK9TLQSxFSl2Cj7tJvoAlooooEGKMU6imIbTqKWgBKKWigBKWilxQAKtPVaFWnqtADadTlWnYoGMpM0UNSAM0zeaWmstMBc0qtUVPWgCWnrUNOpAS0VFmnUAPopitTqAJVp9QrUi0xDlqSmrTqBCrUlR0+gBaWkVqWgBKTFLTKAHNUdOptADaKGao80APao2WlVqazUhjGWo8U+m0DDFGKM0maAFxRSUUwCjFJmjNIB2KdUO8Ub6AJ80VBmn5oAkplGaM0AJmn5pmaTNMCTNLUFPzQBJRUeaXNK4ElOVajzSq1AD8UYpuaM0CH4pjLQrU9mpgRUxqlptIZHTafSUAQYrmvGmpXFs0Nrbu0auhZ2/vdsZrqcVy/j633Wdndfe2SFG+jUPYqHxHn+kpBK0lxdfvJFk+WNumPpV+61J23eT8tYtu4jvpUX+L5lap2+9WVzqsX9PuHivIpd3eu58faTIt1balGytb3kAlXav3TXnG75a9m8N69pGqeA7a31y8ht7i0kKo0zY3IaCZaannH7pfvLVf7UIPlVdy8tXY6xrfgiDK+ZPfTcblhXArm7zxb4ebd9l0mRfnG1pGzwOxoHdszmuBJbuqq3zD+de0aDL9t8P2Dfwy2y7m/DFePr4y09fu6JDt+8q13+h+PPC1to8Fq1+0LY+bdavhSecL7VzYhNrQ1gzsFb7NZwQQ/ejQJ8y43YpsN3JLDM0n3o5WRNvHAqLRdT07xA0v9k3kd0sQG9o1J2Z4HBqVoo13rCd0nmFmb+7url5X1LumQ32yPVrFo2+ZreRf9751q9pqD7LfWrfeWWT8pApquudqS7Y9yn7zfwipoZRFcI/3VnxEzf7fak9hnmGtaf5i+Q3ysh2bv7uBUug6nHqHibQIm8z7Qkux9y43bY25rT8dWr2mteb8vl3JDL/skda4v7UbHUrO8X/l1mWdvoDzXepc8DBRtI7vVLjdqBntyrbbq4fd+CgVcmlLeC9YiWJty2sr7vdi3FN1ZZW1S68mKRrVZI2RpG2JnGCR6itK1eOztb3+0p447Ft29m4HIweTXK+hoeGabDuUNXW6aggyrfN/Cy+2aw9PiijWbyWWSFX2xSLnDAHrzWpbzGOPc33V+Zq7uiMnroc940ujJcQ2u77oDPWP9n/c7lqK+uPtt9Ndfd8xyyrW0qhrcL/sVnI1gtBul25kjdm/uVratF5UNm/8AeA+b61FYqF0+4Xb2C7qua48k2gw/J8qvG26oUtS5LQg0txHdRNvWPaf85q5qw8tXlkWPa4OzbWbZzRxyK8iLJH/dam6hdPds7qNq42rXQclveItLeOSRvl3f3WrrYVRbNkZPlbG2SuP0G3MX/Anr0JoQ1ikHmfK211+XHTnmhEz3OV1BRGsS0+1bdHUd9811tY/d/nVuxX/Z3f7POKB9CWaV44ysa7dw2+vXrXOTQu0jbvmauv1S0SCP5T95N25VxuNc3J8txv8A7tAQKk0LtJtY/vM1as7W43H5Gbb975aZH+8mZmrZtWnlj8pnZo1/qaByY6z3rG+35laui0eCygaJ7h4/lBb5m7isJVRbhVUttzt+X8qsXXh24VWlWaFlUbmaTjnPQUzNq5j65cR32qXN1Hu8tqk0l9Mit1+1QXMjb/8Alm3FVGw0kKsdqsfmrXh8OS3MO+zu4JFX+Hdg0irq1gj1C03L5dnt2/3mzU9xKJ9rxxrGqp92l03w1K1xtvJVhjwNzdetausW9nZaXHFa7flP3up/Ggi6vocbfS+Tu3Jt61n6bp4u7q0SPcvmfM/+yCcZIrS8TNHNasvyq0Q/76FWPAeFku5ZHWP/AFafM33gBk4oNVornbab4S8KSwut5Jq3nRnbujUANV1fBXghvl/4mayZ+armnw3k/wAqpM0L42qseN/uXOOBVv8AsTymSVovmzubdITxTsZOUjIXwD4OnYL9v1GHj+KMUyb4e+GLGQXtvrFzdSRYZIpI/vYra8oxyMrey1JcW520B7VjryB/9FuFfaqzqz7v4Q3BNeW/GyyePUFn2/Kzr/Ku5h1tIrr+zZP3l0qDbG3JcZrC8dS/8JF5ul2to015FHvlaNvlXbzWHLZnSpHkelypbXQeYM0eCrbevPfFV7jDSS7fusSy+uCa1fs4kUbk+ZaY1oJG3MKXMbWLeh3Wl6fdpdyWtzNfIBs3Mnlg4xkCpL69uNWkX98sKrlvLjY9T3J7k1kLEV/3o/l/KrFv8si1ojNlv7DOqlfPZl42q1E1jJtXa8fTc1bc1vub5vbYzVn3CeWyfT5qoi5gatp5sLp4G8tpFO3zF96sWOixz/6652/7KrVjVoi0KS/3RtarPh+Ke7vlSFPMZk3enSjqPmfKP/sKzi2/upG/3mqJtMtv+eS10l1F8p2rHtQ7W/2SKxLpXVty0GabKDaVbt92Kq11pSKrssbbqusp5/ho86VVZVmb5v5dRQWmyja6bFJhfL+b+9uNXP7Et1bayVZ0uYwQqn8KkNWvcXEc67ZIm87H/AKAbZzraTbqu7ylqJtPt9rfIvmVv3EXlt1Vv9n8Kp3Fvu3MrfexRYSkzmZlSNvl+Xd8tbGj+XGqy7F2rhW/HviqtxZJuZqk0tQ02zO1sj5qCnsdD5Md3Gzwsu2sySGWOZLi1KrcQHcrdvTn2NX7eKS2kLR/vFUnev8AdombdubbQZId/bel6Jp4l8N2kra1PH+9nvcEaeem2H1Po9YnhfWrpNVnWa/kja/f57mVsjzD08zPVT3pbxAu6stbTzYX2rTuzSysdJqWq3Fz59rqVruuFfyrjzrhy7FOBWUyaNEri40u9ZmxseGZMJ9RtOav6OJPEMX2Hn+24Exbjvfqv/LMn/noq/drKjmK55Zdp+ZWXBUigESraeGp9w/tG7s/9m5tN/6oalj0LSGPy+IdJ2fwsyzo/wCKbaXdHP8AeSNv+A1KulWkqt+620D2Gtomlx72/t3RZFX+FWk/TIqD7DpTf8xrTo1z/wA85D/Sn/2ZZ7l/d/L/AL1Nk0+zXO2Lcv8AvUhkc1rpEfzR63DMuN22G0kT+dRMmnK27+1WZf8AZtXFSNY2ytt8ukaygX+CkAqnQlhjM1xqkkn/AC1WGNMfg5pkl3oy/wDHvpd7J/d865/wFP8AKij+7EtJtH8KrQAxdSdRiz0qxh/22j8x8fV6juri91EqdQunm9FZhgduAKSRtrUUXA7j4a3Ajt7yw3fdPnp/eweDXaV43Z3UtldRXFq7R3CH5WWvWtB1Aavo8N5s8tmyrL2yDg49q0ic1WOty2tSK1Iq1NGg3VoYk0a/LS7KkVAtPoEQ7KNlTUxmosgIGXbTWqRm+amNQNMTNNWmtQrUAMZutR09m+ao6AFzRuNJRQAu40bjSUtABuNGaWjFACUUuKdigBirUi0qrRSAKkVqjp60DHrUitUa06mA9WNP3mo6KCRzMaiZjStSUDEZqryNUjNUDNQBX5pGqXFR0hkbUzaanooHci2mipaTFAEeKZtNWMUmKBXK+w0YqzikxQMhxUka0/FLigAVadspVWpY6YiLyjRsq3TdlICsyUbKs7KPK9qAKuKYyVcaL2qPFAXKTJUeyrrLUbLQMqeVTfKq1so2UAVliNSLEanVKkVKAKqpRsq3sFMZaAuV8U5VFSYpaAEVRUuykWpVWmIj2UYqfFNagRDimMhqeigCv5VHlVYptJjIdlN8qp6ZQBXaKmshqzUEjUDIqKP4qWpKEplSU2ixIzmjmpKNooKCPNWI2O2olWrCrVEjWao2Y1PUbUAWKWinUCCiilpiEpaMUUAFFFLigAqRaRVp60gFp+KMUtMAooooAKjqSmMtADaKdRQMjp2KXFPxQBHijFS0YpARYp2KfinqtMLjMUUuKkxQIjWpMUKtTUAMWn0YpaBCU6nKtLigBi05qXFGKAI6KkxRigCJqjqzimYoAiqOp8U3FAFdqbUzLSbKVmMgxSVYxSbKAKtFT4pNooGR4oxUmKKAIKRqlxSYoAr0tWMUmKYiGhWNSYoVRQMTNLRRSAM0lLRQA3NLRilxTASlzSYooAXNGabspcUCJKfUNPWkMloptG4UAOpKSigApmKfmmZoASszxRb/AGnw/fLt3NGnmr9VrVpGQSbkb7rZVvoeDQC0Z4RdfurqF1/ixVuZNrVBrlu8Ejo3/LJym33BqaRvMhhfP8ArE7exBI+2qEyeY3zGrUlR4oYyDygtHlbvu+tK2a2o7WOKMRMVVlH97vUjMPyitGwVsNb7lNV5LUrTC47Qda1Dw/qUd/pNzJb3Uf3WXow9CO4r0r/hdEl3tW80mFZm+9KrV5W0JVqY0JZfm+X+81SJpN3Z9CxrrfkuzWLSQy4aGS0uUfjoODWTda7PE0mnfaYI7pSF+x3sflyLxkGuP1X4k3y6TDpPhuNtNsLaJIBLJ81w2P5Vwa2r3P7+4kkZnJbc3JaojFy+JIfLbZnrvii71DW2tGuhCtvvG1YeiluKwJNM2tMsm3bnY/4iuNhutVtIWgtb2TyW/h3E9KjuLvU9u2S5k21raKWhNnfU9EbxmbTw/a2DQtcalADbeZJxHsQ4Dk98rXIalf3OqTb9SvPO2/dj3YjQ+yVhRwyXO5mul3f7VTNpUm35X3f3vlrJJJlm3Z3VtErK1zGv935qg1zVbZrF4LWXcznazL/CKwWtDG37xNy/j8v4UzYm3dHWt7itqIq7Y9tdBb/6j/gArEjTd8tatjhoRz/s1jNmsTQtf9S9X9QY/wDCPuq/Mz+Wv+6c1n2v3XrXtYvtLWkTf6tpY/0OazjuW9jLt7Ty18i4K+ZEdjMvTPpn0qO4fdIsSpt2/wB2m6hdBZrifb96Rv50mmy2n2hUuHbzpPlVV/hNddzje5q6ehb9wqfKx+Xb61015dRW1vbrIWWFQG+7zgHgVz8KmP5o/batNvLrdZ7pvlkU/XdTM3qV47qCRrlvKkZnkOz6VuafdJJdQeXbLCq5ZvmzurK8kQSIi/3AzfjXR+F7cSM7bV/u/dzQEtEQ+LJQrRxQq21RuVWrj5pT5Lv/ABMflrq/FTQKsqW6/NHJ/ez1rl5kRsKrbtpC7f5mhhDYlsYv3f8AeatSFf4qijx5aL93/wBmrU0uFJZolbb8zhP6cmgJMLVH5bYvy4bv8uKy9Yll8xoMt/u7jiu71ixgijn/AHi7lOz5uAu0ZJrzvzTc6humb5fvN+FMmOrGxxGeZV/hUbV+WtuxV1k3Qr+8xVTwzqT6fJNPsVt/zLG3rWxDLFJJJ8m2TeG/3fWkNs0re9TyTOw3M8Y+bccLjisS+uvtO9WVtq/3vQ9BVv7anmS+WPvD5P8Af/D19KwbqKdvNWNZN0fzP6/U0yEjP8SQj7DLKrf7O2u2+ENlI1nJdRqzMznb8v3e1eY3i3F3qUdnG8jSO4VY/cmvorwXog0jQ7e1Ut52wb/x5zQayaUbGtb6VLKqqyTK3DL5zfLgdgKv3VjH5f75V3VYW33N825o+Ny8/L71Fql2NLsbq9vBHHZ2yF5W70zI4HVta07TZtuoX8ELc7Y5G54rNm8faFu2w30Nc/oOhReLbrUdb16Zbe3llKReme/4Ktatr8LfDd9GW0vUZ5rj/ZmFGo7RvqU/B99Z634+1KdZI22Wf7r/AGuas6HL5Umt7v8Aj4a4VW/v4xWFqmiR+AvFNtqFm081mylGWRq6PVopIrz+17VGktbxB9qjjXe6HqJB61k1ubtpWaOE8XTW/nTPp67rjjzV2/IprEsZZJLctN/E/wAtdRfeH7i7mkvNHuIL6PO5o42w6k+1c9cRXEM226imjk/uyLismmjeLTLELxR6H0VZGvWVm9glU7dY/OT5l6/3q0ZtNN3o8a7vLX7YW3bc8lKih8K27bFmu2+Yj5lUBa36GV0mdRawpd2O6EqzY3e3FZFxa+e21l+Zfu1Fqnh+48N2o1HT3uVaKQLKsmCNjcA/StDT5o71UuIztXH60zLzMiSLdC9r/FJ9z60/wa/2bUJkZ9siwbPxNa+oQj/Wr8siv+HFUJroaNqy3kcayR3kf12Gge6Ne8QRsF/5Z8K238wQKz7hHikf/vmptPle5unnkgb7Ov3mXornpUl0sayMkLeZGwGyShkIo27W0Sus0Hmbj+lOkuNORt0dg3l/7TZNVm/1h+lV2zt3Z/4DQUMvrsXN4jLGsa4FaFrp4u4VaOX5mPyr2bHpWTfRSRLvZV2/w+reuK2NJmMVuiqV2qd+5v4TjFA3sQyWj22/cv8As1Gv3m+X71a143mN8ybd39azJF+b8aBIp3Cfe+lZEzeTIjfxVtyfdZKxtQX93+IoNEdToqefN127ot3YFqjuE+Wjwu4bY0m7y2jK/L/Can1L5Wf7rMpoM+pgX33Wqvo67oz9dtXLzyGXarbZP9pe9VtFiPk3DKy7VkFI06FPUrd7a6823dtyuHVo+Cp7EV02ly2/ja4+z6jdwWPiVhiC6m+SC+PpL/ck9HrGvsMr1z0y/MVpXKSudDr3h/VvDeoLZ65ZS2Nw3zJu5SUeqkdRUdvvl2LG7NJIQu1edxJxwK1/C/j2e2sTpHiaJtY0NR8sEnzmI9iuapS+LLcTSHTdBsrFZPlVo2O9EPoT09zT0J16mbdNPBN5TTKrKfruxVuHStYvdq2drc3EjAt5ccJzxU7+O9djaL7IbSzjiUJEsNsnyhaoXXjDxDdxqlxrF2y53fexRdDszZj8GeKJMbtIvV3DcvmYAp8ngrXVY+cLCNuPlkvYwa4+S7u5WdpLmaRm+9ukJ3fWq7IWzu+b/aaldDszqW8O6xGx3fZF2/xNewgN+O6pY/DV/L8v27R1/wBn+0Y81yPlD0Wm7B/dWi6CzOvk8PiOM+dreg9fm23e/b+VVFsrD5t2u2Cqo/uyPux9BUnhTwzb65ZzStevFNFJtZFjBGCODzW5/wAK8t/+gncf9+RVJNk8yW5zTHSoF/4+31CZh9yGEoM9uTXrmi2r2Ok2tvMI1mSMb0j+4p9BXP6L4M0zTbqK63T3E0R3I0zYCkewrpaqKaOerNPYnzU8bCqdLzWhkaayipKzY2erkbfLQBPTGpFalzTERYpjLUlDUgKzLSYprOd1OVqRRGy1HVio2X5qBDKFWhVpaYBinYptPWgAopadtFAxlPopaAEop2Keq0gGKtPp6r81OZaYiPFPpVSn7KBEdFSbKRloAhamtUjLTKBogao2qwy0bBSArYqNkq5tFJsFMCpsNLsq1tFN2CgCvso2VY2CnbBQBV2CjYKsbBRsFAFfZRirWwU3FAyvijFT4ooASNN1WY4qZCtT/doEJsp0aU6nLQA3YKXZT6WgLkeyq0iVdqvJSDYrMgqNoqsYpuKLjK2ykxU0n3ahoEFFFNamA5mplGKFWkAykzUmKiZaYxyuFpyuagp60AWleo5Hpq0xm+ZqBEmaN5qKigY5nNRNKaRqY1IY/eaFlqu1MZqkCw0tQM9R5qLcaoCdXpd9V6Kkos+bSb6jqOgCfzaFlLNUC1Iq0AWI5RUvm1WjWpaAH7zUbMWpaSqJNPFLUmyjFMkZijFSYp2KBkeKMVJilxQBFinKtPxS4oEJT1oVaVVoAKkpMUtABilpKWgCOkpaKBjaFpaRaQAtOpKKBC07FMpc0APVaKRadTBhT1plPpiFp9JS0gFp1MoVqAJaKbmnLQA/FGKM0ZoGJRRRQA1qSlpKAExQ1GaM0CI6KKKAGYplPakpjG4prLTmpGWkBFS0UUgI80ZqTFGKBiZptPxTGWmIjp9Mo3GgY+imUUBcfRTFanZoGLRSZozQIMUYozRmkAYpaKKADFPptP3DbQBG1Iq1I1NVaAEp9LS4oAjpMU+jFAAtMapMUUwPKPiFaeVrF22P9YFlVvZq56GVP7Li3Mu7mu/+KUSRW9neSfd5g/8AZhXnNus8kflQ2s83Vl2wk1i9zqg7xI2lFNaUf7Va9r4c1u7+a30a9b/aaPArRt/AviSX/lzih4+7JcBamzL5oo5RZSrKyhtymnqouZnZpFjVstuk/hFdbN4B8QxWry4tJmQf6qObLt9K5P7yujLtb7rbuKLNDTXQeqQbvlvf/HTUsct2u7y3hmX/AHhuqCzm+zb12bt1SNNA3+st/mpFD11ALJtmh2t/Ftqwr28/yxyr/eqg32Zm3KrLTWtx95XoAs/ZzJIkUbbtx27u2T1rRkh2/Kv3U+Vaw43nib927Vet9WkXC3EW7/aXrQIurFSsm1mqazura7YL5u1v7vStKx02OebbJL8vO3bTC5hyQiRvmTdSKjxq3lytt/iVq72z8Pxt8qhem6snUNE8q6f+JWG9aVgUkc7HcebhbiL/AIFtpJtME674XVm/z3rVuLHyvu1VbMdTyj5jI+ySRN/db/aWpLV9sjJIGWtFbj5dn8NQzRRMvy/u/wDZ7Umnaw0ya3YfMua3/D7D7Q08h+W2jL7q5SFpI2VZFrTmuHj8O6ksPytL5Sbu+xjisrWdja+lzKvGMioi/dlO5vl4xnIp0Nj5TfeXc1P2ot0qbd37vcv+zzWjHF5ir/erpRyMt6b/AKzZM+3j5aZqzhplRfQK1Jb4imVm+aNTub/aFRzFJJJH+8zE1RFtSzasZJDu+aT+Kuv8P3Rso5ZY9v707PL3cNkda4qFxu/h+X+9WpHdeXGVyyryu3qOeDmmTJFW8ZJLp9pby1+bd/E1Z1nmSYvVi4l227rj5m+9U+l/ZvJXduWT/Z5oGtIlyNUaP5l3bfu10GipuuInmh/cqNz7VxuHbFYkKptLRiRl5+q+9dHp93B9lhdpflYhfKhbJYr3I7k0ES2I/EFwLmxmWb93Jky7m6Lz0964WNNtnNL/ABMQi/zNaniS6ju7j5dy/wCy38NZ118rR26lvlAoKgrIltV+XbWtGp+827a1GmtbLDtZPmx/dFbmk2kdzcOsZ3Q/7X8NBMmS6fpsH2eVrh2ZdgbcvG36VieLPEf9ktNBHGu7A/ef3q1tUuI4oVtf+Wa52Nu+8PQ153qVvJqmoQ2turNNI4X/ABJoFBXep1nwj8Pz6zrFxq90Pun5a99t7WKSTzd21VAbdt+6Pas/wj4Yj8M6DDYQovmY+aT+9XQw2nlxjdEsm77q7uKEVLVkUypti+z7dudy/wC1Xkfxq8RSSWtrodmv76ch5o16Nk4QV6xrU0Fpa3N5NMqw20Zfd9K8r+E+j3HivxVfeK9YG5baQeVHt+VpPb2VaYl3Klxon2LxN4e8OXX7zRba23XUe7G+Ztxfpjq3y1j+MtE1Tw7rVnq1rYwWKrJHBFFbNsDljwmO9d98TLERapaT7vvx1V0fwppX2y21Fo55JokDKslwXRc9Rg0hE/jjTUvfDN+1witItvv/AN04rx/TfEd/oWi2TQqtxZ723RSeoPY19D3Fp9tsbm3Yf62Mr7ZNfM/9oDT5LzRtQtVmhgnPys2CpPHFTI1pdjRm8VW2oSGVdN8luN7bhnPsRitixvxqimLd9qVkP+jXXO72U9jWP4Zt/DmoX0FhNHdxtLKFVpJMJk9jXWf8I7/ZepRLDYNbrFL5qXLSAiXj+GlfSzKkknoZ+qLbx6XpVhYvI0LedcKzdVB2hMmjQ/Ckmvx6/FDumvtNtobq3g3YEu44cmqd9d28niZLKzZWt7GzESt/eJPNbNjDLJcRXVneT2d4qHbPC2CyHsRVR2IluVvA7x3sw0G4lnbSdVS4VVk/5d5EGfMj9jXJ+E5jp+rXWl3DLu3tsbqGIr2Hw74cSKG51m8vZ7zUGtzAjXGP3Se2K8i8WaZJbfZ9St93mb9rfh0NMSabOrukRo9v977tc7dQ/abOS3b/AFkf71K17G6j1KzieNvvAe22ql0v2aZJ1Xcync3owpDW47RdPstQ0lJbW5ma6ix5sUjfd/CoZM+Ztb7zDbWHqG/TdSW/sd32eV/mbdxz2rq9Stxc28NxGzfvI1Xa3HIFAnozDZht3LVeT7tWf9X935f844qtIpVSvtQUZ18xbbuLNW5pa+ZYyN97bt3fjWPcKF3N95q1NDlkazlgj/5a/wAxQW9jZmctDCrfMq/L/iTWXIwaNm/4FW3+8ufD8cXlxr5Dj1+bHBrDZdrf+gt+FBkmVW/irK1BDtrVZfmaqV0hbf8ATbSZqjY8E/eZG+aNfvMvJ5qfUEPzN77fyqh4HUSXEkDO0beWW3LxyvPNXLpju3bvvDc1C2I+0Y10m5jUGjwhVu+f9WT8tWLp9vzK1VNHzItwzfd8zdQX0HXX8VY9wBurZvmEa7qz5lSdVZSq0i0Zi/K1T7dqrTNu1mWjcf021BQ2T7tQ1I392o6oGPXKtUtFuvmbFp+KBDMU3FS0uz5vm3Lx83+zQB1nwv8AM/tK/wCf3f2dd3516Gtcp4D037Jpf23fukvBu2r/AAoDx+NdQtbx2OSdmydaWoqfmmZEtSLiq+aM0xFxWFL5oqlmlVqAL6y0/fVGOUrUivupAWN9Ej/u6i31FM1ADGqRWqvmk3GmBc80VAzbmqLcaM0AS5pc1DmlVqAJafmq+aerUDJlqSoVapVoAWikooAetSrUarUqrQhMcq0q09VoVaYhyrTsUUYpAGKjZalqNqEBBTalxTGpgRUUtFIYmKTFSLTWWkA3FGKWigBirRT6KAEoWjFFAxcUmKWihCI2WkqSm0ASR1JUa1JQA6haaq1Iq0wHUUuKMUCGNUTVPimMtHQCPFV2qw1U5npWGJI1Q0jOWozQAtOpmaXNMB1FOWhqAG1Cy1M1RtQBHinKtOpY6Bj1Wm7KmWmUAMZRUdSM1Rs1IQ3FQSVYzVeT71BRE1QtUzVHipKI2qOpWWoqAClpKbQA+imULQBItSVFUkbUASx1MtMjqVaAExSVJTGqiTYoopVamSCrRiin0hiYpaWimISilooASpKRVp1AMSilooEJS0lFAxlFJRQMKKKSkFgpaKKBBRRT6ABakqGpFpgOWpMVGtWFWgQzFGKfijFADGpKkZabigBtS0irTqAHUUUUDCm06igBtNalpKAGUlOpKBCUUUUANptOqKgBWopKGoGgpabmloAMUYoooBDNppKnqFqAI2Wm4qWikBBikqVqbQMjahadRTAjanLTqKAEpaKKQBRTqXFACZpaMUNQAU9ahqSOgCZaWmK1PzQAYpMUuaKYhlFPpaAE2hfvIrf7yjr6jNSqzr912pqrTloES8/3qa1LRQBHXL+KvBdjrtz9rWX7Dd9HlhjyJfdh6+9dZikxUtJjTaeh5aPhfc/bnVdUhW1UBlkki5YnrwK47VtNn0vUrmyuh+8gcq3+13B/GvoPFcN8UtE+12KatCu6a2Gy4/2o+x/CocVY6KdVt2Z5OyCmVL/DTWrM6hm4rRuDUMtMxUgO2f7VXLPUL2ykV4ZW2r/C3NUKkjlMbVYrHZ6f4qngj23ltJGrY/ex8iugt9atNShDK67v94GvNLW6MTboZWhb9KstPbz/ADTR+TN/FPbcbvqKVyeU7S8YSfMtZN1F8rVjw6lc225Y5o7yH8Uf8qux6rb3Py/dkb+FuKYEUyf3ag3uq7ZBuWrsy/Kq7fvfNVKbK0wGMyMvyv3+7WhslXSZmkT9zJ5LK3vvzWLMvzVsWt0G8NpFu+ZCd3+yFORWbWpadtyrDKGvp/8AZAWti3mj2ndu6fL0+Y1z+lxPLI8v94/erbjQVqZMuXTxfZflO5lz/DgZNVoYt0NGoMF093jP+9/OrG62iji23HnMw/h420EDI7d2rUhsrn7Kkrf6lgfmVajsWTzD5n3f4q6TXrqOO1S3j+Xyo137enPSghvWxxF8hZgvtuapLWL5fl/3qGikuZnljRvLX5d22tO3VFZvl7HatBV9CxYxOuHV9smNyturRjUR3Eywou5odzNt5V8dqpW7bWTzD94CJW7cVdurs2MLz+V8zR7fdscCgzerON87zbpePlU7vwBojbzrh2z3NRySiSSaXb97NS6bbmZQy/e/u0GzNix/hVa6nT3e209b2H5f3iq0si5TDcc+4rl41eOTaoVq6jUpfK0NPtW23VrcfuFb5E9z70zGe5zutalHF9oS3X7RM2FRtvK5OOB6mu4+Cvgny75dWvl3XEB+T5vkzWT8N/Bsus6sk98u2NRv+VsNABxg+jtXudxpkFp5MVruj8j+FeBg0FXstC5Gok/e++3bUVwgab5drbQG+992mrK+01m+INag0DQ7nUbj70Y/dR/3j2FMR558XtSLNaeHtP8A3l1duHmVfc4RDXf+F9KTw7odjpdv8yxfLLJ03ydzXAfCXSbjV9UvPGWufvJFkZbf/akIwSPZVr01VLMu07VwKBeRy/xcsTPoMM/3o/PG7b1QVz3ge7LKtrdR7ZNn+sVsq2K7Xx1buvh2bduZWIZOhPNcj4dtf4Y2+VttAmd5Cg27fYMy183fGDSRafEbU/JG1bmOKf8AOvpa1R5I1avD/jdblfiFabh/rdOjb8i1TNaGlH4jybynXK1dk1rVGtVgkv52t1+X739avyWibn2/wjdtrMuIkaF/9msGdZZ0F9upOy/eW3X/AIEN9ejeHWfdsZF8yMne3QMDwK818K/Nqz7vu/Z1Vvzr1Pw23mXG6T2raGxzV9zsbxf7P8H3Kq/3Yi33fvHNcFpNvHqVjNBcbmt5E27evDV2vihw3hW8/uqnzdq4XwjdiJZkk+9w361RkcfpbT6PqV5pF0+1kkPuMj0+tTXV0ZJGVjXQfErRTHbx6zbjdNEdtx+PQn6fdrmo3S7sxKvyt911pGis1cjhhE8L2shby5D8voprQ0G6fUM2d87LdQZV/TAHBHtWfxt21Ffb2aK9tW23UACy/wC0OgNA2tDVuokVtyrtqmyFv+Bfwrz7GrlndR3un/aFTbIuFaNcnb7k+9VmbbuX2C0CTMm+Q7WZTV7wzN5dxFxu/i+bNVb77rUeH23XX+ytIvodXYyhrOaCP5d3zerccGse4cbm+WtDSfMka9eOPbD/AByf3R6fjWZIwZj9TTM4kW9FzuVqrSXEUe7crdKst92sy++69I0RN4ZcLqCO27bvH3VJ/CtjUpxLI7Mir/7L2FYmio+1mVvmq5Mr7W+bdQD3KF5+8Vlam6TiPz/7v8NOki3fepul/M0zZ+XO1VoKG3iGVenzVj3EXzfNXSSKNo/2qw7xh8y0mNFVnqPNNZvm+WnLSLGtSUrU1V3KaQE0au0O6P7ynbT1/wBqktXEeVk3bW/i/umlZtzfLTEPZ9vzL8v86azH/a2tQq7adTEemeB38zwzb/8ATOSSL8Ac10Fcn8N5d2l38H/POYN+DCutWtU9DkkrSClxRT6ozEzTKl2im4oAZS0UUAPVqfmoakX7tAD99RM+6mM3zUlMLDqSkpaBi0UlFIQtC0UUAFPWkxUlAiSOpaijqZaAHYpVWnqtSRxUwuMVanjWjZUirQIMUYp2KTFABRRRSARqjqRqZTASoWqeo2WgCPFMqbaaNhoHcaq0MtPxRsNAEGKdipfKNKqbaAIcUMtTYprLTAhpKlqOkAlFFFACc03mn0qrQAirUqrRT1oAVVqRVNCrUi0CDFDLUy/dpklAyBlqORqmaq7NQIjmrPuKvTVTkWgZXpKlxSMlAxlFPxS4oAcrUM1GKbigQ1mpmafijFABmiNvmpuKFWgCekam0MtAETNTJHpzLUbKaQwzULfepzKaZUjEamVJTMUARtSU/FGKoCCmYqekxQVchpyrS4pVWgB6rSxrRT4akkkWpVqKpVagokpMUq06qJLmaNxpmaM0ySdXqTNU1arEbUAS0tJRQBLSULRQAUtI1KtAgop9MpgJQ1FDUgI6SnUYoGJS1Iq0UARrT8UtFFguNpaRqGpALS1FS0wJlqVXqurUuaBFpWpar76N9AE7U3NRM9IrUAWM07NV1an0DJc0ZptLQAZozRRSATNNoakzQCH5ptJmjNMQlFFFADWqOpqYy0AR0U/FOVaYEVFS7KNlAEVFS4oxQBFSVIy0ygCOipMUUhkdMxU+KjoAjxSYqWjFIZFijFS4p6pTAgxSqtTKtKqUCuR7RRip8UYoAg2UzFWtlNxQBXVDuqRUqRUqTZQFyviip9lJsoAYq0qrU2yjFAiPaaFU1Mq05VoAZijFS4ooASilooGJRilooATFDRJJG8Uw3RyAq8f94HjFPooA+f8AxJpn9jeILywzujjf5G/vIelZjJXofxcsBHqljfxj/Wx+U/1SuF2DbXPJWO6ErxuUmWo2WrrJUTJSLK2KMVMyGm4qR3I2WjcV+7TqKAE3/wDPRe/3qezCT73zf7XemNTMVQi1DdTxfdl3L/darP26OVfm/dyfxbulZm8/xUZpoGX5qtqvlaLP/ecVkWuWmRFLfN8ta+pNtsdn0oJsM0lise2tWFzurC01xu2tW7GoZV3NTRMg1CUtps3lpt/i3VR0+X5flq9qFvc2kLbivlsA3s4JqSzt03BY1pi6GhpfmrMjLF5nlkfL/ep2qXciwiJlVdhO3avc+taE3lWln9njRZLpj/rP4VHSucvnLTIqt3oItd3L+l3EsNq6L91j+oq5CwaTYrfNkVn2rn5a0bddyrxu2mgGXbdH2xJlfmJ2ttyq47msrWtQM6ukgbzOFX/ZxW5DayxRho1b7jNtZThvu1ympTSz3jrJ/rFJ3K3G2hkxWpVZSsYXb96rlnFLLHsjqg0paT5v4fu1fs2lZtq/KrfeoNpGxo8p84eT80mD+XU10VvFe+JtSS1sbeOSFHDq230789vQVheHdMuNQuFgt03bjt/D39q988M6fb+G9Lit7cLJcNjfL1NMx0vc1PD+lQeFtJis7Vt0zf61tv3s9zVxVLN8w+996qdrL5mWZmb/AGl5GelaC4Xd81MQrQorV4l4y1O58beLLLw5opWS18zasi/x/wB+T6KtdL8WvGQ0+1Oiaa7fapUH2hoW5T2Huat/DfwqfDei/bLz5dY1CP8AiXm1i7J9T3oA6CG1gtLexsLEbbW0QRRL/eAPX6muh0mHb81wq7VQqy/3jVXSbeONVuGRpGX5krchctH+7Veu2gDm/GTeZ4Xu2mVeg+vtXIaChWNXk2txtZum412/izz/APhHdUiV187y/wCJq870OKeXT3iuPMkZHDRRx+q+tMl7ncWLiJfNk+WOMDcrf1HbFeafFSwTWfiJpMUjqscWjXErf7QU54r0zTYUaNUjG6Pn5mbecnqK4TxdDcap4y0O90/a0Nmk9tezw/cWN4235NKw02jzLWNMgtI1lt5WkV0V23Ljbk4rmLWxM8N2zfdjIX8zXcX01vc2qJI/3gE+Xkq+M81T1K1i0jwu8H+suryTfuj6KgHWpdPUuNd8py3h+xe01y7t5PveVG6/QjINeh6L+7kTjatcuqxxeJtWlVNsLvH5Tc4YCNTgZrqdDxNIm1vlzuppBNt6nWeLk2+B72Vf+ee2vMvDLPF8zH95wzV6p4sUr8P79/4crXkmnv5dxE2du40yV8J6PCqX2nvBdDdHKnlMvXcD6V4vfWsuga5c6bcfdU/K394djXqmj3u2ZG+6vO3/AGc9xVTx94fj1vS99um3UrTLQt/z1H/PP/Ckwg7OzPO9nynb/Wiz/dXAZvu/xf7VUtJuvN+SRdu0fLV6R9v3V3LSNivM50i+3x7msbmr0zBsNG26OT7rVVvHEtu0U3zLnb/umqVuslkuy4ZvLY/uvRaBE98w8s/Ltkx/Km+F3dbg/dVqbM3mbl96h0WVI77bJ91jSK6HXRpPHDcRXEu5UlKOq/xA85NY8zH7zfLVqFUa4kVWZYeN+71HTJ9KiulPp8y/y96ZmitIu37zfNVO4ieSM7fvVZmbbHVK4lKq219tI0RLov3du7/erV1CKOC1idnXc43LH/dFYWjy/f8A72auahK/zNu3UA1qRzSxMr7ZNrY/i/iqpp+Vs1/2vmrLmczyKn94itr7qjb/AAigZXvpX27m/wDHqxbqUyNtrUupUrHZtzGkykC0+kWjNQUNkaprdf8ARblv7vl/qaWGynnbco2/71alnbxW0bru8xpMbt3qOeBRoFjOa12/Lu20zbtrTaFGsTO3zTLME+9WetUIWNdzVJihVNSN8rfMvyrQI6n4bvtvtRi/vRBvxD13dcv4H0eeyWa9uiyzXKbVib+Edc109bR2OSerFpV+9SUq1RA7NGabRQIKSlpKAClzTc0UwClpKWgYUUUUCClopy0AGKFp1FIBy1Jio6mWmIdCtWIV3NTY1q1GtABsqbb8tCrUipQBHipFWnrFT8UAQ4oqTFJspWAgpKnZaZQBHSYqTaaMUwIcUmKloZaAIqSnMtOVaBDKfS4oxSGJmmtRQ1ADaa1FRtVCEao6VqSkMKKKKACnrTKeq0AOqRajVamjSgRItOWkooAkVqjkejNQSNQMbI9R5pjKaRqACRqhp+KTFIYzFDLT8U2gCPFOVadRTEJtFGKfTWpDI8U3FOpM0xCYoxS09aAGqlOZadRmgZCyVGy1ZqJloEV2Wo9lWWWmYpDuVWSmslW2WoGWgZDim4qTFJipKGbKTFSUlAEOKKmxTcUAR1Mq/LRinUAJUkdGKfGtUSSKtLT1WnYoEFI1ItDUAC1LG3zVEtC0AXlan1FG1S0xEirS0irS0AFFFFAhzLTac1NpgJS0UVIwpKWkpgLSUUZoAWikzRmmIKRqazUUhhRSUUAPzRmmUUALUlR5pM0gJKKizTlagCRamVqgzUi07iJVp9RrUlABRRRSARqZUlRtTAMUuKctSKtAEeKNhqRVp1AyHYabsNWKSgCDFOxTqdigLDMUVJikoAZspMVLikoEQMlMxVhqjoAi2Uuyn1JRcCDFR4q1tFNxRcCtiirOyk2UAQKu6nrEalVafigCBYjT1Q1Oq0YouMh2UYqajFAEeKbsFSYpKBCbRS4oooARqFWilpXAVqSiimAUq1HTloAlWlpq0tIYlFLRRcBKKKdQAlDUYpaNgOS+KVukvhF52+9bTxsv0PymvJIZrfyx++WvU/i1Lt8N21ru+a5uh+SDNeQQ2pkYsyfLWMtzqo/CXpEFQ7KnjzuEEn/AWqTyKRqVPKqOSIVpLCaGh3UBcx9lNxWs1rVWS3oGUcUyrjW5qsy0hkbLTKkqOgZPZ/8AHwrVe1Rv9F/EVlxttZWrUZvP0+X+6nzbqZL3IdNz533q3VUtWJo6lpq6CFBt2su7imiJPUq6k8/kxozMys+1Fq9azPGu6NttZ2pXB+3WyKy/ID8y/wAVX4fu7qBPYuQ/LG/7zy+dzdzg8Vl3DGS6G713VpTSi209ZdyrJ5nyr3+prFVi00vyq350yUa1nlpBW3p7iJtzfvNuVVe3J71iWKlW3NXTaPb7rdnkRfLY/wDfQoJk7Dde1C8trFWWKOGNh8sqtndXIrjazN/rH+9u610Hj6+8y4tYI9vlqg+Zf4q5dn+batDHBaGhZpbbS00m3/Z25LGtSxsZbm48i3hZbj+638GfX3PYVV8P6a891E0O5rj89n/169M0exj02P5dv2j+Jvf3pjk7Gt4X0220mxRIU3TN96WTk+ldNpcqTyN5Mm5shX+vvXNaOkm5PM/hH3ezDpXSaKvlTM/k+WrEs7KuSw60zK7Nm3gSPZBu2wxv8iq2N5YYJauW+I3jKDQLNbO1lWTVm+4q9IB6yVH4s8QafpNmt1b7ZNUlj/dLu+5/tt7VhfDXwaNXkTWda/0iFn3W8ci589/U+1DA0Phf4KlS+XxDr3/H4xEtpbSdXL/8tJK9RaxM8xeR/MXzB8zVIz+blW+bZ8v+7t44pIXlu96Ykbc4VfTigZcW1+ZbeN1VVAVqcyyxsy25VWUfxLnbU1uqQQusn3sfe96auyWGVZPuufu7qAMHxQ5k0e/lVo7hXg+7H6KewrzjwrE7bYo5GVldm3cg9cjH/Aa9F1hreDTb+Cxi/eNAXWP+8RXC+EZpFjVYQrbI42eKT+KFjw491amS9zptJu/KZ4rqL5o8MrL1XNcZqXg/ULHUDcaOjapost0bxY45vLnt3c5kGDxJGWrtrq08u6eWOTbtwrRSchj6g1qfZRBJsjaTdj5ZJPfsaAPDvHEL6hrH2+3tvJmlxYpbLaiB2kT5stGM8tuqxb6qmgaa15qUTQ+af7Odbi2MhidkzkIO9ejeKvh/LqV5Lq2lzNHqDCKX5W+5OnAk56gr8uK8d8UanJeNFYTStI1rO091LJHsMtwRs7dlX5avmtEFFNmXuFy1ra29tJHpdrIzRSzMPOuHxsDsB0AXtXU6GojkVFX7uGrA0WLzJmb/AID/ALprpNLXbMlZFM67xUhX4a6lK27ase3b7mvGdHQtJF5g3V7R4o/5JjqK149o+d3zfMy0AtjobGVI121f+3Db5Uh/3W9+ornrq6eOTbG23j/vmpbdisfy/d/vf3qYHP8AjDR0WR9U09G8xcvdx/3f9sf1rLtbhJ13fdautmldbqOVW/eRPu9mA7H1HrXI6xZfZrxrqzTbCz7mj7IT2/3PSpZcX0YyRBt+b71Rs37nax/3WqwuyeFnWqc0R+770GhFayu2YJP9Z/D/ALQ9qryQSLJujapJEPG1tsi/MtSTTGTy933lpDN7RbiJVTzt3l4/e7VzyOnFF588m5WZmY7vu8/U1n6DL/pDKy7laM1uallYbd1Hks0Y3bW+8B0pmW0jDm+WP5fU1l3zfu/96tC4rH1BxwtI1L2gsI13su5c7vmq5eNujb/Zqppa/wCipS3Uu1W20B1M63Q/blaFdzKPmq/IzqrM3ytVXSWdZpnX221JePuVqARnXEp+bbVRVLNtVafNUsKbflU1my0gW0O3dI6xr/DVq1WCKTfGjNJ/ekx8tRqm6pV+Wkyybcdu7d81PXLK+1aryS+Up2qzN+lZ8kssjfM22lZsLmnJ5TL9o27v4U+bhjUdvb+Z83zbV++yrk1HHLbNtdvOjbJ3Rqu4Z9V/rRNcPJCYl/dwt95f71aLQhs1NNt7zUswabD5i/xtH8iL/vSV1uh+ErOyZJ77bdXiHcvXy1/xNW/CVmLHw/aIR+8dfOf6tzWytaximjllN7Ie1FLRVmIUUlFAC0ULT6AGU1qdSUwEpaWnUBcYtLTlpaQDKKfRQAynYpaKBBS0YqRVoASpY6TFPjWmBYjq5CtVYx92rkK7aBEyrUirTVWplWkAKtLT8U2mA3FNxUlFMCHFGKlopWAi2U1lqfFMZaAIWWmNUlMZaQyKhaXFOVaYBTafijFADMU3FSU3FAEVRstTtUdCEV2puKmZaZQMZtNPxUirS4oERYqRVp+KWgAjSpKFX5aWgAqOn0ygBKYy1Mq0YoAr4pjIKsYpMUAVdlJsqxikxSsO5BikZamxTcUAQYoxUlJQMjxRTqKYEWKZip8UjUAR4p1OopANxRTs02gBKjxUtJimIioxUmKMUAQMtRstWMUzFAytso2VY2UbKQXKmyk2Vc8qmMlAXKuKVUqVkoVaBkarTsVLijFAEarUir81LinLQBJRRS0ySDNJSZopFDqctR05aBE6tViNt1VKkjb5qYi9HTqbHTlagB1CtTaM0xElRtRQ1ADWopjUUhj1amUUNQAUUmaZmgB+aM1Hmmb6Bk+aWos06gLD6KKKBBTKdmm0hhTWpWpKYDacrU2kVqQEuasRv8tU6mjb5aBFxWozUCtS0xE2+m7zUeaTNAFhXpKhzT1agCeOpFaoM0tAE6uKfvFV1qRaBjqbStTGoAdRTKfQA6m03NGaACim01moAczUzNMp9Agp+aZRQBJRTKfSAGooZaZTAkWnUypFpDFoop2KAG0UYp+KAI8UjLUqrTGWgCPFFSYoouBFijFPopgMpcU6m0AJRS0lAhaKKdQMVaXFFFK4DsU6ikoAMUYpaG+7QI87+JmpwWmraUtxuZY4JJflXJyxxXFya7ZSR/LFI3+ysda/xKWe98WXKxldsUUUXzfTJrm47GVdq3Eyqv8ADtrCUbs7qWkR9iUnuvlgaFY4yzKzAnPtWhHCGqOzijiysabd33m67q0bdPm+7TKbEt7Xd2rQh0ksy7R8rVoafaH+98rf+O101rY7cKqfM35Nighs4tdBeRfut/u7c1VuNHMW9l/h/vV7Nb6T5kKsy7v7q1g+LNPCwuij5Vcfw/eIOaCeY8cvrVo5NtYlxCVy1ddryjzptv3VrnLp/l+98uKDVGQ1NqVqjapGiOrLP/oe3+8dtVatSIVjgX+8N7L7GmM0NNX92G2/NwrVsRr833tv6fjmqNjEPJC1NNKIoy/tTM3uVmxc3hl/un73161pwr91axdLeSXb8q7WJbdXRW9udo53c/Td+NMTIb6GSS3a4+XyYzsT/aqvYxDzHZvb9aveILtGWK1td3yYR6rwqI13fw8UEq9i9Dsj/h9f14q39o83yUuLifbHjay4Gz8O9ZbXHy/3eRUEl1JNGywr/wAC/wAKAsJrEtvc6o/2Xzvs6/xSN94jjJq74Z0K41K6Cwuq/wB5mok0x4Ps73A3LPGWT5ThsV3miwpFYhY08tWjDf7WRxzQDdol6Oyg0iSFdNRo18vymZvUcgmr1jF5szs33c/d7saiki3QnzH2r5it+Zqzb3Ai3eZtjpmN29y9DKFuvKb5Wwdvbb6nNVNY8UPp9j9ns5910xHzKvCDuD7mueuvEsksjxWcrKzJs+Xnr/dPoa0PDPhfy7h59U+aTG+KDdnr3NMCbwf4SOt339reIGkaOV9yq3Wfb/JK9vsYhFGFVFVWxsVV+76VgaDaDzN2302r/dFdBJv2ptk2qo27uR0oGSXyDy3f+L+9xinQt5Vn/s/+g1XVLtl27lk2/fZumM1G2V/3sfhjNAF63mj8v5m/2l3c81V1C4/c7Yflb+Fe9U4Uk8x2Y/L91Fb+HuagheRsrv8Am5X7tMCC6upGVZ2fa0ALMzL8zg8EH2FcdocUmn3V5a7N32Eme1X+/btxJFXV3ClVlVv4kPy+xrmdFV4Lx22+ZJbbZYv9oAbSPoUpCOm0uVLmzlgX98yEbW/vQtzG4ra0uU/bIoLhd20bVb+9WHvtNPmhlsU/dwIEmX+9buc5H+61dJcJ9phRbf5VQbkZerZoAtSSu294fljr5R1pd2saj/tSt/Ovqi3V7tfmRdqff/AV8n30u7WLl2/ink/4EM4pMtGhprGCHyvvNwrf7Wa6DSVKttY/M2Pm/u1g6XiSZ+G8z73+AFb1jMkF15Vx8qt92XtkdqCWb/i64uJPAt7ZtAyskcbPP0Rz7V5lasYsLhfmj+8vrXpHiy/Nz4Hud3yyKV/4Ema80scTq/P+0v8Asmga2NP7J81ujfebG709eP8AgNTSRPHb/N/qZSdq/wB4jipoYvMs1VpW8xBuWReuR2NF5n7PGqjcqYXb/dzTAxZl2stZ91saNlb7rfK1a99jaPlrCmQtI235lpFIxebS4P8AErVOzbl3LU91bmSPb/eFZ6sbRtrUjRBioLpH8vdHV3buXdSSfdNIopabcbbj5WZdwK1011dPPDFuZd3lj7uMVysiGCRJYflb71aNre/aVKttWT+6q0Ca1uPuPmWufvsrI1bs2dtY+oKN26kNF/SWLW7K3y7R8tQag/l1ct0Ecaf3dlZepMNwoGT6X/x7s3+3UeoN821fu5qXT8fY1qnfPuZto20B1Ke3zJNtXPkjqKxhMshZdvy1ca3+8qr833qVrlXsQq3zfu6uWqxr80n/AAL/AGRVaO0kX5pGX/gNXYbcbvlTc38Ujfw00rEuQXiRtI21v92s2aIbtzVstas3zNu3YFMvLULavu+9gMq/3qBJmctpuj3Nt67qjaItMsUa/NIQn5nFa8KhoW/2RTNBtxP4msom+75m9vovJo6jvoeoRxCFQi/wjb+XFPoVqWug5AoopjUiBzfeooptAx9FFFABRRRTAKfTKKQiWio80ZoAfS02lzQIWnUUtMAqSo6koGSLUka0xfu1NHQImjWr0a/KtV4atLQIkWn0i05aAHUtJS0wCmU/FGKQDKfikxUlAEbVC1TSVAy0AMop2KMUgI8UYqTFFAxmKRlqTFFAEGKMVJilxTArstRstWGSo2SgRDim4qfZR5VAEarS4qZYqXZQBBinVJso2UANpKfiigYyjFPVacqUARrRipsU3FAEWKMVJikZaAIKTFSstMxQIiao2qVqbigCOmVLUbLSQxtFLijFAxKZUuKbimAyin4puKAExSYqTFLigCPFGKkopAR4pKlpMUwIcUmypcUMtAiLFGKkpKBkeKgk+9VhqrtQIjop+KFpDFxSYp2KKADFFFGKAHrT8Uyn5piM/NOzUOaXNI0JactQZpVagksK1Txt8y1TVqsRtTEX1b5aWolYbadvoEPzSZqHfSb6ALMbfNT2aq8L/NT2agBaKTNGaAFopM02gB9RNTqjZqAGtTac1KtAxVqSmrS0AhaRqKRqACio806gQ7NDU2igY1qbTmptAhy05Wpq05VoAnVqXNRU9aQDs0lFFFwHq1SrUarUirTAkWnrTKetAh1PjoWpFWgYNUElTtUUn3aAIafUbUlICWkZqZmkzTAXNFFFAgooooAWnUyikBJSrSUq0AFNxUjfdNR5oActSKtRrUi0DH0+m06gBuKdS0UxCUUUUhjcU2pKjoYDadiiigBjUyntSUwG0lPplAC09aRakpAFFLRUgFFLSVQIWkmmS2hknk/1cUe9voKWub8fX32bRVt1bbJcv+goew0rux5veTPd30lxI3zO5ZvqTmq8i/NTl+X5qa3zNWJ2E8MXy1p2Kbvm21Ut03Ku2tixw0O1fvZ2r/tdqAbN3SYg33q7TS4Uk2KybmwWrm9FtDJIjfKq4ruNHsvlX67vmpmJY+zyLD5sa/KvyrH/AHue1cd42uh5jJIqxx8/N/fNd7eK8Kqqt/vema838ZNIsMqzKrKwpgeb68w3PXJ3jj7v/AfwzXRa9Lumf/ZrmJMfLUM3jsV2qOlZqSkWhLeEzzIi/wARG5v7oJxWjeSpc6xdtH/q1O1F/uheKj01RFNC38WC7N7DpS6SpkuN394fzpiZuW8X909t22m6piCzZs7lb5d39CKtQqNprN1ZzLJHAp3L/F8uKZC3GaS21Vrdhb5ju9N1Y+mxbV6/dH8qtSXB+7QDWo1pS0zPtX/dbFR7/m/dj5uN1N2yS/dPy/3qtW8X8K0wI47cyL+8bdWnptqGbdJ91cqy0cRq33at2KvJJtjX7xFAmdFaxDULW2sm+7Bnyvx9a0/DsLxWrxTD5oiy++DVaFoNNs99xL5fT71YuoeJ57m4eDS0kVpfl3bcljTMmmdPr2tW9jZzfaJdsyj5F75PHFcc2oahrsjxW+5bfI3dkXIx8xqxpugm5uGl1Z2mbAZYNx+b/eet3xkwgX/hHLGGFfIt4ZYoI1wLieTnJ9dq0Amkiz4R02yW8MSyx3FxGgZm/un0H0r0SG3+aKXYu5RtrktU8ProNv4LtfKgh1ye5C3b23Abby9egLF8yMv8NMm7Zo6HbyyK0W9vmkO6VW+fHYCunW1C/LGF28bV21Q0nES/Lt3MN34VuQ/dTn733d1AyOS3+zLsX5t34DFZt5FG0L7X3Nn5l2/d5xW7M3m/xfNWPcTybmt8MzKD8yrQBmK3lSO21mbA3LxViGESbnhEckij5lWq0Mw+1BY/m4/i43Vs6fEFurl1bd0RIl/hHuKYGHqEPmWs3lsvmbDXF6X8sxlVvl2Ffmrvr6Ly5B5a/MwO70XjjNcTpfzTFZF/d8r/ALppEs2NJYSXCQMvyxfdb++jdUro4YjHZtas+6NhtT1X2NY1vD5CvEu3zM/M1aVvdpudbrczZ3JJH0X60AbVvCbS1bcFZljO7b/FxXx3dIVvLhtv/LU7Pzr62XVZ5I7mKSL5UB+ZfusClfKsihZHVtzN5jbfrnNBSJdBV2kO11XysPtk/izxxXR2LCC6mZk3MrldrfxJn5Kw9HVNrytt8yL5vXbnrWzo+Lm+2yfeXDp/tJnGRSFI0PHkKW2hvtZl811VVrzzT8rI616F8RMro6N/00C7a4OzbazN9NtA47G5p7D51+702r9TUszbZPl+Xd/49iqFvNt2v/wH+lTwuP33mN8ufl/2TTEVJotsKrWXJFtketa6b5V+lZc0u6SgtFG6Y87fSsa4QMrK33q2bpf3dY8y7lH+zUmiKcMrwbVm+61W9wamaxbi20/Sp/OWT7dEJVjVceUMsuCfWqy5g2uvzR0FE8i7WrPkSSKQOrfMv/jtaXmpIvX5v7tVpF20gD7WJYSzfK33WX3NVr7DLt3VHNFt+ZajzSGblrMkmkweZ/DmsC8x5z/NWppvzWLp/dc1kXGfOdfegC/a72tU+6qrVC4bdM1bUiCO3Xb/AAisGT5pF2/xGgEbGlxbbUP/AHz+nQVf8k7Wot8bVTNaGwLG/wBKZDZWt4ot22Yfe/DbVqFY1jXhuny9xVeZSrM3/fLfWpLO6C+ase7c34+1MnUnmQ+W1VFh8xkX+8RVvem3725m/wBkCq107x/KrfeoEiuzJFDeRL/E/wAn4GrHgmLd4m3f3LeTd9TVCRt0hbO6tf4fpu1S/l/uwj9Xo6oqWx21OWlpcVqcwlFFLQAlFLRQISiiigAooooAKKKKYwoopm40hEi0LSUtAEi1JUS1JTELUirUdTLQA5anjqNatwoKAJYasrUUa1PQIkWpVqKpo6AHUtFFABRS4oxSGNxS0UUwIm+9UdOb71OpiI2WhVp2KMUgExSMtS0jUAR4oxS4p+KAIcUYp9JQBHTMU+m0ARstOVaWloAMU7FNooAc1Np1MZqQwxSUtFABin02igQUUYooBCYqNqkamUDG0ypaay0wIGWkqVlqPaaBEWKbU200zFAyLFGKcy0lABS0UlAhdopNopaKAExRikzRmgYuKMUmaXNACNQtK1ItAxlFPam4oENxTKkpjLQBFJ92oKsSVFigZHS06igBtOoooEFFFLigAoopVWgDKpabS1BQtOWmULQBOrVLG3zVWVqlVqoC3mjNQUZpiJGekzUe403NIC3C9SeaKoZozQBfVxS76pRsd1S5piLGafVdakzQA+o2p1Rs1ACZpVakp60AOp9Mp1IYU1vu0+mNQDI6KMUUxBRTsU6gCOnLTqSgAWn1DT80APp1Rb6VWpDuT0UxWp6tQIkWpY6iVqlWmhEi1ItNWpFWgY5akWmrTloAGqGSpWeoJGoAjam0rNUeaEIfRTNwpGamBKtFMVqdmkA6kZaerUNQAyin4oxQA1Wp2aaq0+gA3FlqOpKTFAArVLUS05aQEytTqjWn0ALTqZS0wHZprUUlABSUtFQUJQ1LSNTENpKfTaaAbRRRTAWlptC0rASZpaZTqkBy0LSUVQMfXl/jjUBqGrXEEb7ltsRLtb0616Y0ogjeVmXbGhf73pXzg1reSSeasM6s53M20gsWqJs2oxu7nQyIVbbQqU2xtzFaojblbJZtykGrUa7ak6GW7UDb81bOhq7XEfmD9233ay7OI/d/ib+9/CK2NNheZVgXd5knzeZ0HFIyZ2ehwmOYNu+XhPm9a7jT4g0cSt/D81c1pNpH9nu1X5ZMea0nue9dZpO+9h+1Kkkd1AnyxN064wfY1SIJdWit/wCz/tDBo2zXlXjyWPlY23f3q9M1y7SWH98+3cA/l/3RnnPuK8b8ZXB84ovzbnLbfrQNbnnOqOWkf/aJrFmb5mrY1T7zN71gyfK1SzojsNpn3qWm1LGi5GoWzmnX/rl+fFWNJQszr71H/q9LhT/npNu/ACtWxTbH/epiexfXEe5mO3aBXP7/AD7yWXLbmrRun2xv5xqlDF8xS3T73zM3900yUrFrzdqjb95j92po4f45qIYRG38UkzVoR2vy/vjuagZDGhbdt+7VpUCr8tO4X5V+6tQyXcasyxndtpiJV2LuaQ/KtWI9Yjslf7GnmMw/1jfwn2rHjiu9Qk/djcuRubcAq1t6bp9vBt3HzpF+Zm6ovOKBMbY6beaszXV9Myxt92RurfSuwtdMt9N0Vp7VNsyyKkrd3Q9aLVS2dyrtwNrVoQoZNyt83SmjFskt1RZFX+8P06VFrGkjUtctL+G4ktbyO3+aVsP7AYq/HZBbrz5F+bG1f9oVehTzI/lWmSP0fTQ2oJqV9PJeXyx+V5snRBnJ2jtXb2beZ/u1zEeyCNN27y1wzyLztHqa3NBvZJ5JvMRV2Hau309TQB1djjy9rf8AfXdaXT7e40+6ula+kmtZSHhWTl09Rmqiy7WVY0Zv73y8VPcXdxuCW6Rs33W8xj8vvxQUWfPP2geWWkk2bfLWnag3l/Nu2sv3mqvNNFbfN827G7cvX0zWTcXss8nlbWaP+Jum32oASRI55G5+7hV8urdrqQttvmOyzKNjf7Q6c1mLayRzbWf5fx6ZqdljberNu427uPwzQSaDSiWF2X5mkTaq1zOnsi6l9lmiZpmO9uwx7n1ra0+YyyQp/wAtF/8AHeKo2swk1Dap3Nvb+HjigC/ps32KO72t50Pm/PIy/d9jV+O1e53vYmNvk+6zfoDS27nyVZWjj6MrbafZpHHCVtZFhZj86t9xvoB0oAhsVe20nUre4imh3RM7rM2duR/Ca+Y4U8y88/ezR5ZG3f7NfTmuSn7Hd/e2+Udv0r5qkfbNIq/xOVVqCkSW7JEzRKY/OkA3t/eHcZ/3a6PQc/bofMG392rbeOjHFczY2UcX2lmCtH95F/vc4+b2FdHptwJNWS6+9byD6FiP48elAmSfERt2k20TfxSbq4e1/jb+Kuv+IVx/ott/tOWribeXbmkyo7FyP73+zy23t9RVjlWdW/iFQ2sybUZvvcVYVvMjiaT5WbLfrQAy8XdGv3m/hbdWdNhV/wBrO2tCZ9u7c1UZF6sy/NSGiK6T5WRqx2StNnf+KqNx8256DRGf51zHZ/Y1jhkjV/lZlztDHOKnuvLZoUh+7HAsXzfxFRgk0jL8zVHigZTuIirboflbG6ljl81dkm1Wqw1VpkDfN91qQyFl+8rVWkWrCsd3zUMtIYae5+dKpTfLdbv9urLfu2Vqp3X3moA2dQl2ws1Y1upkvIlrQvsyWaN/sCq2joGunb2oH0ubtqpVflVt3+771f8A3kbfMm2SqlvKNvyvt43VPHhvmztaqMWMmV5F2527f4fx7mqioeOfu1pLjbVO6i8u4ZI/u43LQBdbCr83zN/u4/OqE2Gb7tW5nSXYvzKqoFqnJ3oKIGlfzG/2a6P4dj5dQf3jWuaVfm2/8CroPBMvka08DH5Z4D+a80LcUvhO1ooorY5QooooGFFJRQAtFFMxQA+iiigAooooAShlooZqACnLTVpc0gJVp1MXFG4UEki1PHUCtU6tTAsR1ajqlD96rMbUIGXIanqvG22pVbdQBYWpFqutWFoEPopKWgCRVoxQrUtAEf3aRqfJTKQEeKKXFGKYCUUuKMUAJSU6nUAR0tPprUAJUbVJSNQBC1NqVqSgCPFFOam0AGKKKbQA6mUtFACULS0UhhTqbTqBIWmU6m0ADUmKWjFAyOkapKMUAQUmKn2UYoAgZKYy1a2VGy0wK7LUOKtYpmKBEGKMVNijFAENJUuKRkpgR0YqTFLspAQ4pal2Ck2CgdyOipVQU7ZTEQUVPspjfLQMjxUdStUdIERNUbVI1Rs1AEdFPxTKBhRRRQIKKKWgB6rSxrSKtKtAGNRS0UihKKXFGKkoFp2aZRQA/NG40yigCXeaRmpFptADtxo3GmUUATq1Sq1VlqRaoksq1PzVdWpc0xFjNFRK1SUCDNOWm1KtAD1paKKCkFDLS0UAR4oxUlGKQhuKKdimtQAykam0lMQUUmabmgB9Lmos0uaAJ1apFaqytUqtQMsq1TrVRWqdaBFmNvmqZWqvTlagCbNSZqvmlzQASNTN9NZqY33aBAzVFmlao6Bj803NNzTM0ATq1SK1V1anZoAtLTqrq1TK1AiRaWmK1PoAKVqFakpDCkxS5pM0CBaVaTNLTAkWpFqJWpc0hkmaWo807NADqGpuaWgBlFOopANpKfTKdwDNMzRSUALmkzRRQIKWmrS0xj80bjTKWgCRWozTaKVgMPxxfDT/AA3JcNDJNGske9VUV57pPia2lvo55ob1V3jd+73V0nxOuLieG3023/1bfv5fw4QCuHhiuFkX7Ru25HzVjUipPU66LtE1ryaS5vJ7iT/WTuX/AD5FFvnaU2/M3/j3bNMk3xsu5ty8fLU9vjcy43UkUy5Cp85N38OVX1xXTaLhptuNvFc7CodlbbXUaPEFZX/iX5vZhVLcyex3WiqGtWddu6DDMrch06EV0H22K0ZFhRmjYfuvp3Q1zemyiKbymf5V+Vu3B5BqRrvyLeWBl3TROyrtb09PqtUZkPiC+/dzM3/LUltv92vKdYzGv7z5VRBtXrtHUc13GuX26Eq3zLnd8v8ADXm3iK6+Xbnc1DKitTktQfduWsVmO6tC8+ZmrPb71Zs6krCUi/6xVopi53Lt+9SGakn/AB728X8Sua07eXy49tZkayTzIqr8yp83oua2LWEKyqvzSf3v7opkMj+yhm3XA3f7NXLe3eT7v7uP8jVmG0SNm3NubG72Wp1YRxjd/DTEJDCkX3VqC6uo49q7/m/ur1qPzZ7tttv+7hX5Wlap7XT7eKTzWi+0cBv33TP0pgUfNlvWdLdZNuNzelWrXR4o4UVnZmb7y9lFXV+7tX5VX7q9l9cCrEa+XGzNQIgZizbflVVP3V4CirFrKbZv3f3aaq7vzqTyj+lIk6zT3juV3QtuWtq3SNVTcV3SEbF7t24rgdL1E2Nx/wBM2+V/pXpGi28FzcNqKxK00oG1t2Qg9qtGUjSht9zbsVHHD5dxJtX5a1oQka0SJtV9yszZG1VxQIht23Ls9hWlaymPctUI4Qq/K3bd/vc1PCwX7x20AbsN66w7fm253UyG7fy0dUX5xu915xVGSUqu1v4h8tNXfPsWNlVlzuZv0zQMuR+Vfah5TXN2sij5Vj4XPvVyaIx4gt7aabb9+Vm4TB5/GsbTWuLS+l+1JHJJKQyyx+3UVsLcFd3k/wAXzfM33SaAC+ljX5VO7nb+NU7eLzJPm/4FVyG1j3f7Wfm+YfMaiZ0gkfci7cfNHu+9xQAabFaT3U0VvIzLvDTbcfNjqh9qF2S3iSqPufKn0b0o035Wh2xqrbKkj2LcI7bu9AGisUflom3dGvyqv94Cq19EfJmaz3Qycbmj5PHsakkwzb80yRyy7o2X5qAKmqZXR7p2DeZ5Bb36dDXzyv3X+X5s19C65n/hH7zcVZvKNfOc03lLtX1NJjLtnNuWZW+9KV/IdjWvoo8q6hX+Fc1kaXE7fPN95sVvWPy3QegTKHjzDWtsrfM281x8eI91dT4wl8zyq5qP5VekXHYkhi+581XFXbnc3y42r/s1XjxHCu75an5WRl/hUUARzZ3L8v8AtU2TK1JN92q8nzfe9f8A9VAEMmPm3VRkX+H+Gr0lU2bc1BZVZKay1ZZaiWL5mZj82KBlRlqpcZ9KvNVST71BRWmiDL1+amLlV2t96rFM4X73zK1IZE2GqpdRfe21oKh2/L/D96oWUNSAq3Eu2xjVT8zCpNJT92Xb1+Wqt1WrYxCOFFYdqED2LsfzfLVyNSv+7VWHC/Lu3Mp+arkbH73/AI9VEMbJKFV12NVeRnaRZZNyrj5e273rT8pFVXmT735tUV0waOghPUrwwyNHvZGVfuq23AqGZvmqfzpWwq7mX+Fd3C1Xm+VvmoLRFwrVds7g2mpWdx/Ckg3fQ8VjzN5m1d27b97861fK82NE/wCelCG9j0qRdrMtMqLS7r7bpttK33tgV/8AZdeCKsYrVHHawyin4oxQAyin4oxQFxlFSYoxQBHRUmKTFADKRqkVabQA2mVJRTGJRS0UALQtOxSrSEPWpFpi1ItMROtWYarr/DVmOgCxmpFaoVqVaQFiOpc1CrUqt81MCxSrUWanVaBDs06mUrUgEopKM0wClpKWgAooooAKKVadSAZSNUlMouBFRTsUYpgR4pKlxSUARYpmKloxQBFikqXFJQFyOipcUlAEeKKkooAjpaXNGaAEoxS5puaACiimbxSGPopm8UzzaYD6Kj82kaWkCJWqJmpjS1E0poAkptR7y1G40xElFIrUtADsUMtLRQAirS4opWagBKMUbhRQMKKKKBCYqFlqbNQs1CAay1G1K1MZqAImqNmqSomoKG0UlLQAUUlFAgqRajp/8NACs1JmhqbQBl06mUtIoKKKKACm06kqShKKWigBaKSnrQA3FFSUUACrTqWlVaokRafilVaWmSC1ItNWpKACpFplPWgCRadTVqRaBi0lLSUgQU2nU2gBKRqGprUwI2pKKZQIRmqNqVmqOkMfRUdPVqYEmakVqgp60AWVap42qotWFagRYVjT9xqurVLvoAfuNLuNRZpaBD80Uyk3GmBJioadmikNDKZT6ZQAfw0K1FJmgZIrVJmoFqZaBMkVvmqbNV1qRaBE1NZqdUbUdQBmpuaa1NpgSZoVqjooAsK1PzUC1ItICSnU1aKBj1oWkoWgB1FJRSuAtNozTc0wBqSkZqFagQtLTqKBjKKfRQAylWnUYoAKKdijFAHnvjiUf2sd38IC/kKwLdty7qv+LJfM1a8b/poaowrthTb8rY+asXudVPSJJIu5aktc+X8oqPd91atRqd1SmaMs27fvK7DRVTcjN81ctbxIvyqvzV0Oiu8X8Ks2PwbmrRg9jr45o45rZ9nmLs8qX+lU9Wu4G1KZW2t9pi3JtzjeyMuKg+1pFayorx7Wwy7udtY+rXo4uGVd0YG1fZTTIRj6lqDtHvaVmZgN35VxGsXHmTP81bWqXR/dK23arstcrfTFmdmqTWCMu6eqTVLcPuaoWqGboKuWdqZFieQ7Y8bqqwp5jVt28W6NfMoQNli1XzPkjC7a1bVREr1TV0ih3fdXG6pLOH+0I/NuDJHD/BGvBf3+lWQTyXCK3y/MzfdVaI4TP81w7bf7tSLEke3airxtqRVoAezeWu1VVY1FFC/LTqAGx/eaneaZWb+7wq1HIu1ty1b09Enm247DdSES2sX8O2p2X5WqwyiLeqj5s1PDb7l3N97FMgyZLF5Msqf99V2nw31JPObTrhvmz+6rBmTdtWqENxJp+oRXELbZFO7ctMT1R7nIp2jipPJLKP7uf/rYqro98moaXDOu7bKN1W4/MjbYu3apHzf3gaZmRtCPlX2O319wDTI1DSbV9v8AgQFWmXzGK7VZcfLTWtytwzrtVcDdQBYj+bytsO7dlGk4+X60lq4lmZP7oO6ljQsp/hot1Mce+SFWuMbW8lvve4zigB6y/vmijl8uiF5JFD3Hy7v4W9qPshjvJX/ctGwDfL/EauR7Jf8AWJu2/wAPZvc0DKjfJJuxVa4uo1k/ebfmAi+961oNDIysu1vmyvrVf7LZXa20rP8AKr/L8pz6HIoAsWsojurZs7o5CVWqn9oWdtI1vJLtkZ/kWRSNwNX9PT99DLs+Zd3vVK8untmllxCsezYu7+ED3oAu3V3GqlldWVRubawPH4VYV7fyUlXy2bZ8rdT+FVLP7PbQo0cSrM8Y3Sf3hT5rW3kb92vltkM23OWoAp+IroNpsyRydj/Kvnu3i3b2k+avfPEipHot8y+YzSIVVa8LukMdxIudvz7lWkxot2P+sb6VqQttb/dNYli0nPzqrfw7lzW4q7W2L8yr/wB9N3zQD0MbxR96KsCFPlb/AGq2fFH7tk+90rFhYbaRS2LUeGZWYfKuKGl3Nu3feqGZt0afeVVejaWY7aBk33vlqtNlfvVYhYLUFx+8+agEV5GNRLUrJ93/AGqaq0FjMVXmqxI1MVKBlOTCq+70rOX9426rupS/MqLVdV+WgaGtUbLVjFRstAEG7+JajkYs27+Kn8tRikMp3mNu6tKRflR1VtrIGrNukPP8S1o6Wgk02JW+X+719aEJlu3wy7VT5l+63tV2FwvbdItQafaGXev8Uf3mq8sUbNu+aZf7y4Tn3zTM2M3fNtz/ADPNJcKFhNSLKVVlwqq3zbf5daguMeXQSiorhV+X71RMxanxp8z07ZQalXygtWoZj/e/2ajZaba/LMyN6bqAOs8G3fzXVmzf9N0/rXUbtyq396vO9Pu/7P1K2vNvyxv86/3kPBrqfD9w66hqWmTO0j28nyNuzvibmM1SZhNdTdopFpasyCikooAfRTM0ZpiH03FJRmkAtNajNMZqBi0U3NGaAJFWnYqPNOzQA6nU2nrQIfCvzVMq1ErU9WoAmX71TrVdWqRWpgWVqRWqurVIrUCLSt8tOVqhVqcrUhlpWqVWqorVIrUxFrNDNVfNGaAJc1HmkozQBJmnZqKlzQBJmn1XzUmaAJKerVGrUZoAmqNmpu+m7xQA6ioZHpPNNAElFQbzRvNAElFQ+b70eb70AS0VFvFLmgCVaGaod9NaU0ATUVB5tJvoAlZqTNQb6RnoGS76Z5tR76azigCZnqFnprPUdAhzSmm7nqOnUALvNGaSm0AOZqbSZpN4ouA5WoZqhZqFalcdixmnbxVbzaZvNMLFtpRR5pqpvFJ5vvRcLFvfS76qbz/epyuaALKtT1equ40m7/aouBb30ebVTfRvoFqWGemM1R+bTWegYsjVFmjNNpAFRtUlIy0AR0NT8UbDQMZRT9ppcUxEdSYpNvzU6gYlJQ2abQBjZpdxqOnLUFjlapKip9ADqKKKAHLTaKKAEpaKSgB+aVWqOn0ASq1PWo1py1RI+ikopiHK1SZqGlWgCxS7hUTN8tMVzQIt7xUqtVNWqeFqQyxRSUNQFhrVHTs1GzUAOprUtR0xA1RM1SNUDUAI1R05qjpDHUU2nVJZLS0lFWQSrUytUFSLQInpytUStT6QEmaKYtSUDCiiimIKM0rLTaQC0mKKWgCNqSpMUYoGCrUtMX71PpiYVKtR1IrUCJqY1PzUdCAZikxUlFMBmKMVJilxSAjVakVadiloAWjFFOpDG07FOopgJikZadRQBHtNJtNWFWjFICtsNOVDU+KFoAYqGjYamooAh2GkxU9NoAbspVWn0tACULhfm3fd+b8uabJLBG22S5tlb+60yArWfrmoQRaHqssNxEzQWzf6uQPtyMZODSHbU8ak1i0vryVpJfLVn/i6MM1oLLGy7o3WRc/eWucm0K4aNHVN0P8ADRa2psrhvs77pMfNG38QrG53ctkjo81p6eu75ff7tYsNwkqo6qyxyYb8a3NNbayLUy2EnZmmqCNv4lVvmrT0262xlo4tyqfm71BHbmTa0b0Rr5Em7LeZx91qKc7ompFIt6hKkluZY0+6PmVurCsDULpGVNyM0aJ8vfaDwMmpb69KttY/e/A1jahcbVHzfd+by1xtbNamaRl3k0e1fm28/L1rntQl+b5a0L6UfwptWsS6bc1SzZIgprUU1fmapLLlmv3mrU80RxqtZtqdsb1qx+WrfLt8zP3vcVSJZLboZZN10m6NQNsTdGPvW1a5ZTu9Kz4fu1ow4WOmSLHlt25Nq1G2+Jt38NSK26n/ACNHtagCNcbVqRaj27W+b/gLVPGtADahjd4Jmddvy/w1c2/3V+aoZItyndQK50dnbpPapLG3+s+b5s5z3NaDRbflU7mrnPDepfZLr7PI37uX5f8AdPtXVSKFV3X1pmbKMkW2NuNzNWddIJf9lvu7q1Gbd935W/8AQqrSeWyn/vrt3oEdJ8MdWjXfpdx8q53xV6TH+7uGb5W6NXz+s0lpfJcQsy7Du3LXteg6lFqVjb3EbNuaMNt3UITWpsyIFk3RxMqt8zMrdxTJl3bXX7yirTQjydy7ugqvJ5cau0n+9+VUIcsR3RtHMu1h8+75zVxVjn3Kvltuyv7xfX61ThZJPm2fLgfMtWN33XXarfd3e3SkAf2TBLveRJN3H3ZMewq/HCFwi/Kq/jx70yG42bNzbuu3/E1I12Nu37zf3uM0AIylf4qgvliis7iW6+VVjb7rYKjGeDR9t2su77v92qWoahHFDNPcbvLQfwqXoAzPDN889qjNbyQrFHGqK2ctjjPuDT4buOfzmh2zeVJtZdvKuPX3FRTXzyNFKu2bb/x7ssmNp/uVTtdYjvbp4lElvImf3dwuKBGra3z3PmMr7likKOzNjae+B3xU7TfL81ZEMMdpGyQr96RpXbnLE9as8/Lt3bs0BcpeIrrdpcyx7vmA3t/erxuTLXD7m3MxLV634gx/Zdz8yrtQ7e+4k15SqGS4K/dX71JlIsW+GYqv3sba1oflb8BVOzXbJ8u1doLfN/OrLNt+ZvlVsbqAZieKlLMK5+FJGx83+1+VbniDzJI4m+638S1mx58x/wC7gUilsLJ/q2b+7Qrfean/AHtysPvCmN/CqigYjYZl/u0NF5i/NTZP3X3f4TUauW3fN81ADpstI33ajZB+m2rG3ctRqvzbaBlVUokcRRl2/hqdqytYmHyxL/wKgooK3mSO+75mqXFRw/dq191dtBRDVeb5aufd+9VFmMkjUANjWkxUuKRqQFS4bbGav6TbvLpaNH83J+Vaz7r7taegymPTU2/e3tQtwZH5s9oy7auR3obG75d3zN9am3iVm87+KrF14ckihE9q+6OQbvKpmd11Ej2SY527iKJF+WqkKSxf6zd/s1Y4+6w+VaBFVf8Aj4K1M2PLqvM3zfLUkeWoLIZPvVTuHEbK38VXJu9ULz7tIaLczeZbuv8AeSt/7Yo8Q+G9Qy0K3kIsrjd7cCuQ+0FbdGpb6aeXw/YXHmsy2t1JEn+zn5hg00xSR66spb5mHzfxL3U9CKk3/wCzWfbzebNO8bbo5/Luk+kqbj+AbfVhau5z2J80VEr0ZqiSWio80ZoAkzSbxUdMZaAsS76TfUdM5qQJN4pN9R0UFEvm09XqvT1qiSwr1JvqvTqALG+hXqHNLQIsq5qZZap805c0xF9Zakjf5qprUi5oAu+aakWWqa5p/NAi6r1Mr1QVqljagZbzRmq++jNAiwz0b6rsxoVjQBZVqfmqe40/edtIZZzRmq240u40wLHmmjzTVfNMZqBFhpab5tVWam7zQBc82jeaqLLS+bQMtZpjOai303fQBJRmoc0Zo1AmzT/NqtRQIsb6bmo6SgCTNGajzRQMNxo3GkptAgZ6TfSUUAGaZvpajoGP30K1LRSATNIzU7FRstGoDWamUrU2gYU3NFNZaAFzTNxp2KMUxDOaVacq05VoGOozRTaQDtxpu+m7hTaYD99Lmo6FagCaimZpaQDqbRTlUUAFCrUmKWgQirS09cUMtMCPFNxT6KAGYpMVJSUgI8U1YqnpVWmBy9OWm06oNBaWm5paAH06o6fQAtFFFABRRRQAU9aZUitQA+nrTKVasgfQq0UUAxGWhaWikAUUtOWgLgtSR/epi1LCvzUCLFNapcUYoHcrsppm01a2UzZQBBUbVb2VH5JpiK1GKseSab5RpAVqjZattEaj2UDK+KatWmQ03yqBka0+pFipdlMQ1akoWI1J5RoEMqRWo8o09YjQA2plqPFOWgY+lVttJRQIWkopM0ALRUbUqtSAfRSLS0AKrU+o6WmA+pFqOigRYzSVGtSUALRTKFagCZadUVPzQA6im0UASUvFR5ooGS8UZqKlzSAc1OWm0UwJM0b6jptICTNCtUdC0AT5pahp1AElC0maVaAHVyHxG8VyeH7OO3sf+Qpc/ddv+WA/vn3PatTxNq39m2/lWrr9slHy/wDTJO7kV4dqy+XdTfO0nz/xMSWzUSk0bUoXd2Z1wyvM8t03mTSEszyclietTaT5cl5tjXb1as6RtzVteF7USNPPJ/CAi/U1kjrextw6lPGqqojZV+X3x71BJdTzt+8to49v3JPM5z7U9dNLbZVuNu7+8tWYYo41+X5v9qnZXJvoTwoFjiSti3Qsvy1nW8XmSBa6LT4S2F/y1MxbNK1inZY5Yd3mZ2tu6NV2SyRoXdQ3y4qzpsQZfm3bV/i/SrVxKI/vf6v71Z2syua+5xGpZjbdJJuX+63NclqlwZG6R7a6nxEu1XWH5ufvVx14u1mWtE7oai0zLupg26suZdtWrqqbNupFkTUR/epGpY/vUijQt/ljZvcfzrZhiH9lwys6rM0hVY/4lA4JNYcPzQn/AHxWvbqNu7+JvvVSJZdj+9tq8zjaFrNhY/earnMi/L8rUySZZfl2r96m5/ipFQ1LtCr/AA0CHW7bm2Ma0ViKrtrDkf5t1dBossd3aqrfeyFagGSRruYVXkQrv3VdVCy7mXay/dqG4b5W+lBBj3X+s3r8u0Bq7nQbuO+0tHm/10XyN/IHiuMm+VS1bHge68vUmt921ZRQDOjkiDSHjy6oahCJMbR/s7fxrorxE3Mkg+7j5m9+lZlxF8u6mQjnpk+WVNjV2Hwvvgt1cWDf76VzN15bSbc/7q1Dod1JpuuW11G21Vf5vRs9c0FW0PfVY/yWmSMF3N/dxQuJIw2fvVG395vmpkEy4VSzH5c7qcrhV+b5dv8Aeqi1wFbZ5v3vlWqNvevJJLFJbSQsoCssnVaANdrgNJtVqFYMx3fLVBpRHhmqTeOfm+7975qYEzS+3y02O6eL5lZt1VWY1Bul85lYL5eN3mbuWNIRHuktryZseZa3Pzqsa52nvUH2KNWS8m3LeYPlNI33QfWrdu5jb927f8B4qCZv3z/xLQAlndGVnSQbZoj86++KtrKI9qzO25vlVd1ZbWTyX0d55rR7Btb5eHHQAg9xWlGhZlZkX5D8tAFbxEyLo9yuz5tn3lWvKN22bqq7vl/CvUPETf8AEluFZa8xkT5tv8S/MrUDRYtXMkyeW3Ytt+nGTV3Y+4N/drHUyxyKqs26Ubf3fua0Vm2rukP+zSAydc+WRF+b/ab8azan1RyzVUjbrSLWxM2VZWx2pu7bu4o3+X8zGmsw3KzNtoGKzDbuaq7Y/hFP2lmRmG2NRt+bkse+abtO2gCaFvvf7Iprf3l+8wFJHnd/s4+anyN81AFSZgql2+7XPs3mzF2rY1qXy7VV/vGseOkaInjX5alxTIanVaYynfPtXbVSOnXjeZMaavy0gJsUxvlqSP5qiuG+bbTAqXHzK3+1WjoKeZYr9375asu4+6K1PDaG5txEu5m8wttqVuEti0xSK8Cq+7/gJrasdSFt5sEar5cn3ty5K+4rm775W3f3T/D/AAkHFPhY/wANUQ4m/cXfm5/8d+lUJtn3VfdVdZffdT/nb+BqCbFdvvbmqSO6Ta3y/N/Dt/hFRyVDHig0JpsbazLht27mtC4U+W22sxt/91qQ0Rbd2ms/901b0dRe+H9UsN/7zzY54l9wJM1BbuGjmVfu76rwsbRXZdy9Ynb36g0gO68FXz3MWnpI2f8AQ2iA9o5OP/HWrq8V514Zu47bS7O63fvrXUPKf/rnIn/xS16Lt2s1aLVGE1ZiYo5p9GKZAxakxQtSVRJGq0YqWigRFik2CpqKB3ZX2UbKnooAgxQq1aVaMUBchxT1SpdoqRV+agVyvipFSp8D0pcUARbKkVBT8VIq0xDFWpKKWgAp9Mp24UASK1KtR09aYiWjNRs1JSAlzRUFOWgCzS1CrVLuFAxaKNwozQAlMZqkzUbUCI5KjqRqTFMCOlp+KNlACZpaNlPxQAylWnqtGKVxjKdTtlGKBCUU/FGKQxlFPZaZTEJTKfTaAG02nstMxQBHRQ1FAx6tS1HRmkBJmo2prNRQAxqTNOxRigY2m1JijyjQDIqTNSeUaYyGgAVqWm4pjUwJWcVEzUymstIQ7NOzTVWigB2aKbRQA+nrUdSZpgOpy01afQMkoop6rQIFoxS0NQFyOipKTFADKVVopKAJKVaSlzQI5FmoVqGWhVpFjqKFWnYqSgWpKaq0/FIBKdRinYpgNop2KMUANpy0Yp2KokctOWhUp2KBDc06jYKdsoAbRTtlHlCmFxKkWhU20uKQgqeGoKmjpgWo2qbbuqrG1WqADFN2in0mKAG4pMVJijZQBHspmyp9go2CkFytsqNkG6rrIKg2UAV9lGyp8UUwGKgp3lVIq0tAEflUu3bU1LtDUAV6KseUKTyhQBX3CjFWPKFM8qgLkFGam2ChohSAhWnNS4opgR0VJRQAUUUUgFVakqNaSgCWkopaYCU9WptFMQ6m0lKtAElPpKKQC5ozTKKAJM05WplSLQAUUtFAwzSZpaMUAJRUlMoASlpKWgB1FKtPxSAbVXVtQi02zM8i+Y33Yo+7vVmZ44IZJ7iVY4YxuaT+6K881jUJdWupLja0ccaFYY/7o/xNTJlxV2U1vnvryd5vMaZjuaRuj5449hXHeJMx310u7auwba7DTYXihHnPumxudv049hXL+JkLahN/tRms9zpjZPQ5aus0tPsmkwRfdkbLsvu3/wBjWBpdoJ5N83/HunzN/tHsK3ZJTI3TbSLZpM4WFEX5ttLDhvl9t1Zm+trS7V5F3MtMlmlp6Jure0+HbIN3+8tV7G0KyMrJ8vG3/arpdJ0w+Zuk+ZqaMmx+mtLuCM23Z8rNUesXCQNN/dYfK1bE1oI428wbWrifE10Wj2s8a8bd394ipfxDjqjndWuzztf/AIDu7ZrmL6Xcz/7Rq5fXBbdtasC6mP8AEaDVIrTP/DuqszU6RvmqJqRYUkf3qdbwSXNxDBCu6aVwiL7tWn4k0+PSfEl/YQ7vLtnCK397jrRbQV1sV7dv3f8AwOti1b5axIfut+FalvKFpoTL/wDFVy3cMu3+KqS/NUi/L83vVCNCH5l/2sbqjmf5mXNV/tB3blpjM7fKv3m/ipAPZqm0m7NpeRyt8sakL8v8VU9x3ff2q1HG5V9vmoA9E1DG5Hh/iFZd1/q3p2g3QudF2bd00H8P94U2TDR7mG5qZiZ8mW+6vbbVeGV7a4R42ZWU7qtSfMu2qNx8tBR6pM0k9vFPt3eYAzfNVO4+aNfl3fxVD4Xu3udDhaQ7tvyelTNs/hH+9TMupm3lvE025vmVQGX/AGTWLdKY5K6CbG75ayryL+Ld92go9h8F3pvvDdrLJ80ija1a8g+81effC2+K29za72+V9y13DXW77tNEkjOG+8Nv/AayNUuHWaNVjm3fwt1FX2Yy/e/h+bbu4aoG09I/NnZ5I933l3ZoEytJdpHNEn75pJPlRVX5WxVjzZGUbqgj3xNsaLbaqgZWViTn39CKjt4kVpp/MaRpyP8AWN2FMC20u1drK1QyPuobfuTbLtjwd0e3O41DJQA6NzuXbt2/xbqSTG6oo2+amyMVagktK0a4aRqq3VwY9zq26Pf830prN5jbt3y/7NQbN18/zKtr5Z+8wypNFwH+IJkbR5vLZW3J/wB85rziRfmjZm+VPv8A1b/BfmNdjq0rtZy7trfxL/8AXrh5E82ZF+byVPzKzZ3EmkUi3G/lR/KP30vze+DwPxP3sU9Uijt5EX+EhnbszkU1WgW4Zt6tcZKqq9feqtxMWh2M/wB07dq/xE0izH1L5rrc33V+VV/vVQa4TcF3fu/4mbjb9aXUpvLunRU3SfdWNf4qtx6P9mhiuNcZftHDQ6fHzt95aRXQp28st6qyxxMtiv3rmReOOuKt+SkbfNuZlJVd2AWGeDj1NTXVxc3ajc6xwoflgjXEaj2FRMwWZHZ920Hcv1oGxOWzzS7HWnqwZun+7/I1LCoWR3+9wPl4wuKBBGn7lmqCT7rNUzPUEjbVNAIwtWcyTbG/hAqCNaLpzJdO1PjoNVsSQqVappm8uF33fdHy1GtR6o5WGNP7xpCM5afim1ItAyZW8uF3as/duqxfNtUJ/DVPNJjGTNV/QWMNu7Kdvz1lyN81amhskdr83980LcJbFm4i+WkjUKu2prp0Zdse3p/DVeF/l+61USXI2K/8smp27cv32VqjV938VOVTu+b7zUEEbIfuqNvFVv4tqn5q0WQcrWddDy5v9mgq5ZhUsp+781V7iDy920fNV+xSWSTav/2K0XSfK1AX1sY+2KK+ZV+aNgNrfSq0luZ/tiR/wgS/lUl8pVlZarzO8TJPG3+z+dSWR6a/7m5g/hfa6/VK9a0W6N3pNpK3+s2bX+q8V43GxjZHX7yOG9uK9G8H6nE9w8Efy29zloo/7kg6pVQZFRaHWUtLsf8AuUbH/uNVnOJT6bsf0an+U/8AdaqRIUU7Y/o1Jsf0agQlFO2P6NRsf0agBtLT9h/utSqh9GoAKdS7D/dakwfSmAtGaRldf4aaqv6UCJs06ouf7tKrP/doGTLUi0yPP92pFU0gFpKfsNLsP92iwiOipPKNHlGmAlOo2mjaaBBmhqNho2mgCOn0u005VNADaNxp201JigBy05aFpaAEprU+mbTQAlFLtNG00AJQtP2GnKhoAjxTqdsNGw0hiUU/YaMUAMoqTFJigBtJUlJQBC2aa1TYprLTArtmmqxqbFR0xC80jLTlopAR7TUew1YprLQNEOKSpOf7tM2mkA2nLQuacqndQAuynrFUirS80wuMWIU7ZUlOxQBXaKoZEq63y1UkoC5WZaikU1ZpGQ0AVMUYqxsP92jYaAK+KMVPsNJsP92gZFspMVNsP92kxSuBFin7TTsU+mISP7tO2mnKtOVaAEWp4/u1HilVqAYtJS0UxCZpGams1JSGFFFFABS5puajzQBgqh/u1J5XtUy1ItQUVfKK/wANP8o1Z2/7S0u3/aWqAreUacsRqzS/itAFbyjRsNWuP760cf31oC5U2GjY9WeP760vH99aAK6xPUixHdU6tH/z0WpF8v8A56r/AN9UCIvKNN8o1c/cf89V/wC+qN0C/wDLVf8AvqgCr5RpfKep98H/AD0X/vqk823/AOey/wDfVAiHyjSrEam823/56r/31TfOt/8AntHQBG0RoWJ6k863/wCei05bi3/560ARrCalWE0R3Ftu/wBctTrdWn/PSmAxYjuqwsRoW7tP79Tfa7X1oAZ5Rpdhp/2y09f/AB2j7bbf3m/75oTAZsNG00/7bb/7X/fNM+12/wDdb/vmi4WDYaNlH22D+7J/3zSfbYP7kn/fNK4WF2UzZSfbYv7kn/fNM+2x/wDPKb/vmmA/ZTPK/wBqj7bH/wA8pv8Avmj7dH/zzkoAkWL/AGqdsqH7an/PKSj7X/07yUATbP8Aapce9Qfa/wDp3ko+1f8ATFqAJ8U7HvUH2o/88Wo+0n/nk1AE2yjZUP2pv+eVN+1n/nn/AOPUATNFUbRf7TU37Yf+eP8A49UbXZ/550AL5f8AtNT1iFQ/a3/55LSrdP8A88l/76o0Al8oUeSKi+1v/wA81/76pPtr/wDPNf8AvqgLEvkijyhUX2t/+eS037W//PJaNA1LCxUeUKhW7f8A55LS/a5P7kdGgak3kineRVf7XJ/cjpftcn9yOkBYWIUvkiq/2qT+5HS/a5P7kdMLFjyhS+UKrfbZf7kdH2uX+7HQFi55Qo8pKqfbJ/7sdH2uf/pnSuFi35SUeUKqfa7j/pjR9ruP+mf/AHzRcLFxYkp6olUftdz6x/8AfNPW4n/vLQBc2JRsSqvn3H95ad9on/vLQBbVEpfKFU/tE/8Aeo+0Tt/FQFy5sSjYKp+dL/eo8+X+81AFvYPShUH92qLXEv8Aeahbif8AvNQBpqo/u1J5Q5b5VX8gvvWYtxP/AH2rmvHGqz+WmmwzMvmpumX26AH2NS2OKu7FDxJrY1a6EVr8ulxH5fWdx3NUdhWPc38VVePMhiUfLVuZd0Z/ztqDoskiJWO35m+997bXN+JFLSTNn/lmdy/jXRSKGjVV+Vc7V+g71h68qNDcyt6fLQXEwbdI5YUS1njbb92NmwasMt3E264tpNv95VrJsbQXP3q2LWyu7Zi1jezR/wB5W5FSWy1p81pLIN0y/wDAq73Q4UlULD822ua0+y1K7h23mg22rL/etm8uWmwpbafdItjql/4fuGzuiv4SEWmZ7nrej6YZZN0zL5anav1Fdna6REsiMqN8o+X/AGq8x0PxB4tsrWLzNKsta0v7zSWEwD4rUb4rafHJ9juIp9N5G6C9h8uRPXmquZ6nVeIodtnK+6vIPFjhZP3K/d/Gu11zxvp19C728ysuz5fmzurzPWr6OeR2X7zYaoe5cNDm76Us3zGsaatS++8zVlTN81Bqiu1RtUklQtSLO9+Eek/a9Xm1OYfubEYT/akaq/xUt/I8Wl9vyz28b/iODXceBbD7B4SsU+7JLm4f6muY+LUB/wCJXc4+TDw/+gtVte6cqk3UOHt+/wBKtQoWm/2apQ/6z8DWhat9z6VKN2X42/hp/wDCtVVl/ef7WasSUxD1cN93+GmsxWm/7X8WKjzQBNu/vU7eagVqeuV/ioGbXhm7SDUNsn+rk+WtO8l2yFa5eGUxTI393DVu3zbtrL91v4v71Mm2onm1UkpJHKsaRsfL/tUCOq8G3RWzuYs+jfNW5v8AlKr/AAj5mWuZ8HsPtUu7+5troWYRqyrQZyWpBNMIm8pfmb7zf7NUr6J2XbGfvfNVnanzOy7pGJ/Wk83aqK3zcfepiNT4dzJBrEqyHarR/er0G8a4Vv8AQRHcbgNvzYTHc59q838N4XVk8uZY93yt5jetd3HYiym3NeTM2DuijUmP2FCJe5J9ouYv3t09osbD7sO9zn61LJdSyKrwv975l8zjj0FU1lHzttby87kbcDsP4YwKrSTPJIW37l/hpkXNdbr93tb7q/LUcjlWRmaPy1G35vWsC6m8xt3mzSL/AM8+g980tnqEbSfZ7GH5oxu8rbxyec0FG9JKGw21vm/vKRUDP/tbqzN+ordM32f9z/EzNwtSNMWXa3y0ySfzhuWiSU7m2mszd/tK3NEkwXP3v9pVUmkBeVkWNV+Zv04z0FMZkaFk2bWk+7VCaZGXazsq8fe+ekW7fcqKnmKvzfvMgY6DpQIZrmV0tmUSbW+95nybvYD0rkvN8vZ8q9d3oM1uax5jQzSzNukd97dMMelc5527arUGiC6t0nZFU7ZFB8pum7HBJ9zVa4S4u7iOw0VWmuFHzS/wRE9STUlwv3WZ2+Ybdyt90H0qRnMdq1nbsy2uQ7quPm/GkWjLWK20aaX7PIt9qWfmuW+4h9I/8ai80ySFpDuZvmZm6tUEi/vn5oWkUkWWYxrSbTLv2/dUhWb3PNJt3YbdQ0w27P7tAWFjbbUqud34VT3JuqbcWVaAJmb+H+KobptsZbd2qTbtqnqDeXCzfxNQNbmIv3mqdagVSq1PGtIslWqWoOWutv8AdFaEdZN03mXDtTAbUtu3zfNUSt/s0b9qs1IZHcPumdqhZhRmo2akCIWb5mrS01f9Di+XtWU1bFipWFFX0oQMtrF823+Jv4ap/bYIGO3dIy/3akvnltrV2z8zfKn41iRpu+VaBI3I9S3bfMi/8eB4rQhmik+aM1iLaP8AZVdkZY2+XcynDc4JB9qmVBEqbZf3jf7JG01QmjeWINu4+VarXkXmRlvY1Lp975i7JNu5fvdw30q1NqaaexeRY9rfeVqCNSPR73y1RWVm3Ar8vG7dReKVzuWsyPxXJGz/AGewhVeV2qtV5tYv5YyrQwr/AL2SaTaHyu9yW4tTK23b3qtqGmzrZuuxv3dRSNqM7PEzMrL9/wCXFEcUttuXzpG3f3W4qXJGiTMetjwrcW8eoLbX0jQ29zhRL0MEn8ElZcilZmpkcUk0whhVpJnbYEVc7j6ChPUb2Pb9P1GWVZIrxPL1C2cxXEe3jeO4PcGrP2r/AHv++a47VZ38N63ZWd3I0mpRW0UV9/EN/wDc+q10zfeb/ZNbJnI42Zb+10v20f3mqnmnUakWLn2vd/eo+1/73/fNVVp1F2Fiyt3/AL1PW7H+1VPmjcaLlWLv2sf7VKt2P9qqO40LRdk2L32v/epPtX+9/wB81UWn0APa6+b+Kk+1f71N2mhVNUBJ9opVmPpUfNSLQIsQ3Cbfm3VOt1H/ALX/AHzVPcaermgRdW7j/uyf981J9rgX+GSs/wA2jzf92mBofbYPSSj7bB6SVneaaPNNIdjQ+1wf3ZP++aPtUH92T/vmqaymjcaYi59qg/uyf980q3cX92T/AL5qluNLvNIC59rg/uyf980q3EX92T/vmqO+nK9AF77VF/ck/wC+act1H/ck/wC+ao5pqt/s0AaS3Sf88pP++af9qi/uSf8AfNUVb/Zpdw/u0AXftMX/ADzk/wC+RR9qg/55Tf8AfNUmx6VG3y0AaP2uL/nnN/3zS/aov7kn/fNZtGaANP7XF/ck/wC+aFu4P7kn/fNZ9LmmI0Fu4P7kn/fNO+1Rf3JP++az1cU7fSGXvtEHo/8A3zSfaov7kn/fNUt9GaALjXEH92T/AL5o8+L+5J/3zVXNGaLgWvtEX9yT/vmk+0ReklVKN9AFv7RF/ckpGuIP7kn/AHzVPzaZJLUgXGuoPST/AL5qL7RB6N/3zVPfuo31YFrzof7jf980LcQf3W/75qqrUZpDLn2iD0f/AL5pjXUHpJ/3zVPfSb6Yi19qg/uyf981G11B6Sf981XzTWegC0t1E3/PT/vmpFuIv7rVRVqdvoA0luIv7sn/AHzT/tUH92T/AL5rOWUU9ZRSGX1uoNy/LJ/3zUn2iD0f/vms9XG7+GpN4piLLXUX92Sq7XUHpJ/3zUTOKgmakBZ+1W/92T/vmj7Vb/3ZP++az94/u1HI9MDT+12//TT/AL5pn2qD+7J/3zWbn2pu/wD2aAsan2uD+7J/3zR9qh/uyVl76FekM02uoPST/vmo/tUH92T/AL5qhvo30BY0FuoP7rf981It1bf3W/75rLVqerigDTW6t/Rv++actxB/dk/75rOV/wDap6uf71Ai950H92T/AL5oaaD+7J/3zVPNSLTHZFhbiD+7J/3zTvtEHo//AHzVfmmNQFkStcQbvuyUn2iD0kqBqTB/2qQWLP2iD0b/AL5prXEH+1/3zVXaaOaY7E/nwf7X/fNM82L/AGv++aj3PTsP6NSCxzO4/wB9qcr/AO01Rsx/2abv/wB2pNLFhW/2mo3f7VRKx/2aXd/u1RJN/wACal4/vNUW7/dp3/fNAWJFYU6o9xpNx/2akLD9wpOKTd/u0u7/AGVoAVcU9cVHu/2VpVb/AGVoCxYVkp3yVCrf7NP3GgB/yf3aXcP7tR7jRmgRJuFP3pUHP96hWP8AeoAn3JS7hUHP96n8/wB+gRLvFOVqjXPrUsdUBLGx3VYzUca1NQINwo3j0ajcaNz0wHeav+1Sbx/tUxmf+7RuegCTeP8AapPNT/apm+T+8tJuf1WgB28f7VQsybv4qfuf1qFlfd96gQ/MdHyVFz/eopDJdyU/cKh4/vUb/emBY3D/AGqTf/vVFv8AejcP79AEnm/71Hn1Hx/fpvH96gCTzv8AZo82ouP71HH95qAZJ5tI0v8AvU3cKX5P7tAhuT/tUu7/AGqOP7tLx/doATd/tUZHrRuH92k3CgCRf96hf96mZp2fagCTd/tU7/gVRc0/c/8AdagCTNGaj3Gjc9AyTcaM0xc0vP8AdoAdmjNHP92haAHbzTs01adn2pAGaN5oz7UufagA3mnq5pmR/coVv9igRLvNHmn0qP8A4BRz/dpgSbzRvNNyf7lLu/2WoAVXP+1Tt5/2qbn2ooARmoVj/tUu4f7VOXH+1QAKx3D5mrznVL19Q1K7uP8AnpIVX/ZC8Cu+1SYWmm3c+5tyRH25rzuGIrCP72Kzkzeiuo6Nj5m6r7MNoRjVCHG5V+7z8tTtld7MagtkjMnmL/Cv+eBWF4u/d6CG+60prSkYbtze9Z/jzEUOnWePmWMM340AtzkbG7EDfLE0n+7WtDfSfK32Sf8A4CwpLWGNY6u2OnwSttZpFX7v3qDQ6zwn410/S5o/t1nqMa4PzeTvrv8A/hKPC3iK1WKG/tLj+7BcLh/wDV4/DbzrcMmlzXKrv2bt33qeuj28lwz6lcrD/eeTTnz68YpmTirnUax4UsrS4kl095LFv4ZLSQxj8RWZdax4k8k293dW2uWq9E1W3En5P1qzZ6VYTqiN4tWOP+FZLchKkvPDUcEO7T/F2l3Ui5+VlKUAnY5G6GmofNvNNutF3H5ZLaTfCxqBop/L32d1DfQ/qtR+JlvbmTdqG2RVQqn2dvkz64rCZnWbev7lv4dv8OOBSNUrou3FxuZlkDK1U2bc1Sx3sm3bdJ5y/wB7jNEiQSbmhf8A4DSKKtP0+0e+1C1s49265lWL8zSMu2ktbqWyvILq3fy5oHDxN7ikgex9E+UI1WKNl8mMBE+gGBXH/FK383wr5v8AFBcxt+fFdNouqQ63pUGoW6xqsvyvH/ckHVDXL/FC6li0uyso2jWG7kbzdv8AEE5ArV2SOOF+ax5RGf3i1oW7VJY6ak+oRQLNtjdwvmN/BVaFt1ZnWWoflk/2qvVUjxu+ap1cNTAkbDVAzVGzfNt3UUAP3fNUi1BmpVfbQBM1bNvLus1rEWtCxf8A0d1oEyw3/oQqNf3e5fahXG75vu4ps0vmfLuoEXvD9x5GqJtaunmmeSRm3LXDW8vl3Ebfw10klwPOb995n/AfWmJq5os8bbdrfNVO6mPmFW9N1Umu3XcrbdtVJrt1Yt/C38NImxftb14ryJll27SG3LXsP9qiVYt3zbgG/wB2vBPNdm3NXpXh2U/2ar7/AJcbfdqpEzWh0zTGRvlG1qjZS25lkWqcbo2FbatTK4WTdG+3p77jTMBsflrGz3E8ar/1zLlvwGKJLtFb93aztIp+VuIQ2enSorq+jjVlZ/u/ek7VSkvbdvlkmk2t97dztPsBQM0WuHb71su1fm3f3T7ZoZyyltn3vmquu+T5lXav+11qNsbm3bvm/wBqgoRYpN3y7d2R+Y5NEyPtkf7S0LY+VtufzzUO2T7zPu3feVWOUP1p7S/dVmk3cKy91oAWGJ4/n+2s3A/5Y9+p5p9vM8bHb5Mi/wC9zVC8ut21ct8tJCwjXbJtVVHzf7QouBBrV0FtWTG1mc/KrZ281z8LJ5j7q09WljWHbawLHu++zcvzWHGpVvl+b/epMtIszSlZGdfu1Xur2VYzz5cbfL+AqRk+Xd92s64/usfmUbqktFKPLM38O6po1DfL/DVeNhG3y/LU6sWVn2/7NMsl2haTcm7atRK+6mKxjbo1AizHEG+ZjU6/3qrq22pW+8PvUEkkf3ttY+rTBZmVa1Gby4dyrt/vVyt1cGW4Le9IqKLCtU0bVRV93y7qtRuFoLJpJdsbtWZVm8f9zt/vGqq0gQ7+Ki4+VQtEf3qjmcs1MCJvlqCRqe1QSUhobXQwqNo2+lc8zVs277o42/vChCYzXGk2225f3a53NSaSkbSTSzKrQ20Zl8r+/wA4CVJqzBrMN/dIrMs5TG22mFtDprN7a5s3vNSea4aIbnWOTYIo+gRR2qpHEfJ/0hPJV8MqyLk47VFdW4XRXnYN5ayqr/7QrrNP0q78U6pctM6/akiiZY+gWMDCY9qaM3ocz9lMFu9xCitHkL5kfIz6H3NZdwr3txvupmkZvur1re1TT7jSNQeK4iaNv4o+CGqCxURtKv3m3na1KRcCDT9PDMfM/d7U3+X3ateNRF8sKKvH41Wb93cQu3rtZu2G4q63/j3+Fc7dzZKxnXGftgb+8Nu5vb1qvMgZt1XZE8xW/vVX2BoVdvlVv73FSO5jXkJbc392rPhO6jtfFmmX8w+W1uBcMq/7HzVYkUMvy/Mzf3eBVe3tf9Bvbz7rb1tk/wBonk/+OrWsLmcmrFnUr19Q1RdRuvmmubjzX3N6vXpUko8w/L3NeVspby0X+EV3nh25F5o9u2fmQeU/1Xit4mE1obG8UbxUa4/2qXj/AGq0MidXFLv/ANmq+U/2qNw/2qALO+nbhVTcP9qk3CpEWtwo3JVOj/gVAy/uH95aerD1Ws//AIFS/wDfNAjQ+X1WlWs/mnqp/vVQWNDb/tLSqtUf+BVIq/7VFybF3Deq0qofVap/8Cpy/wC9RcC7sP8As0myq9OXZ/epiJ/Kb/Zo8r/dqP5P79LtT+/SETqlP8qoPk/vU9VT++1MB3lGkZKNqf36Nqf36QCeVS+VRgf36Vcf36BjvKqRYf8Aepu4L/HT9w/v/wDj1CAXyv8Aeo8r/epm4f32pdyf32oEO2H/AGqjZP8AepzMm377VDuT1agEOoqNtn95qbuj/v0xkm7/AGqdu/2qh3R/36XdH/foAl3f7VKrn/ZqLcnrTl2f36QD93utLk/3lpvyf31oVU/vrQBLvf8AvLRvP/TOom8v++tJtj/vrUiJ959VozUSrH/fWlbZ/eoAe3/Aajb/AHVo+T+9R8n9+gYxqSncf3qbx/eqxoNw/u0zeP7tPo5/vUARM4/2f++aTI/2acyn++tN2/7S0Ei/itG3/dpdh9Vp/lH+8tAyLb/tLSc09oqY0RX+7QIKdzUWx/7y0bH/ALy0DJdz0b3qHafX/wAepuw/7X/fVAiwzv8A3qjZi38VQ7X/AMtRikMdzTGV6XaaGU/3qAI/npNr1Jj3pmz/AGqBhtNG00m16Nr0ADb6Nr0bHpdr0ACqf9mn7f8AaWmfP60/aaAHr/wGnL/wGo+f7y1Iqn/Zpkki/wC8tSbv9qo/++aN3+7SHcm/4FTGYf3qTd/u0bv92gBcj/ZoyP8AZqPihWoYx7MP71MWl3f7tOz7UyhVp9Rqw/u1J5oXtSJOU4o+Sj93R+79Kk0Dj+9T+KbuT0p3yf3aBAuPWlpPk/u0Ls/u0AO/4FRijcnpRuH92gA4/wBmnZpvH92j/gNAD80Un4LQtUBItLxTFzT131Ig3ChWFL89CqaQBv8A9mjeP7tDZ9aMUAOVx6U7zR6VHs/2qcq/7TUwJVlH92p45RVWnx0El9ZR/epd49WqJcUvFUId5q/7VJ5o/vVFxTOKAJ/N96jaZN3zMtM/4DSMqei0DH+clHnJUHC/wrRvH+zU3CxK0yVG0yf3abv9lqHft/hWgqxJ5yf3Wo8//aaot/8As0bjQFix53+9Qr/71V9xp6sf71F2Fiwrj0anLL/vVXyfWnrn1ouxE6yinK4qJWpVb/ZWgRPuFG5PWo9/+xT1mH91aoRJuT1o3R/3qPNH9xaTzR6LTATdH6tRlP8Aap3nD+6tN84f3VoAazD/AGqb/wB9VIsw/urSecPSkAn/AH1Sq3+9R59Hn0APX/gVOwf9qmrNUizUAN5o/wC+qf5tKsv+zQIFU0/mhZf9lqPNegYKppVzSee9HmvQBIqml5/u03eaNz+tSBJz/dpfn9Kj3PUiq/8AlqoBfn9Kcu/+7Tdr/wCWoVD/AHl/76oEP+f0o+f0o2e60bPdaAD56Pn9VpfL/wBpaNn+7TEJz/eWj5/WlVf9paMe9AxuX9Wo3PS7D/fpdn+1QIxvFzvHoMy/89HVPwJrkN/lw7m9P/rCuq8aZa3srf73mSbvwArkbhCsaK3yq2drfQ1jPc6aK0HRoGZVb+H5vxpZHLQ/7LVF/eTd/s7qLhvLt/8AepGhY0u3F7eQwZ+V5Fi/3Q3Fc548vTd+Jn+Xd5UYgbb6rxXa+C8QQ6hqMn3bS3Z1/wCujdK8xjuDPeTTsrM0jltyrQEdy9bzGL/WQ/8Aj2N1adnqEC7Fa2kZmI/1cgy1JZzIq/8AHvP/AL237ord0u4t57hVj3edGC6q0eDxzxmgbdin9nLWssUi39jfRSiW1ljXPscgVqQ67ri26XGuT6dq2nzkIJPOR5l3dDxg1qeD9N0fV7q5bULSBrieTdtmbBy1aHjjw1o+l6LJcWun20N88sVvEyrzljWXtbS5bD5NLsit0EbfuRt3f7PLCtCa6C26rJDDJx83mQo+33Ga1fDtjuVF/ukbVpPG1pBbfuphW5zHkPiL7NJM08cUar/0z4/SuPulRpN0db/iq7ntPEF3ZMy+TE4X5V++GGc1zl5EYLh4mZW2/wAX94GoZ1R2GtUDfe+Wnr81R0iiTziy7ZKayjb8tJTKAO3+Feq/ZNcbTpv+PW8B/wCAyL0IrofiYqLDpbK2797L/wCi68+0F3ikluIf+Pi223MX/AK9X8VWsWr+GZZbc7mWMXUO3r0zgfVavdWMXaNRM8nkd1kV4/vL92r2qWkFlqjxWrs1u0ccqM3+0Kz5vun+62Pm9ulOuriW5umaZ/ugIv8AsovAArJGrRKzfNu9qljX5arN95WqeNv4a0ENb71Cv8zL7U7FMxSAWnUxVpfu0ATq23/eq3a3Ajz/ALQqgtKv+spgajSjbTdx27qorlV6/NmntKd21d1MRcb+H+6taquWVH9qwo33ferTWULa7W3NuG35aBMkmQyN8rMq0KnytuO7+7RC4Zdq7t2PutUir5i/e27qBEEkQX5lrq/CdwGtz/dU1yl1KY1/Crmg6gbberfdYfgxoJa0PQGm+bc3/fXPT0FRTXpihj2tuX7q7awYdSDNtmbt8u1af9uHmI7Bf97+6aoysabMVbqyx53J3qH7WF2P91m+Vm5Bce4FUZL4M25m3bfwOBQrD5vOfazfN/umgdjWjnHLtctN/dXbgLU013tX7u5f97FZe9PL2tL83+QaqNdGJisn8eNscfVqQWNyO+f77Nu3feqlqGrD7ZDa24a4vpDtWCNS59MnFR2tiZ40a+uv7Pt2/hjwZKs3F7b2Nm8Gh2y2MbfLLLu3zz+zP6e1AWRWbz428q4dftC/e21YhUs21vTc1c/9qMszKv3VO3/erRZ02/N95cbfwoHYTXmH3c/NWSr7qfqkwlkHzM3P3u9Ull+b5aRSWhZmY/dVaoTRbo253SN/Fuq5I4jXdVLUHCw7YV+995v71A0Z7KfT/vrrT422tUasW+ZqlZk3Hd/D8tBY9WCttWlZitR7hxtpkkp+7QBcjmRflanLL+8VWNZquNtSLMkS/wC1QBJqlxut32/LurBqxqU3mMEX7q1VXFIaRMqfMtTKnzblqOPH3mqRpfloGV7xyzKq02P5VZWqP+JqdQA/cNpqpv3M1Pmf5ar0hoVmqNmp1MakMjkrZtU8uMJvX5RWNu+ap90kjfM1GwWNXVPIjsXVZlaRiv7tax4/9YFpZh0Wo46ExWsdlodqdXhl02Fo182Mu8snAiRBnJqPSNTtSlpBqbXdrJbHbDqdopd1Trhk43U3SZfK8F69LH/rGkhgZv8ApmeTW9oNvo0fhkXGpJDNNbWU32eBes87n5C3+7VoyZi+JNQjn1Lcuq3OtNj5ZWtjCfxBqjY742Esn3mcttXps6HHuO9bMemTtZ2u5WW4u9ON9ayN1YxyMCB9VWsrVLoSSQ3EaLH5uHZY14z0P4GixSdtDQ1JBHp8jyf+hDGRStdRs3yt5nA/1K5255OaI4raS3hlbc0jIGZpOd3qK0JNk/k2+l2zSMse3yoV4Umo5EN1TKa4k3DyR5e4j5m+f8qZb2kaR7s/Nnc/+1urUbw/dr/x8XdlD/vTVFJFbxsUuNUtl2/3apRUdhOVyhMoXKrVRVjbwq7ru8xdTK/72Y6tzXdlGztZ209xtBZpJmx0rG095JdB1BP4YriG4/3d25TQAfd+au58IiBNH2wtu3TSO3+zmuGZjuro/CZksLiFJP3ljfDbE/ULKvVD6GmtxS1R1+5KTePWk4/utScf3aswHcf3qRsetHH9xqbx/doAGx60n/AqXj+7Scf3KAEx70Y96P8AgFN/4A1ADlUf3qcqD+/Tdv8As07n+7VAO8of32pfKH/PWhc+lPXP9ypAZ5X/AE0an+Uf+etO+9/DUi5/uUCIlif/AJ61IsUn/PSpFX/YqVV/2aCSNVk/v0/ZJ/fqTb/s1Kq/L0qhEKrJUirJ/eqVU/2WqVU/2WoAhVZP7y1Iqyf7P/fNTKif7VTKqf7VArlXbL/dj/75o2y/3I/++aubRTdo/vUBcr7ZfSH/AL5o/ef3I6sbB/epViH96gLlb956Q0vz/wByOrPlD1Wn+V/u0BcrLv8A7q03n+6tW/K/3aPK/wBlaAKm3/dprf8AAavbD6LUbRH+7QguZ7LSbfZavtEf7q03yj6LTApbRT12VZaI/wB2k2P/AHVpXGQfJRtj9GqXa/otIyv/ALNAEe2L0ak2x/7VO2vSYPpQA3ZH6tSqkf8AealWJ6XYf7tAB5Uf96k8pP8AaoxRQAbEpPKj/wBqjmjmmAzyk/2qPKFDMaTeaAuNaIUNCPWjJ/vLTWlP+zQA3yv9qneV/ttRv9lo83/doC4vkf8ATWl8o/8APVqj3/7tP3/7tACtEf8AnrUex/8AnrRvpGekIRkP/PWmbT/z1pWak3JQMTaf+etJz/z0o4/u0nyUAJuf+/S7pP79I2yjKf7VAxdz+tP+f1qPcn+1/wB809XT/a/75oAXmkZjTvkpNooEM3GjNP2j+9TNqUAG7/aozRtFOVf92gYcUuR60u3/AHaNv+7QIFYf3qkVh/fqP/vmj/gNAE6uP760qt/tR1DuH8SLSq6f3VpgT7vdaN3+7Ue9PRaTcnpSAl/75pvP+zTOP7tJx/doAfzRzTKTmgdyVd9O+eoKOaBHPZpaMUKlSaC0U7FCpQA2nUvlGl8o1QCUc0qxGneRUiGZo3n1Wl8qjyTQMMn+8tO5/vLS+Uf7y0LCfVaABc+tLk+tOWI/7NOWE/7NAgVv9qjNO8k0vkmgCNl/2qVaf5JqRYj/ALNAEfG2kxVlYf8Ado8k/wCzQSV1qWNf96n+RUkcVAD1o/4C1SbKNgqhEDN/stUe/wD2WqdlqPFADN/+y1I0o/utTqTaKBkbOPSoGcf3KsMo/u1CyJ/dqSiFpf8AZpvm/wCzUjIP7tRso/u0DG+d/s07zf8AZo2/7NG3/ZoAcr05X9qaq/7NSKv+zQA5XqVXpir/ALFTrEf9miwriK1LUmw/7NPWIt/dqiSDFLtNT+Q9KsL0xEW00bTUvlH+/R5X+3QBFg+lJtNT+X/tNTfK/wBqgCLFN5qfyv8AapPK/wBqkO5DzSc/3qn8r/apuz/aoC5GrHdU6vSYqRUNAhuaerUuw1MqUwsR76YziraxUND/AL1ICjvo31Y+z0eT/vUAV/NFG81Y+z/71H2egCHzXpyuanW3qRbcUCK+8/3qVXP96rawp6LR5Kf7NMCtu/2qXNW1hT0WhYkoAq/8Co2n+9VvYn92jyh/cpAVt3+3Sb/9pqssg/uUz7v8FAFdn/3qPNP+1VjP/TOhc7v9VQBy3iKbdqkS/wDPKL9SawbhvMmDf88k2+nWtLUJvtN5cz/wtIdv0WsxkLNtWsXqzqjpEWPDf8BFQ3WZW2/NVqOLb9372K0vB+lDVNchST/U7yz/AO0ByaCm0kN8XSx6N4BggWHy7jUisqSL1YGvPtNhRY1XbXQfFrxANX8VPb28261s8Iv+yRXN2d75a/8AHzbLt/vRmgcVZHS2NpEyqsiNux/C1T69Y26wxLGZ2mY7k3SH5aoafq0u7/mFzN/19FD+Oa2L66uLtbeX+wrvdA+7dbsJkYfhQDK1noOoatdfZdLM2oNGQrxTTYDn/wCtXX+HfDPim+1qws9eSddP00mWJbmYPy3Fc7pevW9jr0mo+H9a/s2aR9z2l7DwxPavXLPxFr63kOo3miQ6ta4+afRrjnHtG1FkZtyOs8M6P5TbWXdcb9zbvbgVwfxWlCyH5tvO3dXoGj/EXw/qkci6Pc7dQX5WtLmPyZ1/A14d8RNWkvdauVj+VZD8y1RCWp5x4kQT6pAsj/KtvuaTqcDdxWDcS+ZIzVo3kxmmvZmSSNn2xKsi8qBWVI3zVDOpbBCwVl3UTOJJnZR8udy0ykxSKG0UVPHEGoEafhNturIv8LfJ+deqeByX8J6ezbd0QaJu+7Y7CvL9HURahZtGv3ZQ1emeD8x6feW7Nt+zahOn65q4mFXY5Hxt4Rj0bS/ttndSNCswTypFGF3e9cdC3X+9XrPj6IyeD775vu+W/wCRryVaJKzKpNuOpaZt0a1JC3zVHt3R1JDjaKgskao80N83y1G1MCaFvmqWqkbbWq0rbqAClVvm3LRxTM0ASTMfLpFzw2aF/eN81LtC7vmoAd5taFvmS3H1rLjXrWha3G2OmhMlVtsit91f9mrsdwG+8P8ABqzdx+al80rHt3fLTEWZvmX/AHhTrFdsm7ev+71qhJcbV+apLH5ptyj/AIDQHQ245Ub5t/y/7VMW9H67aqSINvzN81CodxagixehuxJv+dlX8zU0d2J43VmZem1u6/Ss2NREv8XWrEbmgVjSW6jjXr92po7hI9j/AC+Yvy/dzyazNu7azfLtqXeI1O4tt/2qALzIZ5gzTN8w+b0yabcMVmRN3yr8zN9KS3dFbd5ysuBt+Wo7ibcyruX5f71ArEW4eczR/wARqbyXlZmZ225+XbVVflkG2rqyn+L5VoGUL5BuC/3Tu3VWZv3lS3j/AL6qKzjzD/smgtFySURru9qy7ibd/u1dWIXMm3dWdeKY9rUDRGrfKW3NS7vlVmqBctubd8tC/KvzUhlvf/tfLUEjP/u1Hy33W+7T2xHQAuajk+aRKbI527abvO1tzfNQBWm+WZ2Zv92o4fm3ULhmqXcFpFD1bbStlYzUeaS4m+VUWgQi4pdwWoKKAEmeo80NSUihrU1qc1RNQAKu5qsqtV46tKwqWWivdNukX/ZG2mL96lb71JTJNzQZiu+L70cgCuv97FdRoMNtJeXKNHtka3laJY+Bv2cVxmkuI7jdiuos3MbRzqP3kUm7b3bFWjKSO2Zra++E+iTrEq31iJrdJO6Jvrz9sSaDN8q7oNQ+X6PHkj/vpa2v7Sj0+HU9L85msblxdWjduRyKxpsQ+HY3b72o3LXCf9c4/lB/FqoziS6S08lvFFb6bbSclftNwxI/AcYxW01pq9y2y61Ly4V+by7VQgb8BVDwu5W1SWH+Gc/rwa6yxwtvc3GGXdGNzL9elFiZSszlLzSoFbcqNtX+JmyWqs1lHGwbbXT6ghVvvKqsgXbu/Hmsm4ysaMw7UDUmZskI2snyqrVzmhyiHUprVm/c3kbWr/Vun/j1dTN/E1cfqUPl3z/wq3zfL1z6ipZpDUsNlWVWXay/Ky+4Na/h6OOXWEt7m5uIdPnw83l87JF+5IR6BqrvK+pRPfsq7shbjttkxjOPRqLHUTo15baio8zbKUeLs8ZT580Dex6YymNniuoljuo/llXrtcccGk3J/d/nV2/s1uNG0zX7KRpNOulEDGT/AJZ4/wBWT/6DWf5Q9V/76rQ5hdyf7NG5PWmeUP7/AP48KSTy4oy0k0ar/eZsCgZJuSmZT1WsK+8S6fB8sbtdSf7PT8zVW18VRSNtvrb7OrfL5kbb1X3NF0PlbOo+X1Whcf3lqCNo5I1eORZI2+6y9GFLxQInXHrUiqP71VldKXcKALW0f3lp6r/tLVLcP9qlVh/tUCL+ynqpqmrj/apyv/vUAXNhqRYjVJXPq1Sq7/3qokvKhqRU21RWV/7zVJG8m779Ai9j3qRf+BVU3yf36ery/wB+hCLi49KkXHo1U1af1qVWn9adwsWNqejUbEqNfP8A71H7+gRJsHpRsj9KiZZabtloAnVEpdqVDiSnYkpDJlVKX5P9qoF3rUm40APXZ/ep+5Khp/FAA2KTcP7tLuFJuFADP+A0m4f3Gp3FHFADdw/uNTN4/uVJS7f96gCHcn9yjdH/AHKlxSVIDFeP+7Qzx/3aftFLgf7NMCPdH/dpn7r+7U+1P7y0zYn+zSAj/celN2wVK0Sf7NM8of3aAI9tvTdkFP8AK/2VpGhRvm2LQMa0VvTPKg/vU/yE/uVH9nT+7QA1ooN33qRooPWiS3FQ+SKsCZYoP760eTD/AHlqv5P+1SeT/tUAWfJh/vLSeTD/AHlqDyj/AH6Z5X+1QBO0Mf8AeWmNDH61H5Ro8o0AO8mOj7PH60zyjSeQ9IBzQim/Zx/ep3lSU7ypKAIGhHq1Hk+7VL5Un+1Rsf8A2qAuReUP77U9Yh/eanKslO5oC5Hs/wBum+T/ALVTc07FAXZW8r/apfJ/2qsYpMUBcg8r/apGT3qeo5KAuyPaKMUU3cKADFFNZhTNwoGS8U7ioeKduFTcLEn+fvUMo9f/AB6oeKNwoAkX/gX/AH1Rt92/76pq0uaoBNvu3/fVCrt/56f99UUKv+9UgZO407cajpaCxd3+1Tt/vTG2UfJ/tUAP8+m+fRx/dajan9xqADzvehpv9pqPk/uUvyf3aBiLL/vU7zR/00pq0/NAhN/+9RvPo1LmjeKAF3n+7Ttz1HvFLvFAEm+SlzJUSuKf5tUBJuk/2akVnqur1Ir1IEyuf71LvP8AeqJWNO3GgRYVj/eWpVc1WVjUq5/vNQSS7zSb6ZtekZT/ALVUBJuFMZqbsP8AtUnlH/apAO30jS0zyT60eSfWmAjS0zzRStF/tLTfK/2qkob5tN80U7YP71NaKgY3eKFahkoVaAJFxT9wpipTlQetAEyuKnVhVZUHrUqqP71UQWNwqSN0qBVT+81P2x+rUCLG9P71G+P1qDbD/eajbG396mBPvT+9TN8f95qj2pTPk/urQCJ/Ni/vNSebEvZqi/75qBvvfepAXPtEf91qja4j/utVfHvSbB/eoHYsNcD+EU3z/wDYWo1SnbKA0JPO/wBmnLN/srUaxGplhoAVbg/7NPW4P91aasP+zUiw/wCzQIFunpGu5KlWH/Yp32f/AGKBFRriT+81R+c/95qu/Z/9mmtCPSgZS80/7VLk/wC1VxYhTtg9VoAqqz/7VO5/ut/30atrF/tLT/K/21oEU/n/ALrf99Uvz+lW/KT/AJ6LRsj/AIpFouBU2vT9klWVWD+/R+4oArbJP71GyT+/VjMH+1TfNj9GpgQbZPVv++qXYf8Aa/76qXzY/wC5JSean9xqQyFkf1qreOba1ml/55pV7zh/casnxFdDyYosfefe30WpkOKbZgSZgtUX/ls/8K87RUEfyt93/e/2auW8Rl3N/wAtMVFJmKNIlb/gVQdAf7Ef3mO1q2Ly9Twv4NnvVdVvLv8AdQx91SqWm2olm2zblj2b2/2UrkfH2t/27qyRQ7vstqNm6kFm2cvDbvOxdi3zVfhtBu2rT4U27VUVchUbt22g0IF0kN8zFa0LXR73yw9jNtZR/CxQ0QqWbc33a27O4Ebfe/2l/wBmgUnYyLjU9XgXZrFtDfR/3buHJ9OHGDV7w1rFnZzvLo2s3XhqfjEMuZrWQ10f2+Cddl0izK396ua1ax0yRv8AUsu7+7TITOg8SeKxqVtFF4jsLaPUE+5qdsweGX3Eg6Vxl9e3EbM/nNdR/wAPmNk/nVK4hn09mXT7hmhYbmj7fiKy5nP3lXyW/wBluPypXLSRLdXYnYsr7W/utWe33qdu/vCm1JoI2f8AgNMqZn3RhPfdUNADo/vVdhQ1Tj/1i1ow0CZoaTEW1KzVv4pVr0TwX+8XXWZ/valNXE+HVDa5Ybh8qyB/wXmu1+H7JJoM0+f9bdzvu3epq1uYVHoXvE8HmeGNWRPmzbNXisbfNXvN0kUtncxf34mVfmzyRivA412rTmFB6WLisPLanK21RVflak3fu6g3BWO6pNpZqjjX+JqFoAmX5mqT7tRbtqil3CgQ5n601qdTGagCeGmXDHaKI2FI29s/3aAG+btqezbf977tU+N3zVYhYK3ymgDR3bqazD+KoFl2tT2YMwamIGT5tzVLavtmqNqIW/fLQBseaGXbIN1M3hcLUS09cLTJHMu7v3qxDhZF/wBkbaq3EqRVGt0GXaqtuoA1pJgq7qrXE6Mp2vUUK+Yrc/8AAqhulEasylaAsXo7hIt25lqnJd+bIzfd2vtqorGRW2ozf7VCrJxuVY/55oCxr2rhtm4/NVlpgq1lwuI/mZlpVmMrbVbatAEN9cFpH3fKtQwokn3h8q/7WKbJjczMNzVGrUDReaVI4WSNfvfeZqz7hw3y1YVg0a/3aqzfNIzUDCGpuPvbfmqvG1SNQBHNL5e5VC1XXezfNU+3cxajhd3zfNSAYy7fvH5qrzN+7qRnMjVDddqQxkeN1MZ/3jU3cWpuaBkm87l20SYqNWo3bmoAfmlam0SUAR0UU2oGJTGp+aZGhlmjiX/lo4VfxqgCFtrbtu7/AGW6VbkuI5bXasaxyKdz7ejCn65pM+kahJa3W1mU/ej6MD0Iqnat+8X/AGvl20xbjPvbaGalkY7mXbRSGSWspjbdXR2N78u9TtVhtrl/u1d02YfcZqZLWh1myz1BRFfeYsP96HBNZnijU/7R1LzIU8m1ijWC3RW4SNOABVaZ/l67aoyS+Yu5v+A07k21O58NxeX4Xs3aZVaWVm8v8eCTW7Ysn2Uy3Tqsag/L5mDkDIrhvDc17qVxaabYrD9ol+VfOkEae2Sa7Sx8JBm3atq8l4sQP+h6ZCSMjs0hwBVdDKUUnqZc2pJtKskKty3zNis64uzP80KM38O5a6q8tNO0uEppOk2CtgM093m7nY+uBhErCme8lkK+fc7uH2riMMR7LQCsYd1dTxfJ5bfL+NY988tyobyW+Wti6SdZHZtzbv8AaOM1TZDtqTZGPbyzwSHy3mj3YVlX+ID1qzffv4Qynd5dTyK6/Kzsy/eqsued1IZ6h8DNa+12WreFL7ElnPA9zAkg7rzIlal1aG0mkt7hW8xa8g0e6fSNatb0hpIkf5l/vI3Dgf8AAa7GF5dC8SnTJbxryx2CW0n7zwP0NUmzGcddDp9grzzx1cStrzxbv3cCLsX2Ir0D5K4HxxDu8RK6/wAUEdOWwqfxGfHCZYRcQ/d+63+yaljtT/FUWnzfZtQVW+aGXCvXo2l+HBLI8Ece5nCzwt/z1jNJGsnY57Q2k035pA32GXDP6IfUV1HlCuj8N+HRLqn2C8T9zL8rLWHqGmz+G9ev/D943mSWeGhl6b4H+5+VUc/NzMg8qjZS76duH92mIbs/2qeqD/ao3CpFYf7VAagqD1apVUf7VNVv9lqlWgGKqf71TxpTFxVuNRt61ZIkf3ulS7B6NSRr833lqZVP96kS2CqNv3aeqj+7Uip8vWnqh9aYDVVKmVUpqofWpFQ+tIBMD+/Rj3qTyjSeVQBHijyjTtlGygBvlGl2GjYaXaaAE8o0vlGjml/4E1ACrE/pS+U9MVj/AHqdvK/xUWAXynpNj+tN3yetJvepAdsPqtM2/wDTVaazvTdxoAXbt/5arSbh/wA9KOKbtFACM3/TWk3+9O2f7tGz/dqgG+af79N801Js/wB2k2n/AGaLgMaV2pm8/wB6psUYqRkG8/3qN59VqfA/2aNooAg3e60m7/bqzgelG0f3VoEVt3+1UbN/t1bwPSk2J6LQMp7j/fpvP9+rmxP7tJtj/u1VwKLK/wDepNr1c2p6UMqelFwKW00zaavbE/u0uxKAM/mmb39KutEKiaH/AGqBFfzX9Fo816n8r/ao8r/aoGRrMactx/u0bH/2aXYf9mgB32gUfaEpNvstNwP9mmA/zkpfNSm7U/2aGVKQXHean+zR5yVHsjo8pKAJPNSjzUqPyko2J60CHM8dRb46dsH96o2UUDEZ46j3pSsoqNlFAAzx0zfHTWWo9gqRk3mp/s0ean+zVfZTqAJt4/2aTzRUVMoKLayj+7S+an92q3NHP92gC1vjoVxVPcf7tOVj/dagko4pMUc0jZ9aCx2KNlN3H+81N3/7TUDJNho2bu9N30uaAF8v/aajyk9WpKXmgQKietP2JSUUAGxPWjEdNpP+A0AP/d0fJTacv+7QMTj+7T1b/YWj/eSpFx6UCEV/9hakV/alXH9xaerD+5QITeP7tOVx6Ubx/dpyyj+7QA5XFSKw9GpPNT+7T1louSJlfRqXef7lO82mtNVXAN/+zRvP92m+fTftFFwHbj/dpG3/AN1aT7R/tU1pqAE5/urSNmjzRTfO/wBmpKG4prKf71OaU/3aPNNADNlGyn7zS7n/ALq0BqR4qVVoVj/s1IrGgBypUqp/s0zcakVjVEkyp/s07yqjVqmV6YkN8k1IsJpyy/7LUqzf7LUgIpIZKi8h/wC9VmRy396od3+9QBE1ufWo/K/2qnaoeaAI9n+1SeUKlxRigLkSxGpVQ0bTT1U0BcVYnqRYn/vVHs/2qfsPq1MQ/Y/rSqr/AN6o/KPrQsR/vUDJfn/vf+PU/wCf/LVB5Qp6oKAF5/y1NbNO2CopEH8NAD1b/ZWl2iolSpVUUgHriloVak2CgBn/AHzRT1QUbB6NRcBn/fNG4L/EtO2e1DJ/s0AM3j/Zo80f7NHlf7K0eV/srQAeaPVaTzRS+T7UeT7UAM3Bq5vVGFzfM+W2/dX6DgVuak/kWvy/66UiKL6nrWVMnlxjyx8sZCpWcjWHcgZRFbsi/wDAqz9vmN/s8bqt3CfKqZ+blm/2iTyayr69S0jds/d+ZmpGgeINWeCz+x2bf6RL8rN/dxxWHY6YkcfXdRZ77mR55vvSfd/2R2rShpFk9rYx7R8vzZC1t2+lWW1mkRW21R0/esj/ADfe/wDHRWtYwBl2s33XDf71MzbNTSfD+l3bbZLf738K1oX3w3ivbX/iU3O24X7yt92rnh1DbSTP/EuPl7YrvtBtTBZs/wD303saFuTd2Pm/xFpWseHZtmpW0kfTbJt4cVz7XRZutfaV9otlq2kyxapCt1HL8rRtXzX8VPhvJ4bka609Gaxz+K0FxktmececfMaoJFRm+ZaazH5v4ajzUmpDdQ+Uu6odv+w3/Alq7zJdWkX96Rf51PrEx/tS5/36VhmOymm1Yao6Bjrdfmq9H92qUNXrf7ppks3fDfE2oXTfdsdOmn/E/IK7nwpbC18NaZH939yGb6tzXnqsV8N6gq/LJfXENqv+0E5r1ZU8qNItvyxoEX/gIxVxMKjJIVHmKuF+Y/xZ9a8IukMN5cxf885WX8jivc1Y7t2a8X8RReX4g1RP+niT+dEwob2KituWn/8ALMrUUbbamVttZnQO/u03dtanU2Nd1ADv4aXNMzSbvmpgWN27bTNvzUi/KppVoAfJ92kjl2rt2/eprN8rf7VFv8qmgBzIf9nrTYc+ZupGb7y0Q/eoAnbLfdqRWpVYLSt938aBDmbdtaljcNIN3rUDZZfvUkPyyLzTA2FlqBrr5tjfeqNd9Jx/d2tTEE3zLVi3RGZvMLf985qD7y7d1RyMV2/3moA0/tUcbLt3bv8AGjcZG2qYVaP+FlrM3H+J+1TRzHaVV/8A7KgRaZzt2tEvyk/dbvUKuY5Aq7V2/wCzg05XPl7o13N/vc0ir13f/XWgAk8xm3SSqy1PC21X+7Uewbv7y0SOGX5fu0AVJmMkm1fu0KpkqJpfm2x/dqSMhVNAyRn8paqSP96p2/eKP7tVPNDN8o2rSAkhzHuZqGmLYWomcs21aFUs1AyzG3y0xsc1HvP3aM0AOXEe7bVG6fdN+FTTOVb7tVOWakNC4pOaVmoVvlpAJytC0NmigBaazUuKTFDGNpKWkoAZWp4VhE/iTTl/hWTf+XNZddZ8MbTzdYurjbuWCDb+L047kydkbfjjTTfaaLpf9Zbfe/2oya82X7u6vcLqVLS1muJF2xxRl2+g5rxOb5pJWwqqxLKq/wAIJzxTnuRSbaLK2qXcayW7xrcf8tYmbBz2K5qpIpjbaysrUbf71O3yL/H22/NzUmtiOpIYnkk+Wms5/wBn/gNPjlKr8tMGa8NrPe/Jb/N/C0kjbEqpq2mT6fNGsn7yFxuSXbgMav6fdfKrbu/6/jWhcahbXNq9vdfvFYfN/skd6ZGtzJ8P24u2ktZPvON0W7oxHOK9M8J+IJNSt/suoSSSXkX3NzfLsHAwPavMtPyq74X/AHkT/K3upyK6/Vo5raPTfE2lv5MN8HX5efKnXh0xVIzmkz0G6e0W3+X/AIF/tehrjNS1KziuGfz41X+7uqfTPh54m1+xhuNR1qLyZ4xLEkUm9mzWppvwt0eK1Vb6+ma+Z9iLM2yNyB0oM0lHdnnV9q1ozPtdmrPa+jaut1bTf7PuJbC4gto/II2SQxjZKD3BNYl0oZd2NrYpG0WmZMjhuzLUbVeaYx/Nvb/4oVVZzJJ91aRZAy+YrLXVQo+r+CILmFF+16JKUf18p+ec+jc1zVdL8M5UTxb9im+aHU4Xg2/9NAuYzTW5L2udPvPDN/EBXF+NoZLnWo1t1kkZrcfKvO7lq6rUL5LGz83Z5kkj+VFH/eeqnw1aTVviE8s0ys1tbl03dFwelN2b5TKN4rnOTWxuLa4+z6gjRtEB8zeh6Zr1j4V6ml3ps1ndHdfaVIssX+1A52yJ+HyNXJ/ExHguvti/8et85Xa3VStcv4d1uTSPEFre/NtQ7JV/vxsMODUrSVh39rDmPqHVpbS2kt7iN1+X5ty1zPxgaz1aTQ/EFrt87DWtxtrg77xK/wBlW381mWMDYzNndiqt94oSext7dl/d53VpdGUYyuWsD0pVUUivujRt33gP8akWgYYpdv8AtNSqv+0tOxQAqr/tNU6/7L1DUyxCgRKufWrMLP8AdytVo4qsxwndVEFjc/8AdWnxs7fNtpI4ZKlWKRaBEkbvUu91qJUk/wBmpMP/ALNMCRZXp6ymoV3/AOzT13/7NICXz6PO96b/AN803cn91akB/nCkaYUz5KjZY1/iqgJftUf95qd9oT1aqv7r+9R+6/vUAWvOT/no1L5qf32qpti/vU7bH/fpgWfPT/ao86Oq37v++tM+T+9SsFy550f92k82P/aqpgf3v/HqXZ7/APj1AFjzY/8AapGcVXZf9qo2z60AW9wpuapNvo3P60AW9xpm41U3v/eo81170AXKN9VfNNN3vUjL24UbkqjvNJvNUBe3x07dG3es/du/ho3H+7QBpfu/79O2p/frM3f7FSf8BapAvso/vLScf31qhj2ajZQBd+Rf46XdH/fWqOw/3qPKb/ZoAufu/wC+tJ+7/v1S2P8A7NN2H/ZqhF/93/fWm7U/v1S2Gk2H/aoGWmVP761Cyp/fqDyj/tUzyjQBNtH96k2p61FijaaYEvH96m7gv8VGKRoqAHbxTdwpvlGk2UCH7k/2aN6f7NN2UmygB2R/s0tRslCpSGS0zikxSbKBC8UynYptAyNqa1S4qNl3UAQNUdTshpnlf7VSMbRmjZR5RoKDNN3JTthpdh/u0AIuyncUmw0/YaAG7R/ep+yk2GnYoRJh76TNCsP7tLuFBqJuNLzTt4/u0b6AFzRSZpaBElKtNWnKtBLDFGKOabuNAx2KNppKkjQtQAynqtL5Rp2KAFVakjXbUeKVVNAiSkpKGoAKKZT1oAdTs01adtNAA2KhZh/dqbaaayGgCLNLuP8Ado2GnbTQGg3/AIDRn2p200bTQFxlH/AakwfSm/P6UANxSqp/u0/a/pS/vKAE2GnqhpV8ynrv/u0BcFi9qcqGn80bttUSLtNPVKj3GpFY0CJVUVIuFqHNCtTBFxWSlVo6rq1PzSYIsbkqNtlM3imNMKkBGxUbYqNphTPNqgJ6Kg800bzTCxNS5qBXNO3GgRLmk82o9xo2mgY5paN5qPaaeq0CH5pc0bTS7TQAm40zmpvKNN2GgCPmpFz60bDUixUhhz/eqRd/9+nbBTliFACLn+/Rk+tP2JRtSgBm80b3pdqetG1KAI970ea9P2pSbR/eoAPNNDO7VHVTUpTHCsUf+ul+X/dHegErsrSObu+D7v3MGUT+pqG4cruf7sf8NTxqkEZ3D5UH3fesLVL4xruYqsn8K/3azN1sQatfeRGyxj943/jprjJpn1C6VVO63U/99GrevGdLS2mk+WK43Og7tGvBf6FqraOm63Rv73zVLNUtDYt1EcfzfKuBUkanbtzTI1MkPVWVfmb/AGeKkh/1ifN96gZq2K+Yyt93cfmat63QNIPL+7WBZt82xh22/hmt+zTy41fbt3Z3Rd1IPAFMye51WgxJJ83y7pH+b/aC16N4fUahGYJom+z/AHvvfexXn+io6tD8rL8m5q9G8N744933d3zU1sQ9zo7d3Vivyr/db6VneKNPg1bTbuzuk3QzoV21dm2TxruXdIp/u4qs1rK1x5rbtzf0OaAPjHx1okmia9c2+1lVT8lc7uLV9BfHbw+b2P7ZCu6ZPvV8/Mpjb5vu4+apZvB3RJbt/wATCzb+7KtLrHy6lcfWoY3C3ELf3ZBU2sf8hCRv71IvqUmpjVJULfepDJI/l21ehbbWerdK0rGIzzJF/efbTQmdHolo1zqHh+0b+APfyr+Nei8tu3Vy/gyI3Wratfx7fLi22EP0XrXVbJK0jsctTcjryPxknl+KtTX/AKb/AKEKa9f2P/eWvKPHybfFt5/tJE36UT2KobnPrU8PzLUFT2/3azOgk+98rUnlUrZ20ZoEDKFj+ao41LfNUq/M21qPu76Bjtu7avtS7dq1FCp3VYoEQyf7v3ajV6tUxYgzUAQVJC21qc2F+WjigZNTm+6zUxW27qRn20xCqxVaP4h/FTFX+9TVby91IC8so/4FQrhqo+aWapllG7rTAsK22m7izFmWmtKF/iqNpRJigRYjYf8ALSnfd+aNVqFm3fdqaH7p/vUAOhc7f4f88YqZfmXa1QsojXctO3/3fu0wJeW+VvvLS7R5bUm91/KoJnLLt3baBDdifwimSKKi8+lzSGSMx8n8NtUvnkZqs1B96SgB6qVWl+T/AIFUcjn7q03+KkMk5pm+hmpMUAMmY/w1Xq23yr+FVc0gQlC0tJ/FuoGL/FRTc0ZoAVqZSM3y0LQNC0lLSVIDGr1P4e2P2Pw3FKy7ZrpzK306JXlkn3dtd14V8YhY4rLVvlWMBIrleBjoN1aQ3M6ibWho/Ea+8jTYLJWbzLmQM3/XNa83Zf3lavizUv7S8QXM6tuhj/dRfRKzpF+Usv3qUnqOnFxRFimstG/+8tG7dSNhtCtTaKCWXFby1Taf9r8akWV13NGdrVXX7tSR0ybHZQRWGpeC4dRt4YodU064MGoeWuPNgk/1c+PVWrY8F2/9t2ur+FN3768jN5pv/X3EM7B/vpXE+Gr+PS9YUXwb+y75Ps93t7xN3/D71a7NeaRqQlt5NupaZcB4pV43Ohyj/Qr81Vczaa0PZfgHqWl6/wCGJ/D+sM8d5p7mW0lXhlib/B60PGVrqegSXDaxZSX1jJjZqUOAPpIPWuE8VX0GgeOtB8caIBb6Rr8Av2VOiSdLiOvcYfEPlM+natD5kMqBWVlyk6HoV+tMykeK3ktvq9m1lcOv2XOy1kVR+4J6k15rq0VxY3ElleL++j/8e9xXrnjjw0dJhk1nQ4Zl0lnPnQM28QE+ntXAahDFqlj5Wf8ASIxut5fbun0oZUDk9/zbW+6wqKRB8u2rMkLspWRfLmX70e3lTVZWG5lapNRlRyTS200UtrI0c0Th0kX5drjkGpJvlVWX7tV2zI26kM6m612913UrG/1R1kkjfc7bcFqztP1C68LeJLmW3EcjMjKno6P0NVLOf9yf4vLw2336Gpr5Ptmk+cv+uscD3aBuh/BvlNZXfNcvkTjyi6trtzrckC33lrHESyRxrgc8VntFuVt1VOY2+ZavW7iSN1/vVoRZJWQ5bt/s6Kz/ADL8tRfayu5c1BMpVqrtlvlUfNTuOx6po7u2k2Lf3ohuarm41DZw/ZrOGD/nnGq/iBU1anK9yRWNOzTVWnUCHKxqRc1DmpFY0AWYc7urVZVn/vtVJXerEbmqILcbSfwytViNp/79VYWNWI2NAi0rT+tSK0tV1c1Isr0xEitJS+bJ6LTPNNO3mgRJvPotLuH9xaj3mk82gCXcn91aZIqNTd+6ms1Fhh5UVHlR1EzUxWNIC15UdHkx1W3P6Uu40AWGhT+9TWiH96od5pm80AWPKHrSbP8AaqDcaSgCxhvVaY3+8tRUzFAWJ93utJk/3lqtio9v+9TAt7v92jcGqsqUbDSGWdopdqetV9j0bXosBMyp/fpm0f3qi2vRtNMRLs/2qXyv9uo9popDJNn+3Q0R/v03NHNAh3lP/fpnlP8A36XmmbnpgL5T/wB5qTZJ/fo3vSbzQMP3nrTPn9af5v8As1Gz0AG96TzZP71IzU3NICTz3pv2h6izSfJQBL570fanqD5KTaP9qgCx9oNO+0GqeF9Wp1Ay39oPotN+0n+5UO+jeKAJftZ/u0fa/wDZqLelLmOgCX7X/sNR9rH9ym/u/WjYnrQBJ9tT0al+2R1D5Sf31pGiHqtAE/2qGk+0RetQeSP7y0n2f/doQaEzSxt/FUbOP71RtF/tVC0X+1QBYZh/eqFl/wBqq7RH+9SNFJ/fqSrFjFP5WqmyT++1Ltl/vNQgLXNM3Got0tHmy0ATbzT/ADW/2aq+bJ6LS+a/9xaALPm/7tSb/wDdqksx/wCeS07zh/FHQSZ2KZinqxpdxoNBuKXFLRQAmKKWnLmqESR1Mq1FGpqyuf4akTExTNntU/NG0/3qAIPK9qmhQrS7T/epVU/3qADY9N8p6m2n+9Tdp/vUEkex/WjyqkxTcUAJ5X+1SNF/tU6mso/vUFEbJ/tLTf8AgVObFN2igB6t/tU9WH95qYuKf8lIB24UbhSbkoZhTAZRSZozQA/NN3GkooAXcaTeaY1R5oQ7E7O9Lveq+aetAiwrPUi76gWpOaAH80i5pmT60m56CSXNSK1V/np65oAsZpc1FzS1QidZalWUVUVTUyrQBZ81P7q0NMn9xaiVTRsoERtKN33Fpm/2WlZDupNhpgKrn0WhnPotHlU7yqAI959Fo8005ojSYoGJvNG80uyk2UAG80u80YoxQAu8/wB5qdvNM2UqpQA/e/8AeoaV6TFGKADzXqRZXqOnLhaBEm807e/pUe4UebSAk3v6Uu81B5tHn0xljcaKreaaZ5r0gLe3/aWjb/tLVPe9JuNAFlvLVS8kq7VH41Tt4nlmeeYKvH/fIqPcZJP9n+FefmqDUL1La3/eFfmJ+9/COmahu5pFEOtamltvX+HHy/7XsKxdB099buDdXn/HjGfu9BOfQew71Da2smv30rzblsY3Cs27Bb2Huf0rro0SKNIoUVY1G1VWkU3ZWRwPxYXbq1lz8v2U/wA6z9FT/RYG/wBitL4qW+1tPuP9iSKqWjqP7Pt/72wNUvc0j8JZ/wBXlV/iq1GiNt+b5qg3dWqWz+Vvm+81BZr6XlrpP4uR/wACrobNjGsayN93DbmYZzmsK1fbIrKla8Lhvmk3blx+tMxbOs027dpvut1FegaTKW2NH8ytXn+jqZFiVdvmY+X5a7LT7q4iVJVSNtp2/L6GmtiXud5bvHFD8zSLzt3bfmY1HdXD23yzBlXYGZt2UUVRW7n+zu0ke1VIZdvrWbfalJdrum3Lb/7P5EGmBx/j5v8AXphfm+ZV/XFfP3irR/Lmdrf5tv3tte0+LNTRoZYlikjkgB99wrzK8+b/AIETUscL3PPLhDEybl+beKn1pduoPV/xIgW4too/lklcVR8RSiTVJlVt3l4Xd7ipZ0LUzWfbUNOoxSKFrb0+UWkM94y/6pCq/U1iV0Gk2gvdQ0+w/hZxPN/uLTiKWh3/AIVspNN0Gzgb5ZGHmy/Vua1MyUM43M1M31ocj1FaYwRvLIdqohdvwryuSU3s0ktx+8aV97buTzXb+ML0QaK0Ct+8uX8r/gA5NcVCtZVZa2R0UI6XKdxp7r81v8y/daPvUMamP71W4boy3Dou1Y1/PPvV1okkX94u6s723NbGd/d+lDYWrcll/wA8X7fxVUkt5Y925d3+7V3RNhi4VaRpfmqP+9SMpaqAsrT6qRt/eqeN91IQ1t+6nxsf4vlWkZhupc0ADN/3zSbd1R7d0lLu+bbTAkWnsv8Aepi/LSSduaAHbhSR/MzK1RMu2pY/lz935hQAyR0X7q1H96hl3U/hV6bqBiKpqxGhaof4d1SR/vKBE6qVWp42FVdz/dpY/vCmIvUm4LGV9vlpqsP4qSZvl+amAm7avzN81MkYeXupNwVfmaq8zmSkA3aG+bNSVEqH/gNDMVpDJd+6o1bc1JI277tQK3zUAWKbTd9Ju3UAKzFVqPdI1SUmaAGNnb8xqKlkbc1NzQMczU2imtSGGaSmZozQA6lplGakB9FS29pLL975VqwsSR0rodmVVhPDSfdqxHcPbNI6llZ4zF/31xTtp3VXkQ+Y/PythW/2SaaYFZf4aubw0Krnb/vfxc1Tp+4VQDmXbUbNTabRYAooooESRtU0bVXWnLQBauF8z5WP3QFX6VqaXqHm+XFN/rFjEX+8E+5n/gPy1kQt81EiGJkdaaJPT9Fzr/gHVfDzbWvNKkOsaf3/AHZ4uIx/6FXpvwX1K38ZeB20jVJW+2aVi3in7rEeY3rxDw3rD6bqmnatbt80R3Mv95Dw4rqPCOt2/gf4pM0b7dDvP3T/APXvJyj/AFRqsxkr6Hplxdav4L1h7XVlW60+VAiy9I5wfWvOfHWgwWX/ABOfDvzaTKf3sXX7O5P8q+gtWltrnT303WraO6sWyvrt9xXkOoafceCb6785V1Lw3OPKeTqNjdAaCE2meUaoglX+0rVP9m4Xvn+/WRIny7o/u10d1ajw/rzwLum02X5opGXh4z61japD9ivnVflt5fnibqPpUm6MyRju+amfdZf9oVJdfLJIu3btO1lqFm+Xd/dqWaxQ6GUxt+7/APrN2OaFm8lg0fp91vfqDUStSN827+9/6FWZoaFvpsd3DtW7jWZc/uJPkP4HvUN1YGx2tI67sD92rZLfUCqUilvl+b/d2muo8H+HBP5Oo3z/ALkNuiiXjfjufarSbZnJpIqf8I5q87eV9jaPYdzSSNhcH3rc0nwfBaXEc99cfaJkIdY41wnFdY0u5t2abvFaqJyuo3oMZN3zUqqf71O3Cnb0qiBu00VJvSl3JQBHUirSrsqRdlAhqrU0amhdlTxrVEkkO9atx5qCNfmqyrUCJFzTs01Wp2aZIufajNLuNJvk9FoATNNzT97/AN1abvf+6tACU5qXcf7tDZ2/doArs1R7jUjZqPmkUg3PRvejmk5pgG56NxpuX/2aMv8A7NIB240bjTcv/s03zT/dWgCTcaM1H5v+zTWmFADmamZqJnFRs9AWLKtUisP71UNxp240AaG7/ao3CqO40bjQBezRmqe405WNAi1mm5qHcabuNAy1Tv8AgVVlenq4phcft/2lpMUm4Um4UAKy1HRxSUCCo2pc0jUhjabTqSgCPmk5paNpqWMSjmlo4/u0FCc0zc9P/wCA0bBQAzcaTeak2ijYKAId5pN4qfyqZ5VADM07ePWpNlR7PagBN49aTzR/ep2z2o8r2oAb5vvR5p/vUnlD+7TNgoESeaf71M83/aWkxSYouMRpStM840NUdAyVbj/Zp32j2qvuFLuFUIsecKPOSoN4/u0b09KkCdZkqRZUqpuSnqyUDsW1cUu4VU3CjcKLAVqXaaSn1QBilplFSBJRmkVqKAJ1qzG1VlqwtAibFHFRbjS0AOoptOoAN9M30tJxRcAzSNS8UbUoAiplT/JTeKAK+KdipeKSgLjFWn0tFIApaKfuH92mAyin5o30AMpOaez+1N3GgCNlNJsNSbjRuNAXGKhqSNDQrPUis9AiRYqPKpFd/SpFZ6oQmyjyqk+el+eiwiPyqPKqTa9G16LAIqClVBSbTTlWmA/YKFWlVaetAC7hSbhSNTNxoAVmpNxpmaM0CH7jRvNJRQAbzTN5paMUhkbOaj801MyimYoAj816Flen4pcUDGbzR5pqTFGz2oAj82Sje9P2GjaaABc+tKufWnKhpVSgQnNHNSYoxTER0tPxSqtAxlJipaMUCIce9QNKjXS2uf3jJuarmK5fUr77NrF4/wB7ZmJVqDSKuzX1LUI7GHavzTMPlrmbe0u9fuvllZbVf9bL/Qe9O02yuNduHeRpI7NT88v94+i12lvFHbW6QW8SxwxjakdIttRIbeyS2t0gt02wxjaq0/yjU+aWrsZGVrGi22r26W98GaNX3LtbBU1w626W0jwR7vLRyi/QcDNelr978RXnGof8f1yv/TRv51Eka0r7Ea43FW+61TWv3irfw1Ds3N/uirEfyqj4+apNjVjJVW/vLWhprefJuZv9WKx7e4RY18w7f4fw9q1LFtsjLt28/eoMmeh6K/kQiVl+WMV1Ph+aKK1ilmh3SO+3b1256Vxfh2VJGZNv3hu3f3cV6LoNjJLbsu5vmTZTT6CLWoahHbLcNDEzfwsq/wARPGRXO6lN9i+aNGWRgV/ec8kV0V1YPHJtjnZenzNzuwa5PXL6SK3u0mlVo2Qt93ByeKZLPOPFV28u9mm3LIPvf0NcfJMG3LI1XNWui3m/Wufmm8pZH/hxUmsVoU2lD6/NdSfMtjCX/HoK5xmLbmY/Mx3NW0qmLwvc3DfevrkL/vInJ/8AHqxWqWzaJHRRRSKHR/eH1FehfDmxMi3uqSfec/Z4voOXrz3aW+VRubIVVXrXt2j2I0vR7WyXb+6jG7/ac8k/99VcEY1pWVhzRCjFSt8tIzCrOc4nx0sq31ruH7loyqSf3n6muf8A+WZrf+Il6GmtLJT8sYNxL9T0rlLe48vcsm2SP7rLXPNe9c66btGxrW7n7DEkiw7owYv3cfLJndlvU0u3dUdrLAy/u22/7NWKzm7s0grEdHNSf3aNoqS7EE1vBOo3Cq7aTLt3W5WRc7ttaSrTWWRlfyXjj24XdJkDNXHmexnLlS1MKaGWPcskTLUUZ+bbXXR2V3Jpb3WFkhicLKy9FzxmqrW9nLH+8h21bdtxJJ7HON8zVIq/LWpNpkDf6uRtzVH/AGPcf8s33UcyDlZmNTo8VJNp9zH/AMst3NQqr7vmXbTET0Mm6haXb8v3qYiLYd22p1Q7f9qoPN+bbmp48rupgRtFS+UZPu/dp7MF+alV6YEaxOtTx25X5qFarCuGoAj8rau6mqu1t23atWVx/F96mTfMv3floENVv9mms9Ly0e5aF+Vvm20ARrEW/wB2l2hV3UKxkZ13UkjeXtVvvYoAGxt+b0qL/aaiTLbaFagZDIu2omz/AA1LM3zVErUgBVLNT9vy01W3U7fQAYpkn3aRm+brUbN833loGNopu75vlqxDaTyfwNUXKI41DSBd23cdrfSthtB+ba00jcBt397NVV0+SJWlk2rt/hrqrhT9o2L/AM841/EVEn2KSMGHQoFU7jI3/AsVW1LSkis/Nt1ZW3hW/wBrNdOzBZPvVDqif8Subd/wGpUmVZHIw2TtjzisdTMqQL+7i3NU33asq1s1mq3iSyRxmRvLgYB8uPkP0DVpH3iHpsRR4lh3UxlpNPy0Mjfxb/8A9dTYrN6SKRDiq9xEWXcq/NVxsR/Mx2rWbNd/wx/d/iaqVwZDMu1tv94VHTmU7v4qStBE+n273t9b2sbbWlfb67aS+tJLC+ntZvvRNt9m9CK6PwHY7pp71vuoPKT6nrU/j60Hk2t5j95uMTt7YyKu2hjz+9Y4yiiipLHLS0KtFSBLC+1kX7q5rQ8gSRtu+61ZS1uaepkt1Zfu1YmM0dzHJc2sn3vvr/Wuom086x4PnvI1aS60V9lxH/etX6OBWDcL5dwl5GN3lfe/2k710nhHWx4d8RQ6iyfaLGWNre7g4xPBIMOKpEPueqfDPXTr/gmJJpGa+0//AEeb/aAH7t/++auyTRrC1rfJ9osZ0MTr/cB6kV5d4XuD4A+JUlhdP/xKbsCNZP4Wgk+aKSu88VatbRN5TTL5jOdyryiimc7Tvoef+JtJ/su8bw/fSeZZy5l0y7rkJLvbHJa3Cf6RZpLKre4GK3PHHiBJbEaRHFHI0E/mpc7uU9hXJWLebqCoxbdcxtFubk5Ycf8Aj1RJnTCL3Kkf+rdfb+VIrU2Fv4v++qe3y/LUG4lFFNZSq/NSA09D019UvPKVtsK/NLJ7V6PHsjVVjXbGoCov90Csfwzpp0/SVWYf6RKRLL/ICtat4pJHHUndjs03NFOxWhmNzRmn4oxUgMzT/NNGKNlUAqy0/wA+mKlO8oUASLNVmO4+VaqKlTRpUi0L0N1VtbqsyNBVpVFUSXluqetwPSqaoKkVBTJLXnCjzUqtinUgJ/NSlaVKqM1JmmOxb81Kcz/7VZ+aN9Ai5moGb5qi800xmNAEzMaZuNRbjTNxpDLG40/caqbzT/NegCakqLzXo800wJKYy03zj6U1pj6UgFZaTaKY0x9KRpv9mgB7LTdpqPz6XzhQOxLtNHz0xZUan7hQAc07caTcKeuygQZpdxpcUYoAbuNGaXFMxQA7fTc0lJuNADs0jNTNxqPcaBok307eKg3mjeanULEu8Um8VFTKAJd9JvNMpKCh+80eaaZRQAvmmk82mZp24UAL5po800nFLxSATzTS+bSbRTcUwH+bR5tMxRQBJ5p/vUnm+9RUVQWJfNpVlHotV2qLNAy7vFG5Ko7zS7zUBYnkUbqZsFR+aaY0ppgWPKFHkVX+0Gn/AGg0ASfZ6Ps5/hpFuDTluKAsItq9L9nNSR3VSfaBQIr+UaTZVtZQ1O3CgDKooxSqhoGJRS7DRtNAAtTqtRqlTxrVASKtOpFWlVakRJTqaqU7FABRRijFADaTaakxRigki2Uuw1JiloAi2UbBU6rRVWAhVBQsXtU9FAEWymeUasUM1AEHlGnLEaVmNJuepAPKpfKFN+f1peaNAF8oUKiUbTSqlUAKiU7bH/dpVSjFACfJS7hSbKcqUBoOVxUm8VH5QpdgpiJVlFI0tJtFN3CgQ/fSM9No3CgAzT1ao80qtQBMrUuagzRmgCdqjpmaTNAx9FR5pc0gH0UzNLmgB1LTM0b6YgxSYo82k82kMMUc01pabvo0HYl5/vUbv9qot9NZxRdCsSZpN4qDeKN4oGTrKKf5tVVcU/elGoE/mineaKrbko3J60AWfOFHmiq+Y6Nyfw0CLHmijzRUO4UbhQMm31j3Gg21zqj3kxkaNsM0HZn9Sf6VpbhSq4oBXJdxXCL8qqNqqvAX2pKZmk30AT02ovNFHmigRKrHcv1rgdQ+XUJv9qRv513iyjcK4TUP+Qhc/wDXU1EjajuRK27cv3WzS7ZFb/ZohUbW43NUrP8AdVQzVBsTW/8A0zFaViw3RrlmXNZULlW/vVq6S/7zc38VMix3/heLzWZm2r02/SvYPDdq6xhVLMud3pxXk/hdDuiibbtbFesaLceVa/ws2PmjWgi4zxAhitSqv2DV4v421Ar8u3bzIzfNyxNemeItT2q7SbmbFeI+Mr4TzUagtZHH3ku6RvmrD1qXy7Nv9qtCRtzGq9naDUvFGn2jf6nf5r/ReTSN0R+Kl+xf2dpef+PS2Vn/AOuj8mucatDWrs6hq15eN96WQtVBqkpbEdFFFAzpPAVkl54lgMmGhtQZn3eo4FerswrlPh5p/wBl0M3Ug/fXjZ/3UHC11FaLRHLVd5CbRScf8tPlX7zN/dxS1zfjbU/sWl/Z4X23F5lP92PuabJSu7HBatenUNSubpvuyybl/wBlOgFU/wCKlbG2ljWszqRft4hJVtXnj/6bL+tVbV/mZV+6v3quQtukoaTGm0Ohuo3bYzeW392Tg1MqHdSNEki/N81MWKRNy28rf7rcis3SfQpS7k+KdYzos2nSfYoNQt4pGaazlkKCXd/ex6UjXBVV+0W27/aj/wADTfOsmmZ18+GT7rdUoheO4pWkdTcX1tH4f1K1WJbfUNQlDS20a/u4o15QCuYVadC0bf6tlZVqZYj/ABVM5czHCCiiLyhJ8tCxOrbo2ZasxpuZW9qfioNCmvmrvXzNq4+6yg0u6Tbt8uBv+A4q3spjJQLcpslvJH81vtXH8NRLp9o3yrcyR8/3fboKvt9Plz81MZNrPuqrsLIzJNEkkY/Z7uFv9plpG0fUVXctq0y/eZoWD1p7U2t8rLzurQ0Ox+0zO8k80drEQ0rbsjk1cW2zOVkrnIyQyqu2aGaP+7uWq8bbflb5a9umtdL1DS5PsN8s1xFE33l+8F6lfWvPJLiRZnW8tF8xcb9qitJJxIg1N6HPbt33fSpI1+996t6b+zGY7rf5v722nbNLkZmWNlbP3VYio50W4sx4/wDaamSOPu7a2G0rTpV/d30yyf3mUGopNCRW/wBHvo2X+8ymr50ybMxWYx0+PMjbctt/2q0W0Wfd8s0My/w07+ybhV3K9t/313p3QWZmtsj7feqFvmbc1bEmgX8uPLSFv92YVVk8Oap92RIbdf7zTIKTYIy9xZtq06tj+xPL+Vry2/3Y8mmyaZbr/rLtv+ArUuSQ7GHJUTfe21uLY2e35Vmk/wB6lWKBfu2y9P4qXMg5WVdD0W912SeDTY1kkgiMrq0gTgcYye5rS03wJrd7CssiR2MPO6S5YJtx6iu28FxbfD67RHHJfXnzfL/yzU7B/wCPVkaxrUmpbre6jjW3gkKLEvopxzVtpK7I1crIxm0rw5pcO64v/wC2Lz+GK34jU+5HWrV5qW7wjPFp+n2Vnbxx7WZYfnb6u2TmnwrHHtaG2hX/AHV+7T5pSvzMy/8AfNZ+0NFT7mHGkUcO6FI1XG75eaNx+9u+9/j7VdZ3+basa/3l24qNpi2391G3/AazZpYoXzfu0X5f9YK02uBLdSS7fmwNv+zVO6hgnUfNJCynfu681AtjP96O8hk/3lI70aDNDzRu3NTdam26bEin5pX/AJVT2XsX3rfzF/vQtvqrqF6J1h+Vodo/iWiwFZfmap9gkVl+aqu8bWlUblX8C1RyXEkjbVbatUk3sS2aUbW9tCqtKqrn/gTHqc1Tk1B/M3W67f8Aaaqez5qsbRt+WqUNbslyK8m+Vt0jM3+9UbfKtWGWoGpsVx8eZF+/Gu37vmNimsgX7zx/8B5prLUa0xmtpesahYwtBp8ixwsd3lsoeo9S1O8vmVby5aSNT/q14RfwFaWg+GZ9Sj82adbeFZNm3bl2K1st4JsGz/pNz+hq7MycopnDsny7l27ajrd1zwxe6VGZ42W4tV+9JGvKfUVhKpqWmWmnsSwr8oVqjmULIyrUjNtWoWqUUFXNPungkbaqtvwrK3FU6dG3zbf71UJo6+3w2dq1XhXy/OtW/gPyL/sHmq6zJFCkW5tvl/61f4jUW/y5I7qP5l+63fg1RBv69ef2v4T00yNuvtHX7G3q8BOUq9DfWzeDW1m+uZJr5ZPsKW27G51G4Ofbb1rl2uPKunWMNIsvyNGvJbPAwKl8VWEWiXr6Qrbrq1h23ZVuPPPJUD/Y+7ScknYFC5iyOZFSVvmZjJuqFmeONWU7WQhv1yKev7y3lX+JcOv1HUUitt3bvut95aRuW9TWM3AuoF2291mTb/cfPzL9Qf8Ax2qlS2siw+Zb3G77O+GVl/gccBxReW9xYSKl4m3zEDo38DoehU9xQIgjzXReDbGK9vpri4RWW2AZY/8AbNc+q7mVV+ZmrpvBb+VqUsX/AD1g/VeRRHcip8Oh2XFNp1K1bHGJS1HS5oAfS03NLvoAWpMVHvH92n7xVALTqZvFP3CpAcq1NGtQrVqFhQIkVamVajjap1aqRDHrTqKerUAJmms1T8f3aOP7tAFbNMZqscf3aGw38K0wK1NqfYKRlFIRDRUmyk2igCLFMqfFMZaBkdLTtpo2mgBtFPxSYoAZRS02gBrLUbVJmo2z6VBZE2aZU1MpgMo5p9FACKxWpFd6auKk2igByzFactxUeKeqf7NGpOhJ5opd4qPb/s05UNUA5nSo2lFPxVeRDQxC+aKTeKg2Gm1JZNuFG4VVamc/3qBl3im8VU5/vUi59aBWLmaWqW407J9aALdJVXJ9aTcaALNNqvvNG40DLKr/ALVP2j+9VLef71PV6ALWKa3+8tQs9QSP/tUCsW2b/aprOao7v9qo9/vQVYvNL/eam+fVDNJQFi401R+fVSjmkBZ840nmmq9FAyXeaRnNRs1FAEisaXcajp1ADs05WNMp60ATRtT81GrbafmmIXf70bz/AHqKKAHrUq1AtWFqhBikxUtI2PWpFcZU6rUarU64oAcqin8UxcU6hASKwpdwqOlWqRI+imZp24UAOpKTNDUAGabvprU3eKkoezihXqLeKN9USS7zRueo/No82gCTc9MZnpPNNMaU1ID9z0bnqPcaNxoKJGZ6T56bT1pASU+mUtWSPzSM9NqORqGA/wA2l8+oaFWpAsebR5tR0UBYl30majoouBJvpvm1HTcUXYE3m0m+oqbRdgTebR5tQ0UajJvNpvm1HTc0DsTeaaFc1CrUbjVAWd5pN5qDcaXcakLE3mmmtKaj3mkzRckk800zzTSUUFBvLUb6ZSUASeaaTzajooGO30lJUeaAJM0u+oqKoCXfSb6jpc0ASK9P31DTqAJN9Hm1HS1IhWlNOWU0zaKfigB3mmjeacuypNqUAQ7zT1en7BS7RQBHvrktSUrfXO7/AJ6GuxxXLa8u3VJv9rDfmKmRcNynD91mpW+9+FEeNq8fK1PkURru+9zUmw63UM33f+BVsabCPMKt81ZNr8zblrc0txu2r8zcfNQSeleG4n3Jtr0PT9/lhmXauD83fiuL8Isi2ZZvmZR/Ou1k3rbxJJ8vyBt3tVoxOJ8YXyLeNa/dbBZW9q8Z8RS7pHWvRPHV6FkKW5by/L2pXk+rTebI2372KTLhuZcjfM1N8PsVuNbv/wDn2syi/VuKJG+V2aobXEXg2+l2/vLq5CbvZak2Of8A4ajqaq7VJYVY060fUL63tIf9ZPIEX/Z9/wAKq123w10/fcXOoSfdi/cRfU9aaRMpcsTuoUSKOKKEfu4wFRfYVJvpKRq0OQXeI1Z5DtjUbmb+6BXkmvamdU1Sa8wyxt8sS/3YxwK9K8QWNzqGjzWtjKscz43buNw7ivK7q3ltriaK4gkjZDt8tuq0mbUktyOpVWq/NPjc1Bsy7D+7j2/xVbjcriqMM0e75qtK6St8rfdpiL0b1aX5lWs2SYRx1Yhl3RrTuIuKopzfdqBWqWgRF9lgb70S7v8AZ4NSrbuqho7uZf1FPxRz/FSsnuO7JIftse3b5Nwv/fBala7l3fvLCb/gPz1cs08zPP8As1tWdqZI/l+X+7UuCD2rRy/9p223azLDJ/dk4qzDLBIv+sWuz/syOS33SJG27C7mUGo18H6Pdttks4VZhuZo8oVFT7IPbrqcg0R21E0J9a6xvh/bc/Y7/U7XaN3yyBx6d6qzfD/WYNzWep203+zcQlC34ik6bGq8Wc1JE+37rfNUEmoeVaz2UjtGs8e6KRf+ema2/wDhHfFMeWbTYZtv8UNwh3VQuoLmFWi1LQb9V/iVrZ3H5inG8WN8skWrrxheXd1pz3EenWf2O3MEUdlx5vq7VTZ5JcS3DSNMybvvc8nPNZtvLo1tNuj8uGTPytJn5fbmri31m33biNv91gac5XQU4pO5Nx/DR/FuX1H/AAGpY/KZhtlXbT2tzwuV21iaFdUCyOuxdtKsRZlWGNmZv4Y1JqWOLd/wE1p6a8EXzTIzdN30pxSvZhJtLQy1iRV6/d+98vK0bAzL97/vrIq/qSxSTM8Ksq8N8y9hwKqxqf4k8v8Autt4pPcSb6kW3dJt+9/tbsik8mNV2r96pmULn/ZqPbtbczfu/wD0KkWVbhRGrNsXc1Ube4iuZpYof+WSfM23sK0povNbbINu7+7ToX+w2s6WsW6S5jCPJtxtHtVK3UTbRnbg396o2cLGf9mpJFdVaoNhbC0hHpFrpUrabFF9st7X+z4ooovMbAnuPvEZ9t1cveadZafNKs15e6lIp+b7FCRGpJ6eY9V7i+uZdjQzyL9u2tcKvRpl+UuAemVrO/0xm2yS3MnPzK0hCt7nmuhtKNzCMHcWxmeSzdv3ir5hVFbrgDuaezjarbqnkilk+Zmj6fdVu1R/Z5G+ZRH83+1XOzpRVvPPkuNNijZlWeRt3+1ippsfNt+7V6GK7iX7nyt/d59jg1SkQ7SuGX/ZZaAIlUNVSa4ijkVG+81XFXau2q62ka3gumLM393b3FICRXki+67K392mTTGRW85VZW+9TqqzMPn+lAFO4is1j6yRt91Vqmq/NUkjGVt38NNZfLraOxk9RzU5ajalVttUSLN8u2oWXrUrZb7opPKdl3fw0xkFamg2kcswdvmZc7V7Kazli/vV02ipHCsTRrtVSGahbkydka2hu9pfOknyx3ibl/2ZEHP5rXQeaGrm7yKeWFp7P7ts6um3jcRyBWzbzR3NvHPCV8lwGX5hnmtDAuqwb5G+6wKt9Dwa8rXT5PtU1uv+sikZPm9q9CvNStLKMtcTR7v7isCzVyN19otv+JjdGONrx2ZY6TKpto5rduoo3bmb+7RmszoCkxUt5EIpjEv8Py7v7xqOpA1dFhjvZPIupZI4/wC8vAXtyT0FdZ51n/ZOs/2XDB5jWxt7lo1ITLSKAVQ9PlXk1wMb7ZB83y5+athVZdP1W4zItvhInVeA8hOQD/6EatEONx3hG7VPF2gy3RXy49Qt2fd6CRc03xl5i+NvESyHdJ/aNwrfXzGrBZv+At/DXS+OLgXmt/2vGP3eroLwf7LtxIPwdandmkdDEh+X7v3lpZFHDR/LG347fUGoqdGxX5qRY6MjhJhuX9V+lSQvJbNsjdZoW+by2XI/FKZsRv8AVv23eXJSqkiqy7GVqBEkbbm27I1/2VWtPRZfI1azf+HzArfRuKoW6bYQ+7dup+4qu5f978qpaMzetz0/FNot5fNhjl/voG/MVNitjkIGWkxUslR0AMp2KbRVAFOzTKKAH5pc1HT8UASq9SK+2qyrUqpUgWFmqwt0KpYpaBGgt2PWnrdD+9Waq1Iq0BZGkt6KX7UKoKlP2Cq1JLn2gUjTbvumqmyjyqALfm+9N31Cqe9DIaAJt9JmoNr0nz0BYnzTWaqzM9G40XCxZV6dvqqrGnUXAs76N4qnuNHNTcC5vFM4/vVXo2mi4FjimtioGzTGoAmZaYy1HS0FDsUYpu40UAOxS80ynrigBVZ6mVnoWnVRIZqSNqTipY9m2gQ2oGqyzComxTArSLULKKtyKKgbFQWVZF+aoanmYVWb5qBi0UyigB2KdTVWloAWm8U3NRbTQMkpdwqLaaI1+agCWjFFFAhrVDT2pKBjKZT6jZqQwpKM03NACNRQzUzeKAHU3NGaSmMN9LvFNoxQBIrCnKwqNVpyrSAlpVqOpFoETLRTVpKAJc0/NV80bjQBZWrEf3arrVhWqyR1FFLxUiHqtLSbhRvFAC0ZpNwpu8UAPzR5tM3ijNAEm807eajozQBJvNN3mm0UAKzUyijFIAozRTeKaAdmjNN3CjNAEmaM1HmlzQMfmjNNzTqBC09WplLQA9afTM0uaADmmtUlNagBq07FOWnLTAFWjYako2mmSR7KMVNsNNxRYCPZRipMUlAXZFsFNxU2KbipAj2CjYKkptIobtFJxS01qAG7RSNT6bTAjZqM0/FGKAGc0c0/ijigBnNJUnFJQBHRRRVDCmZp9NoAKKKKACijNGaADFOpmaTfQBJTlWovNNHmmpAlxRiovNo800AWKGYLUG401mNAFjeKVXFVM07NAFnfQstV80M1AFjzawte+a+D/wAXlj+eDWpmszVmPmQt/sFaT2HD4jPh/ipVy2760Qr+7ZajZvmT/aNQdCLEbbV+UVtaHlrwMzfdIb/drFjY7j/481b/AIdUNMu7dtb8OaEZy2PW/DreXb2nG3fn5f7vHOa3NeuxHHHyyx8Ku5funqTWXoqJ9jtlk+bYP7wo8USpLHFEu3qG3ey1Zlc858cSv50q7VVVrza+xu3V1/ii6Ml1I7H1VvwrjLrG7atSzWCKeoOFsZm9qNexBoOg2anduiM8v+yWeotUUyRwW8f3p3VaZ4wdF16W3tzuhtgIFb+9tGKRpuzEZqhapGrofA+k2+q3V619H5lvHHt2+7enuKRTdldnNKrSMqRjdIx2ov8AeJ4r2TRbEaXpNtZr/wAsk+Zv7znk1g6D4WTS9We7kmFwsX/Ht8vPPUt710zPVqJz1JX0Q7NJmo99J5oqjMlZqoapp1pqiqt9HuaP7kith1/EVa30UrFJtHE6x4XSyt57qO6jkt1G5lmXB9MA1zaxRyL8v/fNdF461B57hLKH/UxHc/8AtP8A/Wrmbdvvt/dQ1DN43tqSNEjbVVvLb+81DQyR/dDMtIrBvvf8CpFeWNj5Mu3j3+YdKRY2NJ2mXaJG5rSjuN27cu3n7tQR3ZaNorpJNrdfLbIq5ClnKsSNc7ZP+eki4OOgBoJLEcyfd3VZjpzeHJ2heWxnt7pVHzLG3NUZLe/sm2zQtHJH96qEay/Kvzfe/hoVxGzbl+bG6sddSljysiL13elXbXUIJW+Zmjbj71AHQ6fF5jfMf91ePlFdFYqkcfzfdrF0fy/L2q9dFZon7pWG5VzTRjI1bFHlaJNreWpDVt2sKbX+X/arIs5QzMi/w4WtuxQt/s0zIsxxGSYNj93mtFrRGjZWFOt4v4ttXFoKMltNH2pZV+Vvu1Yjt3WtNVH8RpOGV2U0DMmaxt7lWWaCGTd/z0hQjrWNeeCvD9zlJtGsPm/55whK6xkC1Gyld3+zijQLs84uvhj4aWYxQ29zC3/TG4Iqna/CKOX5YdZ1ONf4fmBr0e4tHWZWX5pGcr/vADOK0dJQRfZoI18tV+aWP+9kdKTimNTkjyK4+E+twbvseuRzf7Nxbf4VnzfDrxrA26OPTLr/AHZjH/OvoiO3G4N8u3nc3er6wD7v0/WpcEWqkkfLM3hTxvG37zSVbj7y3INRf2L4sjm23Gg6izL/ABR7Hr6nktfMZlYbqhmiddqwhVjXP0Y0eyiX7aR8u/2P4pb73hnU23H/AJ4iqt1Za7bSbLjRLuGTP3ZlAr6WWUwWf2phtkkzuX+6BXA+MIjPJ/6E38WO9HskT7eR5Mui+IbmPf5EC7huVmkzu+gFRN4a1XnzrxdzY2+THn+dekzLH5MyZXzGH+rXooXjH/stUJkkWQsytu4X0+8KPZRF7aR53J4dCtGkl9cySN823gdKp3WnosjfvJ5G+7uaSuuuGEcz/wAP8S/hWHcMdx2/daiyKU2ZtvFGsMlnv8lpHDxSs3CSd8n3WpLi5tJIxFZ2XmKn/LVpChf6AdqhkTdHs27tv8jUkaFV+73p2Q9blGSJ5P4/L/3ar/Yj/wA/E27/AGWrWaL5tzVBJSsirszmt52kbbNN/wABY03bebtq3c3/AH0TWlt2/wAO2m7A1Fkx3ZS+16hEuzMcka/7NH9rSr/rrZW/h+9irmKjkiHpU8iHzMgXVYN37xJFqK6mSf5YW/2manzJAq/Nt3VHztfam2p5EPnY1V2rUTONp43VYhsridmaNGb/AGugzS/Z7ayUNeT7pG+byo1zV2JKSo8n+rXdUv2KRYWeYrCv96SpLrVTKsqWcMdrC2Pu8vx2zWe3zNuYszf3mY5oBJlua9jVdsKbudys3pVPznZtzN/tbe1I33aZuG1VpDNS3UyyDb/FXQ26hf8AdWuf0dhG22Qbf7v+IrcjI+9VoiRaVts0KqfL3Ha3pjFZfhXUfDVtbyr4k02S+4Kp5M3lupz1zUN48lzcJa25/fSnyE/HgmuyhsLSKFIltodqDbu8sZbFMzehyd5faZPebfDumzKrfdVcu2fqauw+GpL23mfUpmhkYFool6RH/arp40SKNljRY1/6ZrinU7CcjzG+0fULL5ri1k2/3o/nT9KorXrisV+6zLXBeNrE22sLdKP3N2N34jg1MomsJ3epkXC+YqS/L8w2t9VqtU8biP5ZAzRsRuXd97FQM26Qt93/AGV6LWRoT2ezzvNk+6gL/wC02KsxzyP4fmt2f7kwn/3qz4/larel4W8VJvljb5GqhrYo4resi2oeHbi1yzTWBN1CvrGf9YAPb5HrFki8uR03fNGSv5VY0u9k0vUba7h2tJE+7a33WHdD7GgCH7y/+hUtbfiXRUsPs+oacS+k3+5rZz/A38UL+jJWGrUFDqnji81tkf3VTdUSttb7u6taxtHtlDt/rGG5v9mhCbsRzRbdqx/6tgGRahq1dKIpGi/u/PFVZvvf7LUzM7/wrL5/h202/eTMX+1lTitWua+HtwPst7b/ANyRZV+hFdRmtFsc8tGMZN1QMu2rSvWffX1taN/pVxDH/s7uW+iCmSS0Km6s7+0Z5IXntdPna1X79zcsIIVH49a0LW7iubdJ7fc0L/dZlxu7cChMdmhWTbSYpWcUbxQIFWhlo3CjNACrUitUVPVqAJVpc03cKOKBEitTlY1DUitQBYVqdmos0+mAu40u401akpAG+jfRTaNQ0Bnpu+hqjouwBnNM30rU2gB2aM0lFAAzUm40NTKAHq5p2aipKAJs0ZqKkoAmzRuFRUUAPZqN9MpKLASK1OqFalWgB+aVXNMp60AP30bzRt3UuwUXAj3mkZzTmSo2WgBrMf71QTManZajZaBlRs0zmrDLUbUAJS0lFAxc07NNoWqEJR92lprNUjFVhUislV809aALHyU1tlR0ZoEP2io2QUtJmgYzyhUTJU++o2akMj8qmbKezVG2aAGslN8oUrMf71M3GgY7ZRspuafmgNRmKdsNLmjNArsFWjFLmjNAagtSLSKwqVWoAFpGWpM+1IzUAR4opaKAJVzUisaSlpkhuNG407NGaoBdxo3GkxRipAdRSUUALmnbjTKKAJVen76ixTlqgJM0ZpMUuKkQ3fTd9SbBSbEoAZmkqTalM4qhiYoxS5pM0APopm+lVqkB9PqHNOV6BEirTqi30u+gCZVNLiot5o82gCwq0qpUW80u80Iklp9RZpc1VwJ1pdwqLNNoET5pM0ykzQA6mtRmms1ABRmm0UDQtRs1GajZqkofmio80b6AJKZmkZxUe4UDJN9DNUO8UbxQA/NGajZqZmgCbNNzUe40ZoAfmjNR0UASZozUdFAEtFR0VQD80cUykqQHtimUUUAFJRRigAzRmnUUAFOptOoAbRUirRQA3FFOpM1QDNpqjrCfuUb/AG9v51o5qnqnzWf/AAMVL2HHcyFY+TUMePM+b1qwy7reoYV3fNtrM6CeH7tdT4bQSSL/ALP5LXLcR42+1dT4VYtJsX/d/wB4mhGctj1jSYn+xyK3lt5nzbWb7o6YFU/EDRx6efm+Zc/RauabiO1haaWNWxt/dqXf6k1z2veZHG7fw1ZieX+JHdbiRty7WJ/4FXMSS7mZdtb+sOPOlXd935v941ze3bM1SzeOwWKC58RWytu8uBGnb/ZCisS8mM9xJK38TmtrS3Eba5cbv3iWyxL/ALW98Vzq/dqWaIjavSvANl9m8OpL/FcyGX8BwK822PKyxR/echF/HivabeFLS3htY/uwRhFX/dpxJrOysLTNhqamZrQ5iJlqNlqVqjagYyodQmMFjPKrfMqfL9TU1ZfiaULYxJu/1so/SgaWpyUyCVmZqjWyC27L/eO2reypltzthX7qtlqg3MW6sjEzKq/d+7Vb7Oa35kKttbbuWkWEM3zCk0CkYawybqfcKdyq3y7a6K3tUkkXbGrbap3ll8v3du7DUWHzIx7eaSKTfDJJG396NsVsWfijU4v9c8d1xt/0hefwIrOa0NRtaSLRqGjOjbxBpd3JCuoab9njX5XeFt9WodM0e+3Npt+rTb9vlScGuThty3ys22nyW7xrv29/lkX+GgLHf2vgq/aMLbzR/aG+7Gs3pzk+lNa18T6arvIkkkON3mbRImPYjtXE6fr2p6bM72N5JGzfe3c1s2PjPUILVbNflhX7scbZRad0TZm/pfjK7tmZb60WRV+bdG2C1dlofj7RNqNcefayY3NHMprhdP8AFtnczRJeW0G5dvzNGE3YrqLNPD+u6oy3FtBarKN22FuF9CDzTM5RR6NoOtW+rSO1rJHN0/1bcLn0roIVLSKrV5DceArCO6kl03V5IZogGbqOPbFaUOq+MdA+aZV1yz/3cPz7imQtT1Nvmyvttpiodq8Vx+l/EPQ7tVivDNpd42N0VyuB+ddtavFPGr280M0bD5ZI5ARQBl3U0nmFFhmZW/5aLxspY7ULvWF5GkX5FaRi/BOc1q3X7vyWZu7bt3pVWR0j3JH8zSEt/u5oEMmULMrL/wAs81Yt2SeQMqyL02ydN2Kr7ysbMy/epbWxLTPLJJtXIby1/izwTQBvWsxkZ13bdtdDp80UbN5ir/s1yFvbxx3nmxsu5x75rct8yf72RtoKuadxNaeWzSLuZs/u6yLhRcqFkVV3YZFqa4Qxxll3fL/dxmnQzbo5G8maNlHzeYvYjgigDmtWiKyblG1eE9smuM1xvlVmXb/Dur0SaF7lWZj97/x3JxXBeLkC6gkEf3XO3bQSzm5LSBvs7yNt4O6T6dj9ar6k7uszY2rjd6DGcVqXluGtxtO1v8is66fy43Vn8xpUXd8vGe5FAI5W8tN256xZrcL95t3O6ul1BnVfl9QtYF1nbvjFItGVtTzvl+9soX7tTzRbfm2/eqNV+X5vu0iyCT5m3VE0W6Tb7VdZB/s1EzJGu6Tau3PzUDuVLhkbbt/4FSbCsau1K3mMztCN38XzfxCtTSdJN2ytdN+7X70a0DbsYE0oVSy/NtqGO3u7n5WRlZvw4rqNS1DRtPZoPKhbaSu2P5y/+FY+teLZLuZ2sbOO3X+9Jy+KBq72GQ6PFB815Jt43L81H9sWFpGFhtFmkxtbuK5yaWSeTfM7SM396kVaVx2vuXdQ1a8u9q7/AC4VH+rjyFrOXC1Iy0qxFt3+zU3bK0Q1aXYW+6tSwwnzBWo0Ajx/tJuoC5jyRGNqI9Ou547iWGFpI4Mb2XnryKv3CblNbnhGbbHNBu+bh1+o4ppEtmDoWoWcb/Z9Whe4sT93y2w8R9VParUkMC/Nb38lxC2G2tGQc+lbGseHIr5jLassNw33vl+R/rWPZ+F71rjZePHDD/FtkzuHoKqzJunqafhe1MjPfsm1WGy3X+6O5rod5pixCKNUj+WNRtVf7uOKKozbuyRXqTfUKruqwqbaCRqvUWr2a6rpc1p8vmfeib+7IOlWMUqr81AXszyKRJFYpMjRsp2ncv3exBpOK9fuY4rq0mt7oboZRh68o1C0ksb6a1mO5kP3v7w7EVDVjojNMgp7Z2h6ZUkP8S/wtUmuxLqS7mt7hfuzoG/FetVatR5k0+WJv9ZA+9fp3qnQI6fwl4lGkQ3WnahZrqeiXeGuLNn2YI6So/8AyzkFQ6pY6CyGbRdalWE9Le/gKTIM46plTWFHU8cLszLQ1dhexqafFbQN5sMjXG35fN2lAv0Bq60obbUOlp8sy/wx4b+lLcPHFufNNKxDd2MuMtHu+XdF/I1RkXa21fTcje1bNloupXMa3TRw2djJ92e/mFuj+655P/AVqO4stGsflk1CTVplG9Y7KPy41PoZG5/JaZNyPwbfRWmtSLNKscMsRX8RyM4rpLrxNbRNttbdpP7rNwPwH3q5ZpZWXbi20234byo1Idv5kmqsksUcjsq/aP8AeyiN2GBT6Byq5qX2v3F2rosszcfdhYRp+mSay42uGj274bWNjt/uc+/eovtUjLt37Vxtby1xVdvvbv4qltjSLlvCb26hsvPkmWSXasW44Vz1evSVRI1CR/KsY2rXG+BbTzL65umH+qTYv1euyariZVHrYbimYqSimQMWn0UuKYCc0UUtAg3GnbjTVpKAJFc0vm1HRVATrLUiymqy1Iv3qkCx5tL5xqKigCbz6PPqGigRI0tNaWm01qBjt9M30ykagCTfRvqLNGaAJd9G+os03eKAJt9N3mm7xS7hQA/fRmmbhRxQA/fRuNRrS7hQAu40bjRuFG4UAPVqnVqrqwqVZRtoAkp61GrinbxQInWlqLzRUnmigBaikWpPNSopJRQAyko3Cm7xQBGy1Ey1Ozio9wqhjNlGKfRQAyjFLSVICYpjLUlR0DGYpy0tCrSAMUNUqrSMlMRHUdS4o2ikO5DTGap2So2SgCCkqZloWKgZDimYqwy1HigCKlpaKAuxMUYp9FADMUtOooAVakVqYuKetAD6buFGKjagCTcKM1FRQBcpaizS5poRJRTc0bjRcCTilqOloFYfS5qKigCTNLuFRU+qAlVxS7hUSrS1IE240u41Eq1JVCF3GmVJTsVIEGKMVKyim4oAjxTWWpqbVDG0UuKWgBtFOooAdS0lOqQG0tCrT6GJirT1amUUASZozSUq0IA3GlVqKdQAtFHFJuFAC0xmNDOKjZjQA7eaY0ppaSgYxnpM0MtFACU2n0UARYoxUlFUBDihamoqQIaKmooAhoxU1FAEeKbipqKAI1WnYp1FADcUYp1FUBDijFTUVIEOKcq1JiigCPFGKkpaAI1WlxT8UuKAI8U5Vp2KdQBHRUlMoEMpMU+m5qhjdlV75N1nL9Kss1V7pt1rN9KhgtzD53bd3y0+3QbW+tCr8rfeohyq7qg6Og5V/eNXV+F1Md4kqhfL+8re9ctbp5jbc123hGIfaI/M+7TRDPRLXyIoz88klwwDtFtJ4HQj0FYfih38v7rR7k+638Ndlp7lo0WZVZmQv8vG0DpXG+LsyXFztfavlj9RVGLPHdcxulWP121iR58zbitvxIu26dofutIWrEhb5XqWdMditbuF0vV/+mkipu/3RWLWtN8vh+Vv+ety36Vk1LLRreC7cXfiizVl3LHmVl/3RmvVcVwHwxt92pX9x/zxiCL+Jr0TFXHY56z1I8U1kqakZaZmVmSocVbb7tQYpgR4rmvFD7r6CJfuxx7vxaur2/MK4zVpRPqU3+0+38F4pPYuO5XVPlovMt5K7v8AVxip7VPMmRNyr/e/2ahuHDMdv3chfwFIsj27lFTqlMj+Zv3f3atrEWX5aQElmnmSddtQXi/vn/2fl/WtbR4v3wVtrcBtrdGxzg1m3HzSP/tUElJof9mhrcba0YVTa/mDdyKnxZbf30clBV7GEtuNpSrEmn+XZtLldrHYqr1b1zWrHaW0u5vN27QN25e/tUmuaO+n2NvLHMsnnoGosHPqcU1lR9iK1qqh3fNUrRBvlVaRfMYUkLx/w7qkt2kiYNCZI9v91iK3Ft0+9SNaH/eZjQF0yWz8Ya3FGqSXHnR/9NFx+orpfD/xLntpJVvE27wF9q46bT3b5lT5VO2ol06SWRUh2+Z/zzouxWie+6bfeHvE9iC32C8kwN+1h8x9gajsfCOnR7pfDuo3+lzMflkt249wRXg9rbxrcbG8xZlPySRtjpWxpPjvxBpEwS3vvtUMf3VucPVXuZuD6HskkvjDSfO+2JFrUKpt82NvJnbn06Gp9P8AGelzyC3vhNptxJ8rR3a7B9N/SuN0n4vRSQyrqlhJHJJ92VW3hTXXWfiPw/rdiyTXFldKyfPFuBpkNPqjrbG+tNyN5itt+624Vu27wfZyu/c0iH+HH415MvhXSrld+j6jPpM0h2+XGx2Y9MVo7vGHh+TddWcGrWaHb5ltIPMX3IoDQ9UhhEjfKtT7njjdY2+7XEeFfGWj6pcNBDc+TeMd32S4yki7fY12812EV4mDfN8rbVoGR2t2Zfkk/wB35uKuxy7YVRf91lqGOKO5bZCqrS8NvRW+VT96gCvN80b+Wv3q828aMVvo3Xczb/u/3snHFejSROyt81cNrVoV1ZrqT70YKRL/AHd3VzQSzGmiKw+U33lG1v8AZNYl4o8yFI/vZO1f7xxmulki+X5vXdXK3EsceuSox+WQRt7J2JoBGXdRbmKSfLtrDuIdsnynctbmpXQW3dmPfatc/HLc6hqH2fTYZLi4xt9l+ppFojuIkX5vl+b+96Vl3FxFGzbfm3fdWta40crNNBqF5tuFx+6gwRk+9JdNYWUO5ngt42Tayt1fj+Z7UFGQtvcy7FZlh/i8teXrWtdMMUcV1JHHCrZ/0m4bG0Dnknp9KxLzxXFE0S6TaLujjC+bcLndxjOK5i+1C7vpP9OuZLj/AGWbhfoKVy1Fs6vUta0uKZ2t/MvpGJ2/NhFxxye4rn9Q1q/vY9kly0cP8MUOUSs/a7fw1LDallpXKskVlUUKprQjtdtTrCFpDuZKoauQ2pZatLCP4aLWUeY6fxLRYLldbcK25qsqiLubbVnbHubbuZaXyj6dqdhXK0iFf4e9WNpls2+X7p2/hRIu2rel+W0j28h2rKAqM2Au8dM0CbsZbQhVP93NGj3X2HUN7btrZ/wIq/MhViki1l31uV3MrfMuGpgd0uP4W3Lj5WorH8N33n2aRN8rKPl/qK1qaMmOam0U2mImt/vVYxVNfvVKsppiLCrT8VCrmnbzQIK838XTGTxFcru3eRiJfwrude1MaXpslwv+u+7Ev94mvLtxZnZm3Mx3NUSNaa6hQtNp1SjoRc09wt5G0n3ZPkf8apzRGKaVG+8hKt+BxTlqxcYu283dtmbCuv8Ae96TBlWNzGytW7av5UkVx/DGRWR9n2x7pm2/3Y1rQ0mXcpi/u00SzrvEmmf8I34oRZG3WN3biVZVXIeFxg4osdSttP2toOiQzXWfl1DU/wB4V9whwiVs6tjXfhXZ3DfNqXhy4Fq/+3ay/c/Jq4K6mnZWWSZmj/u7qozRLq13Jd3j3GsXM2pXmPl/fb09xvqs17Kvy2qx26/3o1G9u2C561TVT8zNtVefmZq2bbwxrF1bpKtm0NvL8wluZFgRvf58UitEYa4pkjBcfNXTNpOl6ftbUtTW8uGHFtp2dufRpmq/Dqv2Zl/svRtNseAvmtDvLfV5KLBc5TT9PvdSk2afZz3H+1DGSPzrUbwpert+2PZWf+zNcjev1QVYvLq4nUpfa2ske/5ordi/6JgVmRtZqzbo55F+6rLiOgLst6b9isZo2W71Ga4YhVW3URpk+pNdwy/NXD+H7X7dqS7k2rARLu3ZruGb5t1UjGbVxlFLSVRIUUUtUISn5plFAC0UlFAC0UlFAElFMoqQJlanZqOnUASUtMp1AC0lLRQISo2pzVG1AxtMpJMrVfe9DGiZqjpu803eaQx9G40zNGaYD8n1o3mmUUgH7zR5pqPcKM0AS+aaPNNRULQBYWWnrLUFKrbaALStS76qbzRvLUCsW/NoWaqeaM0wsXPtFMaaq2aYzUgLTTUz7RVamUwsWfPo+0VVZxTPNoHYu+fUi3FZ3m+9Kr0AzS85Kb5oqlvo30AXfOFO80VQzT80CLquKVWFUs1Ir0gLqsFoZxVXzTRvNO4E1GareaaPNNAFmkqt5po800ATYoaofNNN800hj2qKl30UAJRRRQAUUU2gB1FFFADo6mqBafQBJUbUNTMUAFFFFAFjFCrUlLTATFGKXNFBI7FNxRmjNUAYp2KbmjNSA+l2io80ZoESU77tQ0VQydWpc1FSrUgTK1LuNRLTqoB240zcaWm0ALuNG40yigB60+mLQtAD803NFFSA6ijFFAC0K1LijFAaD6KFWlxQISloxTlWgBc0tGKdikBHTakxTcUANop2KKYDaSntTaAG01qGpKAEpm80rNUdAx280qsaZT81QBuNG40lKtACrmjmjcKKACnUUUAFLSUzNAElJTc0maAFozTWooAdmjNR0VIEm+nbhUNFAE24UbhUNFAE2aVWqNaWgB9Lmm0UALSUtFAhlFPoxVDI8VBcD/R5vpVvFR3Hywy/7hqWC3Ockwq7V/i+an/8s12/8ComX7v+1ihW2rtX7tZnQFu5Va7jwKsktxtx+7XFcfZoGk/9mr0Twb+6ZNv+6tNbmcj0XbKlncT43LsCp5a5PAxXDeJoEgheJW8uNkCpu/ka9ItWf7Ls/irz/wAdOY1dv4lxVGTPKPEShd38TY+971zfKq7+1b2rSmSRmrEm/wBTNUs3jsZ99+78M6du/wCWskrr9N9Y7Vq6xldJ0RP7tuX/ADdjWSzVDNUeifDK326LdTsPmluNq/RBXYVi+Cbf7N4T09f76GX/AL6NbdbJaHJJ3kJRS0VRBBIvy1FirLVCy1JRBdSiC3knb+BC1cEyn7Qd33uN1dV4suBFpLL/ABSuFrlrVNzFppNu0b2Zv4gOeKlmkBZpTFD8v3npqsdu2oWfzJpX9wtWI4j81Iont0FWY18vdRDEFh/DdtqxbxfaWZVeNdo3fM1AmWLd/IjeVvl3Dbt/vCs1m3MzUt1M8vy7qIYhQIkjQ7R/tU9lKtViPy4vmV/MbO1V/u1JZ2qT72mnhhVf7zctQBZ0PSn1C4S1hkVZG3OzN0XHrUfiS7uZY4YrqZZFVNqsvtwTXR+GbKJbi4aa4tpPNT/WK3KjOf8A0Fa4vWLqO7vHWN1+XKq30qiE7yKcbvJt3elWVTbUccSbgytu/vVZVP51JY3ZVr7K63WzHyp8vtnHNJCm2T/dG6rNu3lx9fmxQIhWFGWRm9v+AjqeKjaxRm32+6GRU3blbjHrmtmzsTfxy+SFjZPmZmb+AUWN7Ppt5FdWaLMqxbmWaPIb1FMSZzE2n/6D/rI/O8wfLJwcdcis6S0fc67VbdXV+INTj1K+aeG2W1VgFVV4qgqJI3yj+D5qC1JnMXFrJu+78uPmWoZIZIGH3tzANuVvu11TWiSK7fL0FV7fTPtMnVdyjcu7gYXnmkWpIo6f4j1Wx2qtw0y/885ua7Hw78S7iymRrrztq/dj3b0rjJrJ2bdt27v9mobi1kjhZWj+X+9RdhyxZ7jDr3h7xfDDFrWnWl1M3yLc2/EiBemDWva6bqNjGP8AhE/GcjQxHY1nqaiaP86+a4VeJfNjMkcn95eGrS0nxXrGnyIy3LTRqd2yanchwfQ+lF8VeINJ2vrmhtcQt8v2nSphJ+lbGi+O9D1BVis71fO/55TL5cn5GvEdD+LSLMn2yC7tWYlWkt23pXQab4m0rxRqSW+tLYX1rJJtt5YYwJpzjiNu6CndE2a3PWrHXrDUI3a3u1m8tyjbeVyOorC8RX1uszNvWuUbw9dxTN/wjureT/043K5RPpVK60zXFkZ9Ui0yFlO7z5LjzEX6RigVi5fa9G27y22xr/y0ZsItYkkWoX0Pnw26w27/ACrc3beXH/iaRb6ztI3bT7SG8uFA36pf4xF7xg/KlcZrnjKzaR/OebWJs/8APTy7ZaTY1Fs2JJbC2uF+2XM2pMpO3avlwKfQA9ara94mSys/KjkhtWkxutoVztx64rhNW1u/1SRftEixxqPkjhXYi1m/7vy0rmqhpqbmoeJryfctv+5j/wBr53z0zz0rDbfKxeRmkb+82TUqwuzVchtz91m+XO6kUrIz1hdqn+yFWHHy1oLFTmTatAXI7eyHkptXc33mqx9nRVG30DfnVrR0glukS48zyWPzNHU19EIpFWNfl42/yp2JuZrRHctMZRVyRag8qgdyv5X901FHaBrhW3t1+b/aq4ybV+ZqZGhb5qAuaEnkRKq2sLL/AHmZs7uKpyMW27ju4q1bsGVl+VabIg3UEFZV/vUMvy/LUuKOP4dtBVyx5326FfM+a+iG3/rqg/rVOSLdu3D5sUm0o29W2tn5auRzJdsqsu2bPzN2fNAGOvmafdLPH93htv8AdNdbbzJLDHLH92QbqwryIeZIv8K0aHcfZJvscjfuZD+6/wBl/SmiXqdBRRijFMgKFakooAlVqkVvmVajWsrxVqX9n6aUjb/Sp8om3qo7mhuwWucv4q1P7dqTrG261gyif7R7msfNKq7VpMVk3c6krC0lOVCys33V/VvpRIybvlTav3fmblqEAU5XK/7uajpaCris9WNPm8q6i3fd+61V44nlbbGtaWn2UEkhWbdJtG54422Jj3ehEs9K+HNxaR+IF07VNraXrMBsZvqfuH8GrJh8I7vHn/CNaxctp+2YxNOsO8+qAe7Viae4khMUcqtJE+1ZV56dCK9F+JTjX/Dfh3xlajbdMgs75lb7k6VZg7pkV1otv4Xm3WtpZWsiv8l5qLCadcdCEPT/AICtchr2oR30jz3V9d311/eZcDHtuqtaskm5pD5kjHc0knVvrmn3UUbYVdv935aBpNO7Mv7VJHJut1hh/usq5Kj6mq+3zdzSFmZv4mbNWLiIx/e+VWG2qnK0ix6rtbbRIvytSq26lVDLJFFH96Rwv5mgDqPC9obbTd7f6y5If/dHathmqNcL8q/wjatDVa2Od6sdml3CoKKYE+8UZHrUFOouBLvFJmo6bikBPRUGaM0ATq1FRZpytTAfSrSUq1QiRakWolqVaAHU5aSipEFKy02hmoAMU3FGaTfQMRkFVWiG6rDPUTNQMgZKbilkzUdIaEptOplAC0maKSgYu4Um8VG1R0AWd4oWWq1LtNAFnzaPNqtzRuNAFnfRvqtuNG40AWd9OV6rq1OV6BE+aSo80uaAFamtS5ooGiJlpmKnprLTAi2mlxUlOxQBHSrT6bigBM0b6RqZigCXfS+cKhxQy0gLPm05Zao0ZoCxe3ijNU95oVytAWLWaTNRq4alzQBJRuFR5pu8UCJqfVbzRTlegCeio99LmgB9FMzRmgB1FGaM0ALUitUWaM0ATYpuKbvNG80AOxTaM0lAFmnLS0UxBQtLSUCCiiigAoopaoBKKWnYoAbin0tFSAlSKtMp61QC4oop1SA2kxT6KoCGjFSU2pAFp1R0UATUVHvpd4oAfS1FmjfQBZ3CjcKqK9CuaALe+jfVbeaN5oAtZp2ar5ozQBZVqfmqqsaermgRLSZqPNGaAH01qSigAzSU3FJQAUxqdTWqhkdFPxRigBlFPxS4qQI6eq0uKdVAMpadRQAUUUVIBRRRQAUUUVQBTadRQA3FGKmzTc1IEeynYp2aM0CG4oxTs0UDG07FPxRmgBMUU6koASilooEJS0cUcUAFQXyFrG4VTtZkqxUVw3+izf7hoGcxdOWt4mX+FA1Irfu/lXdUm0fu933fLqJUKsdp+X+7WZ0F2zcMwb+Fq73wvMfMiWvPYcr8y12Xhe4fzERfvMRTRnM9is/3lr8rsu4fK3da4nx0vmM7M/3QF/3jXTWN0Vs1+9uYD94vNcb4su9qv5nrVGR5bqzeVld3aufun228/wAtaWuTGWZtqLWPdYXT7nd/EKg3jsN8SKFt9ET7zLp8TfnWBN/qX+lbvij5bq1Vf4bOL+VYTfNhf7x2/nxUmq2PbdNQxabZp/dgjX9KtU2NNqhP7oC09VrdbHGwop+KbTuSNaoWWp6ivLiKytZrq4/1MQ3N/te1SUcj4ylEl5bW6/ejQu/49K5+8yu2BR8zHc7f3farF5dvLJJeXn+uncfL/IfQVWWI/K7PuZvmaoNkrIWFDHIzba1o/L8lmZm87ZVSFd2N1WF/vUA2Tr935aWRkih/2m+X/dohxz5jbVWotxkk3tQSMX/x6rEbfxLUeD6VPHQA6GUrIrbVbaf4qv6agubzarxwtzt3LkNWdiugtbGCy0P7ReRTfanKusf9637mmS2a2vXsnh3RY7doLBbq+t9q+TyUj9c+prz5YfLUvtb5j81XdUvTqWoPcMv7tQEij/uoKh2nb8tDCKsgX5m/drVld9V7X5fmz8taaudu3b83G2kUMhR23bvT5tv8I9zVnyXik/vbMbW4p0eF2LHu287m/v1ZW+/0V4MRtHIQ3+3wcZPuFpohlvTZf3kSb5I42cI/cSjPFb3iC4+yfaWa1ZvNk8hJI1Cbio9OgrBW6jgXcy7ZIpd26FsFDjjArJvtYublTB9pkZVO5fmpiszPmA+8q7V+7T4WEeP/AB2p4Yka3V/Mbzvu+Wq/jzSqo3Rr/wBMx97ouaRYzdHyyqu3jd/s/ganhSNYZl+VpGcKsi+3p9als1e5ungWNV83O35vkXBzQtuZVEqxKskRHmqrYDfh1yaBXGzaeZZkWNWbYn3VqPVPDVzB5HmeTHHP8vmbvkU+hNaVig+V5j5Nmp27mbB54xUniS3gvtHW3tbi5uLWN/NeRWGW4zgUCTdzitQsbdbqaJbhZlX+KP1rCaI/Oqo3/fPCiui0m1ge6V47Ruu3dM3C4rW1K1MSr5iQfMSzbeijqATUnQjz9pRFGysFqnu2yF/4q6S+e2kXbIsbbf7vNZrRRSSfLD2NIsk0HxRq+lalHeW9000yZ2+f+8ro9U+JGoXtn5Ullaed/FK2SOf9iuStYTufd8rLiljh3NLu9aLsTUXuM1TVLzVmT+0LqWZV+4jfcT6IMVW3hattbptb5altWgVm3RMv+70ouylYrQo8v+r+atHT9PuJLiPzkjjt1O523ZfHsKf5Vptd/lanLF5caOsMjM3zL16UEstNbosjbfu5oqrZtqDSK1jbTMy/3Vztro2tIo9JhlupI1vGyrxL7cAnNNEN2MeNalWIN/DU6oNu6nrimRcgjXy23L61dhlSWPbJ/rFPyyUjRHbv8ttrfxdm+lM4j3bl3LQJkkkW35W2/wCeahkiC4bPb+dXI5Uj2RSbZlYfejb7tTXWnyLC7/Kqqf7wzQFzCaIUxV/hzVyZI1X5W3f8BOKpyL81BVxGx6/NVyPEq/L95R826qWymM5Vl2sy7f7tBRd2bWZaiYCNmq3Z3UUyqk3+s/D5qdeWpi2StFGqygMvzZPXHNBGzM6RaiVgrFmDdKstUTL/ABUFjmlFzHt27ZF+Z1qnNF5i7f4v/QTmiQlW+X5f7tTwslzH+7XbMudyf3vcUAbGm3X2m3+b/XJ8sv8Ate/0NXa5uGZ7abzY9rcfMvZq3reVJ4xLGflamQ9CWlpKWmSP3BVLsdqqNzN24rzfWr46pqUtx/DwqL/dSuk8ZagYrdLKE/NKN0rf7GelclCvy7v4VqGzamrasPur/tVHu+ajduZmoqTQN3zUU2pliC/NMdq4+73agBsaPI21V3U9okX7z+ZIp27V6L+NPklG3ZGu2P8Au/3vrUFAFhZkjXavzf7PRajkuHlXaxXb/dXGPxqOhVoQGro8vkXSfN8rna3+ye1ev/DfOqWuveFZP9XqdubmFW/57x141p8XmNtb+IV3Ph3U7rTLyy1S1LfbrGZZR6ts6j8Vq0ZTRnNayQXTxTLtZDtqOZnjkZv73/jwr0b4xaPbx3GneKdF+bR9aHmxN/dfrsNeezKWVW/hWgSdyhcSmSFkZ9yqaz1y351PNL8zrtplr91qCwjXdurT0GHzNWh/uxDfVGNerVueGU2/a5fcJQhPRG3ijFGaSqMAopuaM0DHUUzNGaAH0VHvNLvNABijFGaM0AKq09VpFelVqACpaarbqWmIWnq1MWn4qhD80u41Gqmn7TQAZpuadtNMagAzSM1NZaSgAqORqkqCSpGI1RtStTaQxtJRRQMSmZoqNqYwZqZmkooAfS5qOpI6QCUVJimYoASlxS09VoAjxRT8UUwG5pytQ1NoBklFItLSEFOptOoAKFoooEx1GKKdQAzFJsFSUUAR4pjLU9RtQMrstMqfFM2UxkdGKlxRigCKlzT8UKtADKa1SstR0CGb6N5oxTcUgJPNpd5qLFGaAJd5pd5/vVXp2KAJvN96PN96hxTaALaymlWWqvNHNAFzzaVZd1VFenZoAuZp1UtxqRXK0Aa+KKdRTJCijFFUIKKKKAChWop2KADNGaMUYqQDNLSYpaAClzSLS0ASK1FItPqgCiilqQI2plSNUdABTWalooARaWiigAopaKAEop9CrQAynqtO2inYoAFWnYpyrTqBCKtLinqtPxQBDiipsU3FAEdFPxSMtADajxT6KAGYptS0jLQBHiipMUygYlFFFUAUUUVIC0+o6KBDs0lJRQAtJRRQMKKbmnUALSUUUAFFFFABRS0lABRRRVAOVqM02ipAdmjNNzRmgRIrUVHmigCSimZozQBJUd1/x7zf7hpVaorpv9Hm/wBw0MFuc5J821W/uUL/AHvamyOOd38NNj+ZW27laszq6Fu1UK3y+u6t3Q5S0y87eR7bq56Fj5i/N8v/AKFzxW7pcO2SJGdV5DbvamZyPVIbiRbeFI4PM3J821sbRWH4ut7iexfbCy7gG8voaxm+Isem/uIbBbiHG3duKP8AhUd18U9Ka1RJNKv2mUH7zCndGfK2eeaknlzS7h8q/LWPqDj+y5/xrf1zxFpd7/qYbmFmJ+Vo+1cxePBLavFbybpJTt+76mpujdXsO8Wf8hbb/dgiX8krMs0M2oWsX96WNf1rR8TPHLrV01u6tCpCqy9OBiq3h1TJ4i0xf4ftC/oc0ralfZPaJG/eP9aKrtKPmahZhWpyFuiqn2imfaKALlcd4s1D7TcLax/8e9s+52/vSe30rV1rUzaWp8sr50mVT0X1euJhlik+8dyr935uWPTJpNlxj1IeZZt8g+VfuLU8YCrT/NPlsqxLtq9ZrZy/NNM1vuHyqq1JoyJVKqafGpalkhCzbIZVk/2qJJfs1uyqfmkoJI5n3fJH8y1JG26orfG3a1XIbWVvlWKRv7u1fvfSgLgvzNt/u1NbqPMLSHbVv+xdQihd5rfy9o/5aNjdmrLaDfxQq/7lt391s7Pc07E3QaHpkd9dbprmOO1iAeWRv4hnoPc1F4s8QHUr6VI9qx8RIq/wxr2q7cINE0mGf7XbSXEvzJFH8/0zXJw4VnaT5pGfcze9ALV3LEaVMy/K/wDsimrU+x9v3du75vmpDBYjG21vusK1LOxu7mNVjj/yOeM1nRrI0ZT5vm+93/KtG1tbuXbEsUzMuFbbno3Q0yWWIbE+WHWeDbnbtkbBXHBpLdLSOT/TrlY41G7auJHU+9Wf7NsILV/tk0izKCm2Nc8k9e3HtWZrVxaNM1ro6Mtu/wDz0UZV+9AkR6hfW97fNBpaTrDwqtI3PHU1WaJNzLHu3f7XRhUGxI/ljLN/tVPG0jYfduk/h3c8UMYQsfmX+7lv932OauWdvJOsqfLud40RfY9aRVj85Fjj2q0Y/iz+BNaP2SNVhaO5jWRdsu7d74x9aBNki25tFk2puhbCPtbnnoBT7dDBl5oYZIc7VjkY5cnkHirOkrFLcbrqCSZlHmxRRqXLFu/FQX11eaa0qLpDSXEvzJLd8BAO7H0pkasxpl++zRbtv47fUmq0OrXcarFHNtjTO1VwOtUbd7/UtSknhdZrGIfvZ1xHAzjsvqKq6xfWkbNb6bI1xJgNK23AT2FK5qo9CPVNS+xN5WmnbNKB5v8A9eslpZblt1xNJM2f4mqusQVVb+JhuZqt26fu5Kk6ElYjaIqy7V+VgKnhST73tUseKnVPMZlX5tuaAKrRH71N2/MauW6vP97/AJ6BajhX5blmC/K9AGfIrx53D5akkX5auMqS28qt93H3qrxw7bfbu70gMO+/4/DXY+F9aj+y/YLh28ln+X5QdmeDXISW8s91N5a/Kp+ZmYALV/7J9km2ws33Bu3c0ITVzs5pbnTbq4s2eaFlyku1uzc1TbDNTofFMc+l2ul65B/qn2xakvLoD/BJ6ipr7TLuwhE7NHNasAySRtkMD3FWY7blepYZpI1ZI2Xaw3fdB2ioFMckasr7mz92hflX/az+g4pAXmuxIsSyQRybfqC3GMmqvH93ctTW8SSxsysy7U3NuqNW+UrQAxpflKKdqt97bTIboxNuZfMX7rN3xT2VP4aZuC/xbloA0I7e2u43e3l3bR+tU5rd4mZWVlaq/wB2TcrVsWeoW87OmrK0jONqyL1X/GgDFkQ7fl/h/hquyVtXliYlWVRuhYbkkX0rPaEr838LD5fzoGmU2Wp7G4MEg+0L5kefmVqGi2/xUzb/AHqBl+OI3Mh+yorbvm2r7ckDNVJF+ZqjhlMEm5fl2kbW6VqNbm50+S9h+9G4WZW/hzQIxpEqpInzblZlbPysv8JrQk71WkT7tBoiJZvN3eZ/rvu/71WbO9eym/vK331qoyCn/wCtt97f6yM7HouB1kbJIqvG+6NhuVqbc3EdrBJcSnakQyayNBu9rG3kPyt8yfWs3xhqXmzLYR/dQhpf9p/SnczUbysc/dXEl7dS3EzfvJDu9lpszfdShflVmqOoN7DaKKKQx8ed25Ru20MxZizGu/8AB+jCzsTdXUf+kXK7drL92P0/GsfxB4W+x28l5p8jtDGNzRSclR7GnZkKor2OYpabTqRYjUqtRSfdZdq7qkDU0n/XBq7e4spLS1tNRaLbDKQnpuIGRXnkd1cJ92Ro/wDZVa0bVjOyzzSzzTf8spGkJ2mtEyJI9u8Bf8VP4H8R+CJfmuEjOpaZ9QfnQV5rYsPLmiupre32/K32iQR7TWl4T16XQNY0vXLNd01nJvaPcfmTpJHXS/FXTLbQPH0Wr2cENxpGroL+33KCrBxTI2PLtW+zW022G8trjd/Fbyb6ZG9mq7lumk/3YTWrqGsIsz7ZI4W52rGoAweuBWN9qjkkbdDG3+19w0iwvL5Fh32sDLt+bdNJn9BXX6HEYtJttw/eOPNf6tXGNho5WVdy16BDKk9vHLH910DL+IpomewlMqRqZVmI2inYoWkMbRUlFAEdFSUygBKKWlxQA2lWlxRQA6nK1R09aBEtPVqjpc0xEmadmo99GaAJM0xmpM1Cz0ATZpjNUW80zeaLjsPZ6hZqGam0hhTaKSgAplOamYoGFJinYptMYxqSpGoVaAGYp6rTaetIAxRUirSMlMRDTqMUYoAM0zNK1R0hofmimZozQBJmhWqPNGaYFiioc0u+kBLRmo80ZpgTU6q2aTfSEWqbVfzT/epd9AWJeaRs1Hvpd9ACZozSUUDFzRuNJTKAH7jRvNMpM0AOzTWam5pGoEGaKZijNFx2HUUyikMXNGaSigB9NzRmkoAXNGabS0AFLmkpVWgB6tUlMWnVQjexTlWhaWgzCihqKACijNFACU6kooAXHvSUUUALRSZozQAtOpjOKTfQBJS1Fvo30ATZozUO80ZoAlzTKbmmbjQA+m0lFCAkopFpaACiinqtAAq1JTVWnVQC4p+KFWpFWpECrTlWhamVaAGYp+KWiqJExRilooAiZabT2amVIEdFPzSYpFDKWjFFMAqOpKTFAEVNqZlpuKBkWaTNSYpmw0AGaSiiqAKM0UygCTNLUVLuFADqKbvFN80UAS5ozUDSim+bQBZ3ikzVXzaTzakZb80U3zarb6fvFAE3m0m7dUdFUIkopM0ZqQF5/vULTKFaqAnWlqNaetAD6KKbUgDNtqvdPttZv9w1MzVXvGH2WWhjRgsm5nT+781Scrjd6U2Rj9oP3dualk+6y1mdBLb5Zvl29a0vtQihuXjH+rgZk/LFZNn8rbVq8trJc2d5Ev3mt2VfT1IoIZB4V0WTxBa3tx9oaGGKbyt3XbxxxXX/APCjNZvZtsOq2UMP/PSavOPDPii40CO5ijjWS3lkD7Wrs7z4++Id27TbfS7X/Z+zvJ/M1E+b7JcSDxR8FdR0iMuut2Vw2PmXyXSuAbRLuxmfzDCzKDt2setdDrHxS8TauztdanabWH3VtAgrmptYv5fOeSS2m24ZtvHWs0p9S9DHmt5Ym+YVoeEf+RmsP9l935Cq0l8ZP9ZFV/we27xFA3tJ/KtYt3B/Cejb6TzTUW8UzfWxyFjfSNKI1Zmbaq/M1QZrn/F2oPBDFawt80v3m/u0mwSu7GVq19JqV8+35Y1O1fp6VJZxBYwuNq5HzVUtbcIo3ferQh/u1Jv0LsNrbM25rn5f92n3llHHGr28yzR5G5um01Tp8biNdzf/ALVBmOV/KYszbdv3Wp0PlyTK8y+dJn7q/wAIqm2ZZmZqu28sittV2XjbTA1bGG9l/wCPPTo12j5pNv3avfZLySNpb7UoYY48bdsg+X8BWIryMuzzZP8Ad3GpPKMTbZI2X/eouQ0a62+nS/LJqc8jfwrtJHPua6aHR9A0TS3vNQivbxs/KjcIuT1Y1zemxaXaSJdXF3M1qpDJtj5Z+4JrN17XbjW5GVTNHYqfkikbO760xWciprEw1DUnn27YclkX+9z1p8LBs7kX+7UcP93bViP5lNJldAb5mZsKq/3f/wBdWIVkkYMoaTj5l/vCi3tzI3zGPb/e7KB6itK8snihd/8AVwqB8ytyx65AoE2itDEVkZm3LJ93d/dIq5Z6ne6fcJcRt5jMNu2TnpVOTfFGUVv3iYbb1+lJDdXEsgit4VmkZD8v90D1oEWfEXiK4vrhEazht+Dv8nJ3Z71lXS28MirZ/aduPnkm659qbHncysqtNKfmkbqprp9LsbDUI9rRzKu8q2376kUD0ijm4dnmBrhpNrfeVVqWFo2b/Z3/ADfN265FbmreGZNPbcrq0MgOzd6DqfwrGuIpLRlW6Ro5vveWy5DD2xQF7j2leOSJl2/u8Kv8/wAjTWldbjd8rbT/APWqJXMjOzK3lt8vzLjbilVraCFLjVBI0MuVhtof9ZcOOw9EPrSGb+h6xcWmL2OaCxhto9st3I2Awzwg9Xrl9e1u48SXUqsZ49Nb5trMQ84Hr6J6ClaHUNfvEa6ijkaJP3NpCo8m3SsLWtViWFrKx2tNnbNd7v0jH8zQxxjroLqGtn7Cumwt8seF9oh1wKyrP70q+1Ms0G7pU+nqJLqX/cNI3SSBV/hqxCu2jaFhj/vK5qxCn3dtAxVTarf7VWNPT95L/wBczTVXcrf3VqzZqWkdf9ht34CgBmlqPL2t/wA9F21DCv7u4+vzVZsU/do3yt+92/gBzRHEdt3tbdtegCkvyx7f4aay/wDjtWJP3caysvy520eVut/NX7rH9aBGHqUUkkLwb/3PmK+3+6W+XNT3Epa+kVfmWPam78Kv3Fuk9uYG3KzONrLWNcWj2N826dpmgfd83G7HODSAfMkkjPuNX/D/AIivNE/0dpGm0tif3Ui71Qng8Gn6xbx22tTJDu8mULPF/shuSBVCZR91aYmk0ekNolnq2lpq2iytIrJtaOPGUPXBxXOTQzxKPODbW+X124rndF1a80C882zlbyW+V19vcdxXe6X9k8QQvcWMix3y/M1svCSjvt96Zi047mHt/iUt81G3dUt0kcEjbd23O1omXEiH0IFNVkkVtq7dv8ugoAbsH97bTvKg8llbd51SLhvl20bP4lWgCDyhtVsUfZ0kX5m21PTM0AS6TqAtrz7A1w02mz/L+8/hPqK2PFmiwafdWy2u5VeAbpGbhnrlbyH5Vdfl6V2DaONW8Mx6pHfbY4ECvBJ0Q+i0xS0d0cpIoX7pVv8AdqJvlb5hVhULMyr6bqP3a5aRN24UDKkio3/AqZZuVmWBn+V8fLuIHoKmupRIu1Ylj/3aqbDJINrd927+7SKLt9AbS6aBvmZapsu5a0GMFza7/PX7VF8rx/3gO9UpEK/K38VAIptiiNvLkKsP3co2tUki9KiuMsu1fSgsj+eKQMvyyRncrd+Kx5A3nPu+8zFmb+8Sc1uTKZFVv4sfNWTeL99v71IaKbNSUi0VJYtb/g3RhqV81xcDdZwEbv8AbfqBWLY2kl/eR2sP+slO32X3Nep6XbR2NjHa24/doNvu3uaqKIqSaVi63zVC3y5/i/l6GplprLWhzHmfibSv7L1D9yv+iz5aL/Z9UPuKyWwv+9XqWq2Eeo2ElrN/FgpJ3Rx0Necalpl3pcgS8iVd3zIysCG5xWbR0053VinQtSf8Co3BaksSNDJ/sr/ebpXS+G7KC7uFS41Oa3Xj/U24J/Ak1zi5/u7f96rFvdGJgyzT9fmWNQn4DrQhM9E8QaLaaC1otjNPNZ3IP72fBfzRy9dJazf8JJ8Ib3TZPm1Lw1OJ7WTdz9lfqK8xku5bm1XbbyboyH82WZ5pPoCegre8G6qlpr0PnS7bW+H2ab0aN+OasyaKP2qWWxWCNV+Uf6v7MH/Pg1ztxsZv9VArfxeWuzmum1q1vdG1S806O4nt5Ek+byZCm8KeKyJtQvFXZMkF0v3l+0Qg/keDQWjMhcxSbm+ZcbXVfvYrvtFVF0m127lXy/l8zkrnoDXB3C+aoWNFjb/ZbjNd1o+rWWoMlra+YsyRBmXbwuOMZoiTPYtUVKy1Ey1RiFKv3qZSK1AyfFMxSq9DUCImpKVqSgY3NOzTaMUAOzS5plOoAXNKtJilVaAHU6hVNSYoEItFLtNOxViGVXZTuqyy01lFSMrqtLipMUbRQMgxTamZajxSAbijFSqtI1AEOKMU+igBlRtUjNUTLQMXFDLSUUwFxT1pitT1pAPWhqXNMZqBEUlC/doajFAxGqFqmZqhamMSiiigBM0UVHQBJmjNMopASZozTM0ZpgPzTM0lJSEOWn0xaKYx9FJS0AGaKKKACiiigApKWigBmKbUtJikIhptS0zFFh3G0VJim0DG07FOpVWkIjpKkZabigBtLS07FAXGUUtJQMN9KrmkoZaAOg833o801FS1RBIsppfNqKikBLvo82oqXFAEm+jfUVFAEu+jfUWKMUASebR5tR4oxQA+iiigAzTlpMUqrQIfRS0UAxKWikpgLRRRQA5aWmLRQIkp61HS0ASU9agzT1agCwrUtV809WoEWVan7xVfNPVqAJt9G4VDRQBLmmM1NptFwDNGadRigBtPWkVadSAKTFLTqCRmKTFSUYoKIWWkqVqipgI1MZqVqa1AyNmpjPT9pamMtAEbS0xnp+KjxSGJvNM30YpMUxhmjNNopAFFFOWgAopdwo3CgBKKN9GaAF3Gn7jUeabvNAE++n5qBWpaAJ1paRaetMQ5ak+7ULS7ajaWgRYZxTN4qv5oqNpaBlhnqC6bdCy03fUNw58ukNLUz1XddOzVNMw/hqOHDZb+LPzLTpMRqKk2JLP5a6TR2dbhGUdiu2uXhba272rb0m+SOZXmf5lO1VoIkdDb+CdKl8yWPTdzMfl86TeFPsKyde8NCyWZmtLZY+FVVjrqbXxVFBH/AHmUfNXPeKPFEc8h8td1DJhzXPO760iXdugj3Vk3CJbRmWEfMv8A48K3r66SVmb71Y90ols5lX7y0jcq6xaJZXzJHu8tgHX8RmpvCp2+ILdW/iDfyo1pvM+xzr917ePd9QMGqen3BtNStrj+FJQ1Jbj+yekZooZdrMtNrU5h+4Ku5m2qo+auCmun1DUpbplby2+5/siuh8XXfkaaLdf9Zcnb/wAAHWuftUCw1DNIrS5djWrEfyrVeP7tXI1HmBZP9XxuoGG4Rx/vPvfwrULLvk3NQzmRm47/APfNSxrQAqpViFdvzUbdu3/aqTbtVaCLhHXaeC7QaveL/a0UP9m2xDXF3Jxs9Bmsfwvo6apI891dx2enxfNLPJ0qlq2pC9VrKzfydNiz8u7mc56t607kPXQn8calZalr1z/Yvy6XAdlu20JuxxnFUbfyPsqQSblZc7WXncaprFt/3m+9Uyp/RaCtEi7JZFVO11k2/XPvUUOFxt/iO3/dqxGzww7mLMsj/iwFWrOK3lkigmnjhh53TsuffAoFcvWs13FZxbYbby2O1V4JcjoD7fxVq2+ppH5jR2cczMAsss3KdewrP1a3sLaS3azuJGtcbV3L3FGoaxZ+Tbpo6NHeeV5W3sh7vnvTIabMzWJhaXy+SytN93y/rWfbs8Cuqu258q+3jdVryUtG3zTeZdS/flVshEPp71VXYu5Y23KppFoGw1aem3z2SmeGFWk/ibk/JWeq7dvmfd+63TOT0wK2NF02fUL5bW3+ZpYtzbfSgTLusTC9uoVZZF2j5F5yqe/1qPXvtEF1DcNfQyTXMQZl8kHyh08skGq0ySwRrtlZVZ2ZG5+YrxxWPfeZJIILeFWuH+Z1j5f3NFxRVwjme5kZryRmsYPmdt3H4GqcMs+qXkuo3T7Wb5Yo/wC5GOAKJtk8i6XZtut4zvmkZeXJ52V0Gnwwafora3qRj+y2jlUi7yuOgqdzR6aGH4u1CXR7GbS7dWhvLxB9qbusfpXFwpt+Vfu421Y1C7n1LUp7+8O6ad93rt9hRCu2hm0EkiW3Qr+VT6T/AK6f/rnRaqd25ql0dB/aBT+9GVoGEcX7vf8A3n21MuVyv+P1pVX5djfwyFqs2bD7rJu3DdQAkK/u6khbbJtb/gXpRJEJNzLSrEZlKru6Dd+NAhLdhFHGnyttcbmX3qWNwsl3t+ZZXDfL9c1CrJtZ4220Rkqzr97bldv93jFABwqqrKvT7tMVdu75dq/wr+NSNEJNzr/D9PmPSlj2TwvLC3+rHzRtgGgCL7sMb/xebt/IVQvF8zXplZflaQK1aEaH7VDt+aPzBu+pqk3/ACGrn/roWoAuapEZ9D026+99lJtXb+9WRIv8VbmloLm3vLBvl34lX8Bz/wCPLWWq7l/CgSKUyHdVfT7iXTdWglhLKrOG2q1aky/NWXqiH7PvX7yHdQN2aPZ9UiTV/Csd+u2S+g3LcOq44Hc1yeoKFvGaMqyyxr+nBNbHwtvk1Kzu9Lmf5byKNl+q9aq6xZR2UweHb+4O1l/vjODmr6HKtJWMuH5mf7vSpNny7qjhxHN833cfN64NTspjUL/FsWpKIG+7UbYVV+lTSJ/d+aq/LKv/AHz+OelAwvpvMb/ZUBV+XFanhWWKTTdTs5jt3R7k77j2rHb5ttN0mb7NqUe59sbPtZugoBq6J2Uqz7drMtRN8y7avX0QjWRo/u71/wCA5FZ8dAkRSJ95qqMhb5avSJuaoNu1qCxIbe2tryLdIzK3yy+XUt0kXmOke7/Zb+8KqSL/ABe+6r3EtnFtHzL/ABd/YGgCjMtVsVfaqn96gpDF/iX+8P1qldRblKrV2Rfl3e+6opl3LuX+KkM5+RNrUfwtVi8iK1qeEdK+23n2qZf9FgP4O9K1y72R0XhDSfsNn9ouE/0y5G7/AHE9K6NVpseed1TcVqkcrbbHYprLTs0M1UIrsteeeLsSa9c+XJ5m1FVv9kgcivRZK898aaeLTVPOVv3d1l/91xwazlsXS+IyPK2qVZ90i4VY1/rUtqs6tuhfa395etVl+Wp4ZXVqzOkstpsjNukdWZsVo2umRfK0n3apQ3Eki7av6fcD7sn3qYmz074Y6bp1zHKt9bq0ikbd3pXl2vWT6TrGp6Wx/wCPW5ki/DORXZ+G9WFjqEfP+jy4V19q5n4mS+b44vbpflW7CS/7xxg0+hkk+Yt61qQ1S10y/Zf9KWIRTf7Trxmsu6UMzf7VULO6P9nvbt/E+6tSZfl/2qZSVjPmg/d/LWt4NvbO0mu4rp/LmlKrEzdGA7f99VR2/KahsYfN1rTk/vTKv5c0luD2PQmT+GoZFq1J/E1QtWhzlelVRT8U5VoGRbTSVYZahZaQEbU2nNUdAx1Kq0ync0AO2VJsFOVvlpaYhdopNoqRaKBCUtFFAC0jUUjUAGaYzUVE1A0Ob5qbTc0lIYuaRaSjNADqjanM1MagBKKKKAGUyn0UAMxSYqSimMjVKkWiikDH1G1LmkagEMpKYzUmaYwZqZStSUAIzUUNUdAElMpKKQBS0lNzQA+iilWhCEZaTZUlGKYDfu0U9VooGMp9FFABRRRQAUUUUAFJmiigAoplFAh9FMp9AEeKMU7FGKQDcU7FGKMUAGKbinYp9ADMU3FS4pmKAI6MU7FGKBjaKdRQBsUtMzTqCRafTFp60AMp9FFADadRRQAUUzfRvoAfRUeabQBPmjNRZozQBNvo31Dvo30AWN9Lmq2aM0AWaNwqDeaM0AWFanVVVzT95p3ET02ot5o3GgCWnVBmjcaLhYsUZqNWozQBPmnK1Vs0/NAizmnq1VVapFagCen1ArU/fQIlVaXFRrKKd5ooAdijFN82jzRQBJRUfm0eaKQElFR+bTN9MCfcKNwqvvo30gJWamVEzUZpgPao6M0zNAxWptNzSZoAGqPFLSM1AxjJUdPZ6jZ6QCNTKXNJmgYlFFFABRRRQAUUUUALRRRQAuaN9JiigBd5p280ykoAdSZpKWgApKKWgBKjmYrGzLt3VJTZl3Rq3vtWk9hrcrQokcYb2qszH9dzVY3FYyrVVZ6k1HRyhW/3qY021t2ars/yv9arySigZfa+eqN1dFlqvJNVdnG6gAaU1HHMPO/2cbabJlqhpDLCqJYZ7f8AunfFWeyjbtb/AIFWkrBlX+Fl+7Ve4i3K0q/8CoYXsdZ4V1E3tm0Ex3XEGP8AgSdjWzt3Mq/3q82s7iWyuori3bbIv/fLZ6g11s3iCJtDnuofluMCLyt3KufT2qkyHEwNcuhfa1cOrboYv3UX4U+z+Zaz7cbY0WtW3UKvy0itixGvzLU0jHbsX+L5n/pTYccvJ91aF/vN95qZI3lfmqzCtQbfvVZh+6tBLJ2p6/MrLTG+aFm21p6DblmmumVvstt80sn92glkGpXci2MGnRvtjQ+a8fueMms6Nfm3f3aFYzySO33mNSqtAFq3WP8A5afKrVcjt90k3lxeZHj7393t2qnb43Fdvy1rWLyR+dtO1ZU+VV9RwKYmU7pkWMRSbmkXC7l6KPf3ra0e0ijhF4zf6HHKPlbBdeMYpzeHJJbOSWFlk2jd5fUtzgYrDmSP50+bzM7Uj3feJoJ3J766uJZhEsLMzFvKX2zWXJavHIyMsnmZ+ar6vc6TcN80c0zgfN2VPQE1BHfJFMX8to5m+ZpFbsaBoihhdt23cqr/AOOmrVrZO0Lyrt3LldvfA6mtPR7S2vllaN2+THyySYP196uR6TLPfO1jL5i+W2+NeqoPvigTkZ62r7Z2uLfdM0BZdy/d2ntVmztPtcZfLbWc/dYB+OM4NXJrq2j+zN9kaRlz81yzlFymRgDnmqN5e3lpCkUMarYqCi/KBIgJyc/40C3INSi/s+1aeS4XbwvqWzwB7GstmltLVJ/NZb68O1Pl+6AcE59BUGrNd315BLNBM1vGdzbVPzHpyRSRtO11LcTRMvARVZiSiL60mar3Ymhouk7WlW33NIoL3DN9f51zfjDVo9UvI7W3j8u1tRt+9nca29e1q20+xZdNMjXDj7zcDJ6/gK4eFDQVCN3zMljQVZji+amwrVmNaRqPhQ1a0dN2rItRKpZqsaP/AMhiJfrQJhJFtt0Vf9Y0rL+HSk52vtX7x2r9aWRSsjt/tlVbcT0oX5fu/wAX8P6UASQvutWZRt2kL/vZ9KuaTnzJt33fKZ91UNxb5t27aC1aWksNs0Wz7ybfyFAFfSbeOW1dWVtyzD5l54ptnCJLi7VZtrK4+ZuNwHXNTaDKEjuX9h91u7cVBCsjTag0LfdPzfiaAEhYfMsj+Xx97bnafQimR2/2bezSrJMw+XbyMnvR/CzN8q/40Mo+9G/mdGbb/I0ALa5W+RMfedX2/Ss+ZSuqXTL97e1adm26ZW/i81dv0rPuGK6hdt/dlb+dMOpZ0+4ksr5LiFVbaGR1bnch4IqtJs+0XHljbH5hZflwMGpVU7v9lgabt6/U0BYryLVS4i3KVb7rDbWg38dVJF3UAWvh/qE9lqFu0bbZLaf+L0biu88WQiK+ba7NDJHsXd64zXl9ifI1plztW6AUfWvYda+zat4ZtL+F90mBuZeOR1Jpx2sYVNJXOKjfdGm4fMoqzG3l+V837xh97+924qkrff8A73NWm2N5fz/L/e/u0hDWbar/ADfNzVdmMf3W3LITv+lWZEO3b825k3f73Peq0ifL95vvmgCFm3f7v8NU7rfG3+1VxsfN95tp+aq95DujLbvWgpbmta5vdJd4zu8oBn6/KScVR+6wqt4dlkZZotzfN8rVPMpWYrtoFazF/hamN8zUfe/3s7fwqwtu7LuVW67aAKWKsaam6RoGXczfKi/3jVeaWKNWZm27c1FDqttLdQxQttkU7vMoGWrqF4pCkiMrfdZWrPkwrV1/iS18qNlmlaRZQLi3lb7z/wB9D7iuTuEDbqGEdSDcG+627ioluII1dpn2x/w/7VVJlMTGqsyOtif7quKVzUW4uhLt210/gm78yzezb70HzL/tI1cZCoaZFk+7kV1uhwx2OqK6/Kso2fnQtwlsdfHUlMorQ5yTNOqPNLmgQ+vN/F179t1yTad0MH7pPw616LI5hhml/uIzfkM15Jy3zbvmb+ZPNRNmtJa3G05flap7HT7y+3/YbWe4WMbnaGMnbWnD4V1uRSy2W3b/AHpkFRY1ckjPt7jy2+WpZrgeYHWrf/CL6/u2x6ZNJ/tQsHpZPDmsxwu02lXu1X2s32Z8rVWYroih1Ibdu2tb7XBqlv5F580fG3+8p9RXLyW/kMVmZo2X+GSN0NWrPzYPvI23727stAzUXR/s025Zlmj/ANpealaizugy7Wb5aJGoERVZ8NxeZ4gtW/uhn/SqzfLVjw2/l+ILT/podn5ijqJ7HctUTLVlqjrQ5yvinqlSUtAEeKryJVuoJqoCtim4qSnLUDIcUKtSU9aAGKtTKtNWn5pgFJmms1Rs9AEm/bSM4quzUzNAWLe+jNVM0bzRcLE7PUTNTM0xmpDH5oZqjzRmgY/NGagZ6PNFAEuaM1F5opPNoCxLSZqFpaRnoCxLmjNV99G+mBPvNIr1DmjNIC0rU3NQ76N9MCakqDeaM0DHNTKM0maAFoplCtSAc1R0rVHSBD6KjozQBJTc03NGaAHU9WqLNKrUASK1LUStS5p3CxNmjNR5ozTAkozUeaKQEtFMzTlpgLRRRQAynUU3mgBKKMUYpCClzSUUALmnU3NOpgLRRRQMKXFJS0AOxRilWkpADLTcU6m0AGKbipKKALlLmo6fQSOzTs1HRmgCTNG+o6KAJM03NNptADs0ZptJQMfmm5opKAFzRmkooAXNOplFAh9GaZRQA+iiigBaWm06gB1KrUynZoAkopm8Ub6AJM0ZqPNIz0ASU7fUO+lVqAJ99OWUVDRQBN5vvTvN96r03NO4FpZfenb6p5p+aLisWfNo31X305XoAsbzS5qvmjNAFjNLuFQ0UXES7xSb6jzTc0DsSb6M1HuFFAWH7zSbjTaKLgOzTKRqbQAM9Rs1OqNqQwZqZSNTaAHUU3NGaAHUtMzRmgB+KSjNLQAlLSUtAD6MU3NOoAXFKyU5aGoER4plSUlAxlFPooAZRT6KAGUXWd0SLt+X5qnhUL87fdWqMk3mTN8vy/eqWVEiusec7fxNVOT5VqWZt2arSNu+7QaIpsxZmqJlDVLMwqDaKBjdg/vVCyVJTaQyNv8AdquzH5t1WGqFqQEcf3qsRttk3rt3fxK38QqtuG6hm+b5moAnurVNvm2v3f4o+6mqDIKvwzFW3K+1lwqtUslvHd7vJ2x3H/PJv4/pQMr2bBmH+ya1IawmzG392Ra0LG7H/LTb5n/oVCE0asnzKsX8K0uKbHLuj27V21KveqIFjU/8Cqxt+UVFHUjUEMRZTG26NvmXG36V2WragdP8D22ktCsd1ebZXb2rm/C+k/2vrENruZY+GZlx0zitLXlF74wu7dXWS3tHKL83pTRL3sYqxCOT5f4asRp/FTmidWZpB975v94U3nc1ADoc7mrV0No/tCRXDt5bfd/2T2zWZHlYy394hauW7COF/mVbpZFZeo3AdaLikdlCiNdWyWMy+ZbDypfL583+Ikj0rg7iUy6sGYfxs7fnya3rW4uVa4v4dsc0f735cEbH69OlczNFJLfS/wDXMfe/i3UCgia3uhu2zMzR8rU8iWcsbPb/ACsv3o5GB3fSsv8A1bbWqSNtv/xNBRca1ktplbPlyKN3ysP5itnSdd1G0WZY5VVmAVmZfuisOOXcrbq0IW8tX3eytHuxQJl+41q8nkj87yWjz92OMJupG1WWSbzZFaRsjd5n8XrgjpUGxNu1h5iyYX5lwWNRbNu1fNjbja3zY2/jQTZFz+2pFbZvmWPjfHuxu9PwqjJM9pZzPJ5azT/e3LgoB3HtTrWJFWWW6jaa1Qbdrc8muY8YatHLGmnWqtHGwDSr12DslBUY3lZGBeXRvrx5fux/wL3xUkKFait0+WrlutSdSViWNKsRrTY6sxqfurtoAWNTG1SaOwXWrf6mm7dsf3vmwPyBpdF/5DEX+zQJ7El0oW4eJV+aOQt/QCk2+W37sr8uW/LjNLeKFZpfm8xpj/wHFLbuFZ1xu8wBd27HU5oAfHEVjZWZmXhdv6kipLFvLkZlb5WQ+nVqrLM67ktzuVf4eu3J4zUzM67Vby1k/ux9MCgA0GYxNdKyM3Tcv06E023SRZJvMG5nf8MDuabG21in/LRvl+9T41k9WXigB8ipFuX/ADkVJp8Ulpa3Fx91WG1dy/exVCSIctG3zN/e9+aPOeRfKk2/Kf4W4/CgCWxz9sif7qrKE9dufY1SkQ/2pdp/en/mauWu9W37d0cbq77f4QOag1DMWsSsv8RV1oDqPZSu5f8AOM4pGzu/H+tSM/mybs9g1Qen0DUxiSD71V5B96rUi/MP9oCq01AjI1TMapPH/rInDV7F8P5Yr7RdR035VjkTz4pP7gIzXk9wgkjKtXYfCe6HmWO47WgmNvL/ALQahbmVRXRBcWpimdWb7p+9/UUkbfKy4+9XcfErRBZXSX8flrbz4i2rwd471xcKmRQ235v8Kb3M07omVN252+8pG1fc8Ul1CFjDMP8AWE/8BwcVYjYfZ9zD/a3exOBSXUO1t33mYlW/2ecYpAZOz7zbdy421DMo8s7fmq7Mnl/Ln5aqTf7NBRlWrHTdW/eJ8sg27e9bGsalpcUn7u8jkZT92Poo9hVO4snlhklkb7v3q5JbUfxPQaJKTubt54jg27bW2+b+GRuKy7jWtQudq/aGWNRtVV4pi26Lj5Pm/wBqpmi+VdtTc0UUZrLIzbmLM3+1UljEZLyJFbazGpmWq8mY5g6/ezuouNnsNnavqnhm4s2l866tgHhk/vH0rjLhd0aNn7w/75wa7LwDqEbSNKqttn8tFb+6e9YPiay+xahLuXb5o3/7r9Hq+hyxb5mjn5PlXd7VFcQiW1uVVfm8suv1WrLf3aLNtsi/iv4HikbXOVrptLuPNtYX/wCeZCtXPXCeW34/yq7ocu2R4m+64pLcp6o9HVhtG2pay9JuTNGq/wCwPzHFX2arOYkozUWaXNMCDVxcS6TdRWMTSXUo2Iq46sea43ytM0n5ZwmqXqn7kTfuEPu/8ddzmuI8WRRRaoy28ccf7tWZVXG4tzzUyLp72J9O1W+1KadZnX7PZ2zPDbQ/u4Vc8D5R/vVFptoY5gzLGyr8v3c/pU/hO0Mul6xL/D5cSxfNy+HycDvitKztyrbtv3aVir2ehseE9Ms7tpn1axgkhiBb7v3gqbjXCW8uoKrNDfXce4Dd5dw4r0+aXdp+oXDJtkXTyu1fVyq8Vw3lD+HatRNtMqj712zEkvtUgY7ryaRW/wCejeYG/PNWNFvbf7d/pj/Y4/vGeGMsinsWj9KuSW/zbdv3iF/OqDWgVrlFXy9pqFM1cTY1jTZbKZVkhjWZ4/NWS3bfDdR/89Iz/MVnQzH7tX/DOqxpB/ZOqSsukPKNsvewlPAnj9v761BdWktpdXFvcBY7iKRopY16K6nBx7GtVsZbaDGbdUVu/k3kMv8AdkVvyNSbTVeTO1tvptoGemMw3NSZqpbzebZ27/3o1/lSs9aHMT76N4qo0oprSmgdi00tRs1VmmNM800XCxNJUavTN9MzSGTM9Hm1X3ChXoAtLLT/ADRVPNGaALDS1G0tRM9R+bQNImzRmofNpfNFAiXNFReaKN9AEmaiZ6N4qOgZJmms1NpjNQMXNJRSUwG0bjTaKVwF3GjcaSikAZpc1HRQBJmjcajp9ADs0ZptDUwDcaM1HRSGSZozUdFAh2aTNJTaAHM1NZqRqSgBc0ZqPNJQMlzRmoqKAJc0ZqKigCXNGaiooAlV6XfUNLmgCdWpc1BmnZoAsZqRaqZp6tTEWaKiVqdmmA+jFJvpc0AFFGaRmoAKZRTKQh6tS02m5ouMezUZqOii4WJc05WqOhWpgTZozUe+jfQA+imZooAmpVqJWp2aQFuio80uaBElFJSZoAdRSZozQAtFJmjNAC0UlJmgB1NopmaAH0tR5pc0wH0UzNFIB9FR5ozQBJS1GrU6gRJRmmUUAPzRmmUUAPozTKKAJM0lNp1ABTqbRQBJS0yigB7NSU2igB1LmkooAdmhaRaX7tADqdmm0UAO30b6bRQA7NJTM0ZoAdUmagzS5oAmzRmoc0ZoAezbqSm0UAI1R09qZQAlMp9FADKKKKACiiigYUtJS0CCnU2nUALQrUUtAD1alpKVaAExS4p+KXFAENFSMtNagBtFFSRpuagBt04+zhVO2qUihmZ8bV4Xb+laDeWzMqr8uPvNVOaVF3bhuZaktMoSLtqtJjbVuTMkn/sq9aY1lJu/eeXGv/TZglBZmSfNUbJ8v92tNobRcbrtZGUf8sVzUf2izVty2jSR5/5aSECgZlrFUi2skjbY0kb/AHVNXJtdij+WG2sLf/dj3lvzqtNrcsm5vtM23P8ADxSDUkXRL9vvQsv+1IwT+dRtpKRttutRsoedvyyFz+lZN5qDtjdF5nB+aRs9aredKv3fLVv9mOkBstZafGvy3jSf7Sw0Kmnx/dF3J/e3YSqc1leRtskduit8vvyKRdNlZtrO3/fVMZO01s27/Rtq/wC1JVW8uUaNVj8tdpG3y6rXFuYpNnzbqg2Hc1K4Gpql9HPcMsPl+WoCrVLzfl+ZVaqlOpDL1vqBib5vmWt+NxIqsv3W+Za5LFdFpLhoY0z90baaZMlZGmtDUtPjheebZGKoyNzR4bzS9Nl1ldqq0ckStux7msK1UMqvu+aX5mra8UagW0HTNLjG2FM7v9st1NY9uu1dtMla6lqOaTyfKz+7zuqWPY2dv3VH61XzSxuVWkM17O1SWNE87bNJllXqMew9ar3CpBdeV5rfKB83So9NmNtMlxbv5c0WGWTruNX9UUyNbytG0bTxBl+XHQtnA700T1LSwy2mi395DDuhbFt5/QKW6/jXPWs3lTfaJk8yFnG38K1dciubHwzH5jtHHdzb2i/vFB1NVfDNqLu1eKZtvG1KYdLlW6eCaYtD/Fn25J4qLaFjXb6fzp80Pls/PzK+3/dwalmxJIWZPL3Jv287VzycUhjI0faNu5lb5l9VPtVvcGVG3NuUhV67mpIWj2sud26PbuqxdJtjXcyr5m3c3GOOc/hQIFhkVlVWkbkbevykmlZT9o8pV+ZT8q1JbqJI2/eSbo0+oYZ4x83AqC6Xyo3/AHsc25DtbaUfB9PWgQi309tY3Nur7Y5ztfcv3scZrzuZ/PvrqX7259q/QcV6j4itRpugzXWfvDe6ydcgV5baqfLX/aFJm1HVXLUP3atxrUEKbVq1GppGpKtWFqJfvVLTAey/Kzbu1SaO3kLPdbtrKNqK3qap3D/e2t8tXtrwWNqke5pG/etQA24ie2uPKk2tJgM1QTJJKq7V3R5G715pnmvIzNIdzN95qcspX7tIRZhm8tWijiWNv9n24JIqf7unzSt8u7Cr+NZu/wCYLVq4fdpYVV29KALPh+3j8l5f+WjHatRWrCPWpFVvlbP+FGn5XT42UqrM/wClFup/tqVvloEQfdmdfeiTy1ZlWLb/ALTc+2ATSSY875fm5pn3qBkkMsis6Q/8tBspNUUfZ7OVflZgUbp2NR8qyqv3mPy0t4qNpYZv+WcoWgGJC26NqkVRUFvnbU9MYn8R/wA9qrTVaqGRaBFGZam8JyGDX57fzWjM6h0f+66mkZvvfLWdJMYNSs7pfl2uFalsxNXTR7z8QrSSXSbC6mm+7u+X+8T3HtXB6bFFJJOs03kqsZZP9o9QB9a62+m8/wCHdlcSfNMr+Vu3fr9a4q3by7iVN3zNhffNUzljtY0dPYLhpPuxg7fl4aT5gM/Smshky7Ou3f8A6tf4fx7mo1Yxw/KP729d1OkuDt/55q4+Ztv4fn6UDM9mLL838P8A49Uapuj3Y3f7PvVpsMv3l3Km1l3D8hUjSiyuvmWObyk+b/aNIoy9ai8q3S3V28yUbnWuVjQruWu30WH+1PEjpcN/rAf+Ak1y91EFvrhf9uhmsH0INn96nbKmjWpFSkaGdJEKoXEXytW5IlUpoqLAdD8Kb0rqjW++NW3h0Vv4q6/xoiX0KNs23XzN6bnQ4IryPT7iTTdWhuIW8to3DL+Neux/aNU0mXd811skuItvJZ0Pz/mtNbHPNWlzHn33lpF+9TmUxyOrf5FJH/FQalDWLXybiZGH3ju/BqybdzFcK390/pXUa1CGWzl3bvMj2t/skGuYuk2yNUsa1R2FrcCDbLH/ABYdvp0Irf3D1+X+GuL0WUTWYi/uHa30NdJYv/o6o25mi+Td9OlWjKS1L2acriq7NRmmIsbxXH+IrqBdanZo45mVFXy5PuZXrmuo3hfmb+H5q4zw7psmv+I7Wy+811Puf/c6uaT7FQS3Z7/8NW0bULGxXVLa2kuLaMMzeSBsL+noBXS+IvBmiMv2y1tvJ3Ha3kt94+tePt5ltrjXVuJoYWuNiR+wr1jw7rv7y2W4dfJ2bl+XvmmjF6M4Txho8djot+1rcLM0sW7y2XBUIck15msoZeten/FS4TybydZfMhu8Kny42g15Uyhd3zVz1tzqw/wlmTG5W/yp6VGsW6a+/ibC0kMvy/72K0dJhMl1dNJtW3YKrL3baahG7djCayEiyr97z0O1fda6fXZP7T8O6VrzSb7hkGnXf+zNEv7uT/gcVZN1E8FxcJu2yRvvX/aqSHUI9N03UNOmEs1nqGGVoWB8qVDkPg/7LVtB6GUyluFR7R81Fvd221POu5Ldsf8ALa2Lp+hqXaJI0eGS2uI8fM1sx3r7lDVknR6LKW0e3/2QU/I1KzGszQX/ANDkX+7J/OtBmquhi1qOzTc1HmjNAWH5pM1Hmm5oAfuNJmo6KAFahWpmaSmMn30b6gzRmgCRnqPfTGao80gJN9Gah3GjcaAJt9OV6q5pytQBZpM1BuNLmi4E2abmo80ZoAfmimZpM0gH0UzNGaACiikoGFFFFABRRRQBJQ1GaGoER02nU2gApM0tJigBKKKKBhRTKVqAEqOn0UAMooooAKKKKACiiigApVpKVaAHUUyjNAElKtNooAmVqcrVBS5oAnzRmot9NzQFifNJmo922lzQBJmio80ZoAkopmaM0ADU6o2am5oAmpc1HvFJmgCWio80ZoAkzSZpmaM0CH5pVcrUeaM0AaGaFao6VaYE+aTNR0uaAH5o31HRTAlzRmos0bt1IRJmm76bTc0DJN9GajzTqAFzS5ptSYpgNVqdSqtKq0CG0UuKfQA2nUUUgClpKWgAooooFcSlopaAuxKfTadQAUUUUAFOop9ACUUuKMUAFFPooAKKbSZoAfRTM0ZoAfRTKKACiiigAooooASinLRigBKKXFGKAI6Kc1NoASkpaKAEptPpKAG4oxTqKAG06ijFABRS0UAFLRTqAFpVptKtAD6VaFpKBDqMU7FUdQ1K2sW2zSbpFG5o1obGk2WFQsy7Ru5/75p000UH8XzZ21yeoeI7mRdtvthjrBm1KSVj5jySN/tcCobNVA7K41i2i+VfmX/Z+dqz5teCs+2KNf8Ars364rlGuJZW279q/wB1atyKiwwNhVpXL5UXm16RlfbLN838MeEVvqarTak8jM0ca7v9ps1SVd1LigLEjXVw3/LVv+A4FR7C3+sbd/wKljTdV6GIfeoAghtSzbVWtS10mSSN3Y7VWn28W3G2tmzUNbzbv7lMTucpqlkLZrT5v9bFvq3qFui6fp235dyHd+VWPFUW1tK2/wAViv6mrOsRFdL0V93yyDd+GKBX2N7UrES6tKq/3ImVv7x2KTV3RfD4ubh1x90bqnVoGurJ/lZZbWCdm9wmCBn/AHa6bwqwi1gMx27huT/aI3GmZyZ4nfRf8TK/3feizWfDD/oJlb03fma6fxBaCLxJrFv/AHkLVjxr5nh3K/7NSzZGHSYqWSL+JaipFBWtoMLtcb/uxr96q1rZFm3SfdrcsVEfyqKaJm9DR2/L+Aatrw/pksq/aI2VtziLy93LbqyV+WNvoFrcsXksdNk8tP308ZWKT+7uHUVZzyZi61cG71y4dtu1CVVV6L7VAuasXDadpupJFqTSKroH+X+EGtC10/TruRljvlt2yNizc7ge+RQPoZW41KrBZNud3O2tebwrqMfmNGI5tp+by/nrJmt5Yo/mT7xP6GiwXT2JI5fLV1kSPc/y7v7prSs2tPJhW6uGk2TfPB/gaxd21dqjb/wH8av2dpJKy7R8rPt+7y3sKBGn8SLoNb6bBt+bYX/Bqz9Pu449J2bNsmNqtVTxdei91hU2ruUCL8qn+yzrZrujXy48bm+tHUForEKuPO82RN0eRv8A9qr1nsW8WVkZo1wu1mzuRuOKox5VZ1/haP8Akc0Q7F8z+H+76Z60Azo9YtE/0f7HFtkknZFiVc7tvesppQrJt/hf8MY7VLY3on8uCZ2Xyo22yK33ixzyapLvVfmVv9qNfUd6BIsebFuG7/U/eTbjKnoQSBQqGeaGCNGmhZ9zLGvGB1OKhjuAu1tn3R95l4q/4fuD/wAJJZyt83lfM1AGf8RtStJdH2af8sckgVl+tcVbqFrrfitdmfWrOLdH8qGVtq8c8CuYjpPc3pq0SaNasRrUMK1YjU/d9qCyZfu/+g0u0t8q/wANJSt93b7igCuqGe6WJf4iF/8ArmtHUMrdeVH91E2VW0tX/tJGUbmqWR0ZZ9zbpGf+72oF1K+3/vmn7Om1fmoVTt/H7tP5bHO3d936Uhkezcv+8f0qa4y1juz8vH5Co1bd/wAC/wDHUFOkbd97b1/75FMCxbsPs8SNu6/98io1l8u+mlx8rZX8TUauV37n+Zh+lNoEG3/4r8BSNml4+97f/WFIzH733v4d1AwX/WB/o1Fwsbae/mH5vNVvm/izziiZ4LaES3T+TD+Zc1UWWe7YPMnk265aKL69zQItwpthLf8Aj1DN8v5tSR/NHtqRYgzfM9AEe4fNub5qhZvlarEyJHMqbty/e3dDULYX/wBCoAryfeP92s/UoS1q1aLVBcPuXbtpAdv4NlttQ8Mzp9oZbxRvSJYy+8+1V2SexvF3R+XMw2fe5Wsb4b3z2UlyqsytH8qstbl1LI1xFLcL++Yl1aNucZwDVbo52rOwxVj2srbty4Zt3HI3A5qWNhK26F4+hXc2flB9DUdwqN8vyqq/Lt3Ejjuc07Ym0tJub/gVAgkYRfL7/wAXJbP9BVeGIM21V+9Gfm/u1ZWIyN91duB93lsMOdoqC6ysnyptZkKsv1HSgZFoO+PxBbso+Vpwqt/eOeKx9YhNtrV8n/TQ1uTMLS1tvJl/0rzPN+XovpVPxdDHHrRlU7vNjDP9TQVB6mRHVpVqCGrK0jchkSqMyVpyVTkHVaQjD1SIbQ9egeFddeC3068Z9zQOrL/sgcOPxrjrpBJC6tWx4De3l03VbObb5yJ5sTf3QOuKaJqK6Lni60itNYmazO638390396N/mFZK11GvQo3hXT5VXayllZv7wU8VyzUERd0WbjDaX/1zk+X8a5u+i2qW3V0ULbo5E9g35GsXUoiqlf7tDLiQ6Gx+1Mn8MgrpdJm3TSxf3o1b8uK5PTW23kX1rpLOUR3Vvt+8sjRN+IyKSCSNjNGaM0lWZlfVJfK025b/pmf1rU+AdjbXPia7luP+WVqfogY4zWB4icro83+0VWtz4K/LJr393yIYvxMlLqN/Ae0XWm6Gypax/N5cm7b/eJrE8WWkujzWtwu2PT/ALTF9q2/8sozW/b6J9iuIry6EkdjB9zd/F71S8QeJdPubp0haFvKT+Jc7vUH1pnOeWfES6nufs0uWjs7mWSW3X+8BxvHtXn1xcGNtsddp8TLi4l1iBryZppmt9/+6HPQV55JKWmbb/FXPLWTO6irRRqWbSSf6z5VWuptX8pd3y9P++fWub09o41hT70jfN7sfet/T08yEyyNukyV9QvpUmj1M9lE95M188kNusckrKv32AGQD7Fqh0ny9Ssby1uJIbe4ytxbu3CO44MZPbK1b1Bi1neSs2790Eb6sVrG0/5c/WtYbGUtyxfaZe2Kr9stZFj/AOen30YZxkOM1mahborQSw/LuT+HrkGtZpZLK3uGtZJIW2D/AFbYRsc8jvVd9Qj1CNIntLa1ulO9WtlIEuexHODVMSLPhG4nka6WZmZV2/N75ro81m6S3+gp8vf+HjdVrNUjN7krNTGam5puaoQ6m5pKTNIB2aSkzTM0APzRTM0maAFozSZozQArfdqKnNUdIApM0ZpjUAPzS02igB1FJmjNAC0ZptNzQBJRTaKAHUU2igB1FNooAdRTaKAHUUZozQA6im5p1AwptFFAgptFFABTKKfQMZRS5oxQA2mVJSUAMooooAKKKSgBaKTNFAC0ZpKbQA+io80uaAH0uabRmgB2aTNJRmgCSio6KAJKKbmjNADqXNMp1ADs0ZptFABRTKKAH0UyigB9FNzRmgB+aKSigBaKKKCjQpVpKKogfRTKKQD6KKKAGUU+ii4DKVqFp1ADcU9aSpFWgAWlWkVacq0xDqKKKACiiloAKKKKQgoop9ADKKfRQAyn0UUAFOop1ADcU6iigBaFoooAfRuFR5puaAJM0maZRQA7NNoooAKdTakVaAG0tLT9poAjpVWn7TSqlADaKlxRigCKipMVHQAUUUUAMZaKfRQBDRTqbQAUlLRQAlLRRQAUUUUAJRS0UAOooooAKctNpy0wHUq0lFAGH4o1CW28qK3O1WG5mrjZLstllXczf8tGr0PVLGDULN4Zvl/uuvVPpXB6loWoWLNugaaP+GWFd4rOSZrSa6mczFvmY03NJuC/e+WlqTUmt/mk/CrzQuyw/Ky7jtqtp6hpH+ldJeIF0/TX/uuu78aaVyW7HPRpt3K33s/NUipVi6i8u8ul/wCmlNVaGMIUG6rkK1DDVqNaALEdaVjlsc/ePzVRjxtFW7NzH/wI0CKfixQ2m6FKv3vIkgb/AGdkjVoatDu8C6PdbvuGRX/2cGqHiRx/Z9jb5/eK8krf7Ic5FdhY2Ulz8KZlkh+VX81JP73amS9jH024ElnYSru3WxMTfzStqz1byLjczt8p+T/aNcf4Zm8yG8s2+80fmp9Uq7HcBW3LQRbUk8YSxt4mjvFPy3KBWrA0eJ5LO4s9u5opD+Qq9rFx9ptWgx++V98X8qp6HcH+0Hdd26SIqy9eRxQWtDNvLQxM3y1mx/LMPrXS6hiTLba5y4XbJuWkWakLVftfvVj2Mu6tWH5WpohmwrFoX2/xDb+JrvLzSvPt7vyx/wAg+1jlf67MAVwumr5txbxbfmeRV/WvRYdQjXR/Fkse7dsbcvZUQbRmqWxzz3PC9cuHu9UkeRtzKNtVI/MX/Vuy/wC7mm7jLI7/AN41YjX5qg6+iNGx8R6zYr+5u5GX/exXSWPxAiaEprGmx3G/CtJXIbd1P8r2VqaZLhFnplnfeFNX8ry7qSxuPurGzZ3VJ/YmoaezXVm0d1CqFt0bZTFeVfZI2+8lS28t7Yt/od7PCqndtVjinczdLXQ2IYpbvWNsm1ZlxK+3kfNzXcqkv9ly/MvyAM2772BXD6HqF7falNLMkTXDRj5oY8bucc16BCt5HHukto/JVGZmZsbu+KZE9HY55rd/JluP+WfK/wC8WqxHFFJNtV2WNsM+6tDTZpIbryrryZI1wyqq/dduMCr7XYvWtYI2g+zx7mWPyfu+x+u2gm5h+VHH9mlVFmkaVl8tfRaj/dtHE29o5l3bv9rHQVe1ZDEtp/yxjuR56r1C7jjArOm+aRvl/eKf9YrUDQQzRLHN5katJs+7u5X0Irb8I6Pb30yT3XzKudvltjcegrnJpS3ybfm/u9812fhWyNjY3t7JcyeXHAWaPbxxzTQpPQ8r8YNE3izUEt/9TBIIE/DrVSP/AMeqCNnn33Dfelcu31Y1at4jUPc6lorFiOrEf8S1BHavu61YW1kVd2aYD1z81OjceWdw3NjbUeyRV3UfOv8ADQBY02UQXD8fMwqOTY0n7793u+aq80QlXa3ysv3WWpobq/jj2TLDcKv8TR0gFZRH825dv+z/AAikXDL8q7d33v8AZFO+1xybvOsmj3fxRtUMl3ZqzN5lzH/vQ5oAm/8ArNt4/Kj+JVk+995/8Krte2G35b5d33trRkUNe2e75ryHr70xk7MV+Vv95qI2H975ufmqp/adgrfLL5zf9M1JNN+1XMrbbW2WFf8AnrNycf7goAuN5iwmX5Y1X5mkkbAU1XW+kkyunx7uP+PmZeF9doNQfZ08wPdO1xMv3Wk5/IU/efurQIWO3TzGuLiVpJv77cn8PQVKzVFGrs33f92nqtICTeaN5Wms33do3Um12X5lpgLt+V/73C/iaJMfLSbTt3Y+bFT+VG25WDbuFXp82aAKbN1qvJWrNZbc/LtXAqm0I20AReEbg23iQ7Sq7gG+ZchfwNdjdOJGfyS00zSFml5LuPVieMVw8f8AoWtWE/3o/MCt34zX0nt0y2mKRp5izpHuaRc7cU1sYVtGeQ+TLHHC0kTbZcunyglwOMj2FOjaOJg+fMbG7y9vHPqe5rpvFjQfZ/3cNssjTt50ka/vmA6fhXL2eGmRWO1v9luf8ABQQtUPuFlVYmkCru+822iZHVvNZWWaTLMu3Ai9hXS6K2lXcly21be68nbFF98L94fLu6muXuGKrMmdrZ2Mq49cnpQBV1RSqhl+ZfvK3+FaPjq1gbQ9C1G3XbJLF5Uvy90rP1Jw3/LRW6Km2tfXphd+B7X5W2pclfM/ujZ0oKW6OLhY1ajz92qcbfL/AL1XLf71I6R8iVUmXbV6TC7ear3GGb5fu0CM+Zf4qh0H914iaJTt8+Mqv41bZaoRv5GuWE/y9RS2Ynsdpa2/m+HdRiZ2byjuXd/M1ysfzQp9K7zwygudL1jbbt5yjbLJuyOa4VV2s6+9UZRfQmhY7ZP9lKp64n7x2X+IBvzrRsYjLNsX7zIar6sm61hf/Y2tSZa3OYhbbMjf3SK37z5VeWP7yFXrnpF2yV0DI8sP7vb+8i+aki2dJu3fMtFU9NlMmm27Z3bUCt9RVnNWYszvEEMtzYpFbxNI3mjcq47Dqa7L4AvbWV9ftqFzZW/m7fJ+0TDqK5PVESbT51YfLsLflXPx2Sbkbyo/lwv3chqnrcu3NGx9L+MP7X1e3Kqklxu/itGDooFcFZ7IpF3QNH0T5o8Fto++Pc1xGl6bdxXUcun3dzZs3zbraYptr1XweniDUFt4tQ1W7mjZ9yxzKkm4DjNUZONjzX4qMF8XXkX8MEMUX5R157H8rV2HxGuDc+Ltel/vXLfpxXHL96ufqdUdEjZ0392wf+6RXTLcCNXRWb5vvL03f/WFc/pcXmR1tQ43RMqtI3l7WXbwoqSyvfMP7Jvv7uYv/Q6o6Wn7xmYVrap5cHh2bd8rNdRov4IxqPSdMuJbGK6hMCwySFEVpgHYjrgGto7GMnqU5AfLlbbu2oWrBhi83a395x/wEk13Nrp8/wBqaK4ikj3Ryf6xeGOxq4fTW+WP6rTBanYqoj+Vfu53UZo31HmqRmTZpm+o80lMRJmm7zUeaM0gH7jRuNMooAfmkptGaAHUU2igB1R0UUANakpKKBi0ZpmaM0ATUVDmjNAEmaM03NGaAHZp1R0uaAClptLQA+imZozQA+im5ozQA6im5ozQA6nVGtTUCG02pKbQA2iiigY3FGKM0ZoASiiigBKZT6ZQAUlDUUFBTKWkoGGaVWpKWgApGpaKAI6Kdim0gHZozTKKAH5ozTaKAHZpc0ykpoCVWp2ahp2aBWJM0tRZpc0AS5ozUWaXNBJJmjNNozQA6im0UALRRRQA+im5ozQA6iiigDRoooqhBT6ZT6QBRRRQAUUUUAFFFLigAxT1opVWmIVVoWnUUALRRRSAKKKKAFoop1AhlLTsUUAFFFLQAlLS0lAC06mU+gAoopaAEopaKAEptPpKAG06lpcUANop2Kcq0ANxT1WlxT6AExS0UUCDFLRijFMAooxRQGoUmKWikMbijFOpKYiKinUUhkdJipcUm00AR4pKl2mmUANop2KMUANop2KSgBKbT6SgBtPpKWgAoopaABadRRQAU5W+b/aptKtAgkijl3eZDHJxt+aME1E2mafu3NYW27/riKs0UaBc5zxBZWltHC1rbQwsxO7av3qNUQR+F7Jv4sxN+GaseJvmjh/Gs/ULjzNDhg/uorfkal7mqWhjXDf8TKVW/iFLHUWoI/7q6jX5VG1/9nHehb2OT7y/N/s9Kk0LKrVqOqC3dsv3mb/vmlXUNzBbWFpGoGbEPzL8x2r/ABM3SopNajtt32P99N/ebkL9B3qpHpuoXyr9qlWGP+Ff/rCt/R9Ns7Jt23zGb+KTHy0EsTwn4RudduluNSeSG1Ylvd69gvtPt7bwjLZLLG3lEr93Zt44rk9H1KO2w7Ou1fw21oapqwmsxFCy+TsG6mjKbPIfOk0jxIzrtVopRL8v3WBrX1aEWmpSpG26FiHi29GRuRUfiLRb+91COWxs55GZCr/LsXC96jvLXU/Jh86JfMgiETbm7KaTauaJOyZWmUSKytVNmuLa4+22PyzKCr/jToZRJGGVfvVc0+ET/bVZfu20j/itMow7zVb2RR53k/N91ljx7VnyOW+8d1dXr2mWlisO24Vm2D7re1cpNjzm21Kdxklm+2Za24WrAh/1g+tbkdMTOi8Otu1S2b/nnl/yrrPGkp0/4c3kW1o5pTFE/wCJ3GuQ8L5k1qFF/iwv4E1ufFrUi3htINu1p7rd+CcVpsjmfxpHllutXo0qrZr8taEamoOtjlSpMVIq1Iq7qBFfZUEymrrJ8zVFNQBZ8NtJBcXdxG21kjX9TivRrrWjJpuyOHdC2F9fy9xXC+G0/wCJXrL/ACttSJPzLVvrZPHaxXkNzu4C/e5po56lr6ib9sLr83mb9ytxlfriljt5WjeePb5bYi3bsbjUG4rs3H5sfwrzxW1ZxI3h2+lVdsn2iNdrcjYeM5PpTIZmfvWjg85mZVDRLubIx0IFQbR/e+XJ2tVySKJbV5VDK0bhW28j6iq7Nuw0jruX7vzcc0DG2spbUrRFXzG8wbV/vHNdP4ge7g+H+uPcHy9sOxVj9WOK57S/M/tS2aFoWbJ27vuKe+a3/iT5ieBNSlmMDbzGiMq45L01sL7SR5Bb5WNKtxu/3qrR1ZjqEdZYhd46lWV2Ztx+9UceKsbY/vKaBCLcOq0rXB20m2NqTYNtADluBtbhaJLh2Xqu2otm1t1MZaAHb6N9Mpm4UwLG8fd+9U8MVp5O64TbzVBWNSXFwFh27dtICPzR5xWMKqqavX11ujSKFdq/e21iw1JuP8NAE2acuP8A4qq6tUy/LQBZV9tCtUSr/epy0AP3fL+Ap7Mfu5/2abQrfepgO5pfu0xc0LhmZaAJJJX8v79VWc1Nt3bm+6tV5F2tQMz9S/eWp/vL826vW1mefRdD1KG9naTyFWX0UrxXlFwm7K/wtXfeB7qO98A7LySdodPuP9XDgHmhGFVaXJvEmY9WvPMmb743bazly0Z8tm2r/d/mc9far+qOn+h3CxruliEvzMCeHxVCaUR/dVl6fM3O89+BTIWxbvJRHDE8Msny53KylAueoHrVeaaSdt8i7W+7/qwN3GaYqlY/3h7Ft3Ufj/hRay+RNuxGzYO3d8+3NAGnoMsCtcxTLHueDaq+TnnrgE9Ca0fD/wDp3hXV7WG3hWaMq3mbeGHufWsBX3W8i/aVVeF/22xu6YroPhzdmDUrizbb5N3EVZW6KR8woBnmqt8zL7mrMLVP4ktzZeIr6CRNu596r7NVBWO4baR0J3Vy+rD9KhkcVGru2dsW1V+9JIwQLzVG6uArfLIsn+yvCUhksk0ca/MaoXzJ/o06/MqyBvzqtM7yfebb/sr0pVcyaa6/88jSA9U+G+oRLcX9vI+3zY934VxOoQ/ZtWu7f+GM/LWp4Zujba5DLG+2Nk3fh3FM8cKi+KpJVG1ZUDVfQxS94r6XmO8haq8n73TblW/1kEzL+VLYttmRm/hIprMft2rQfd8xBKv16GlYvqcxeLtuGrb09zJbw7fvbNm2sm+X95uq1pOfJ+83yuKlFM1fDr7rWVP7kn861c1i6Cu26u13fNx/OtirT0M2tSG8bdZ3C/8ATM1naS/7tmt0XzsbV3cha0LhS0Mir/Eh/lUXhVY/LnaRWaNown50upS2Ox+HN1Pd3DRXEMbTRHazKuA4r1nRbu0tprtbhvJWKAP+m4CvPfB9vb2k1rFbstvNOd0ys2/cAcjjtmrPjLUJI7zUdy/dsi6t/ddjtAqnojF6yseOa08t9NNL96SXzJ2/PdWDXVaaoaaafb93ESf7Q6mue1C3+yX0kS/dU7k+hrFLQ621c0NNuHX5V21s2s0skbLI+3b+bZrmbGXa3zV0li/mM6fxYDflUPcZHrzSNb2SSfLGzyy/iNq1BrAG3SrNgrNBbK34ud5qfxBE8l9YW67l8y3j/wDH3Y0t9svdcu3t08zdL8v+yF+UYrVbGbILeKXbtVmWP/eNQ3iyNcQtIq+YzhWbaAWr0L+wpItHtb/yG+zyH5W7NXN+IrYLDaz7Nu25Hzf7yVRKkiHd8xozUdFNEjqbRTc0AOoplFAD6XNR0K1AD6KKKACimUUALmm0UxmoAfTM0lNoKsOptJmjNAxaKTNGaAH5ozUeaKAJM0ZqOigCXNGajzS0CH5pc1FRmgLEmaM0yigLEmaM1FmjNAWJ1apY23VUqeFqCSzUbLUmaa1AiOmU+mtQMbRTKKAH0UyigB9NaiigBKZTmplBQlFLRRcYLT6YtPWgTDFGKdRigLkbVHUklQtQMGpaZTmpALRUdPzQMM0ZozRmgAzTqjp9AC0UlFAC0VHT6BD80ZqPNGaAJM0tR5paYEmadUOadmgRJmio80uaAH0UzNGaAsbFFFLVEDqKXFGKQCUuKWnYpgMxRin4oxQA1VpyrQq05VoENVacq06lpAJS0tFACUUtFABRRTqBBS0lLQMKKXFGKBCUtOxRigBtFPxQy0AMp9CrT6AGKtPpVWkoAKbipFWjFADabin4oxQAlFSYpaAGKtOVacq0UxBRRTqLANop1NoQhy0LQtC0AGKWikxQAUUtFAxlFPooAjopaKLAJiilooAbim4qSkpAR4oxUlMoATFMxUlNoGMoxRiigAopKKAFVqKSlVaAFzRmkooAXNOqPNLmgCTNG+o99GaBGX4kb9zHXNapKVht2X7vKt+ea6TXF8xliX7zRnb9RzXOwtHPbvbzfd43eq+4qXubx2H2NwF/u/7v96pJLezkbd9kVf8AZjyKoNZXNt8yr50f95akVrhm2+TN/wB81JRbWK2iYrHBHuqx9q2/d2r/ALvFU47e8l/5ZeX/ALTYFSfYol+a6ufmx/q41zQBL9rH96rVu1zP/qYm8v8AvNxUdujthNPsv+BSVq2vh+8vMf2hf+XDn5o1pkkH2uz09t19d/aGX70Fv19wT90Ve+GsN/P4002/1YyNDFcq0UUzZC7unFbmj6VomntBLb20d5yN3nLv5zjNO1RBpPi6VYV228cy+VHu7Ic1E7qLCFmz0iziN9prS3TtIyyN97nbsNeK69qUl7qF+s0zW6rKV8hevy17TauI7XUrf/nldSbe33uRXnXiSFNxdUX5v4tvNcVLc2PMYcLuVfX3rU0lwseqyt91dPm/XisuRRHdTLuq5Dn+xdTdf4xGn5vXetjNnT3nhXztLh1G8ZdL01owqbuZpyBzgVyV5ZCNnW1i8uFf4m5LV6t4F8KyeJIZby81CG88ohWjWTOyq/jLQoLGS7Rdqxq4WL1b1NUZczTseNMgguFbb/vVow/K22jVIo49y+22s7T7ja22pNDq/Csoj16Hc3y5WrHxeuC2oW1r/wAs4xuX6tzVHw7bJd3UyyFl/ut/dqj48XytShiZmZlQbqq/umdv3lzLs16VqRp92qFuvypWiv3RSRsTKtSLimx1Jt+9TAiZflaq0i1ak+7VaSkBt+GVH/CP658u7c8Ct/49VzS5Xi0+D5l3K5+VmyGBqj4dV20PUmj+bdcwq3QbsIxq1Yy262aI0O6TfuaRvQ0zCW5MuW/dfL5e/wCTb71ct4p28tY0WNpX2LubvTdQfT5YR9jkbc2P3cij8cVetdajtJIJZotzKR/q8AKAMYOe5pkamfJK8Czqr7fnCuvZ8HjNV1x/FE0nH3eR/L0ouPPnkR40287V/eZ2854Jpu7bJ8vmblG372NtAIbH+6miZtzLkfLwNwqb4kXckvhuOL995bzI25m4x7Cqu5JJtjNt/wCua8Zql4seRdB06Jjuj+2Blb6Ci5SXvGHbwO1XPJC/eNV4ZTUisWapOgn2CnbRTVp1MQfJxRx/eptMkoAlZxt+Wot9R5/hplIB+80ykbNJu/2qAFXMjKq0l0vlx7t3zfxfnTo2Ea/NVK4fzJnZfl/h/WgCRX+ZV2rVjaWXc23/AIDVNUC1chcbaBgrDc1Sbh8tQM43UmaALCuKlX5VqlUsb/w0CLW7dTd38S1HSZoAnzRmoM0maBlqRz93K7ahZh/vNUe/5W3UzNACTL/DXRfDeWTdrlhCm6aW3LxL1rm81f8AB9wYPFFou/b56NBu78007MieqOtuopJdLj3D5oH8rzO2FFUrXO5vvbePu/nz7etacN666beWcjRzbzu/3TWWuPLX5m+YBWb+ePamzBbDYZY1uNzP5cOWeJlXhnHqPSpOGZ2k+VZMfe469qSZAqqm7ay/dVf4T6GlW6KsWhZvmHzMsfy/jQMJFLNH537tefpgccVqaGwstWttrz/NJGzSbcOg9qzmy0aNIi/N935vQfyo1C7t1hjit5lkZEK7tpAyecKP5GgGRfGCxNj4k89XZllTdu/vbTiuchu5PsbrG7LwHXb712nxQu/7X0HQZ2SRZlRleRl+8cVwGnv8u3d935aT3NIO8RrTFm+ba3+9VdkKs1XJogrPxUHLfl8tSaFNlpkL7PNRvusKsMu1Wb2qrteJVlYfLn5d1AzotBuhDNprzeYqqdrNGueK6D4hW6btPuoRJ8w2M0mM5X1rj7Fz5Kurs3lyBWXsoJrsPFUW3S5Yo23LBtnVvdqpGL0lc56FvutRqDhfE0TKu1Z4in50yP7tV/EWVawuF+9Gg/nSZZnX396pNHf7y+9Pvl3Rs1QaSx86Tb/cpFPY3bFQt9dsv3WRav5qnasPMX/r3X+eKsVZkySq/huGf7Y9vGvb5lqRqn03C325pmh8xAvmL+QoA73wnbzx61D53k/724l9g7EVz/xK1WTzmt96tdXJG2Nf7idD+LfNVPw3rE9ks91qS7ZOVijX77P0yPase6lku9Umv7o7riQbV9EQdAM0CirO4lqgghEWd237zf3jmsTxNFtmhl/56IV/KtuqGvKH012/ijIapexaeph2f3h/skV0unqPtH3ex21ytu22Suo0tt10rKPuxmsXubGjdRRNbwai0yx3FjGsUsEnWUJ0eM0/wTayfbIpVT7v3ZNuTnHWpPssl3puoQQp50y25lVO5wV4A7mjQ9TOn3Sbh5cyEbfMXBrVaoxkdTqHiK70u3/s1oVurPG5Vauf8Yaxpk+h3f8AZ9td295czQq26QeWjpy4Wt3xhexXumw3FuqrdSfeX2Hc15zqj/aWhijLNb2w2r/tO3Lk1REFdk1jcPPao8m3d/F+BxVioYVEcMarTs00Wx1FNzSZoJFzRmm0UFDqdUdFAElFR5ozQBJRUeaM0Ei0lFR0FElMzSU2gY7NGabSUgFp1NooAKKKKACiiigApy02igB2aM02igB9FMooAdRRRVASVNHUK1ZjX5aRDH0U2igAqNqkpKBEDVHUjVGy0FhTlpmKfGtADsUU6igka1RNUrVE1BSGUUUUhhT1amU6mgJVaimLTqBDZKhapZKixQNDaKKSkMKKKKAFopKKAClpKWgAp2abRQAlLRTs0AMp/wDDTaKAEpaKSgBc0ZpKKAH5ozTKWgQ/NCtUdFAHR0U7FOxVGZHS0/FOxQA1VpcU9VpaEBHinqtLRQISloooAKKWigBKWinUCCiilWgBKWlooASn0UtACU7FOooAKKKKACinU2mAU6hVp9IQmKMUtFACYpaKWmAlFLRQGoYp9ItOoEJRS0UANxRinUUANxRinUUAJRRRQAUUynUALRRRQAUyn0ygY+iiigQyiikqhi0lLSVIDKKa1CtQA6m02koGFFMooAdRTaKQDs0tMooAdTaKbQAtFJRQAtLSUUAZ+pJ5twFVtsioGT61kNbx3LN8yw3H91qv6w5guIbhf4Rt/KhXsL7LSfLJioe5tHYzFtbmP5dm7/dp6w3bNtZtq1fXT/lZYZ2/2aGsT/FKzLmgZUW1/wCe1wv/AAHmrcMNvE27ydzf3mpy29vGreY+2om1O2Vvl+agDRWaVflhX5a0rGynnw90/wAtc3/ac7M6wxLtwKu2bTytuuJmWglo9E0e10u2WVJJVk3R7t3901l6xDHqE186hluGtVuE+i8Guem8Rafptr5Cy+ZNjb5a1hzeMrxm837P8qwfZotvRRnPzHvSfUErHsWl3vmXk6t8zXkEN0n4pg5rl/GV1b2S7Zm2s/3V67qseGbgXOn6FcY+XyWtvxR6r/EaxM95bXluyrJAhib5cBga4lZSsbnl1wwlvHZVZd395SKt3D+X4fkXP3rhfTsKZqWWvPmZfufwtTNQYro9qq/M0k5+X+9iuxbES3Ok8I+Kh4f1Ce8jDW8MsZi8rdkvnoWPfFVdY8V3OrzOvzdfu1z9vZQSXDvfTTxw52orcu3YCust7q5gtXstF0uLSVQ7Jrnd5lzKfTf2+i1RDte5yN9DOqlrz9yzfwycGsatfXLcxs7MWaT+81Y+aTLR1vg+4K3RZfvZ+aqnj5w3iS5bbtWm+F5hHJLUfjL5tclZfutT3RFveGWrBtv/ALNwaux1l2N7JHD5EixyQ/xLIuSvPY1r6WkF3IE+1w2rMfkW46N9XoRRIqipf7231NOurW4sptlxFt5+WRWzG30eoVcUwuI3/wCzVdqsN92q8jfe+lAzoNBXb4Vv33L819Gv4+XU9uwaFfutJn59zcN6EU3QX2+C7v8Ai3aiF+b2jq1dW6WVvbPJKzM6BvL28YNM55PUjjWBlZ2+9ztk5NNt0DbWWKSTd9zdxtNOt5YFmV7hflUj93uxTrdoJZJUkeVv7qychR70CE2zyK6yTbYcn5WbAY1WaXdHtW4j2/7v3aluFktmdJFjVf4pfpz8tJdWjxRxPGytCw3f7Sn3oAg+xfaWjitXaaZvl8vy+az/ABdazWdrp4m+6biTYu4dFFbGms8F1Kvm+T+7b5lYZrI8cTSXM2jrI/mSeXKzN+OBSHH4jGhU1bj+61V4W21Mv3qR0Ey/dopq06mIFpslFNZt1ICOmM1R3EoWq7XFK4yyzBabvHO6qclx/tVA11tytAFu4lLMKg85I/vMtbHhuxtr61e4ukaRlkKqu44ro47W2jz5dtCq/d/1Y+mDTtclyscJHdJt+Y7ae16I1O3dub71QX32b7Y/2HzPJ/h8zgrTKRRahcystXFWqcLpGvzGrMd1F/E9ICRVoakaaPy3aM/Mo+7VRbrcv3aYF9X+WmM9U/tB3fdWl82Rvm3LRcRaVnb7qt1qWO3l+XcNu7O3d/FiqHnSN96VquWreUyvu3bSGpgE2I5FT+9n5qvQrZbW86S53fwrCoA/EsaqXidePmiO5Kkh+Zd394bqBMfI9nH/AKu1aTn701wf5DFVrq5lUJLDDbQ+Q4lXyY9pyvvyalkXbVWRtysv8LUAeh+Slza7vOaRnTzVVf4Q3eQ+9UrVzHbu0yKzN+621T0O9kudBtoFfay5R/onepYWKtMzI26RCq/N90Huaq5gTqvmtsZWbcm1tvXNTaPDuY/d8tHKtu53cZH1/wDQajjukWT5U8yThFXbvRqSRzaXCedDMtwp+ZZF2fQAc0CC6tUiuCv75mXH7uT5NxPU8VHM7ru2oqqv8MfG0eg9BT1uBuf52hZj8yt/Fjuar+bFI0qq+3jdtoAsa5cfbfA5lYQLNYlfqwzXBwtt+f8AvkLXoFq1vc6brFrfCNlks5HRmblXHSuFkilaxj/dxrCsYdWVuc+9JmlPYb5N5OzNHHJJ5Sbvl9M4yKNPiedpF/iiQu1SxzFY90PmeZIgRdv8W485q/Hbiyt3iUtubDPJ3akaGfNEN33aoyJ+7b5t3P3a15l+UIu6qkkO1WpDRHpMXmRzKp+9H8v1r1DUtNt5fBZ1KFY9z2Ks8ascq69Sa8r0l/L1aHdu6n5a9S0e4EnhVbNkZVWCe1/3pDyhB/3apGNS97nAW/8Aqx9BRrmG0+22/eUtRCu2NqfqCj7C7Y3bSv05pM0XQy4182xG7+Ebfy4qrpbBdQCN71Y01t0dxF/wL8+DVeM+XfRt/dekUdBZ/wCs3f8ATML+tT1Ba/d/D+tTVaIFzSUU3NBI6lpKhku4o/l3M3+7SbSKSbLC1haxqCTr9nh3NGpDNJ/exUl5eyXKui/u4f7v96sqZfmqXItQtqNj/wBcK6vR4hubc33Y/lrmLVDJMqrXZaLbvJH5S/6yd44k+XO4scZrJ7ljbzzFmgiyyswFyrK2D83yg/XbW3DqWowWvn/bGmjY7PLuFEgx9GzVTWnTVNeunsxtjVxFD67E+Qf+g1NcZWOKDH3T83/163Wxi9Q1a+gg0WO6kt2Wa6eSKKOH5UQrzkg54rj1uzHI6zLuWQ7m2+tbXiSU+dpFqzblgtzL+Mh/+JWsVoUkulTO1fvM3+FA46I1W2LaweXLHJ/rPu1BQ2F+Xbt/ur/d9qKYBRTaKAHUmaSjNAC5ozRSZoAXNGaZRQA/NJmm0UgHZptOzTaACiiigAooooAKKKKACiiigAooooAKKKKACiiigAooooAKetMpy0ASxr81WVqGOpKZA6im0UCHUUUUARstRYqzTcUDK+Kcq0/FGKACiiigBjVGy1NTcUFEWKTFTYoxQBFilxT8UuKAI6dSstJQAVGy06igCFlptTNTaQyKilZaSgYUUlFAC0UlFIBaKSigBaKSimAtFJRQAtFJRQAtFJRQAtFJRQAtFJRmgDrKKKKsxFopM0ZpALRSUUALRRRQAUUUUALRRRQAUU6igAp1Np1ABRTqKAFop9FAgpy0i09aAG02paioAkqOpFoxQA1akpKWmIKSlooAKfTKfQIZRT6KACiiigApVoooAKKKKACkpaSgBlFFOoAbRRRVAOWlplOWpAWiiigAooooARqa1PplAxKGpaKAIWopzLUbUhoGptOam0ANpKWkoAKKKKACiiigApKWkoAKKKKACiiloAqalbi7s3T/AJaY3J9a49kdWbyzXd1geIrE+Z9stW2yN8sq9mPrSaLg+hjrdTqv8VR/arll27mamyXEn8USt/u0Ldyfw29ZmpNsll+Vt1TwxQRf6x12/wC1VDfdyZ2p5dNaKKP5riX5v7q0wNGbVYt223RpKY0V3dqr31ytvCv4LVaGaT7tnb+Xu+8zVYh0yW5k3XTtM35CmAQy6dA2yxs5L6b/AJ6TcItbENlqur2/lXVx9ns2621uvDYqNXs9PVfObdt+7GvTNbmh3GoapMPs6fZYfu7VXLsKCWY9v4pv/Cy3OkW8MUypOJUab+HjH61X1rxB4g1tVuLqWKONwPlhjxVzxRpM8U22685uPl3SViNbz2ipLHNIyyZ2x9d2Knkje5SldFeFXWNmkdpJG+9TdWlP2exTd90s/wCdV5r6dpNvlxx7qqyO8jfMzNTuM6K1mDWYdizTbwku7njKkV1K30ax3it95rhnb864CxctG6f5yDkVqSSyMzsv+rlw/tg07ktDvETiX7tc3WzqCH7PuasakUjd8Or5cj7VXqKPG0Rg8RXCfRqi0OU7ZV/hwKk8ZXH2nWndvQU76E/aM+1X5fmqwqBmVWG5ajt1+Ybasf8ALSkMmt7t7Zt1m7Q9G3K1aDateXOEuDDI0p3PK0Y38dcH3rJ2bas2uzdK/wDdG1f5mmIt2dxBJfSJffaPs6kLut2G9fpmtWbw/aXMKvpOv2kjZ/1F7GbZ/wA+RXN2q/Kzf3qvt80IoA6m10y50/wP/p0axtJfFk/eBwwwozkZpNWm8yOzZnWT90N21cFT2BqHT0ePwPu/vXx/4Edi1PqkXlQ2DNDt3Q/M3941Rg9zOjY/wtuXO31q7dQywwmWH5oZMKzKuAtUFbb8u7bV+bUp5YZVwqwy4ZYvoMZNAFCSZ3b99M0iqRtpFldY3i/vUu3+9TeN23c39703D3pXGbPg9kXWoVYLtYFWVqxPihsj8WQRR/Ksdtu2/U1t+GW26xbthWXPzbuStc58RpQ3jCZs/wDLvHT+yEfiMWOrK1TjarCtUnQWFpajVxRmmIfUUzbVpWaq0jFs/SkBVkYtuqncMV+WrUmapyKf4qkpENFFFAHZeEV/4k5b+9K1bW3d8v8Ae+X86x/CqldFj/2nZlrWzWi2Od7nnMkRimeJvvI5RvwOKmt/lmWr3ia3EWqO6/dlQP8A7xHBrOVtrCs2brYGXbI6+9FLI26Zm/vUlSMkhx5lMZdsjLSL8rU+TLbWqhCx/NUi1FGw/i+9Uq0ASxrVuF/5VUVhtp2/+HazNTEWd52ru3f3fy4plvKI/l/u1NCs8dqr+TJHC5O2Vl4YrxgetMt2e9uI7X9zul+VJZONppgP81JfuvTmiDK31qtNaxrdfZ/MWS45XdGwIUjsDUrAwLtZfmX+7yM0CNPw7Lt+3RL8rZV/wPFbLKkd8qySs0bDa0n071zeh3Bg1aLbtbzQYPm+62a6KbeqhW+6pNMyluaEy7ltl3MqyRfMzYIZyeaJpRFebo5Zpo4yG3XGd61GypHH5vzRzffXvuNSQ4khDK7NcM/yxqv3UHcn2pkDZroXccUGxtsYLMu0Hljnmo7hhJH5FvDaXCt/DHDgqfY+op+0Ssn2g7l/ijt1I69MH3qvcfeLR/uVbG5ec/iaBlnQZzHeQKsMarynzR5/H61yyr5SzQfwxSSIvbjPpXX2L/Ym019zLIlyrsrdGPQgGs/xxp6af4w1CKHd5bxxXH4uOaGOD945exyqtF93y3+X88gitW6/exo67fn+asqZfLukb+FhtrVs8yWMu370Th+3fikaspSLtqpNWjN8y1WZKQzn7jfFMJfusp3V6JpLPPCssK7VWSN++F3cVw2oRblP0rrfBdwW0eJlf/VuFZd33tvIoRM9jHZRHdXKL/DIy1LMu7Tbv+75W78jUmsReTrV4v8AffzfwbmiH5ozF/eQq340wT0Oes/3eobfvLKlQXy+XcKy/wAJFTM3l/Zpf+eUmz8q1L7T4rn+No2pFssWa/6LE+Nu7NSUyFPLt44v+eYp9MhhTPu/Mx2rT6Y0Xnq0X9/Cr657YpgZ9xcee3y7ljX7tV5KkjYruSZfLmjyrqy9wcYqtdOfM2qNzVh1NlYYzCq0lSsp/iqKT5pNq0yi7paFWd/b5a73RZhpdv8A2iy+Z9jiMqL0KyuNkf8A6Furk9Jtd2xNvpurp9UYQ6PaW/3WupTO3+zGm5B/49valHWRE9ivps0l9MjSFVZc/L09zir91e2Wl6W1xfPJ9qaQpDBDgvx39hVGNHijSWNfm2bV3LWV4mRLuxjvPNjWa2/cSxd3DdHFbGS1IptTTUtWm3W37l/lhb/lpEFHH1FRxxeX827czfxVDpMXlw3E+Pmk/dL/ADerVAwzRmm0UAOzRmm0UAFC0UUAFFFFABRRRQAUUUUAFFFFABRRRQAUUUUAFFFFABRRRQAUUUUAFFFFABRRRQAUUUUAPpFpaWgCZfu1JUa1JmmQFFFFAC5pKbmnUCCiiigYUNTKKAEooooAKKKKACiiigAooooAZRRRQAlNp1NoKEplOooAbimstOopDIsUVJSYoGMpKdSUAJRS0UAJRRTaQBSUtJTAXNGaSigQtFNptAElJSU2gB9FMooA7CkopKozHUUlLQIdRTafQAlFLRQAUUUmaAHUU2igB1FFFAD1paRaWgB1FNooETUUyn0AOVqFpFalVaAHU2n0tAhFWilopgFFJS0AFFFFABTs02kzQBJSZptFAD6KZRQIdmlzTKTNA7D80VHvo30ASU2o99G80BYkoptLQAUUUUgFopKKAFp1Nop3AdRTaFoAdTaKKBBSUtJQMRqjqRqjoGFR1JTGWkAykpaKAEooooAKKKKACikooAWikooAdRTaKAFqO4i82F0/vCn5puaAOSkSPzPKkTy5F/ENUUmnyNllkm/4C1dNodxZNcTJfQxzW/8AFG38XNZPiBLeK8b+wUuVtc/6pm37PofSoZunqZq6aW+8ZP8Ad3GprfTY4/4Vp1jput32WtbGdv73y4C0+603U7aSNdQZVVj823n9aQ7olh8vzlihRpJm/hrUaxuFj3TOqt97bH710Hw/srNtQj8wLtYhfmra+IDWVlN5VrFGrN95qZDlrY8rutPeC4inmXcrV6V8Mdb0+yk/0wR1xPii+Euj2EEfzLE7M+3rk9CawbG6kjbav3moHa6PQ/iVrFpe6oPsrfu1FcJqF0kscSK7RsnzK1WpNJ1S5jWdrWZbVj/rZFISql9ZJbLtZ1/3mbFDCK0MOb5cbWZt1RLU10oVti7qhqSySFvLkHNdDY4lj/3fm/Bjg/k1c1WtpN19muEaRd0efmX+8DwRTQNGtrFrIsZ3D7oFcqtdvqE0ctuq53Mqfe/vCuKb7xoYomho7fMU/vYo8SZbVHXb90Co9Lz5h20zWlMd86s26joH2ixbof0pkjPub6bv1q3bruj+VfmqxcQ/abVFj+W6izt3Y+YUBczoZt3+sdVX+Jm596tN8ti/kvuX/HuaLiYXK2cX2KC38olXaNeWOec06FbeS8K3k/kw7Nqyf3SfUUxC2rhf+A1c4b/V1lw4W82wlZo87flrVVDHv3UAdNp8pbwKfm+b7czfL6YWrmsKZ7HTdsMn+q2tI0Z+bFZ+k2UreC3ulm2qtzNvj7sF21o3SazpdmnmDbbzgbF3evI47VZzvc59lHzeYu5l+Zv9r2p7OWX5ttWriaWVWVolZm+bcqgc98e1V7ibds/0dY9o2syrjcakohoVo1bcyeZH/doXNOjTzNy0AanhViusRNtb5kP3fn4PHNcp48uB/wAJrevtVtqouP7uBXV+FWMV5dSqjM0UO/bXA+Jrh7vxJfzyfeZ/6UPYdP4inNKZGVl2q1aKsFhLsN20CsuHDTKrfw1fmb/Rdn947qk2IftSbqa13uY/M1V2WmUDRZa6O35Waommdv42qKm/7NICbznW32N8zMf06Cq7MWanSfeb+7/DU+lxfadStov70g/Q0wOntdCskhj8yHzJtg3bmPzGrS6fZRtujs4F/wCA1ab7zNRVJGV2H8I/u/7PAoprUlUSY/iqHdp8c/8Azyf9GrmFrvLyEXNrNA38aFa4P7v+9/FUM1iDYZfxpzZ/ipVX7y0lSWLVjyT9lWXP3vzWq8bD5twqWH5W/hoQh9ulvIsrXDyK2NqbV+8ajXKt838NP/1cjLUkbDbTAYr+XIG27l/9CrVuLfTLlg9m88O7H7uTB+oBFZbNUkPyrQIt3CXa7EaWa6t0+ZF3Y2HvwajuESJQ8atu/wBrHy1bsZStR6ggim3r93NMV9R2nsIof3ar0+9x9anVA38O3b92qFuwi81a0rWIyNuzQBVktZFw8f3ozvWuumcXNnvh2/vzvXb95S1ZGzatW9Pfdo6pvXzIJTEy/wCw3INMzki9C5khX94u1ECbfrxkU6P93H826PcN3yt39z6Gq+nui+duiaTcm1VVsfXNWLht25ZtzTMR93ouBmmZvQh2hfuuvmLnfJ/d54Aq0yx+YkCybbdf9nLv3L4qGSV1hCeUytEf7uS2RjJz0pLdpfMlWOFvMaPau5gBn1NAD7i7e2jfdHH82P4fvem30IpnjS+fUrzTb1vvPZmL2+U8Y+m6q15E6rtuP9Yw3/Lx16Eim31oVhsdxbbk7l/ulqBpWkYt9CWj/wBrIqbQ7hFvI/M/1co2N+Pc/RqsXCFWFY/+rkkT7v8AGv41Jsbl1amORomX7v3qpSJt3Nu+8a04XkubEXH8X3H+o6VRuMK3zLTAx7hBIrVrfD24gi1Y2d0yrCxLbvwrPZD81N0X914ist33ZTsboaOoPVGlrWG1LcrfeRaZC5jkRver/iCIW1xPEyqsyybtvtXOXlxJIrIreWuNrbf4qBLVFfUIgsmpwZ3eXJvWteFt0aN/eQVhxr8zr/ejZa1dPbdYwN/sbfypIp7FuimUVRmFKv3qSo7ibyoWb+L+Ff7xoZSVyC8uDHNsh2+Z/FJtDnmqLII/lWpre3+XfI25nO5qkmXb833VrC92bJWM+T7tR2MRkuEZvu0TNu+Va19LtxwvzUmyrGnp6JGu7+KQ7K0V1DTbnULawmnW1uoIhAt3JzDkHiNvQe9Urx3ghhaN1VpSVh7FUHBk/wDZRWLdW4jhlbZu2p7dPWtIKyMpas7DWEubJfs99DNDcfe+b+L3UjqDXLa4ohupbWSRVaMhpW/uyN/BUek+I7yyhW3mLXlirhlimYkpjvGe1V7e3Msy3Uh3bvmXd1ZyckmrJSaL/wB1Qi/N5fy02iigAooooAKKKKACiiigAopKKAFopuaM0AOopuaM0AOopKKAFooooAKKKKACiiigAooooAKKKKACiiigAoop+KAEWinbKTFOwCUq0+igQ5adTVp1BItFJRQAtFJS0AFFFFABRRRQUJRTcUYoJEooooAKKKXFACUUuKMUAJRS4oxQAlJS0UAJUdSVHQWNooopAJQ1FIzUDGUUUUAFFMooAdTaSloAKKKKACkpaSgQlNp1NoAKKKKQwoopM0AdhRUeaM1ZkSUtRZpc0CJKdUOadmi47ElNzTc03NDAkzQtJuFC0CH0UUUwFooopALTlamUtAElFItLQA6pKhp9Ah9KrVHQrUAT5pVaolanUxEmaKj30b6LgSUVHvpGegB9DNUOaM0hj80lR5ozQBMrUb6jVqM0ASb6N9R5ozQA/NGaZmkoAfRRRQAUUUUAFSVHS5oAkplJmkoESZpmaSigYuafmo6ctAElFC05aYhtFOptACNRS0UgG4qOpajzQAlDUUNQMjplPooAZRRRQAUUUUAJRRRQAUUUUAFNopKACikqPd81AznfElvJFcG8h3LDIBu/2TTvDrj7OWkbc3mbt1bsyCSMoy/Kw2stY+oWgsbNXjfdtfb+fQjFS0aJ9D23wzrFvaeH/wB5t6fLuWvOfFWsQXuk6irL911aL1yDXIr4iuVtWgWVvLrKkupZW+Xduz9aQKGpqWOqy221lfbT9U1qe9YPJKzNWfb6fdySKrDazH5d1dbpuheH9NtxeeJtSkkk/gs7ZeW92PYUFHIbbiVS8fmVPp98+myRztbLNJGd3zN/Ot3WtWFzu+w6e0Nr95I5FwFH0Fc0zeYs/nHc2Bt7bT3oBPQ9Dh1LX/Hqy/2pqX2e3sbbdDbQrhMV57eQxrcN8+7afmkkatjR9eudLsZ1s3h/eoUZY1ycH37Vg3DSSzebNt/2VXotJgiO8zLvlz83H/AgKo1prbu3zTfL/di/xrPZfLYr/dNIsRau26ho6pLWhYr+7pgyZXnWPbGytH/dbPy1nTPubdWzGnymqV1ZFfmj+bmgSJ/DbRrqC+d8yqRu+lL4kWP+2tsP+pY/K394Z4NL4XST+1onVPukUa8v/E+/GjoTfUkVOjLVu3T5aghUbn/u1Iz+Vu+70qgCO1824uHVmXcQu1WGGx35qxodvHJJNcXG2Zcnasi54qPd5ViG/ix9eTxViziEEKL/AHaBM19Uls5I4JYbC3hmiGxZI1xu9M4rn5JX3Vrr+8h+7WbdJtZl3fNmgSOg0eZP+EFmbLN/pkm1d2A33eoNRNqdw0MSM7NDFlkVlyFJqlpeW8NyRLG37u4Z2k3eval5jX/ex78dKZn1J2d923dQrVHtKtQ2Puq3/jtIBeFo/h3N81DL/T5ttKybVLfN0+agZv8AhVY2t758bZlwqN7HqDXmXiKYS+ItSlUbd0zfL0rvtF1A2lq38UjOFZfavOrphLeXlwz/ADNKzf72TQ3oOktRluhZS1Pkl3SGlt/mkXzG7febpUVwnlTOrPGzf7LZFSbDKSnsh8sPjarVHSGDUxV+anqv7vdu7/do/wCWf+1mgBjVs+EYt2oSyt/yyj/Vqxq6nwjF5emyS/35P5U47ilsbdJS0YrQwEopcUlABXE61D5GqXKqvysQ6r7Gu2rn/FkP/HtOv8JMTVMti47mBG21lakm+WRv7rHd+BpmKkb5o93935ag1EpVpFp1AE9xiRRKrf71JC+3dUtqols5l/iXDVWVdrf3v85FMRJU0fzfxU6FA1TeV8u35aBElu3lt/eq5fReZbq33dvytVaFduGrVjZJbGaLesasNyt/dIpknOq3zIzf7rVtWuNv3ttYbfNu2/8ALRN6102k2VvPbxz3l5+5yG8pV+9joDQgZHHFcXbM1rHuj/56NwK0tDsS2sJatNH5l38ivu4Rxzmp2unlXyl2xwr/ALOKI1ktrqK4t2VmgcTq3bI9RTIepbmhjtLoruby12/e6y5P8qsNFutbi4un23UshZIlXG0Drn/gXy03WNQfVNW+2bY188eVF6IijGamt1SRZf3zLDFbqjyK3Cc5cD1pmJmNdSNIZWRZlUfxe9LCwRVdf75VWXq5PBAHtU915k7OlvHJHCvzJAuHOC+MsaI1eD96ysu1DFFJGpyx+tAyK1QSLO8w+8dq7udxHHNSLF/xLQ0yzd0Xcvy5z61d0fTZdSjdFZdqIH2r/FufHU9K3fEUMC6PDYearSWqSSy+S3f5cA/8Cpg3qcHcRI0lYeoJ5dwktdJIny/N97FY99bnbtb71SbIteGW3XE1n93zQWX+7lf8VpkyBpGrIt2dfmU7WX/x0jpXUahEGhgnVf3csYlX6nrQN7mDeJVOaENsf5laMhkZW+7WjcKG+WqUmNtIobp7Ft6sWZs7dzNktmqd18szL/dqxZvtumX+8gb8jVa8YrcSf7RoYyvGwW6ib+6fm+lXdH/489v91ytZzfe3e9aGlt/x9L/003ULcHsXadTadVEC1HcQieNV3bWz8rf3TUlC/N96gSdjH82S2YpMvzf3uzVBJN5rbfmq/q1rG15I6pdyQ7/3UXDlR2+eqUKDady96xaSZsndDYUEt1tX+Guo0e3jZZJ5i0NvGnmyyr/DGOD+J+6K56xhK3ksTHazY+9XT6hvj0u1tWG3fm6ljXoyDiM5/wDHqS3HJtIyLy9+23xuJCsbNjbGvREXhE/Csy6lEm/d8vH/AH0akupU+X+Jv71UY4ZLmTbD8zfxf7PNakFpdPuFmeKZWj8vG9uvB9K01UKoVfurT4UeK3jikfzGQbd1FAnqNooopiCiiigApKWkoAKKKKACimUUAFFFFABRSUUALTs0ZptAD6KZRQA+lpKKAFpM0UUALRRRQAUUUUAFFPxS0wGqtSUUtAhcUYpKKdiRcUYozRmkA6imK1CtQA+imZozQBJRTM0maAH0ZplFAD6KZRQA+im0ZoASijNMzQA+imZp9AD6KZRQA+im5ozQAlJTc0jNQUDUyim5pDHU3NGaZQMKRqKbQA6m0U1moAdSUyigQUZoopDCiikoAWnU2igAooooAKGopGoAZRRRSA6zNGajzRmtTIkzRmo80ZoAkzRmm0ZoAdmjNJSZoAkpytUWaKAJ80ZqHNFAFjNOqrmnK1ICxmjNQZozQIsZpc1X307fQCRYVqdmq+admgCbNGajzTqBEitS76izTaAJ80ZqDNGaAJ99Jmoc0maAJc0ZqLNGaAJM0ZqOigCWnVHmjNAElFR5pc0APozTM0ZoAfTs1FmlzQBNRUeaXNAD6KZT6ACmU+igBlFLinqtACKtS4pFWnUxBT6ZT6AEzTafTKAHZptJSZpALUVDNRQMKKKbmgBGWkp1NoAZRS0UAJRS0UANooptABRSUUAJTaGpKYxM02ikpWGLio7iFJ7d4pPusPvf3fcZqSnNRYDjW00rdPE00aqh+ZmrptN1TStKtzb6DafatQYDzdQueij0jTtVPXLEy7bqGHzJF+V1/vAVkWrpFM8sySRr+Q9ahmujRJfPPNNJLNN93+NmwFNR6TCJLoS43NnduZqp3Vw8825htjU/JH/dFSKotlR7qFWZ/miWRj8o9xSGdh42vbfybb97G25Av7tuWri5pXkX/nnHn5VX+tSQwz3tx+7Sa4m+6qxrv/CrMmlPBI0V1/rl/wCXZWGf+2mOlAaIvaDpkdzdJFHb3t0zELtVgg/E12viDwJqGjabHcSRWVmsnzfuZDNN+L9q5fR9Y/s26RmT95Hj866DXPH0+oaSbJo928hmbd6UyJJ30OOm2RRu2zuF3M3c9zWDdKnmfKd3+1/eq9NdvLlaoXS7VDe9JmiI1rQ09htK1nLVi1fy5lahDa0Nlal/hpsdSVRmXvCNp9p16KLb8rOGZfdRWNMxn8QXL/xYLfia6fwO3la087f8sgfzxiudt/m1y+/h2vtWhrQSfvEnlFd6U1lLKIl/iP6CtFkjZVZm3NVJnDXErL91QF/E9aBhN+8kjX+FiW/BauW7dUxuX8aq2aCSR2xu8s7FX6VakURtvU7V/GgGWN5ix/dX+KpJrK21eF5bFvsupfxRs3yS/wCFQfJ87Z3VGzJG26H5f9r+73oEXtJt7628P3K3ULf651b0yDimeVLu2/KvG771XLGaVvD9y803yyynarL3BqpvO1f739PYUMz6iLE+5mZGZW/vLmm7T/eb/a+Whc/N95eP4lo3Hcu3d8w/iagCeHfztXcv8XzAlhTN0iq+5G+5Uf3VLL/wJamjeTa7xs3Tb/vUAXYYrBtJR2eRbpBvbbj568yjbc3+8S1d5ePI1rOZljZYLdnb+DbgdBiuFt12r/tfdpMulsWtp8n5dvzfxVXXEeOFarEzbYwtVak1Q6aV5Nu5vu/dWo6GptAw/iC0jfepV+7uX/dptACfwtXe6bD5Gm20X92MVxem2/2m+gi/vyBfwr0Bk+arSInIZUlCrT1WqMRmKTFStTMUwG1m61bm50udF+8o3r9VrUao8UmNHne4Nhl/iFSQ/MrJ/eFOvoTbXk0H9yQ/lUcbbW3VkbjVp9JMu2ZmX7rAMtKtAyxYsVmSi6QxtuqNW21bk/ewo+flamSNt225arcblf7tULP5vlrQj+X5v4fu00BNsMi7l+9WzoKWjXiS6kq3HlkMsUnCfjjrWGrv/wACWtOxT/nofmXDUyXsQ+MLIRatcy28Kw2bSb4fLXCbG5wPpVHRZfKm27flbDLXY6xpktz4b+0MY2W2ct97ny24yK4S3YxMnzfMj7W+hpPcIanbwxC5tWa1haSRsfdyasrY3KqqTQyRr/tdGNP8Mr+7Zsstdfp7+VGfm3bv4mwTTM27M5D7DeSae9vHas3kON8irzg8Y/GtvQfD+o6sqNJbbYYDtVZMIIj7D1qxrmsf2RH595N5NvK6y/Kv35EGAlYlv4y1zUFuPsOjXupRtIZVdlKJyMcnvVXM/eZ195b6Zp98PtE88f7s/LbRg7kUd854rLs9e0fTbe6l8m2WFAP+PmTO+RucrmuE16Lxa6zXt9NHZ7xtZY5Mvj0yM1xUduJJA0zySNw26k5FxpX3Z6FqnxGnlvmvI7r5lwqrCoCYrDuPGF/fSSrZ2zN5r75WhX75rrfh34e0q+8PtK1lBJeJIUaWRd54rR1Kw+zLsjG2OP8Au8UtQ91PYwVilbT7d5o/LmaMb4/7pqjdYkj3Y+Za6CT5rd1k+9j5aw7pRHHtY/eoKTOb+7dSxe2/8q6qFxJ4btn3fNFJIjL/AHQeRXLXXy3iP/D91voa39BzNpupWq/eVBKv+1g4oKZQm+89VGWrlxjnbVOQFt22goz1cRXQdvu8r+dVrp3853ZfvVLfMY5tyr93FJcN5jR7vusNzLUsZX+981XdN+WaXd/HEr1Tkq1p5/0iDd/zzkX8jQgNKiiirJH0bttJS0CDdtz9C1Zlio3fN95q06rrpsjfa7i3kjVYozKyyMfm7YFRKLZcZJFS6in+1O9qm5mQL+JrY1rUE3XMVuq/KgifdztwMYHt8tZ15KbmGO3tWaSON93mrxvk/v8A+FXnluLi2hiu2hfyiZMxwhMuertjq3vQkJt3Ma3sjL80m6OH/a6tWnGiRRqkYVVpaKoLiYoozRmmIZRRRSAKKSigBaSimUAFFFFABRRTsUAMop+KMUANpKfijFADaKdinUDI6KkooER0VJRQAlFLRQAlFLinqtMBKXFLinYoAbRTqKBDaKdRQAtFFFBIUUlFABS0zNJmgokoqPNGaAH5oqPNFADqKjozQMmozUOaM0BYk30m+os0ZoCw7caM1GzUZpASZp2ar5pd26ncdixmjNV80uaQifcaM1FmlzTuA+m0maM0gFqJqkpMUAMplPooGMpKe1MoAZTqWmUCCiiikMbRRTaBjqKbRQBJUdFFIQ6im0UAOpf4aZRQAUUUUAdPRTKfWhiFFFFAD6azbaM0maYC5ozTc0ZpAGadmm5pc0APoqPNLQBJRUeaFamMkVqFamZozQBNRTKWgCZaWoKdmgCXfT1aq6tSq1ICfNGajzRmmBJTc03NGaBC5ozUeaM0DJKfUGaXfQBNRmo99GaBEmaXNRZozQBNRUeafmkA+imUtAh1FNp1AC0tNpaAH1JUdOzQA6im5ozQA6pKgzS5oAmzQtR07NAD6Wot9SK1Ah9NpKTNAC0lFR0DCiiigBrU2nNTaACim0lAC0U2igB1JmimUAFJRRQAUlNzRQMSo6VqKBhTaKKAHYp2KI6WmAlYfiS081oZ/Mjj/hZpPXsa3aivLcXNq8TfdkFQwWhzVjaRSSRRWNvLqmoMdqLtPlr+FXta0yfSbryrho7jUmG6bd8+00yz1a58O337lPJuF+623O4H0NZd1q08940sx3M1I1R3fgXRL3X9QispNSXS4ZcLut1CH2FdB4+8M6H4Lt/sWjvJNdZ/fTzV5tZ67cQf6lqr6xrd3qDGW4maRqCXHUbr0vn6lI6jbHhdsnZtoqnp8L3sm1XVahVTL8zI22pYf3TIqusbLndSLsW7y0SORYoVaSRqoXSyeT93uN3zVaurtGhMUKrukA82Xn5vYH+dT2+mTrD9omTav8Mfdvc0AYTKVYqy7WqSNfMapbxNrFqis/vH6UijZtX3RhWb5v4qtqv3qwm+aRK1beZ9q800yGjpPCKxrcea0nl9f5VzWnv5k1zL91WlP6VsafepDC/y7dsZ+VvWs3QYf+JejN8rM5bb9avoSt2y5IoaHc1Z8bbV3t/CN7fjV66lDKsX8X3aqMvmfL/ffd26CkUWdPYW0KLs3N/F9avrEJ13UliiMu2tC1UR7noJZj3ETpv3L8rU1V2wtu+7mthsTyFtirtFZ+pKVV9p+Wglbl+ziLeFd7H5VG5V/vZdqpqh+8yV0ljaxx/De0nkdd06blj24rAbDbd3/AdvVqbJ6iM/3VZFk/u+Yv3altbeKWT5j9nVnCvH9ehAqZrSCKxeW885vMx5LR4+U+jZ9aqKjyMu35m/LafqaQGhqll/Z+xlDLIwDbl6MD3NZk2Ktw6lLHC6MVk8wBW3VEqiWRUYeXuoBX6md4jmP9gyvtXzHkSJ23Vy1uvzf7K1ueNIJba6s7W4X5thl+XowPAIrFjbbt3f71Jm0PhCZtzNUNPamVJSEpjLUlNj/wBY3+yKBg2F2r/dqOnN81NWgDd8H2/m6s0v8MUZb8W4FdhisTwfbGLS3nYbWuX3fgtb1aR2OeerGYpafRTJGU2paRqAIWpKfRimUcn4stxHfQzqvyyptb6rWDXZ+KLfz9Hdl+9AfN/oa46spLU2i9BzLut9237pqNWqe3YfOjfdYVEq0ih1XLHDK6N91kO2qVS277ZB9aBND48rNWhb/ebafmWqd0u2Qt/FjdU9u27a1MRejXdj+9V6FhE2/wDh/iqmrDdVlWG7/eqiTvPBq297b3ml3DfLKnyyfhXl99bvbalLFIvzNlG+o4rt/Cd2ba6iZjtZT8jVi/ES0SLXJJY/m83Ev4v1oFHRl7wnN5nlr/wFvwr0XQ4nXC3EXy/w7q8f8O3xtrzcv3WAavXdDvhdw7ZpNrLhloRE0a11DZXeyJolm2kOv+yRRdN5cLKzt5aVa8qNsP5XzMP73H1BqG4Y7XWaKNoWO1lb+KqMjE8RQo2m7V+ZsH9a8XvIfIupov7r17jqyvcqZWHlqvy/72PQV47r0PlaxLArbmZA1SzWmztvgvcIuoajZyf8tRHKtdl4oijim+X5VbO6vLfh7fW+keJrae6m22+Ckzddo969I8QX1pPD5ELbpFJ/e7shsnPHtTFNe8cffS7m/d/L/s1jXGdxVttbOoReVCzzDbNWFGrtSKRiat8qvt+9Ua3twvz2abV+63+17VFdTea0srOse1/ljb77Ulq+2Prt2k7WpGgs17LFNtVF3bwrr13Z44rT1CL7NeS2/wDzyO1qqaPEJZJb2b5tr/umqxMu6Qvn71MCheRCRlam+Ui2aPH97O1mqWb5Vplv81vOn93D0hlGSpLVtslu392Xb+DCmSfepi5Xc39142/WkM2qWk/iptUQPpaRaKYD6dG5jkDxnay/dam0tAhWcsxZm3M1R0UlIYUzNOplOwC5ooopAFFFFABRRRQA1qMU6igBuKMU6igAop2KMUANooooAKKKKACinYptABRRRQAUUU/FADKkVaKfTsITFOWkVaetABRRRQSFMp9FAEdFDUZoKCim0lA7BmkptFFwHZptFJSAWkpaKAEopMUYoAWimUUDCjNJmigAzRSUUgFooopgJRRTc0gHUU2imA+imUUASUVHTqAHUU2igB1JSUUALTKdTaACikooEFMan0ygCOin0ypGFFJRTGLRSUUALRSUUALSUtJQAUUUUAdJS5pKFaqMR9GabmjNMB2abTaKBjqM02ikAtGaSigBaKZTqAHUU2igB1OzTaKYrEitTlaoadmmIlopmaM0DH0UzNOzQA6im0UAOozTc0ZoAWimZpN9AElFRZozSuBLmios0u+gCXNGai309WpgS7ttKr1FQrUAWVanZqrmnb6BFjNOzVbfT80gJqdUOafQBJmlzUdOoESZpuabRQA6jNJSUASZo3GmUUAPVqkVqgozQBZ30b6hzRmgCRnpuajzRmgCamZpmaKACiikoAKSlpKAG0UUlAC0UlFABTKKTNMYjNRmms1NoGOopM0ZoAWm0UUgFWpFpFoWmAq0tC06kIguLeK5j2XEayL/AHWql/YlgsMyww/M4+VmYnb6EVostC0rXGcFcWs9pv8AtUTK397qGos1Rvmk+Vc7a7yRRLGUkG6NvvK1YFx4fk3bbeVWhb5l8zIKUmjRSKUOJ5D8/lwxJvlk28KOmB7moLfyJ5vKVJPLYbl3NzVeS43KsEasq5+Ze7npiup8P+Ebm7t5ZZl2ssfzNu4i+vuewpDurGx4D0rQIJvtWrFm2kbfm5z7elSfELWNMa6RdP2tGp+VVrh77z7GTymdZFYbkZW+9VHJkk/ePSbEo63C4zJIzfNt/DvVeFtrNWhsTbtb+L+XSs9l2yMtIsk3/vq0lX+61ZKr81bUP92mgZbt/lVWxWjb4Zf/AGas2Or1n8rKv8VUSU7z5b6Rt33UCfieaLeISXUv/TMBf6mot3mTO7D7zlvwBwKs6Ou63Z/4m+b8TQBrw2+2NHUVZZPlXaarxymRQlWmlEa7mH3aDMYtv958Ntb/AMdrM1JfKjdN+7aPmq/JfD7ufvH7q1ia5K81q6QrtaQhdv8AeJNAR3O3Kt/wrLR3c7isSxp6KDzkVz8Ljbu+7tBVWXir/hfW9IXT1sryWKSF4grRtcY2uBjgVq6C2ltI6alCs3B+y7dhDZODmmZttGJJqF5PCqSS/wCj87Y9o2e/T+dVZIkaNfJZZF5Zo42OUH49RXoK+H9Mbyft0MEMzIV8uZgnOcCsK+8Oy6fcKkwtt0bhN0fH3xxyKBKaOZhf7/EbK+F917DFQyErJ/db+77itTUNKeC3s7jZJG0vmebu6KRWb+8W+VZjt/hbcvHsTQWnc5fXn83VpV/55hYlX2FNkcxK67vvY/TjBot/399LLJ91nLNTLph5h21BvsrFaihqbSKQjN8rUfdh/wBpqTbuZVom+9/ujbQgGU+GIyyJBH96Vwi0ytzwjb+ZqnnsPlgT9TTW4pOyudhDEIIYoI/9XGAq/hxUlFFaHMLRTlp2KAI6GqTFNoAhamtUzLUbLQBXZBLG6MPlcFa89kQxSPE33o3K/lxXozLXG+JovJ1Rn/hnAf8AoamRtBmYvy7WomX98W/vDdSUv/LHd71BoFFFGaALjMWhjb7zLimQy+XIVos4pJWfy93ypuqNYjLIqR/6xqCTXhY/NVyN/l2s3+76VnWvyyPFNtVl+VW3ZDEVcVgv3lqkJl2O6McnzBunzLT9cuI9QtbblVkQFG3YHHWqGrJd21nDdLFutZCU8zqu8c4qtC+nyW9y11LP9u2D7PHCvyMR1yaBDbVBHND5c0O7O395lOvpXV6Trog+abdtXH/ATXFXCFpJovvK33e+2tqzt5dXtVTT7NlmUhHaSQYc0A7W1PatH1qO5tx86sv96tmFooJH86RZJJHDeW3GwYwBXmHw70m/02S/a4Elva7xsWT+IrwcV1klwVUStGzTM4VpI/vPVHO7X0MXx94osrTUl063fbdbBuk252hq881pZJ7Wa8UMsKlYt3dgTXXeN/Co1RUv9E3Nqk5DTWm3AwvVwaoax4d1iPRUl1K/WZrVPltl/wBXj04oNItHFxqF3eSixyY3Iy+tbFxawassy6DYX+6KMNKrSAjJ9AKz4cN/x72yx/3d0mQtevfD1LLSfh/DeKnmXlzOzXEn94qcCkVJ21OR07TtRtvBdk2rLKsjyM1qs/DrEP6bqqbki3V0niK6uNQvgtw33UH/AAHPNc9qVuIpNjNu/wAKCU2zBksU/wBI8tV2ykMytztqjHaRNdTKw3cblraulCx/LWPu2X0X91sp+fFBoa+zy9LhZV2qv7pV/wB01QmatO3h83Tbn/npEVfb+hzVCRf4qBlK4X5ajs223ibvuvlGqxN8y1Skyqhl+8vzUhkdwnls61B/DN/1z/lzVvVFHnbl+62GqvD/AK4L/eyv50DNVfmUNT8VBZtus7dv9gVYpkDKfRQtMBVWnUtJQIbRRRQMTFJTqKAEoxS06gQzFGKkxSqtAXI8U2rO0VHItAEFFOam0hhRRRQA7NLTKctABijFLRigBKKKWmAYoxRijFABijFGKMUALRRTqACnLRRQQOpaVaKAEpKWkoAKKKZQAlNp9MoKQ2m06ihjG0UUUgCikooAWikooAWkoplAwpKKKAEooopAFFFFABRTWpKYBTKKKQgp1FFMBaKKKAClpKWgAp1Np1AwpaSlpAFFFFMBMUUtFADKKdTaAI6bTqKQEdJS0UgEopaKYxKKWigBKKKKACiiigDoaKKKoxCiiigB1NoooAKKKKACiiigAooooAKdTaKAH0UmaM0DFp9R07NADqbSUUxWJFakzTM0uaLhYkzRmo80ZouFh2aM03NGaAsFJSUUhi0lFMzQA/NGabRQIdmlzTKdQBIrUVHSq1AE+aKjpaYEtOVqZS0wJFapFqvUitSET0tRq1PoAWjNJRQIXNFJRQAtFJRQA+im0UAOooooAKKbRQA6im0UAOopmaKAH02kzRQAUUlMoAkplJSZplAzbaZmkopANZqKRmpM0ALRRRTAfRTKfSAdRRSUASLS01WpaBBJTM05mqPNAx1Gabmm5oAw5tllqjsyKrZ3K+371azeMpYNJNlCPlanTRRTrtmiVl/2q57VtNiguEW38xVYFvmbPNQ0WtTPmuJJ2bcflamLUk1vtZWVvvVD92pNCSRi3y1DcIVZd38SBqmh/u1Nq0sc80Xk/wCrWNUX/axyTTApL/DW5a/dVvasqNa0rX/UihAy5/q926nx3SLDK+7bIiH9ai1LT3n0u3urc+ZJE5WWJfv4PIcVTXMlnH5dxtk83a8bdcYpkk27bC3+5t/Pirlm3lLt21nb5Nu1m3L99fl5wprQs2ErfLQBq28wkXcy0XUryfd+7/dqjG3zH5u+2rlqx3bV+amSWI7H5V3ev3qw9UcNfRqq/Kvz100lwIrVU/vfLXI3DmS+mb+6gSgERx2kVzcRpIi/MR822tTUNHsI23xxeS2f+WchSoNHYLeK+37qfz4qe8lfc1BTI/7S1CJREupXMkafKq3LCZVHtmrEPiO72ql1FDcKo+VlYof69KybhhJJUe3apalcVkdQvjaTzI/OeZfKQorSLvHNX77WdIu/CN0qy20k1tCzRLG22RHP8xXncz7aqKnyhqLsPZo0tNUR27v7VTkbdI1XZnEcOxf4QKoUihKY1OpmaRQsf3mf+Goal/hqKgAruPCdqLbSVdl+ac7/AMOgrjbGF7u4gt4/vSuE/wB0V6QqhVCKu1VAVfwqoozmx60/FNVaeq1ZiC1JikozQAVHUlR0ANpKGplACMtc/wCLLfzLFJ1+9E/6NxXQVXvIRd281u3/AC1QrQyo6M8+qSP722oOV+Vv4akWsjoEb5aVf9r7tE3+u3f3hupFoAsW7SRM3ku3zfK22mzYZQ+z5fvfNUa1fvF82OOVf4htahCJLVhGqt/dFWVfzF3bdtZVuxaPY1X7dn2un96nck1LPUHtleJTuhfDPE3KNj1rV8nT9XjigvEaGNSfKkh4KE1zStt+Va1bFis2771UJlLXLSfSLiazmkaTbhVkbgsD0rU8H3Ag81GXcu/7rNV3x9CJbOyvV+Zmj8p/9ojoawPD8qfatrf8tEH6UdRbxPVluJZGDt+7jYjd/cU1qR2vlMjwvtkb8utc3p97JbWcXmTSNu+Vdq5Rh6EelaMN7dwbGWFfs7H7rc7aZg0aEzyx3D7o/vY+6tZWsMfsMqSNu3Ia3IbqK52bTtrI1qWOXein5l+b19uBTYlueRMgikZMfMj7ffBOa9Q+Gd1HLot/ZXXzQodyR7vWvP8AXLR7TWHVv40/lV7wbdm01yHy/uzxtF937xHIxUm8tYnT6tKI9QK7t3Hy/wCJrEusSyFlPzMKk1i3nkvrjzBuaIfP22hjwKz921VVmZqCVsQ3XzViahmP5l+8p3VtzfKtZF9ht1I0Rqaa/wDpELbvlkynt8wqvefeZai01z9jibd8yH8flNXtcULM7fRvwNMOplSMNtU2q3JVVsbqQwkxJZp/sfLVSP8A1g+tW4fm+0J/eQMtVf4lpDNKx/49UX6/zqxiodPX/R/+BmrOKpEsZTqWimISm0+igBKWiigApMUtLigkbTlWjFSKtACKtPVaatPoAMUxlp1MoBEDLQq1NRQVchxSMlT0UBcgVKeqGpKKAG4puKkooAjxS4p9FAXI2Wo6sVGy0AhtFJin0DClpKKBC0q0lKtBJItFJmjNACUU3NIzUAPoqPNGaAFplFJQUJTaKKQwpKWkoAKKKKAEzRmm0+gAplPplAxKSim0AFFJRQA+m06m5pANptFOoENooooAKKKKAH0UyimBJRRRQMKKKKAHUtJRSAWikptMB1FMopALRUdPpiEptOptIBtFOptBQ2iiikIKKKKACikopjCiiigDoaKKKoxCiiigAooooAKKKKACiiigAooooAKKKKACiiigB1FNooAdRTaKAHUU2nUDCim0UAOoptFABRRRQIKbRRQAUq0lKtMAxS0maVVpAJmnrTaetAC4p60lOzTQD6KRaWmAq0+o6WgCRWqRWqvUitQBJTqh30m+kInzRmoM0uaAH5p+agzSq1AE2abmo99JuNAE+aM1BmjNAE+aM1Hvo30AOzRmo802mMmzRmoc0ZoAmzSZqLNGaQiTNNptFAxc0lFNzQANSUUUwCmU+igBlPopmaAHZpaizTdxpXAsZozVen0AS5o3Gos0/NADqKSihgFFGKMUwCsfVf8Aj4j/ANytisjWF/fJ/uVMthx3KMyjzNv91BVWSIVbm/1j/wCyFqJl+WoNSvHE8bP/AHWG2lmTbIFX+EVZhX94q07Z8xagZVVP9mtK1X93Uca1Y2/LTEXbOYxMrL7VkXkQivmbYzLJmVdvOz1z7VcVyvzL96k3GaZ3+ibfemIzFuB5yrGPMVU27at6f9oi1aKBoZIVfG6OT0PQirenukVxO8i/Kx2/7tWri6eOFfLC7V+560gG3EJ3bVX5V/i561LNe28Gn7rj5ZFIVW/vGmR3Rlj/AL3+1RHpMGqN5E1z9lX+/t3qppiIf7VuJYx5aTLGo3N8vFZayyMrMqRssnzfvG5atnxZpU+n2cX2W4naxUBXVmHXpzisbbtjTay7VQbdzd6QKxZ0m68uR2/2Buj4q5I3mxlty1TuLuOXSY/L02RWgBX7ZGvD/wC9VfSYXa1kvWk2xq+z5myXJ9BQMnZfu7ar3j+XG1Scr86/M2ahmhdplZl3R4O3/ZNAGa1SwsFX7m5l+alum3ME2KvFOj/0bc25fM+6nc0iiOR97bqbT5EMjM1w3zMfmpLhwzfuV2qo2qvt70CIWprKd22nZpI8tI9IYTMOFWo2oahaBnQeC7XzL6S4x8sCbR9WrsKyPCMIi0VH/incv/QVtqtaLY55bgtPojqSmSMxQ1SUUCIqhapmWmMtAyKmNUlMxQBHTf8A0KpWpjUDRw2uWv2bVrlV+6/zr9DVKuh8XQny7a6UfdJRq5ys2dC1RJJ80Ib+6abTofmV1/vD5frUS0hkq1ft18yxmVfvL8y1nrV3T323H8O1vloQmQr+7m+X7rYari/N/DVOZTGw3fwErVyzcLjc1MRY+9WlYuFk3fMv/Acj6kVnyIKuWsoWQN/jlaok6y+VL3wPeNmFvIkjf5W/CuCsXNtcQvu+7Jt/PgCu70WaOW3uoJod32pGi8zgHkYHsa4Fl+8v8TJ+ooZMex6hpfkSxxLM3y5DKtbUyfLtjk/3PRa5PQ7rz7ONmZen3u6muhjaKS3WKZvmjIfdGv3sc4FBlLcPtclow/drJcN93dkBR68ULqcCwvFDYLGrfMzLwWNJHDLcqvmQ/u/vK0LAHB96hkiuIMPDDtVctt3Z2imI4/xYpa4hl8pl2vuZqybOU215BKv/ACynjf8AAHFdNrEUk9i6yD5pM/NXJW7blH+0m3v8p6YpG8dj0vXLoM23yt0bke3JrlZLgecVVlXcNq1rSXEUnhuwnWRmkwU8v+8RXKyb1VtxVpG+barUEpFq4iEa7Wb5v4l/HoKzJE3bqn58nbimyL/dX5VoLItNYK0yN93httW7xzPDCzfwjY3+1jis2FvL1CJf4ZPlrQZS0Mu31DUDZSmXatU5q0Jk+X5mqhJ8zNUgRW7FbhP9r5ahk+8af/Ere9NuP9c9BRqaf80Lf75q1VPTW/cn61bzVLYhi5puaKbTEOzRTaM0APooooJCiiigB9KrUzNG40APpVao80UASM1NpuabmgB2aM1HmkzQBLmjNRZpc0FEmaM1HmigLEmaTNMozQBJmjNR5ozQFiTNDU3NFBIU7FNzTs0AGKbRTaCkOozUdFAybNJmo80ZoEPzTc1HmigZJRUeadmgAoptFFwCiiikAUlFFABTKc1LQAyiiigY7NMopKACm0U6gBlLRSUCFpKM0ygAoozRSAKKKKACiiigAooooAkWnUyimAtFNooAdRmkzRQAUyiikAUUUUAFPplSUAJTKkopgR0VJRQMjxSYpaKQEdJUlMoASiiigYUUUUAdDRRRVGIUUUUAFFFFABRRRQAUUUUAFFFFABTaKKAHUlFFAwozRRQAlOoooEFFFFABRRRQAU2iigAooopgDU2iikWOpaKKCQWloooEOp1FFAwzRmiigB61JRRTQgooopgLmjNFFABmkoooAXNGaKKADNGaKKADNJRRQAUuaKKADNGaKKADNJRRQAUUUUAFFFFAC5ozRRQALSUUUAFJRRQAZozRRQIaz1EzUUVIxKKKKBi0UUUAKtSLRRTQmOWloopgKtOoopANxWVqHzTNuoopMpFOZdrP9arNRRUM0JYV/eFvanr97/ZxRRTAkj+bK1JRRSQixboJJF3Uy3YeWsvy/vHL/gKKKoRXtf8AV7v71WY2LLRRQMt2aJGzeYPlb7tWY0HnLtaiiglmbrjzyRpBM7fMaz5oo9zbY41b+GiigDsf7SFppscEMCttjC+m2uXmw03T7x3fLRRQCFaL93uYbarTKVXdn5aKKCjOky0zN/sVdVPLsd//AC0bHzUUUhmZI26o6KKljQ1qF+WNm/vUUUxkdG0svy0UUAeo2sItrWGBfuxIEqVaKKtbHMwp6tRRTJJM0UUUwImplFFIYymstFFADMUYoooAz9YtftOm3MX8Wwsv1HNcH6NRRUSNobEkLbZB9aJk8uZ1/vfNRRUmglSRttYUUUCZdvlDSOy/xpu/EVBbuN1FFMRfjlP8XzLVmN/m3UUUxG1ot35EybWZd33l/u/UdxWLrUKQaxcrGf3aynb9DzRRTF9o2PCt2Vt2g+60Z29u1dhY6mI2+zyN+7/2v4X9zRRQTJItNfxrDKsk26bH3v71SW8u6GPzH8vo21vSiimYsh1xopYVSE//AGINeYzKYLy4T+7Ju/Oiika0tjW0dfMW5iZ9scTh1VvR+ahuGSPcuKKKCupCvzMNo+apJMSLt/ioooGZN5EY5klV/ukN78VswrukdVbarofl/vY5oooDoZl59p2/LEv+9uqq0U+35oqKKBor4plx/rKKKkou6a37l/rVvNFFUtiGJSrRRVADUi0UUmAuaXNFFABTqKKAFpKKKBBS0UUAMakoooGMooopAOzTc0UU0AUZoopAOzTc0UUAOzRmiigAzRmiigBc0ZoopgGaM0UUwEzRmiipAbRmiimgCkoopAFFFFACUtFFAwpM0UUALTKKKADNJmiigApKKKACm0UUAFFFFABmkoooEMooopDCiiigAooooAKKKKACiiigAooooAKKKKACiiigAqOiigB1OoooAFqZaKKAFxRiiimAlNoooAKjoooEFRtRRSGJRRRQMKKKKAP/2Q=='%3E%3C/image%3E%3C/svg%3E)
To get the Circade armor set in Soulframe, you must clear out two very elaborate puzzles in the Crypt of The Circade dungeon. The first of these is a gemstone puzzle that requires some coordinated cryptography, as only one of the Gemstone glyphs is revealed to an individual player during a single dungeon instance.
It's completely doable solo, because the order of activating them is always the same, and thanks to a joint community effort, this sequence has been figured out. So before we proceed, a big shoutout goes out to SaraLovesArchery and other pioneering community members for figuring out the Circade puzzle in Soulframe.
Soulframe Circade Crypt - Gemstone puzzle order and walkthrough
Before you start with the process of solving the Circade Crypth puzzle in Soulframe, make sure you've already cleared out the boss, as you'll need to zig-zag across the arena quite a bit. In case you don't know about the other drop tied to the Crypt boss, here's how to get the Triune Talisman in Soulframe.
Now, assuming you've already cleared out the Circade boss in this specific instance, you must shoot (melee throw works too) ten Gemstones around the arena. This needs to be in the exact sequence that we've explained below.

Stand at the center of the boss arena, and look around for walls with banners and the Circade insignia up above. The first Gemstone will be under one of these.

After you have activated it, turn to your left, and the second Gemstone is left of the staircase.
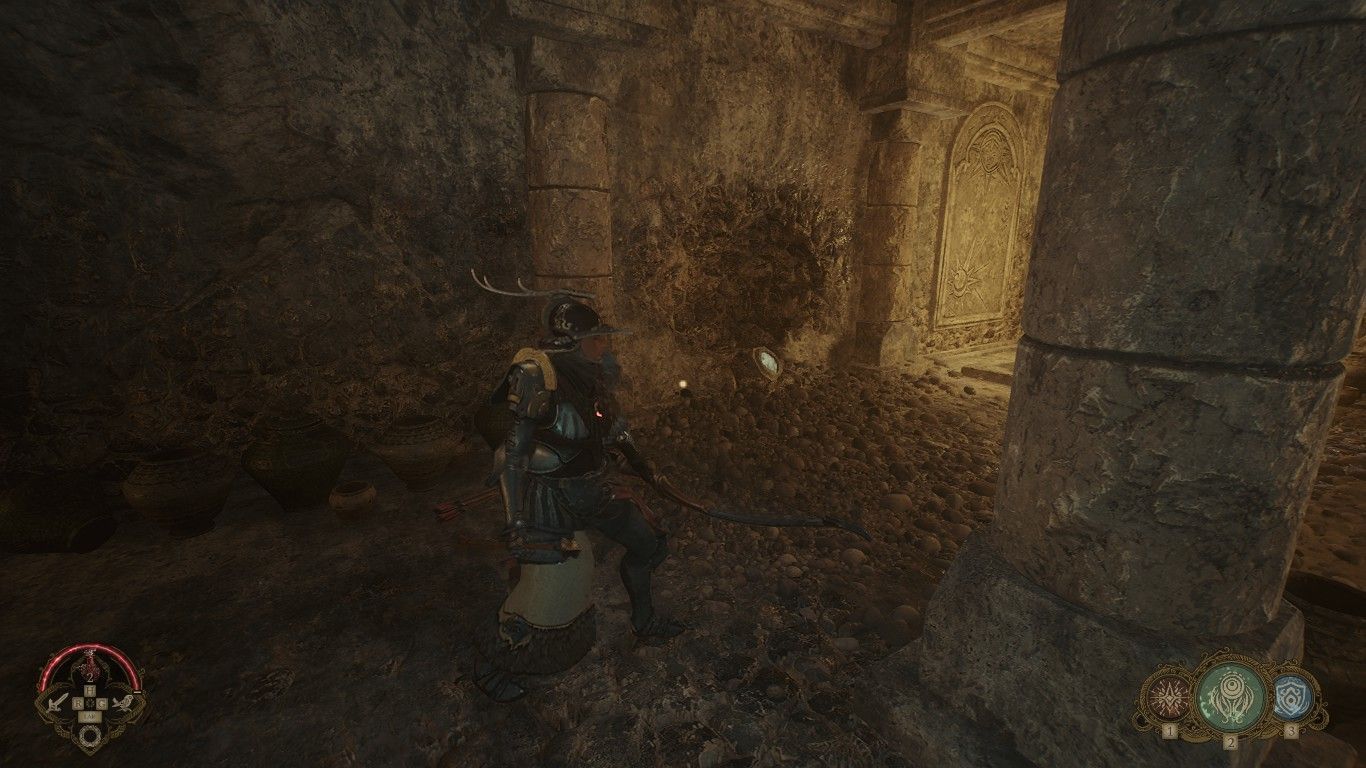
Go up the stairs and go towards your right, where you'll find the third Gemstone collapsed next to the wall.
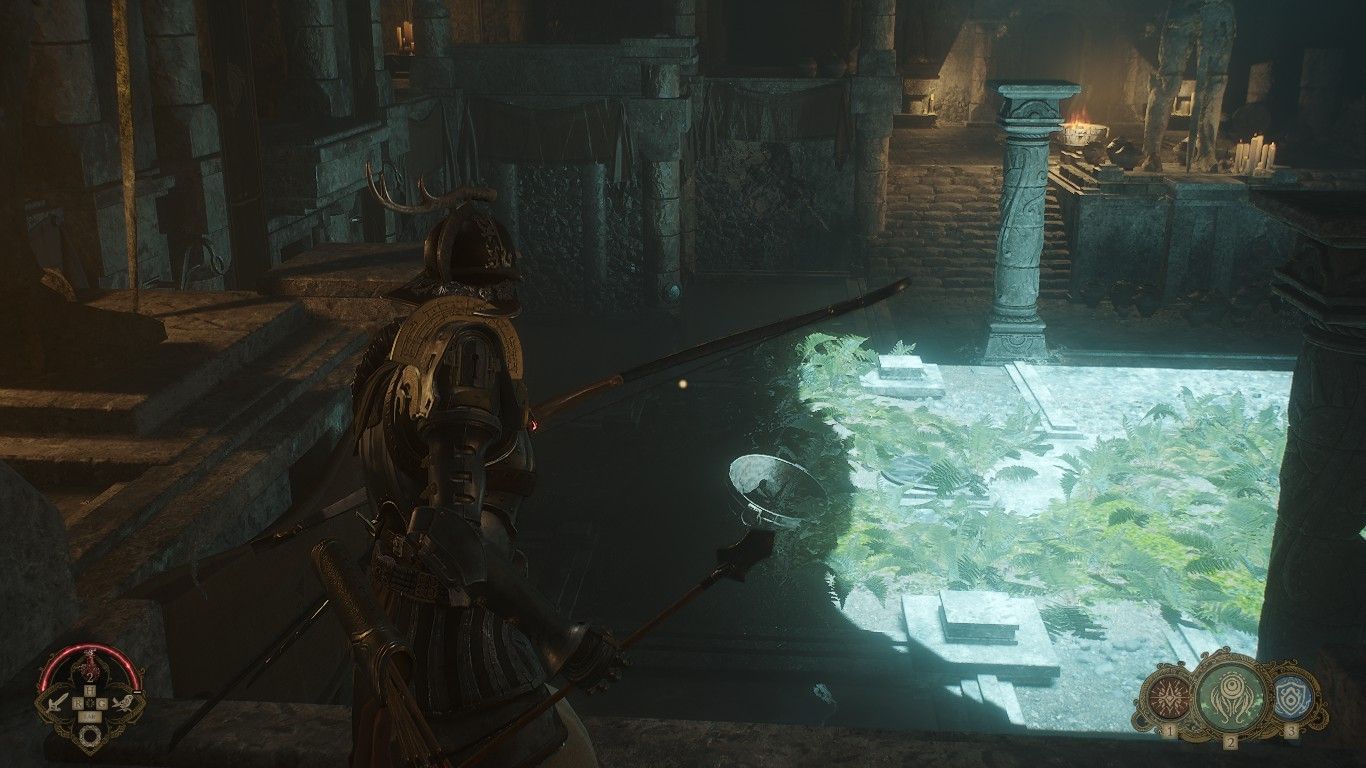
From here, turn 180 degrees, and the fourth Gemstone can be seen from here across the arena, in the distance - at the base of a pillar on the floor.
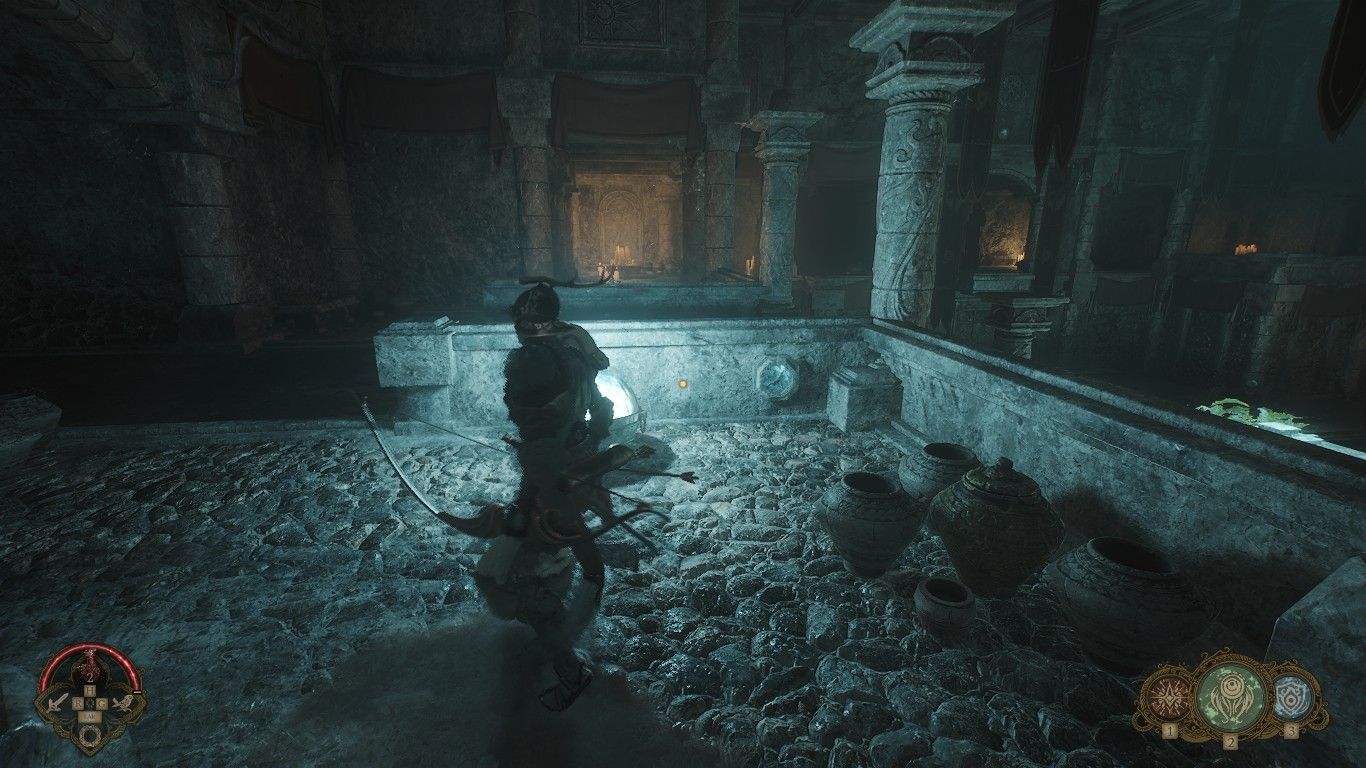
Go back up the stairs next to the second Gemstone again, and turn left this time. The fifth Gemstone is at the corner next to the light-emitting blue dome.
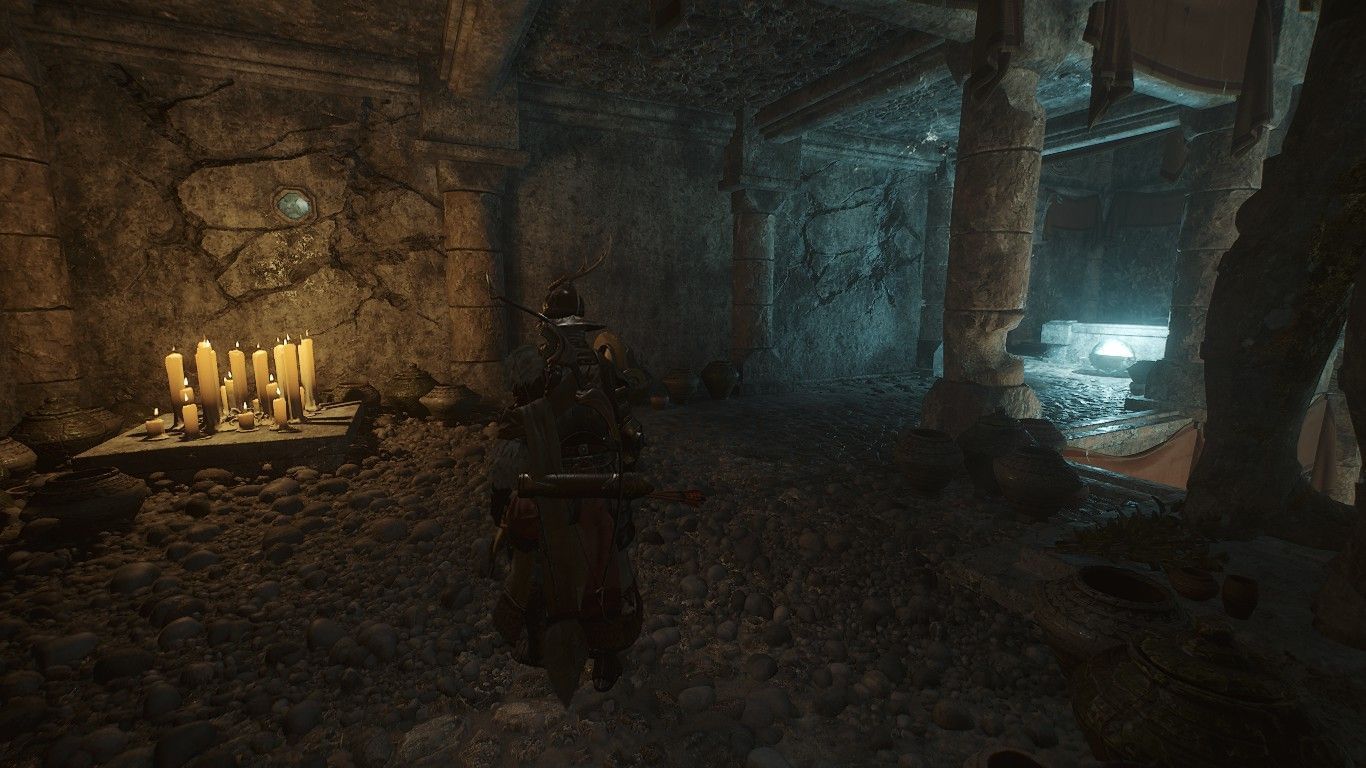
The sixth Gemstone is also nearby, on the wall next to the candles.
Continue along the same way, and you'll see a statue facing away from you. The eighth Gemstone is crested inside its chest, but don't hit it before you've hit the seventh one - on another wall past the statue. Activate this one, and go back to the statue to activate the eighth Gemstone in the correct order.
After you have hit the statue chest, turn back 180 degrees, and then go left and down the stairs.
Continue along the wall to get up the stairs, then, after the turn, look for a flat square on the corner facing the center (there will be a good number of vases next to it). The ninth and penultimate Gemstone is on the top of this.
Turn back again, and go down the stairs - and the wall near you will have another statue with the tenth Gemstone in its chest. This is the final one. If you got the sequence correct, the door next to this statue will open after you shoot this final Gemstone.
The key thing to note is the correct sequence. In practice, soul-mode highlights the symbol attached to all of the Gemstones in the Crypt in Soulframe. Only the order shown here will open the gates to the second Crypt puzzle; if you get any of it wrong, or mistakenly hit a Gemstone out of turn, you should start over from scratch.
This completes the first phase of the Circade Crypt puzzle in Soulframe. Once you get to the room inside, though, another complicated puzzle awaits you.
Soulframe Crypt Armor Room puzzle walkthrough
In the final Crypt puzzle room, where you get to unlock the Circade Armor set, your goal is to reveal three murals hidden behind drapes across three walls of the room. This involves lowering three big gates by placing busts on pressure-triggered altars, and burning down the drapes covering the murals.
Step 1: The First Bust

Once you enter this room, hug the right wall and go to the back corner. You have to pick up the bust found here and carry it over to the other end of the room (towards the side you came from). Heading back, you can find a place in the corner towards your left where you can deposit the bust, which opens the door next to it.
Enter this room, and pick up the torch inside. The next step to solve the Crypt room puzzle in Soulframe is not only to light up a number of braziers, but burn the bardings covering the three murals.
Step 2: Lighting The Braziers
Once you have picked up the torch, go back out of the door. Facing outwards, you will see a small doorway at the other end of the room, lit by a brazier inside. Go here to light up your torch. Now, you have to ignite five other braziers.

The first brazier can be found at the closed door next to the bust you picked up earlier. Lighting this up opens the door.
Now, once you face the center of the room from this location, you can already see the two other braziers close nearby.
- Brazier #2 is directly ahead (use the image below for reference), halfway along the room. Lighting this one up will make some nearby hidden stairs extend out of the wall.
- Brazier #3 is towards your right-hand side, next to a tiny hidden chamber that's revealed once you light it. Inside, there's a brass pressure plate on the wall, but that's for later.
Light all three (the order doesn't matter), and then head back to the door that opened up next to Brazier #1. This room will have another bust on the floor, which you need to pick up now.
With the second bust in hand, head to the newly materialized stairs next to Brazier #2, and put it down on the altar here. This raises the iron gates right ahead, revealing another bundle of torches, and further back into the dark, there's a piece of cloth hanging off wooden panelling - this is what hides the Murals in the Circade Armor Puzzle room in Soulframe.
You have to swing a lit torch here to set it on fire, which burns both the drapes and the wood.
(You can either pick up a new torch here and light it from the brazier nearby, or use the first lit torch you dropped in the bust room earlier - it doesn't matter which one you use.)
Go back down the stairs, and then turn to your right. Move past Brazier #3 from earlier, where you can find a water curtain. From here, go up the stairs to your right to stand on a pressure plate, which reveals another small chamber you can slip into. Once you're in, you can lay down the torch in the opening to your left (sort of like a drive-through window).
Go back out, head through the water curtain, and then retrieve the lit torch and light the fifth brazier here. This raises the grates ahead (where you can find yet another bust), and reveals a passage to your left. Pick up the bust, go through the passage, pop it down on the altar here.
Like the last time, this again opens the gate to a room where you have to set fire to yet another cloth hanging off the wall. Thankfully, you dropped your torch very close by.
Once you have done the cloth-burning routine here, turn around and go past the altar, and you can drop down to find another bust in the rubble of a coffin just ahead.
Step 3: The Drawbridge Shenanigans
Next to Brazier #3, you can throw your sword into the pressure plate on the wall. You need to use a proper melee weapon or a dagger (secondary) here - bows or flyblades won't cut it.
Drop the bust (press R), and then throw your blade into it. This opens the drawbridge. The plate self-deactivates after a while, and the drawbridge retracts. However, pulling your blade back reactivates it again, which is the trick we'll be using soon.
With your blade lodged into the pressure plate, pick up the bust again, and carry it to the first altar where you placed bust #2 on. Here, you want to go to the crystal dome emitting blue light. The drawbridge will most likely retract by now. If it doesn't, let it.
Now, here's the very time-sensitive part: go right up to the edge, put the bust down (R), and then retrieve your blade (middle-mouse button) to open the drawbridges. Immediately pick up the bust and go across.
Turn to your right, and you'll see another altar - but there's another gap you need to get across. Drop the bust right at the edge like last time, and drop down below. The pressure plate chamber is exactly at this location. Lodge your blade into it yet again, and then climb back up to the location of the bust.
Like before, just to be safe, you should let the drawbridges retract, and then call back your blade to re-activate them before you carry the bust across. Placing the bust reveals yet another chamber where you need to burn the cloth. Thankfully, without the hauling handicap, you can just jump across the gaps, so it won't take long to bring a torch here.
After you ignite this final drape, Circade will say: "Well played, Jotar", signalling that the puzzle is now solved. Go back to the coffin at the center of the room. The guard rails around it will now be withdrawn, and you can interact with the coffin to reveal Circade and get his armor set.
With that, you have now beaten all the puzzles in the Circade Crypt in Soulframe. Your reward, a fully crafted armor set, awaits you in the Nightfold.
How good is the Circade Armor set in Soulframe?
The Circade Armor set is mainly focused on Physical defense, with very little overall stability and Magical defense. Aside from the fashion-frame applications of a traditional medieval metal cuirass, it's quite mediocre and far from the best in Soulframe. Here's the stats:
Overall, its biggest strong point is the fact that you don't have to craft it. If you manage to get into the Circade Crypt in Soulframe early on and solve both puzzles, this is a great early-game default armor replacement.
Anyhow, that's all about the Circade Crypt puzzle in Soulframe. As of Preludes 10, it's not known whether it will be available forever, as Festival of the Circade was originally referred to as an event - so farm the armor set when you can.
Check out our other guides on the game:
- Soulframe Joineries and reforging guide
- Soulframe beginner tips
- Soulframe: Orengall Pact guide
- Soulframe: Oscelda pact guide