'%20x='0'%20y='0'%20height='100%25'%20width='100%25'%20%0A%20%20%20%20%20%20%20%20%20%20xlink%3Ahref='data:image/jpg;base64,/9j/4AAQSkZJRgABAQAAAQABAAD/2wCEAAMDAwMDAwQEBAQFBQUFBQcHBgYHBwsICQgJCAsRCwwLCwwLEQ8SDw4PEg8bFRMTFRsfGhkaHyYiIiYwLTA+PlQBAwMDAwMDBAQEBAUFBQUFBwcGBgcHCwgJCAkICxELDAsLDAsRDxIPDg8SDxsVExMVGx8aGRofJiIiJjAtMD4+VP/AABEIAAYACgMBIgACEQEDEQH/xABiAAEBAAAAAAAAAAAAAAAAAAAABhAAAgICAgMAAAAAAAAAAAAAAQIDBAAFBhIRISMBAQEAAAAAAAAAAAAAAAAAAAUHEQABAgUFAAAAAAAAAAAAAAABAgMABAUSIREjMWFx/9oADAMBAAIRAxEAPwCM5DSua7c62jfWrcitW1WtF9F7KgEkiySKylQ3bwOoyPt8TWS1O6AQq0rlYlndlQE+lBYEkDGMRZZbKMg47MTqeqs80pqxaRcgk7aOdfI//9k='%3E%3C/image%3E%3C/svg%3E)
In Episode 6 Act 1, Valorant introduced Lotus, a brand new addition to the competitive shooter's map pool. Ever since its release, players have been constantly testing out new strategies as they try to win competitive games on this map. That being said, mixing a few Agent compositions can really bring out new strategies that gamers might want to try.
Sage, being one of the most popular Agents, can use her Barrier Orb ability in a variety of different ways to make one-way and off-angles on Valorant's Lotus map. Her wall can be an exceptionally powerful tool in intense post-plant situations, given that players don't hold back on their creativity.
This article reflects the personal views of the author.

A closer look at the best Sage wall setups to use on Valorant's Lotus map
Although Sage's abilities are most suited to delay or prevent an enemy team's attack, she can also be played aggressively if one understands how to use her Barrier Orb for strong off-angles on offense.
Listed below are a few great Barrier Orb placements that players can use as Sage on Valorant's Lotus map.
A-site has a few great spots to place the Barrier Orb
A-site offensive wall
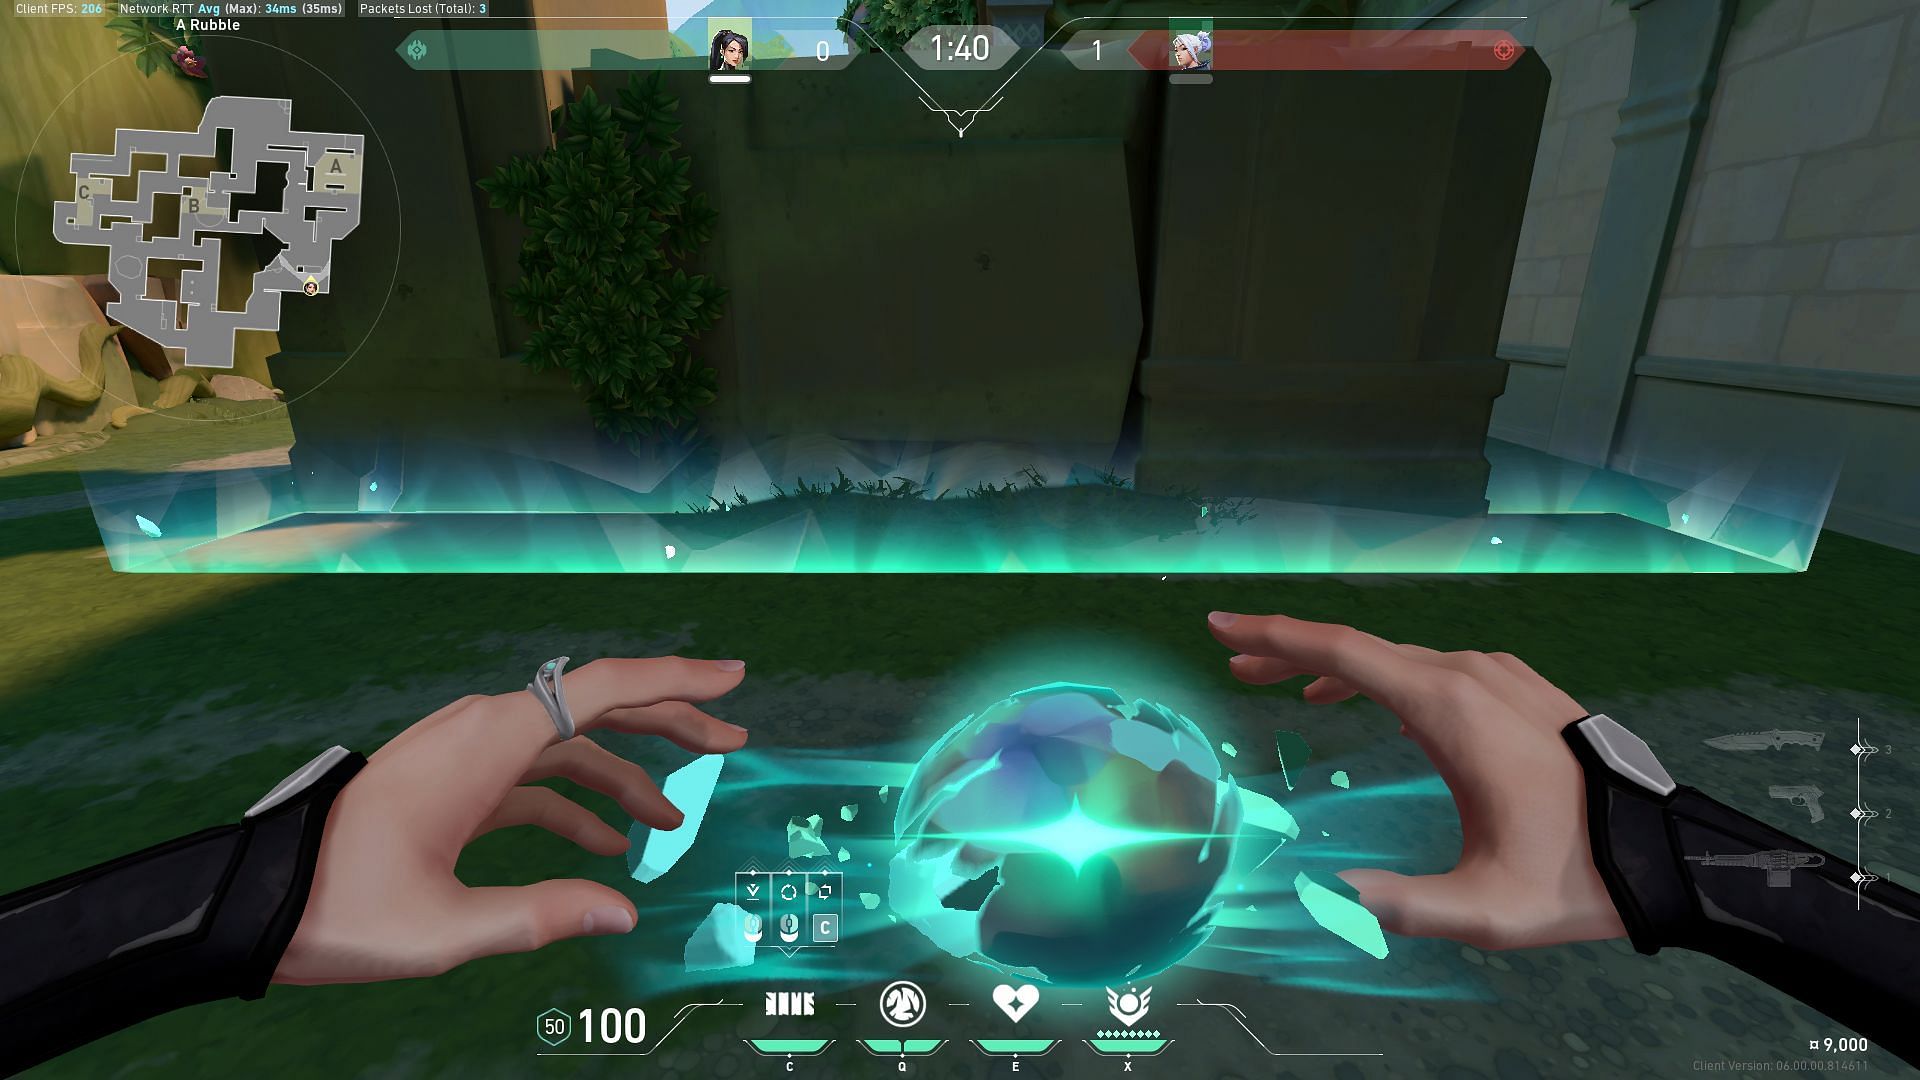
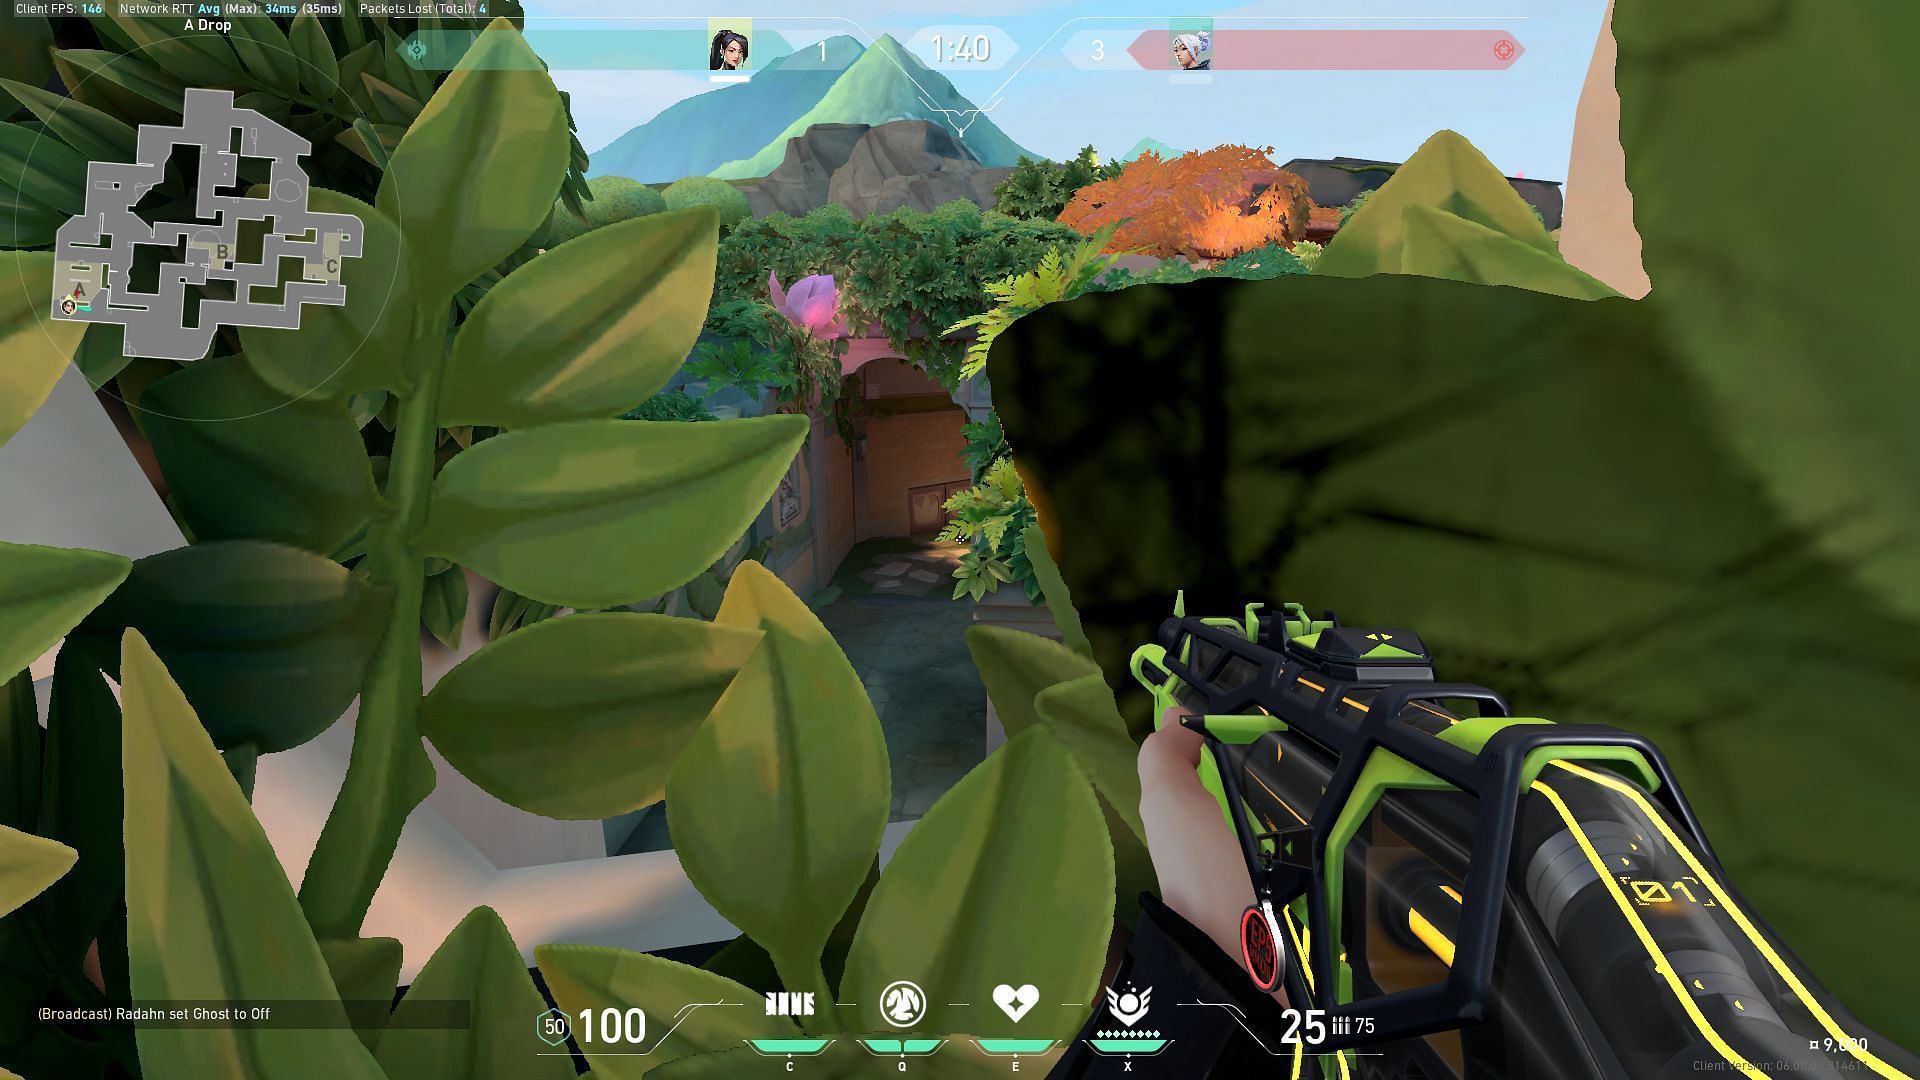
This first wall can be placed on the attacker's side while playing as Sage. One can place the Barrier Orb on the half-wall beside the Roots as marked on the map and jump on top of it.
This elevated angle will give them complete vision over three common peeking spots in attack.
Enemies wielding an Operator or swinging across will have a hard time aiming at this angle when they peek initially.
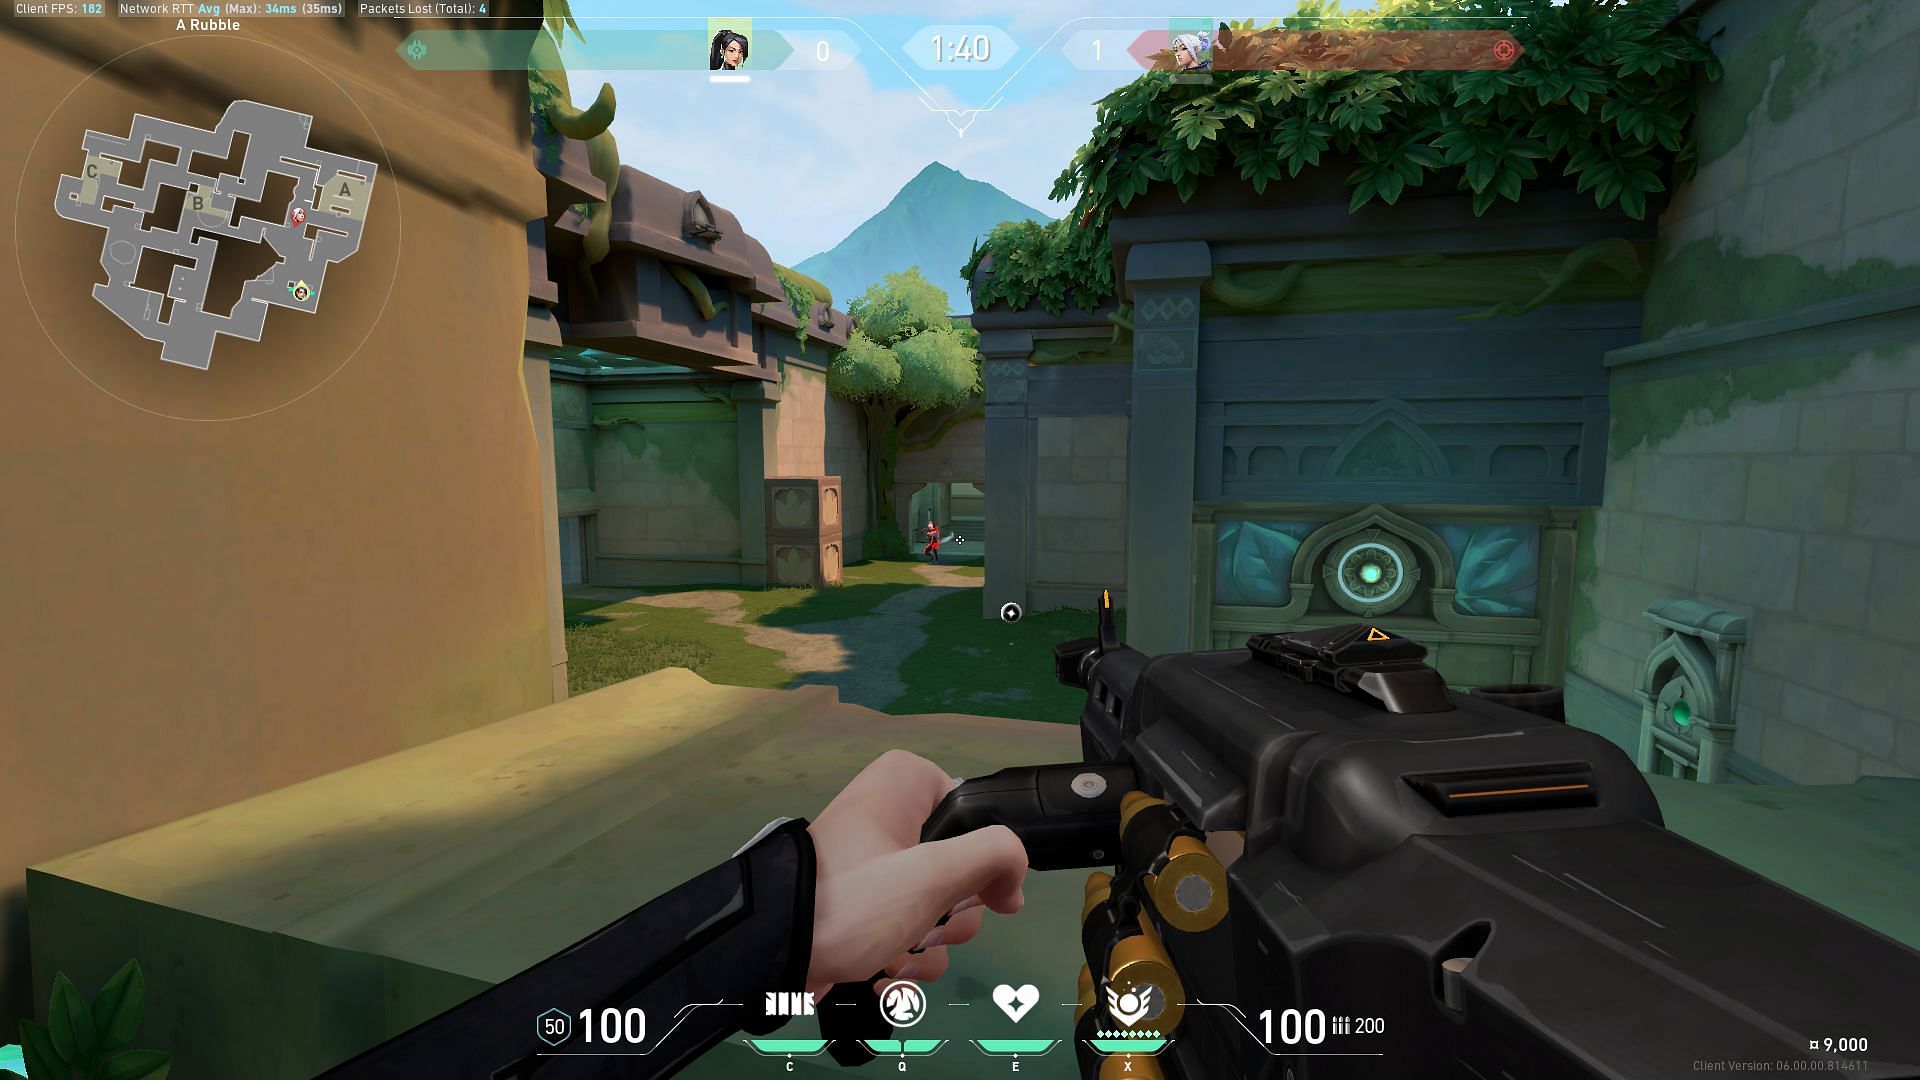
A-site defense intel wall
This particular Barrier Orb placement is better for gathering intel instead of getting free picks on Lotus' A-site. One can place the wall close to the leaves as shown in the image above and tilt it to the right until it extends.
Players should be able to see the A-main entry from this spot. Unfortunately, the leaves at this angle will block your bullets. To land your shots, you must crouch and spray through the wall.
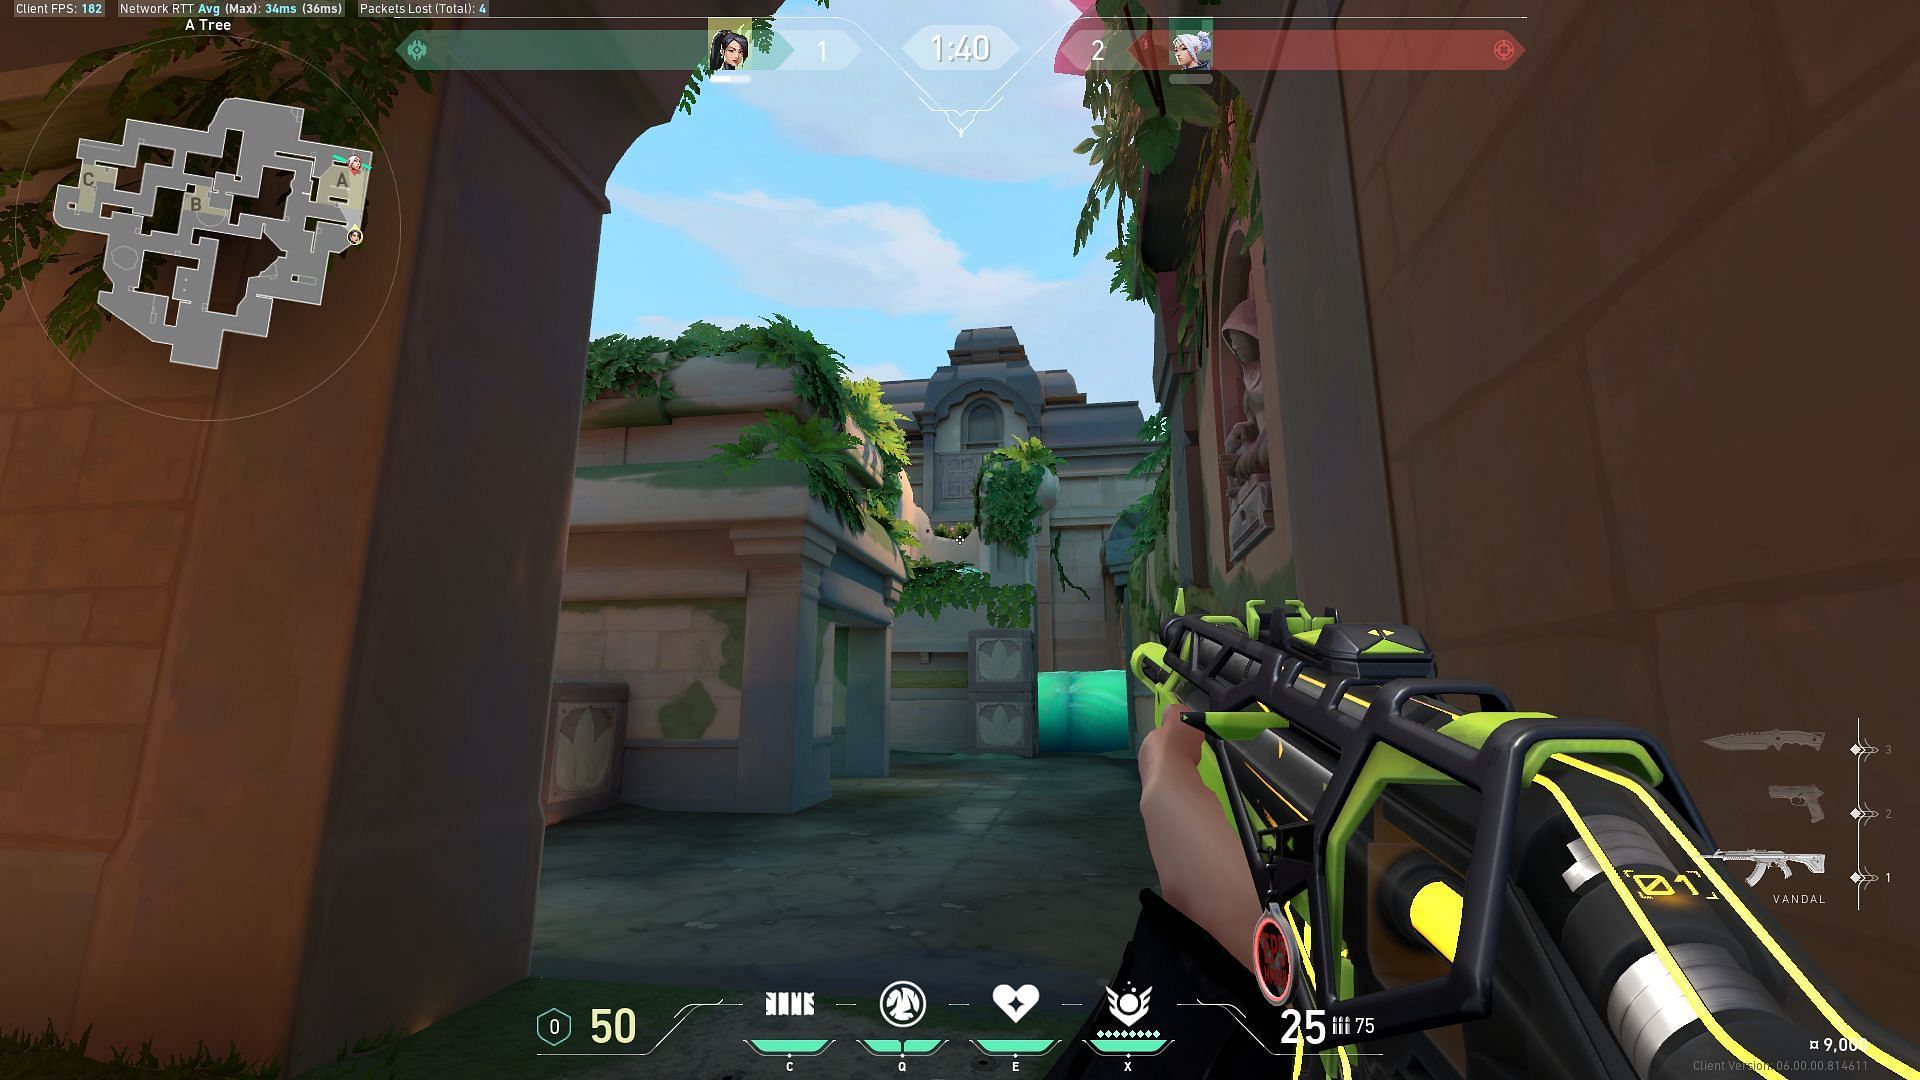
Enemies will find it difficult to spot players hiding behind the leaves, allowing them to call out the entries.
Being a relatively small site, B offers only one good post-plant wall
B-site post-plant wall
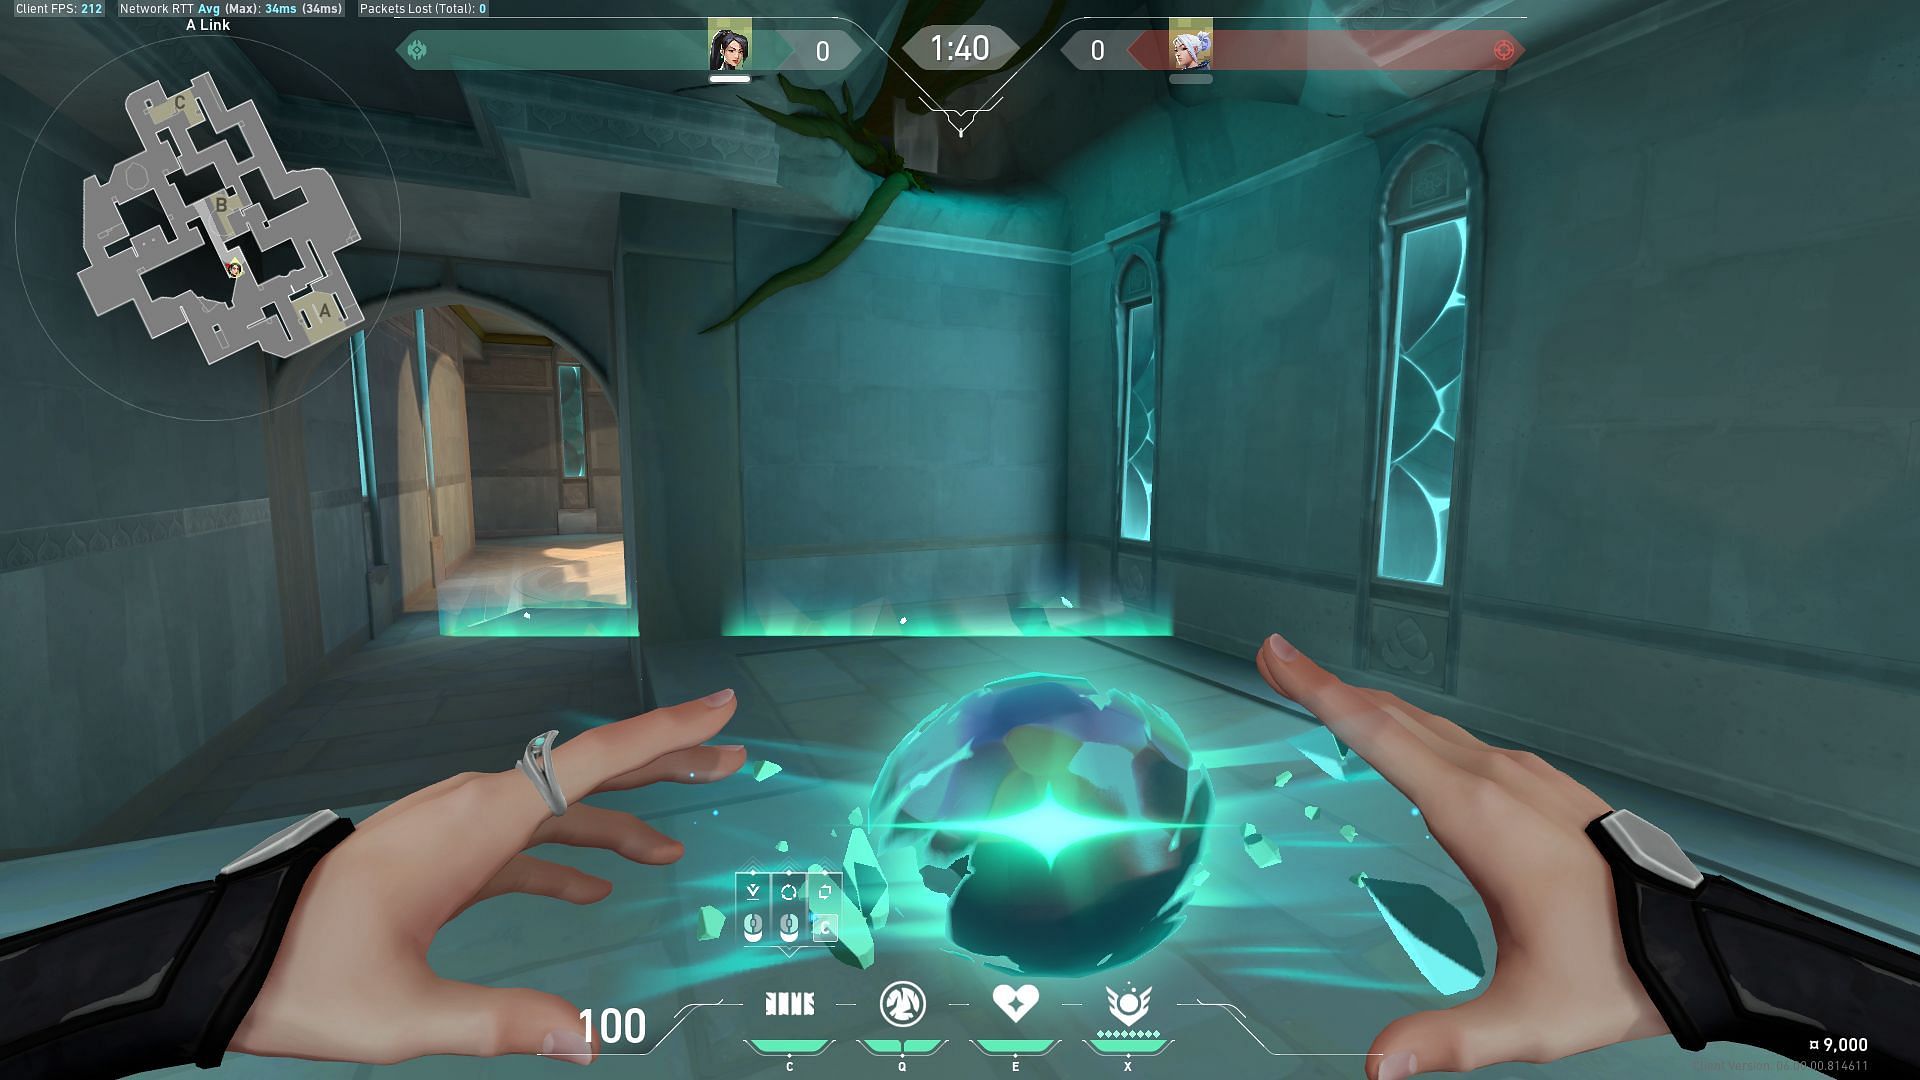
Although this post-plant setup can only be used in certain circumstances, it's incredibly effective when executed properly. It should be noted that Jett must be included in the lineup for this strategy to work. You can place the wall in the location displayed in the above image.
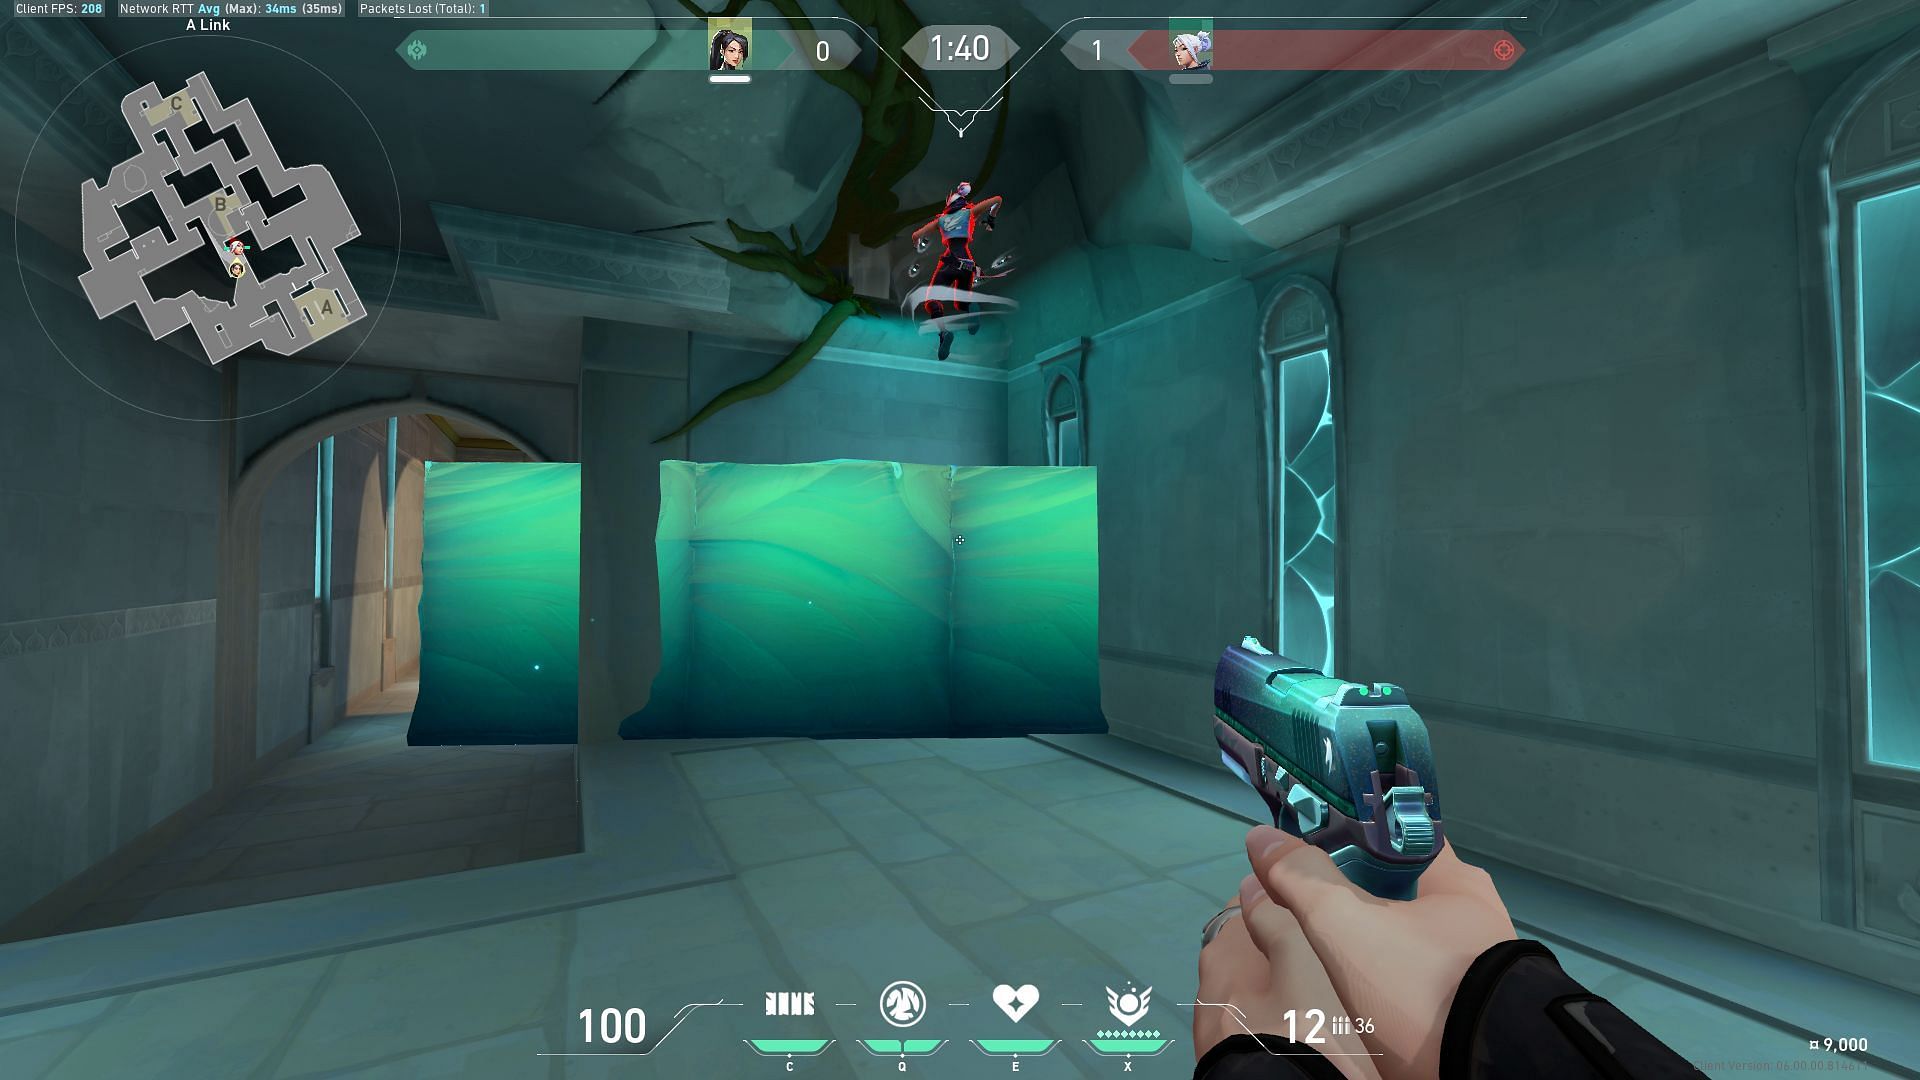
Plant the spike in the corner of the site near the two brown boxes and ask Jett to Updraft to the top of the Sage wall.
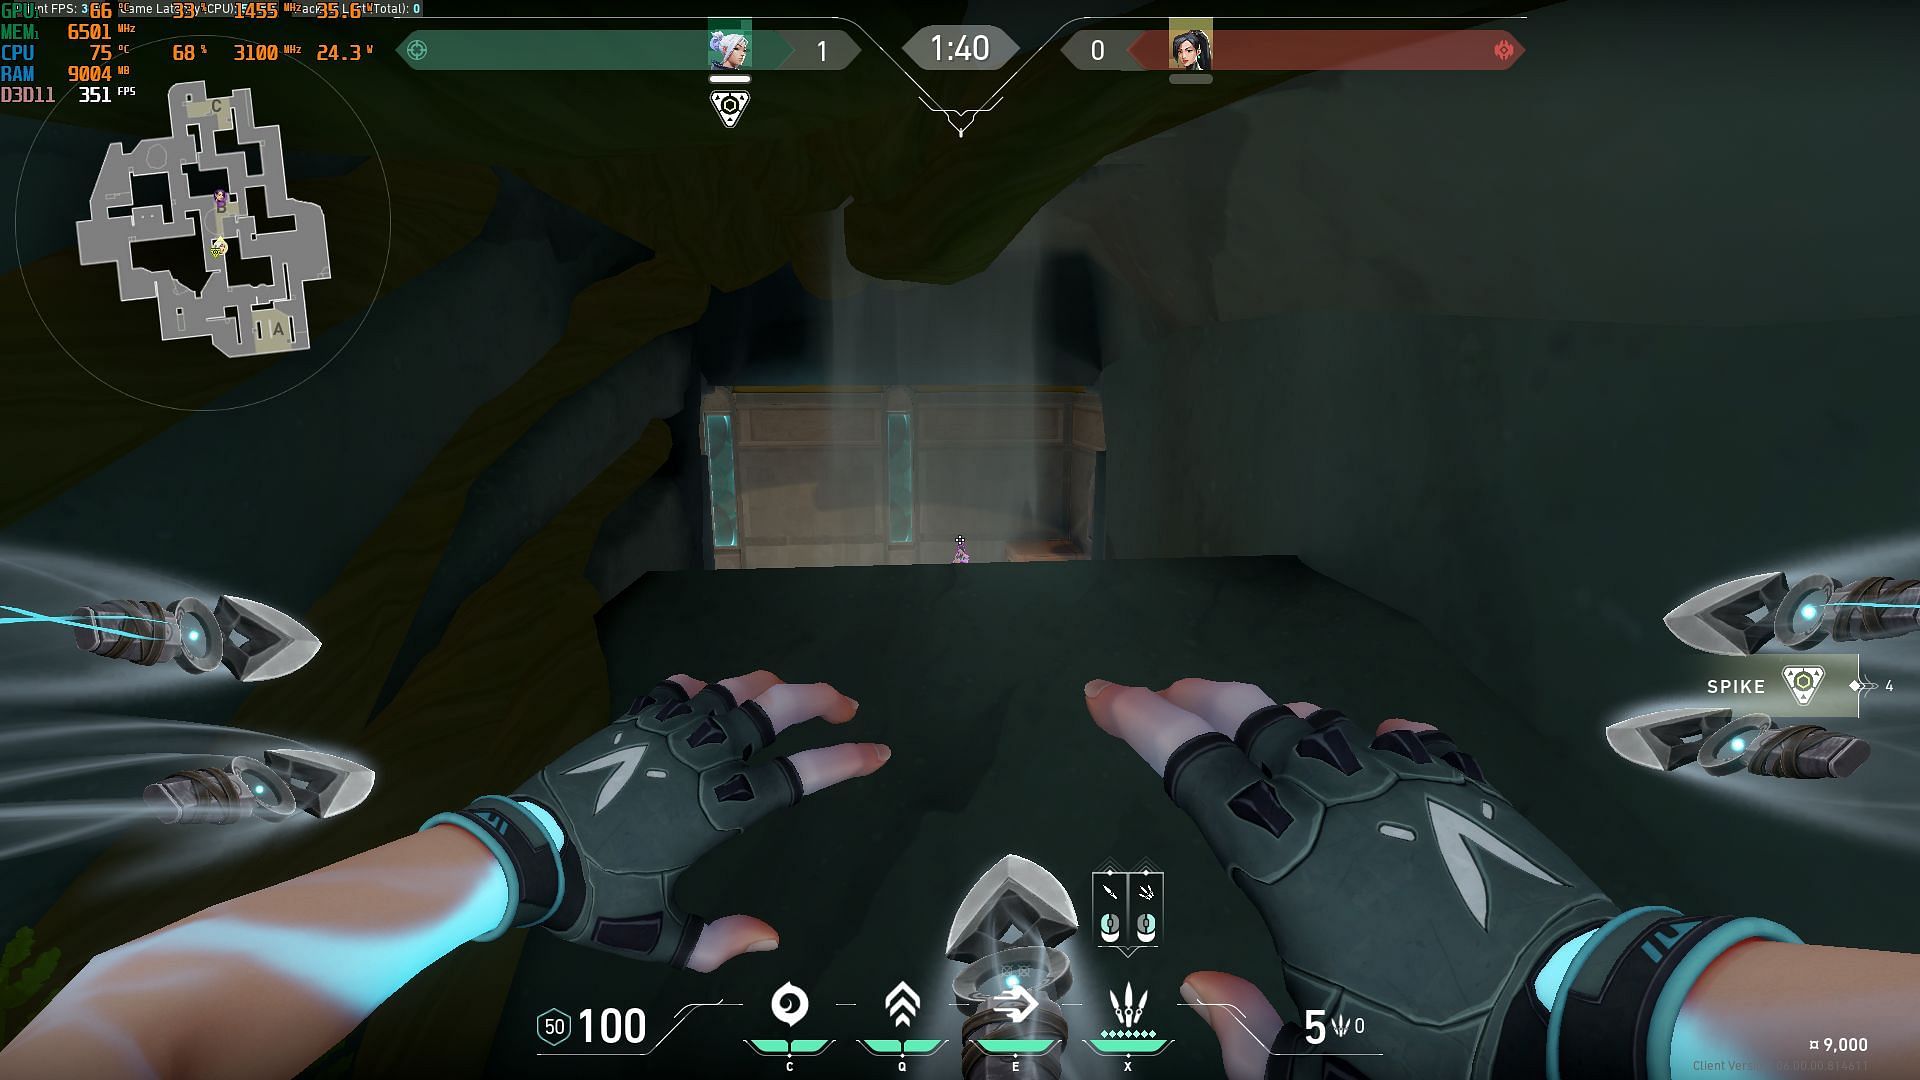
Jett will easily be able to see enemy Agents that try to defuse the spike and can use Updraft again to get a few more kills.
Use a teammate to pull off this C-site wall setup
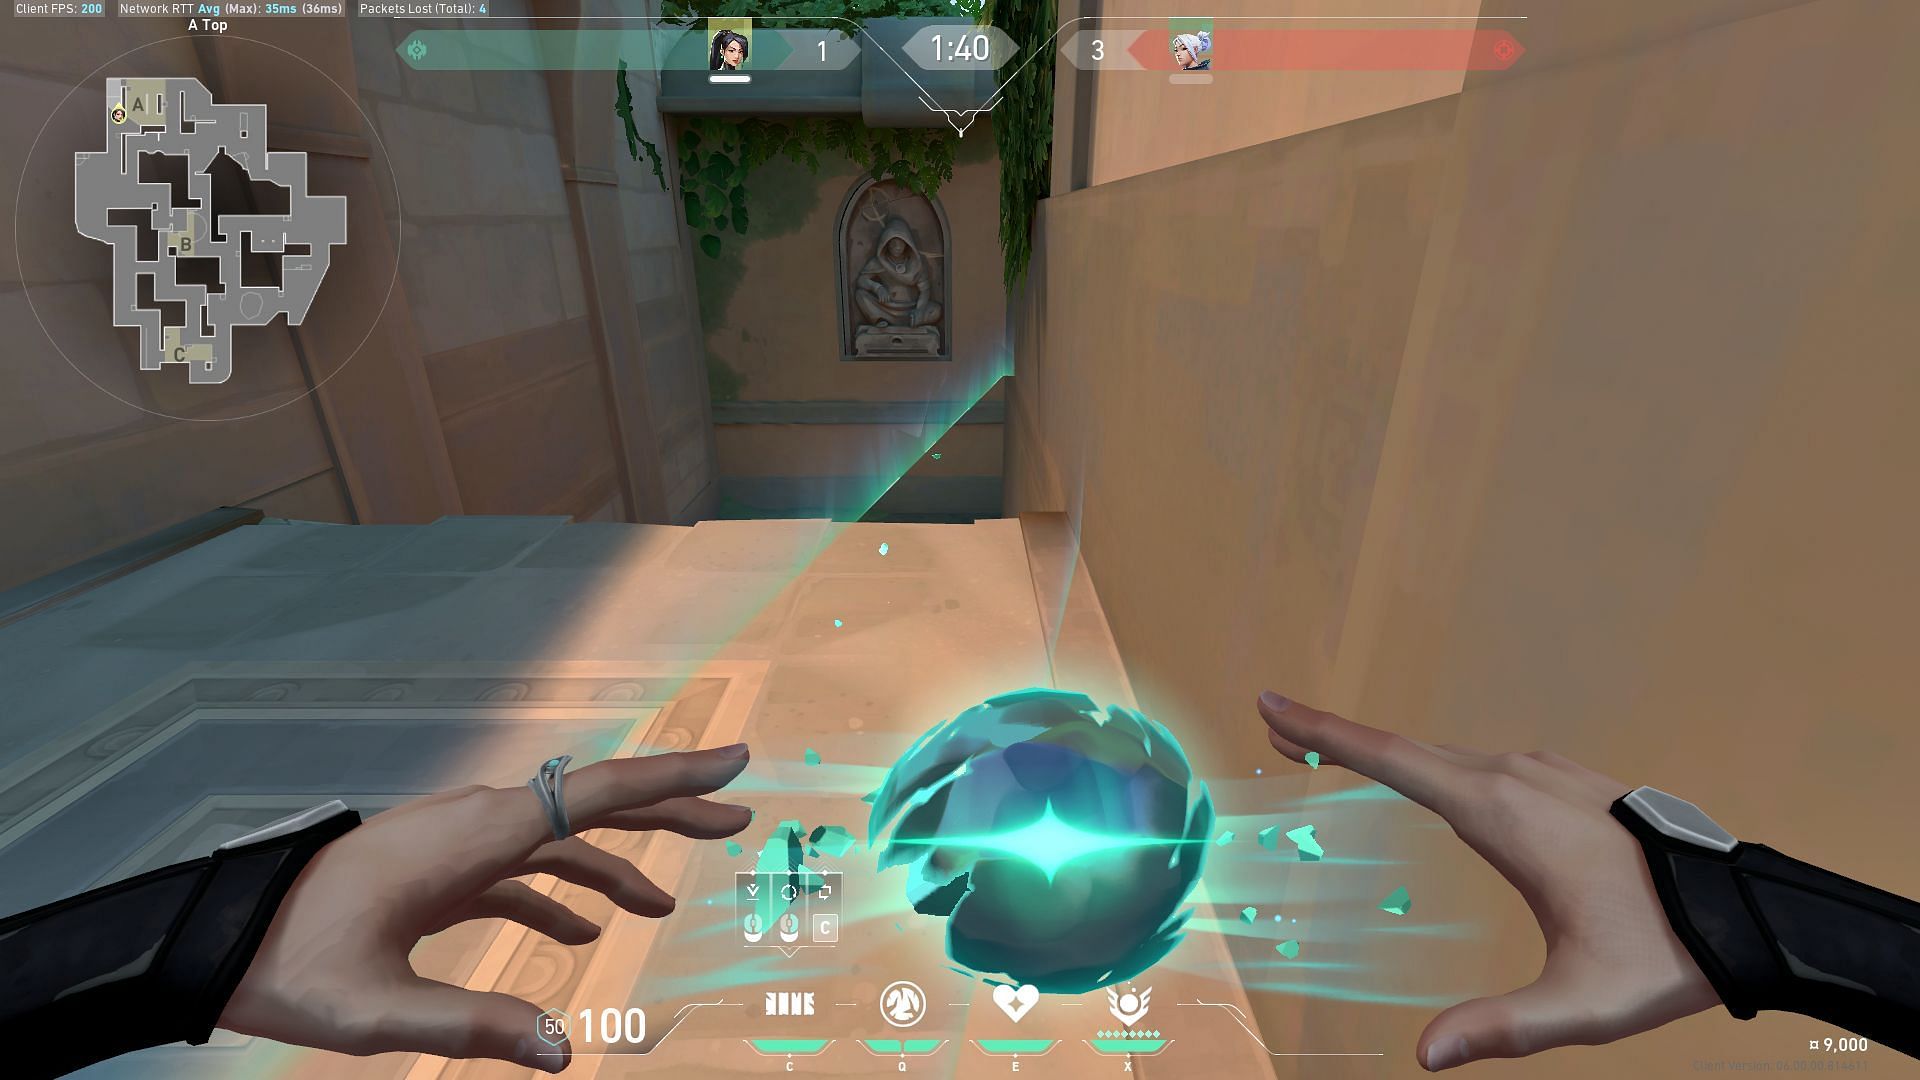
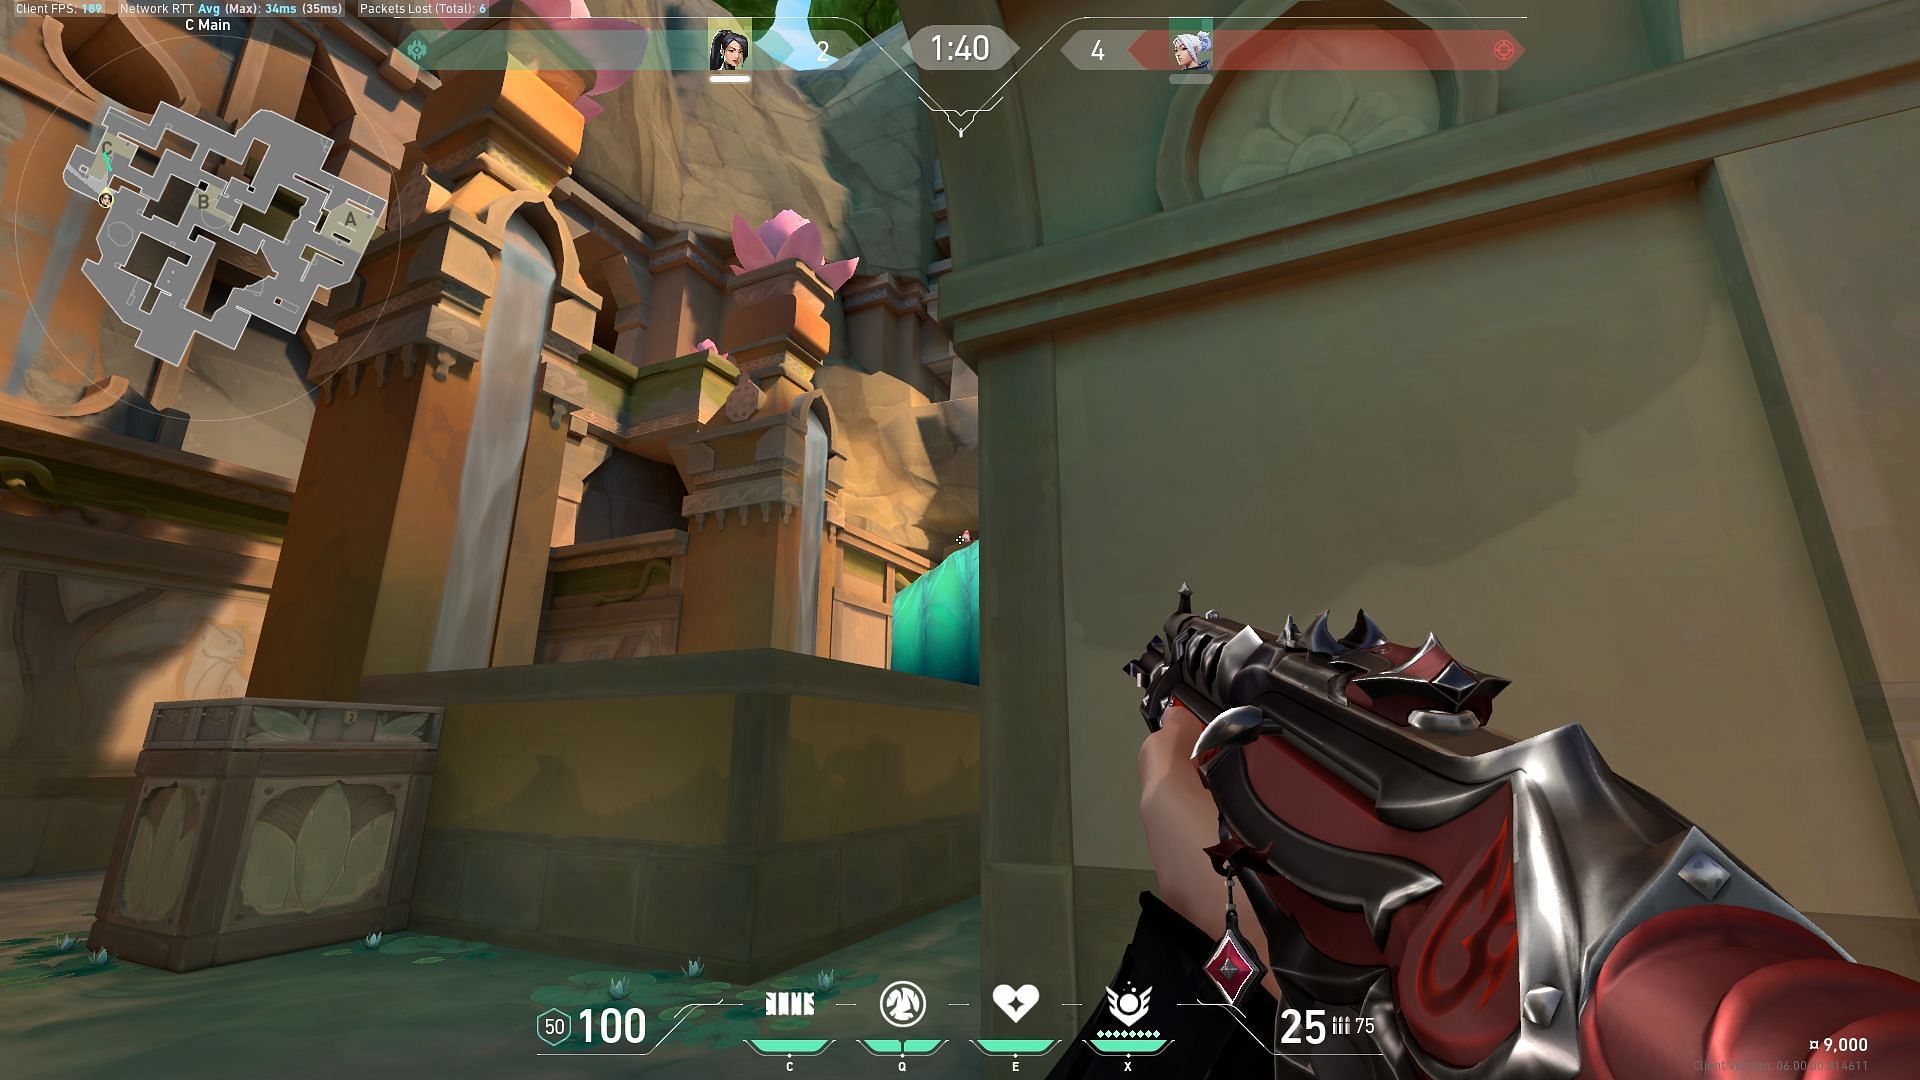
C-site post-plant one-way wall
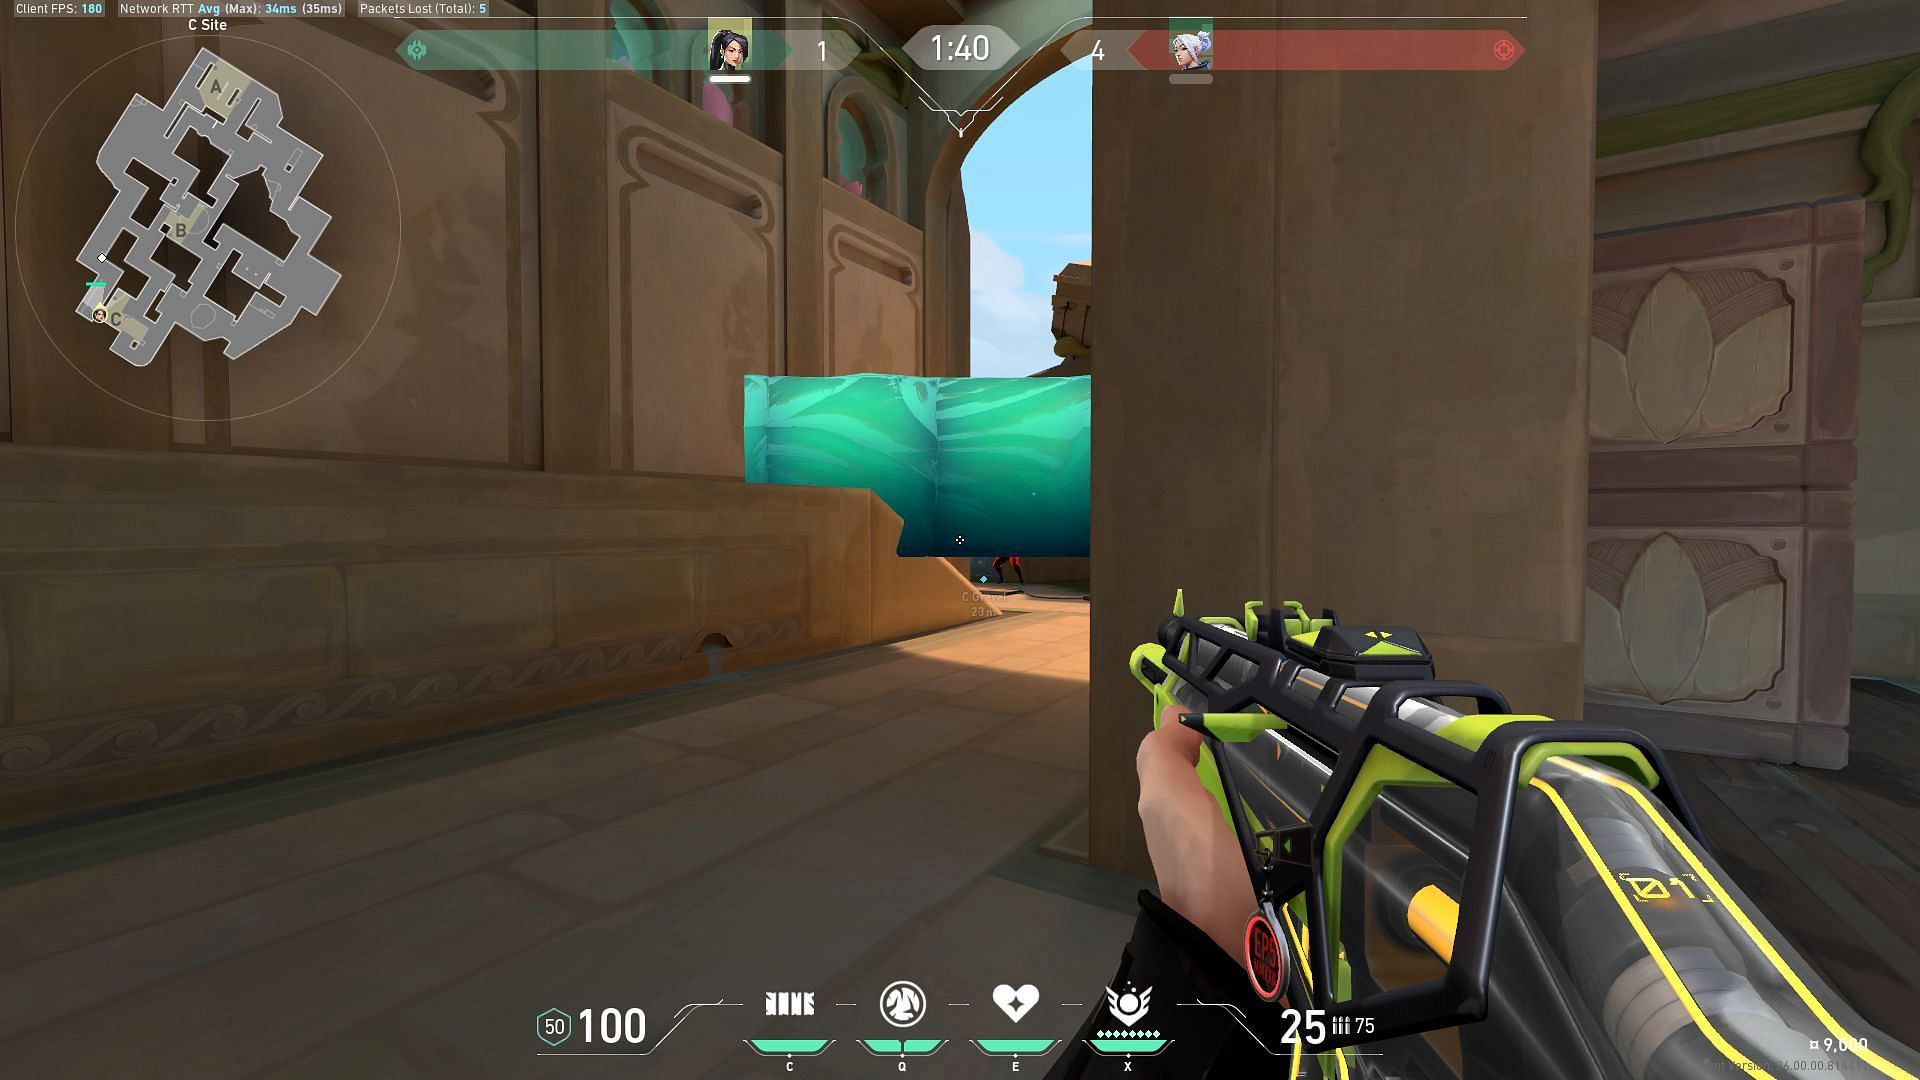
This one-way wall is pretty simple to create and works best when the attackers use it after planting. Once a team has complete control of the site upon planting the spike, Sage can create a one-way wall near the entrance of Defender Spawn on top of the staircase.
Any defenders attempting to retake the site from this angle will be blocked.
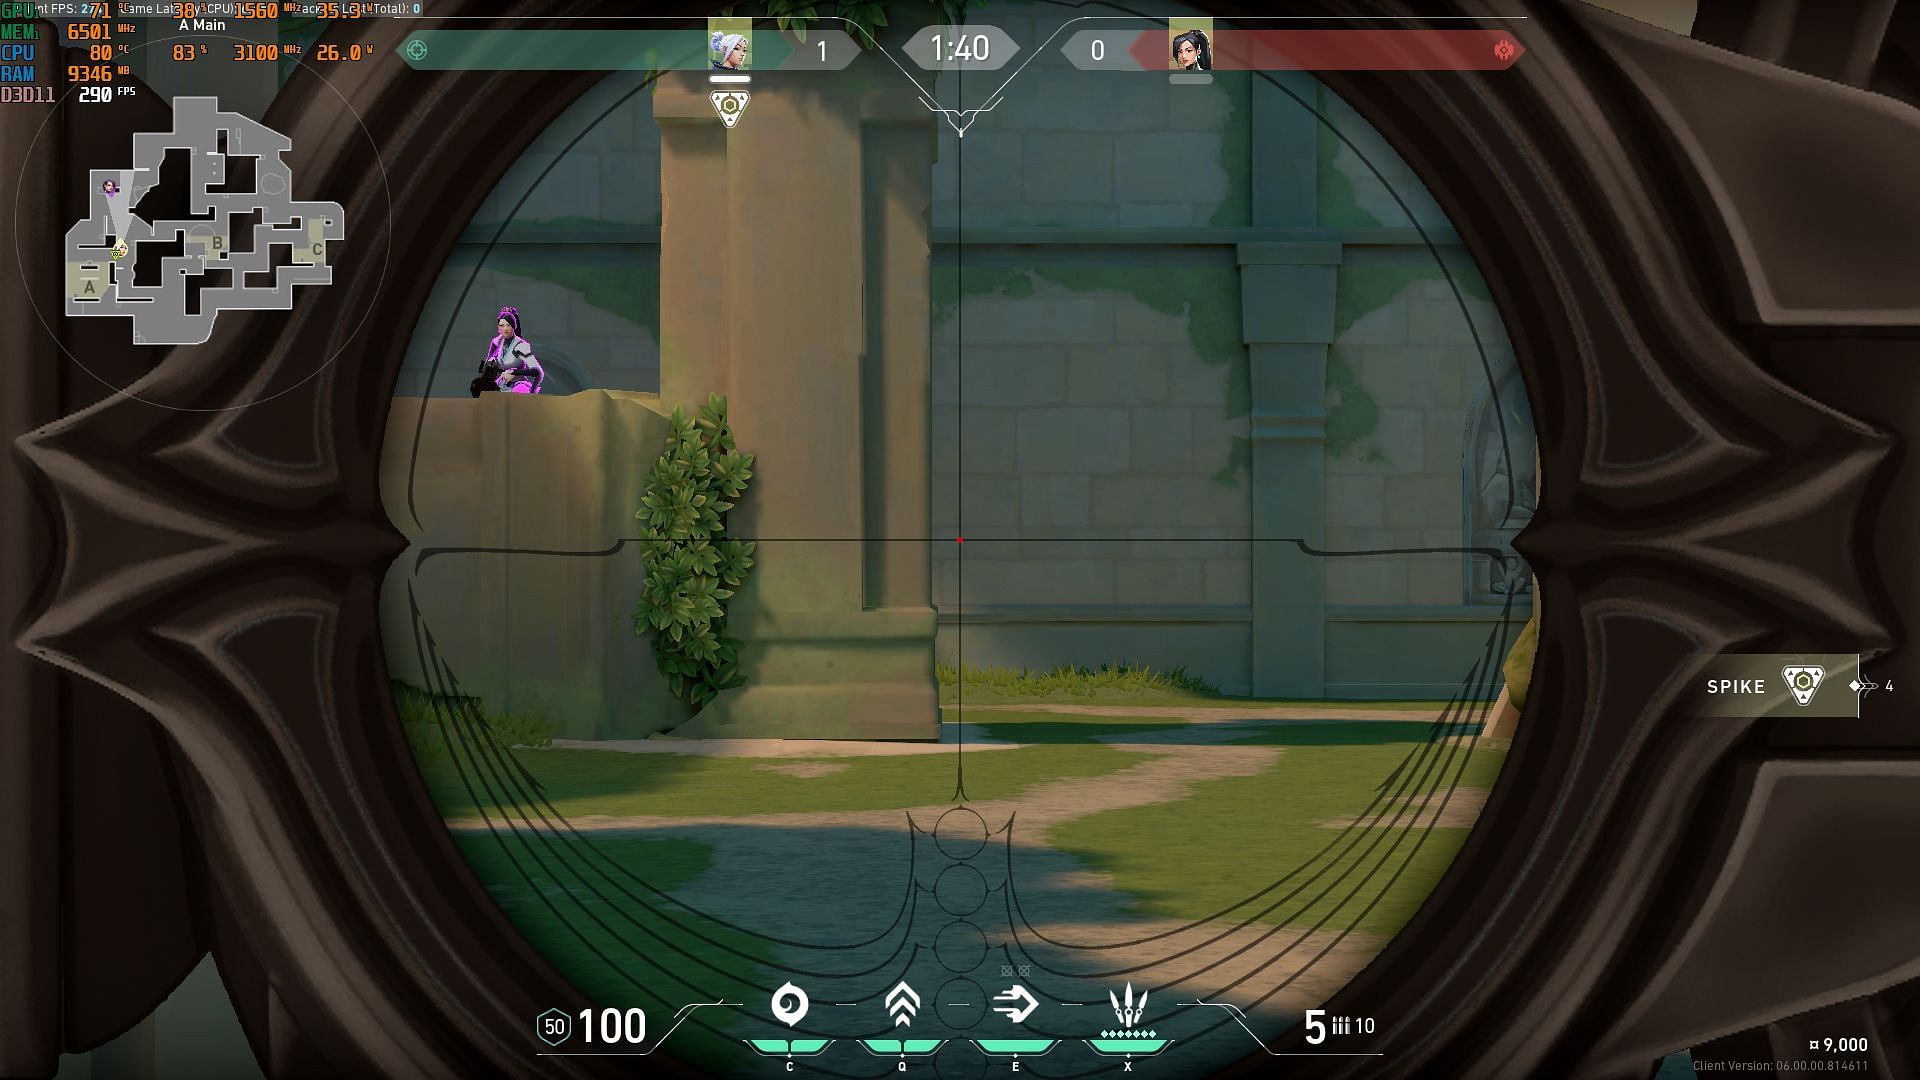
C-site defensive off-angle wall
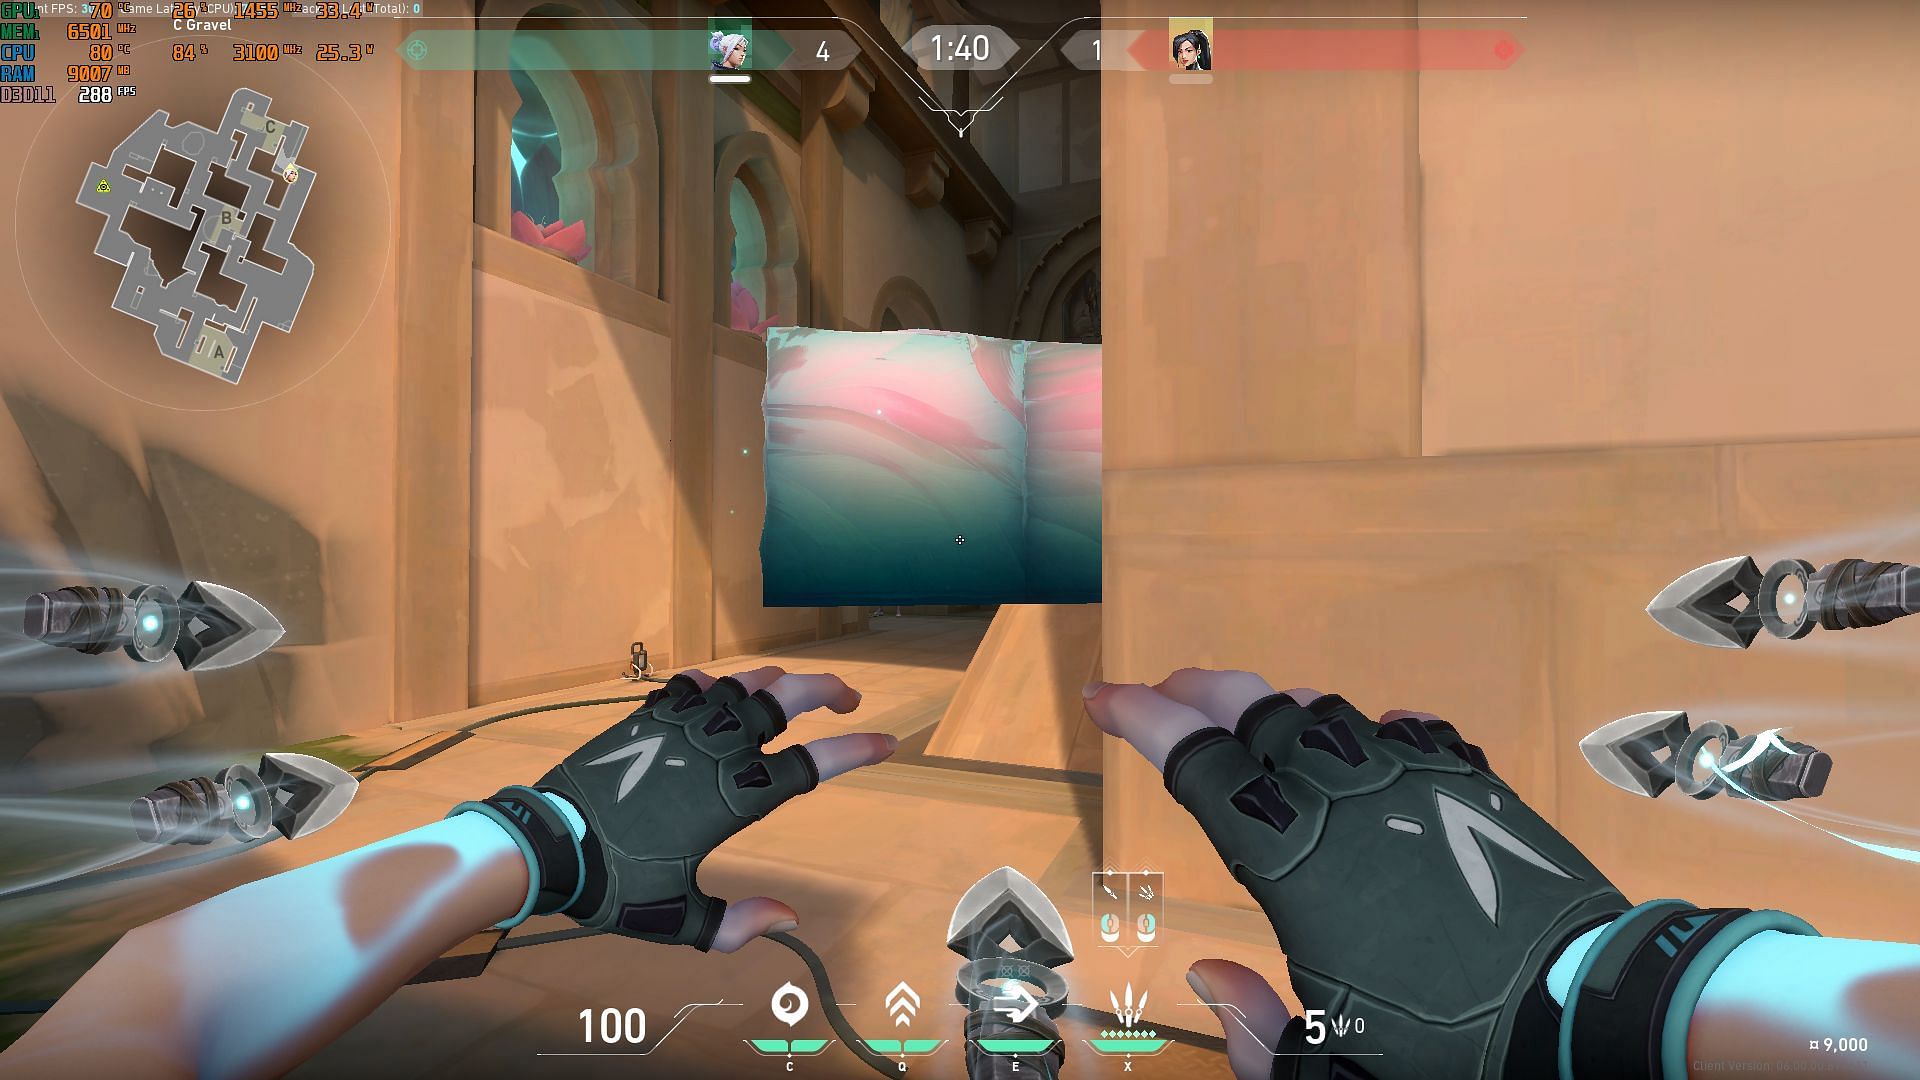
While this Barrier Orb placement is slightly situational, it's still a great option nonetheless. You can use this wall with a teammate and ask them to look at another entrance to C-site. The Barrier Orb must be placed between the double pillars of the site on top of the half wall as shown in the above image.
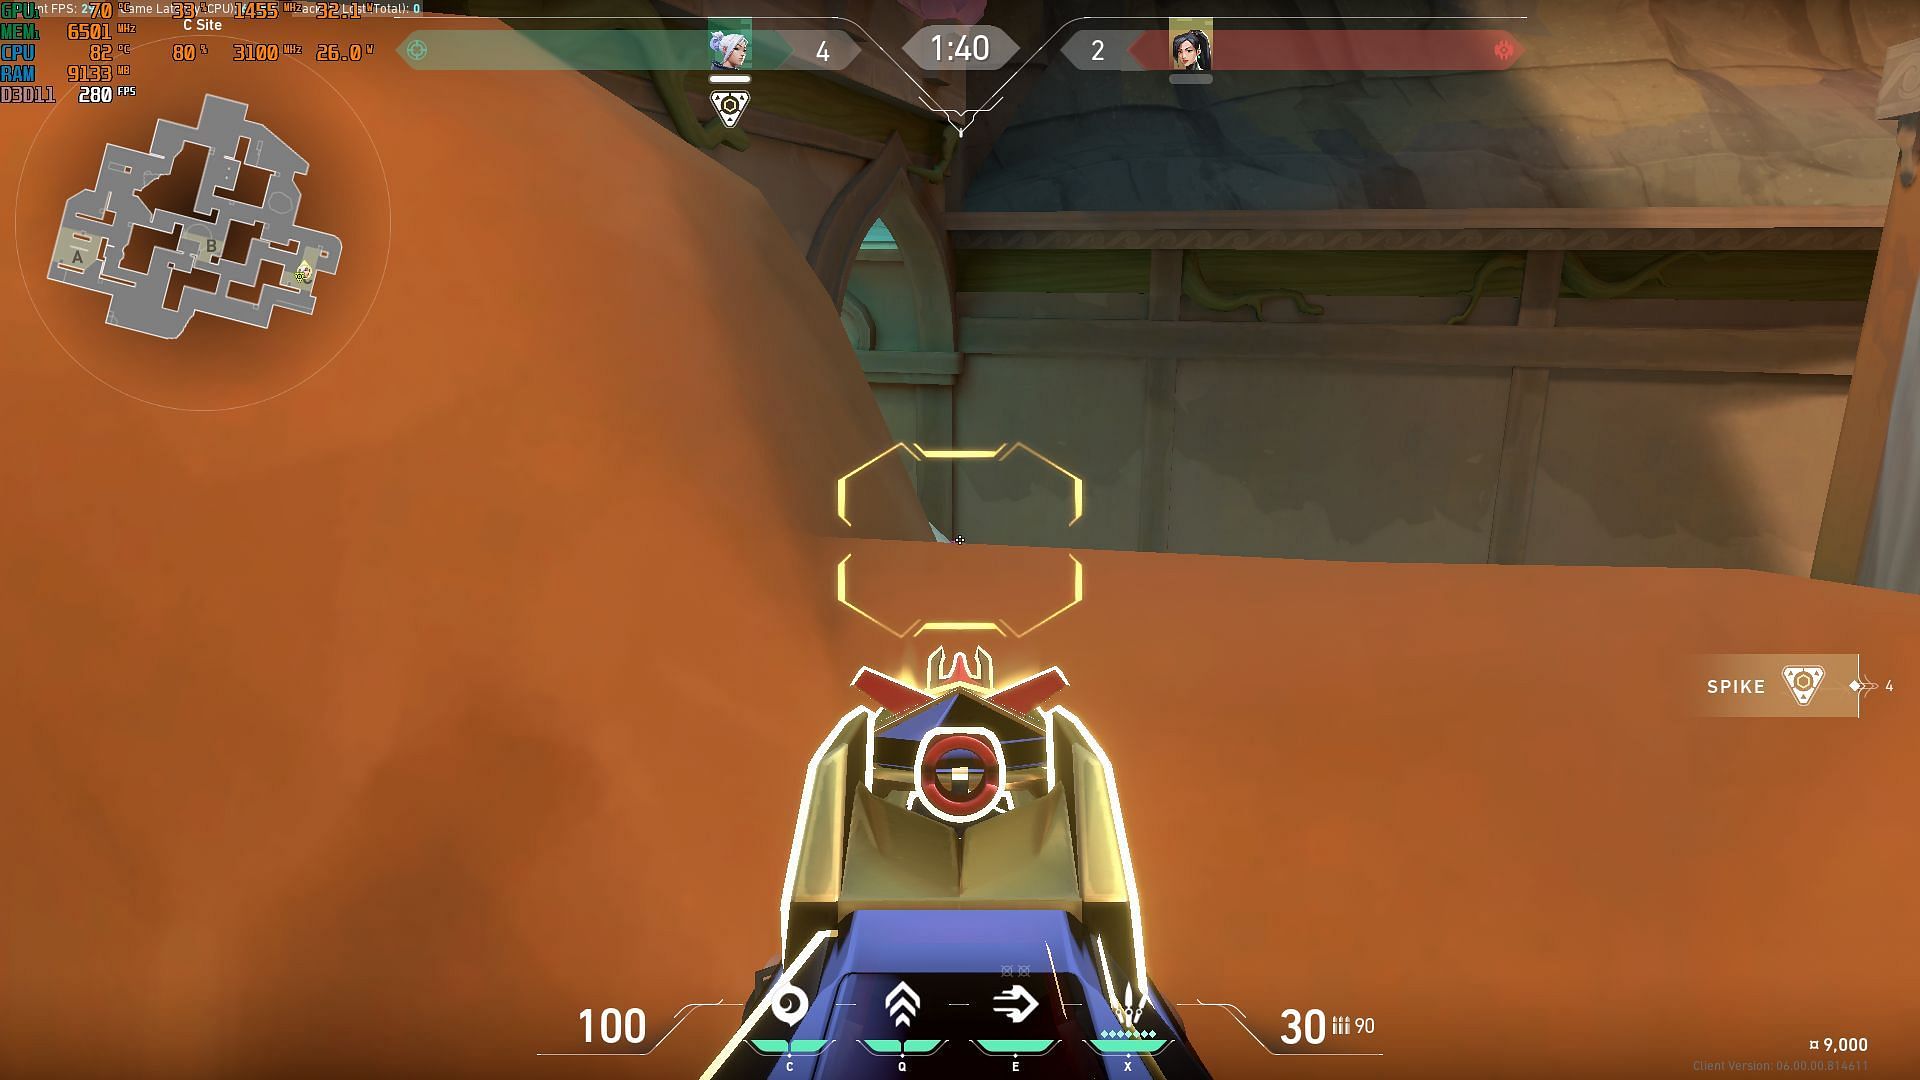
Upon climbing onto this wall, you can use the off-angle to view the direct entry point to C-main.
While enemies can see your head if they aim in your direction, it's highly unlikely for someone to clear this off-angle position.
Valorant players who are still learning the new map can add these Sage tricks to their arsenal. Considering that the map is fairly new, they should be able to get a few easy picks with these Barrier Orb placements. Looking at this season's progression, gamers will soon find more counters and strategies for the Lotus map.