
'%20x='0'%20y='0'%20height='100%25'%20width='100%25'%20%0A%20%20%20%20%20%20%20%20%20%20xlink%3Ahref='data:image/jpg;base64,/9j/2wBDAAYEBQYFBAYGBQYHBwYIChAKCgkJChQODwwQFxQYGBcUFhYaHSUfGhsjHBYWICwgIyYnKSopGR8tMC0oMCUoKSj/2wBDAQcHBwoIChMKChMoGhYaKCgoKCgoKCgoKCgoKCgoKCgoKCgoKCgoKCgoKCgoKCgoKCgoKCgoKCgoKCgoKCgoKCj/wgARCAAHAAoDASIAAhEBAxEB/8QAFQABAQAAAAAAAAAAAAAAAAAABQj/2gAIAQEAAAAAnkv/xAAUAQEAAAAAAAAAAAAAAAAAAAAC/9oACAECEAAAAD//xAAUAQEAAAAAAAAAAAAAAAAAAAAB/9oACAEDEAAAAH//xAAcEAEAAQQDAAAAAAAAAAAAAAABAgAEERIDMdH/2gAIAQEAAT8AsrfFhKXKQiyXXYzt5UnEkWaj2V//xAAVEQEBAAAAAAAAAAAAAAAAAAAAAf/aAAgBAgEBPwCP/8QAFREBAQAAAAAAAAAAAAAAAAAAAAH/2gAIAQMBAT8Ar//Z'%3E%3C/image%3E%3C/svg%3E)
When one plays Minecraft, the official launcher of the game automatically allocates a certain amount of RAM to a version. Whenever this version opens on a device, the allocated RAM gets occupied.
This method of pre-allocating RAM to Minecraft offers smoother gameplay and prevents lag spikes. However, there might be instances where the game still lags.
Minecraft is a huge game, even though it looks dated in terms of graphics. The map of the game is nearly endless. Hence, when a player is loading new chunks or running heavy shader packs, the allocated RAM might not be enough to handle everything.

Fortunately, there is a method through which players can change the RAM allocated to any version that is installed on the PC. However, it can only be done in Java Edition.
Chart New Territories with the ultimate Minecraft Seed Generator!
Players can use the Minecraft Launcher to reallocate RAM and help the game load faster
Before proceeding further, it should be noted that this is a technical method where players will tinker with code. Although this works most of the time, players might experience game crashes or other issues. If the problem persists, it is advised to revert all the changes.
Here are the steps players can follow to change RAM allocation in Minecraft via the default launcher:
1) Open the official game launcher
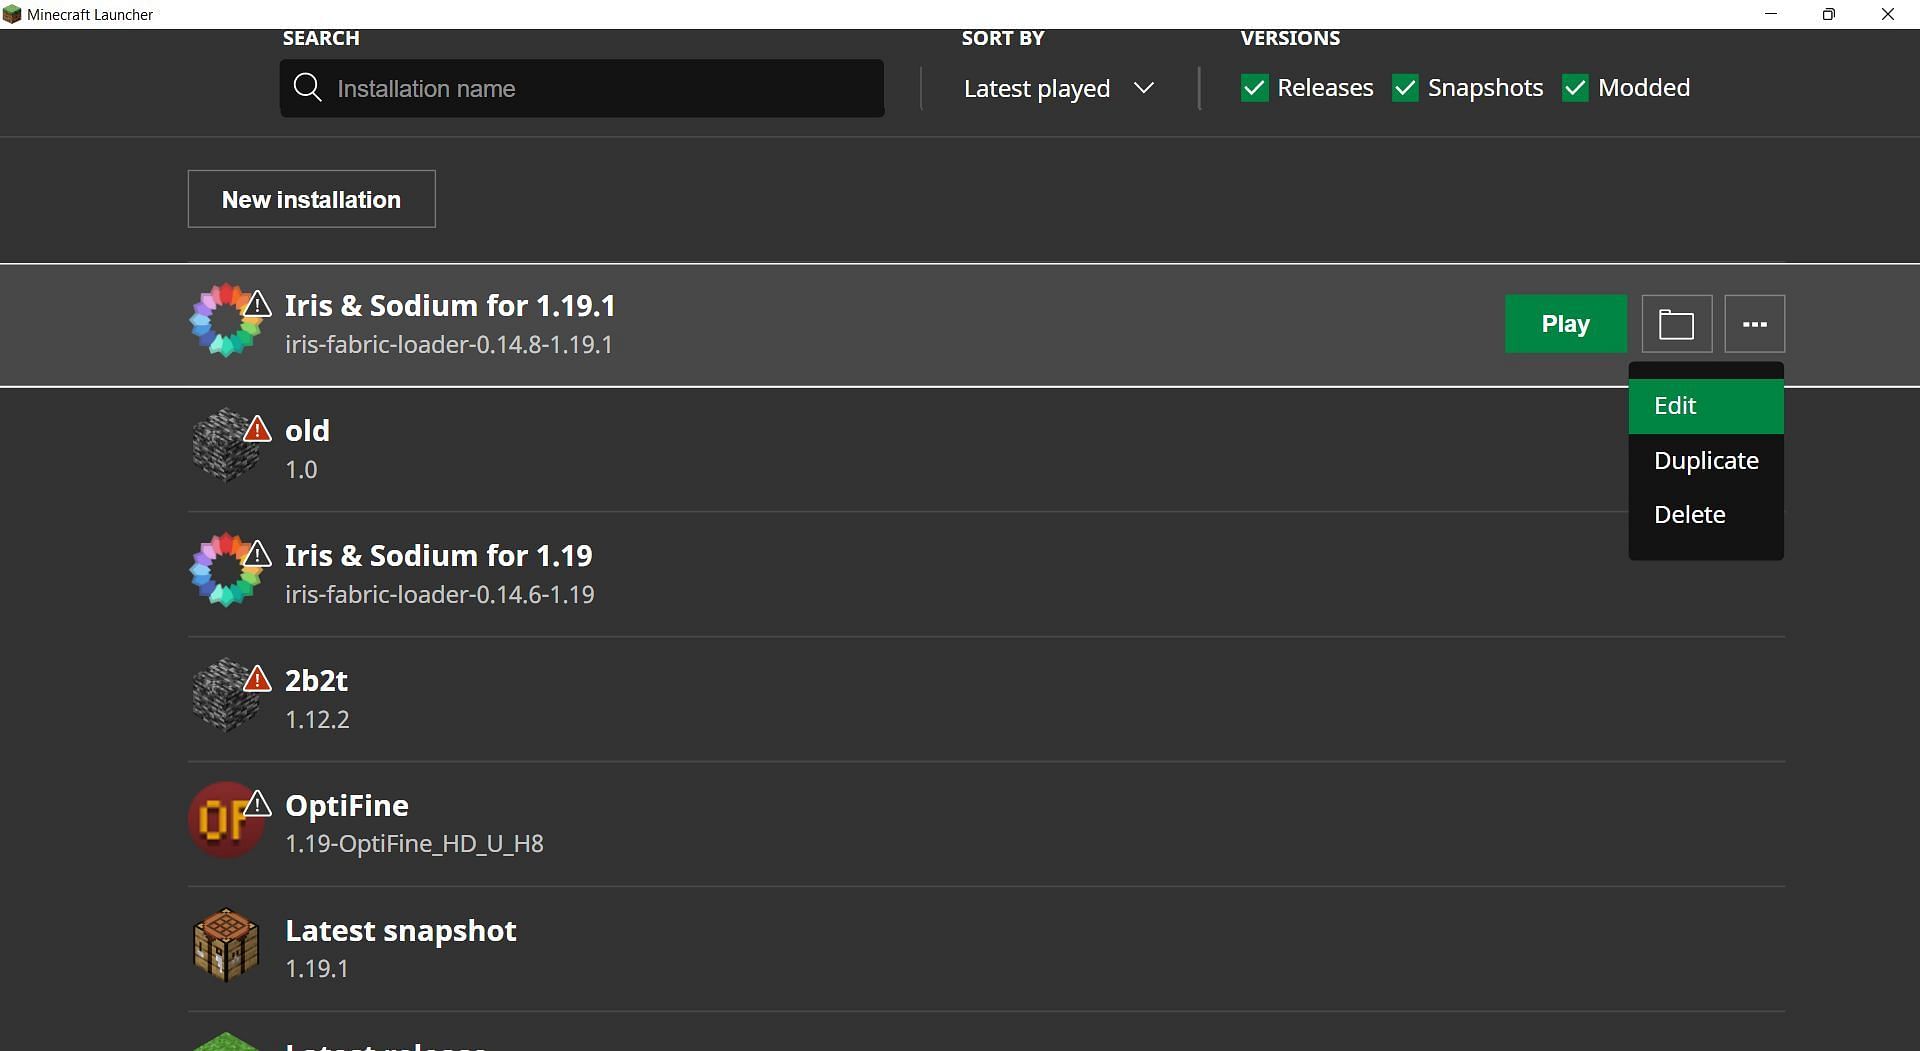
Several Minecraft launchers allow players to change RAM allocation. However, this can also be done in the official game launcher.
Once players open the game launcher, they can head to the Java Edition of the game and click on the "Installations" option. This is where all the installed versions of the game will show up.
Players can select whichever version they want, click on the three dots on the right-hand side and click on the "Edit" option.
2) Edit an installation to allocate more RAM
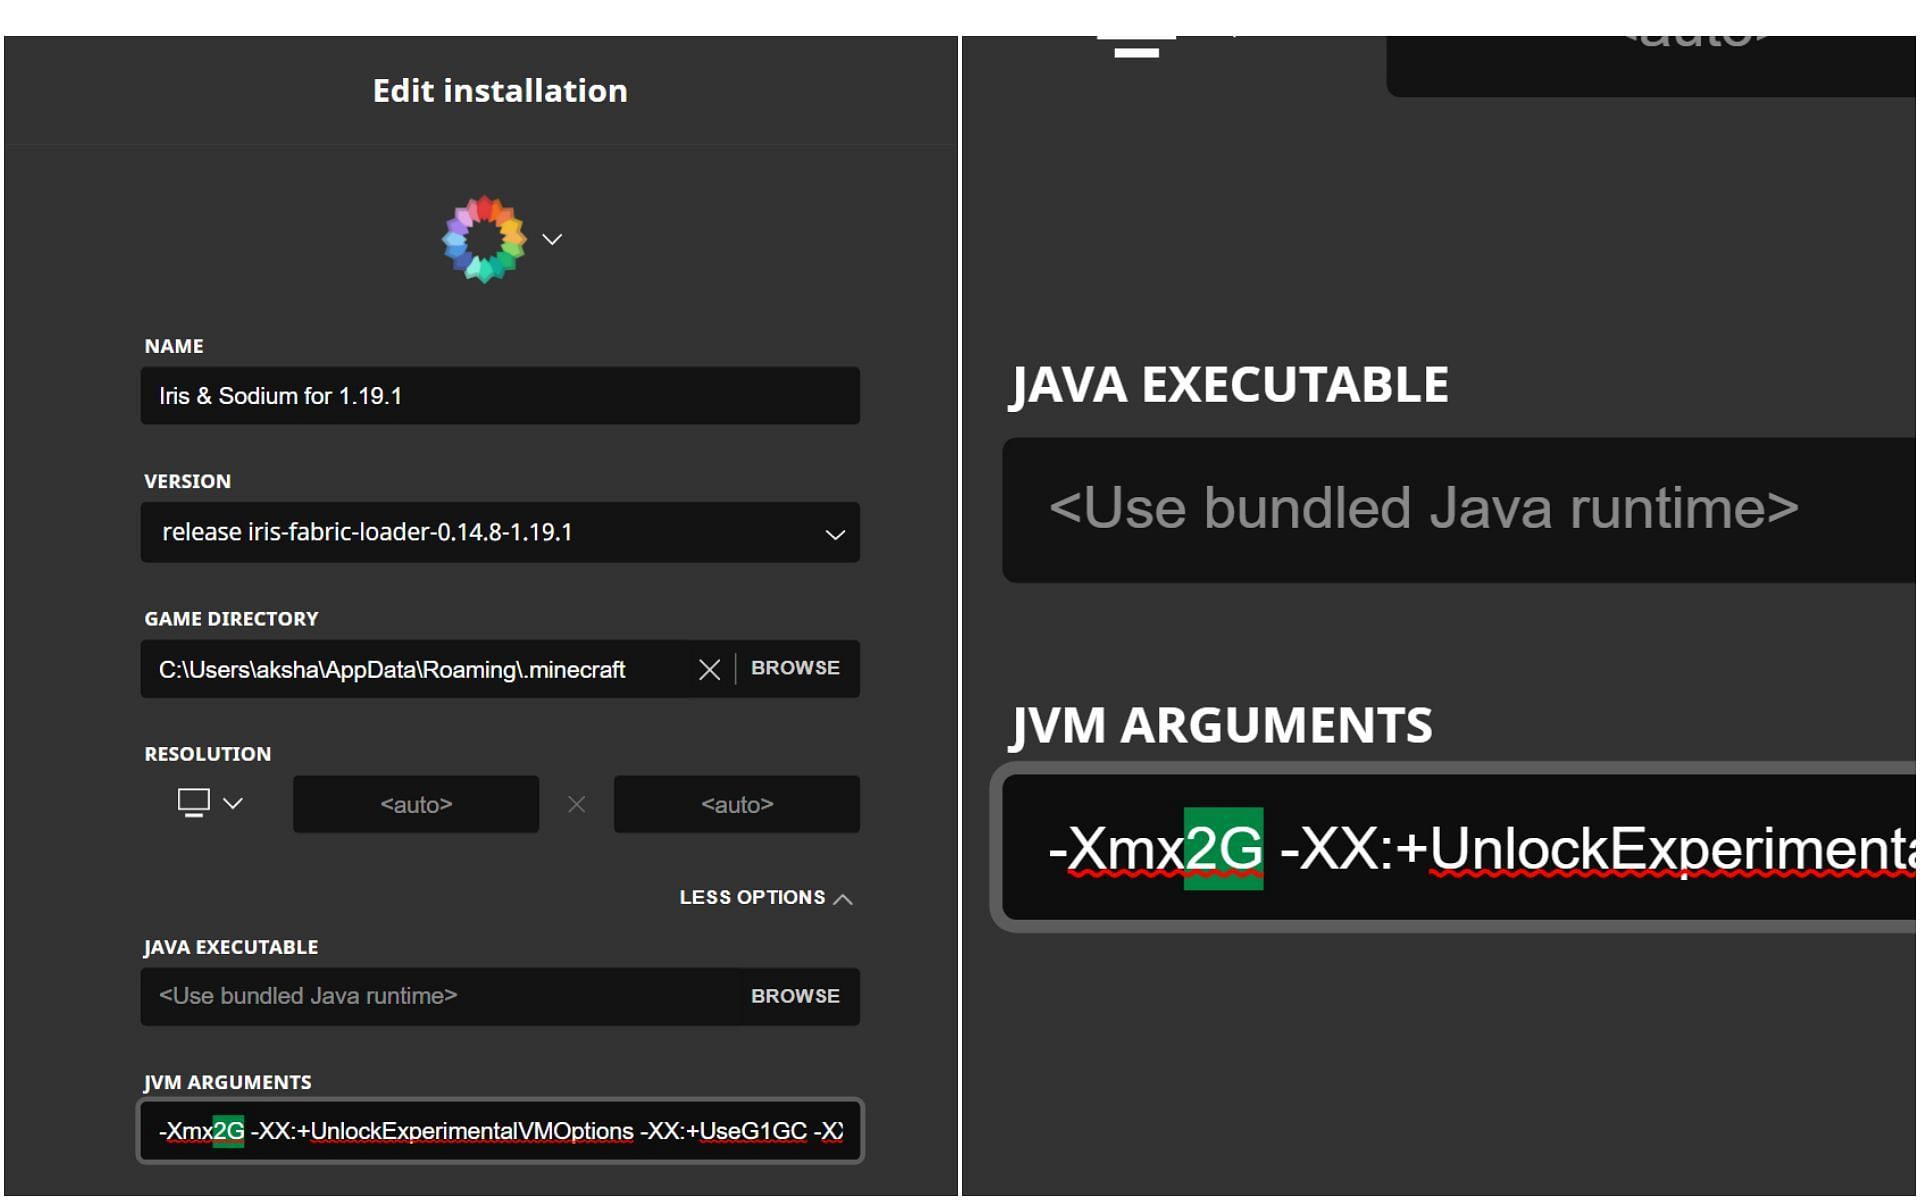
Once players are on the "Edit Installation" page, they will see a few pieces of information like name, version, game directory, etc.
Players must scroll all the way down and click on the "More Options" button. This will open the technical settings of an installation that will contain a long code. The code will be present in the "JVM Arguments" text box.
This is where players will be able to change the RAM allocation of the Minecraft version. In the first few characters of the code, players will see a code "-Xmx2G". This is the main code that determines how much RAM is allocated.
If players want to increase the RAM, they can simply change the "2G" to some higher number. For example, if players want to allocate four gigabytes of RAM to the game, they can replace "2" with "4".
Once this is done, players must hit the "Save" button in the bottom-right corner and play the game normally. They can also check the allocated RAM by pressing the F3 button to open the debug screen.

Uncover new worlds with our Minecraft Seed Generator!