
'%20x='0'%20y='0'%20height='100%25'%20width='100%25'%20%0A%20%20%20%20%20%20%20%20%20%20xlink%3Ahref='data:image/jpg;base64,/9j/2wBDAAYEBQYFBAYGBQYHBwYIChAKCgkJChQODwwQFxQYGBcUFhYaHSUfGhsjHBYWICwgIyYnKSopGR8tMC0oMCUoKSj/2wBDAQcHBwoIChMKChMoGhYaKCgoKCgoKCgoKCgoKCgoKCgoKCgoKCgoKCgoKCgoKCgoKCgoKCgoKCgoKCgoKCgoKCj/wgARCAAGAAoDASIAAhEBAxEB/8QAFAABAAAAAAAAAAAAAAAAAAAABf/aAAgBAQAAAAAIn//EABQBAQAAAAAAAAAAAAAAAAAAAAX/2gAIAQIQAAAAC//EABQBAQAAAAAAAAAAAAAAAAAAAAT/2gAIAQMQAAAAH//EAB4QAAICAgIDAAAAAAAAAAAAAAEEAgMFEQATITJh/9oACAEBAAE/AMM02q+tjcc0yqW7oUDrYmI7kQNnz95k2qFck3QyGZ31WzhZMXT1KQJBPtz/xAAZEQACAwEAAAAAAAAAAAAAAAABAgASMpH/2gAIAQIBAT8AZ3ro9M//xAAYEQEAAwEAAAAAAAAAAAAAAAARAAECkf/aAAgBAwEBPwDKLfZ//9k='%3E%3C/image%3E%3C/svg%3E)
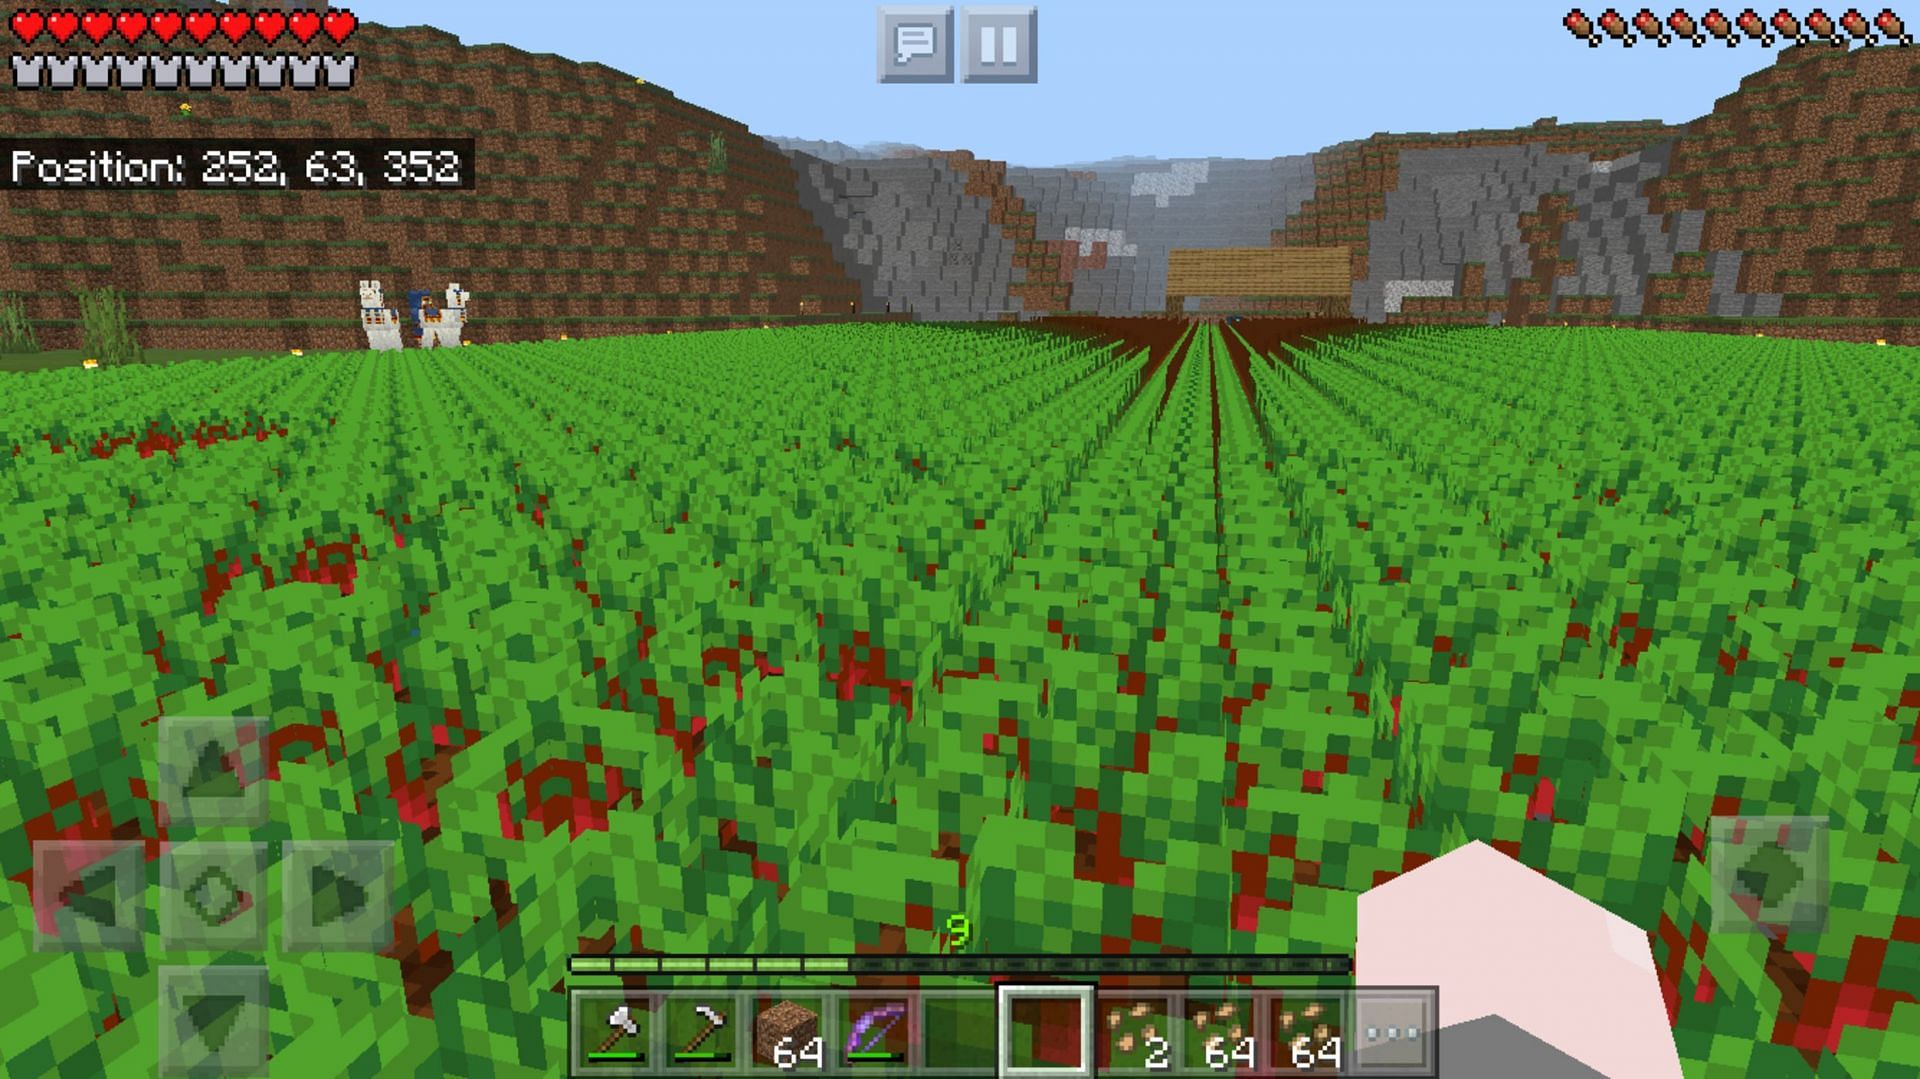
Farming standard crops like beetroot in Minecraft can be time-consuming. However, if players automate their farms, the growing and collection process can be significantly easier.
Once players have automated their farms, they can grow and collect beetroot without worrying about being present for the process.

If their farm design is done well, players can simply head to their farm after a day or two of traveling to a full chest of beetroot.
Chart New Territories with the ultimate Minecraft Seed Generator!
Players can even incorporate farmer villagers into the build if they'd like, but that can get somewhat more complicated. However, there are simple designs to account for as well.
Steps to build an automatic beetroot farm in Minecraft
1) Transport a Villager
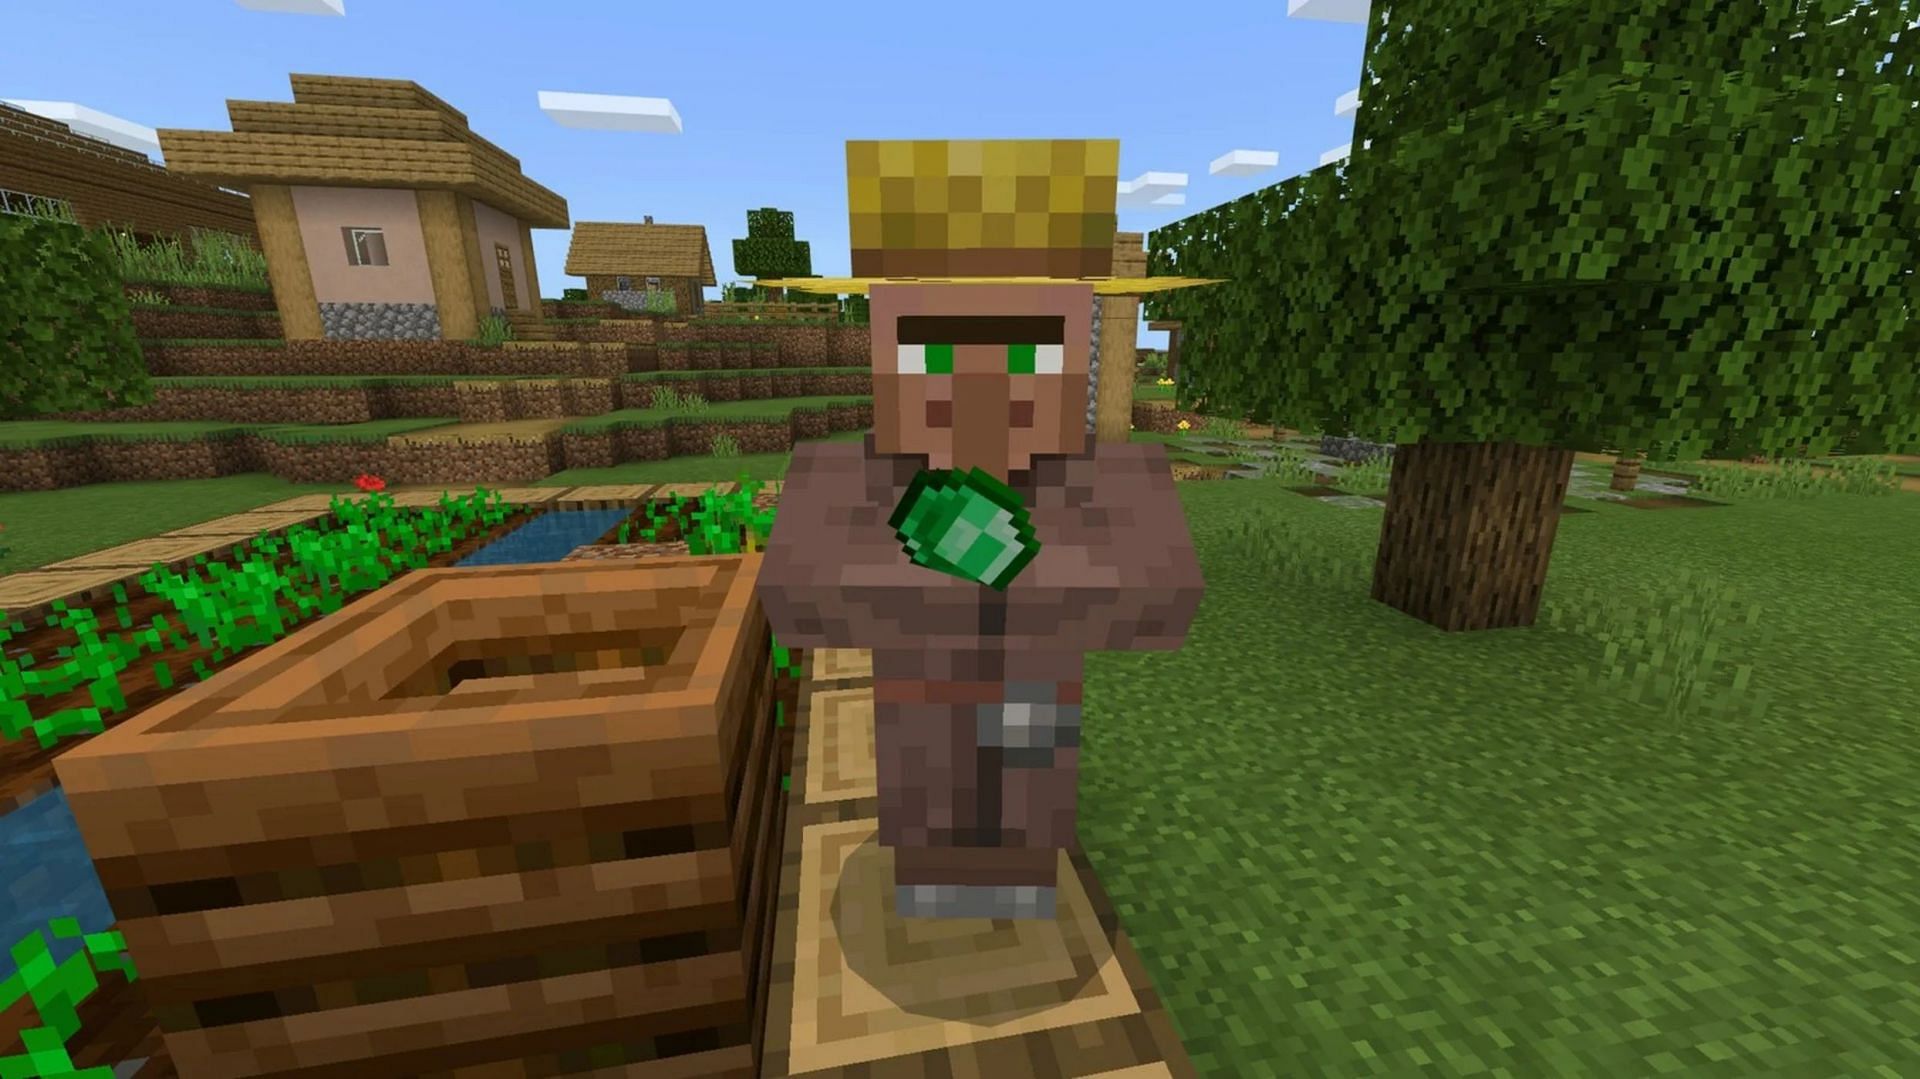
To begin, Minecraft players will want to find a nice flat patch of grassland or dirt to utilize. Once they've got their farmland scoped out, they can transport a villager to the location.
There are many ways to do this, including via minecart or boat. Regardless of how players decide to move their villagers, ensure that they're not taken out of their vehicle until the player builds an appropriate enclosure for them. Otherwise, the villager may wander and get into trouble.
2) Create the Perimeter
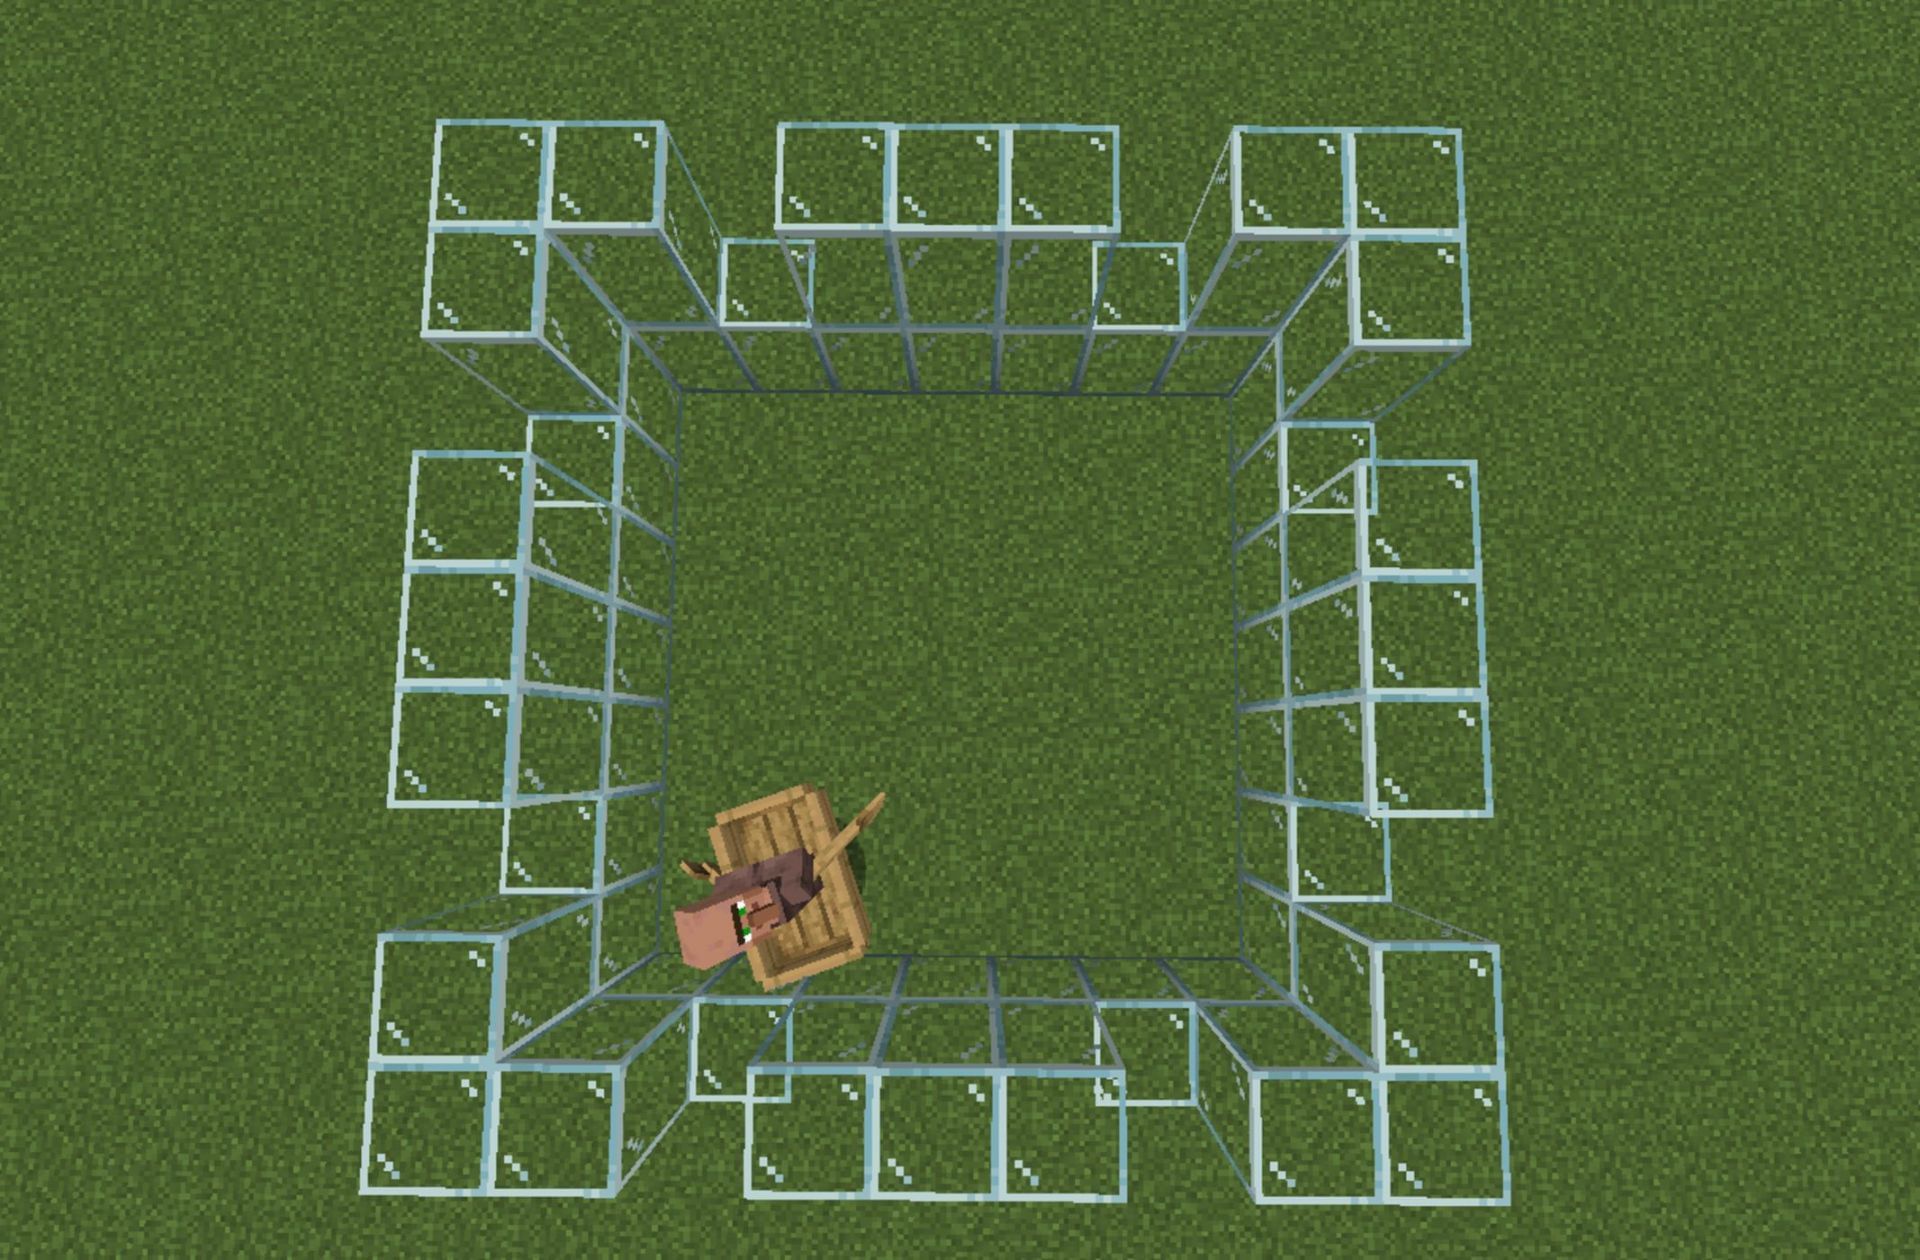
Using glass blocks, Minecraft players can construct a perimeter wall, two blocks high, around the desired farmland. Leave a few blocks on the top of the wall open.
Players should ideally not make this particular farm too large, as the water source may not be able to reach all of the farmland blocks. A nice recommended size is roughly nine blocks long on each side.
3) Place the Water and Composter
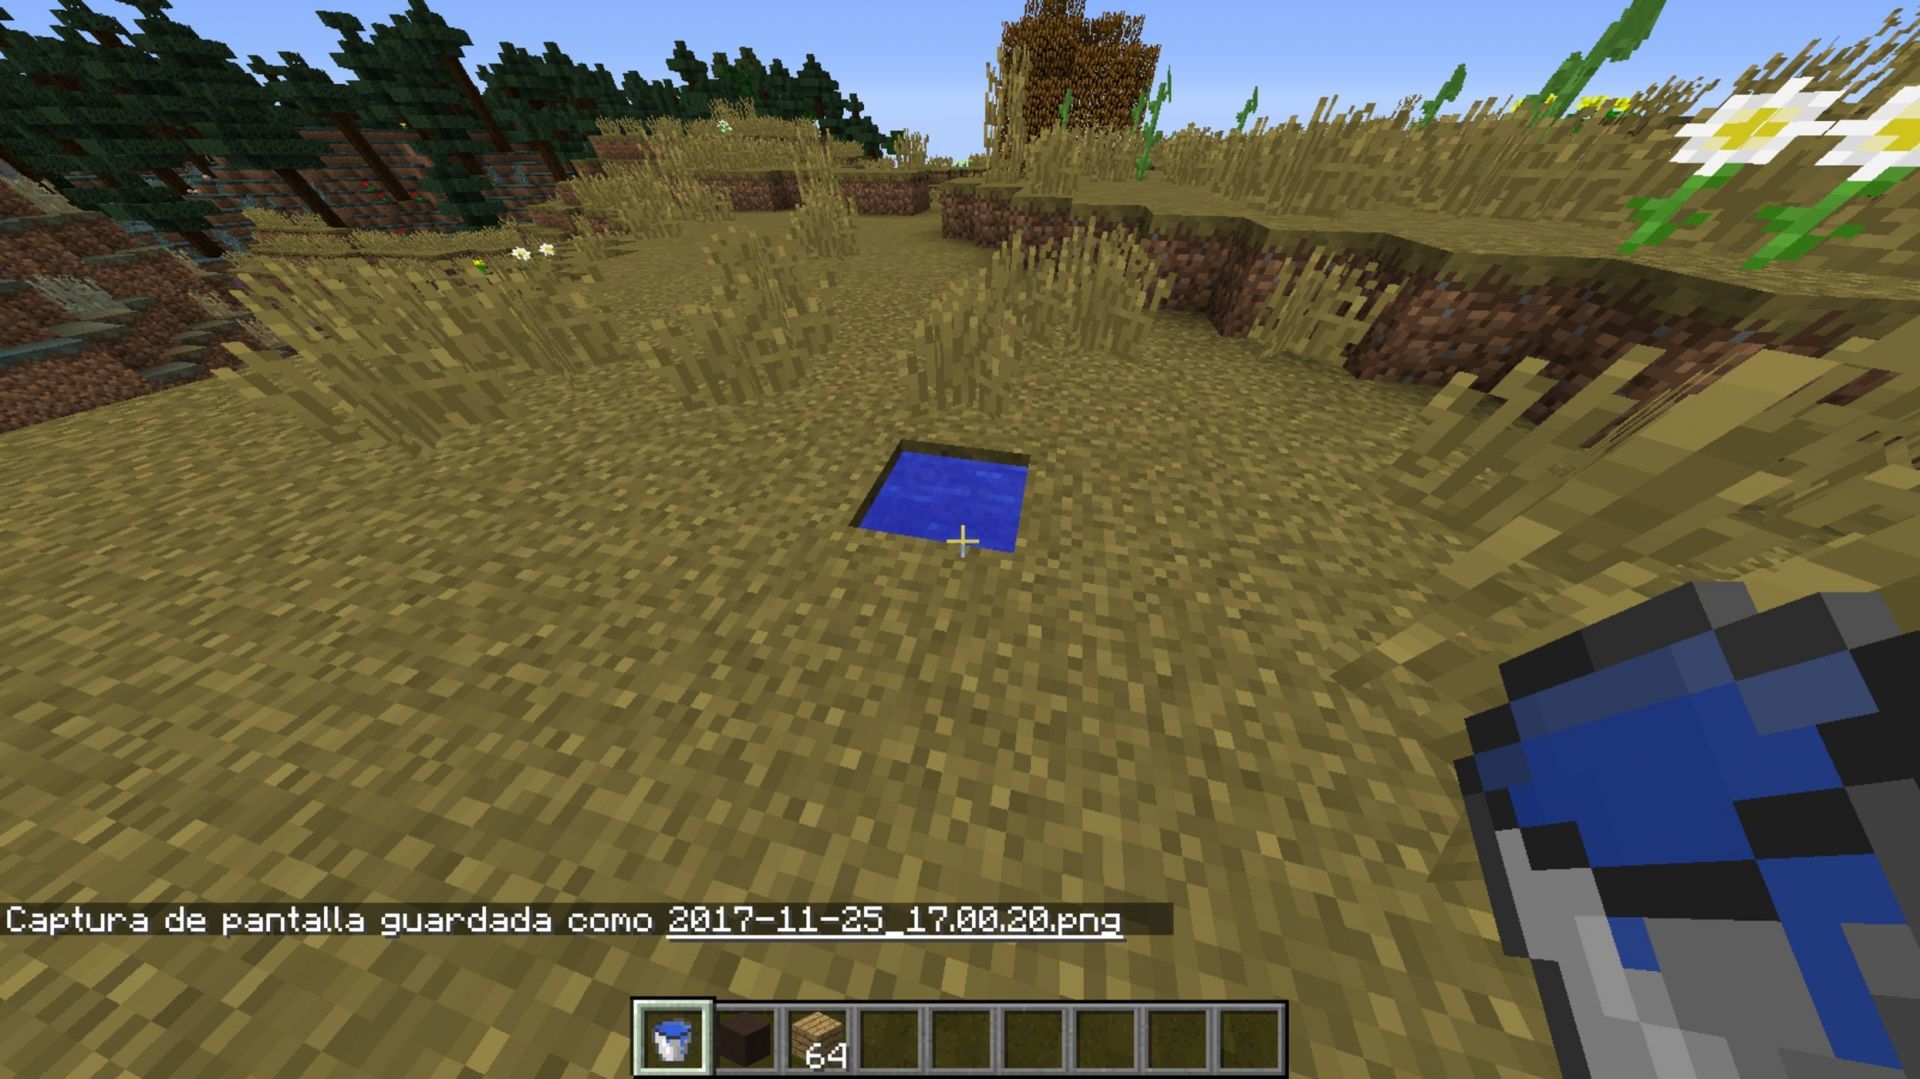
Next, Minecraft players will want to dig a lone one-block hole in the center of the enclosure. Place a slab of any block type into the bottom of the hole, take a bucket of water, and pour it into the hole. Place a composter block atop this particular hole.
The hole will be covered, but the water will still reach the player's crops. Players can also release their villager at this point.
If the villager has no profession, they should be able to claim the composter block and become a farmer. From here on out, they'll tend to the farm endlessly.
4) Create a Light Source
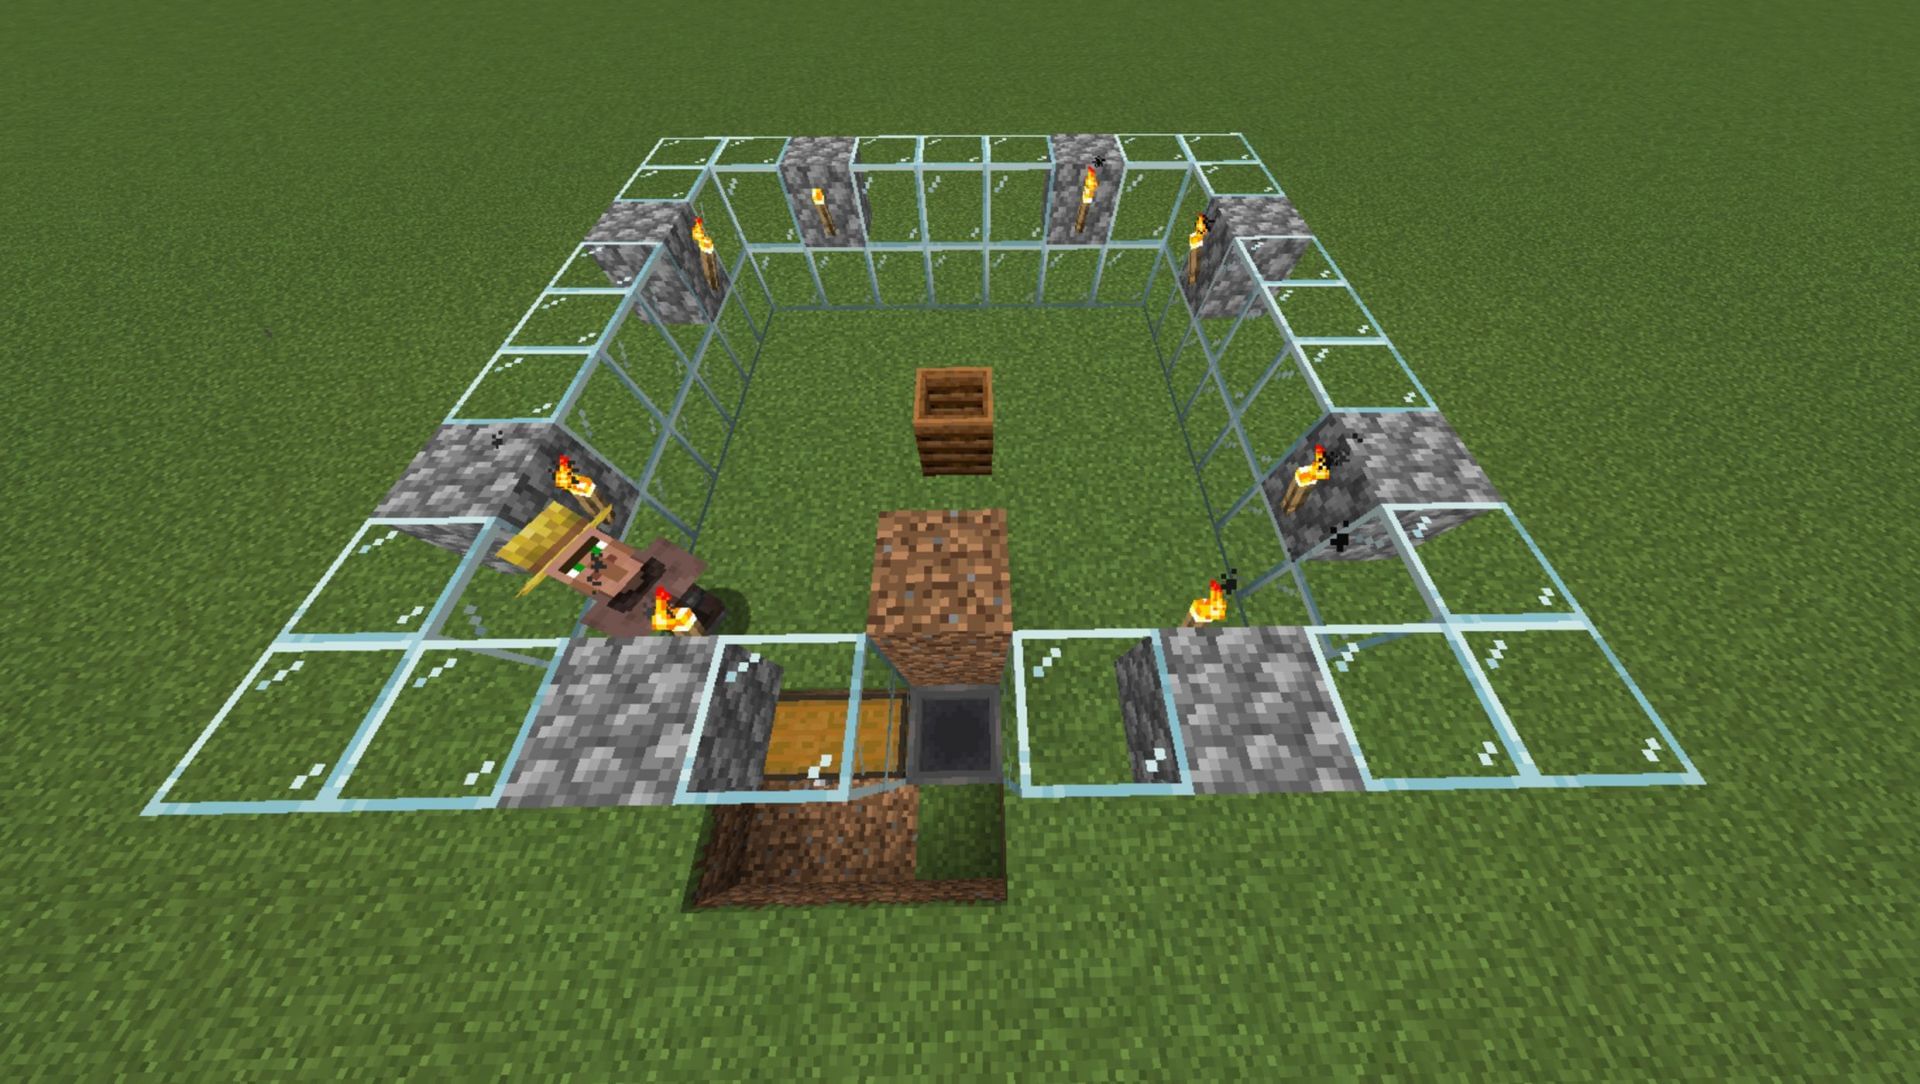
In the holes that Minecraft players left in the perimeter wall, place solid building blocks and attach a light source to them. This can be a torch, which is easily accessible, or a lantern, which provides more light and is more aesthetically pleasing. End lights also work perfectly fine.
As long as players can attach light sources to the side of the building blocks, there should be enough light present to keep the beetroot growing even during the night.
5) Build the Front of the Farm
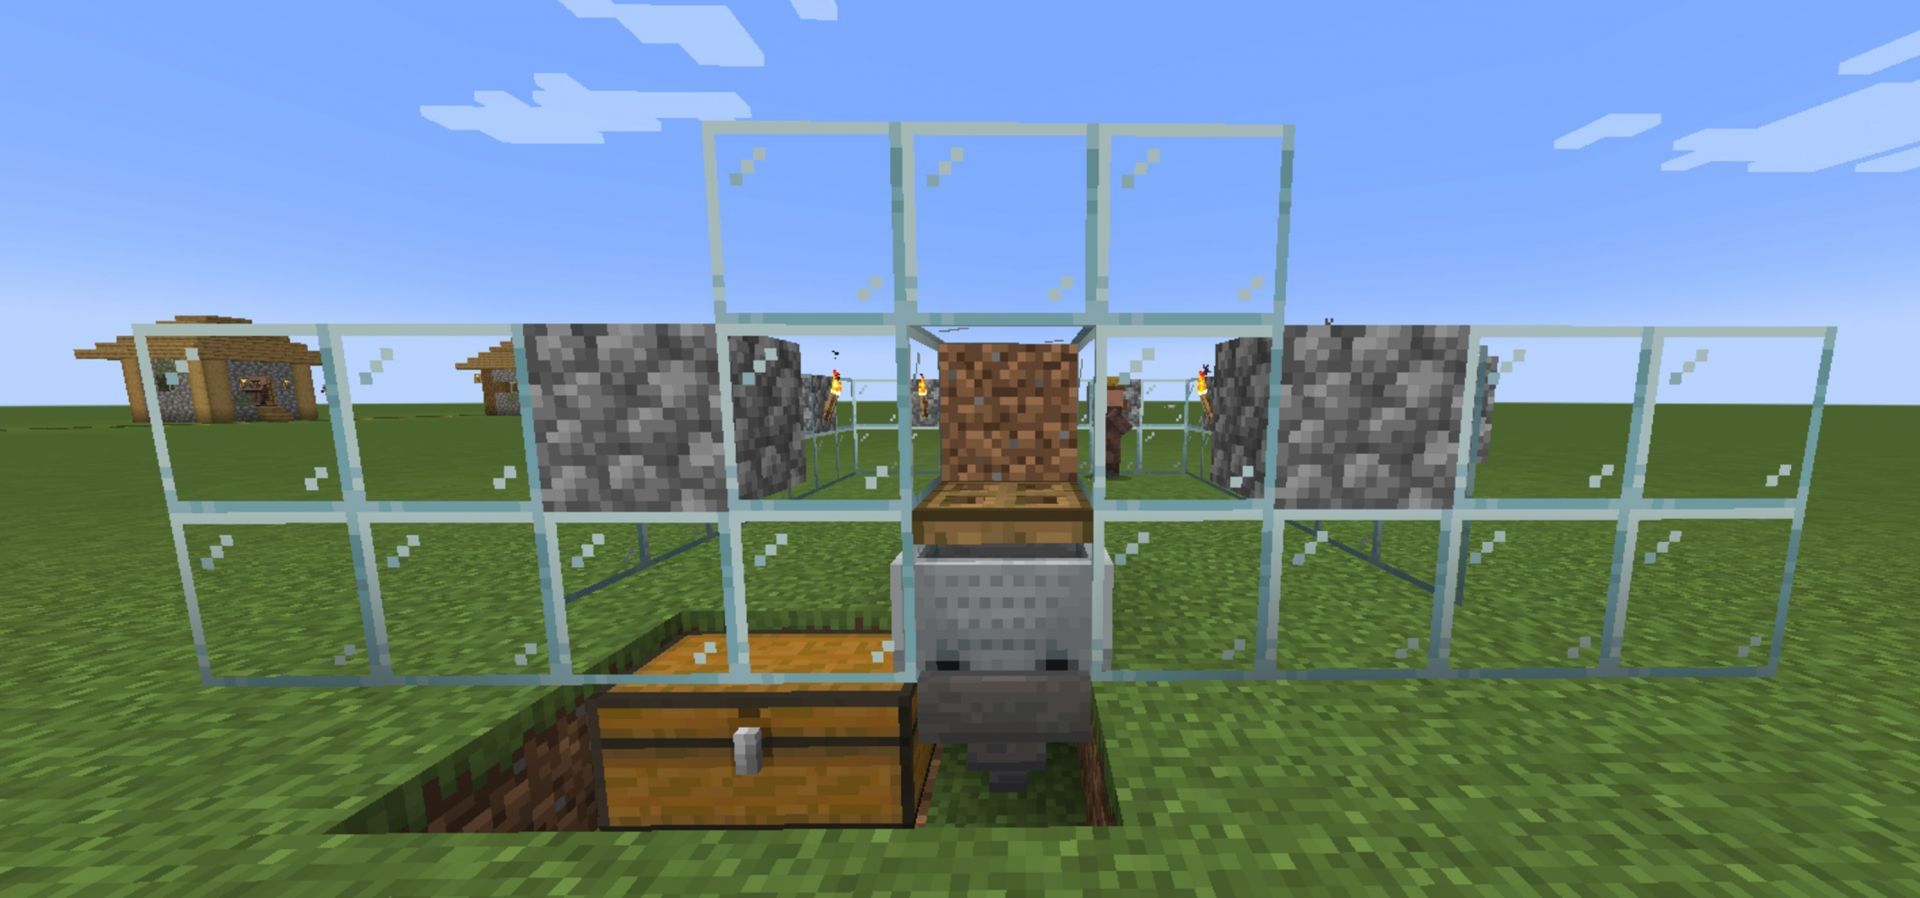
Minecraft players should now select which part of the farm they'd like to mark as the front. This is important as it will be where beetroots are collected after completion.
Wherever the player decides to place the front of the farm, they should begin by digging one block underneath one column of the glass wall and then two blocks out to the side.
Then, break the same glass column. Place a chest underneath the hole on the side (it should rest under the unbroken glass wall) and a hopper next to it (under where you broke the glass column).
Next, place a rail on top of the hopper (the rail should align with the wall). Once the rail is set, place a hopper minecart on top of it. Break the rail, which should lodge the minecart in place.
Place a standard trapdoor on top of the minecart's hopper, and build an arch of glass blocks over the trapdoor.
6) A Second Villager and Finishing Touches
For the final touches, Minecraft players will need to do a little more building and bring along a second farmer villager.
The ground-level block in front of the minecart apparatus will need to be replaced with a slab. The player can then bring their second villager to stand on the slab and lock that villager in place with blocks, so it doesn't escape.
Afterward, all that is required is to till the soil within the farm's walls and plant beetroot seeds. The villager inside will tend to the soil and crops. When it attempts to trade its beetroots with the second villager, it will drop them into the hopper and succinctly into the chest, where players can collect beetroots infinitely.

Uncover new worlds with our Minecraft Seed Generator!