
'%20x='0'%20y='0'%20height='100%25'%20width='100%25'%20%0A%20%20%20%20%20%20%20%20%20%20xlink%3Ahref='data:image/jpg;base64,/9j/4AAQSkZJRgABAQAAAQABAAD/2wCEAAMDAwMDAwQEBAQFBQUFBQcHBgYHBwsICQgJCAsRCwwLCwwLEQ8SDw4PEg8bFRMTFRsfGhkaHyYiIiYwLTA+PlQBAwMDAwMDBAQEBAUFBQUFBwcGBgcHCwgJCAkICxELDAsLDAsRDxIPDg8SDxsVExMVGx8aGRofJiIiJjAtMD4+VP/AABEIAAUACgMBIgACEQEDEQH/xABjAAEBAQAAAAAAAAAAAAAAAAAABQgQAAEDBAMBAAAAAAAAAAAAAAECAwQABQYRBxIhEwEBAQAAAAAAAAAAAAAAAAAABAURAAEEAAcAAAAAAAAAAAAAAAEAAgQRAwUSEzFBUf/aAAwDAQACEQMRAD8Ai5xnvIlvyi+2uLkSmYkWW/FS0hhCQUMqKNkj3atekVsfHPlcsetM15hpLkmBHeWEA9QpxsKIHYk69pSo4zKeyyJGJZPZtLfGj6WjaZx4v//Z'%3E%3C/image%3E%3C/svg%3E)
Storage might be one of the most important facets of Minecraft. There are hundreds, if not thousands, of different tools, weapons, ammunition, blocks, and items within the game, and the players have a comparatively restricted number of inventory slots. This makes having a way to store items vital for long-term survival worlds.
However, chests can quickly become cluttered if the player is not hyper-vigilant at sorting their inventory properly when offloading. This problem, however, can be alleviated by using redstone systems to automatically sort items into the correct chests as the player needs.

How to make a simple item sorter in Minecraft 1.19 Java Edition
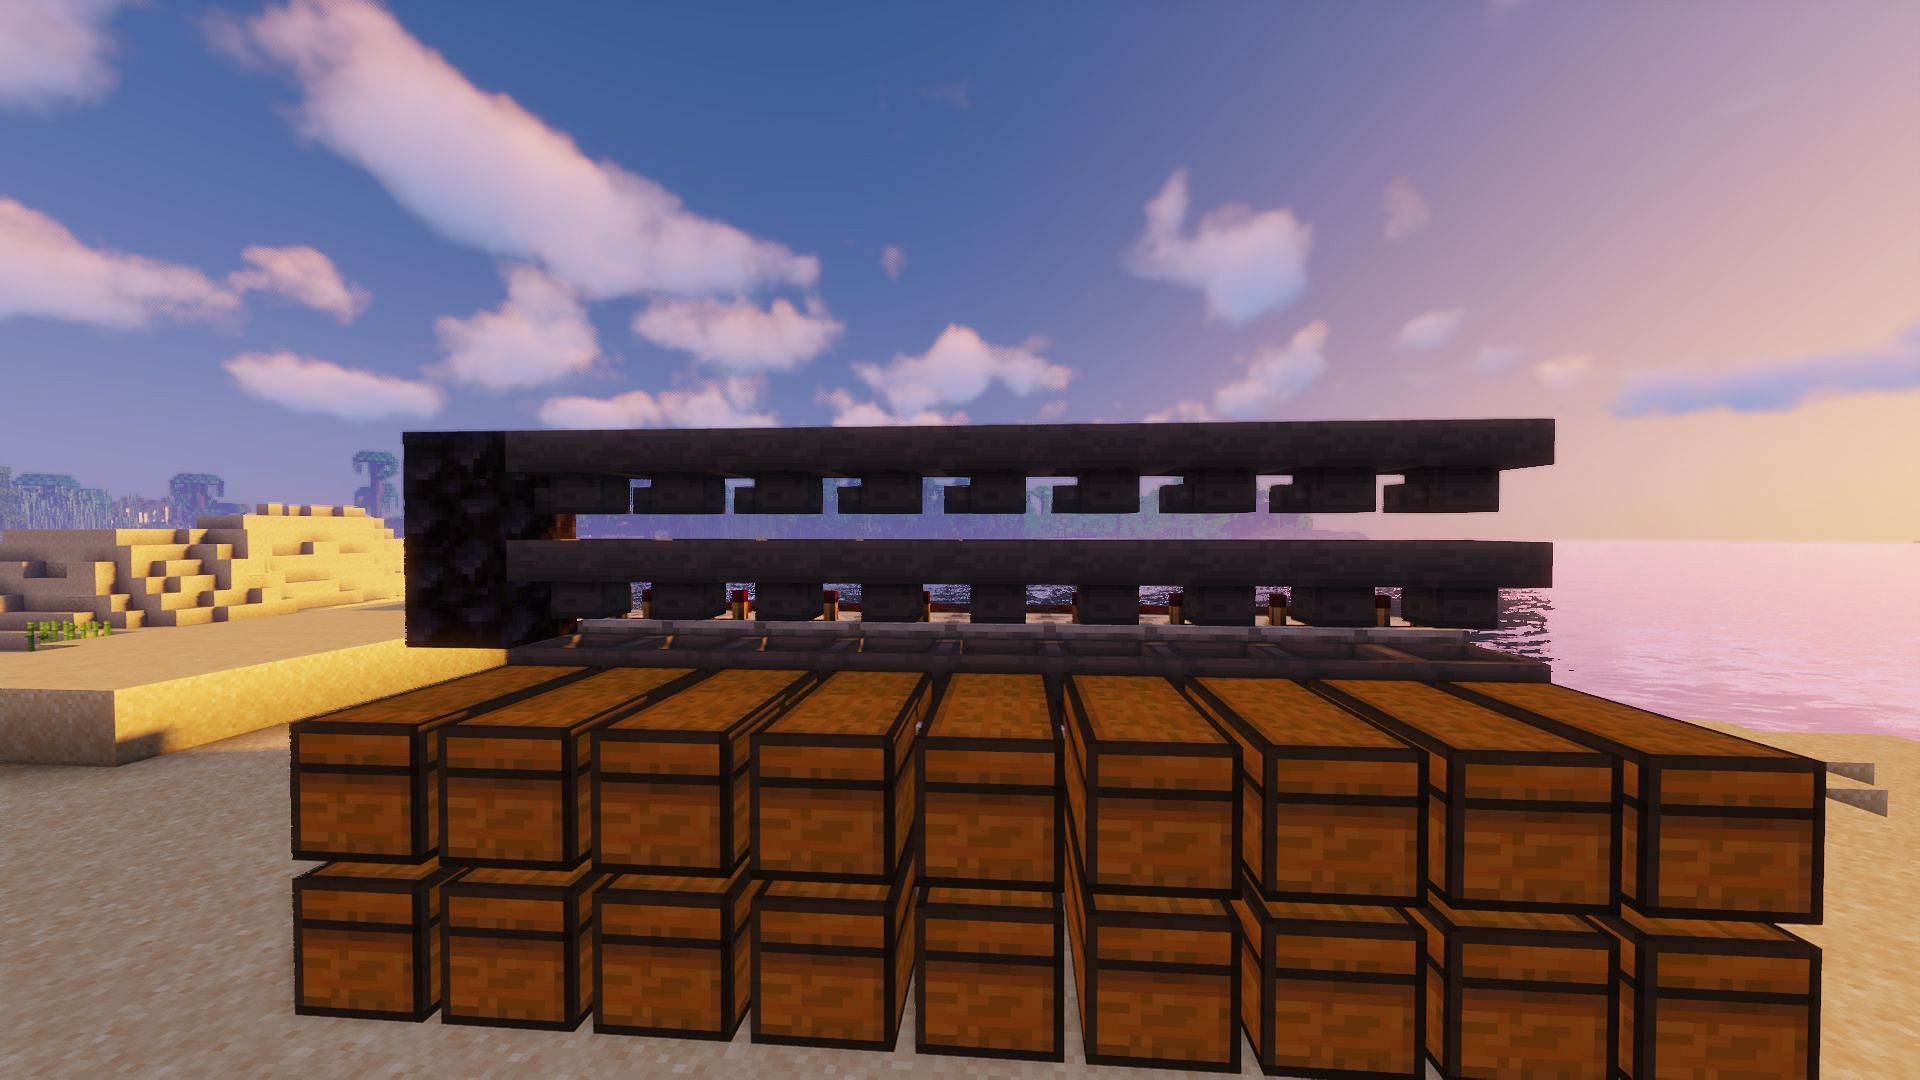
1) Place down chests
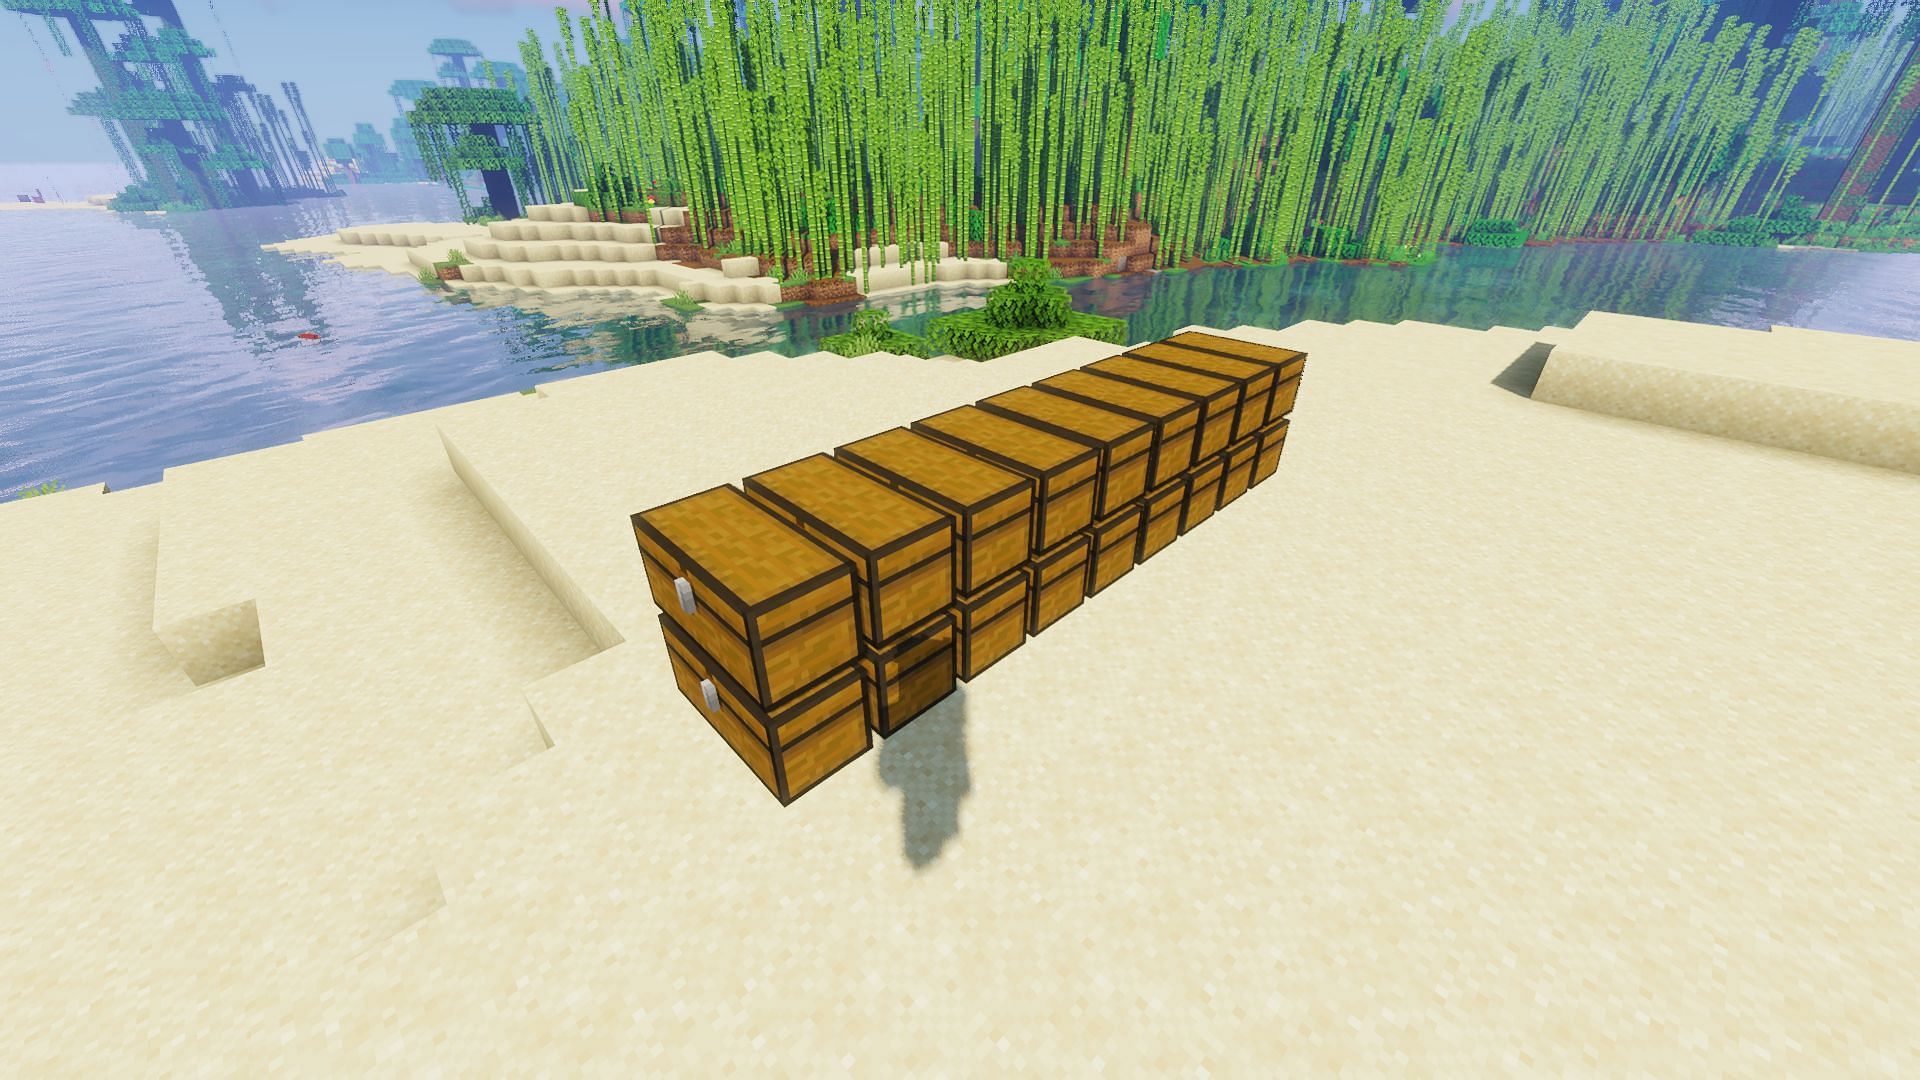
Chart New Territories with the ultimate Minecraft Seed Generator!
The first thing players wanting to make an automated storage system will need to do is place down several double chests in a line next to each other.
The number of chests does not matter, as it can be expanded in the future, should the player want to make a small initial storage system before expanding. This example build uses 18 double chests and a double chest for the input.
2) Place chest hoppers
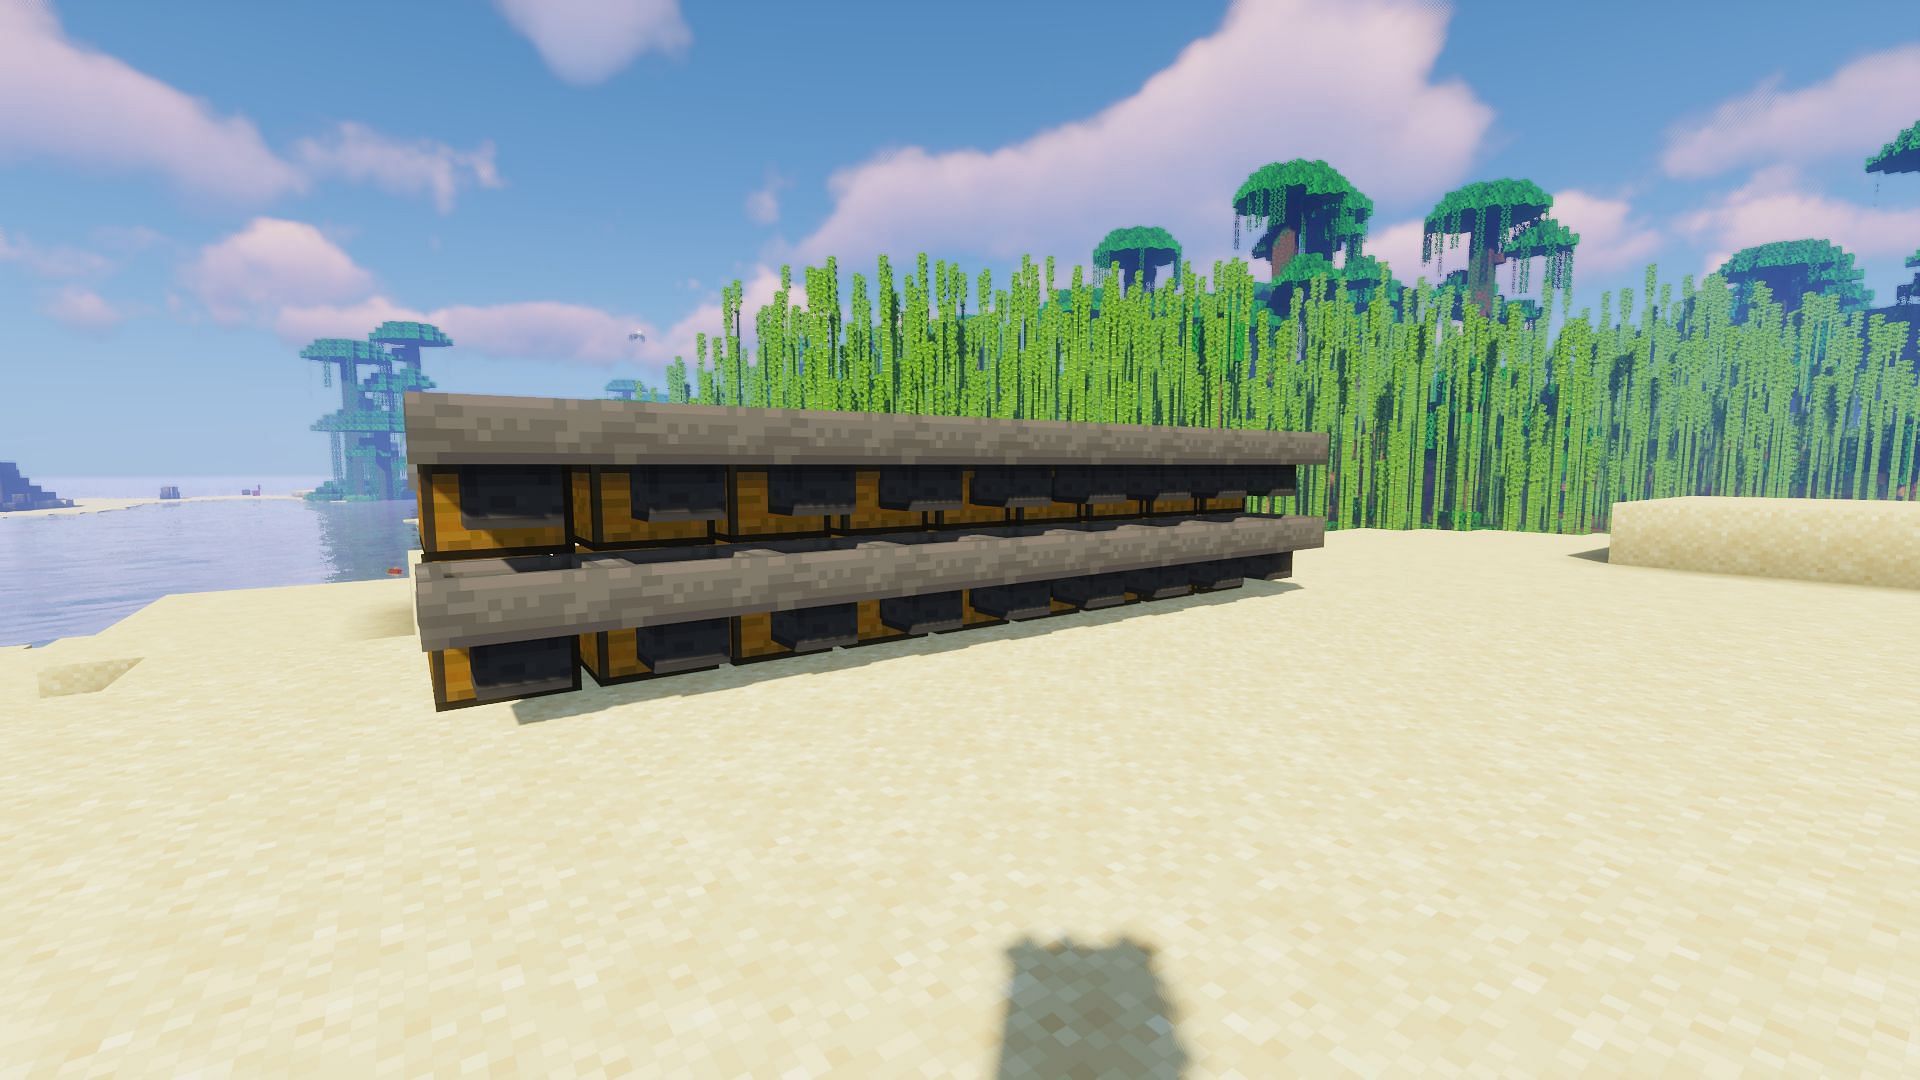
Next, players will want to place a hopper on the side of each and every double chest on one side, with every hopper facing into their respective chest and not each other. These hoppers will hold the filter blocks and pass the filter items into their respective chests.
3) Place repeaters
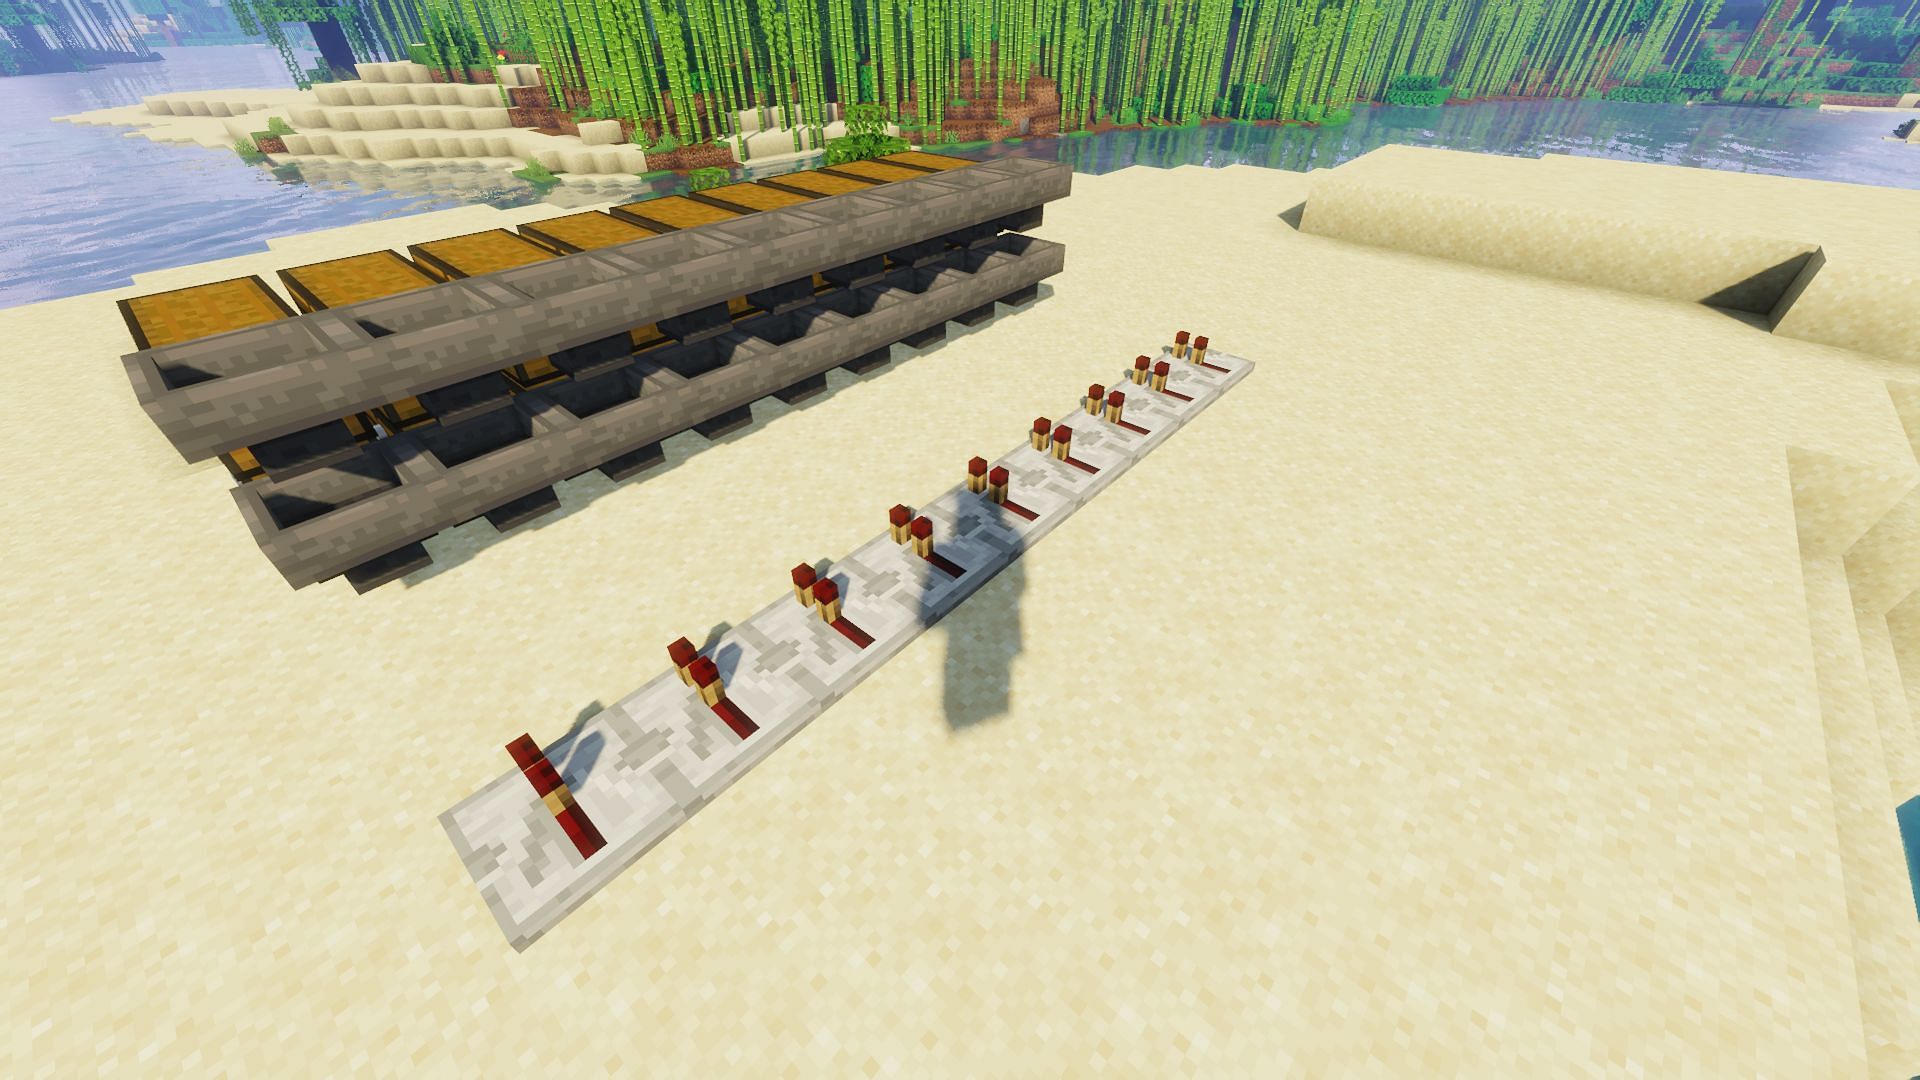
After this, players need to place a row of repeaters facing toward the hoppers. They need to be a total of three blocks away. There should be a two-block gap between the hoppers and the repeaters.
4) Place blocks around the repeaters
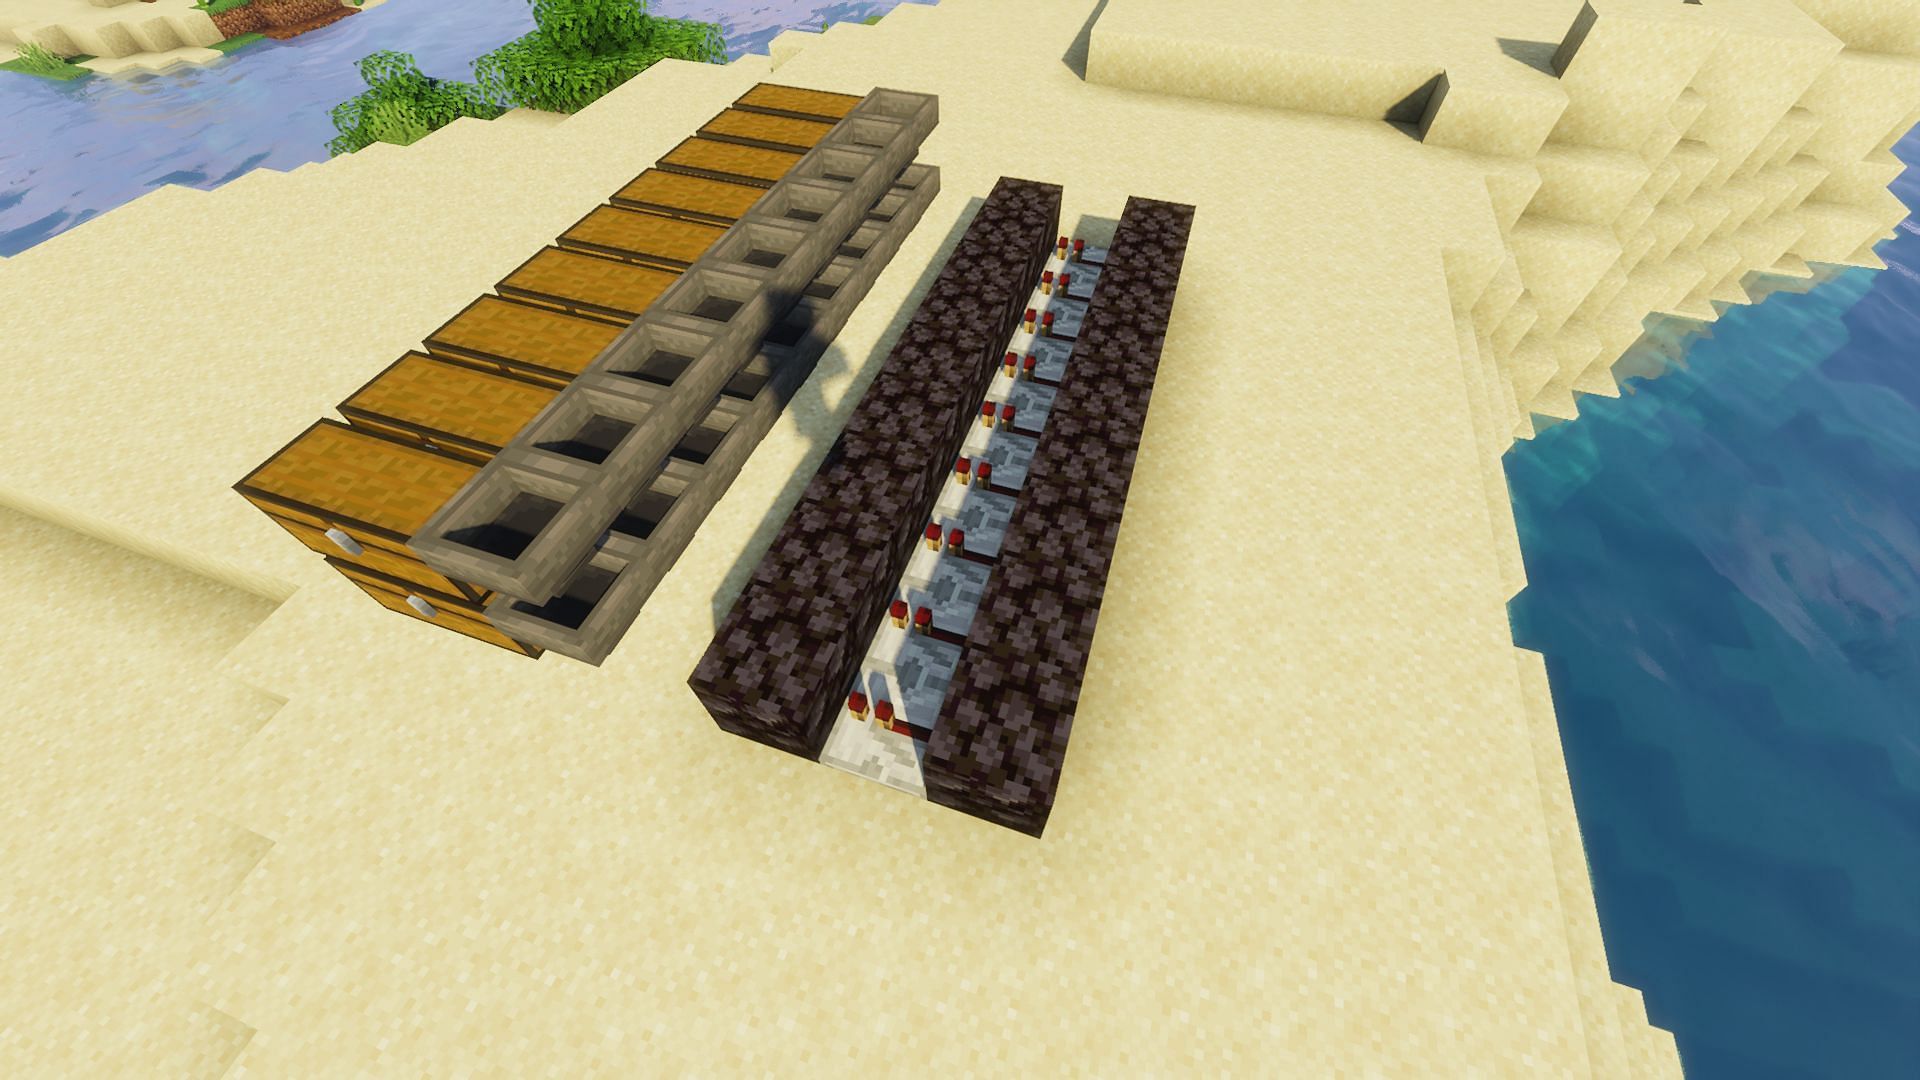
Once the repeaters have been placed, players should place any solid block of their choice around the repeaters, with a row in front of them and a row behind them.
5) Place redstone torches
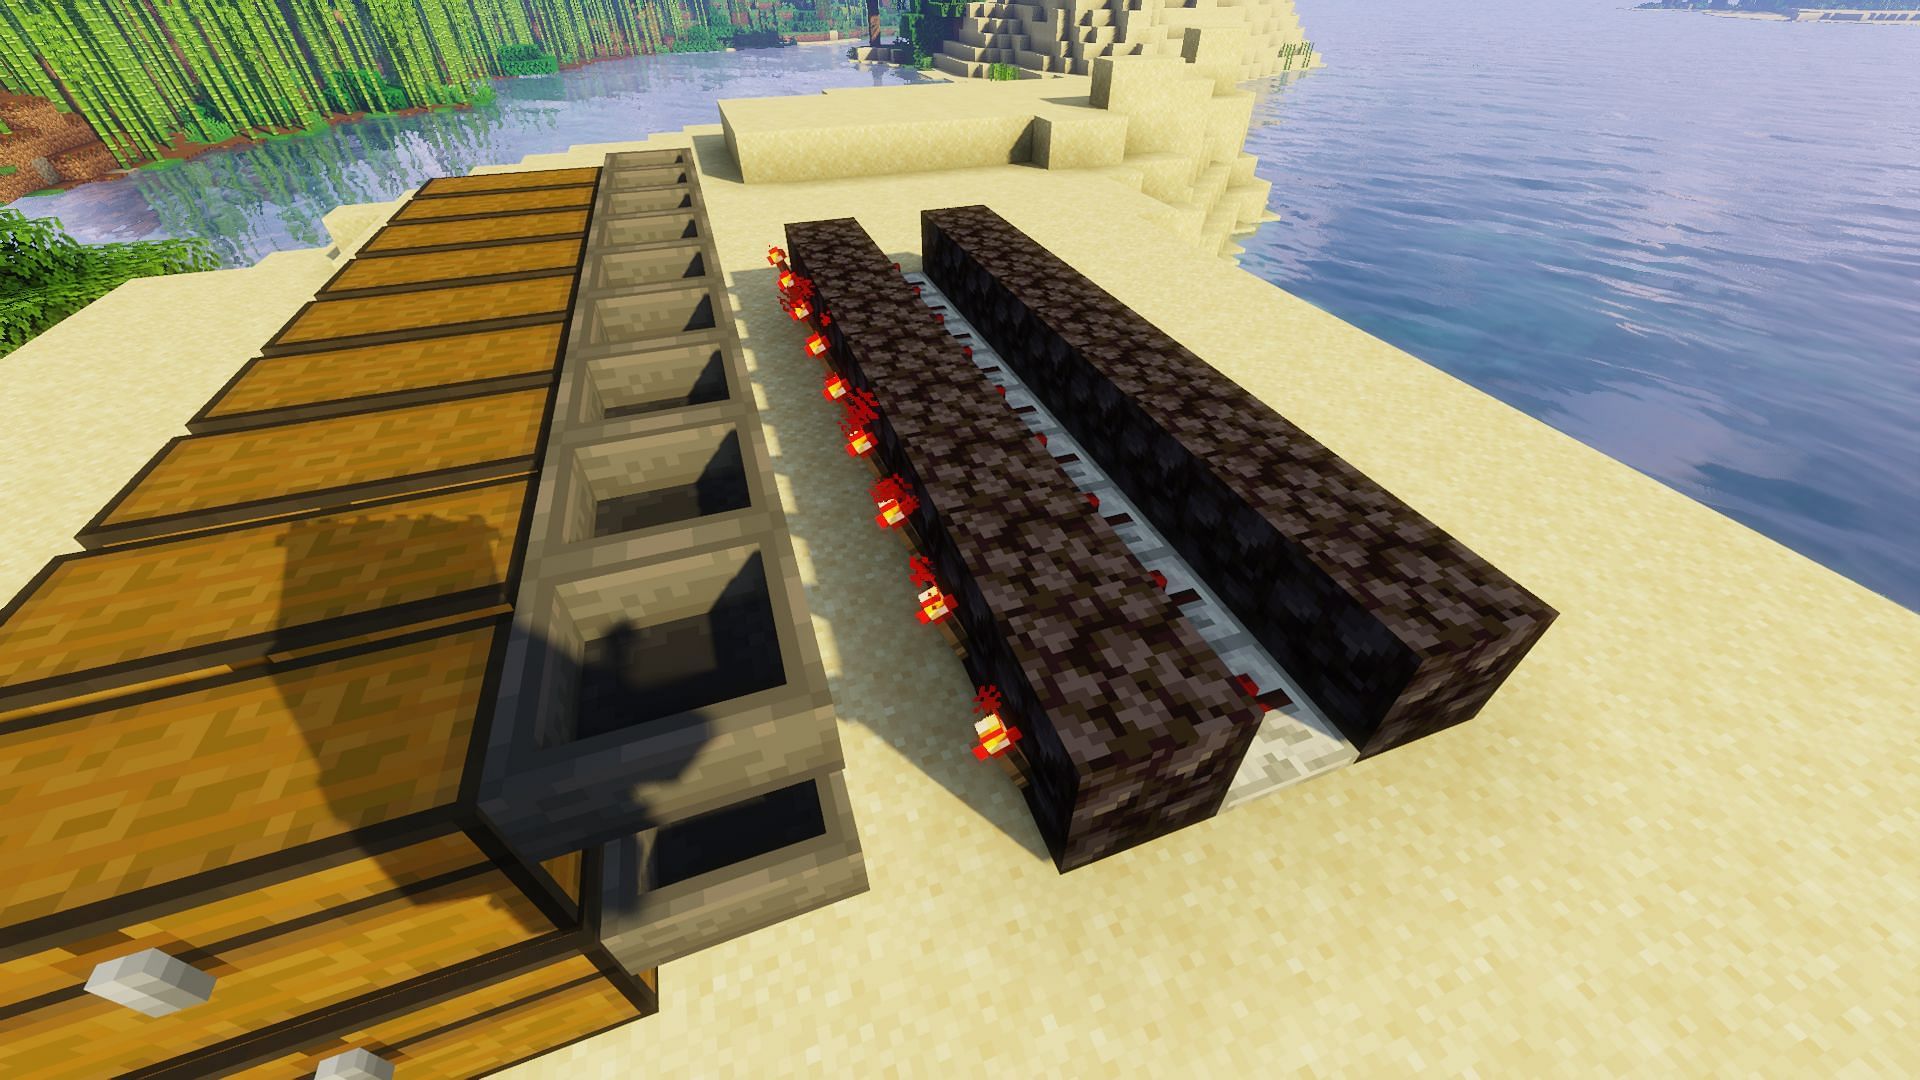
On the side of the blocks closest to the hoppers, players need to place a row of redstone torches. These torches will communicate with the repeaters and the comparators that will eventually be placed above them to power the redstone system.
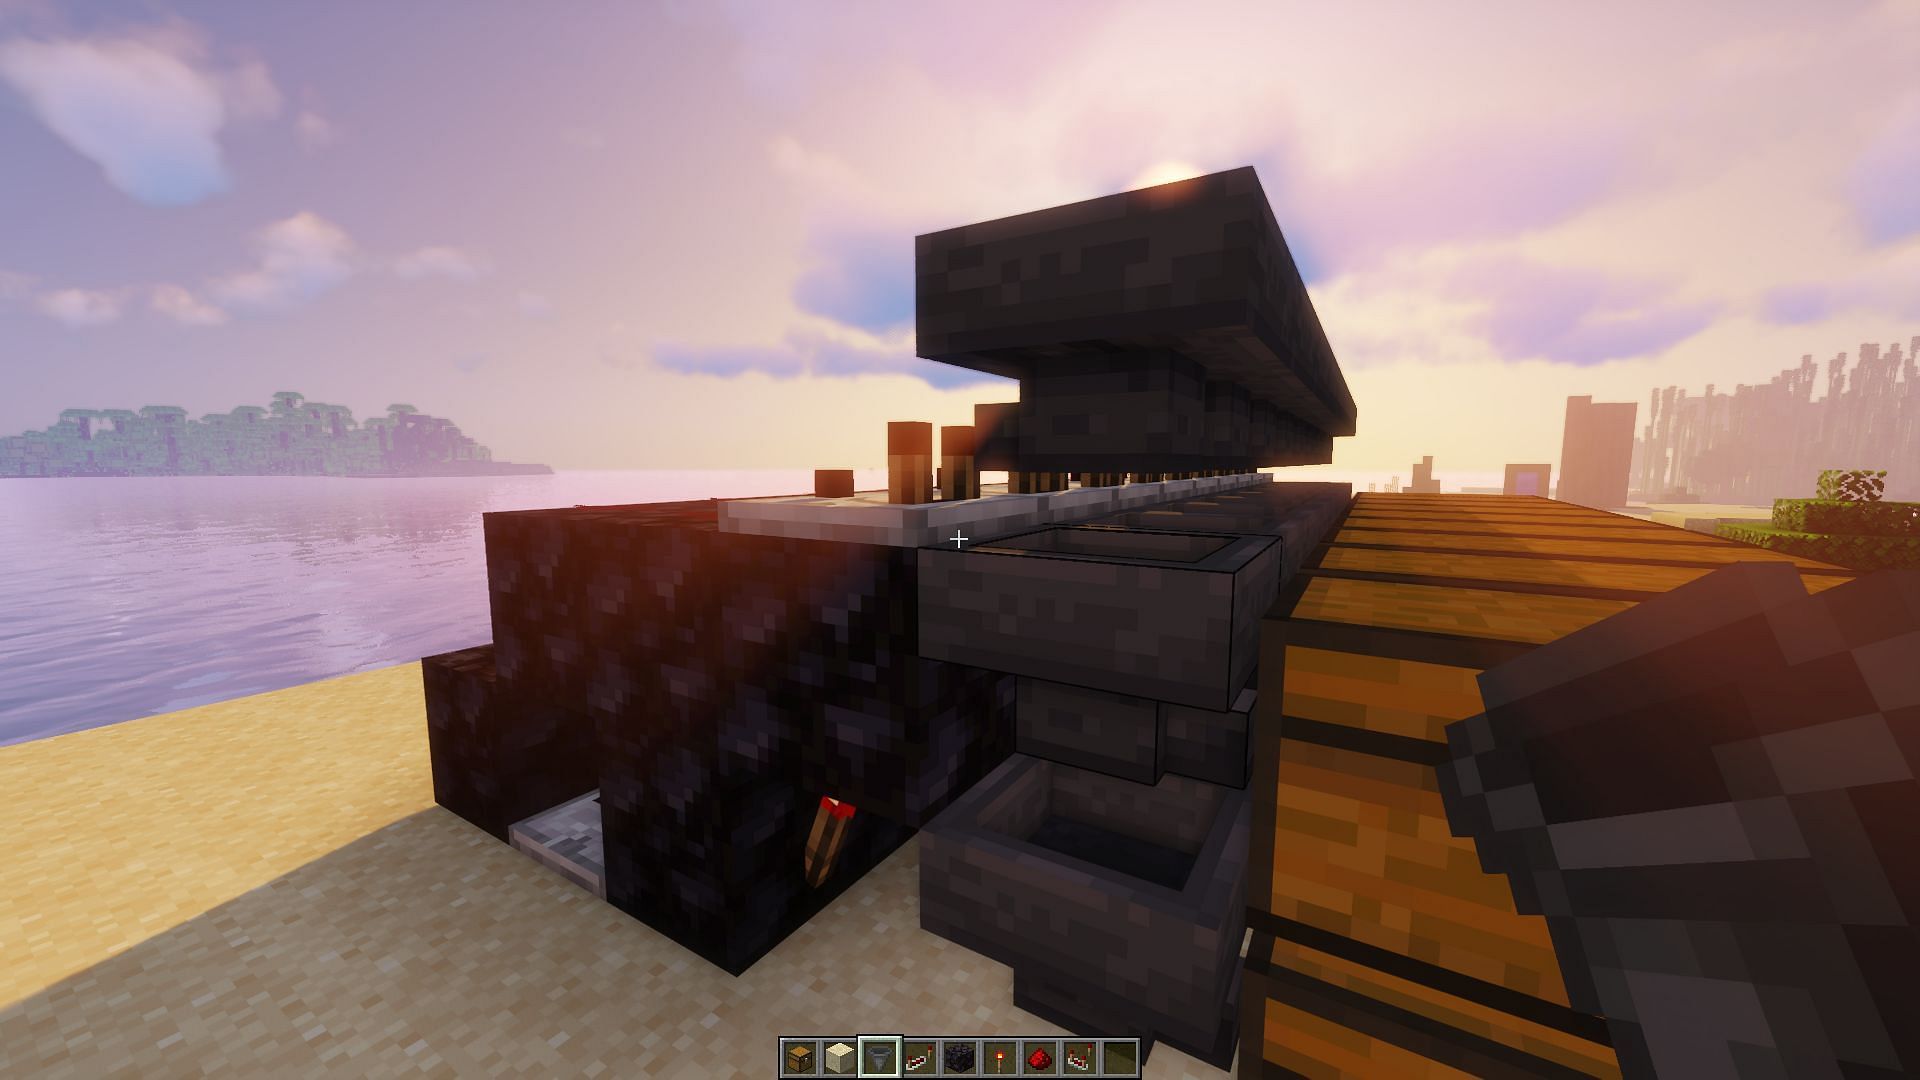
6) Cover everything
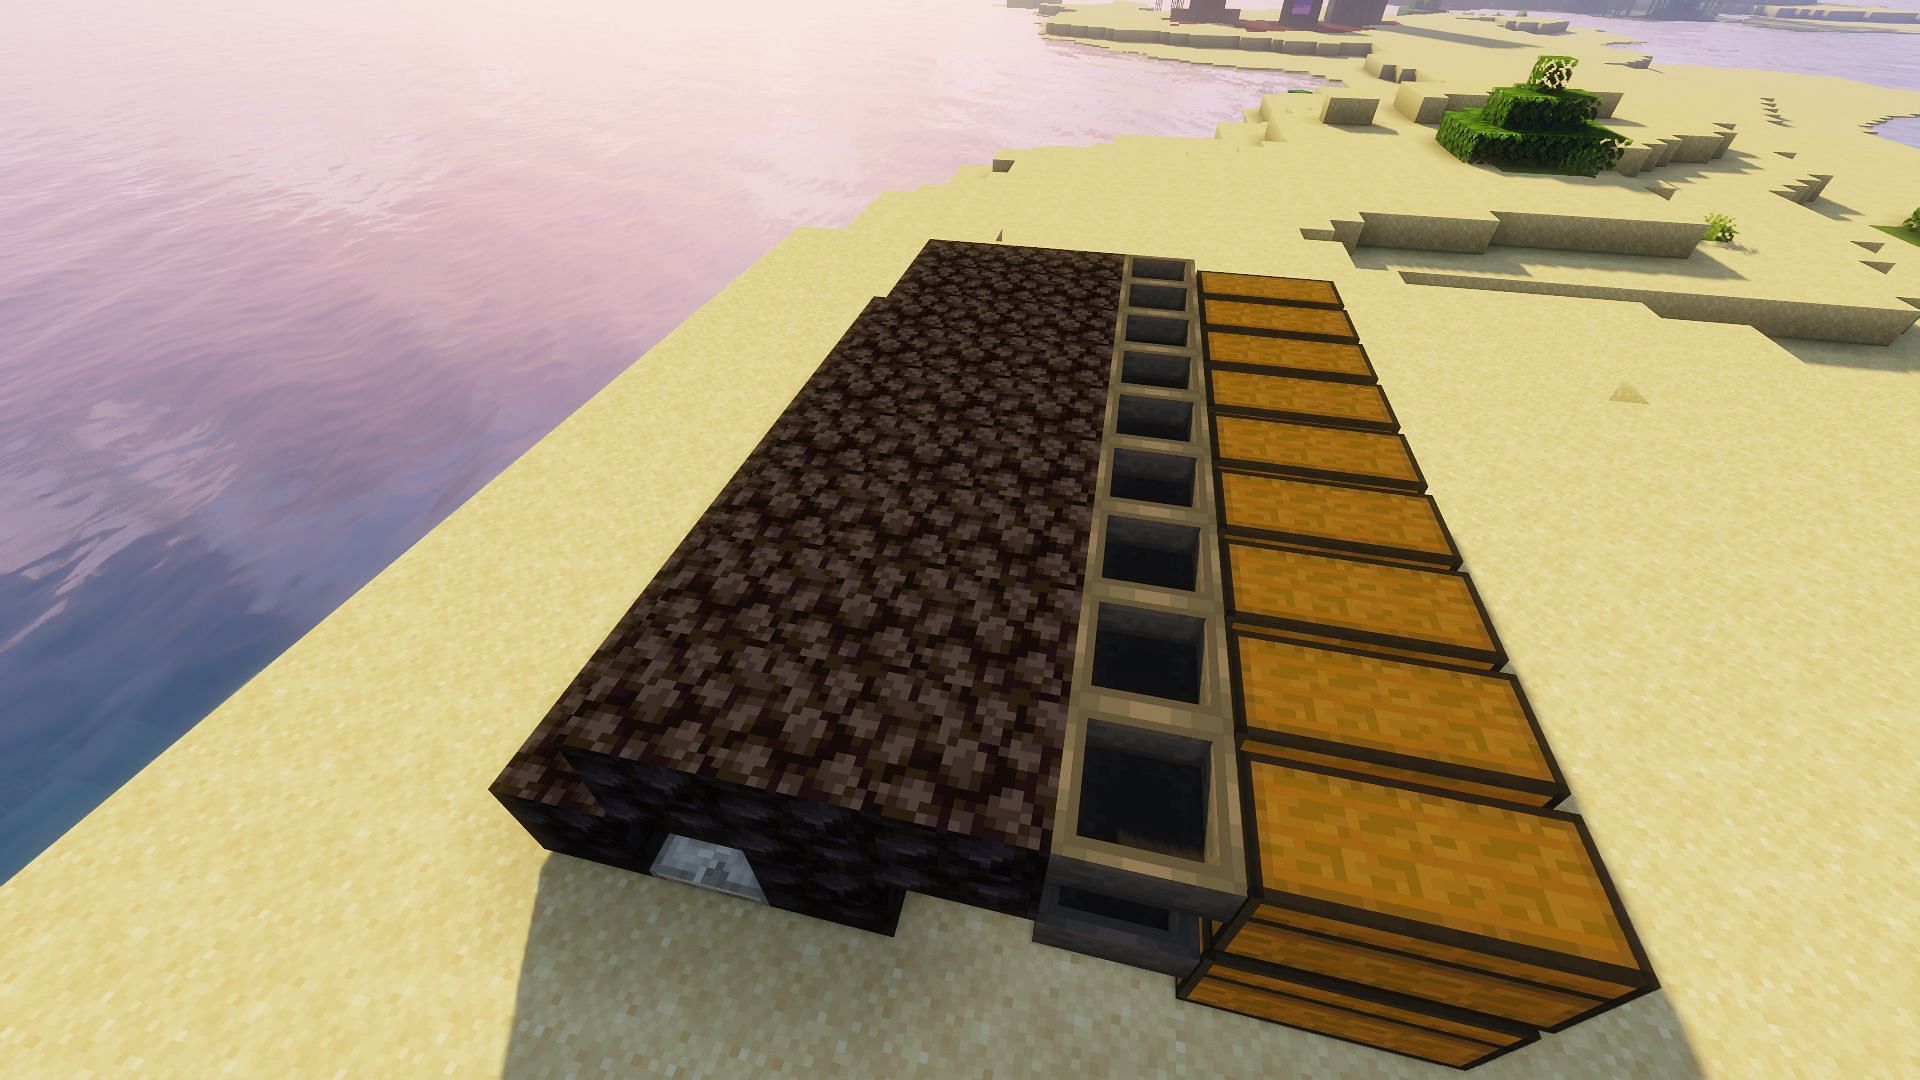
Players will want to make a flat platform that covers the redstone torches, the middle block, and the repeaters, leaving the last row of blocks a single block below the rest of the platform. See the above picture for confirmation of what this platform should look like.
7) Place comparators and dust
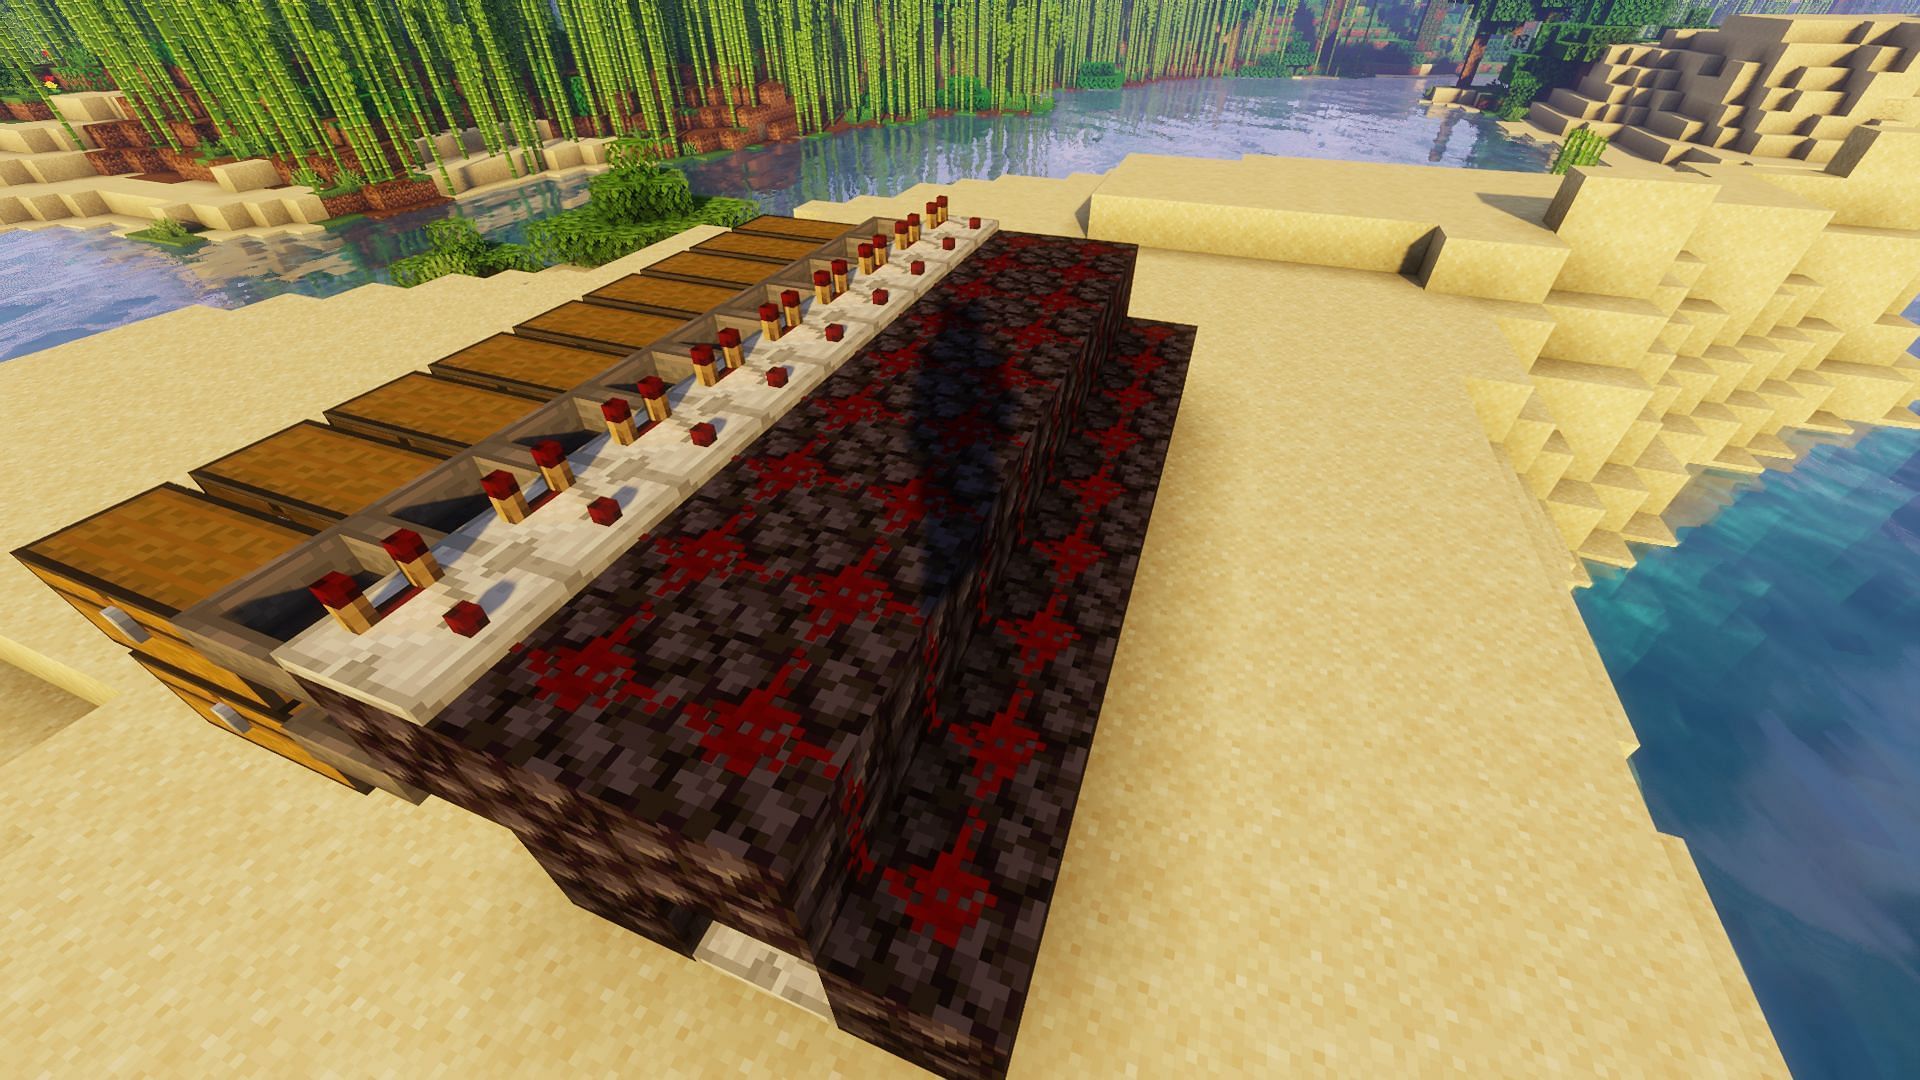
Once the platform has been built, players must place a row of comparators next to the hoppers, facing away from them. Players then need to cover the platform, including a row of blocks one block lower in redstone dust.
8) More hoppers
Now that the platform is covered in the required redstone, players must add an additional row of hoppers. These hoppers will face the comparators. Players should be careful to ensure they are not faced down into the hoppers below or each other.
9) Even more hoppers
The next step is placing an extra row of hoppers above this newly added row of hoppers. These hoppers will pass items along the filter chain, so players should make sure to face each one in the same direction.
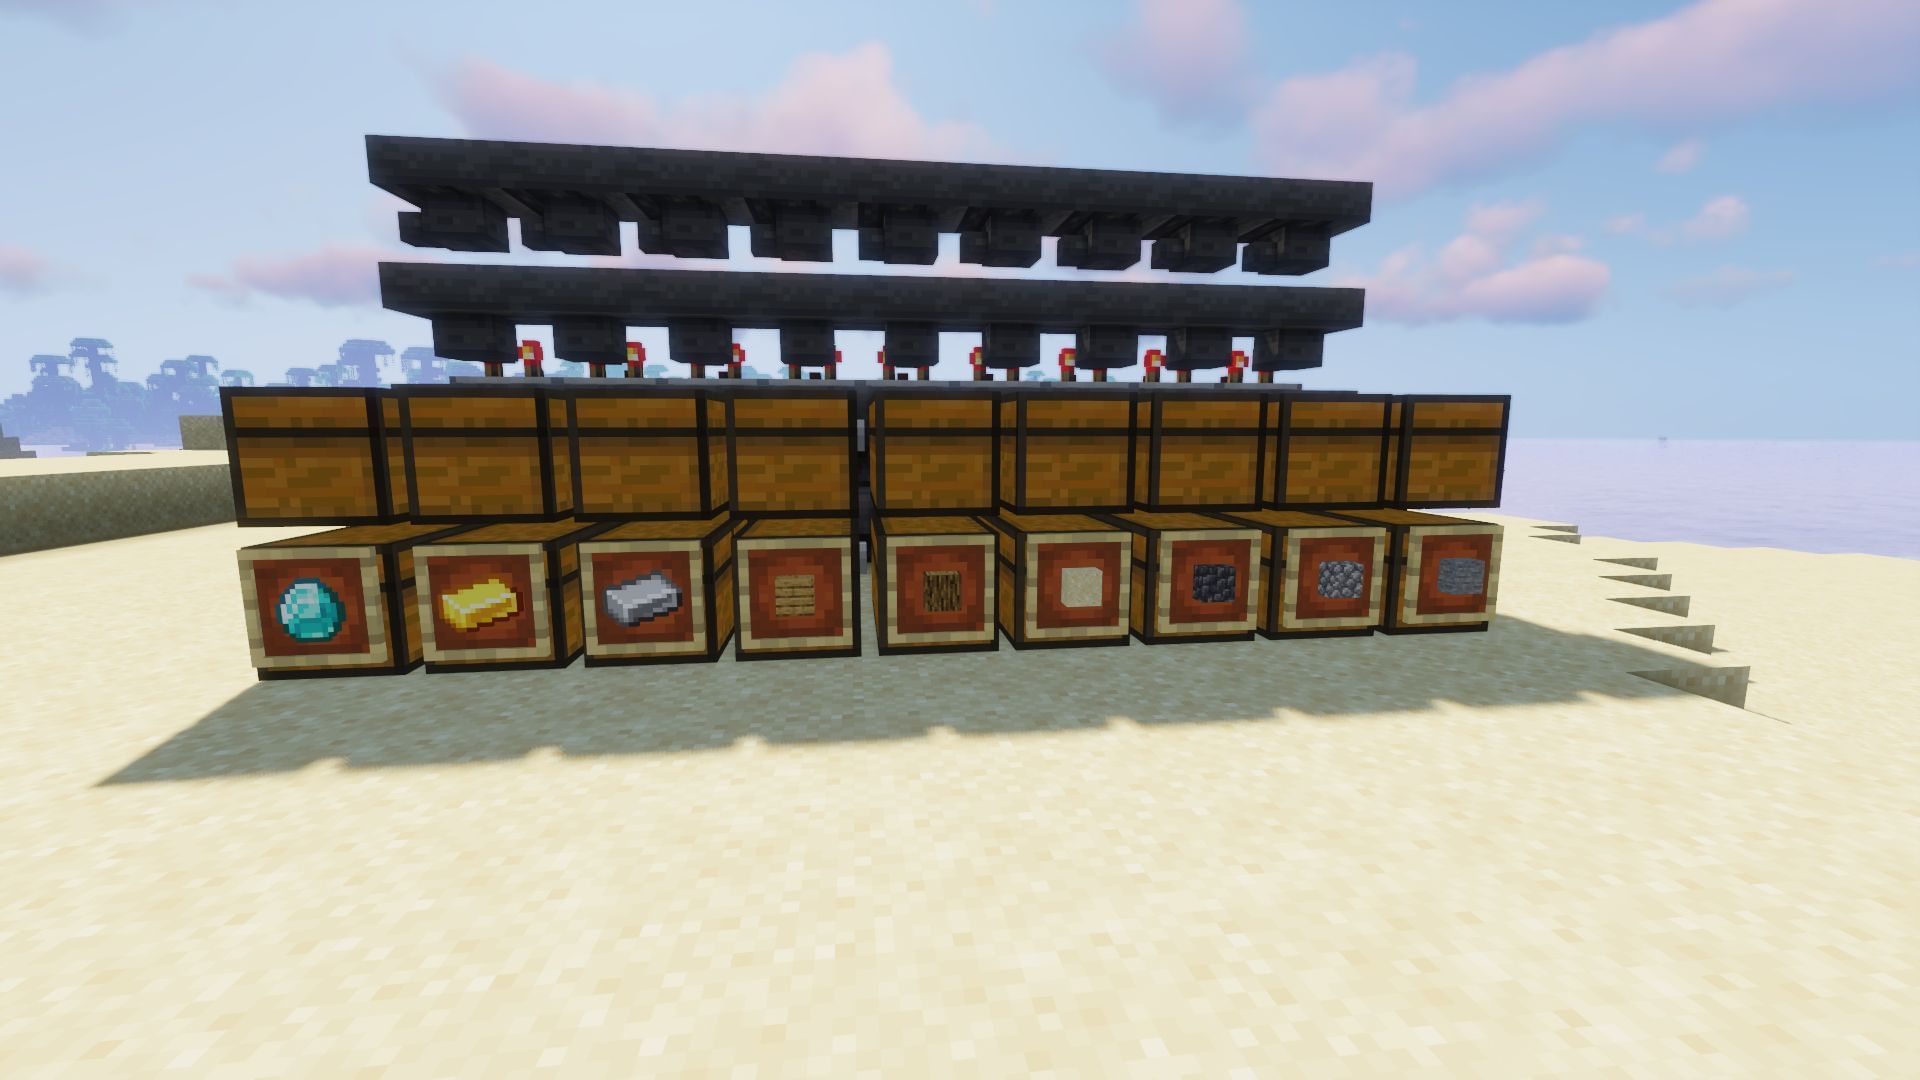
10) Make filters
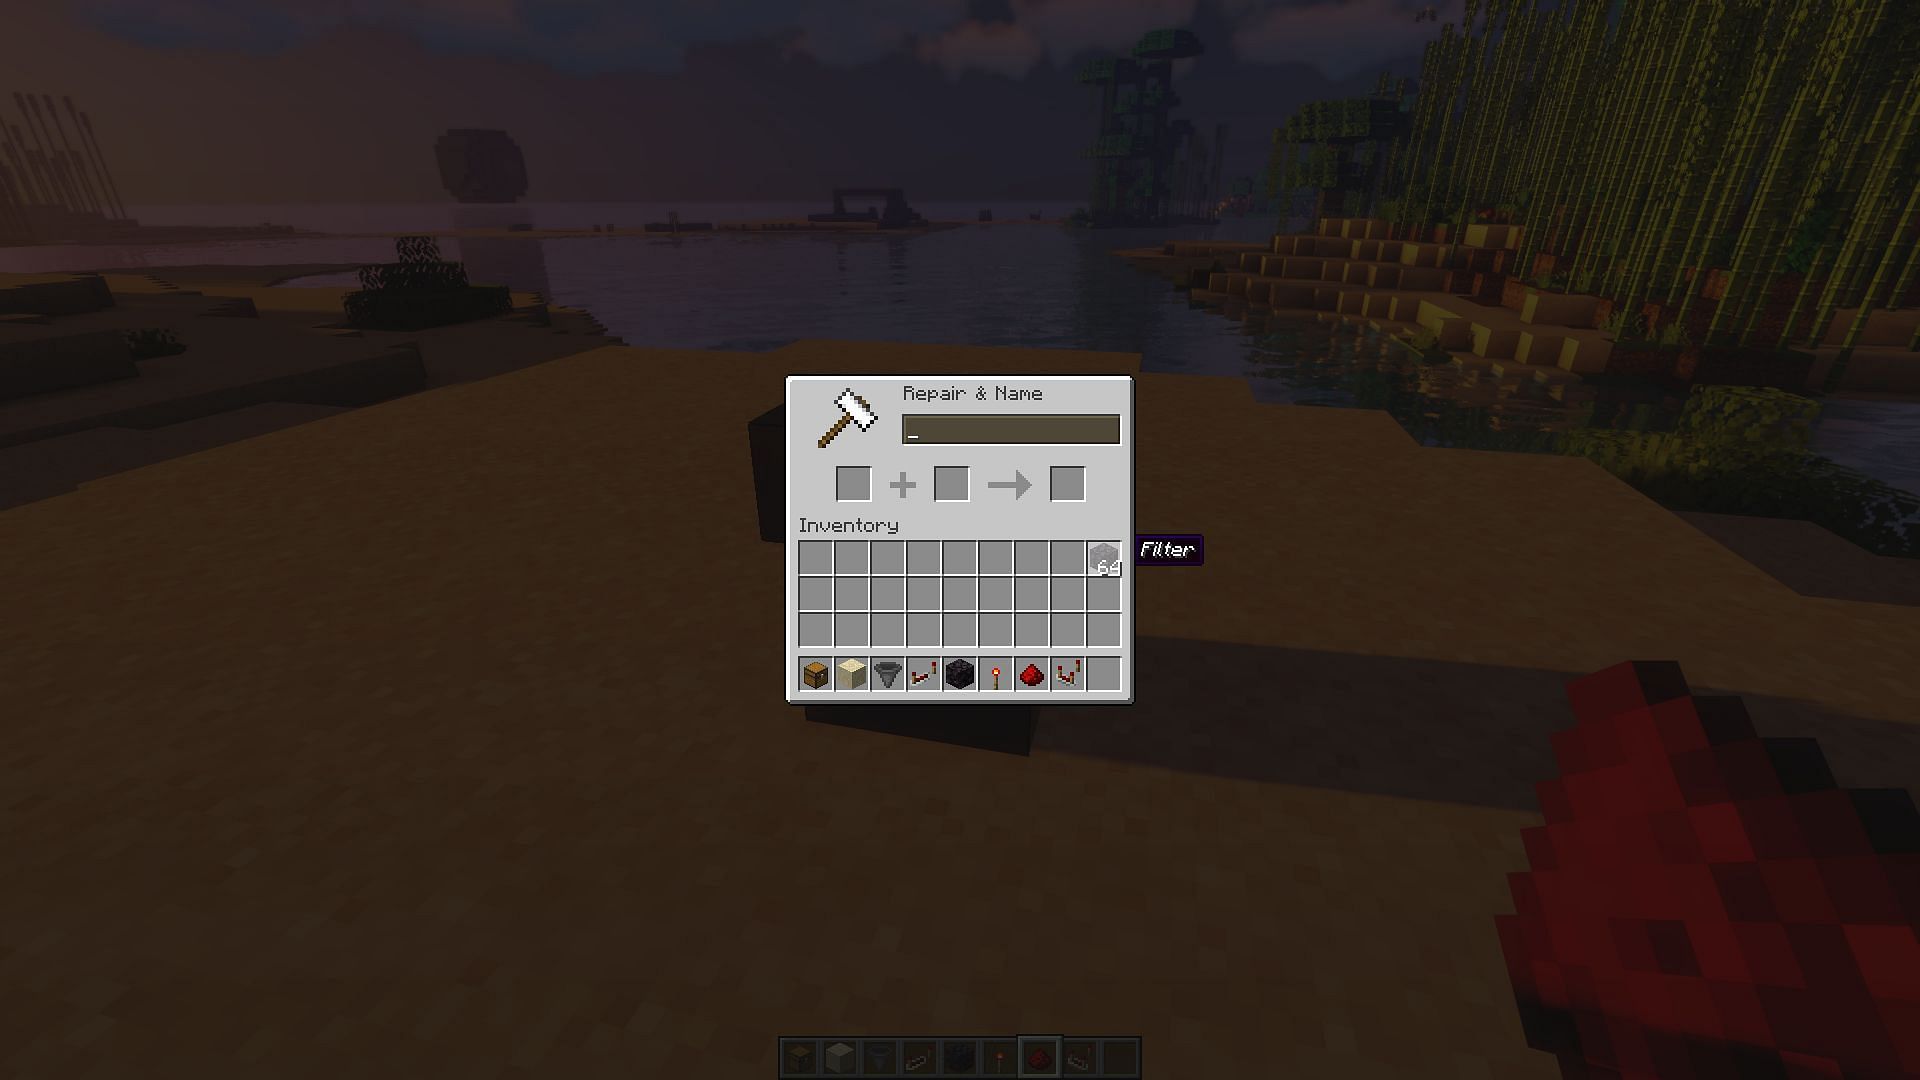
Once all the hoppers are in place, players will need filter items to allow for the sorting to take place. This can be any block with any garbage name. The above example uses blackstone that has been renamed to filter at an anvil. Players will need four filter items per type of item they are wanting a storage chest for.
11) Place the filters
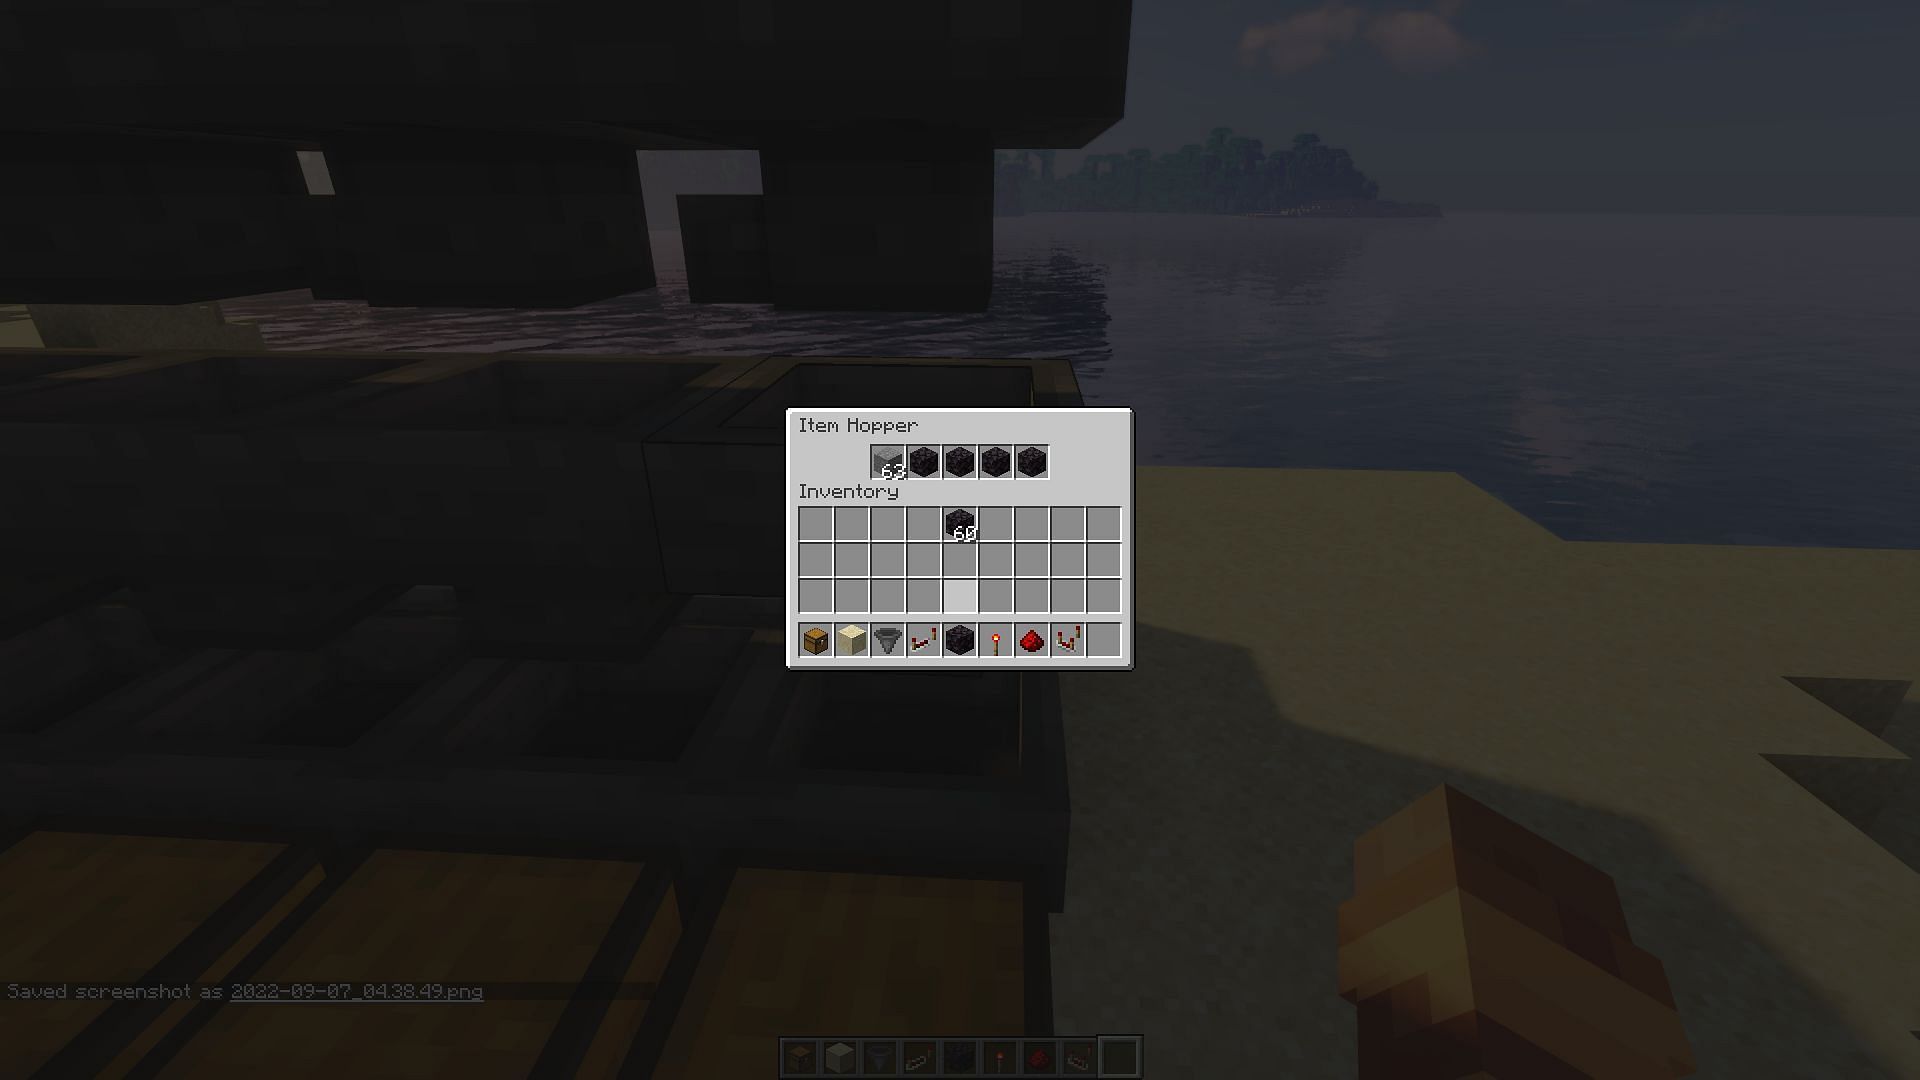
Players will need to place these filters within the redstone system. They need to be placed in the hoppers facing towards the comparators, with one filter item in each of the back four slots of the hopper, leaving the first slot open. This is where the desired item will be placed to sort into the system.
12) Place the desired sorting item
Once the filters are in place, players should decide where they want to go in each chest and place a stack of that item within the last slot of each filer hopper. For example, for a cobblestone chest, players would place a stack of cobblestone within the last spot on the hopper, which would then drain down to, and remain at 41 cobblestone.
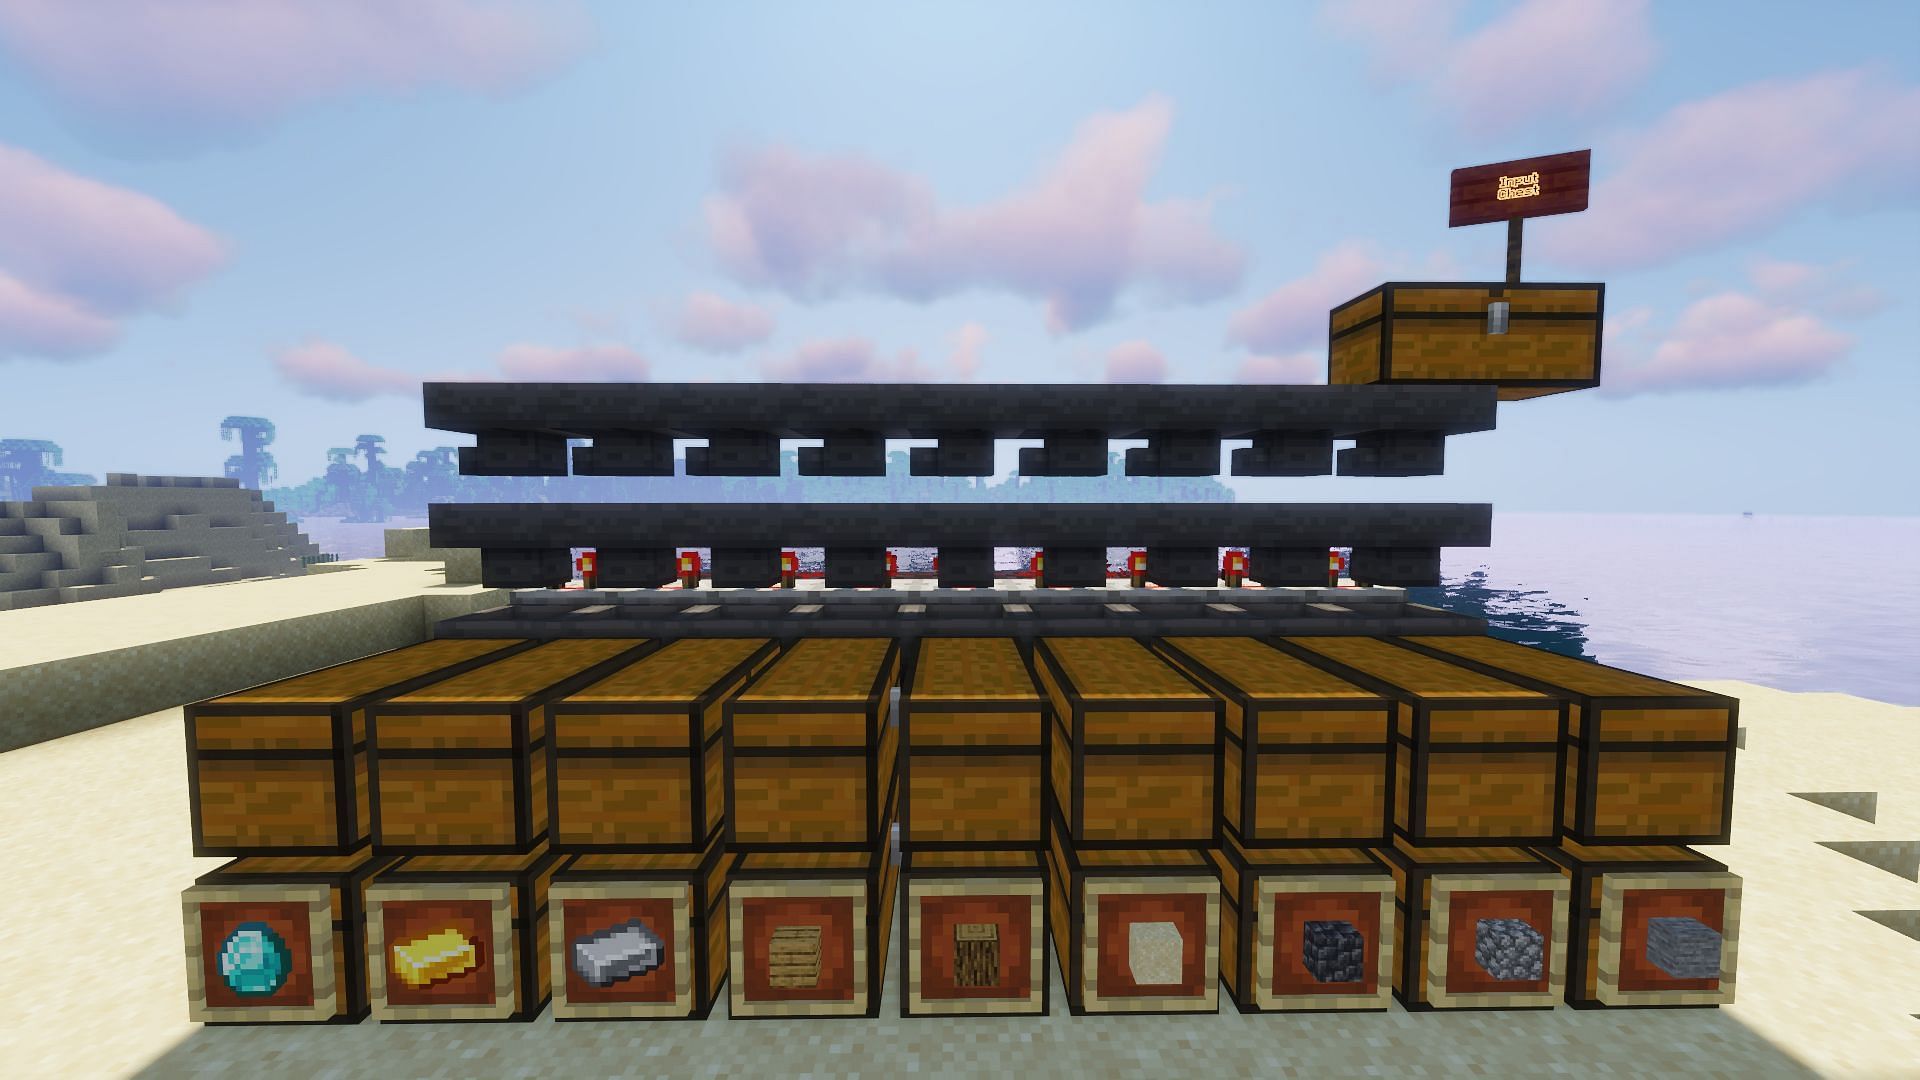
13) Finishing touches
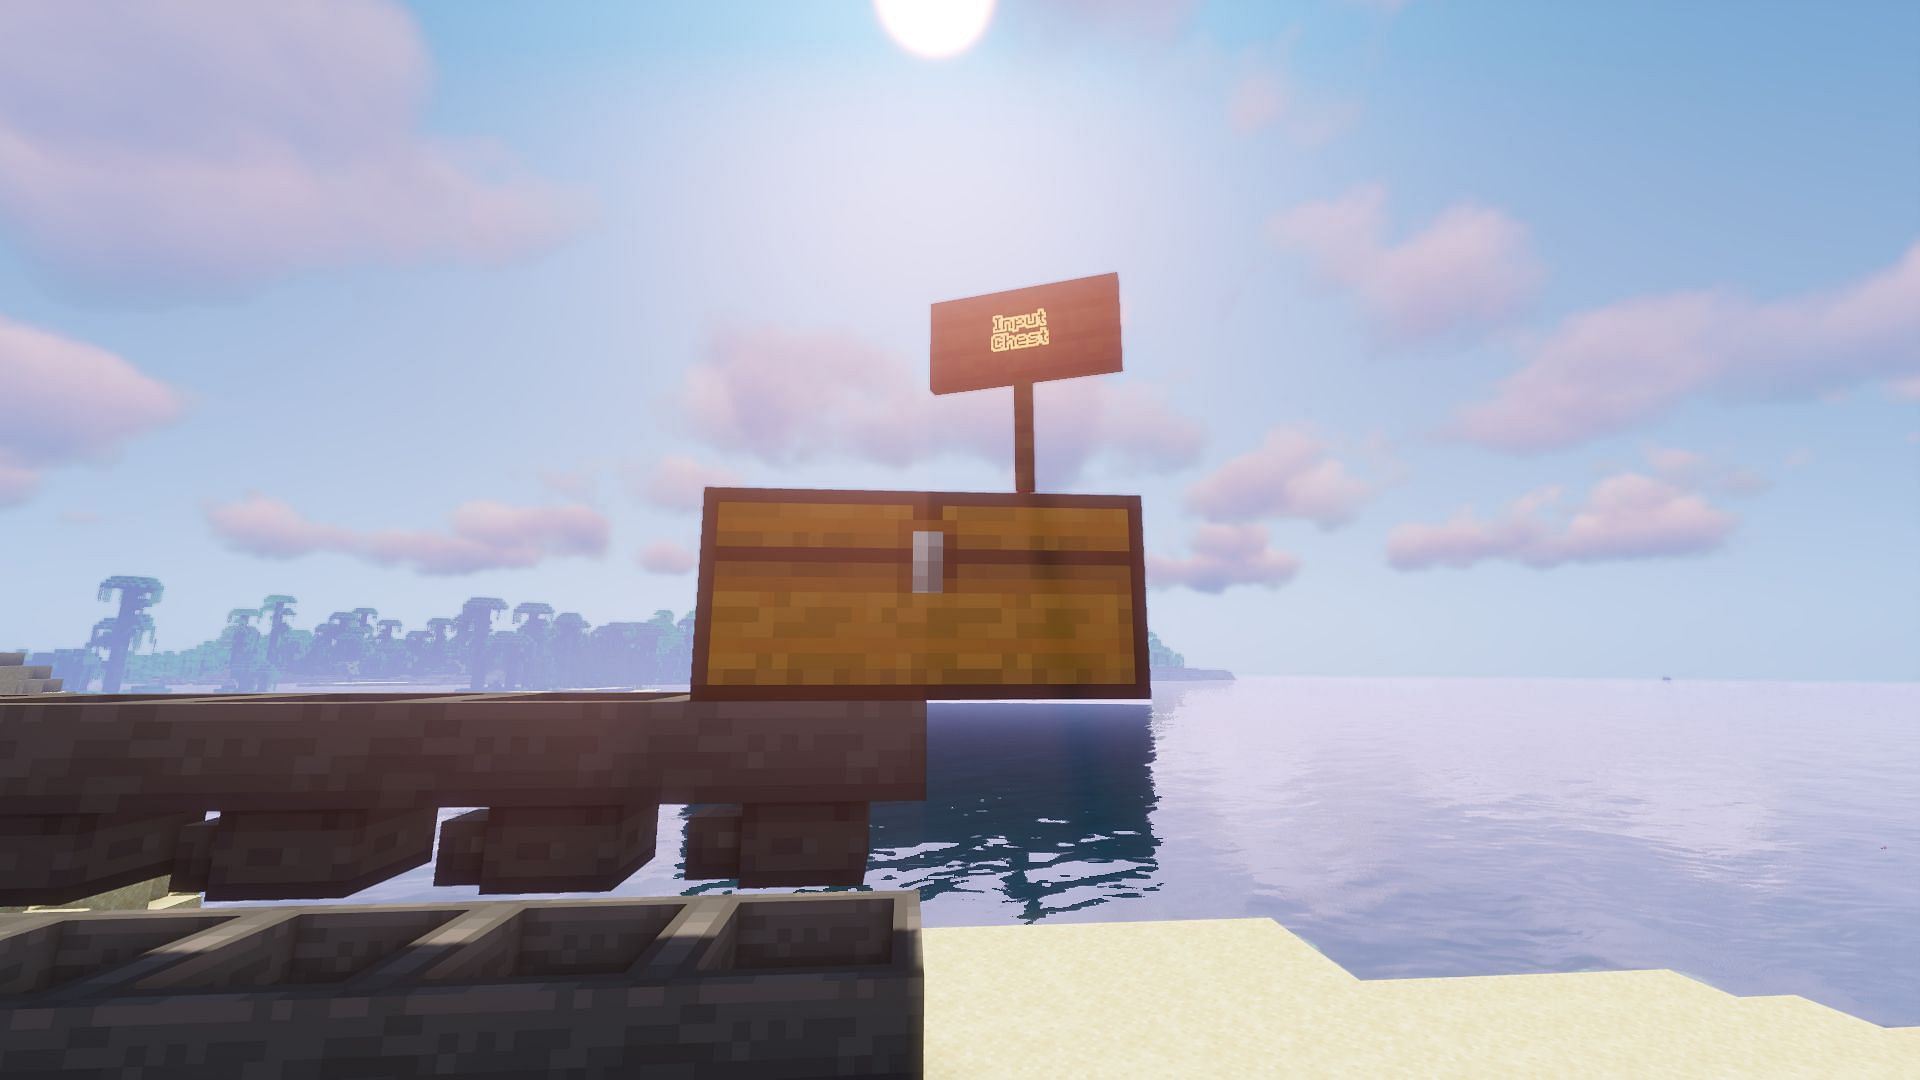
From there, there are only finishing touches remaining. For a simple item sorter, players can simply add a single or double chest to the very topmost row of hoppers to feed items in. Additionally, players might want to use signs or item frames to label each of the storage chests for ease of use.

Uncover new worlds with our Minecraft Seed Generator!