
'%20x='0'%20y='0'%20height='100%25'%20width='100%25'%20%0A%20%20%20%20%20%20%20%20%20%20xlink%3Ahref='data:image/jpg;base64,/9j/2wBDAAYEBQYFBAYGBQYHBwYIChAKCgkJChQODwwQFxQYGBcUFhYaHSUfGhsjHBYWICwgIyYnKSopGR8tMC0oMCUoKSj/2wBDAQcHBwoIChMKChMoGhYaKCgoKCgoKCgoKCgoKCgoKCgoKCgoKCgoKCgoKCgoKCgoKCgoKCgoKCgoKCgoKCgoKCj/wgARCAAGAAoDASIAAhEBAxEB/8QAFQABAQAAAAAAAAAAAAAAAAAAAwX/2gAIAQEAAAAAuF//xAAUAQEAAAAAAAAAAAAAAAAAAAAE/9oACAECEAAAAB//xAAUAQEAAAAAAAAAAAAAAAAAAAAF/9oACAEDEAAAAC//xAAdEAABBAMBAQAAAAAAAAAAAAACAQMEBQAHExJB/9oACAEBAAE/AIO6zizG23aQBhqZg5zkKp45v6v6HzoZSh89P5//xAAZEQACAwEAAAAAAAAAAAAAAAACBAABAxL/2gAIAQIBAT8AWa1MOiuf/8QAGBEAAgMAAAAAAAAAAAAAAAAAAAECAyH/2gAIAQMBAT8Adklh/9k='%3E%3C/image%3E%3C/svg%3E)
Minecraft is a game all about player customization. From the style of the base to the type of farms, to the biomes lived in, even down to the types and palette of blocks used to create these things, players have complete control over precisely what they make and how they make it.
An interesting use case for this customization that many users might not have experimented with is the game’s ability to customize their shields. These items are one of the title’s best due to reducing damage, so having a personalized one is incredibly cool.

Creating custom Minecraft shield in The Wild Update
Custom banners
Chart New Territories with the ultimate Minecraft Seed Generator!
At first glance, custom banners seem wholly unrelated to the topic of custom shields. Banners are decorative cloths, whereas shields are thick slabs of wood and iron used to protect users from the world’s dangers.
However, in reality, the two overlap quite a bit, as customizing a shield requires gamers to create a custom banner and then combine this banner with the shield.
Using banner to customize shield
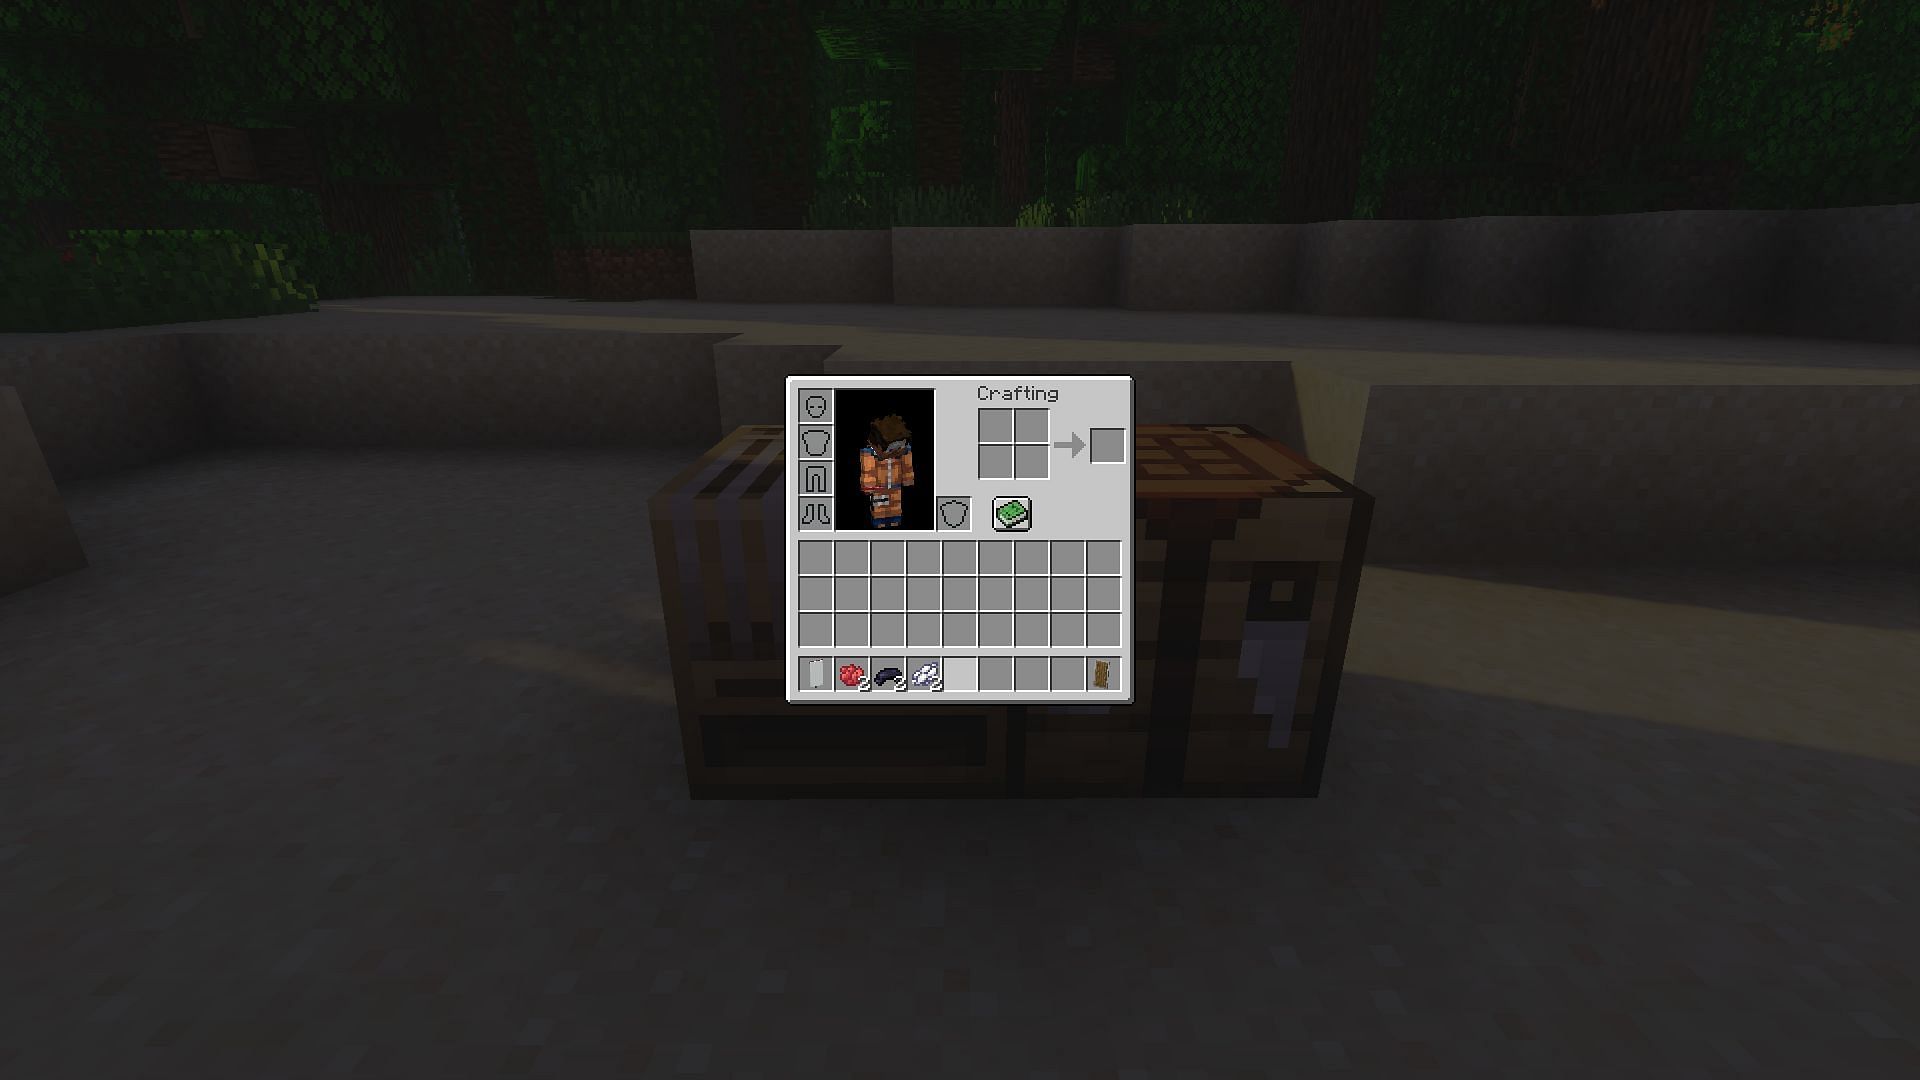
Thankfully, once players have used dyes and patterns to create the custom banner pattern they want their shield to have, getting this pattern onto the shield is almost trivially easy.
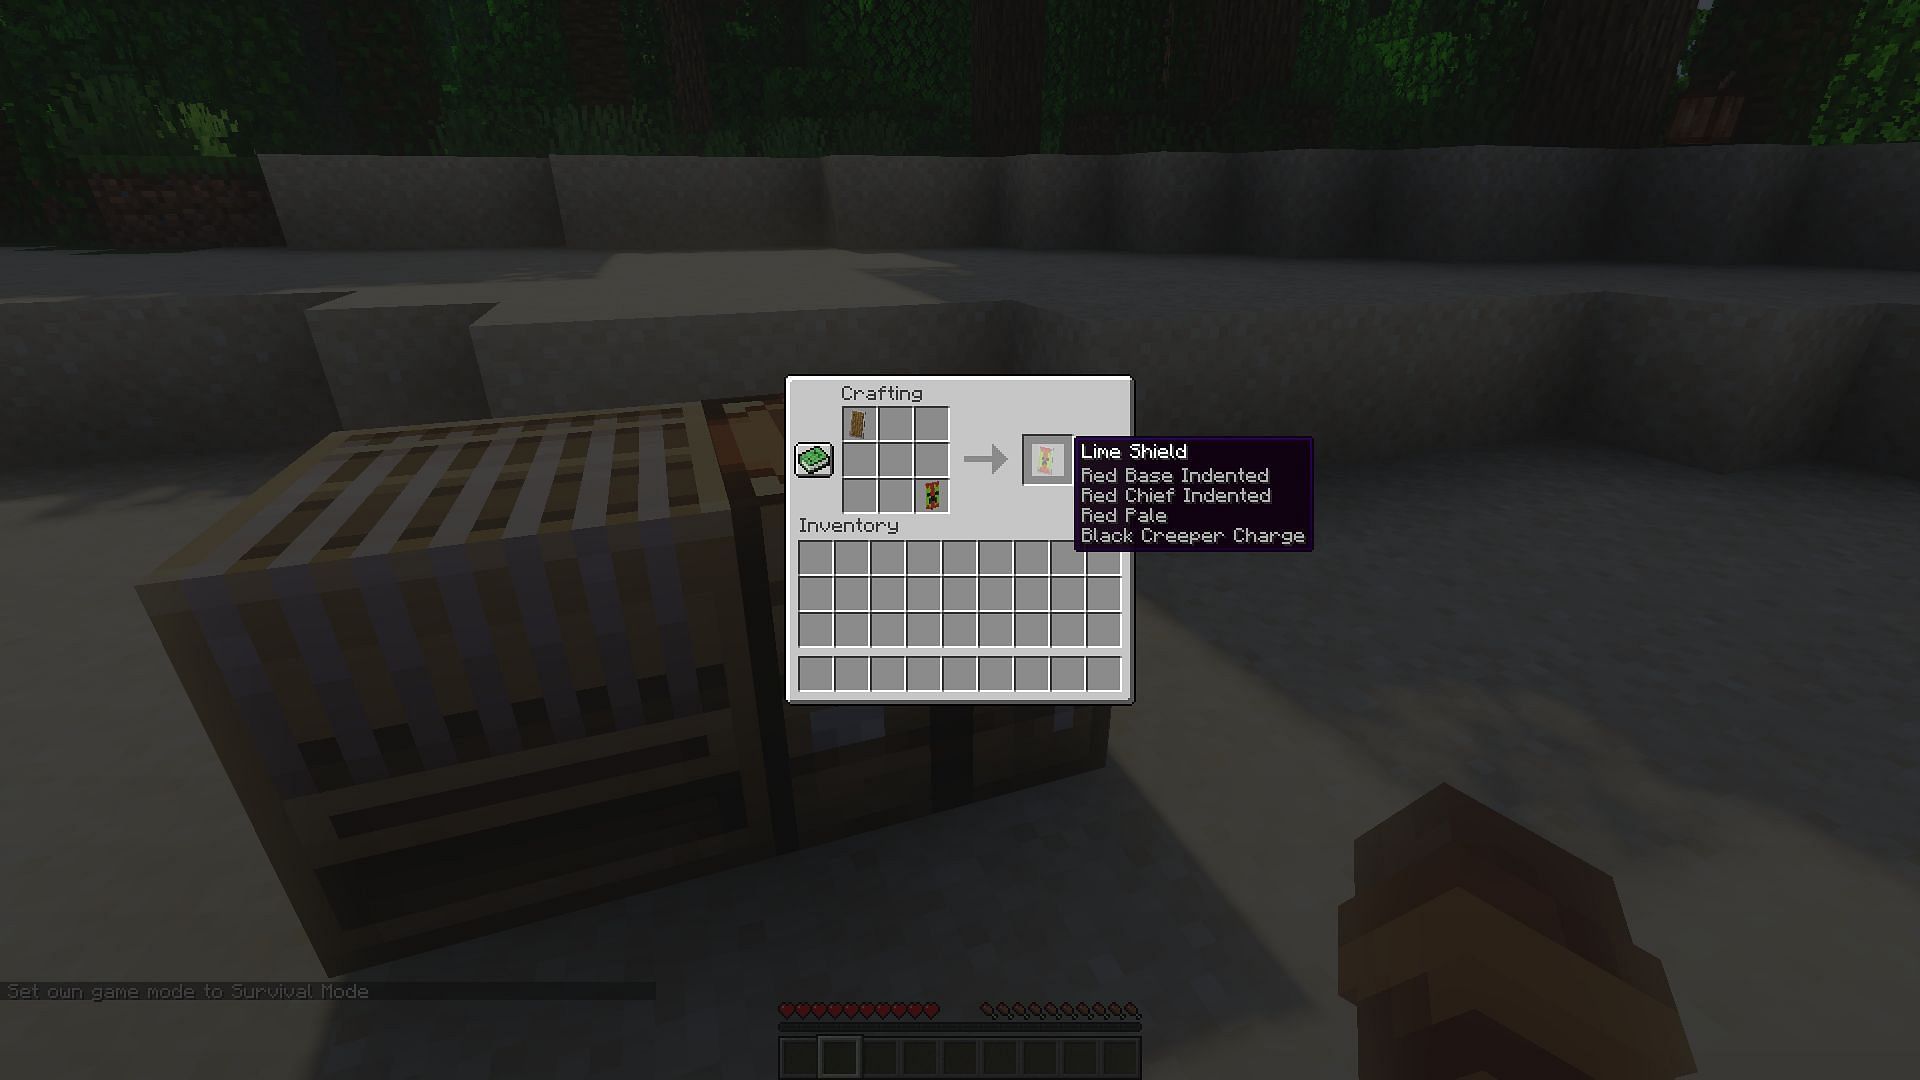
While the anvil is used to combine enchantments with items, it is not used to combine a banner and shield. Users simply need to place the two into a crafting interface, and the custom shield should be the output.
How to check out custom shield
There are two ways that gamers can see their custom shield in-game.
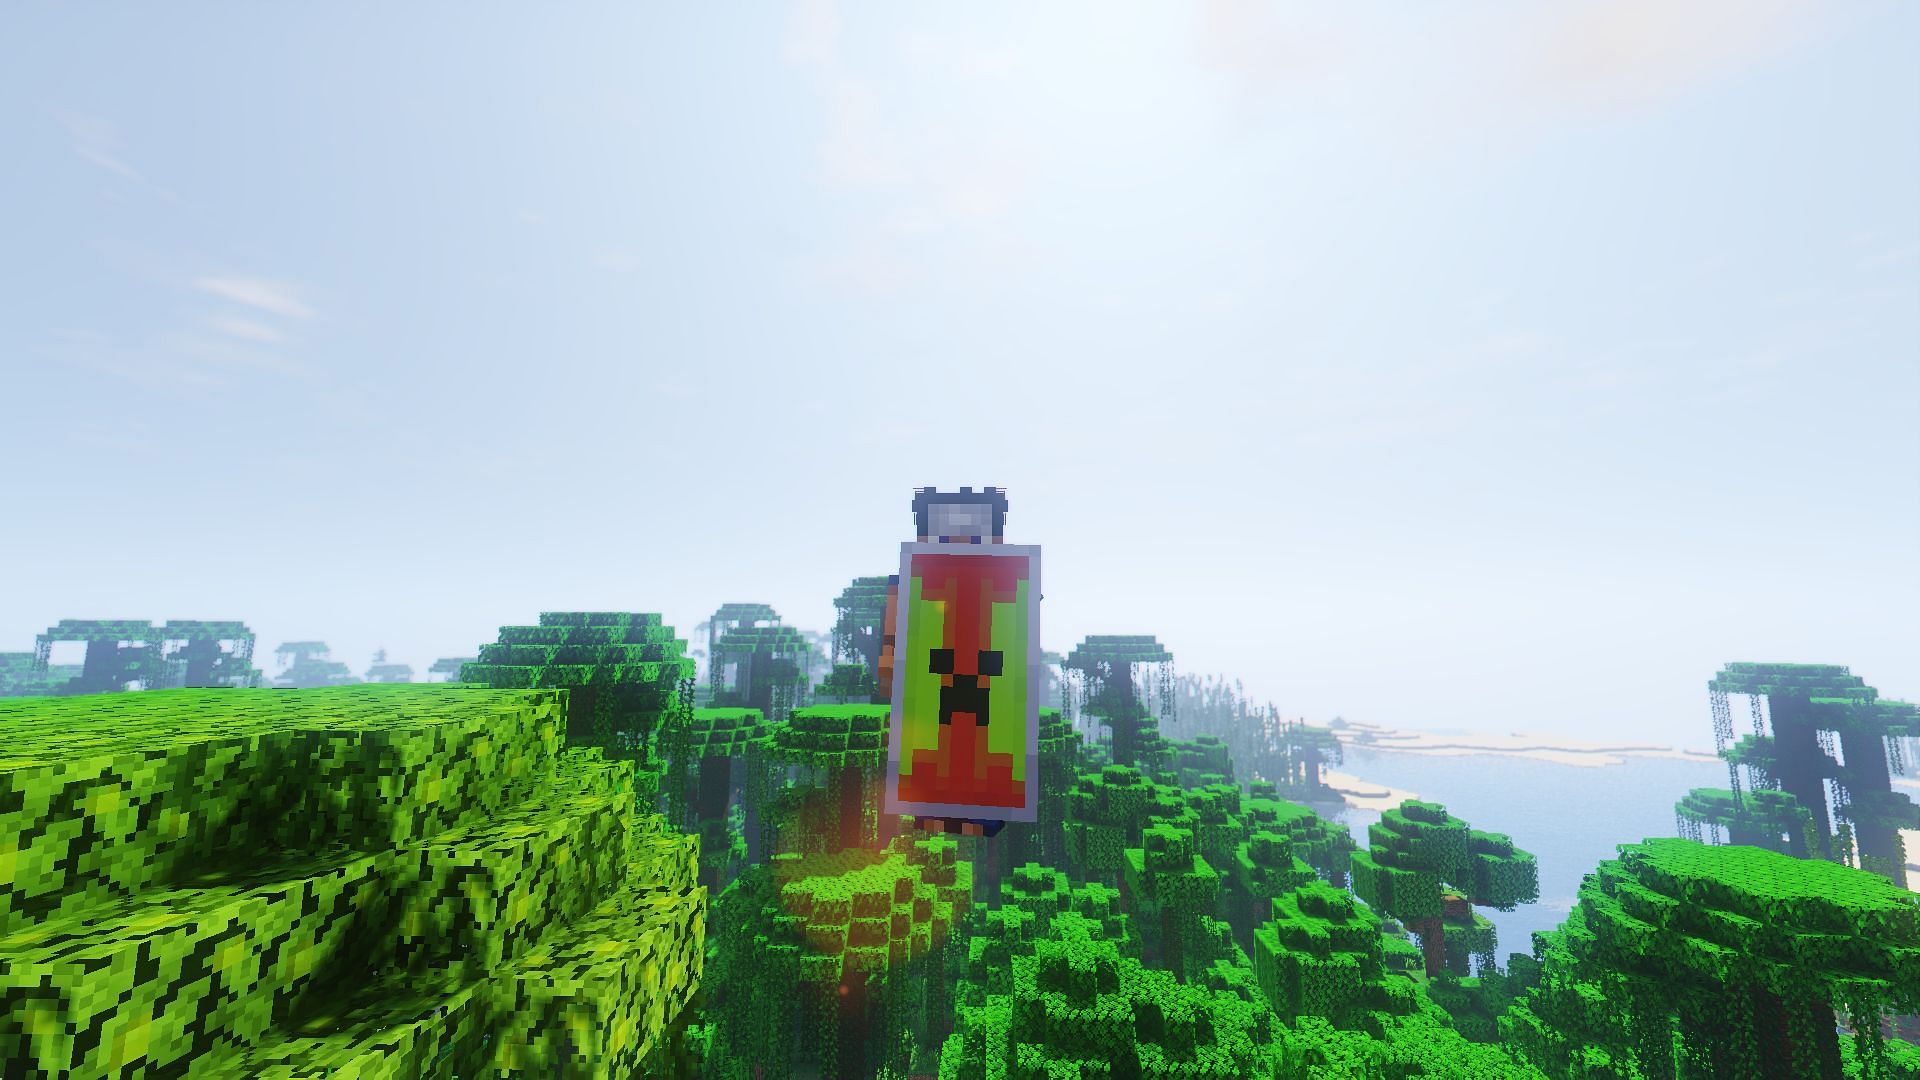
The first is having the shield in either the main hand or off-hand and entering the inventory interface. By moving the cursor to the far edge of the screen, their character should turn enough for players to see the custom design.
Alternatively, they can use the title’s third-person and inverted third-person viewpoints. Users can see the custom design while turning by taking advantage of these viewpoints.
Else, if they are in the inverted third-person view, gamers can see the design by blocking with the shield, which will cause them to hold it flat out in front of them, plainly visible to the camera.
Example of process
The first thing players need to do to create a custom shield is to decide what the base color of the design will be. For this example, the shield design will be a Pokeball from the popular franchise Pokemon. They will need a white banner, two red dyes, two black dyes, and two white dyes.
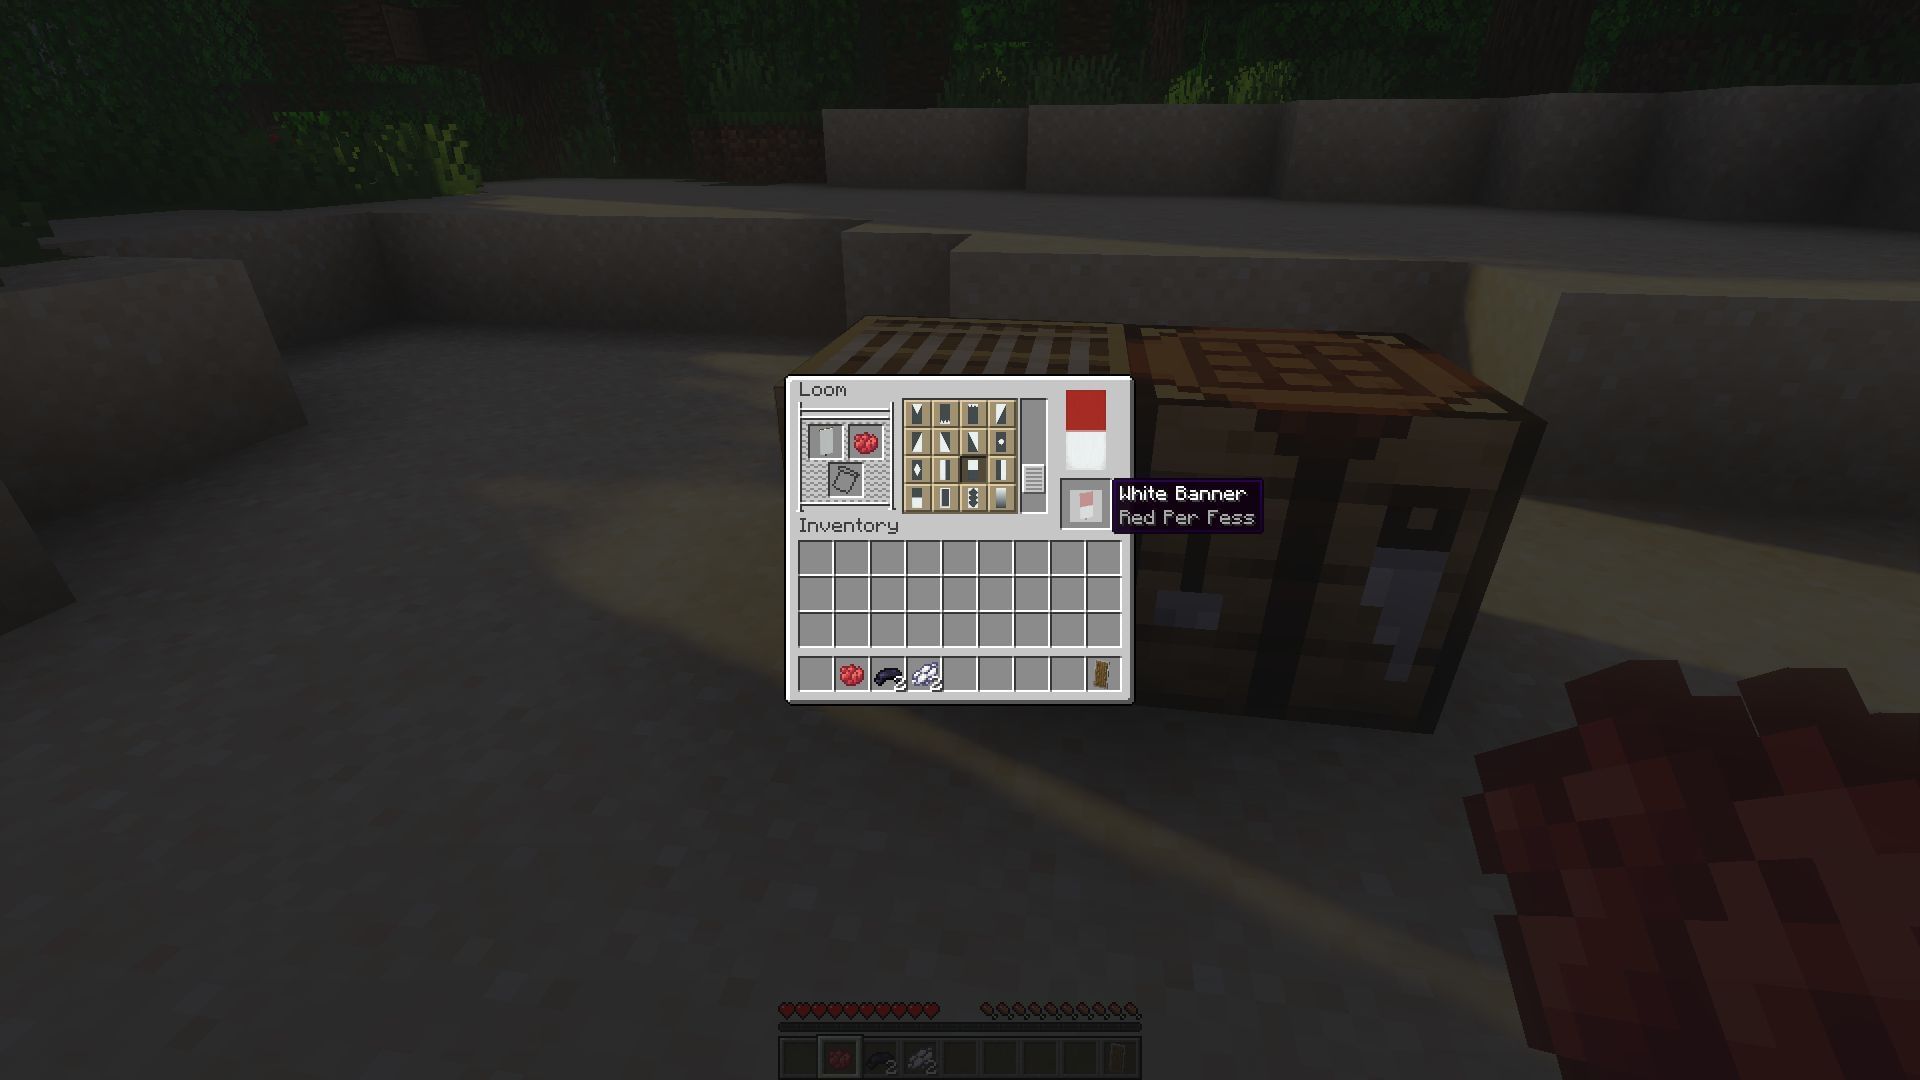
Users should place the banner into their loom and place red dye into the slot. They should select the pattern that will turn the upper half of the banner red.
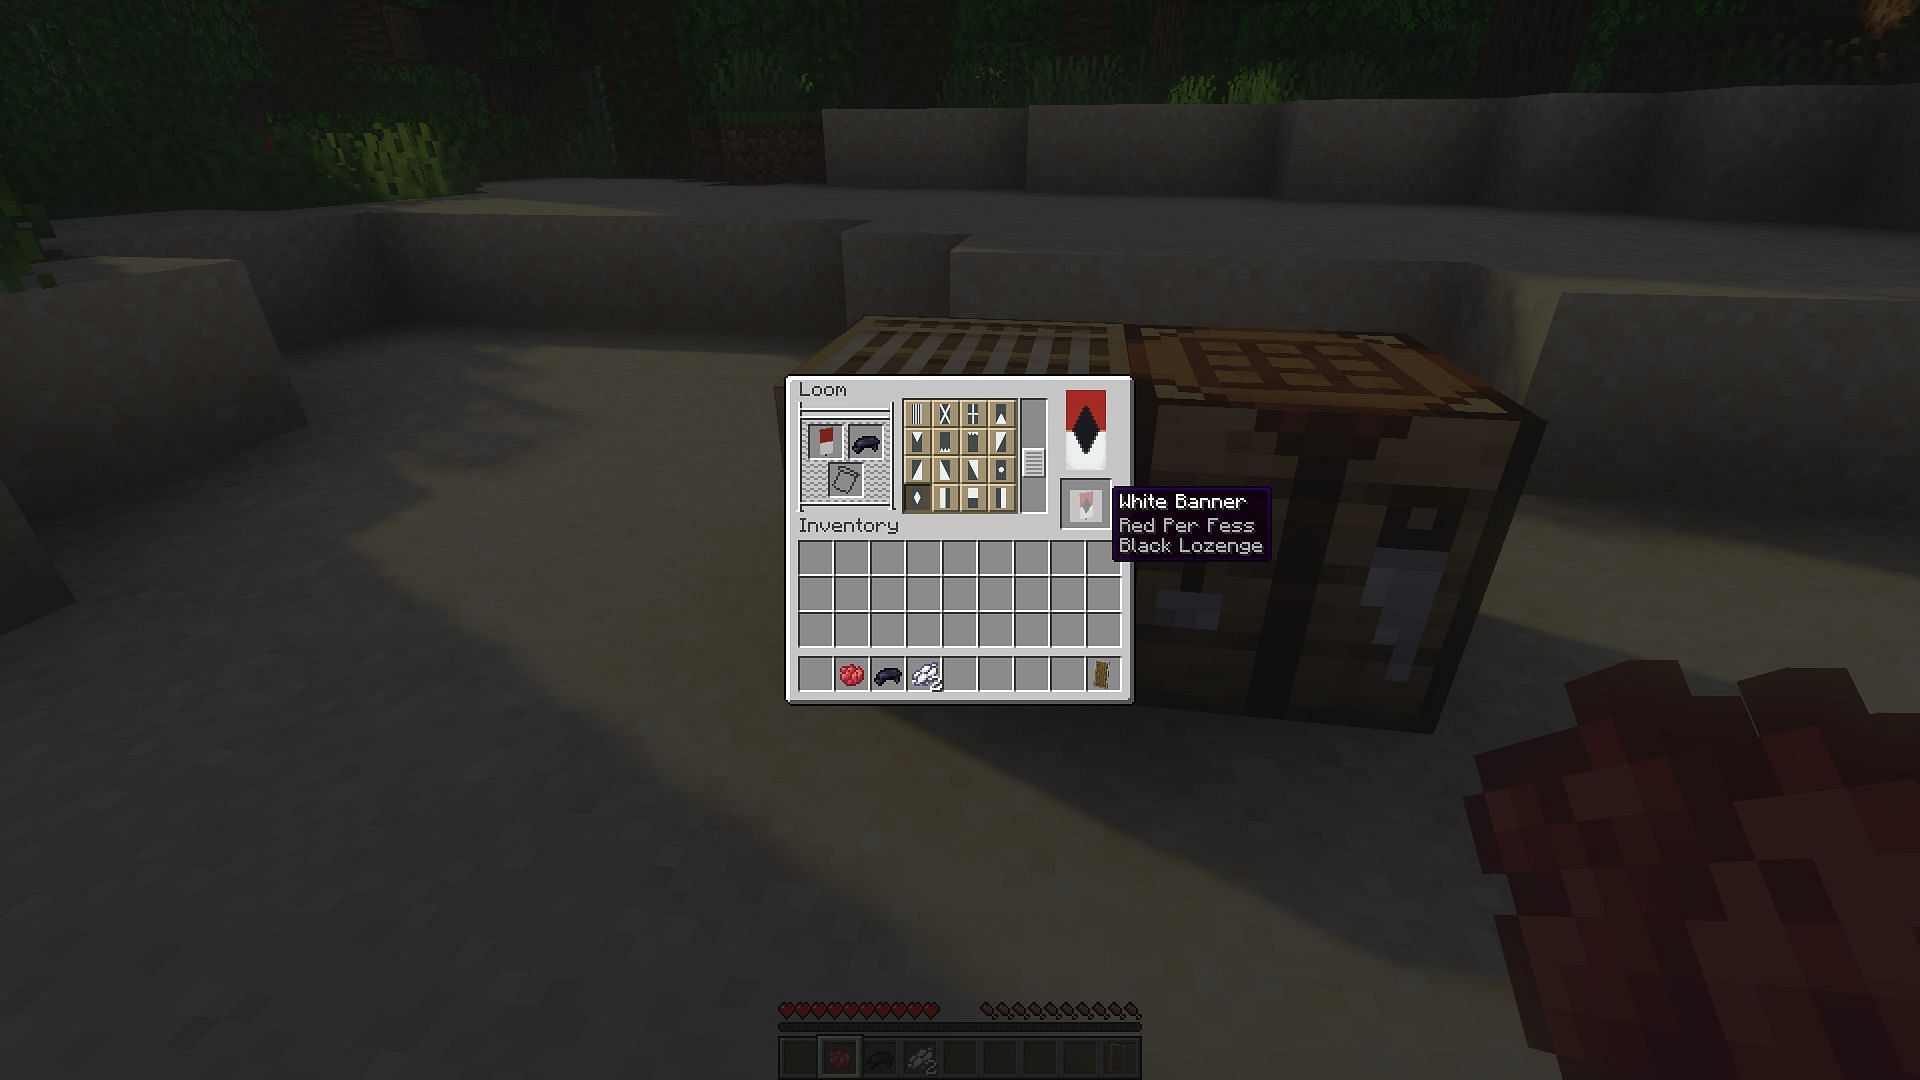
They should place black dye into the loom and select the central diamond design. This will form the rim of the Pokeball’s center button.
Next, gamers will want to place their other red dye into the loom and select the pattern that covers the top quarter with red. This will remove the upper spike of the diamond.
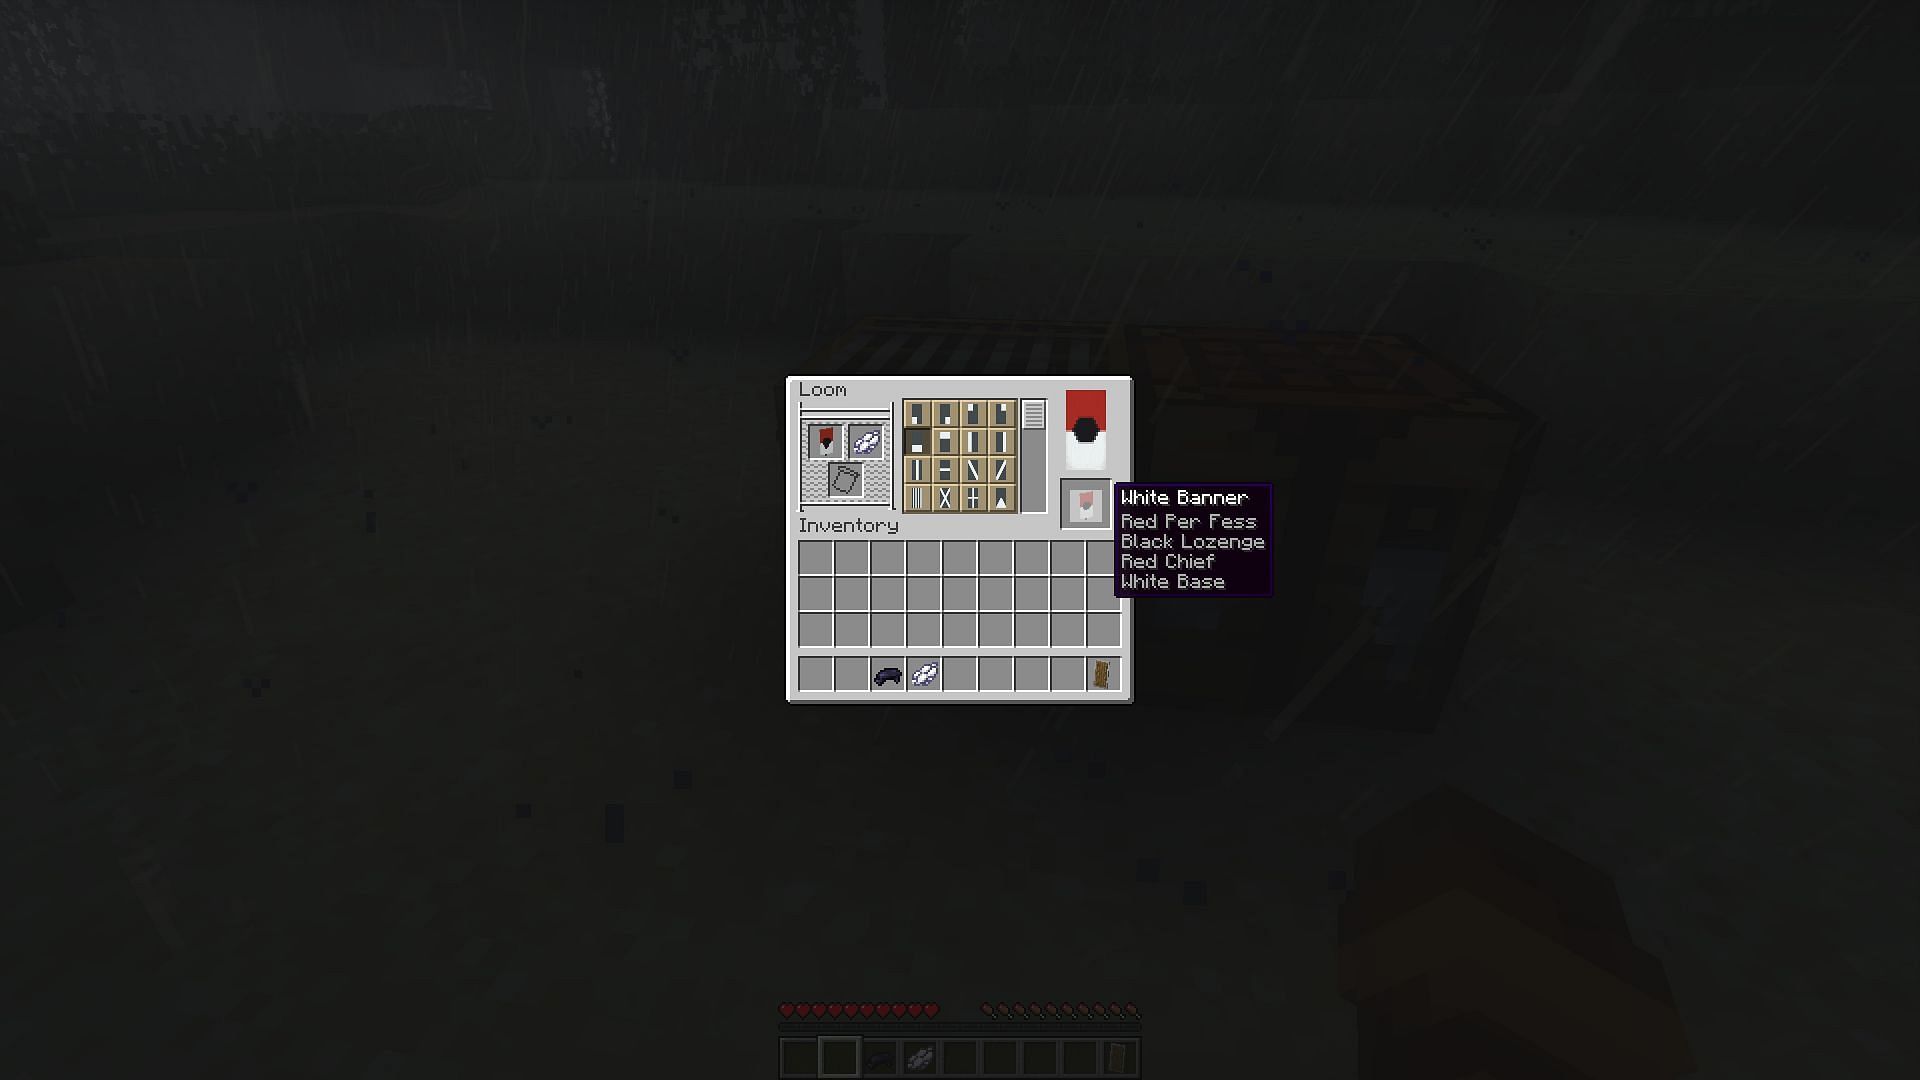
They will then want to do this same step with white dye and the bottom quarter of the banner.
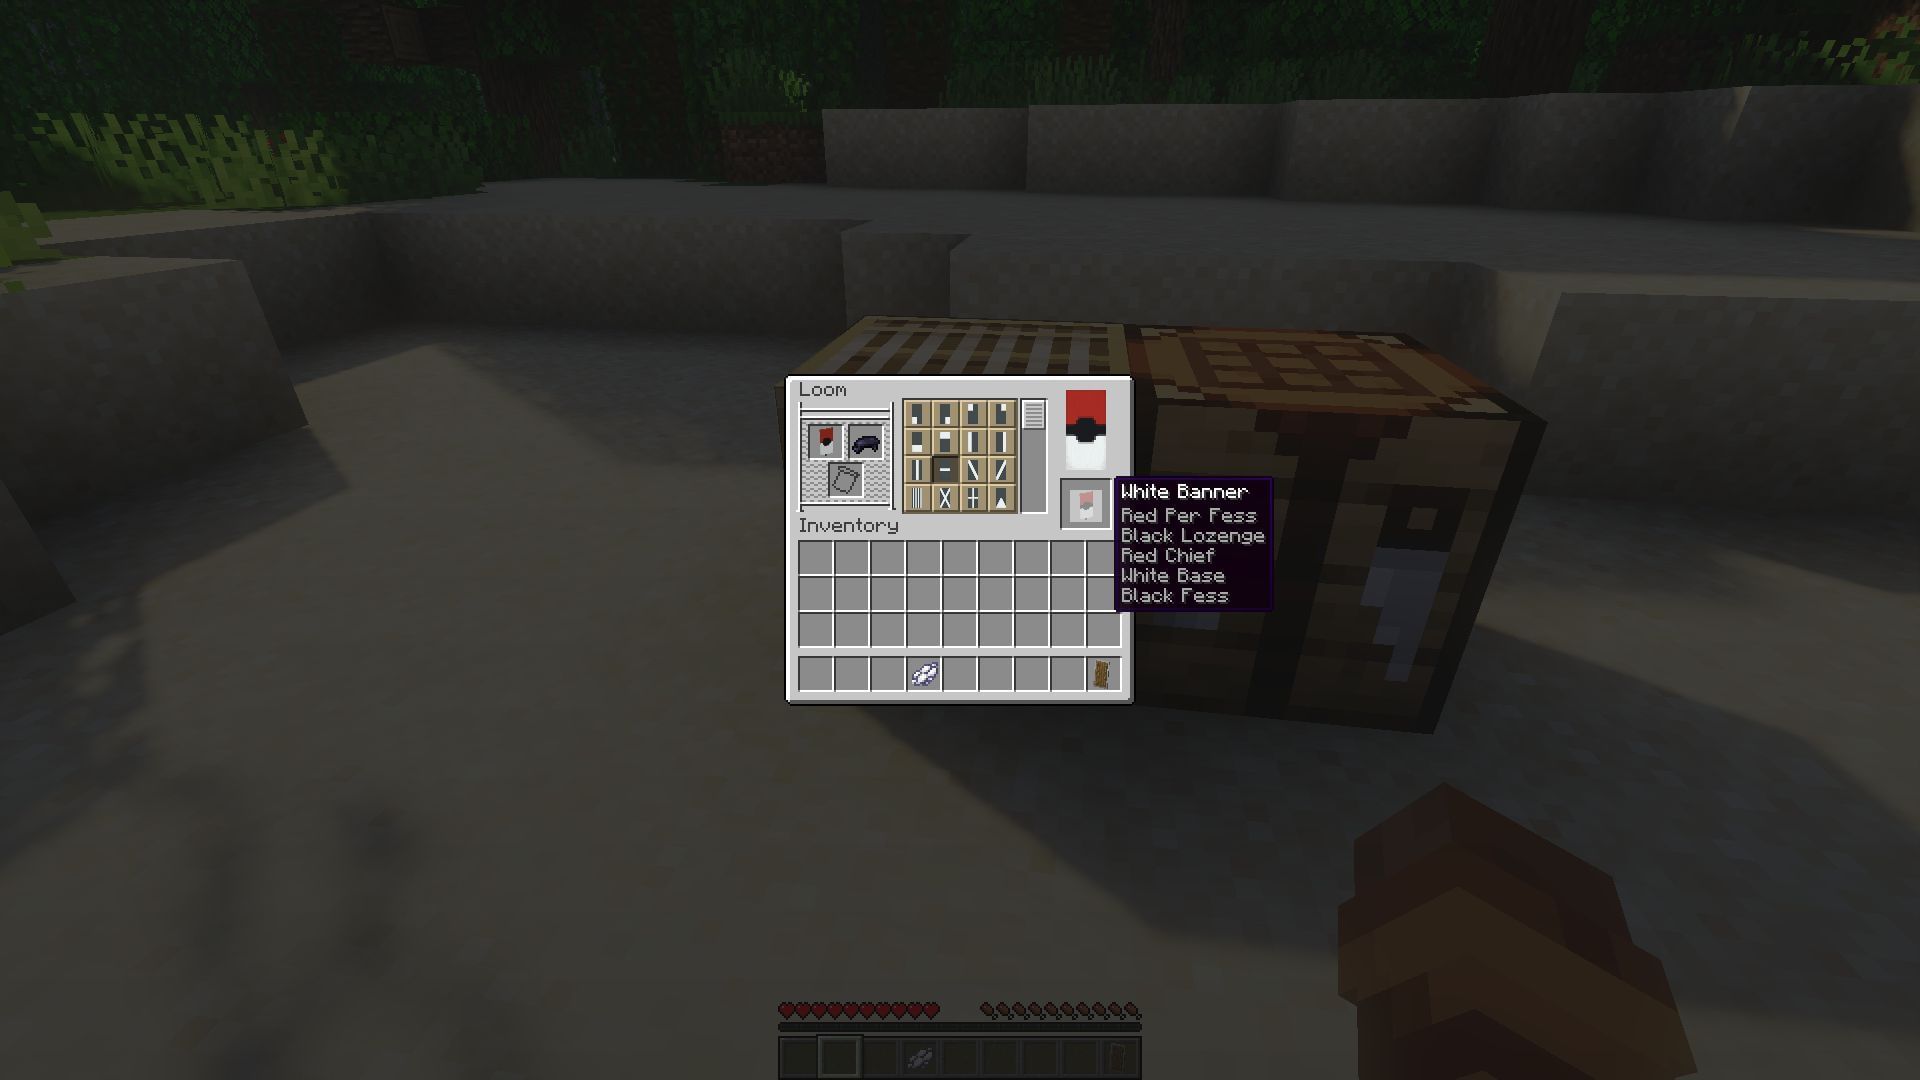
The next step is to put the second black dye into the loom and select the horizontal line. It will form the black line representing the seal between the top and bottom halves of the ball.

The final step is to add the last white dye to the loom and place a white circle in the middle. This will form the big white clicky button of the Pokeball.
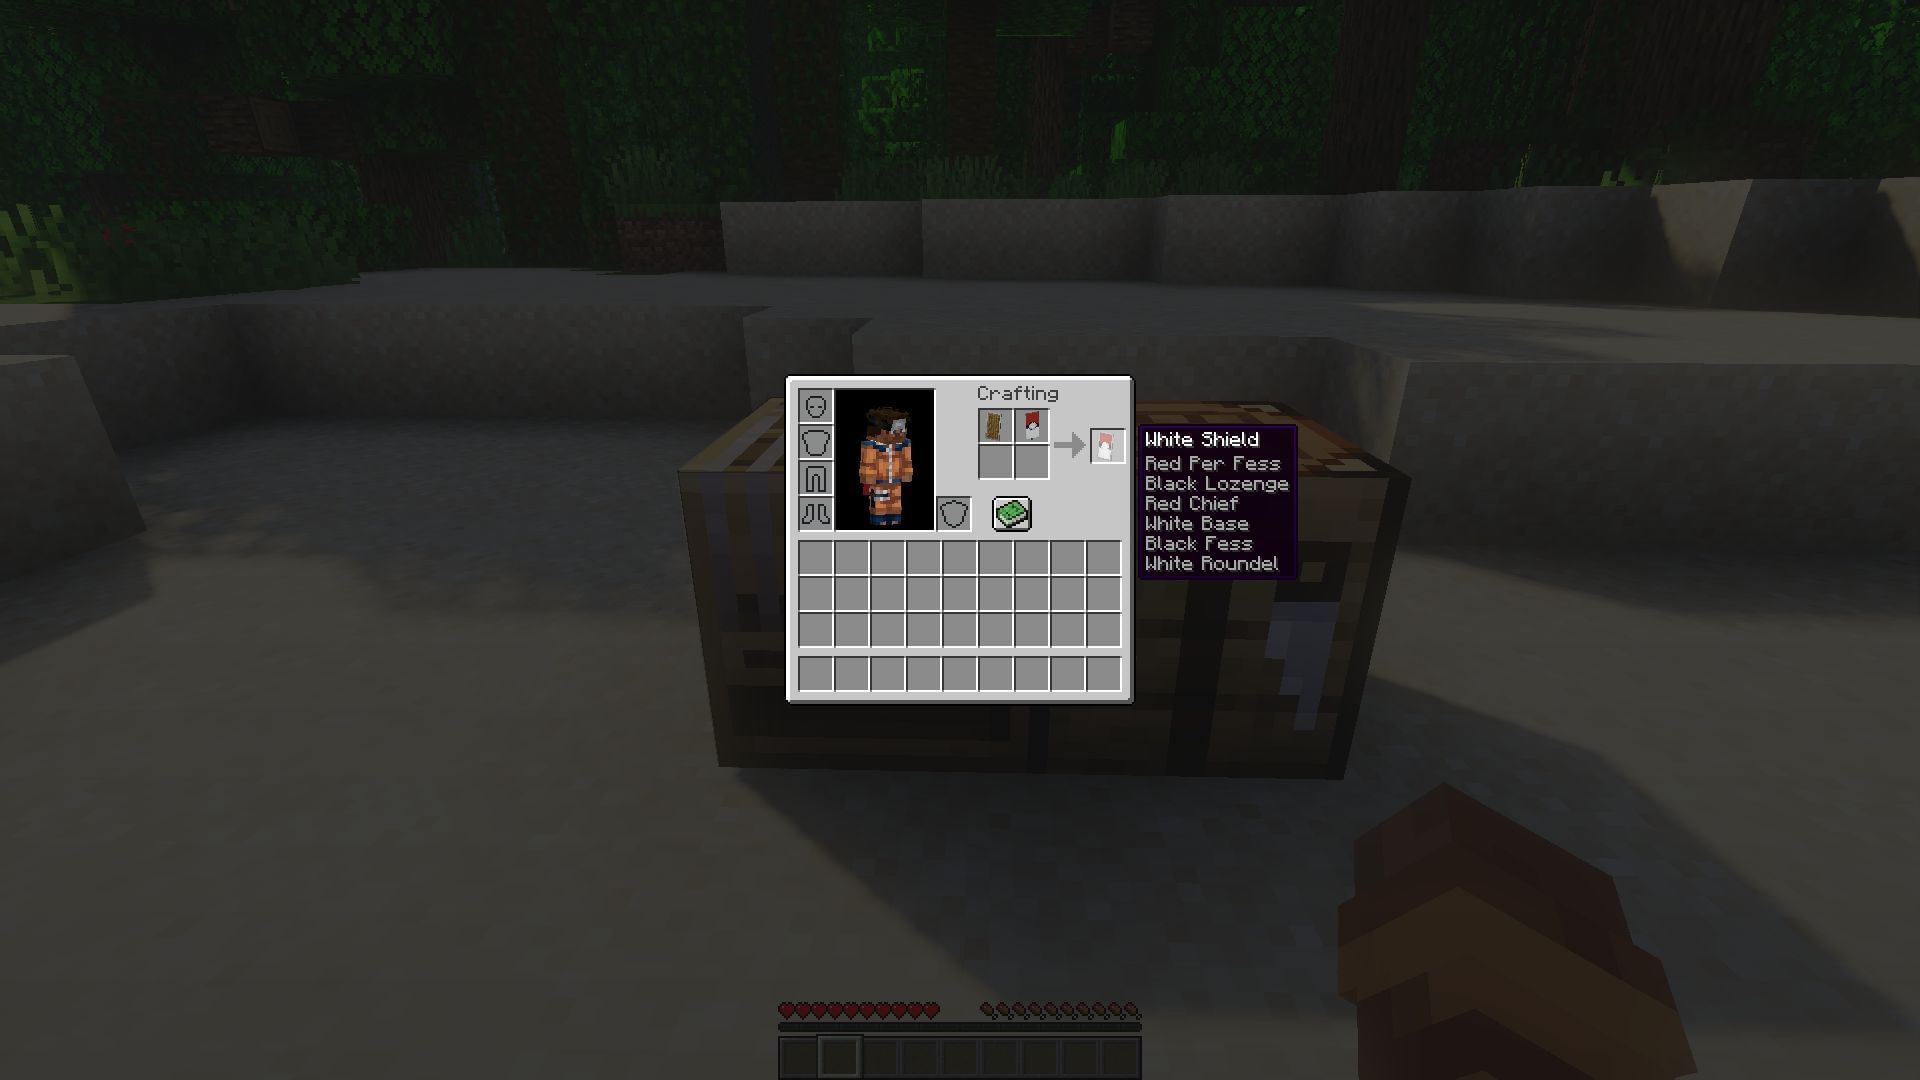
After finishing the custom banner, fans should open their inventory interface and place their shield and the custom banner into the crafting interface. This should result in the two being combined, and they can then take their custom shield out of the crafting output and reequip it.

Uncover new worlds with our Minecraft Seed Generator!