
'%20x='0'%20y='0'%20height='100%25'%20width='100%25'%20%0A%20%20%20%20%20%20%20%20%20%20xlink%3Ahref='data:image/jpg;base64,/9j/2wBDAAYEBQYFBAYGBQYHBwYIChAKCgkJChQODwwQFxQYGBcUFhYaHSUfGhsjHBYWICwgIyYnKSopGR8tMC0oMCUoKSj/2wBDAQcHBwoIChMKChMoGhYaKCgoKCgoKCgoKCgoKCgoKCgoKCgoKCgoKCgoKCgoKCgoKCgoKCgoKCgoKCgoKCgoKCj/wgARCAAGAAoDASIAAhEBAxEB/8QAFgABAQEAAAAAAAAAAAAAAAAAAAUH/8QAFAEBAAAAAAAAAAAAAAAAAAAABP/aAAwDAQACEAMQAAAAzu8CX//EAB4QAAEEAwADAAAAAAAAAAAAAAIBAwQGAAUxB0FC/9oACAEBAAE/AK7ZKrGbiR52gJ0CcBTdAURzqKv175j948eC8YhWdyIoXElBn//EABcRAAMBAAAAAAAAAAAAAAAAAAACAxL/2gAIAQIBAT8AtNdn/8QAGBEAAgMAAAAAAAAAAAAAAAAAAAMEEzH/2gAIAQMBAT8AivZXp//Z'%3E%3C/image%3E%3C/svg%3E)
There are chiefly three types of enemies one fights in Warframe: the Grineer, the Corpus, and the Sentients. The bosses of Warframe also fall into the same categories, with the exception of the new Orowyrm boss. Among both regular mobs and bosses, the Sentient is the most difficult one to fight.
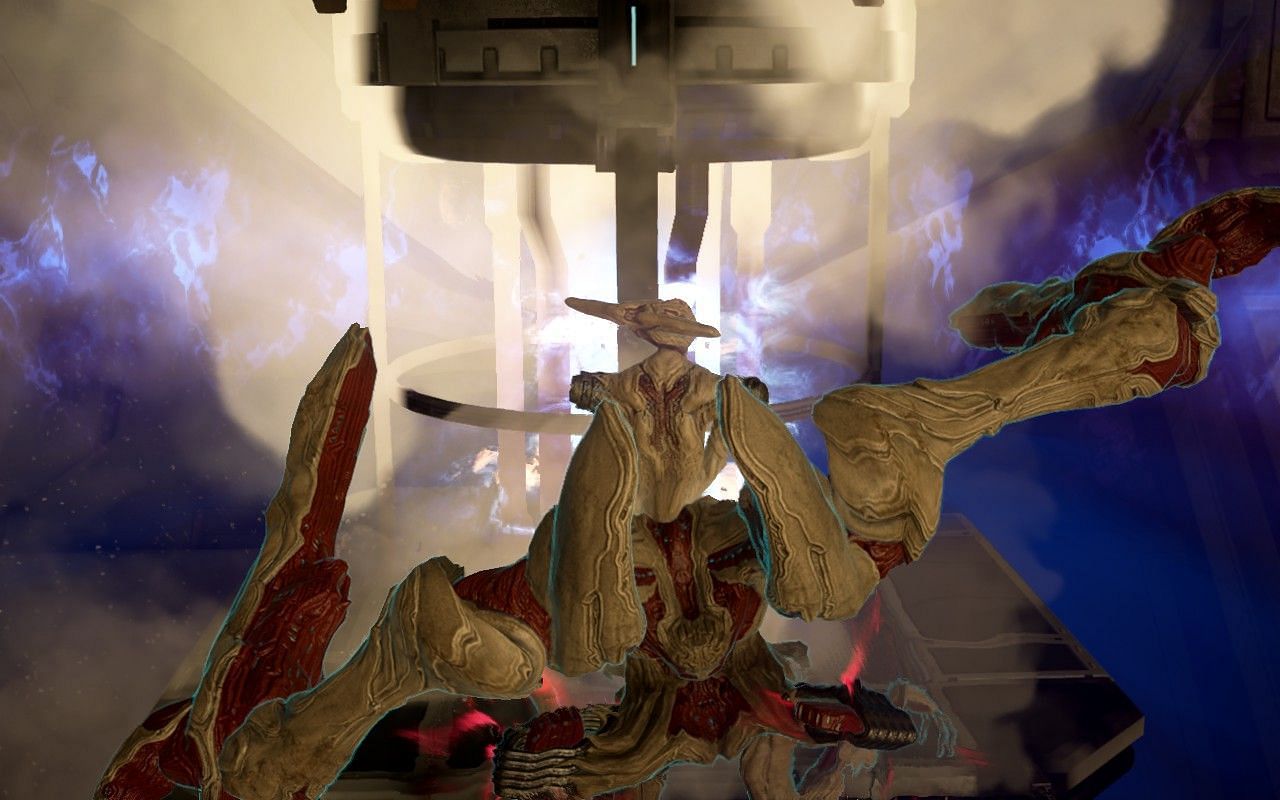
There are, thus far, two Sentient bosses present in the game. The first is the Eidolons, the raid bosses that roam the open Plains of Eidolon at night. The second one is the Ropalolyst, which was added in the Jovian Concord update (25.0). Ropalolyst is the second boss found in Jupiter, making it the fourth planet alongside Eris, Deimos, and Earth to have two Assassination nodes.
Barring end-game open-world bosses like Eidolons and Profit Taker, Ropalolyst easily outranks most other bosses in Warframe in terms of complexity and difficulty. It requires one to engage almost all of the game mechanics learned thus far, both as the Warframe and the Operator. However, once you understand all the steps and do it a few times, it is much more routine and predictable to defeat Ropalolyst than something like the Zealod Prelate.
Warframe boss guide: How to beat the Ropalolyst
The Ropalolyst is a level 40 boss in the regular Star Chart, i.e., non-Steel Path mode. To unlock the mode to access the boss, you must clear the main questline at least up to Chimera Prologue.
At this stage, most players will proficiently handle all the content on the origin system. The Ropalolyst is, surprisingly, not the most durable among regular planet bosses. At spawn level (40), it has approximately 11,500 Shield, 44,500 Health, and 440 Alloy Armor, or about 60% damage negation when the shields are down. For reference, it has roughly twice the effective HP as a level 46 Corrupted Heavy Gunner.
Suggested builds
The greater challenge in the Ropalolyst fight comes from the devastating damage it can deal, should the player be unable to outmaneuver it. It does not have many knockdown mechanics, but the damage instances come from multiple sources, including Sentient Battalysts that spawn mid-fight.
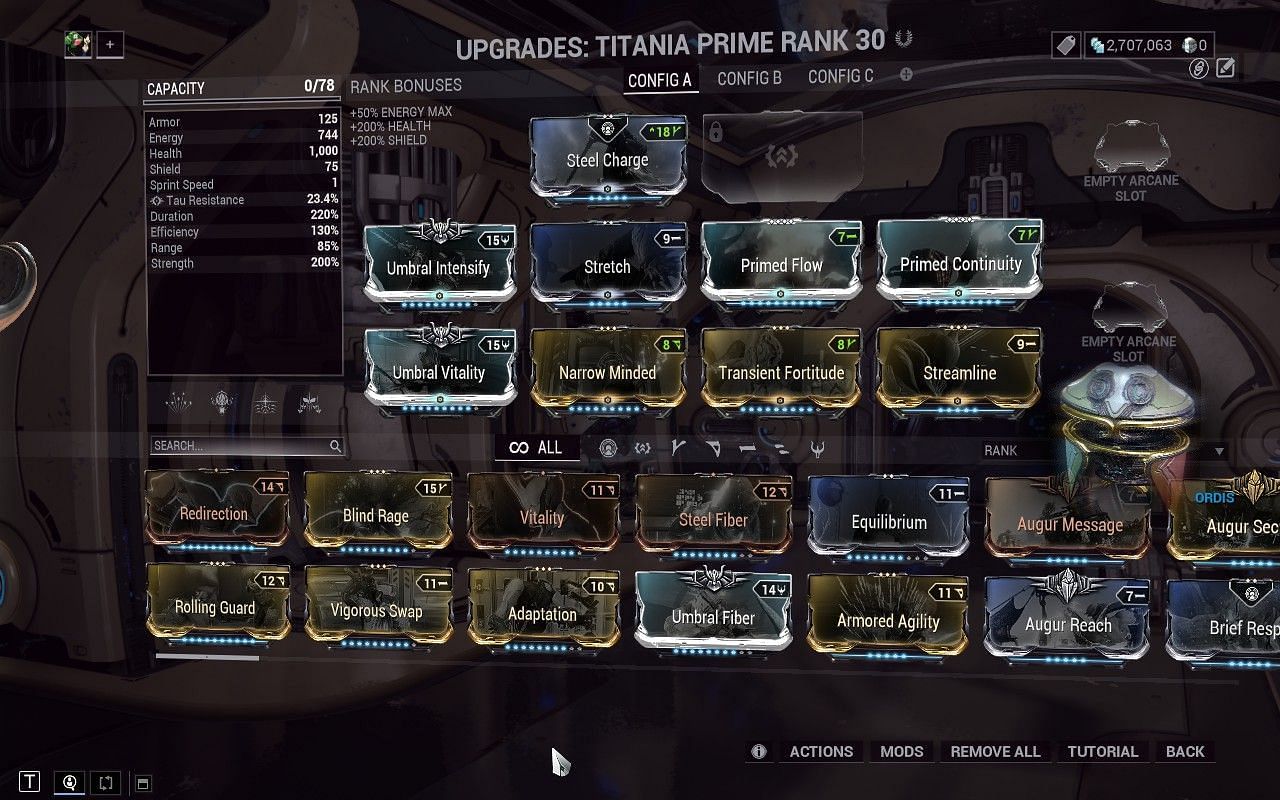
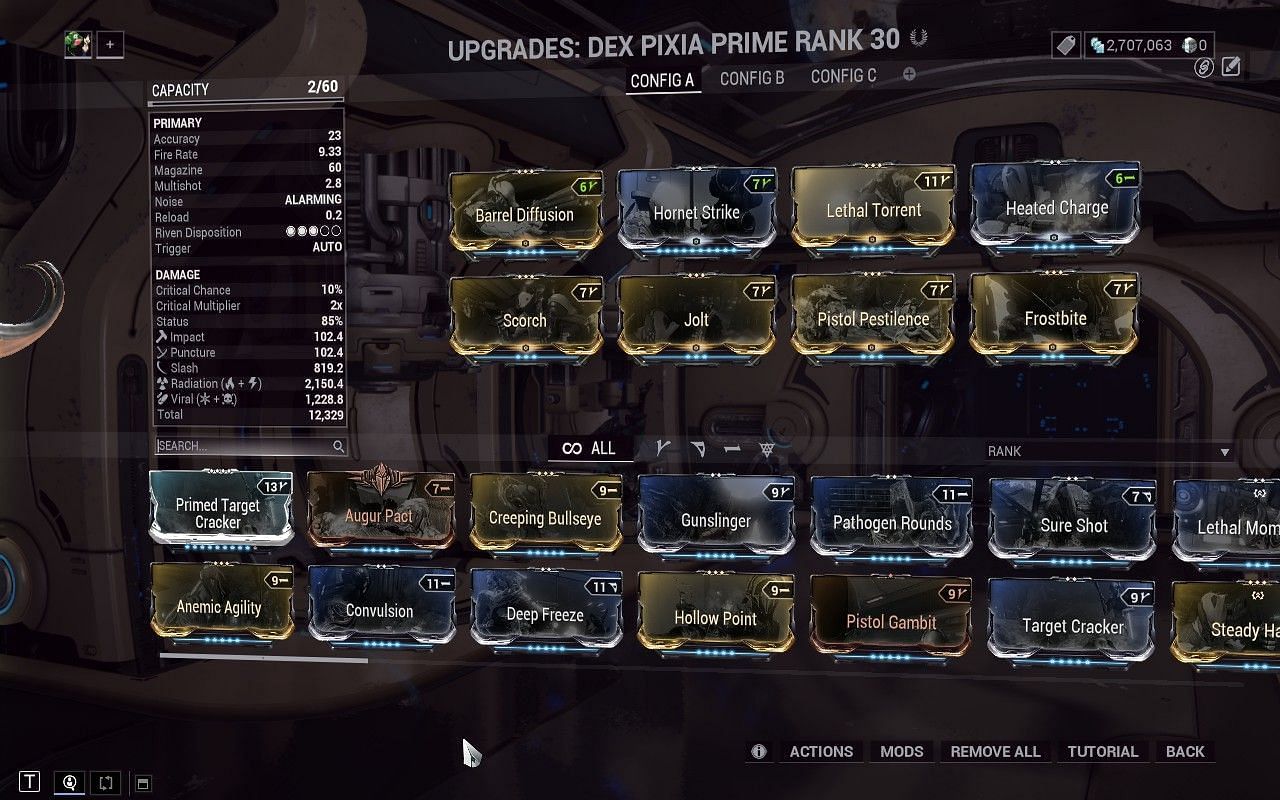
Therefore, A Warframe with a combination of durability and mobility is recommended for the fight. Titania is possibly the best Warframe for this particular boss. Her gift of flight not only lets her get to the boss arena much faster than other Warframes but also completely ignores the ground hazards laid down against her. The Dex Pixia, with a budget build modded for Radiation damage, can easily deplete the Ropalolyst's health pool.
Other Warframes that fit the bill include Wukong and Zephyr.
Ropalolyst boss fight: the mechanics
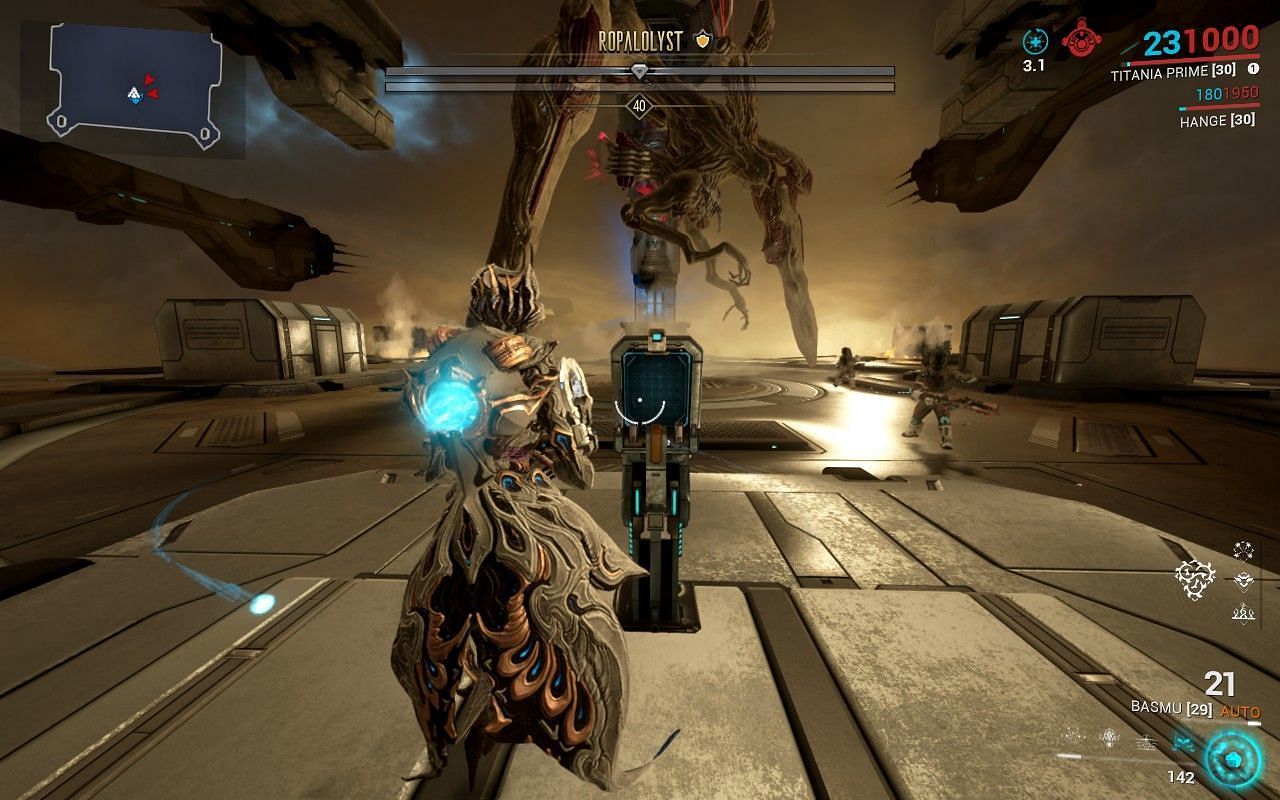
The fight revolves around the Capacitor Tower, i.e., the three electrified reactor structures surrounding the central arena. Essentially, you can only win the fight by destroying all three.
The first thing you should do is get to one of the towers. You can use the ziplines to get to it, but note that the Ropalolyst can send a wave of electricity through it, knocking you down upon contact.
After this, you will need to carry out the following steps.
Step 1: Hide behind a Capacitor tower and wait for the Ropalolyst's beams to hit it. This will supercharge or 'prime' the tower. The indication for its trigger is obvious, as the tower starts crackling with electricity once primed.
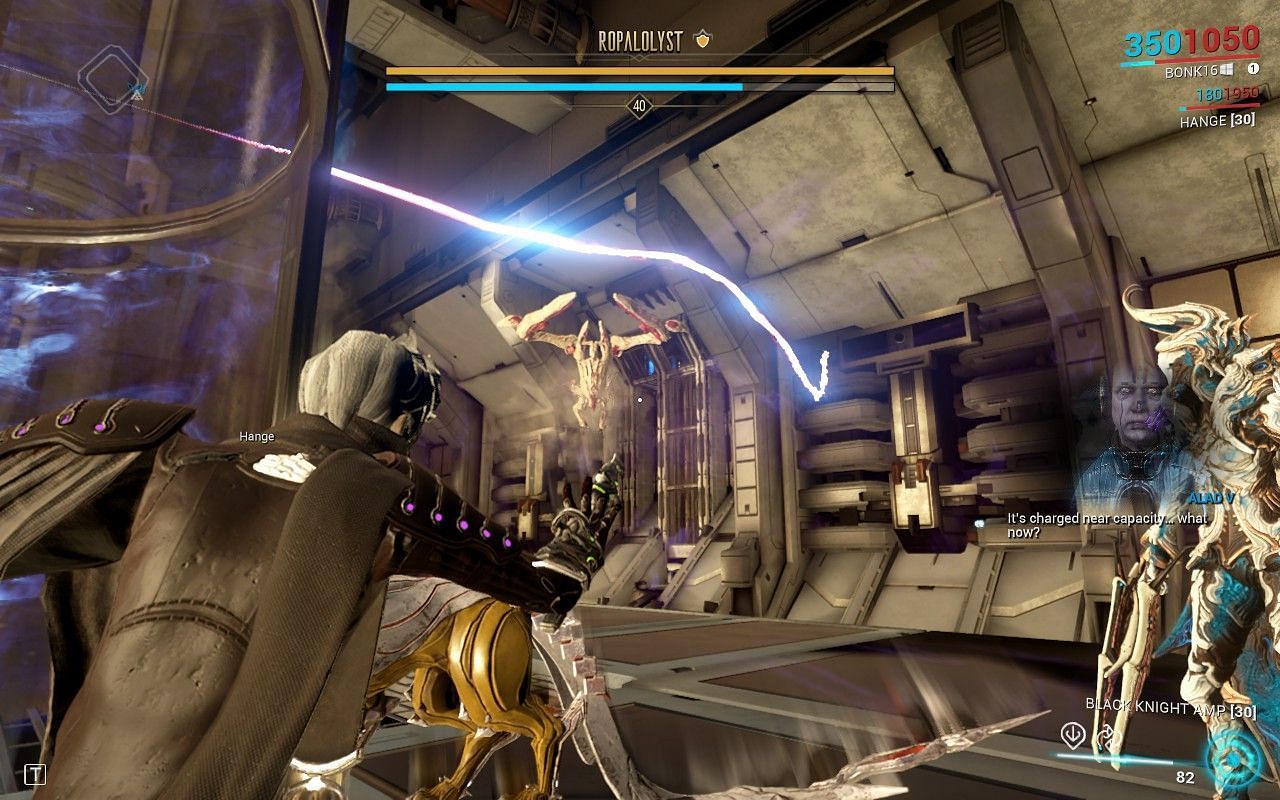
Step 2: You will need to deplete the Ropalolyst's shields. You can only damage it with Amps, so switch to the Operator mode. An early-game Amp build should be sufficient to drop the shield in a few hits. The demonstration used an Amp with the Raplak Prism, Shraksun Scaffold, and Lohrin Brace (1-2-3).
Step 3: Once the Ropalolyst's shields are down, you can mount it when sufficiently close by pressing the Interact (X by default) button. At this point, you simply need to ram it into the supercharged Capacitor tower. This will destroy the tower, damage the Ropalolyst, and drop both your Warframe and the Ropalolyst in the central area.
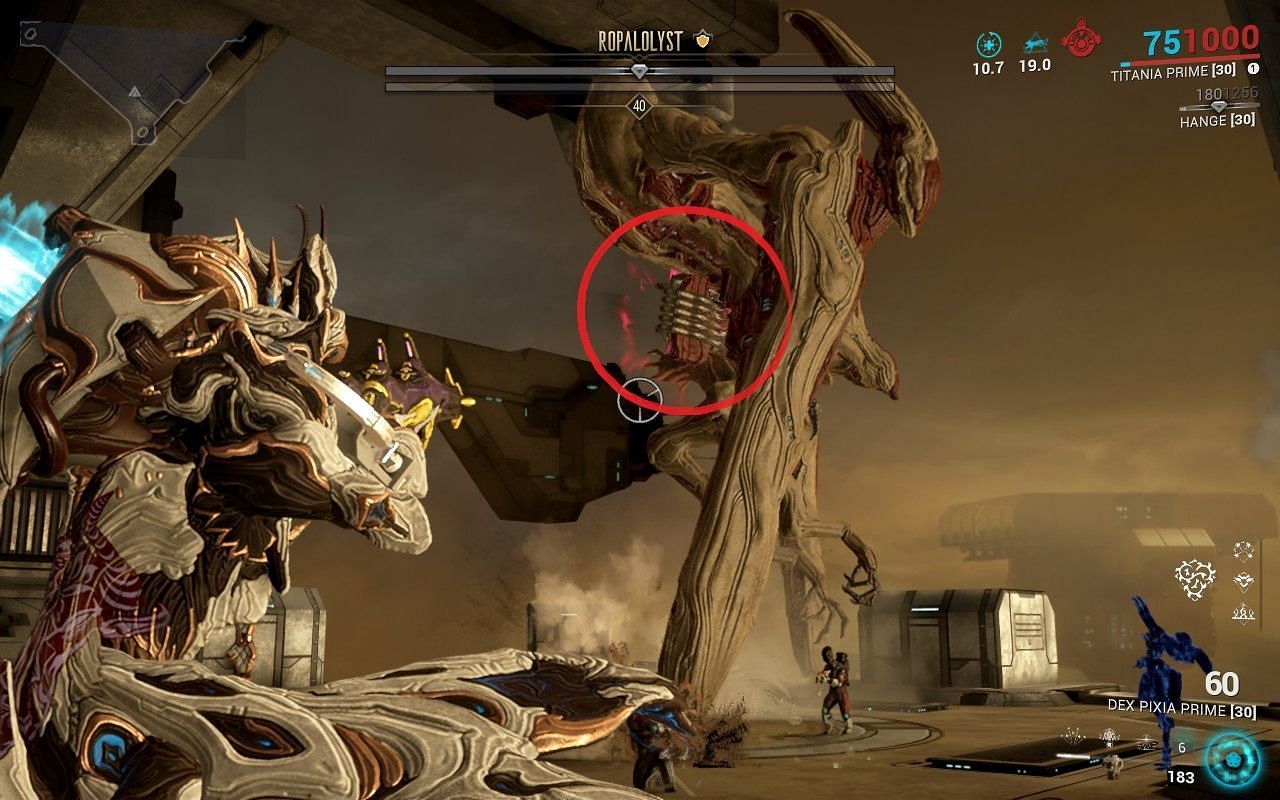
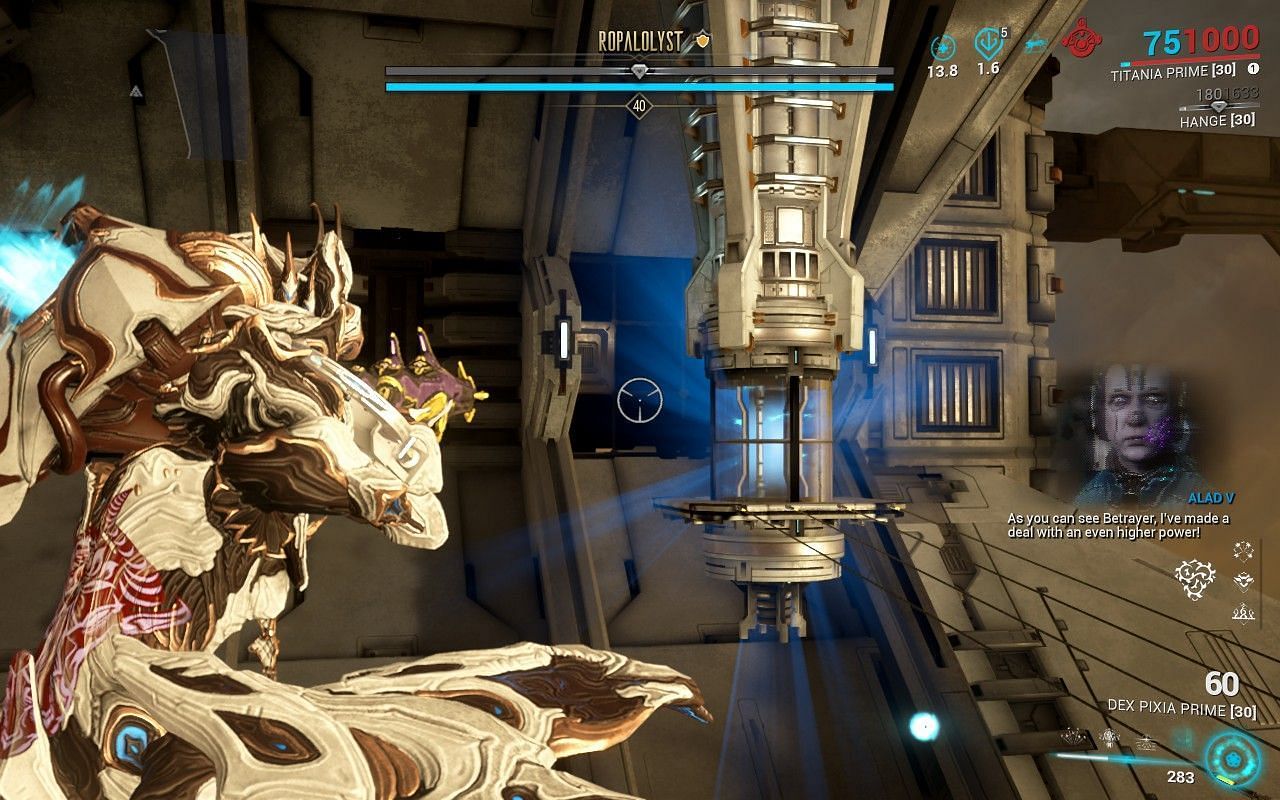
Step 4: Now, you can damage the Synovia on The Ropalolyst, the brace-like formation jutting out of its hind legs. Destroying any of its Synovia will stun the Ropalolyst temporarily, and you will have a three-second period before it regenerates. Within this period, you must interact with the terminal in the arena shown in the image below.
Note that the boss can grab you and completely disable you to slowly zap your health if you get close to it during this phase. Therefore, The best strategy is to stand right next to the terminal before destroying the Synovia. Once you successfully interact with the terminal, it will cast a laser beam on the boss.
Rinse and repeat steps 1 to 4 for the two remaining towers, and after the third tower, Ropalolyst will be dispatched for good with the laser. The arena as a whole will be destroyed, and a waypoint to a nearby extraction zone will appear.
Check out other guides on this game from Sportskeeda:
All Warframes tier list || Incarnon weapons tier list || Kuva weapons tier list || All Warframe Twitch drops this week || Best stat-stick weapons in Warframe || Latest Baro Ki'teer Inventory || All Promo Codes || Best weapons in Warframe for each Mastery Rank