'%20x='0'%20y='0'%20height='100%25'%20width='100%25'%20%0A%20%20%20%20%20%20%20%20%20%20xlink%3Ahref='data:image/jpg;base64,/9j/2wBDAAYEBQYFBAYGBQYHBwYIChAKCgkJChQODwwQFxQYGBcUFhYaHSUfGhsjHBYWICwgIyYnKSopGR8tMC0oMCUoKSj/2wBDAQcHBwoIChMKChMoGhYaKCgoKCgoKCgoKCgoKCgoKCgoKCgoKCgoKCgoKCgoKCgoKCgoKCgoKCgoKCgoKCgoKCj/wgARCAAGAAoDASIAAhEBAxEB/8QAFgABAQEAAAAAAAAAAAAAAAAAAAQF/8QAFAEBAAAAAAAAAAAAAAAAAAAABP/aAAwDAQACEAMQAAAAzbh5/wD/xAAhEAABBAEDBQAAAAAAAAAAAAADAQIEBQAGBxETISJ1w//aAAgBAQABPwDTuib6VYSqCLMiDnBhsknIpydMo38ojV8eXd0wuyxFI9XWtci+tc77Z//EABcRAAMBAAAAAAAAAAAAAAAAAAABEQL/2gAIAQIBAT8A07Ez/8QAFxEBAAMAAAAAAAAAAAAAAAAAAQARMv/aAAgBAwEBPwDK1P/Z'%3E%3C/image%3E%3C/svg%3E)
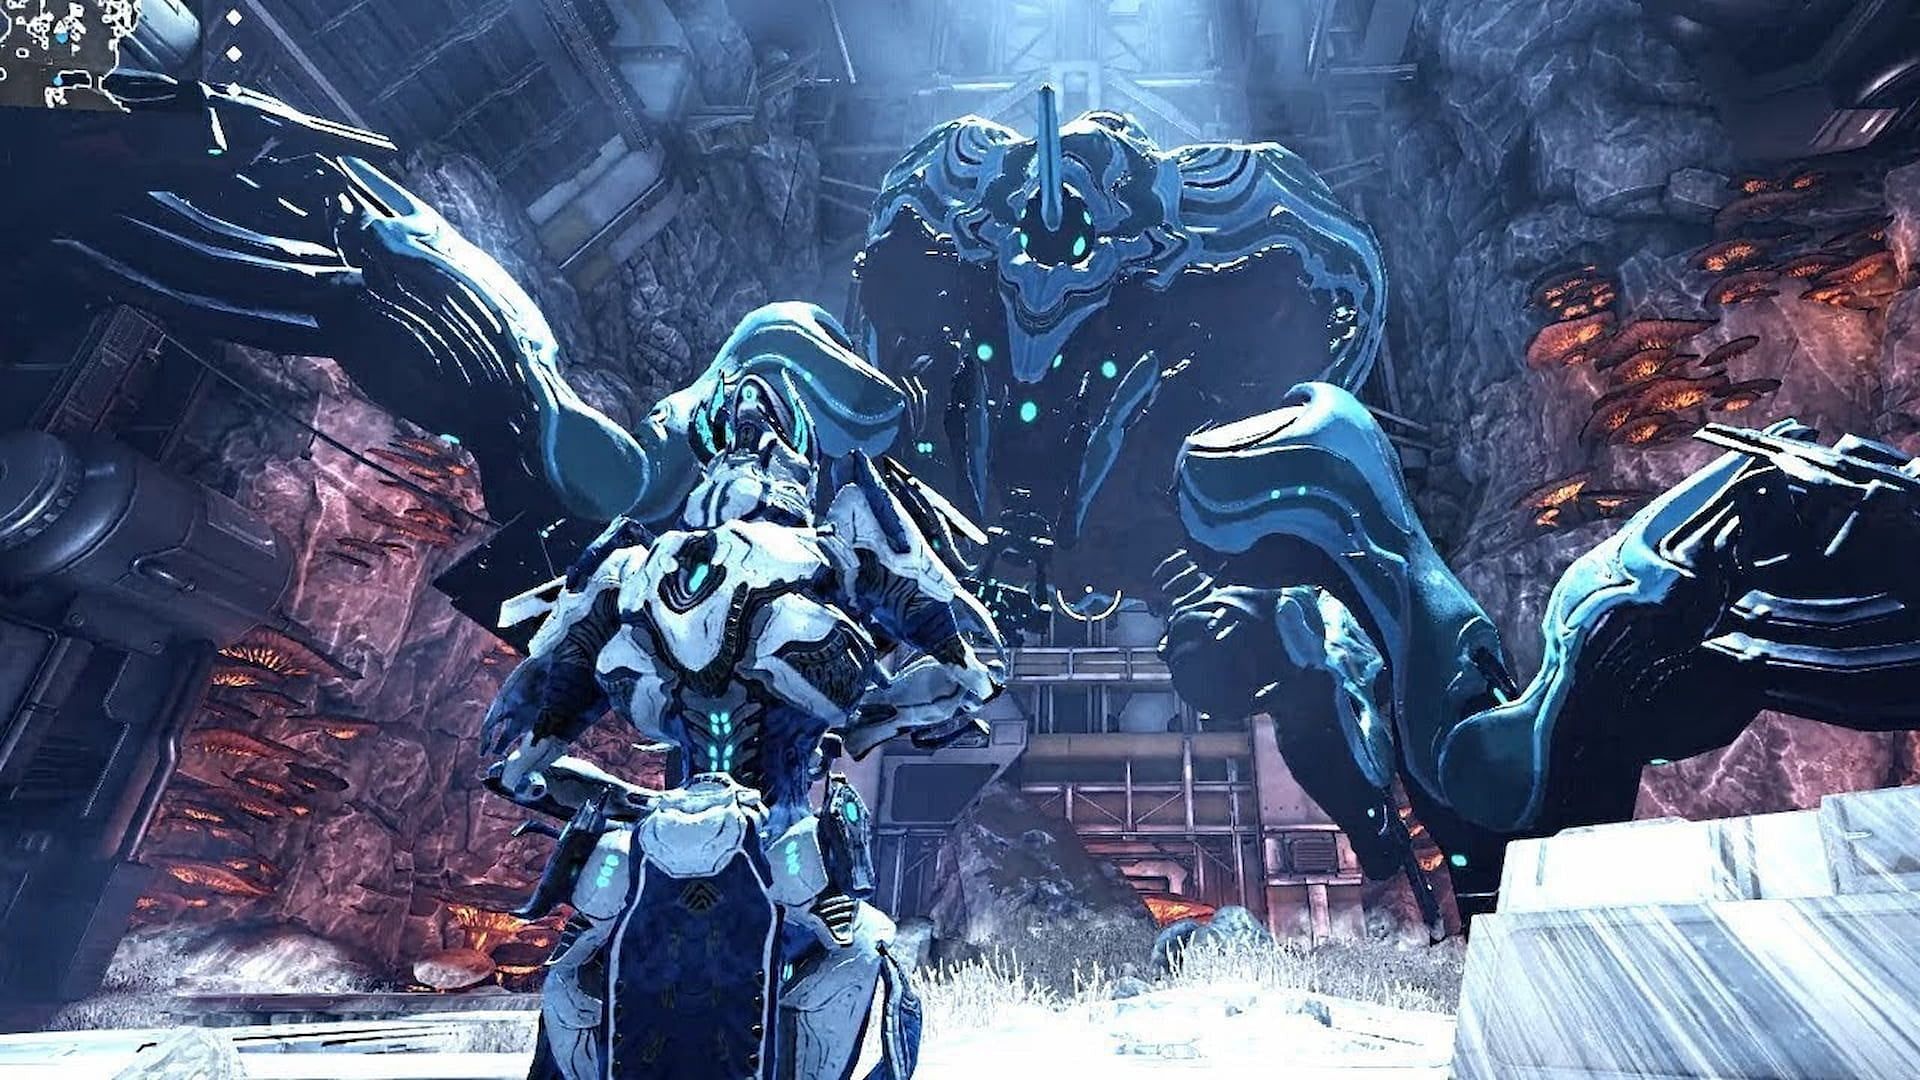
Exploiter Orb is one of Warframe's end-game bosses. Classified as a "heist" in Fortuna and Orb Vallis, this is one of the few raid boss equivalents that this MMORPG boasts. After defeating, the entity drops components for the Hildryn Warframe, as well as numerous rare gems, mines, and fishing harvests found throughout Orb Vallis. It is also the only source of the Lazulite Toroid in the game, which grants you 12,000 standing apiece with the Solaris United faction.
While it does not require as much deliberation in preparation and equipment as Profit Taker, Exploiter Orb can nevertheless be a mechanically challenging boss for many players. The multi-phase fight takes place in Deck 12 and its outskirts and can be started by either taking the Heist bounty from Solaris United or by manually visiting Deck 12 in Warframe.
How to get Diluted Thermia in Warframe
Diluted Thermia is an ingredient that can be fed to the Helminth, but does not present itself as a crafting ingredient for any in-game equipment. Its only purpose is in the Warframe Exploiter Orb boss fight. You need at least one of it in your inventory to successfully participate in this heist.
With the right Warframe, Diluted Thermia's acquisition is an easy process. Ideally, you can use the Amesha Archwing to do it solo:
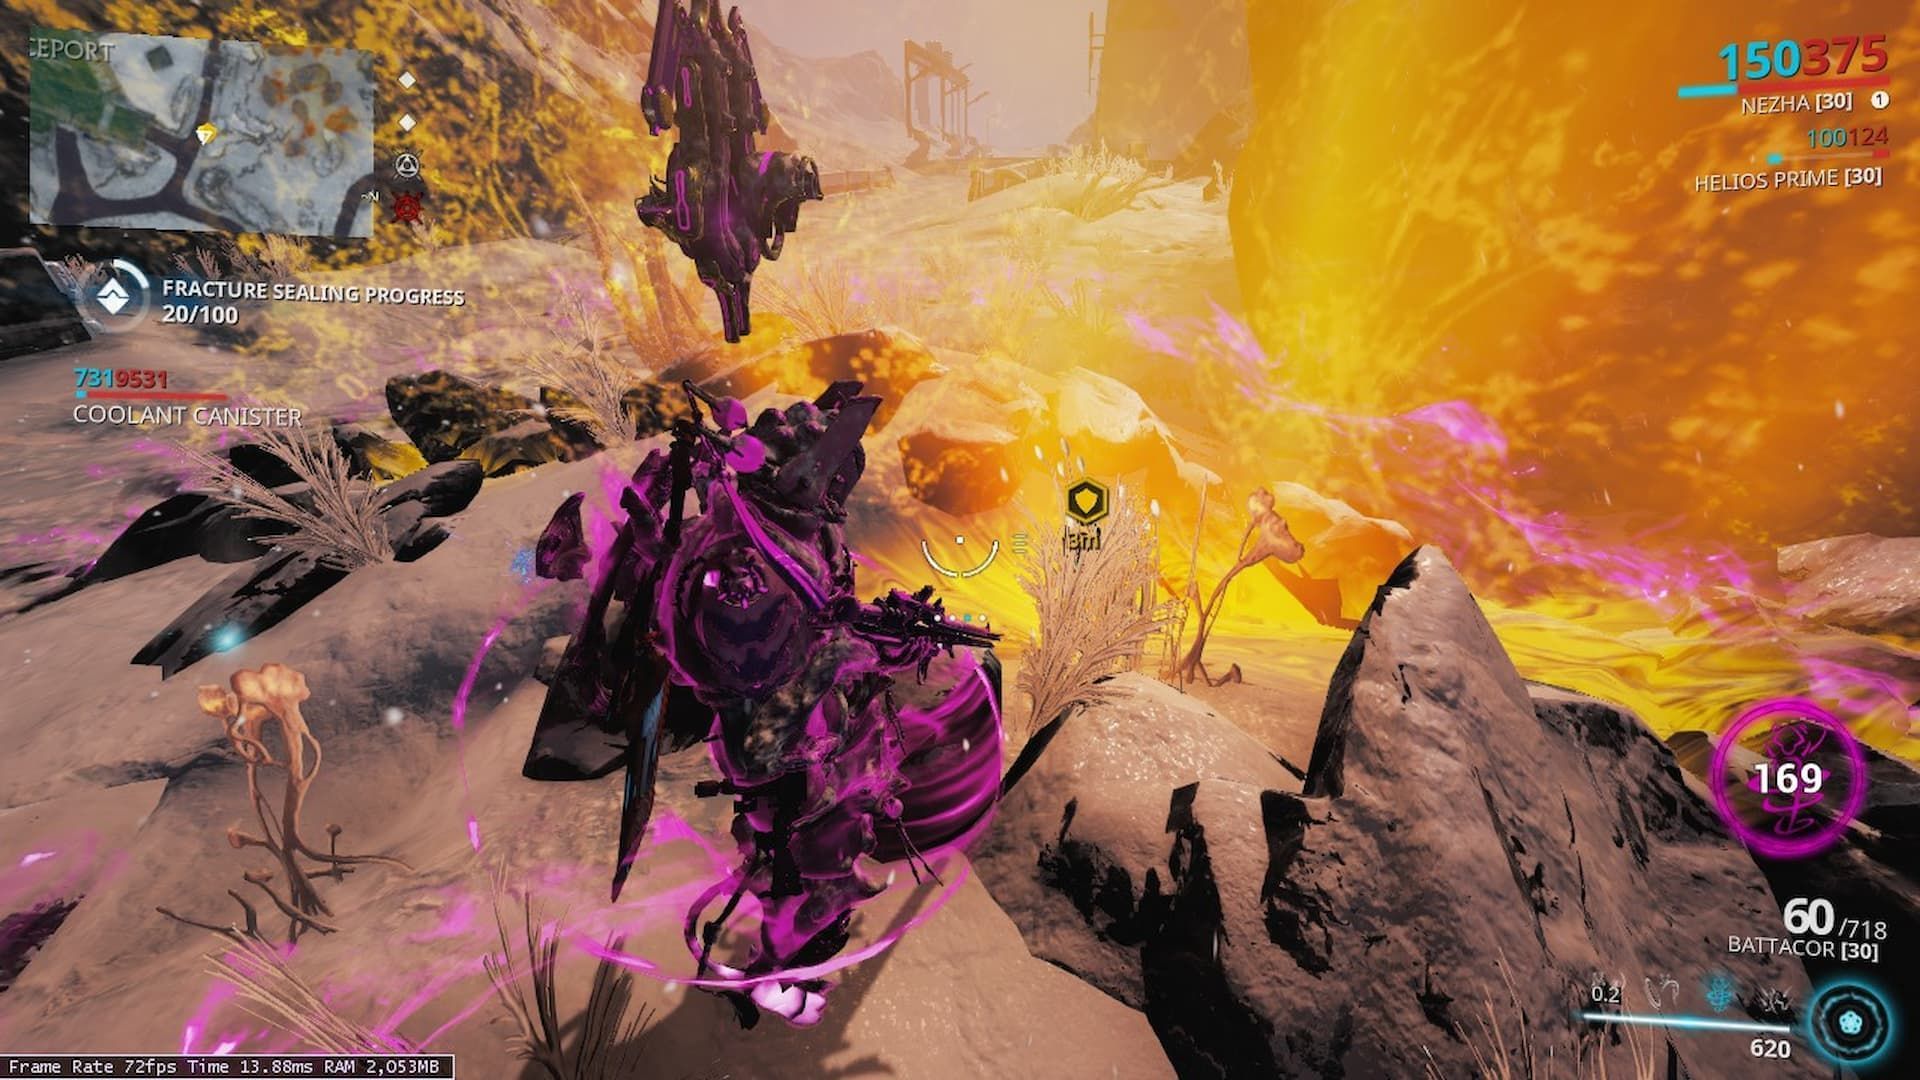
- Travel to Temple of Profit and look for Exploiter Orb roaming the valley up north.
- There will be Coolant Raknoids around her that drop Coolant Cells on kill. Pick one up on the frame, and another one on the Operator.
- Thermia Fissures, erupting orange lines, can be found across Orb Vallis. Find one and place the two Coolant Cells into it.
- Pop the Amesha second ability on the defense objective and wait for it to finish. Once the process is over, the Coolant Cells will be converted to Diluted Thermia.
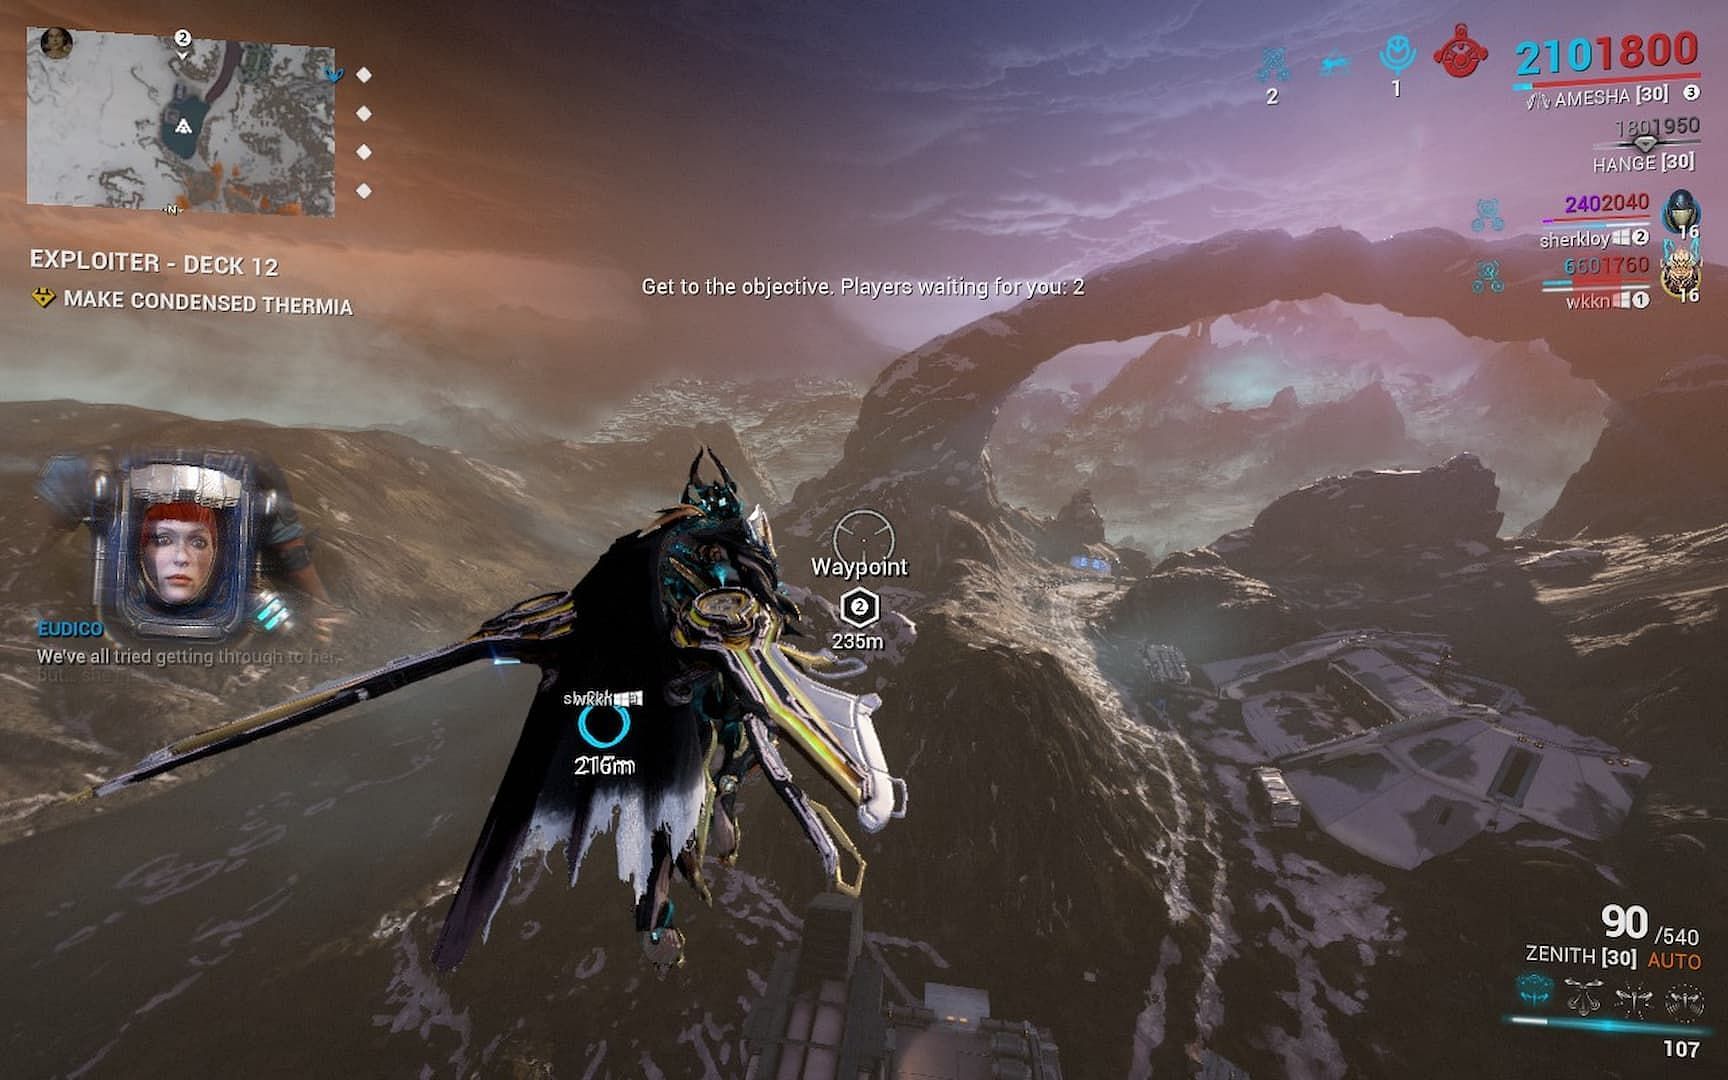
Warframe Deck 12 location: How to start the Exploiter Orb fight?
When you load into the Exploiter Orb heist, the first objective will tell you to craft Diluted Thermia. However, if you have at least one in your inventory, you can simply skip this objective and go directly to Deck 12.
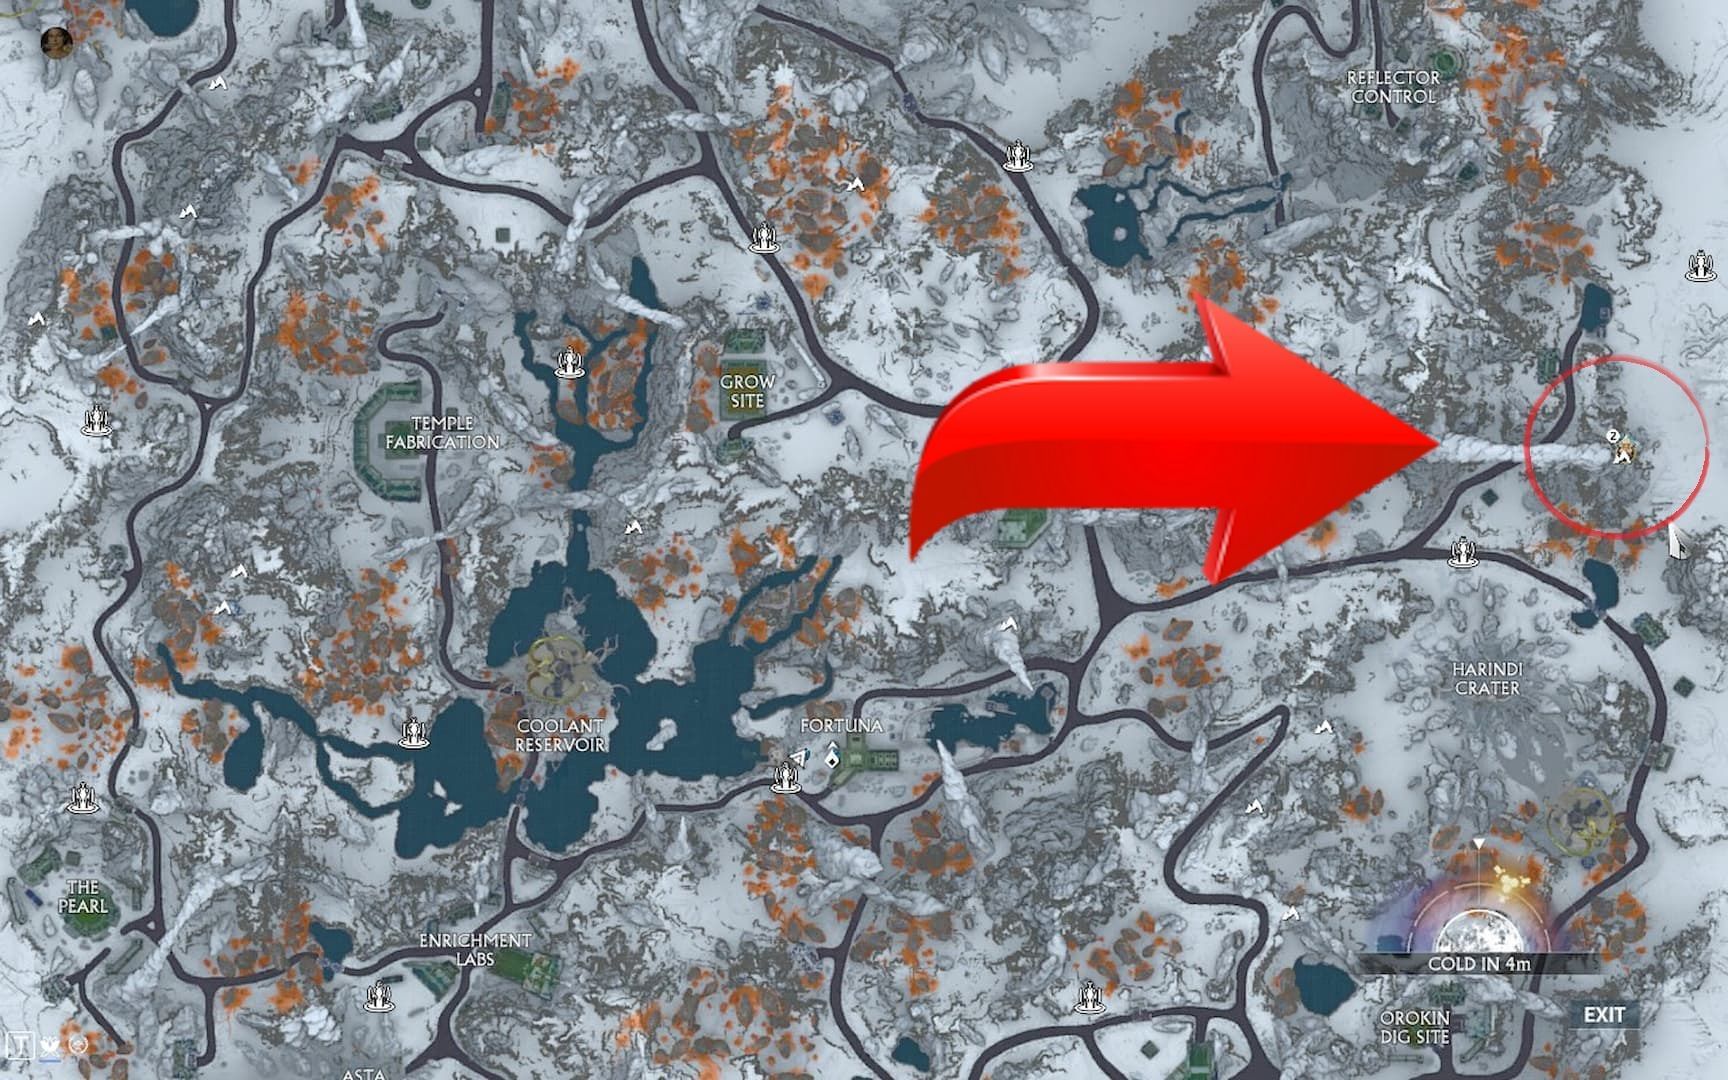
Warframe Deck 12 is a bunker area located towards the far eastern edge of Orb Vallis. Travel to the area indicated on the reference map above and you will find a long slender bridge-like rock formation arching across the valley. Deck 12 is accessible from a cave under the far side of this arch towards the edge of the map.
Warframe Exploiter Orb boss fight phases: Step-by-step breakdown
When you load into Deck 12, the first thing you will need to do is get to the console shown above and pledge one unit of Diluted Thermia to commence the boss fight. In a squad, this will only consume Diluted Thermia from the person who personally interacts with the console.
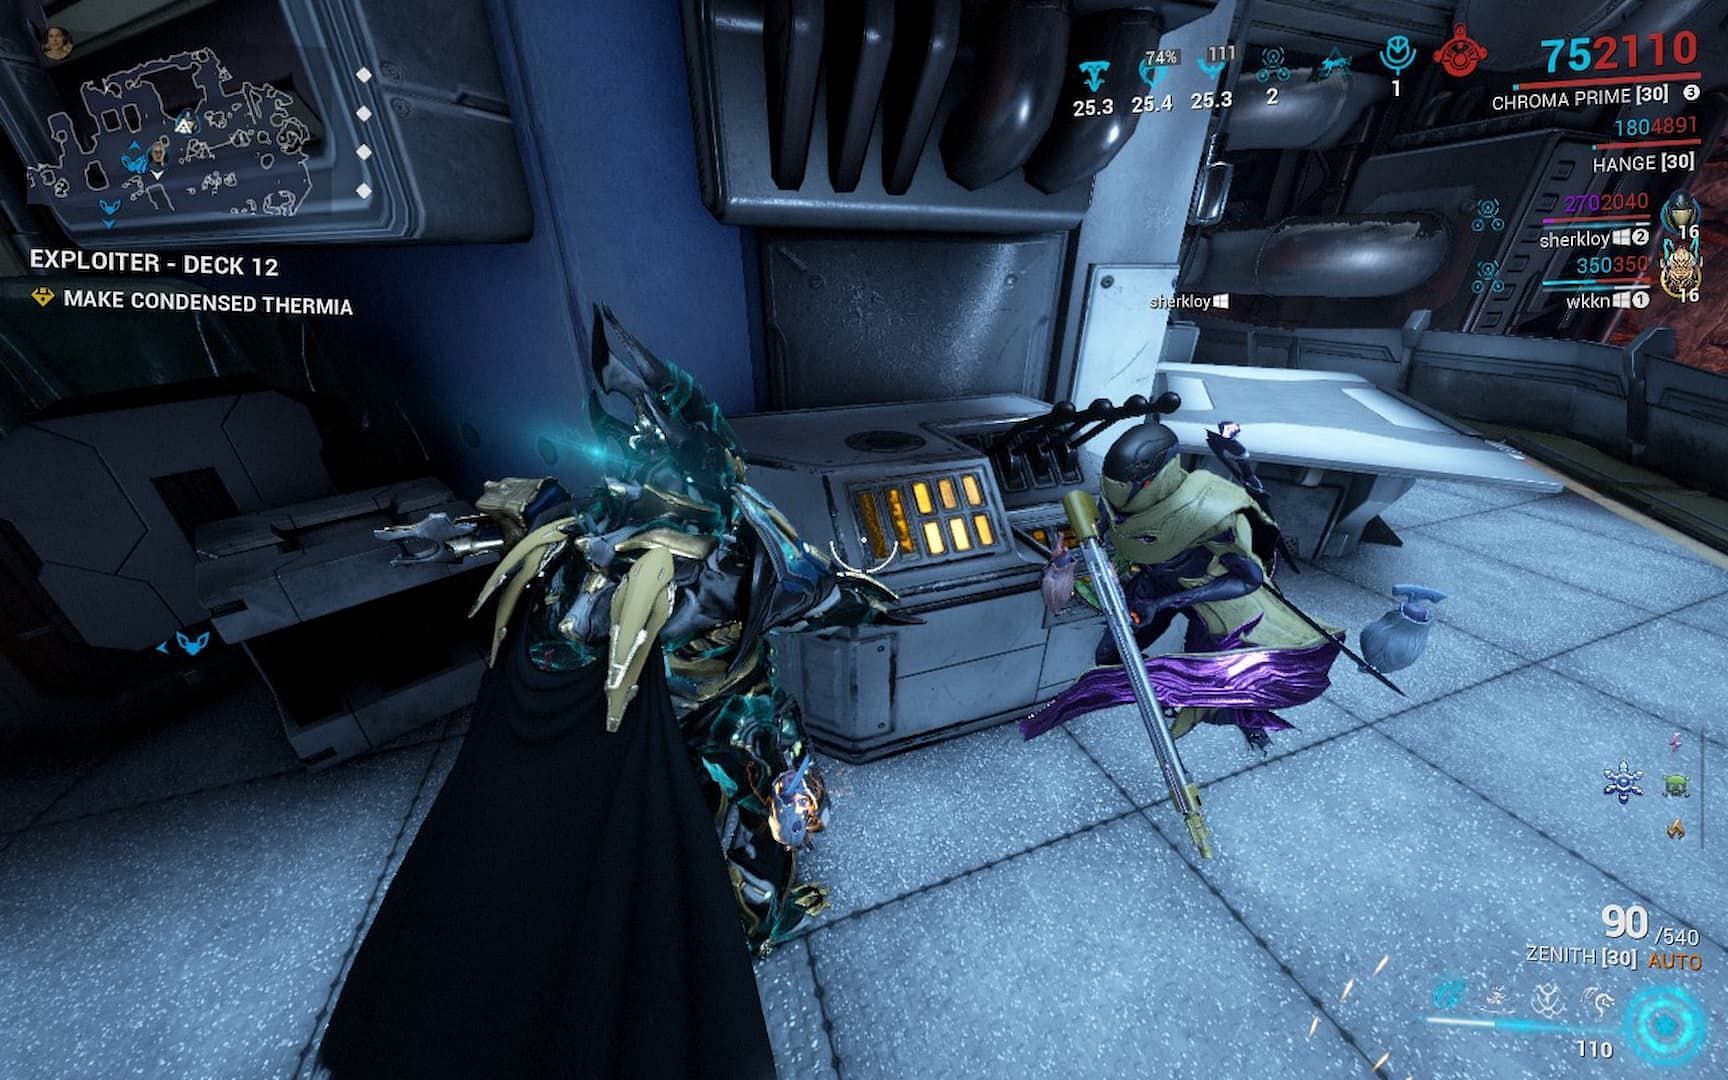
Phase 1 - Inside Deck 12

The Warframe Exploiter Orb boss fight begins in earnest when the UI momentarily disappears to toll the bell.
- Exploiter Orb will crawl in and fire at you while perched high up the wall of Deck 12. To get her down, first dislodge her foothold. This can be done by destroying the two rock walls where her hind feet are placed.
- Once the boss gets down, get behind her and destroy one of the vents on her back. The Warframe Exploiter Orb boss is invulnerable by default, and the vents are the only means to hurt her in Deck 12.
Exploiter Orb will now have a thick layer of ice that shields all four of her vents. She will shift to the other end of the facility, and you need to unfreeze the rest of the vents to destroy them and progress the fight.
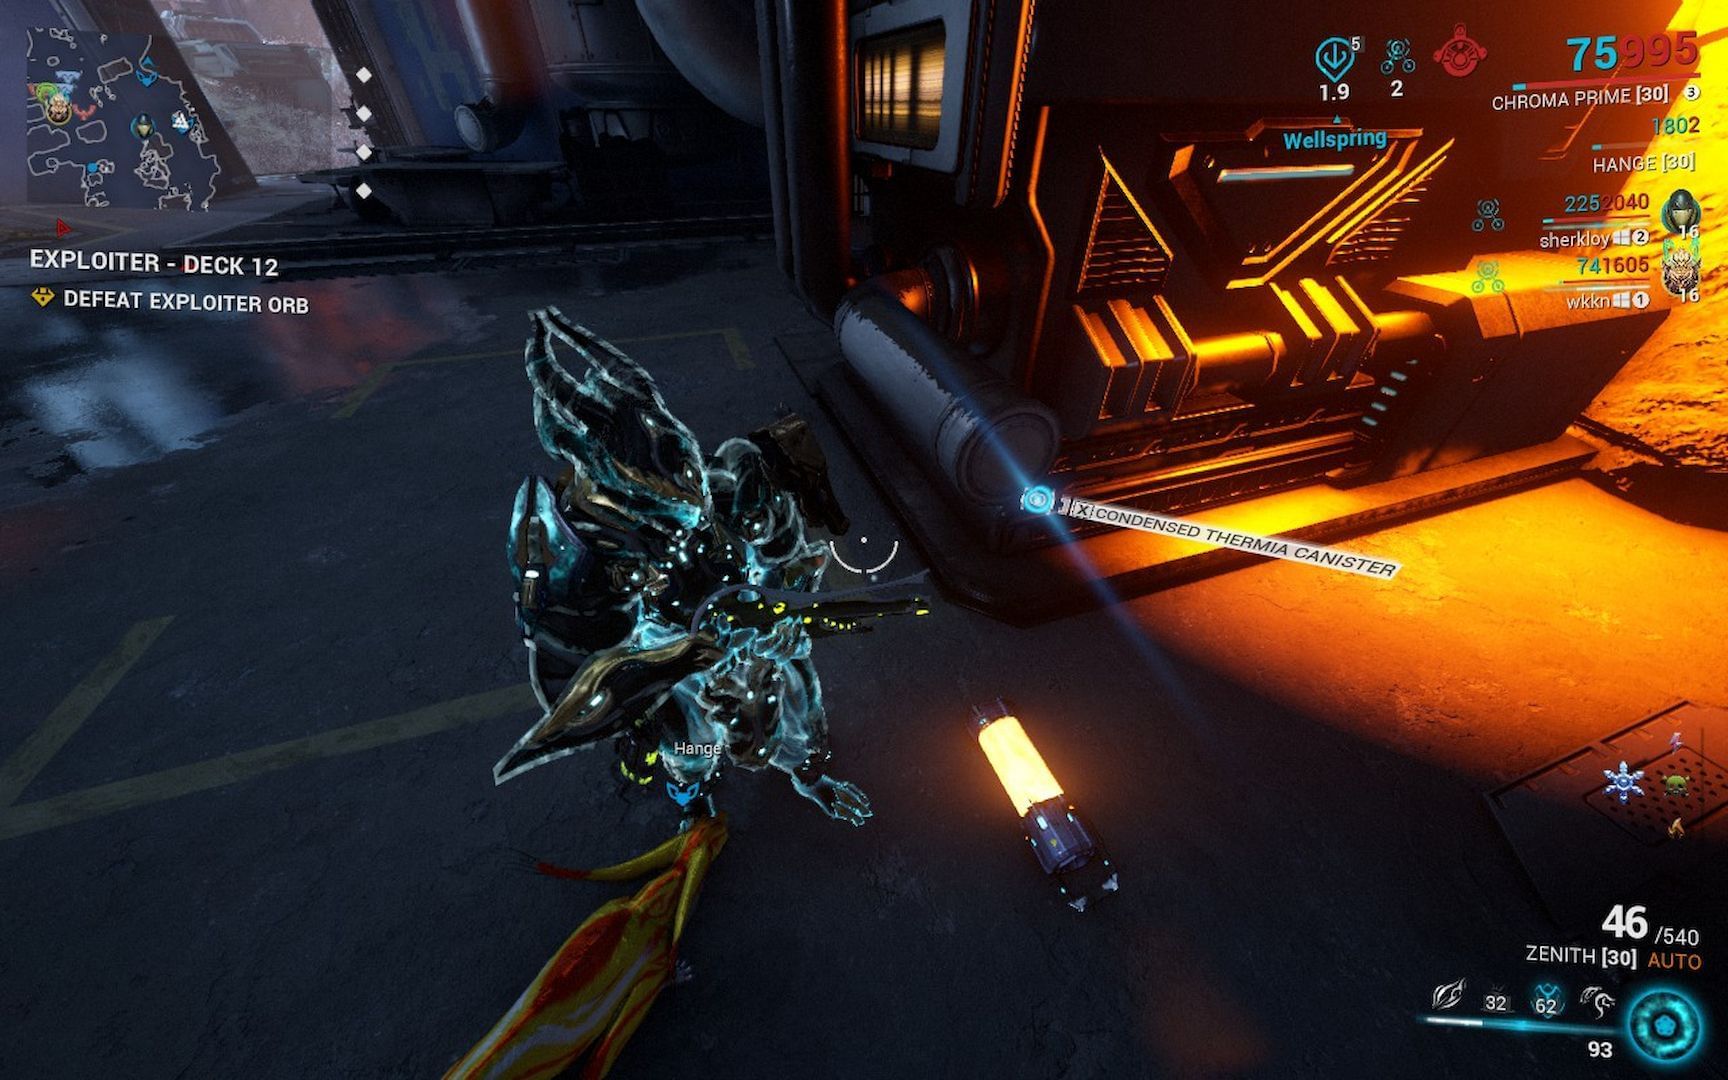
- There are six Thermia Condensers in this arena at Deck 12, which start printing out Thermia Canisters. You need to pick them up, press heavy attack to throw them at the frozen vents, and shoot the Thermia Canisters when they are mid-air to melt the ice coating.
- Melting the ice on a vent can take up to two Canister explosions, depending on how close the hit was. A direct hit can melt it in a single Canister throw.
In any case, destroying two more of her vents in this manner will prompt the Exploiter Orb to relocate to the middle of the facility. Destroying the final vent will compel her to exit Deck 12 for the next phase.
Phase 2 - Outside the cave
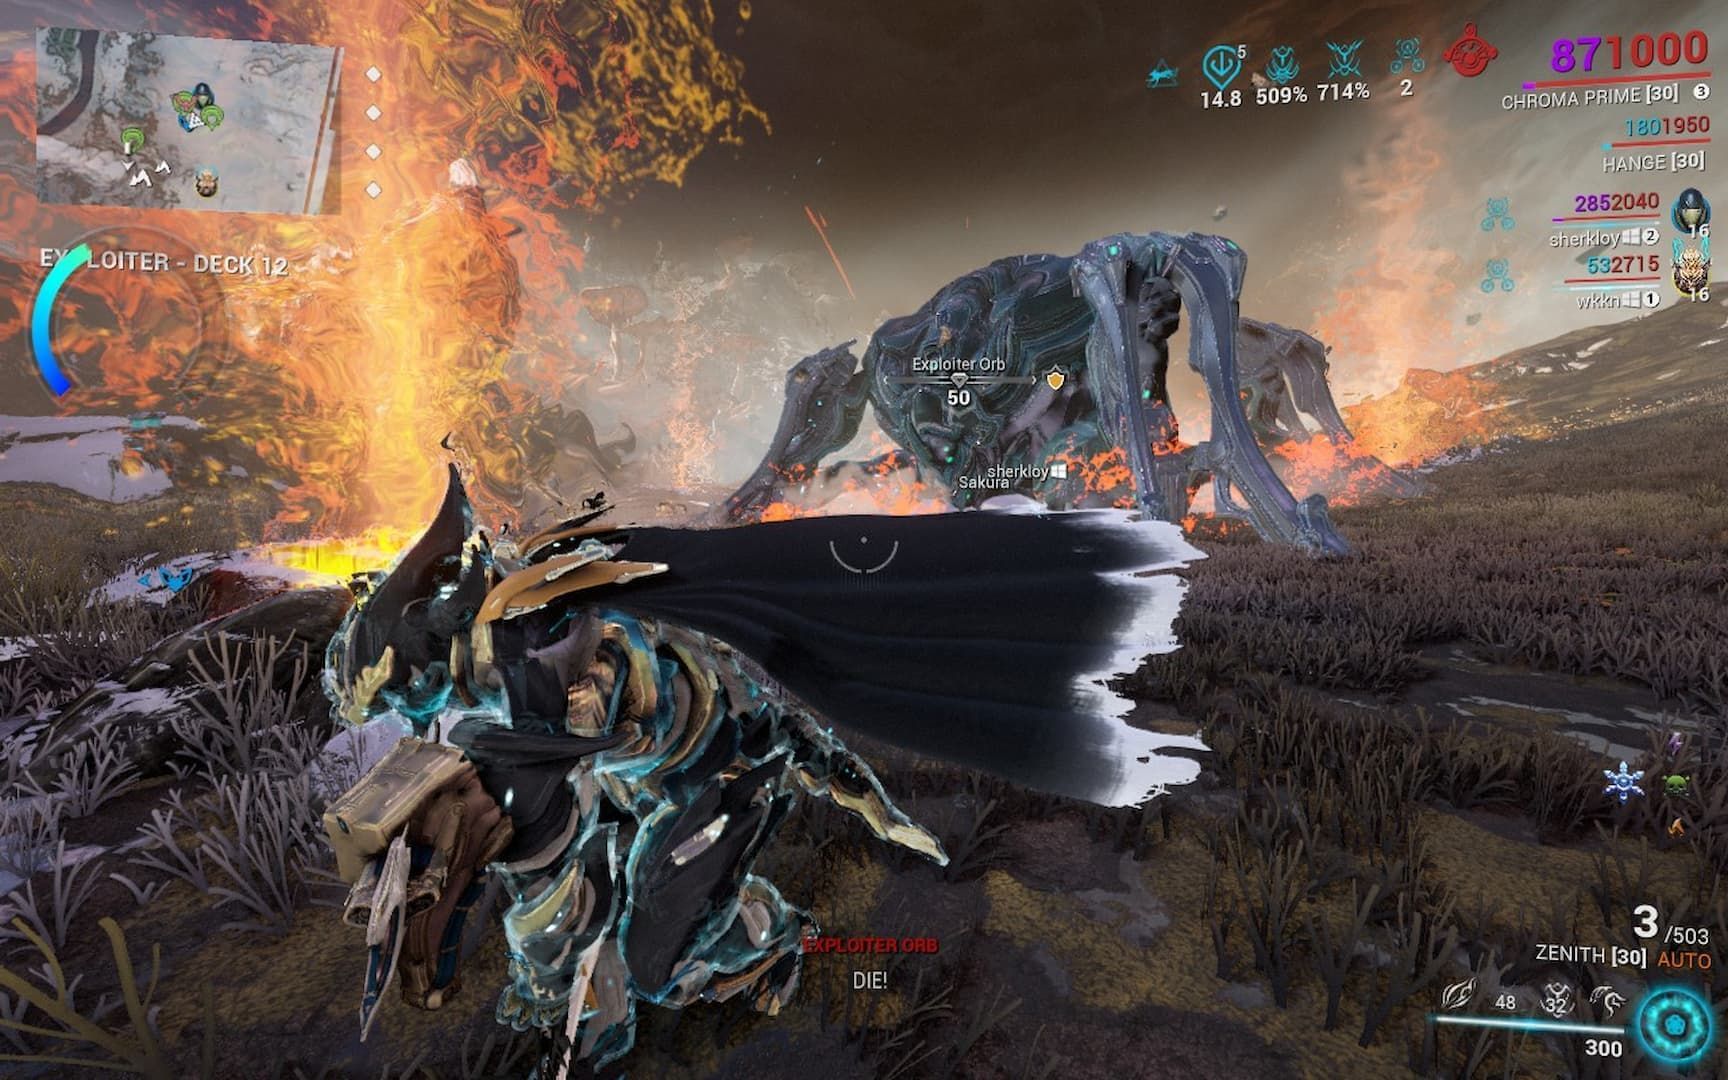
The final showdown in the Warframe Exploiter Orb boss fight takes place outdoors, next to Deck 12. A new UI widget will now display the entity's overall temperature. The goal is to max out this heat gauge.
- The heat gauge will rise on its own, albeit extremely slowly.
- Coolant Raknoids will crawl in from all sides of the valley to get under Exploiter Orb's belly. Being unable to kill them before they get there will cause the heat to fall.
- Exploiter Orb's slam attack will also reduce the heat gauge by roughly one third of its full length.
To accelerate the heat gauge, you can throw Thermia Canisters at Exploiter Orb, like in the previous phase. The Coolant Raknoids will drop Coolant Canisters if you kill them en route, which can then be instantly converted into Thermia Canisters by pitting them into the Thermia Fractures.
Once the heat gauge is full, you have to get into Exploiter Orb's melee range and press the Interact key to progress the fight, akin to the Ropalolyst boss. This will have your Warframe rip out a part of her exoskeleton, revealing a glowing vent. This can be shot to reduce Exploiter Orb's actual health.
Reducing her health by about 33% causes her to regain invulnerability and resets the heat gauge to zero. The same process has to be repeated two more times, at which point Exploiter Orb will drop a wad of loot and a Hildryn component blueprint before exploding.
Check out other guides on this game from Sportskeeda:
All Warframes tier list ||Warframe Incarnon weapons tier list || Kuva weapons tier list || All Warframe Twitch drops this week || Best stat-stick weapons in Warframe || Tenet weapons tier list || Latest Baro Ki'teer Inventory || All Warframe Promo Codes || Best weapons in Warframe for each Mastery Rank