
'%20x='0'%20y='0'%20height='100%25'%20width='100%25'%20%0A%20%20%20%20%20%20%20%20%20%20xlink%3Ahref='data:image/jpg;base64,/9j/2wBDAAYEBQYFBAYGBQYHBwYIChAKCgkJChQODwwQFxQYGBcUFhYaHSUfGhsjHBYWICwgIyYnKSopGR8tMC0oMCUoKSj/2wBDAQcHBwoIChMKChMoGhYaKCgoKCgoKCgoKCgoKCgoKCgoKCgoKCgoKCgoKCgoKCgoKCgoKCgoKCgoKCgoKCgoKCj/wgARCAAGAAoDASIAAhEBAxEB/8QAFQABAQAAAAAAAAAAAAAAAAAABgf/2gAIAQEAAAAAXyH/xAAUAQEAAAAAAAAAAAAAAAAAAAAF/9oACAECEAAAAGf/xAAUAQEAAAAAAAAAAAAAAAAAAAAF/9oACAEDEAAAACv/xAAfEAABBAICAwAAAAAAAAAAAAACAQMEBQAGBxIhIjL/2gAIAQEAAT8A17br2fQNWNc1GbhMCPo5IcQxEA7KiZb8jaqFrNGXqVe9IR80ddKCCqZdvK/ef//EABgRAAMBAQAAAAAAAAAAAAAAAAECAwAx/9oACAECAQE/ALSSSBkHd//EABgRAQEAAwAAAAAAAAAAAAAAAAMCABIx/9oACAEDAQE/ACdGvW65n//Z'%3E%3C/image%3E%3C/svg%3E)
Roblox allows players to freely personalize clothing items, allowing them to express themselves and stand out from others.
With millions of users and a game that is only growing in popularity, there are a lot of avatars that appear highly similar. Not only is there a store full of new and old items to customize the character with, but they can also make their own outfits.
Before gamers get started, they must ensure that a couple of prerequisites are met. They must ensure that they have Roblox Studio downloaded and have a Premium membership to upload the project to the platform and submit it for review.
Detailed guide to making a shirt in Roblox
Roblox T-shirt
The most straightforward clothing design is a T-shirt, which may be submitted for free and simply requires a picture placed on the front of an avatar's torso. It is a good idea if beginners start by making a T-shirt to understand the technical requirements and procedure.
Please remember that the image created for the T-shirt will only be shown on the front of the avatar. 512x512 pixels is the optimal image size.
Follow the steps below to create a T-shirt:
- Use an image editor of choice to create a design. A template is not necessary. Players can use any image editor to create the design. Pixlr is recommended for easy design creation. Image format .png, .jpg, .tga, or .bmp can be uploaded to Roblox.
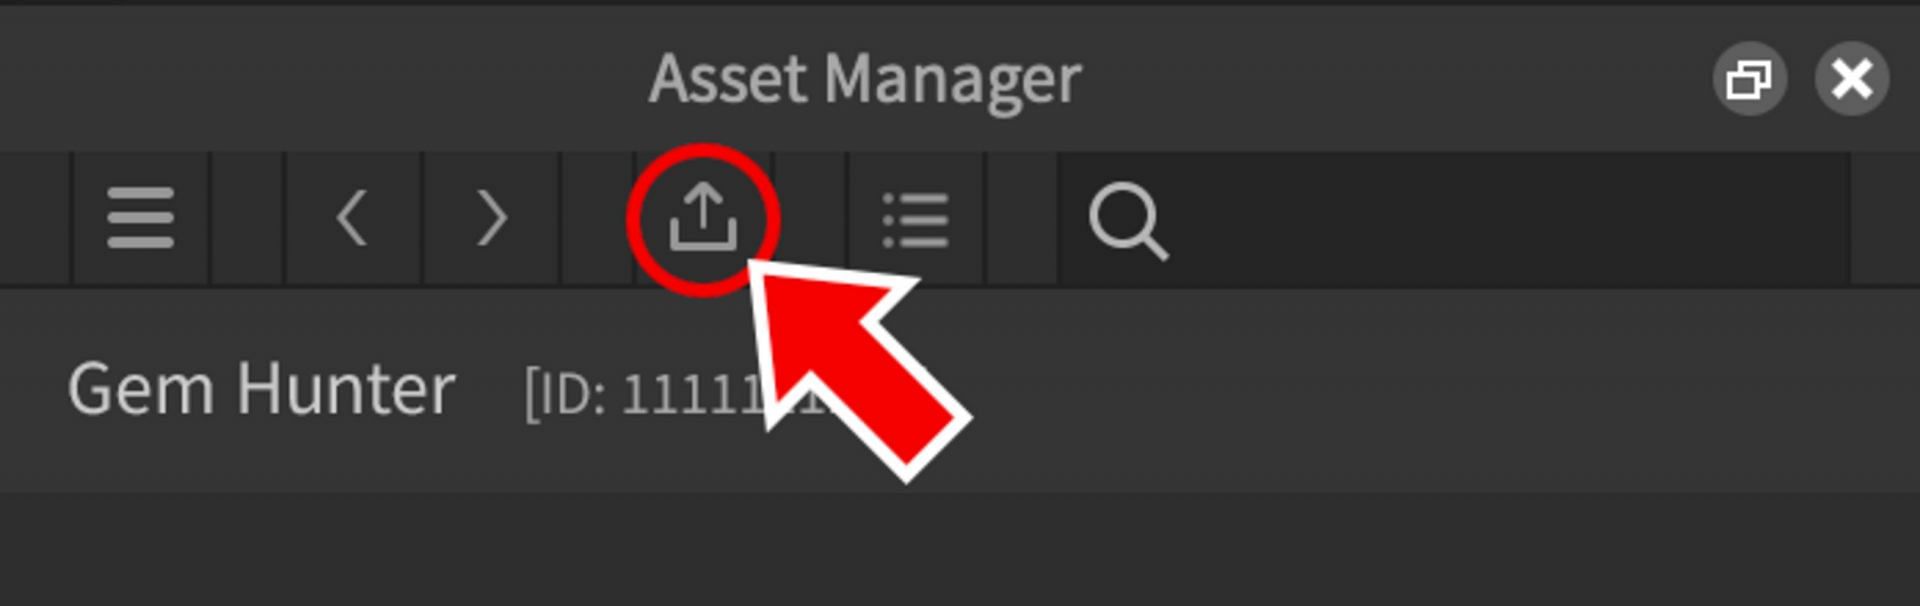
- The next step is to upload it to the platform. Head over to the Roblox Studio and select the Asset Manager option in the View tab.

- Click the Import button to import one or more photos after the window opens. Save it, and the T-shirt will be uploaded.
- The final step is to head to the Configure option. Under the General option, a description can be added, and users may choose to switch to the comment section.
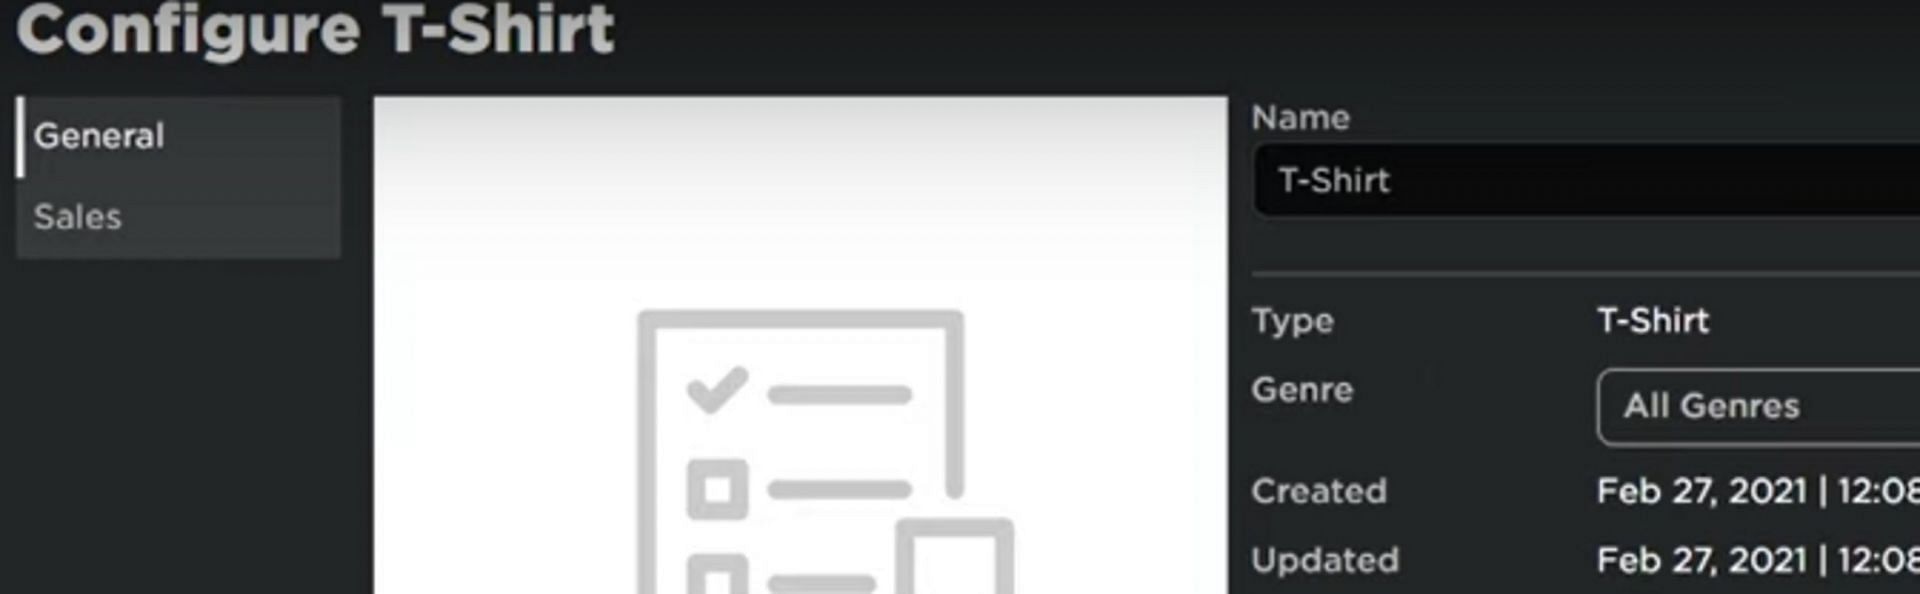
- The Sales option allows to set a price, so users must set a realistic price for possible sales. Give it 20 minutes for approval, and that's it. The T-shirt will be published.
Roblox shirt
The platform has simplified the process of creating avatar clothing by breaking it down into a series of smaller images rather than one giant image that needs to fit correctly. Shirts and pants wrap around the avatar's body, and as a result, they can appear a little more intricate than T-Shirts.
It is, however, a lot easier than it appears at first appearance if users follow this guide. To post the shirt, they will need a subscription and ten Rubox. If ready, keep reading to learn how.
Templates are used to create garments. The developers have produced simple graphic templates to use in personal creations. Once players understand how it all works, it becomes pretty simple to design clothing.
Downloading template
- To download the Shirt template, have an active Membership.
- Next, log in to the account.
- Click Create in the top menu and then click Shirts.
- Select download it here.

- Right-click the image in the pop-up window and select Save image as.
- Notice how the parts are "folded up" and wrapped around a character's body, limbs, and legs on each template. Use Roblox's size guide for each template part.
- Now it's time to create an image for the shirt. Open the template in any image editor; some free options recommended by the developers include GIMP and Paint.NET.
Upload designed shirt
- To get started, go to the Create page.
- Depending on the design, select Shirts, Pants, or T-Shirts from the left column.
- Select the file to upload by clicking Choose File.
- Give the item a unique name.
- To get 10 Robux, click the Upload button. The item will appear as one of your creations once it has been approved by Roblox and can be applied to the avatar or sold to other users.
If users are going to employ a pattern, design, or logo, they can imagine it in three dimensions and consider how it will appear. This will take some time to master, but it will be a success in the end.
Testing design
Testing the brand new clothes in Roblox Studio now that they have been published on the site!
- Open the app and create a location.
- On the top menu bar, select Plugin and then Build Rig.
- From the popup menu, select a rig type. In the office, players will see an avatar named Dummy. The Block Rig is my choice.
- Players can alter the size and direction of their Dummy by clicking MODEL and using the Move, Scale, and Rotate buttons.
- Locate Dummy in the Explorer window on the right side, hover over it, and click the + button. Depending on the outfit type, use a Shirt, Pants, or ShirtGraphic (T-Shirt) object.
- Find and pick the new Clothing or Shirt Graphic (T-shirt) item inside the dummy.
- Click inside the property's row in the Properties window, located beneath the Explorer window.
- Select the image to be uploaded by clicking Add image.
- Players should have a peek at the design now.
Selling shirt
Users can sell their creations to Robux once they are proficient enough. This can help them earn some extra cash for the game. To sell items, one needs to be a member of the Builder's Club.
- From the Create window, choose the shirt.
- To access Settings, click the cog icon in the top right corner.
- Check the Sell This Item option under Configure.
- Check the Robux box and type in the amount.
- To put it up for sale, select Save.
The platform receives a share of the sale when an item sells. This cut is 70/30 for T-Shirts, Shirts, and Pants, with the clothes designer receiving 70% of the money. When an item is sold as part of an experience, the creator gets 60% of the revenue. The remaining 10% goes to the Experience owner.

Check out this A-Z list of all of our Roblox Codes 2025