
'%20x='0'%20y='0'%20height='100%25'%20width='100%25'%20%0A%20%20%20%20%20%20%20%20%20%20xlink%3Ahref='data:image/jpg;base64,/9j/2wBDAAYEBQYFBAYGBQYHBwYIChAKCgkJChQODwwQFxQYGBcUFhYaHSUfGhsjHBYWICwgIyYnKSopGR8tMC0oMCUoKSj/2wBDAQcHBwoIChMKChMoGhYaKCgoKCgoKCgoKCgoKCgoKCgoKCgoKCgoKCgoKCgoKCgoKCgoKCgoKCgoKCgoKCgoKCj/wgARCAAGAAoDASIAAhEBAxEB/8QAFQABAQAAAAAAAAAAAAAAAAAAAAX/xAAVAQEBAAAAAAAAAAAAAAAAAAACBP/aAAwDAQACEAMQAAAAnQA2f//EAB8QAAICAgEFAAAAAAAAAAAAAAECAwUEEQAGEjKBwf/aAAgBAQABPwCy6rsJazHynKvDEy9x0Fdox65Nd5rzOwlk0WJ89fOf/8QAFxEBAAMAAAAAAAAAAAAAAAAAAQASMf/aAAgBAgEBPwCyYz//xAAWEQEBAQAAAAAAAAAAAAAAAAABEQD/2gAIAQMBAT8AlUd//9k='%3E%3C/image%3E%3C/svg%3E)
Valorant’s latest map, Sunset, has various twists and turns that can be utilized perfectly by Raze. Be it the Boombot or the Paint Shells, Raze can quickly clear out and take map control with the explosive ability kit. This Agent has been on the roster from the beginning in Riot’s shooter title and is one of the most useful Duelists on the new map.
Sunset features several low-rise walls and ceilings that can be exploited for lineups. These are usually best for Agents like Sova, Viper, Brimstone, and Killjoy. However, the projectile speed and dispersion of Raze’s grenade can be used to deal damage from the same areas. Valorant is a tactical shooter at the core and proper utilization of abilities is necessary to secure rounds.
Raze’s high mobility with blast packs allows the playerbase to take quick action after deploying one of the abilities.

Best Raze Paint Shells on Valorant's Sunset
1) A-Lobby to A-Elbow
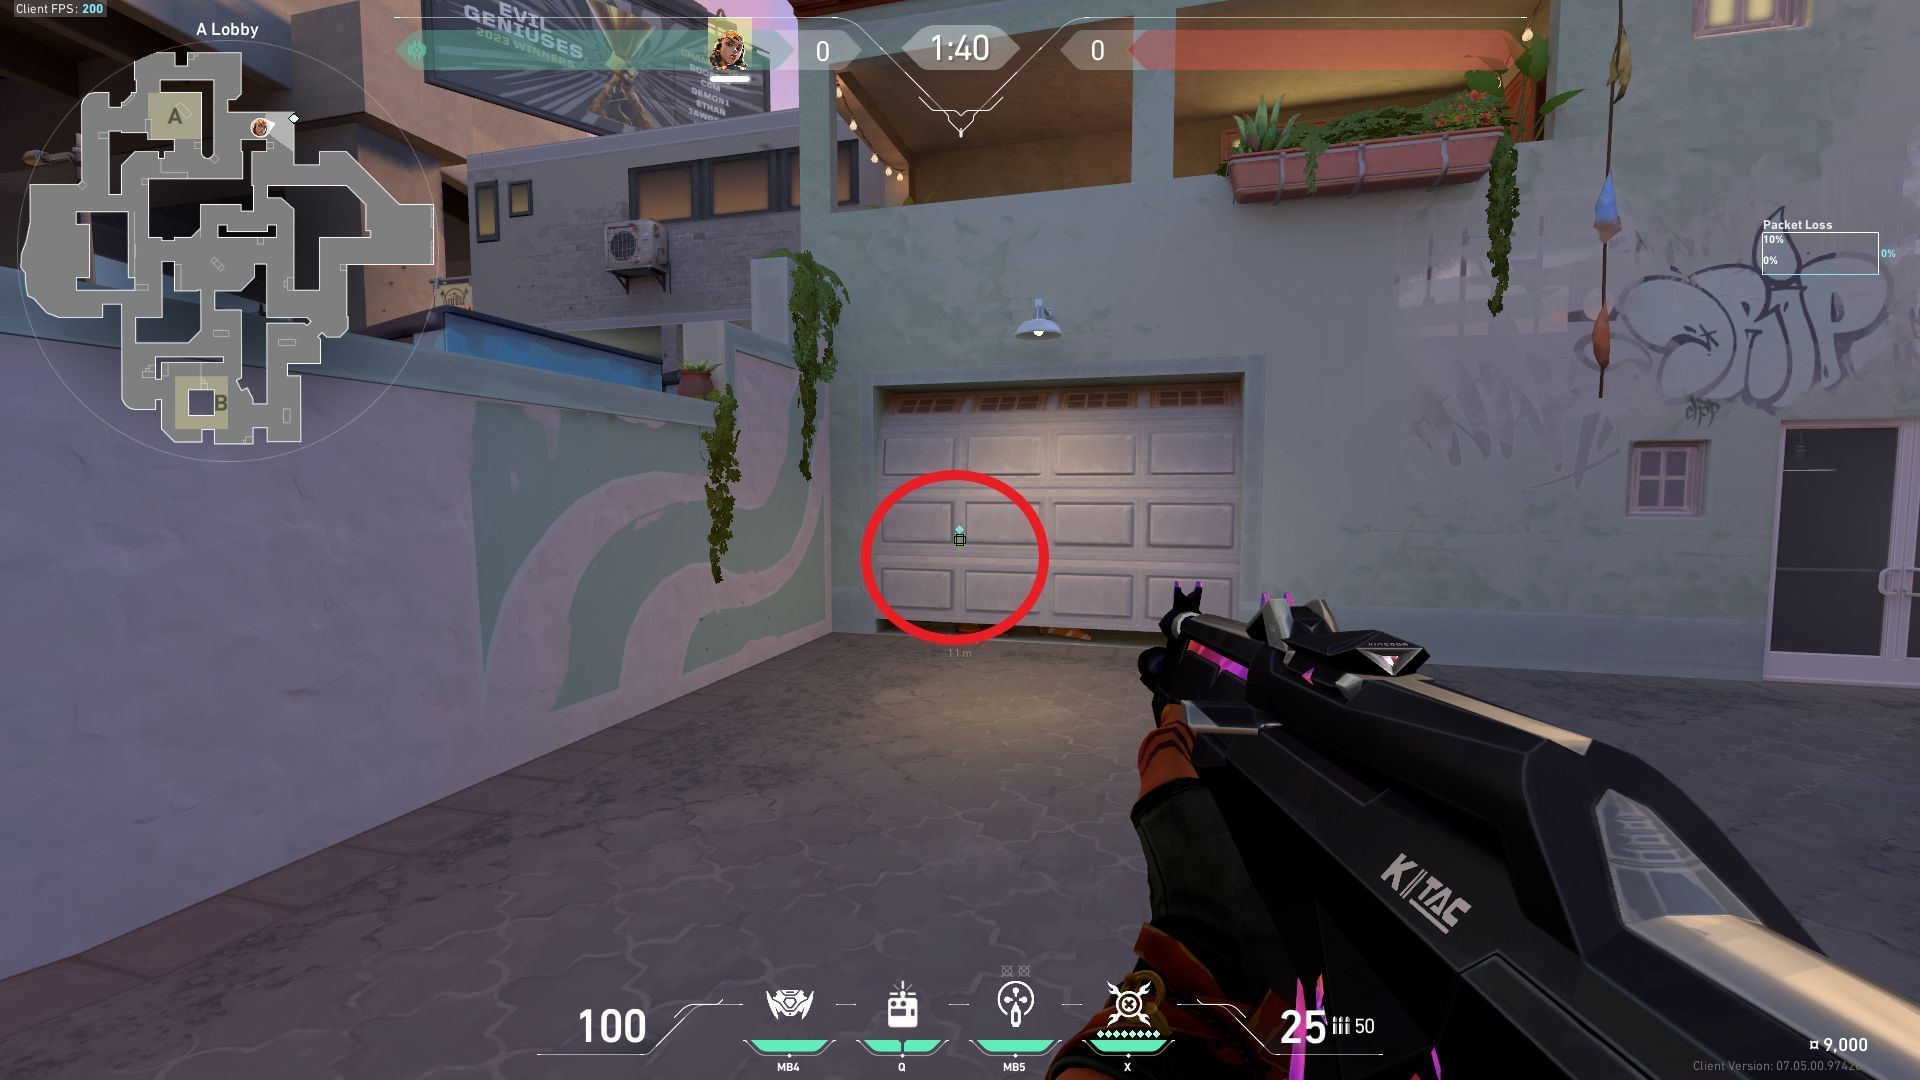
Position yourself in the middle of the two left-side box designs of the garage door in the A-Lobby area and look towards the row of windows present on top of the A-Elbow wall.
Place your crosshair above the second window of the upper row (shown with a circle) and deploy the grenade with a simple left-click throw.
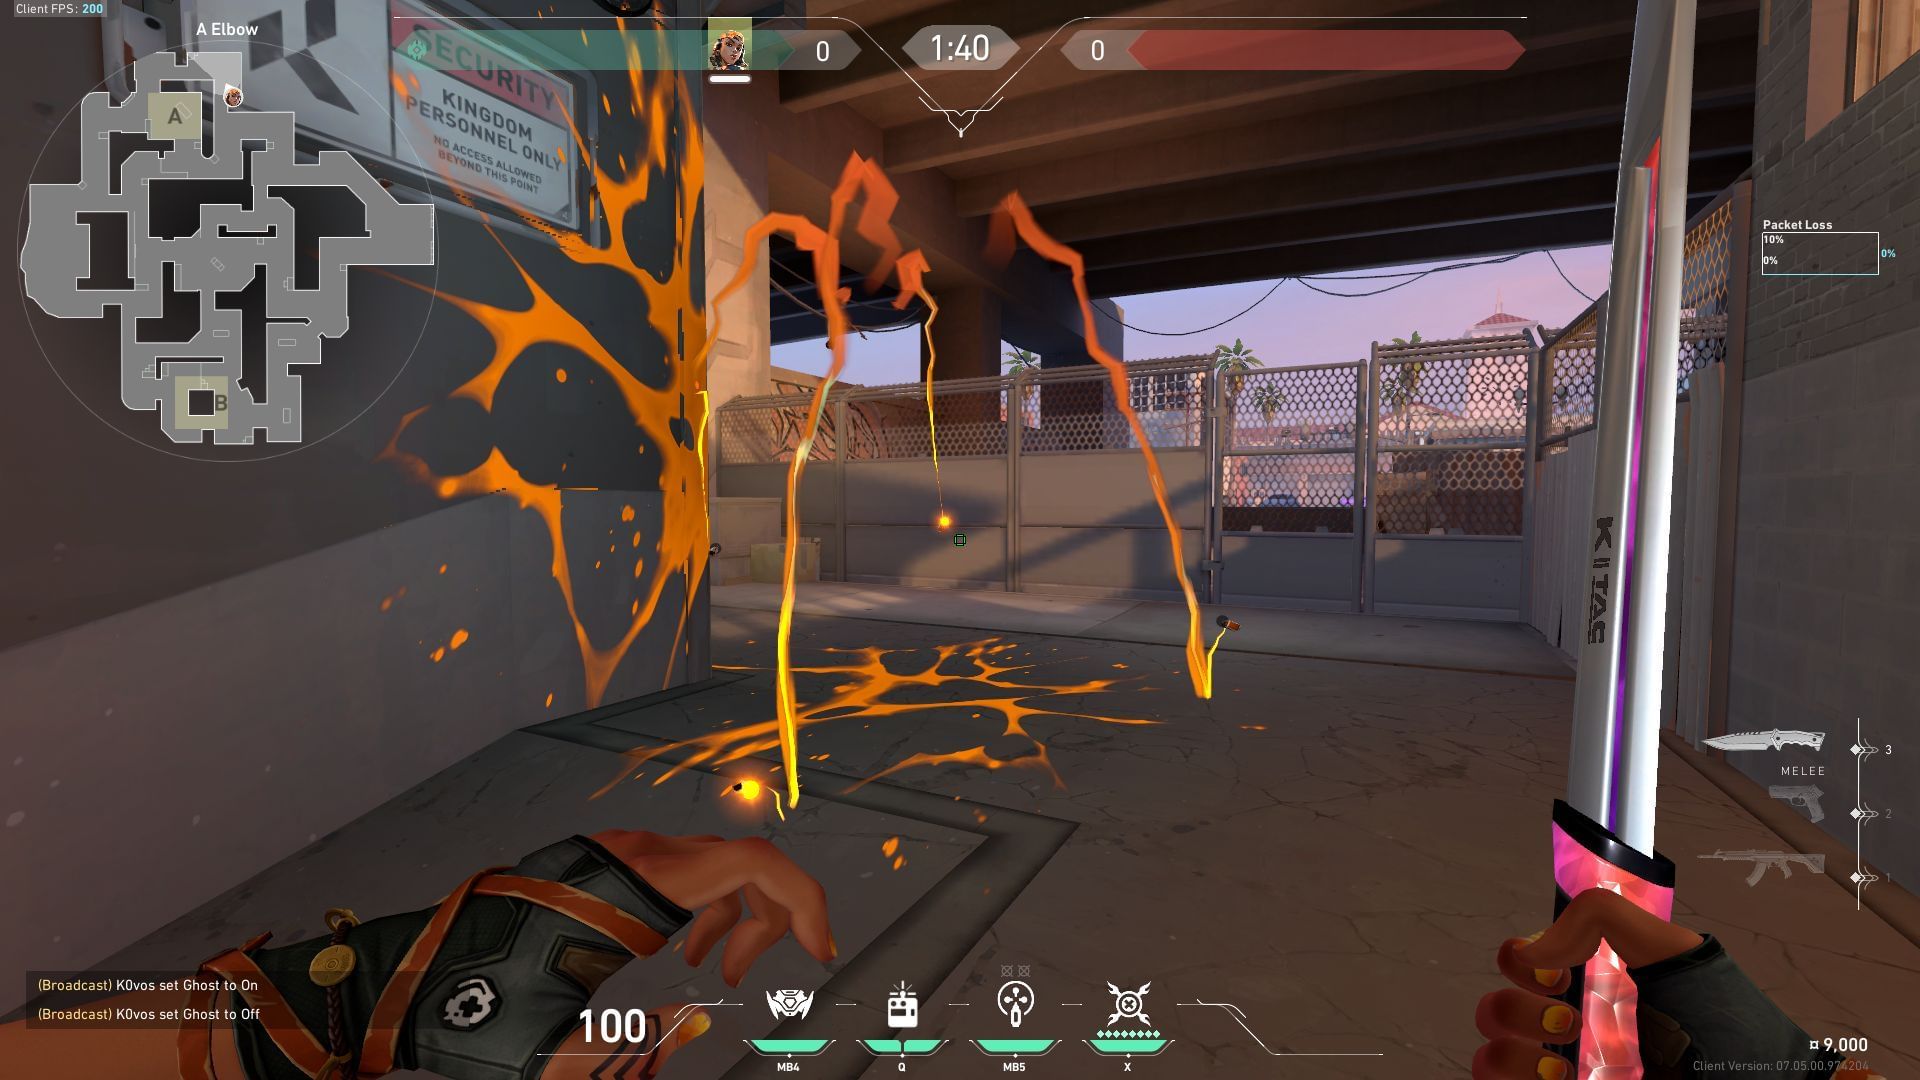
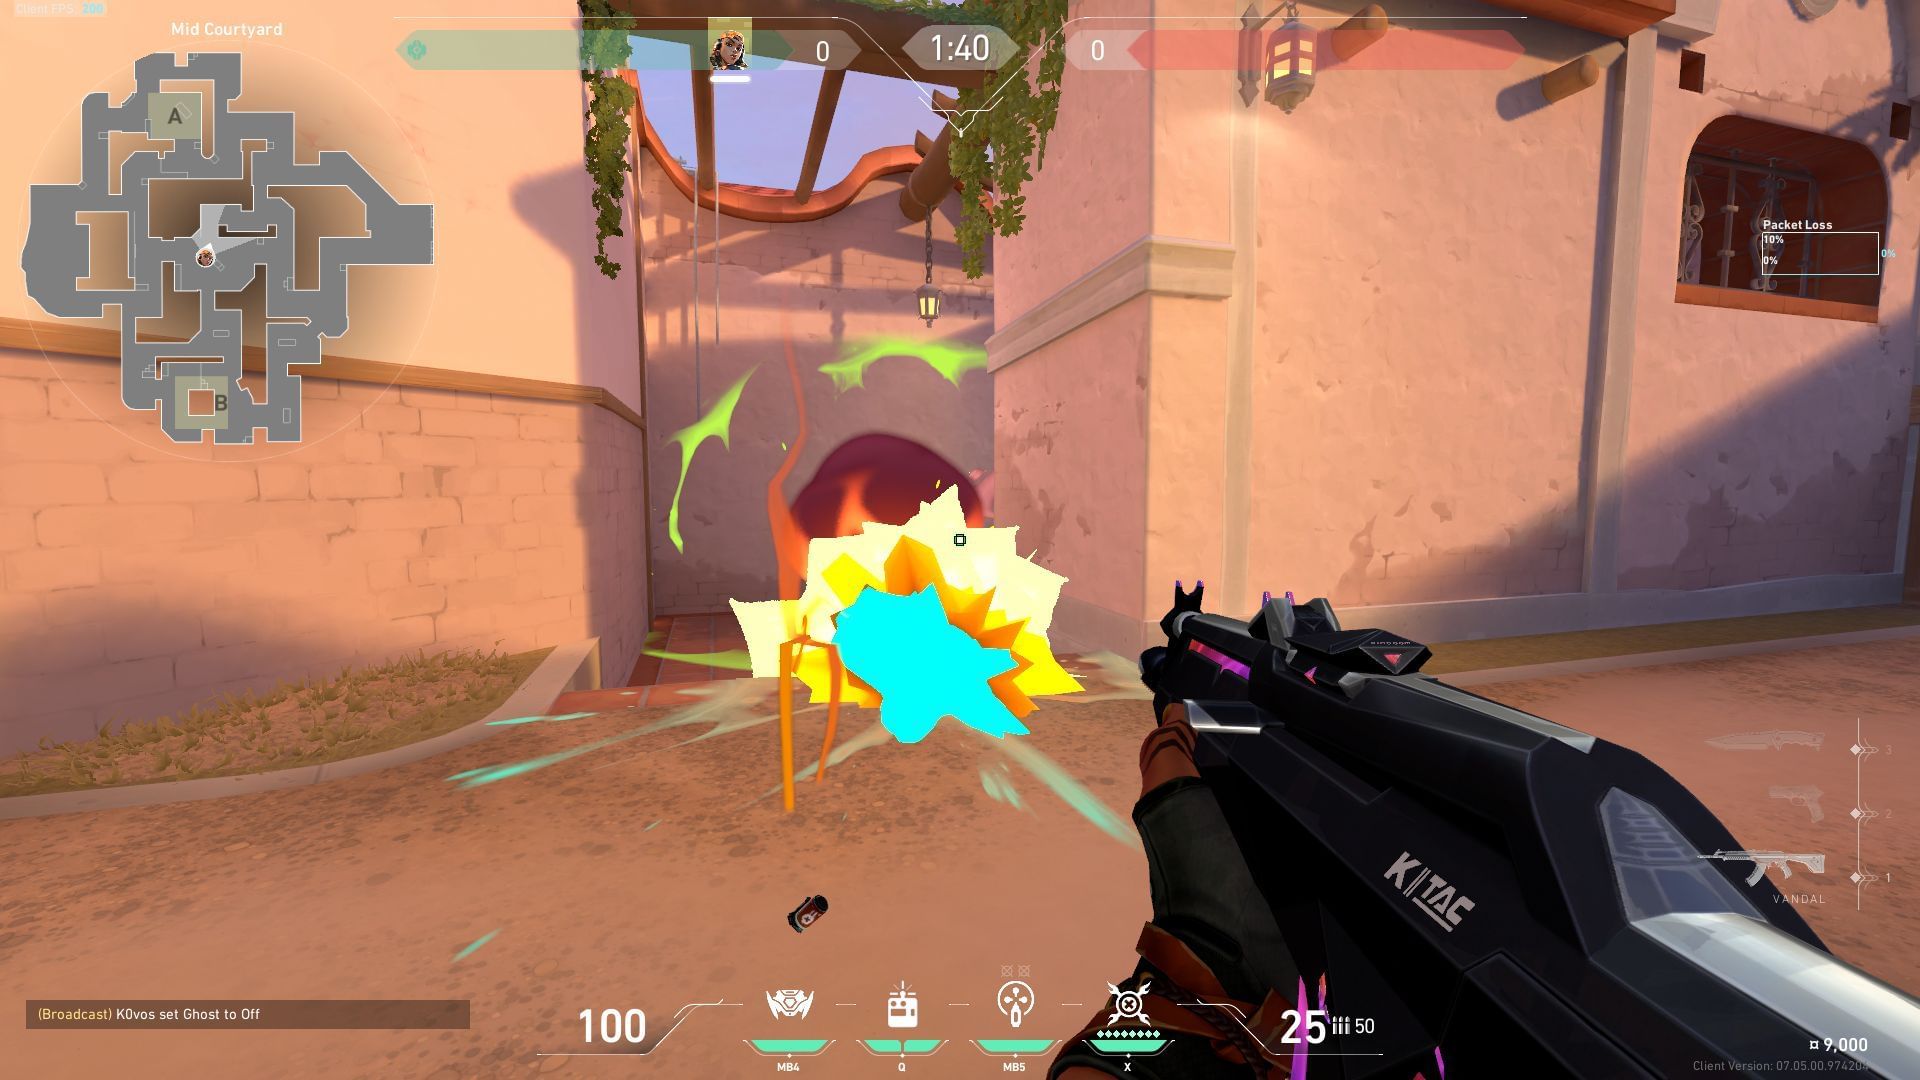
The nade will bounce off the A-Elbow wall and detonate near the entrance to clear out anyone trying to push or hold the angle (shown in the image).
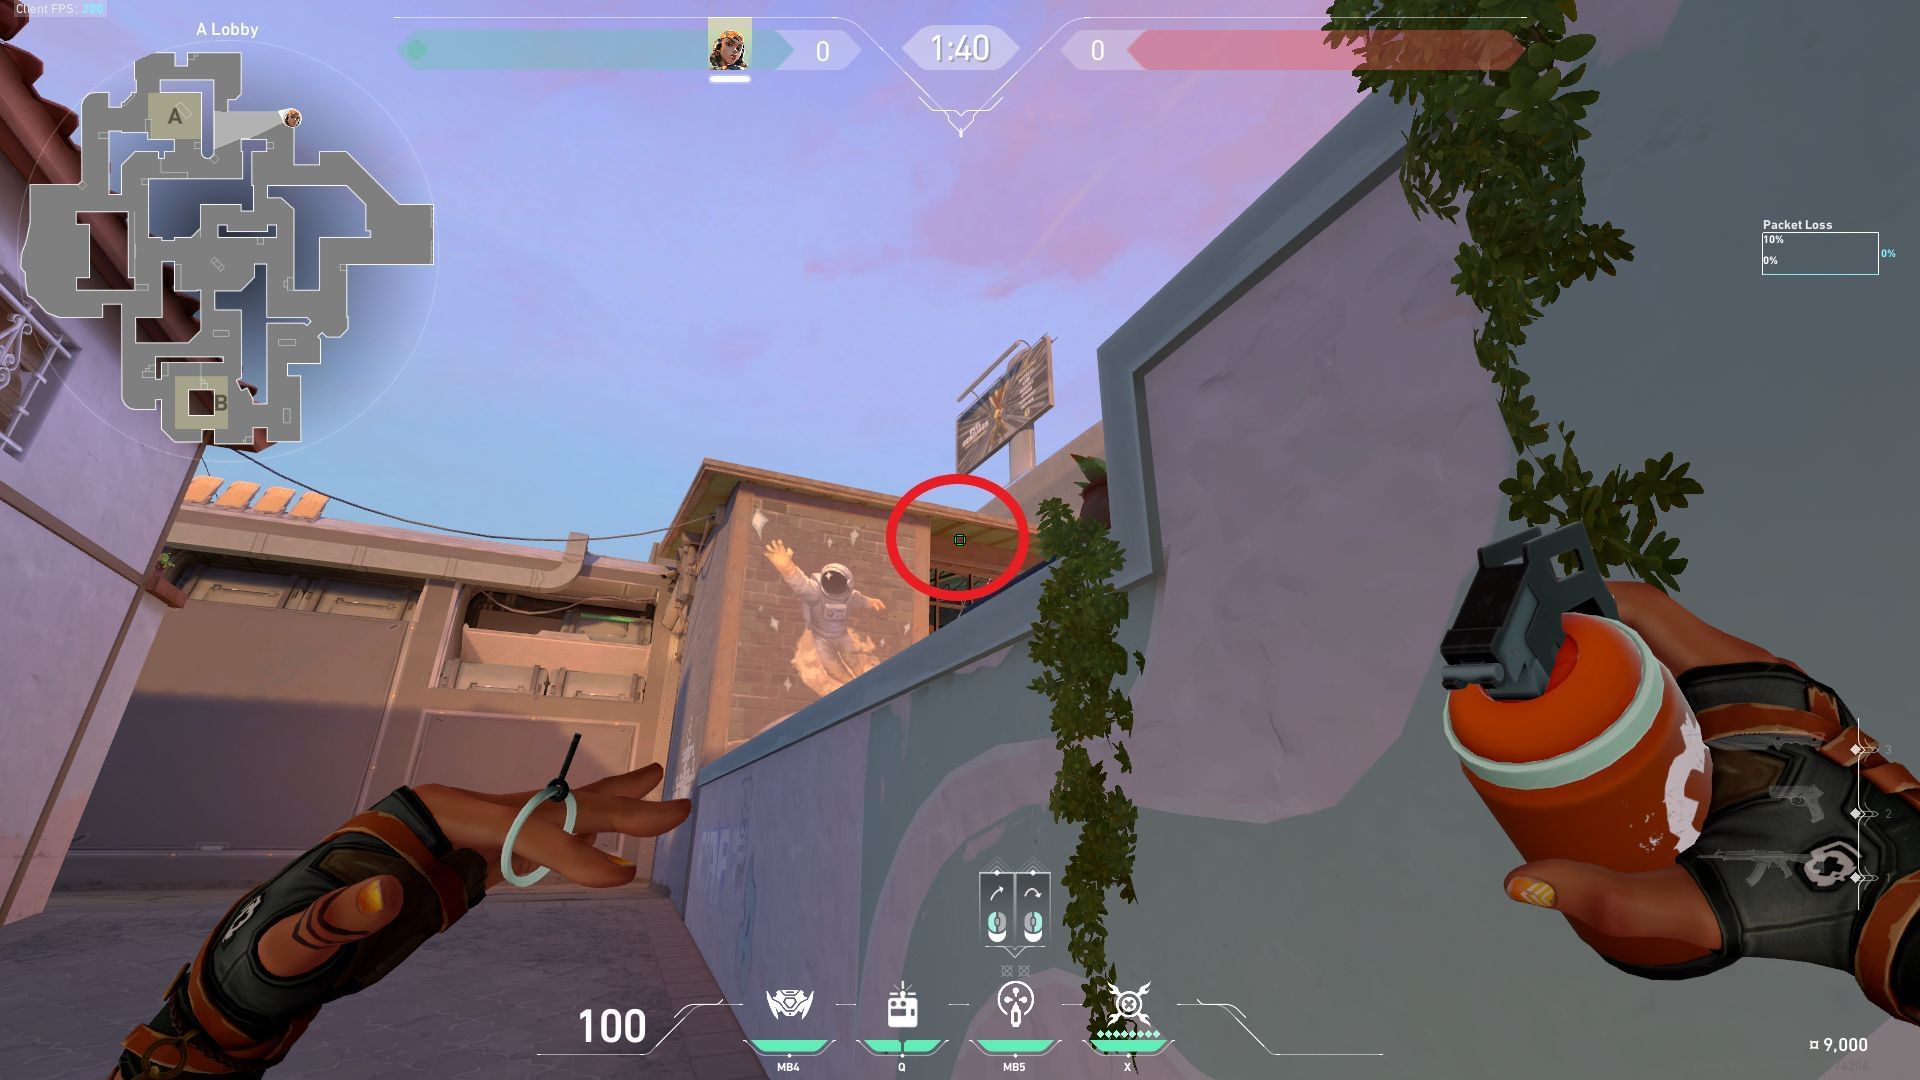
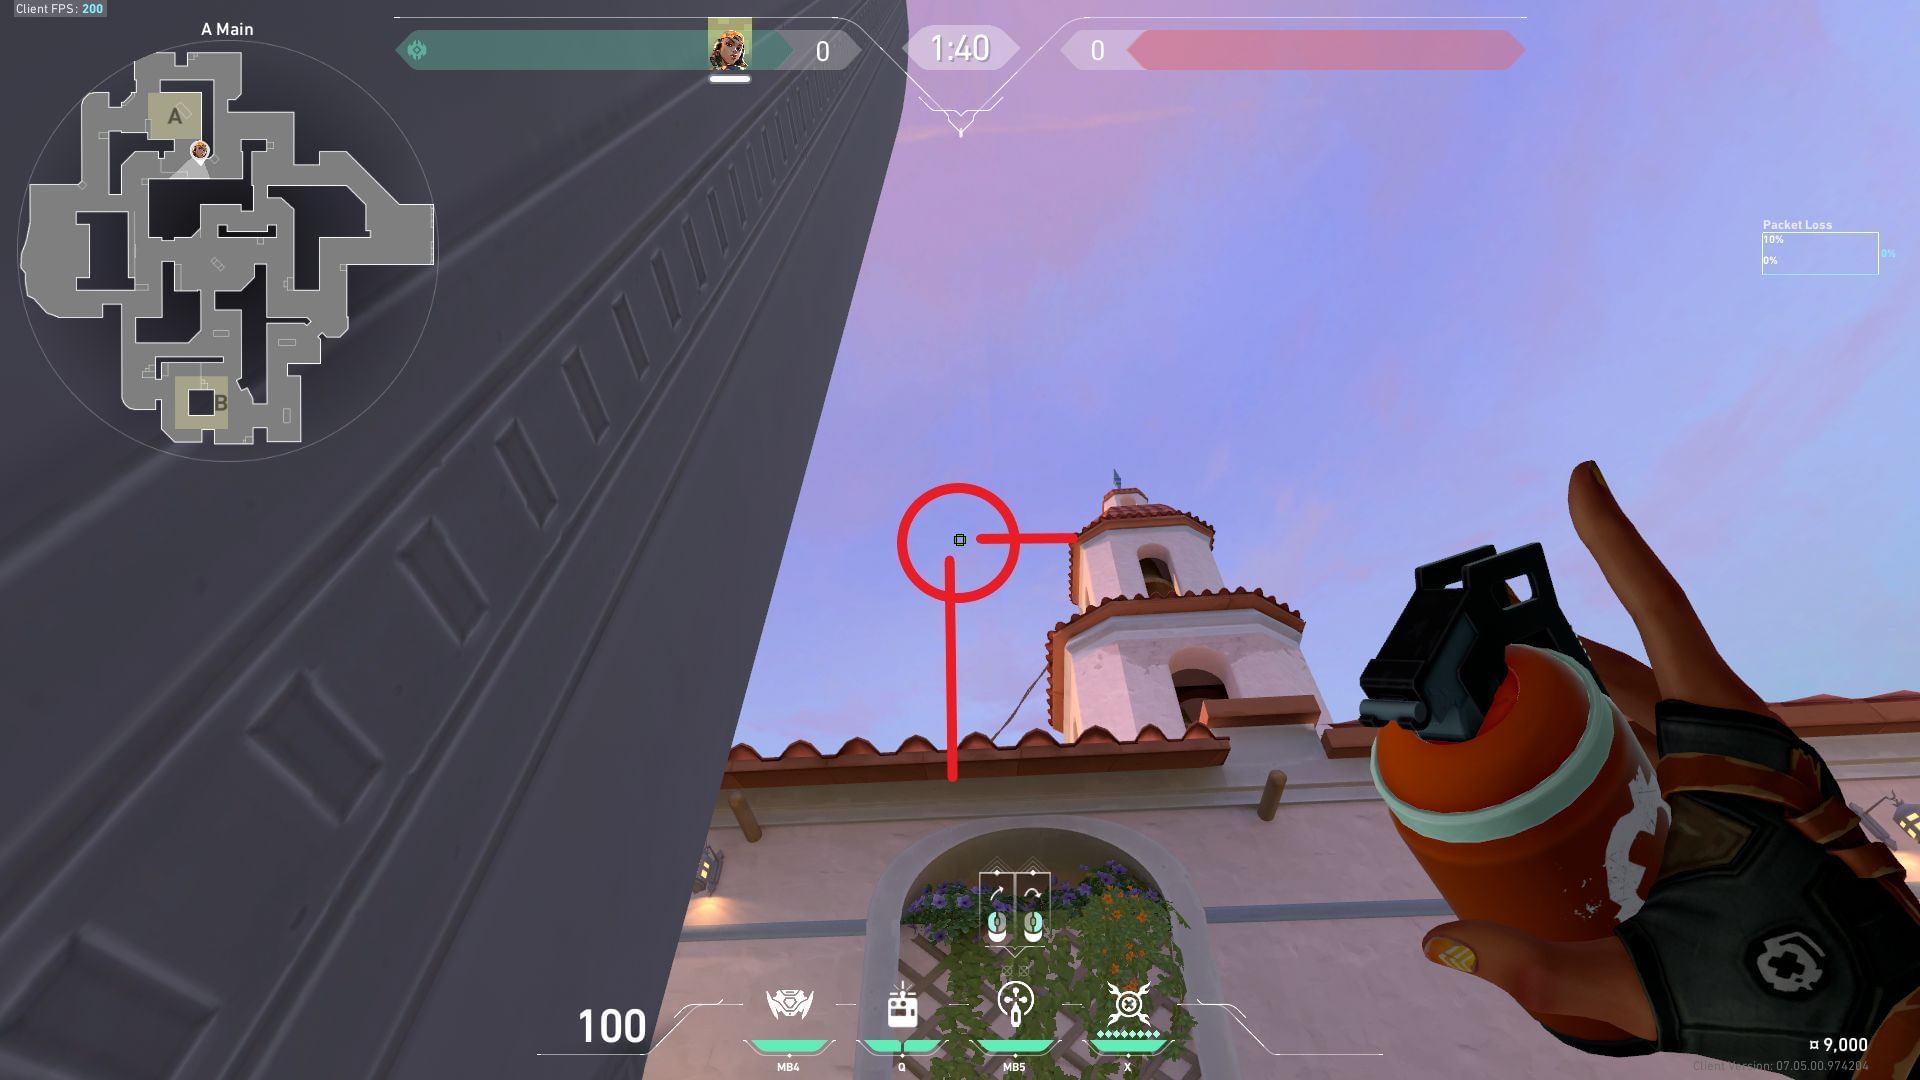
2) Attacker Side Tunnel to A-Main
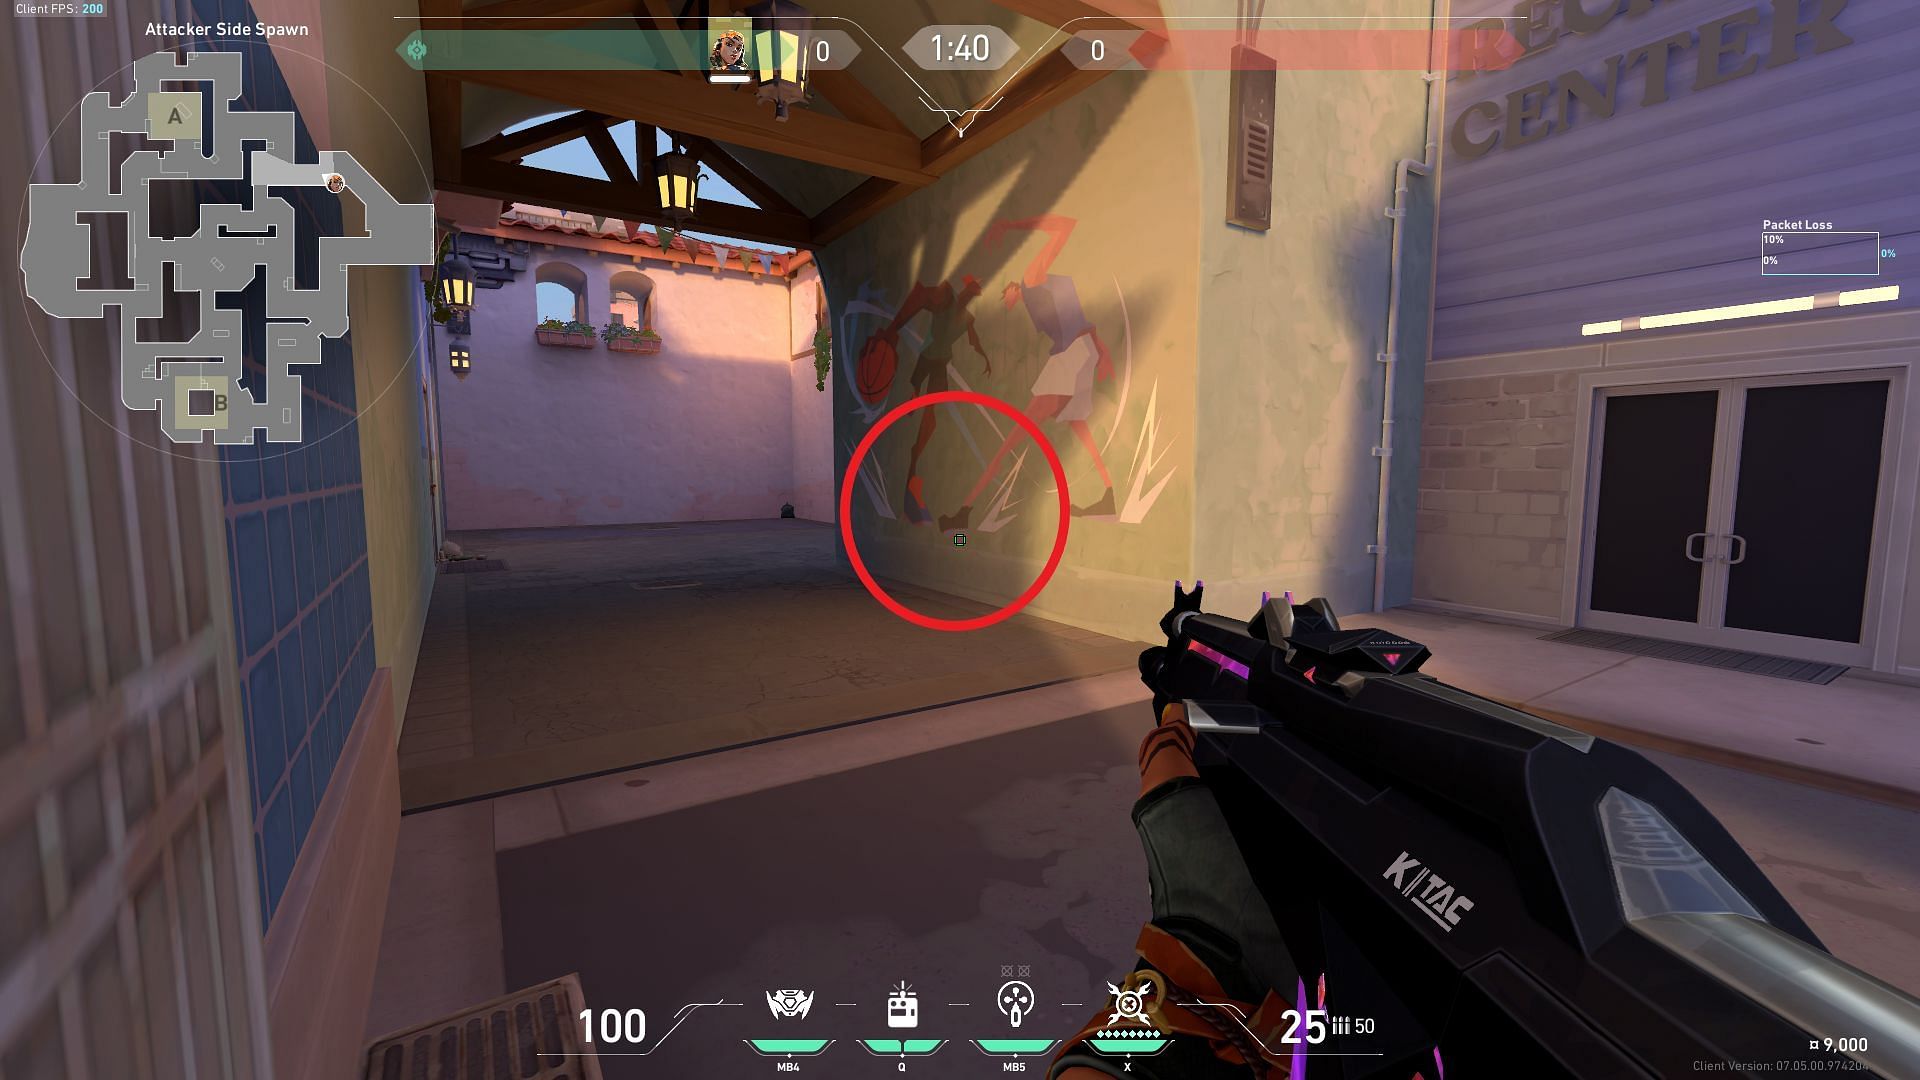
Place yourself inside the tunnel connecting Attacker Spawn and A-Lobby, as shown in the image. Look towards the two windows present on top of the A-Lobby wall with your paint shells ready.
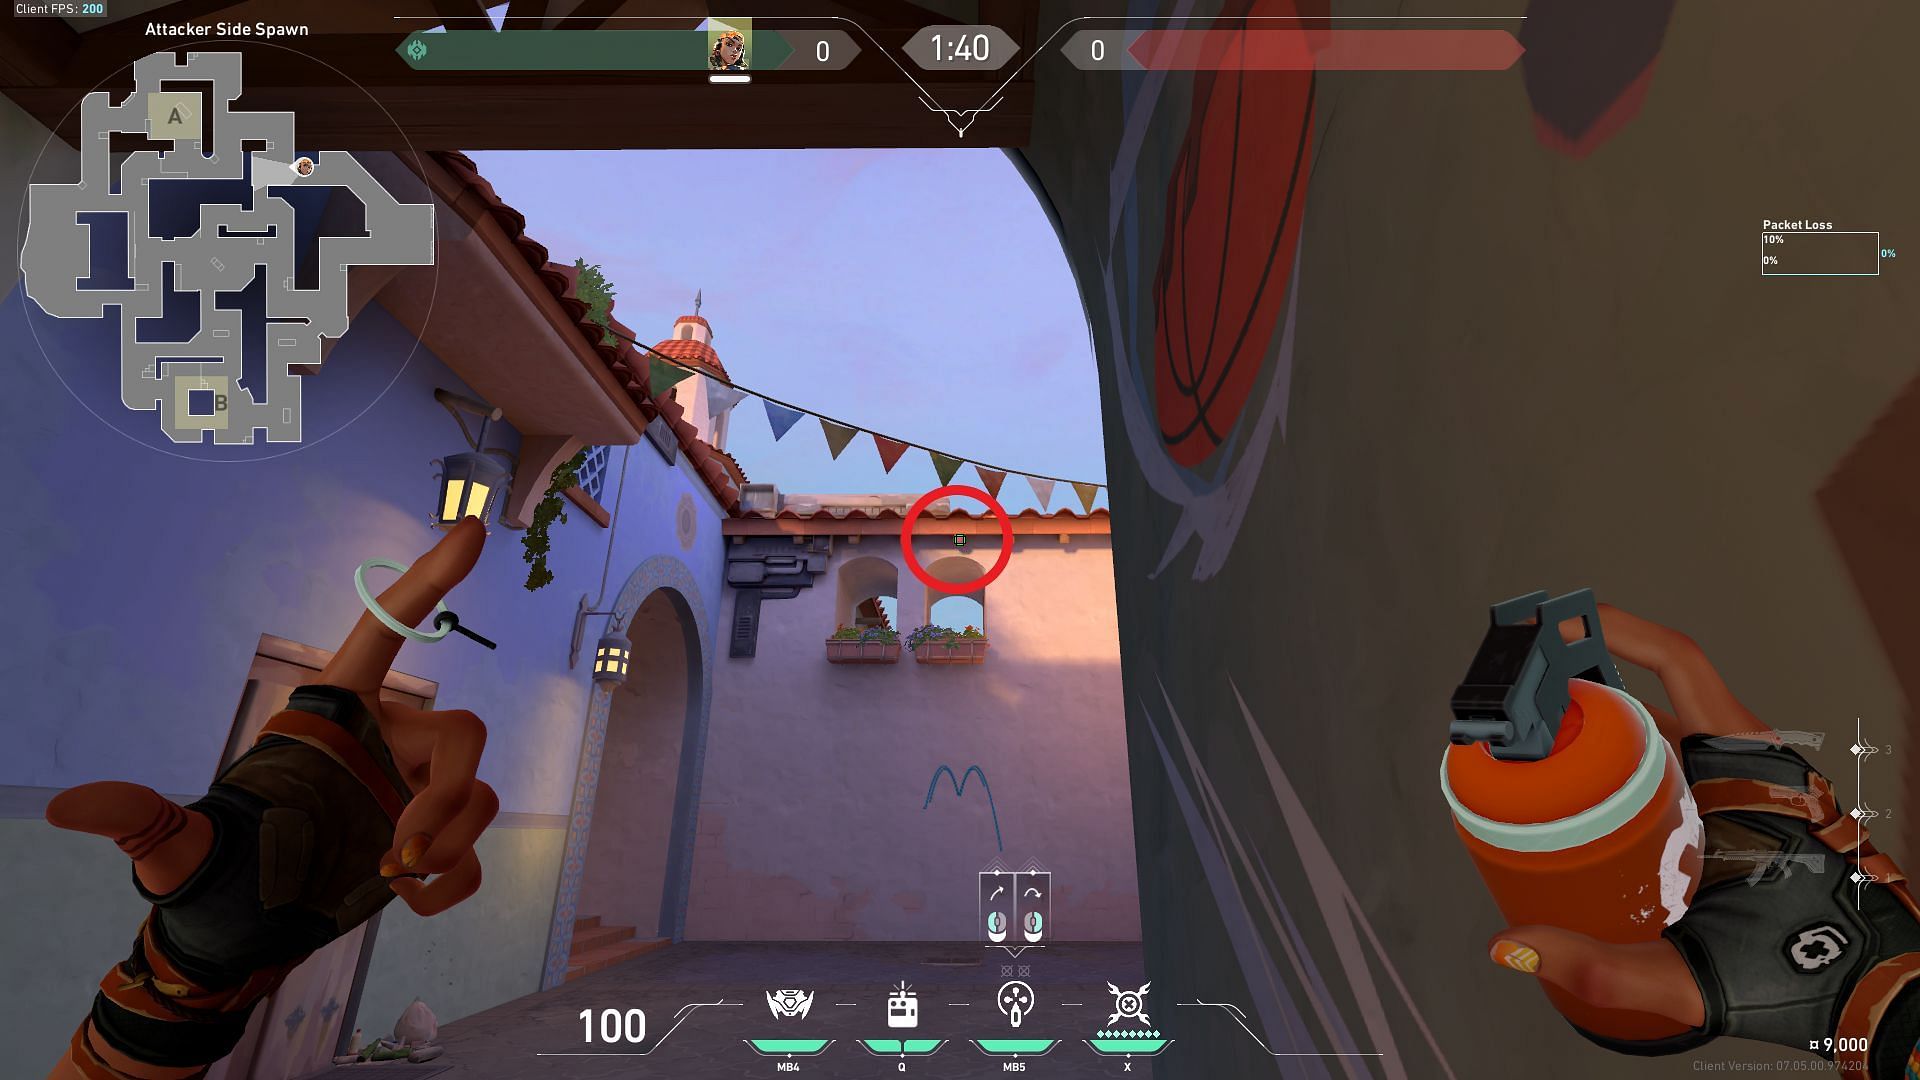
Place your crosshair on the roof ledge above the right window (shown with a circle) and throw the nade while running forward.
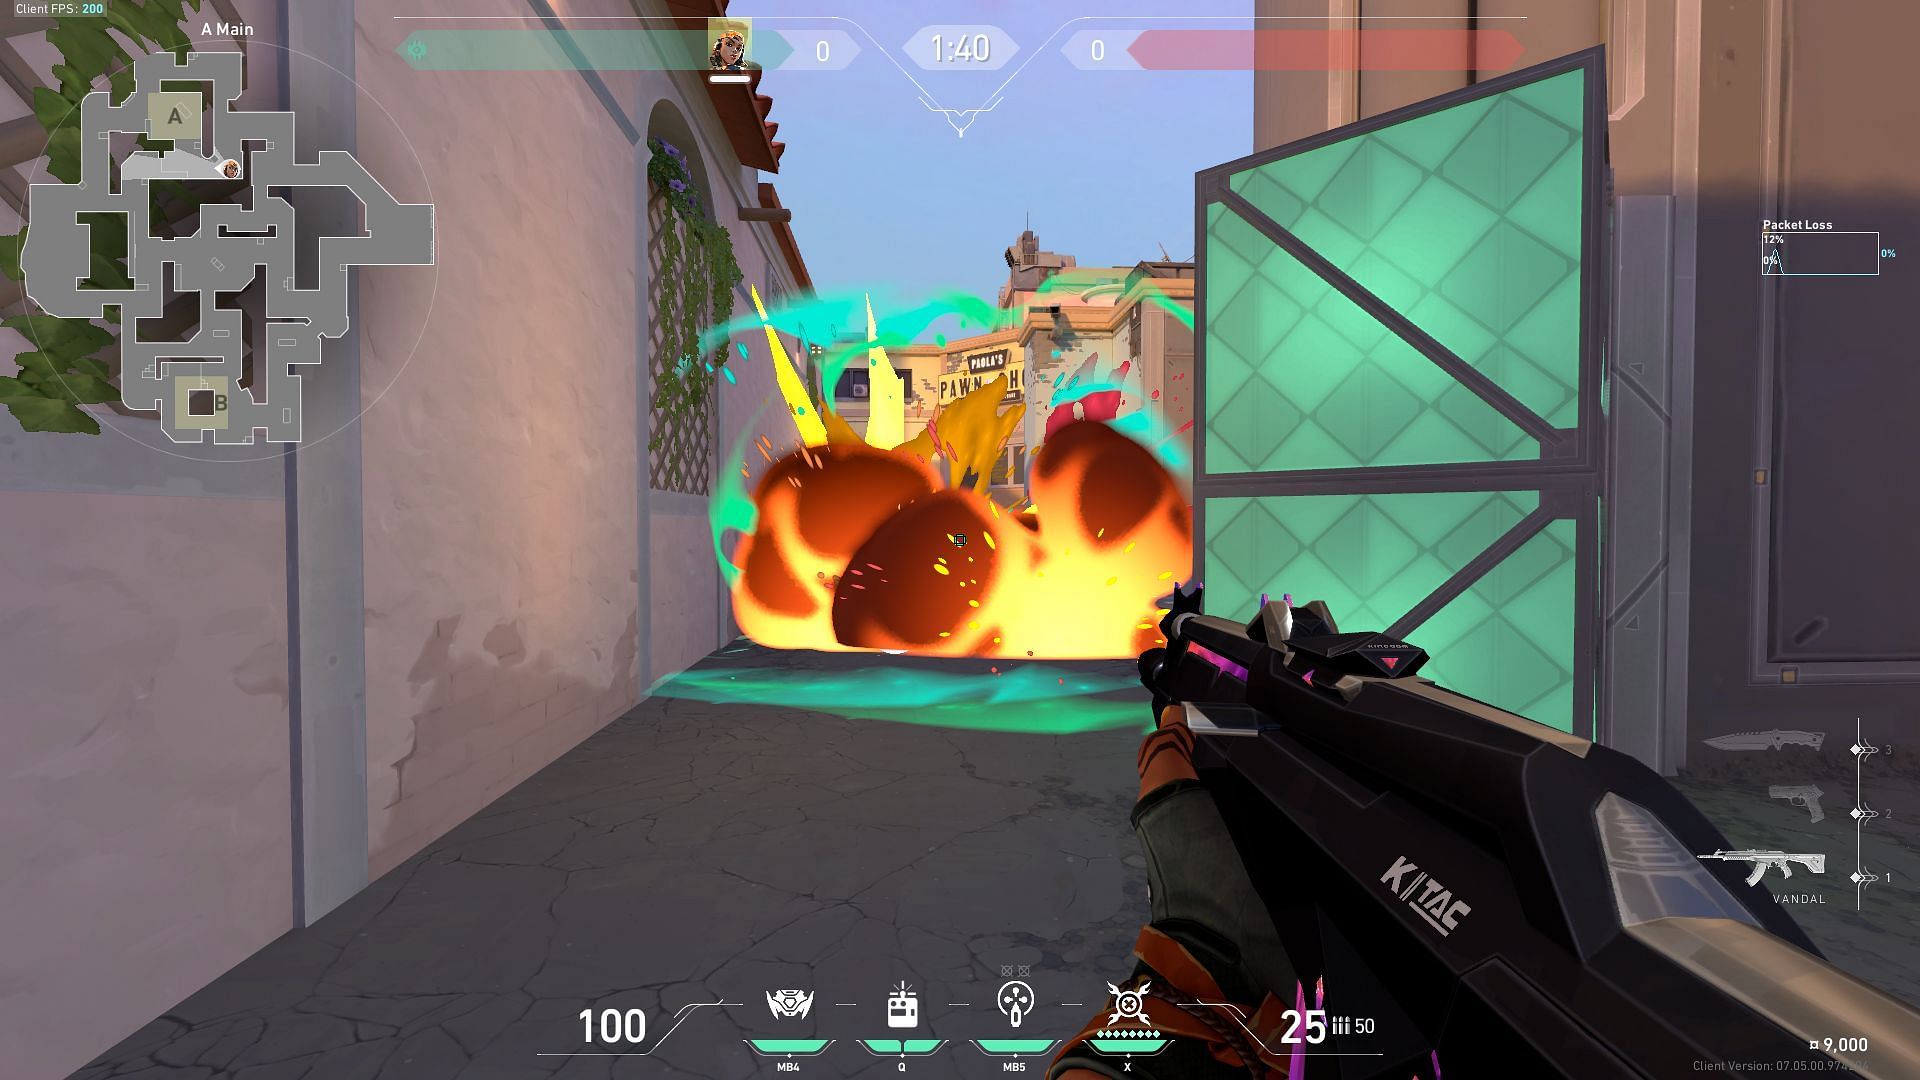
The grenade will pass through the window and land behind the Radianite boxes in A-Main to deter anyone from pushing or holding the angle (shown in the image).
3) B-Boba to B-Site
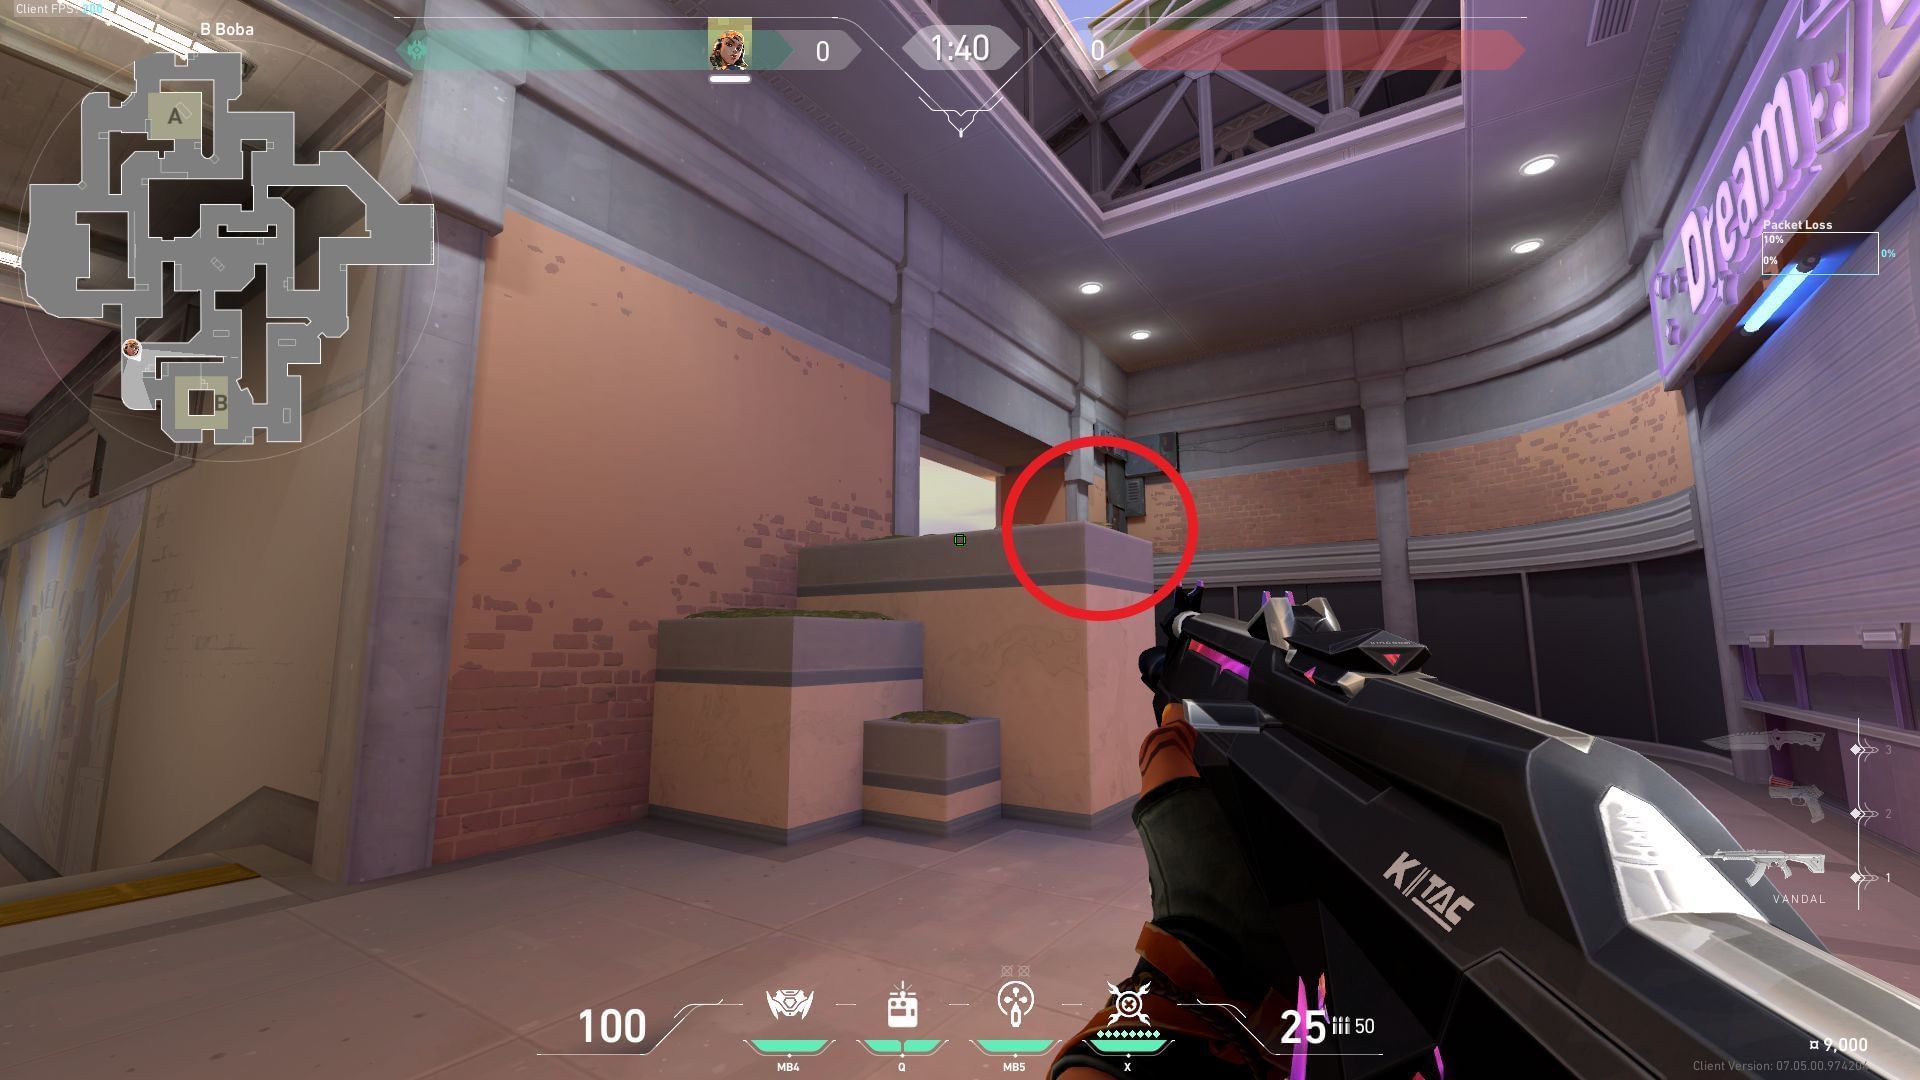
Position yourself on top of the boxes present inside B-Boba and look towards the B-Site. Move to the outer edge, taking out your grenade ability, and point to the wall near the B-Site stairs.
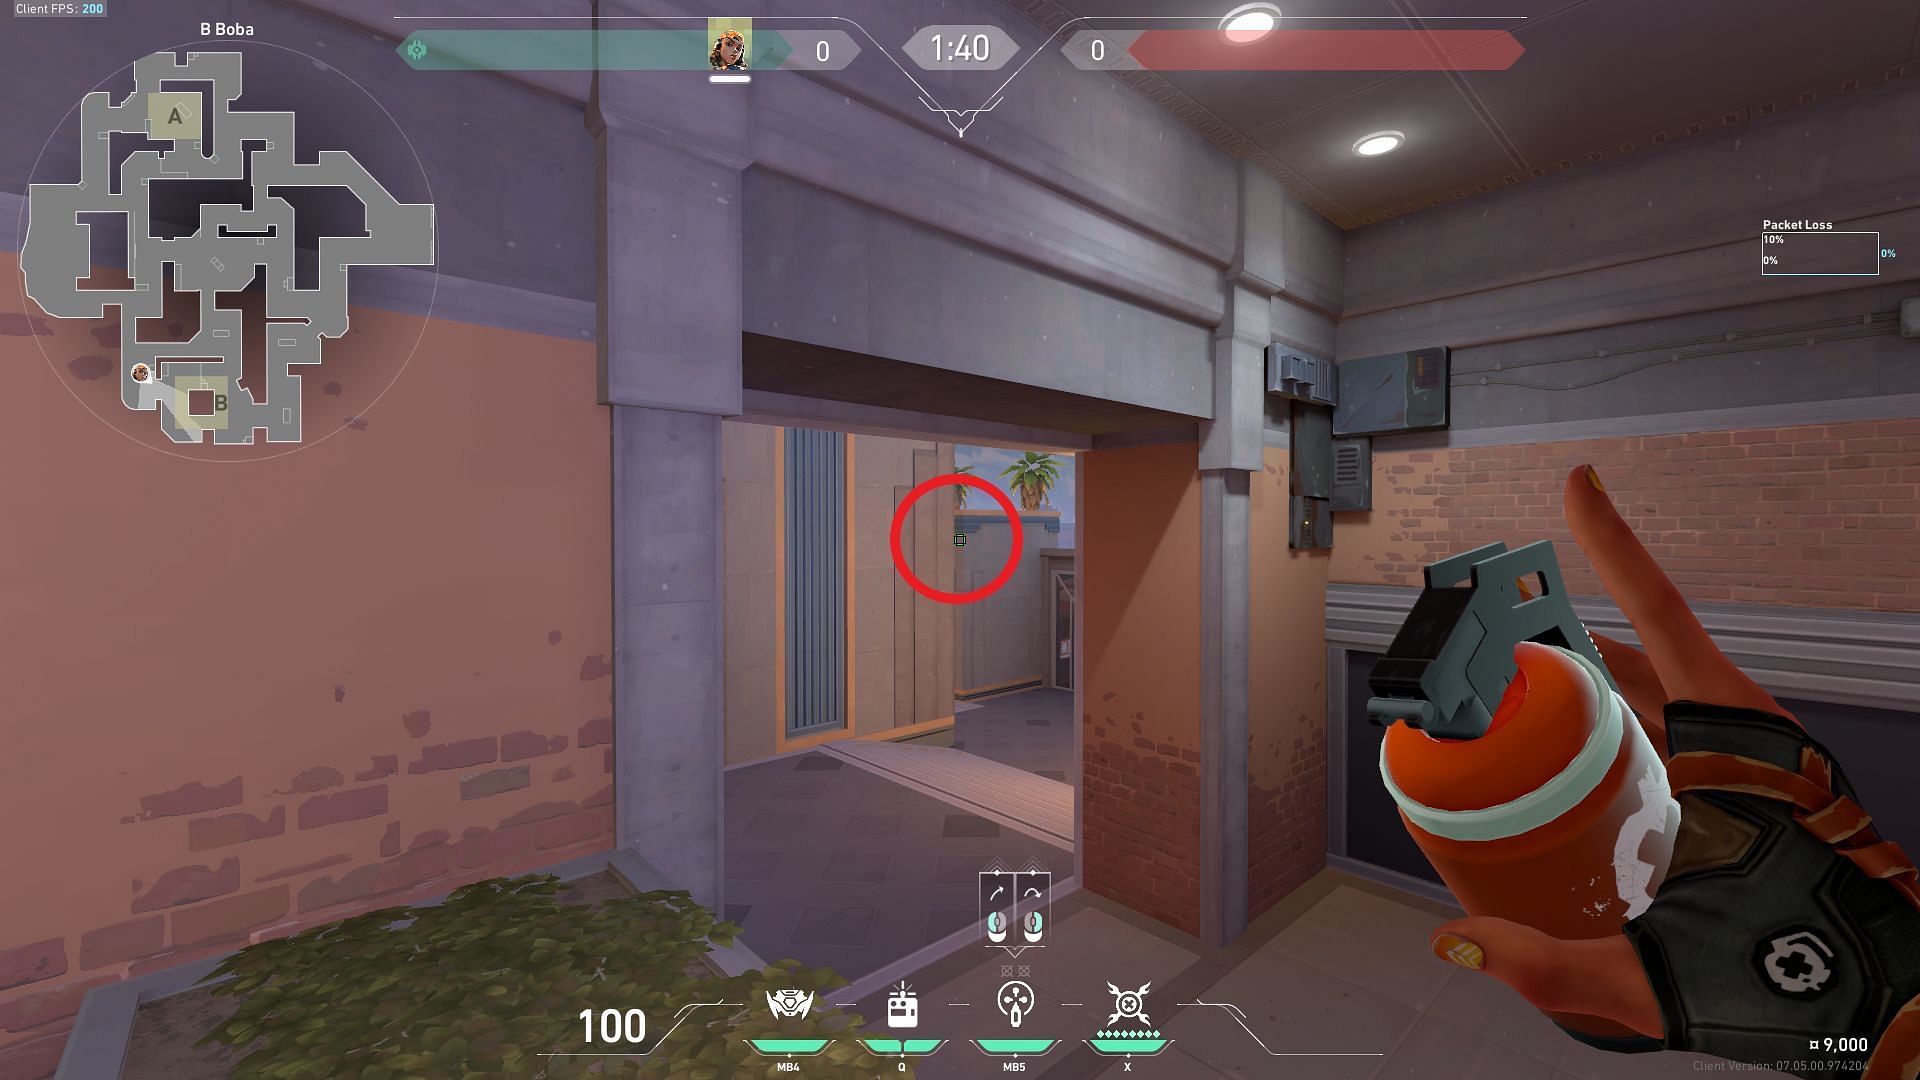
Place your crosshair directly below the blue ledge of the B-Site wall (shown with a circle) and throw the nade while moving forward. It's important to note that you should throw the nade before falling off the boxes.
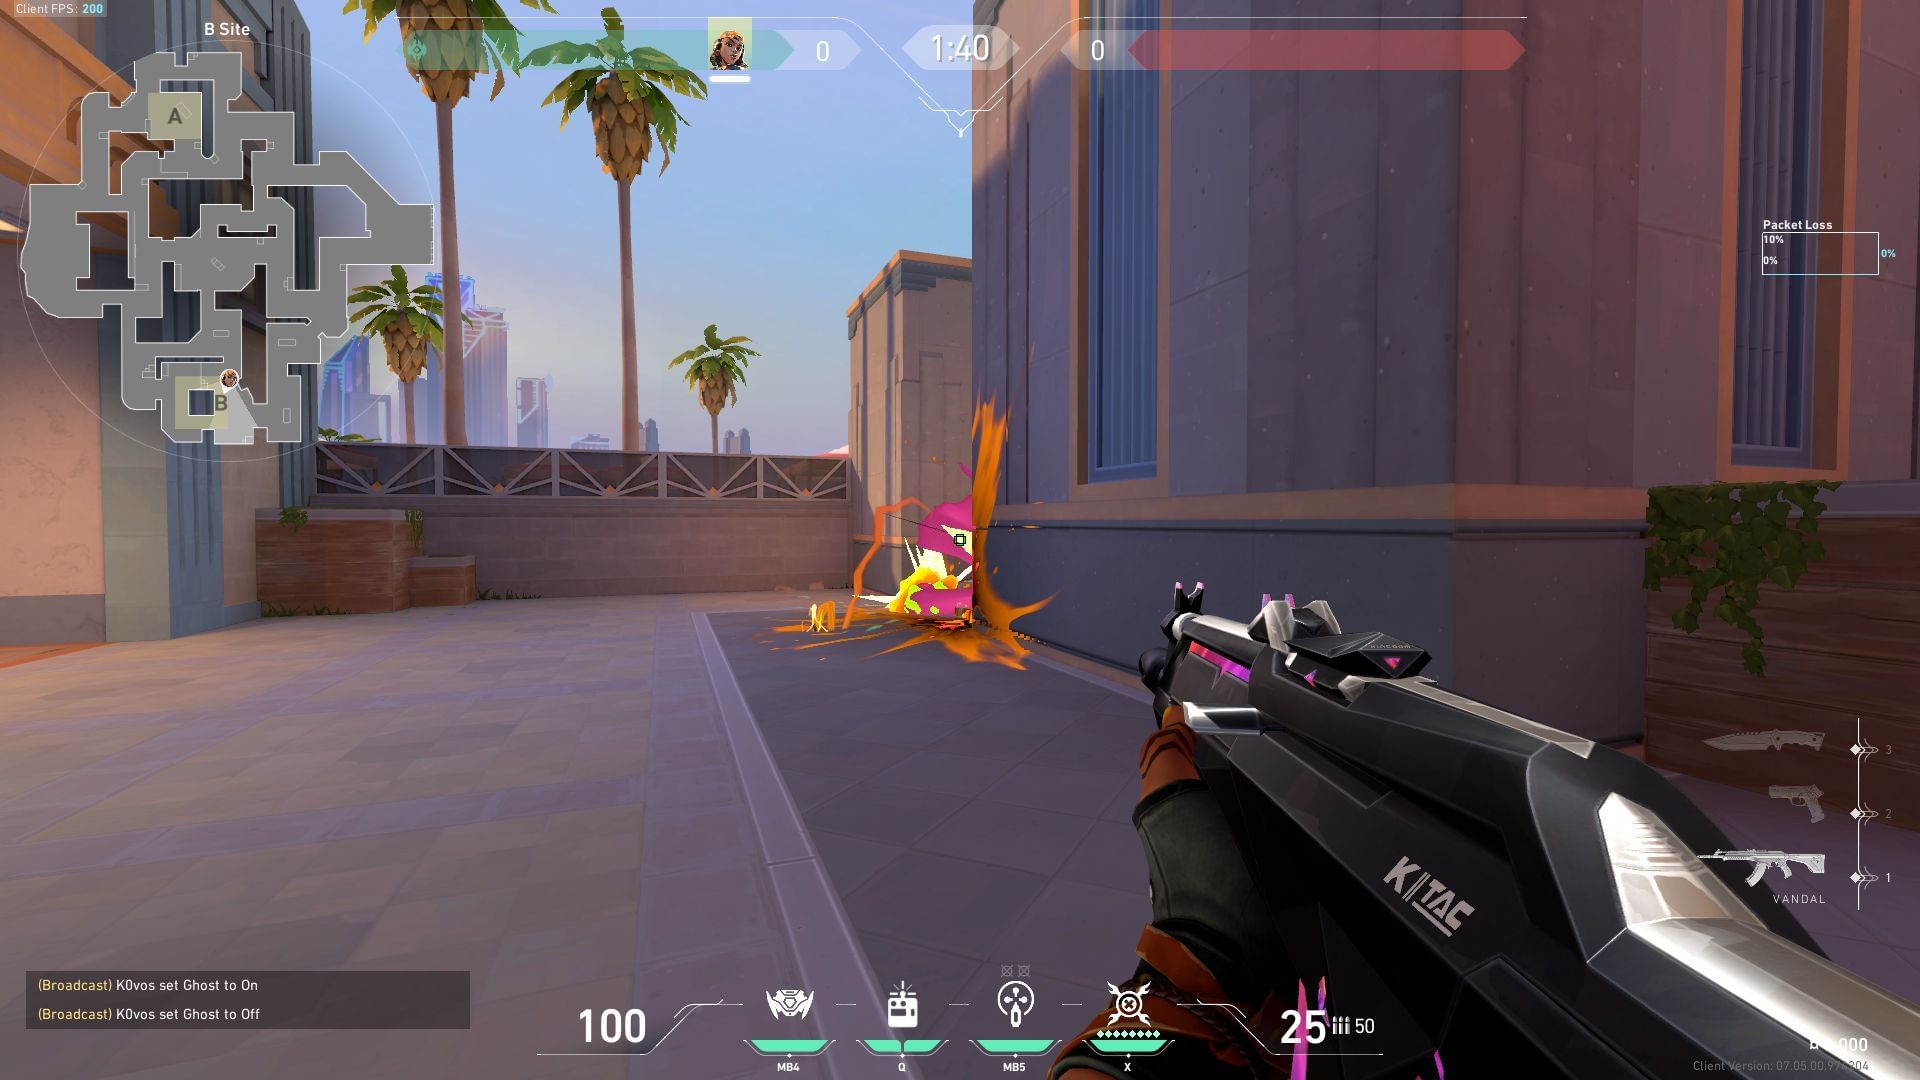
The grenade will bounce off the wall and land directly at the base of the pillar in B-Site and block the default plant location.
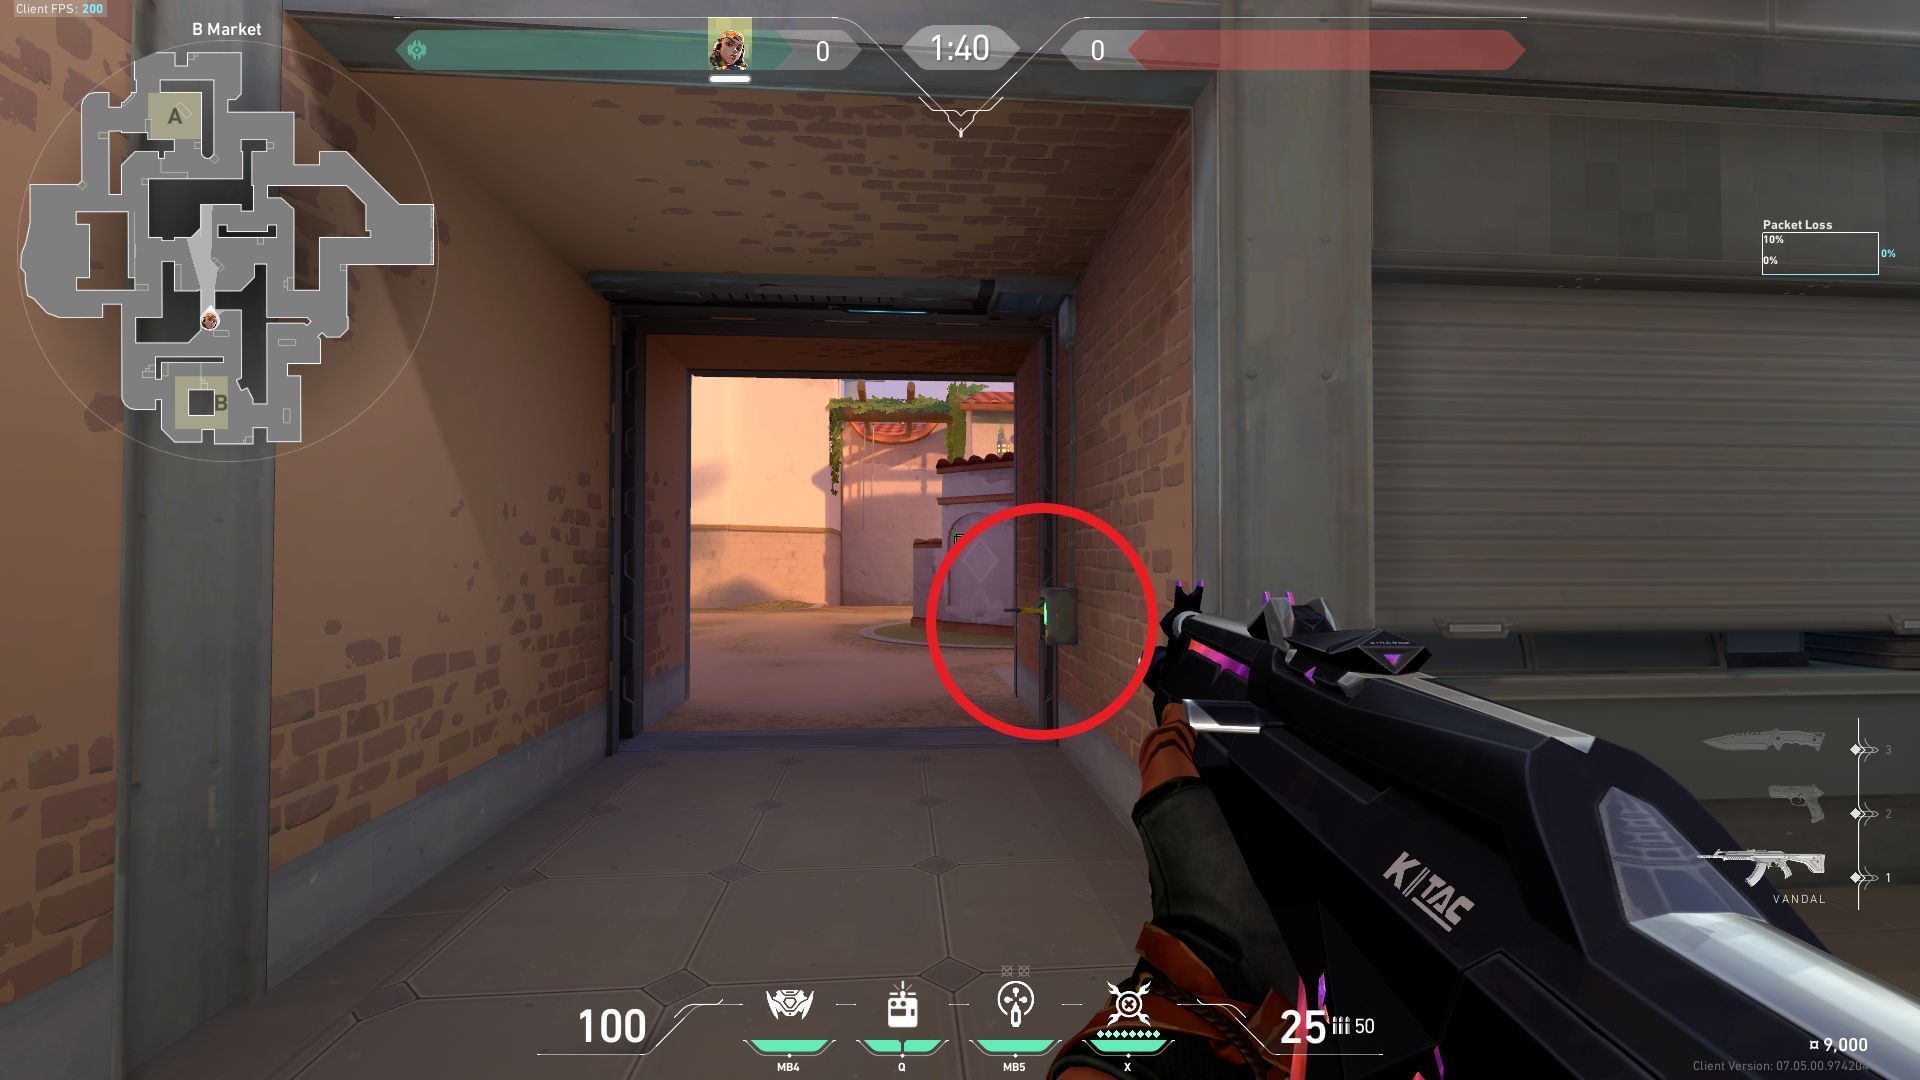
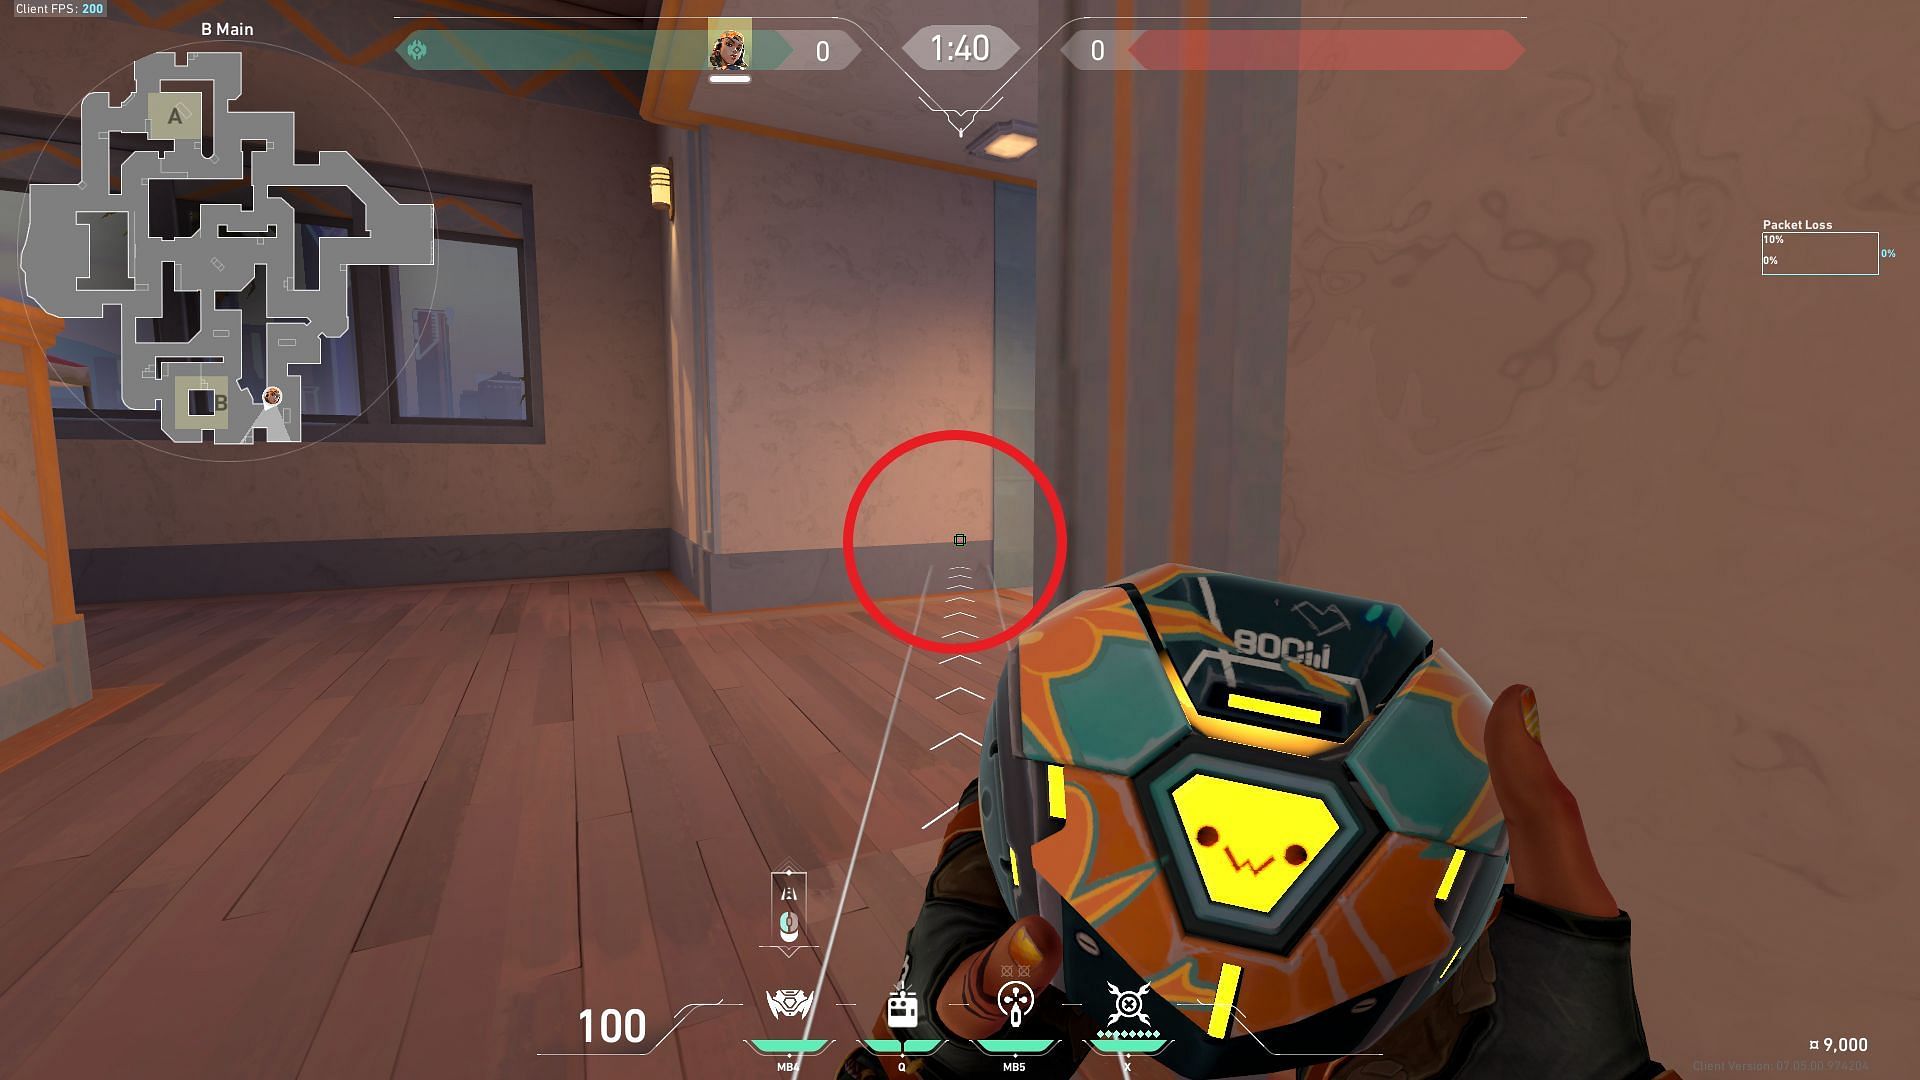
4) B-Site to B-Market
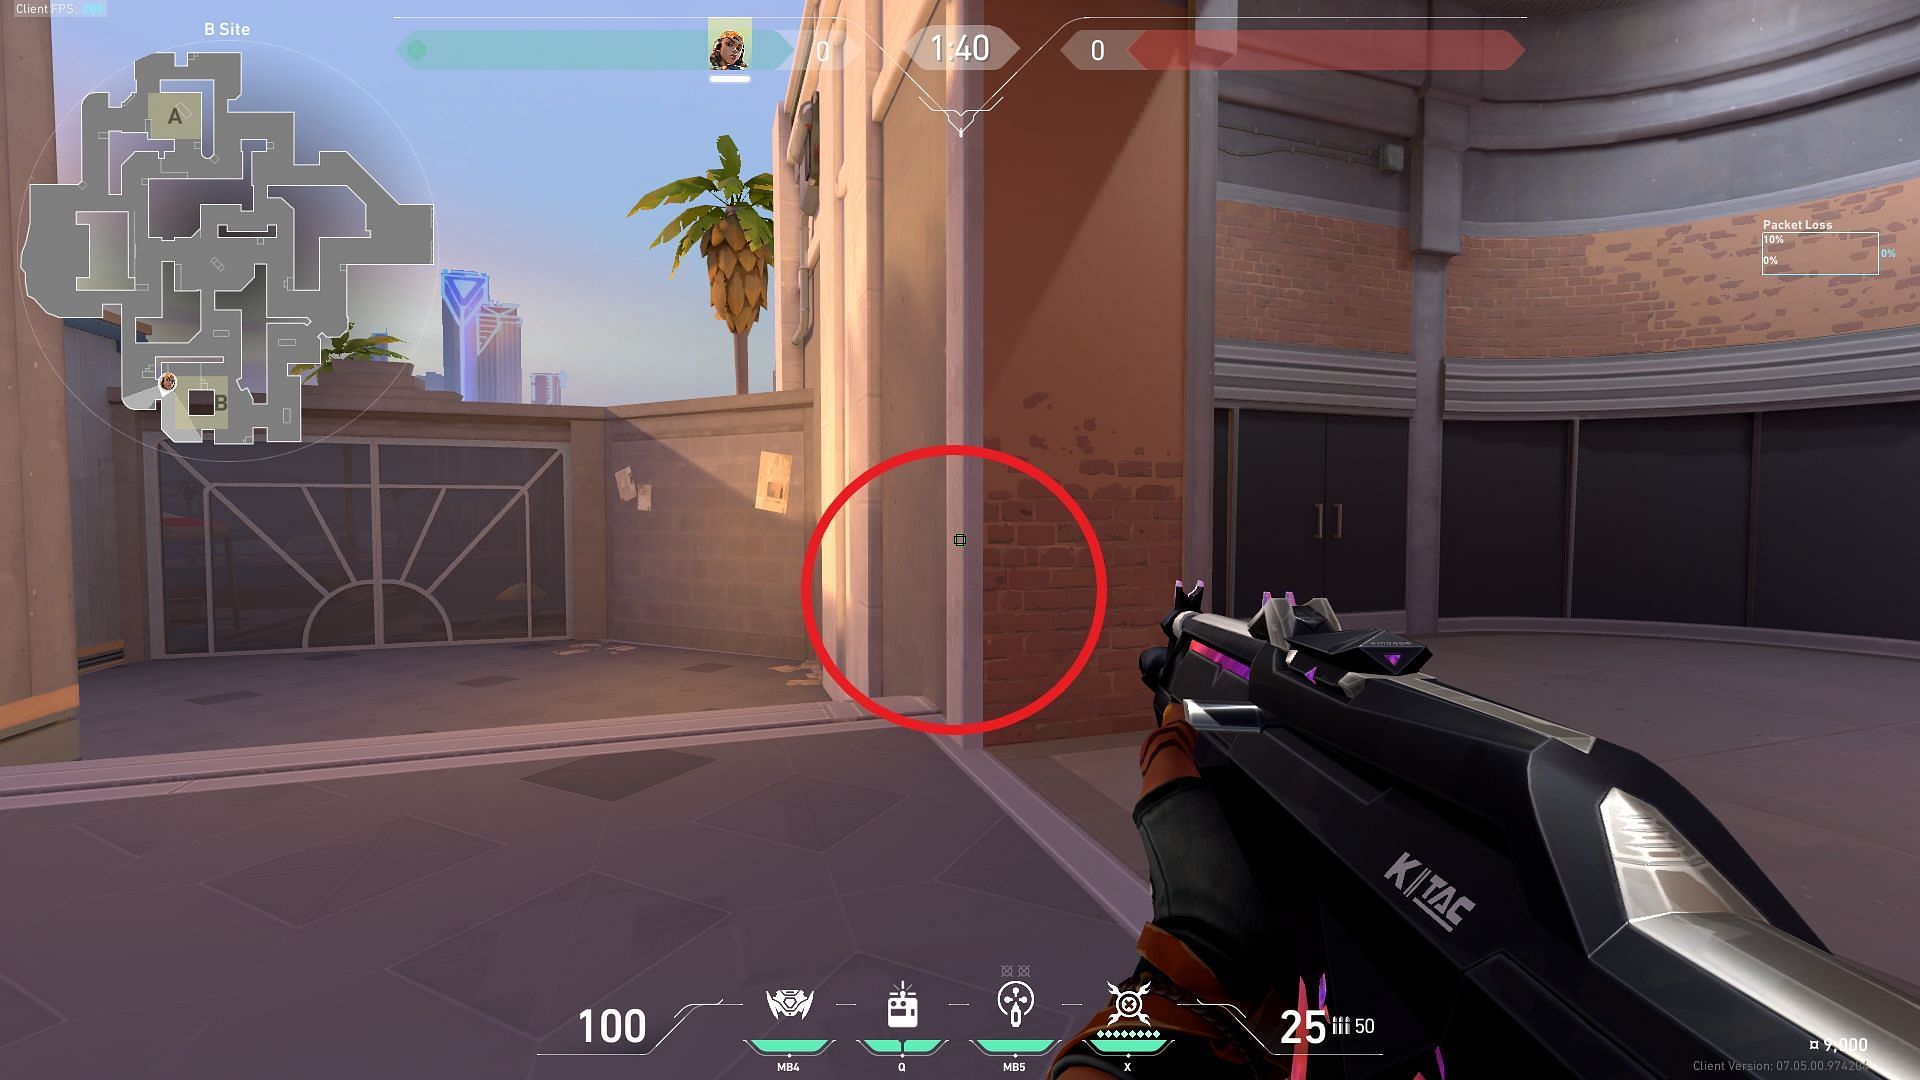
This is a fairly simple lineup that can be customized depending on the situation. Place yourself in front of the B-Boba entrance to B-Site and look towards the windows on the B-Market wall.
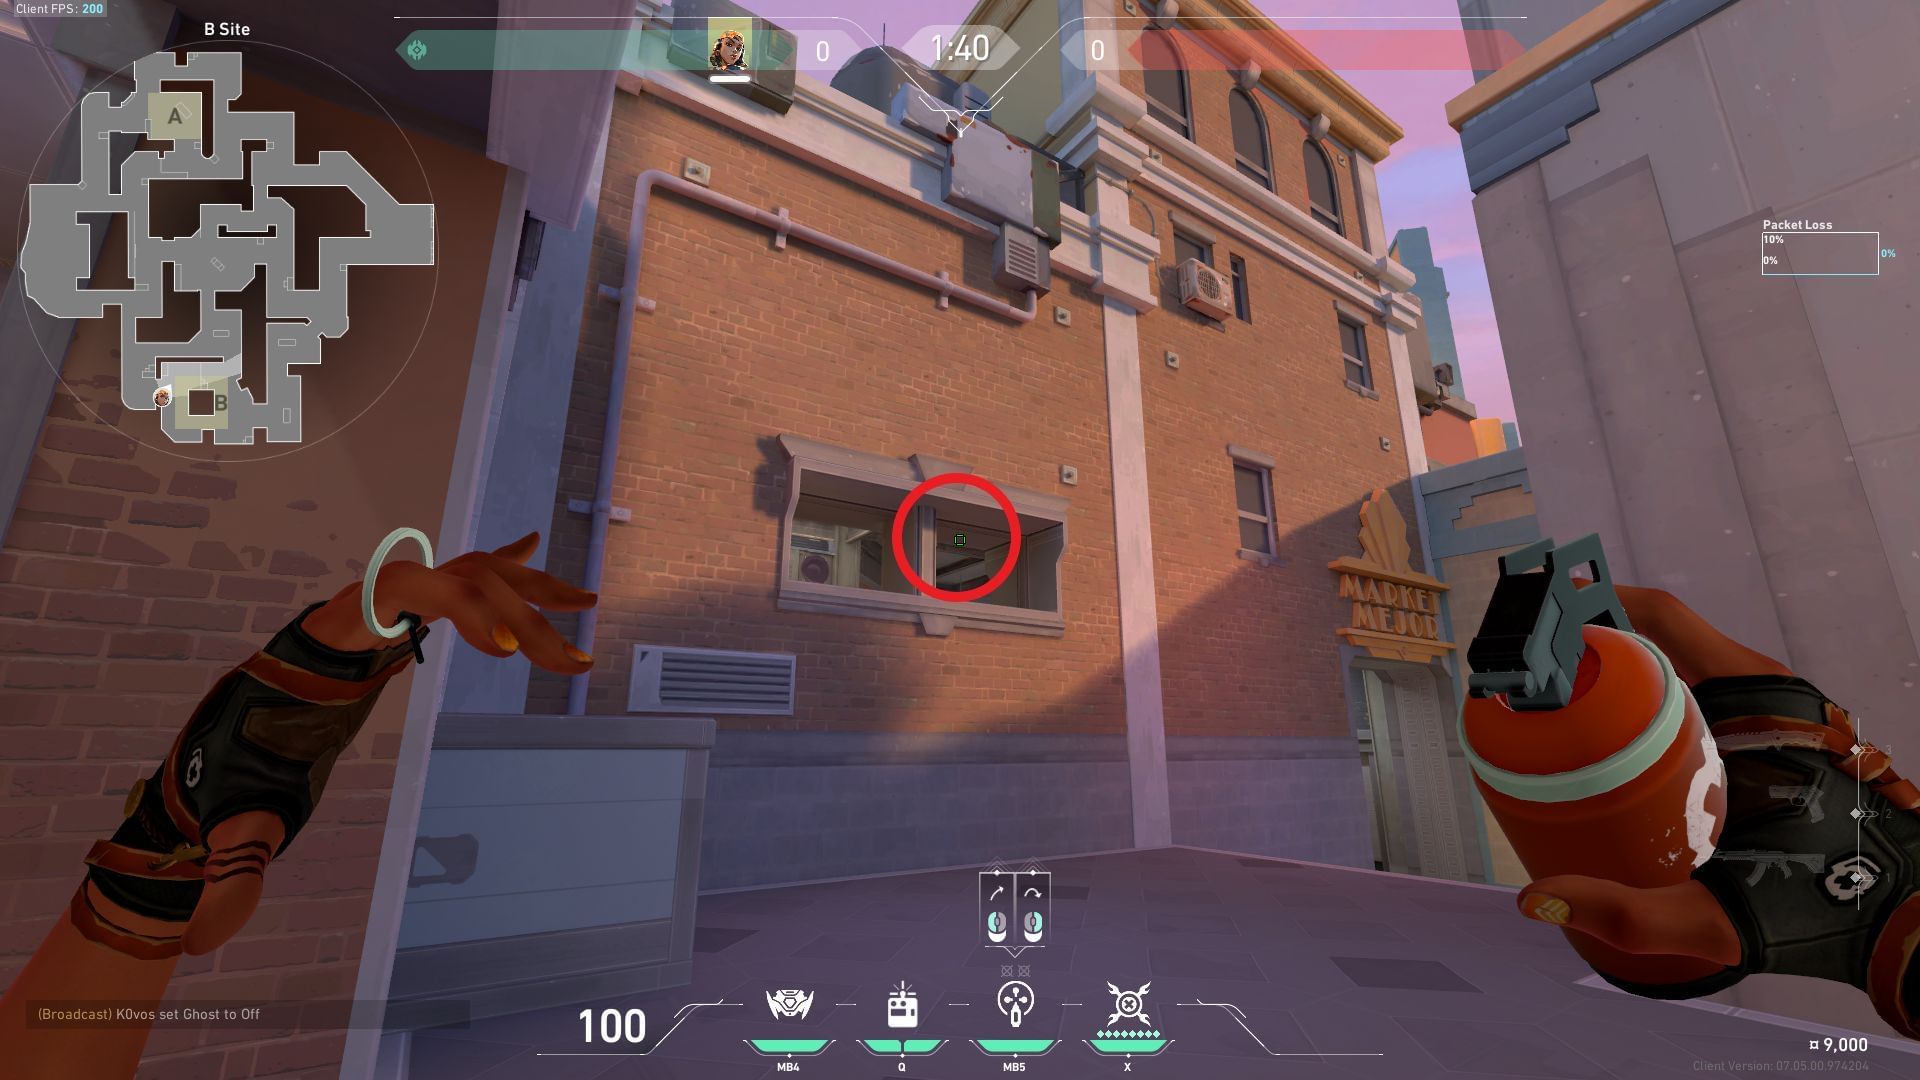
Place your crosshair on the window (shown with a circle) and perform a simple left-click throw to deploy the nade.
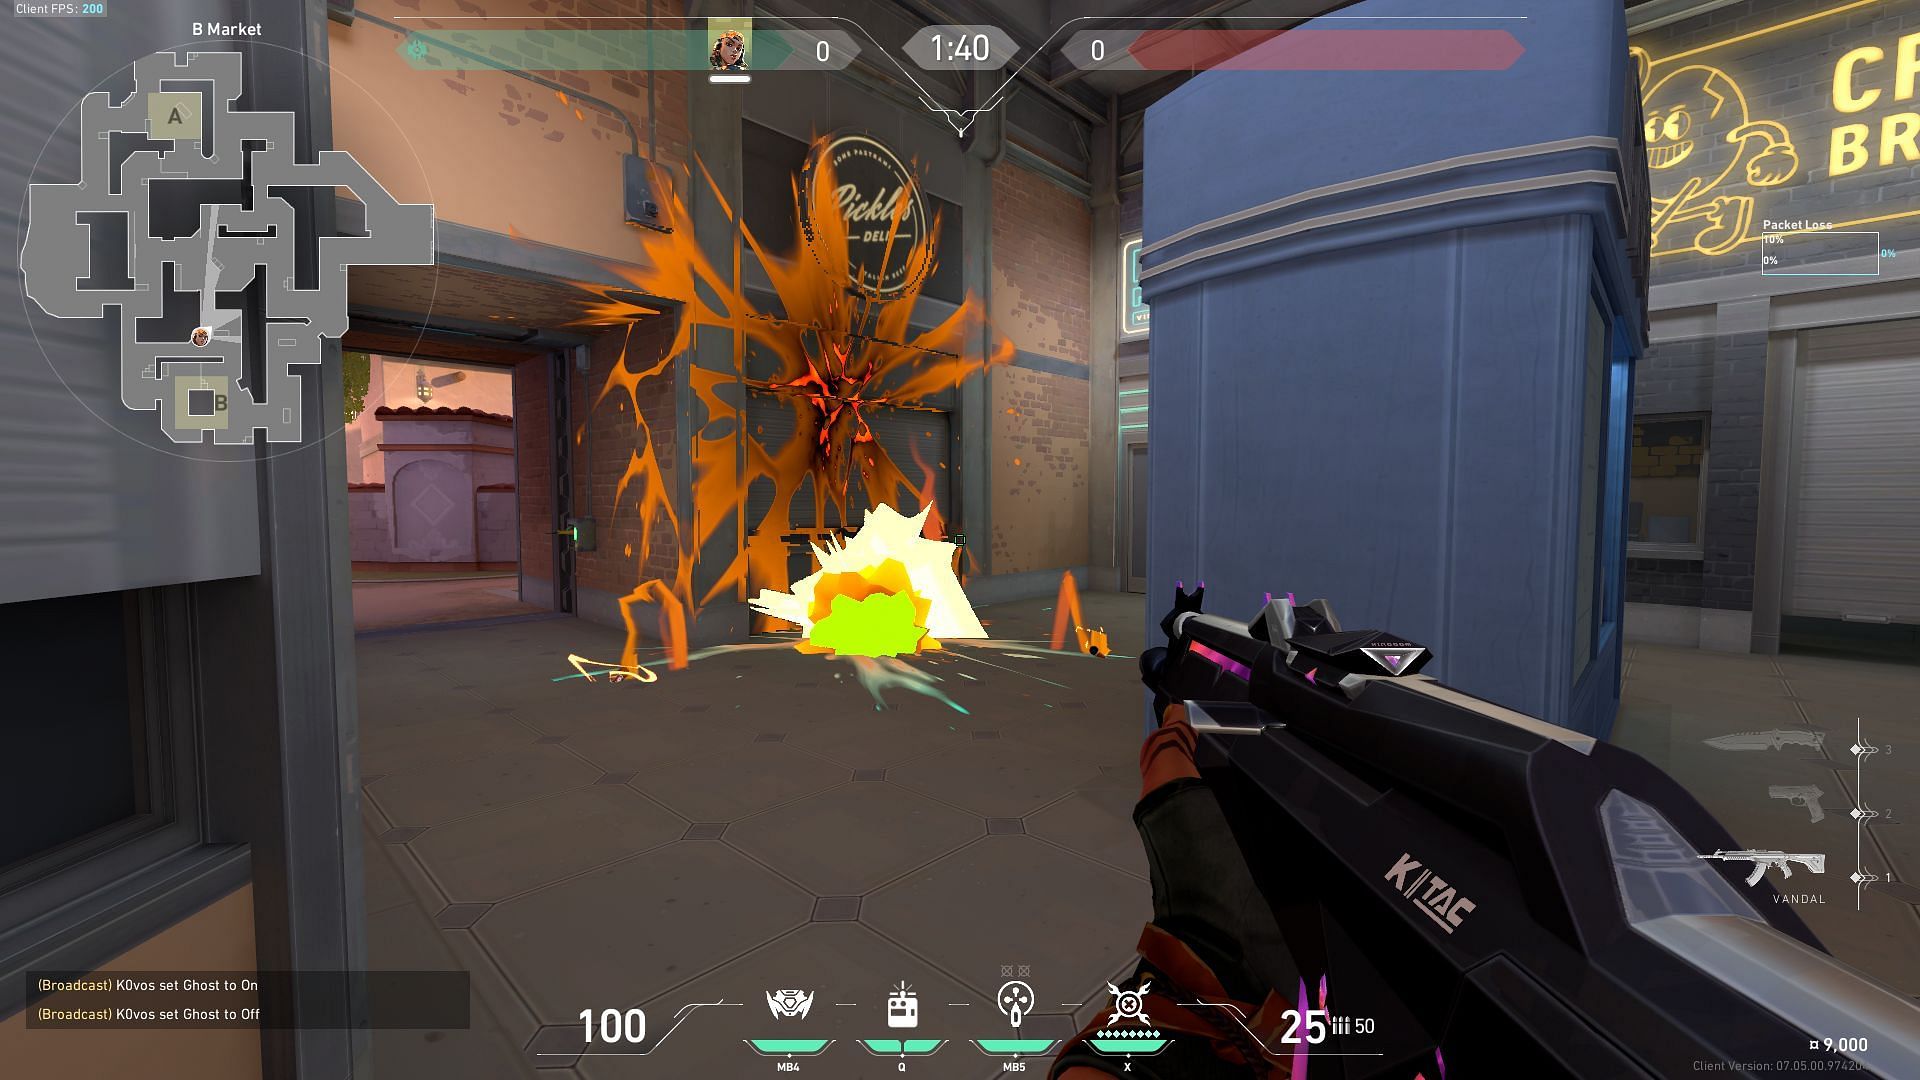
The grenade lands behind the blue box in B-Market and near B-Market Switch. This can halt sudden mid-aggression towards the B-Site through B-Market. The same lineup can be reversed to take control of the B-Back Site from B-Market.
5) B-Market to Mid-Tiles
Position yourself near the B-Market Switch, as shown in the image. Equip the paint shells and look towards the window with grills on the Mid-wall.
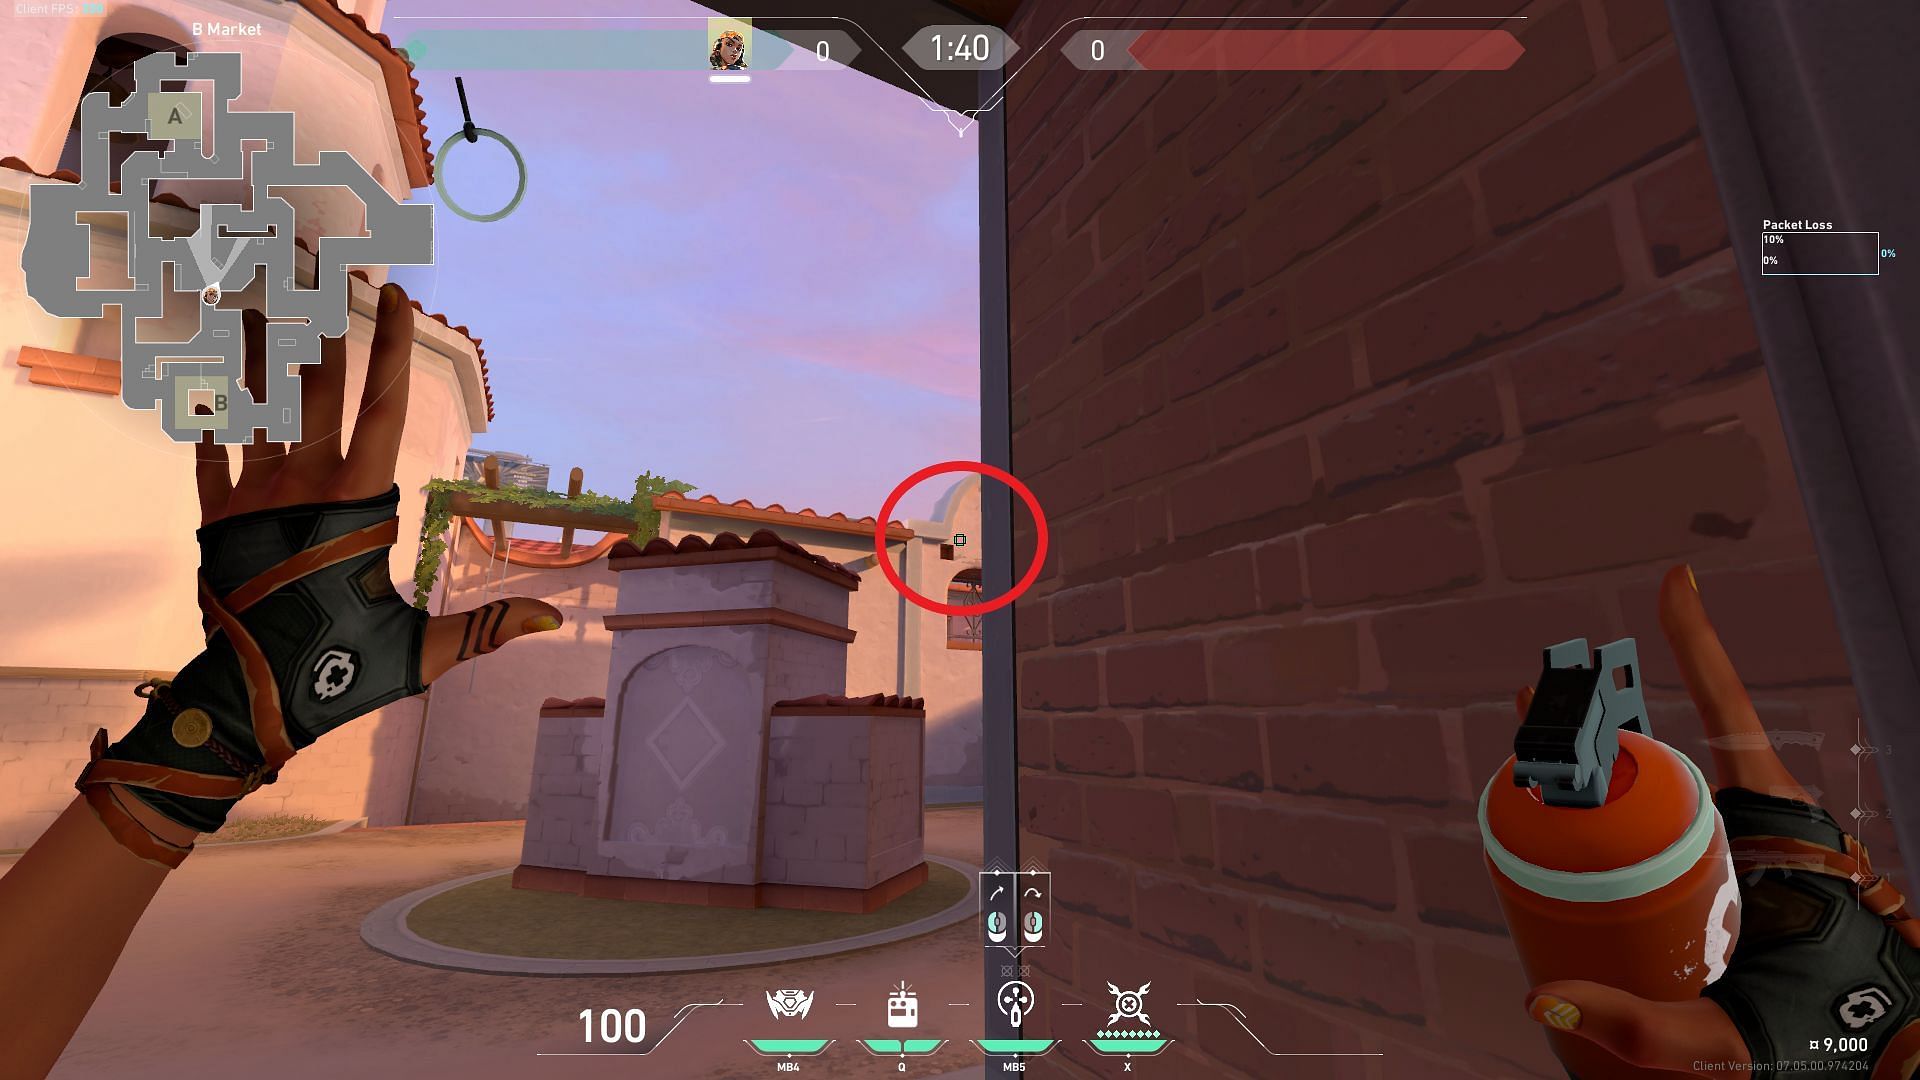
Place your crosshair just above the square roof ledge (shown with a circle) and throw the nade while moving forward.
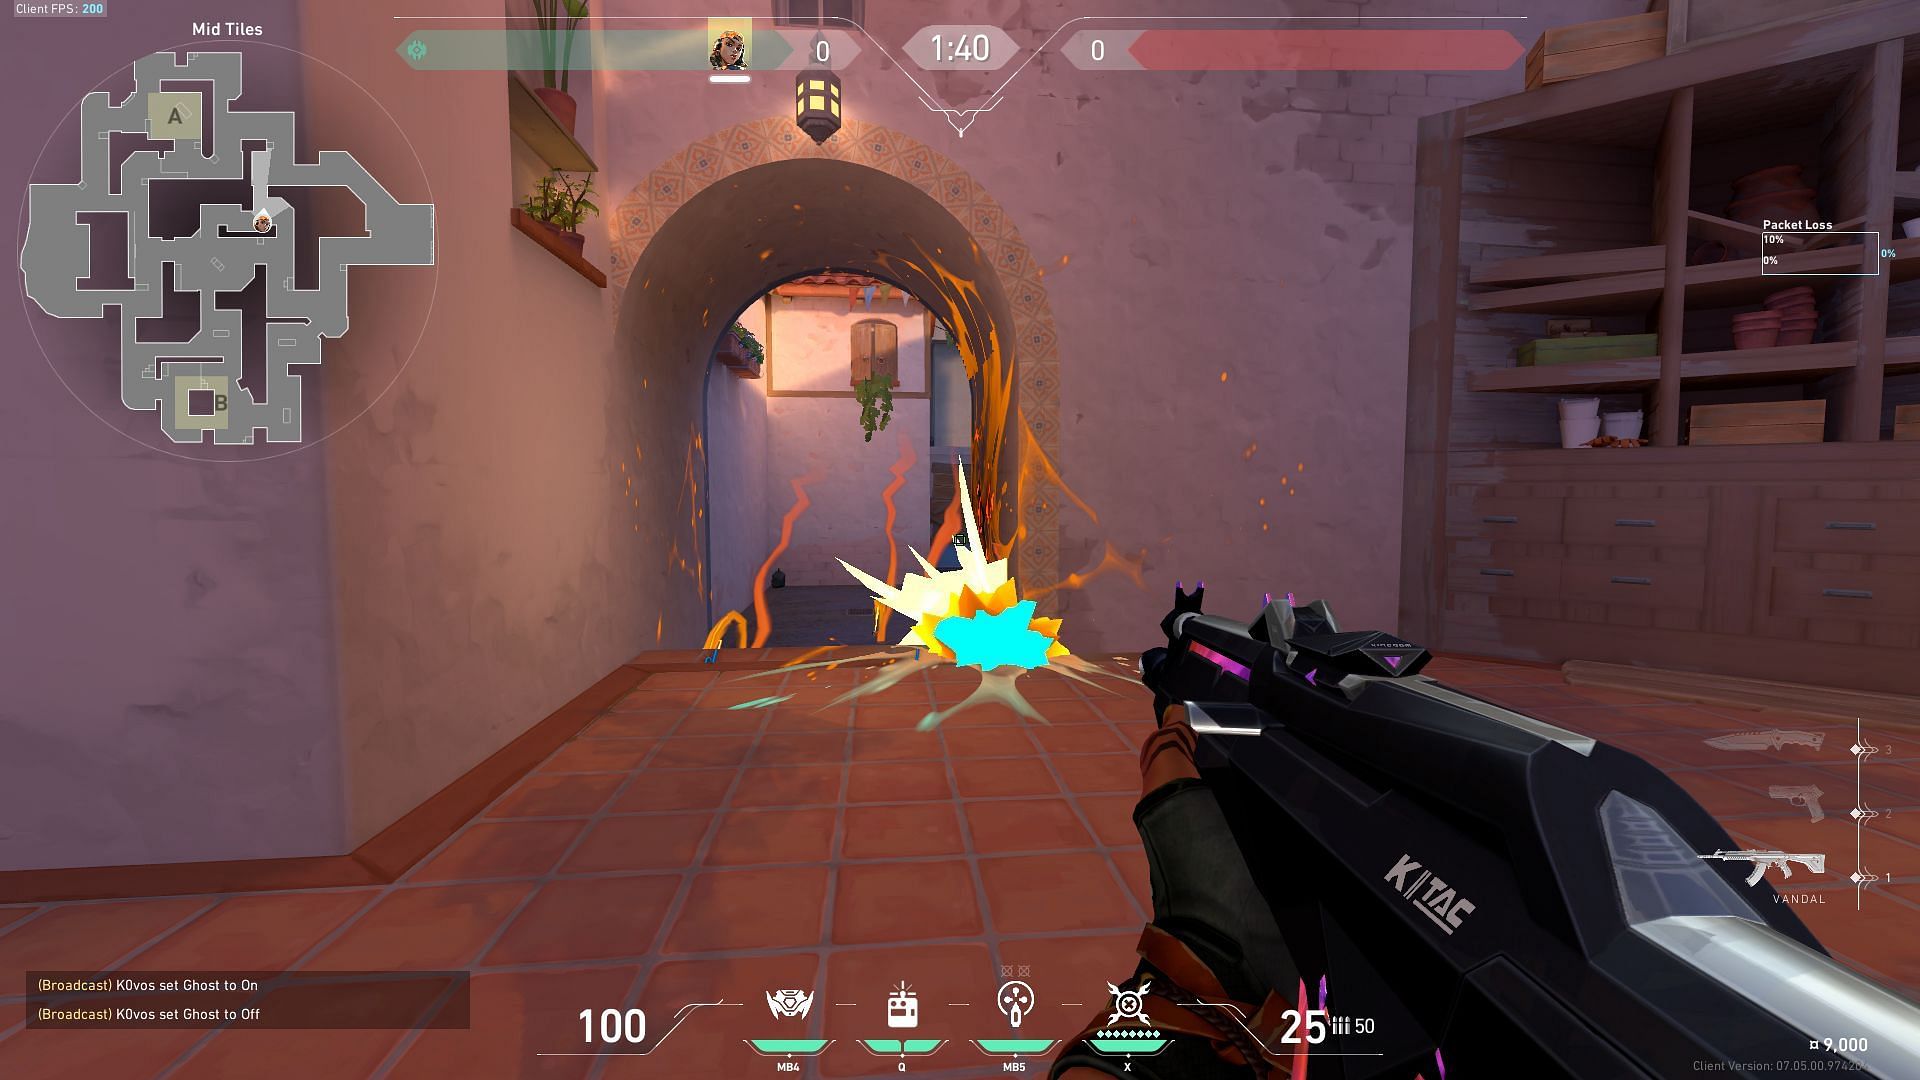
The grenade lands directly in the Mid-Tiles area connecting A-Lobby, damaging anyone pushing to take control of Mid-Tiles from Attacker Spawn.
6) Mid-Bottom to Mid-Top
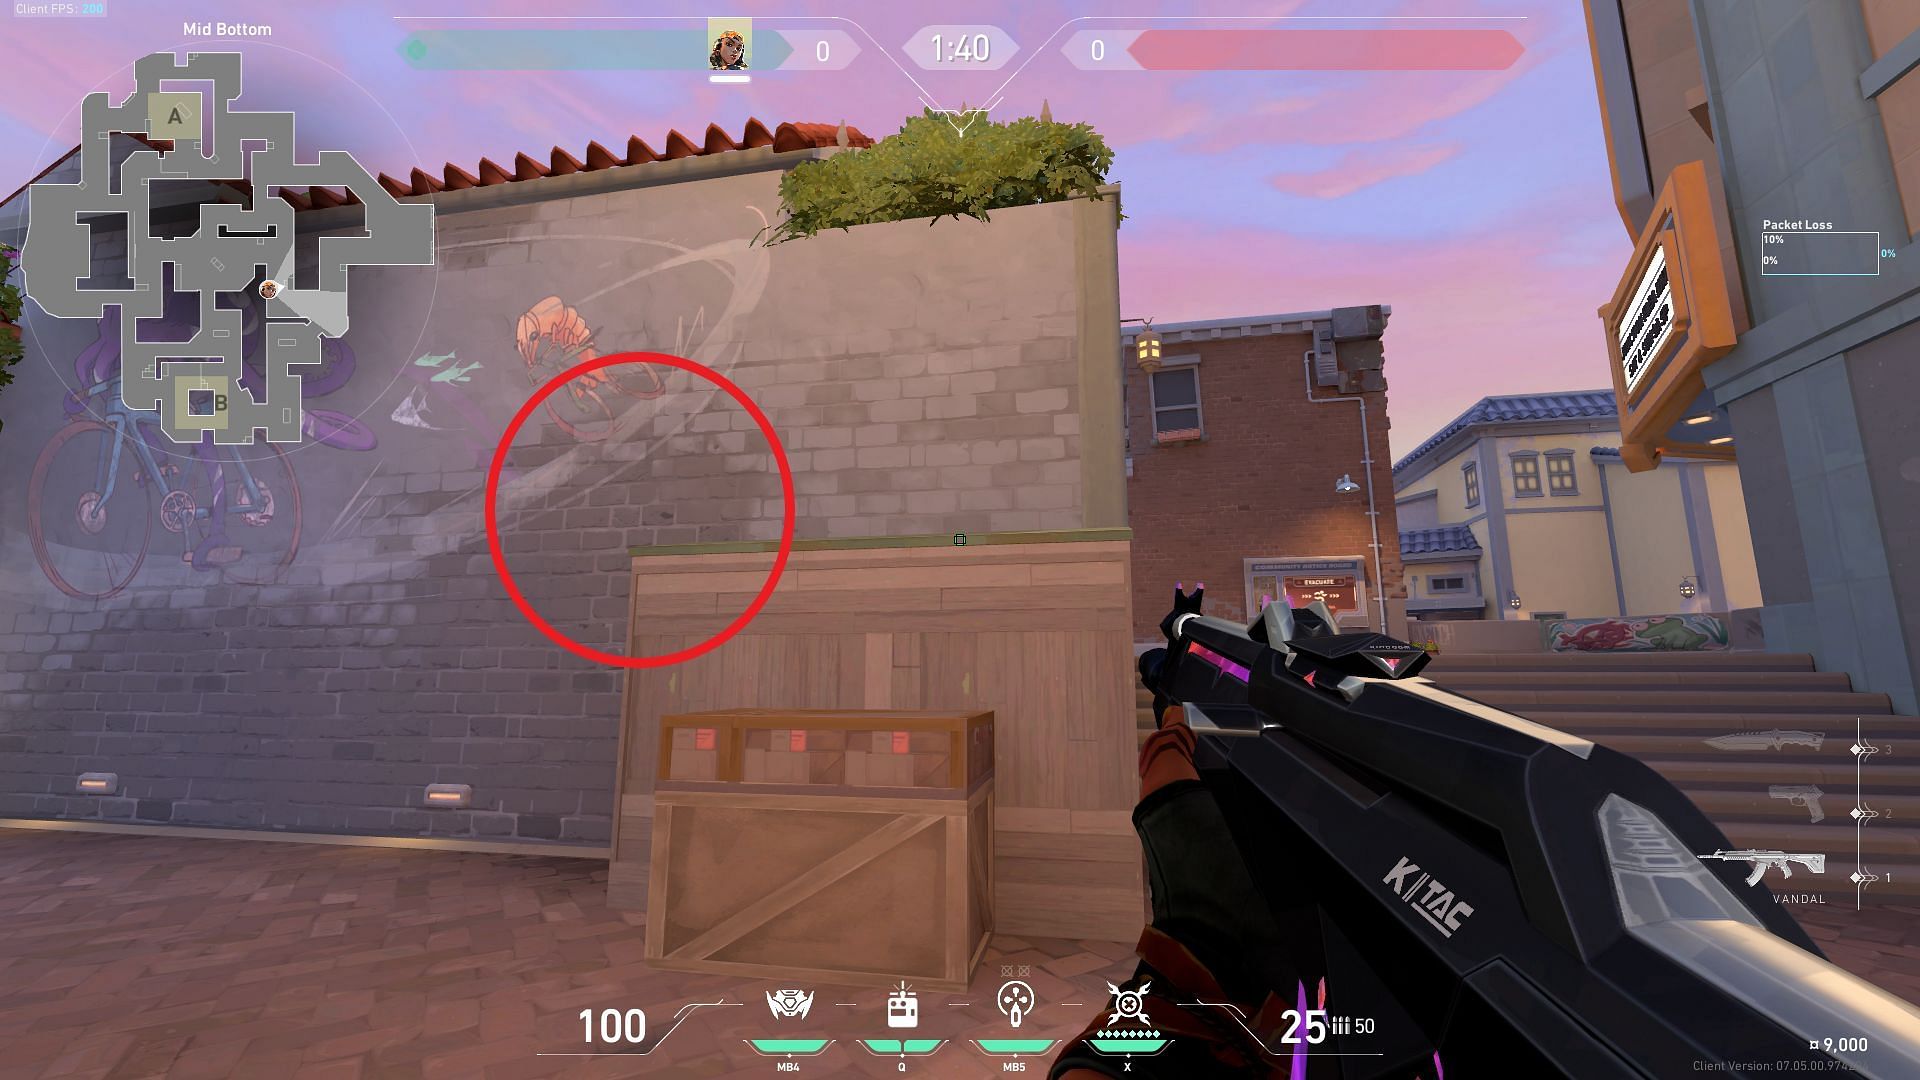
This is a rudimentary lineup that can prove to be essential while taking mid-control. Place yourself on top of the Mid-Bottom boxes as shown in the image towards the right-most edge.
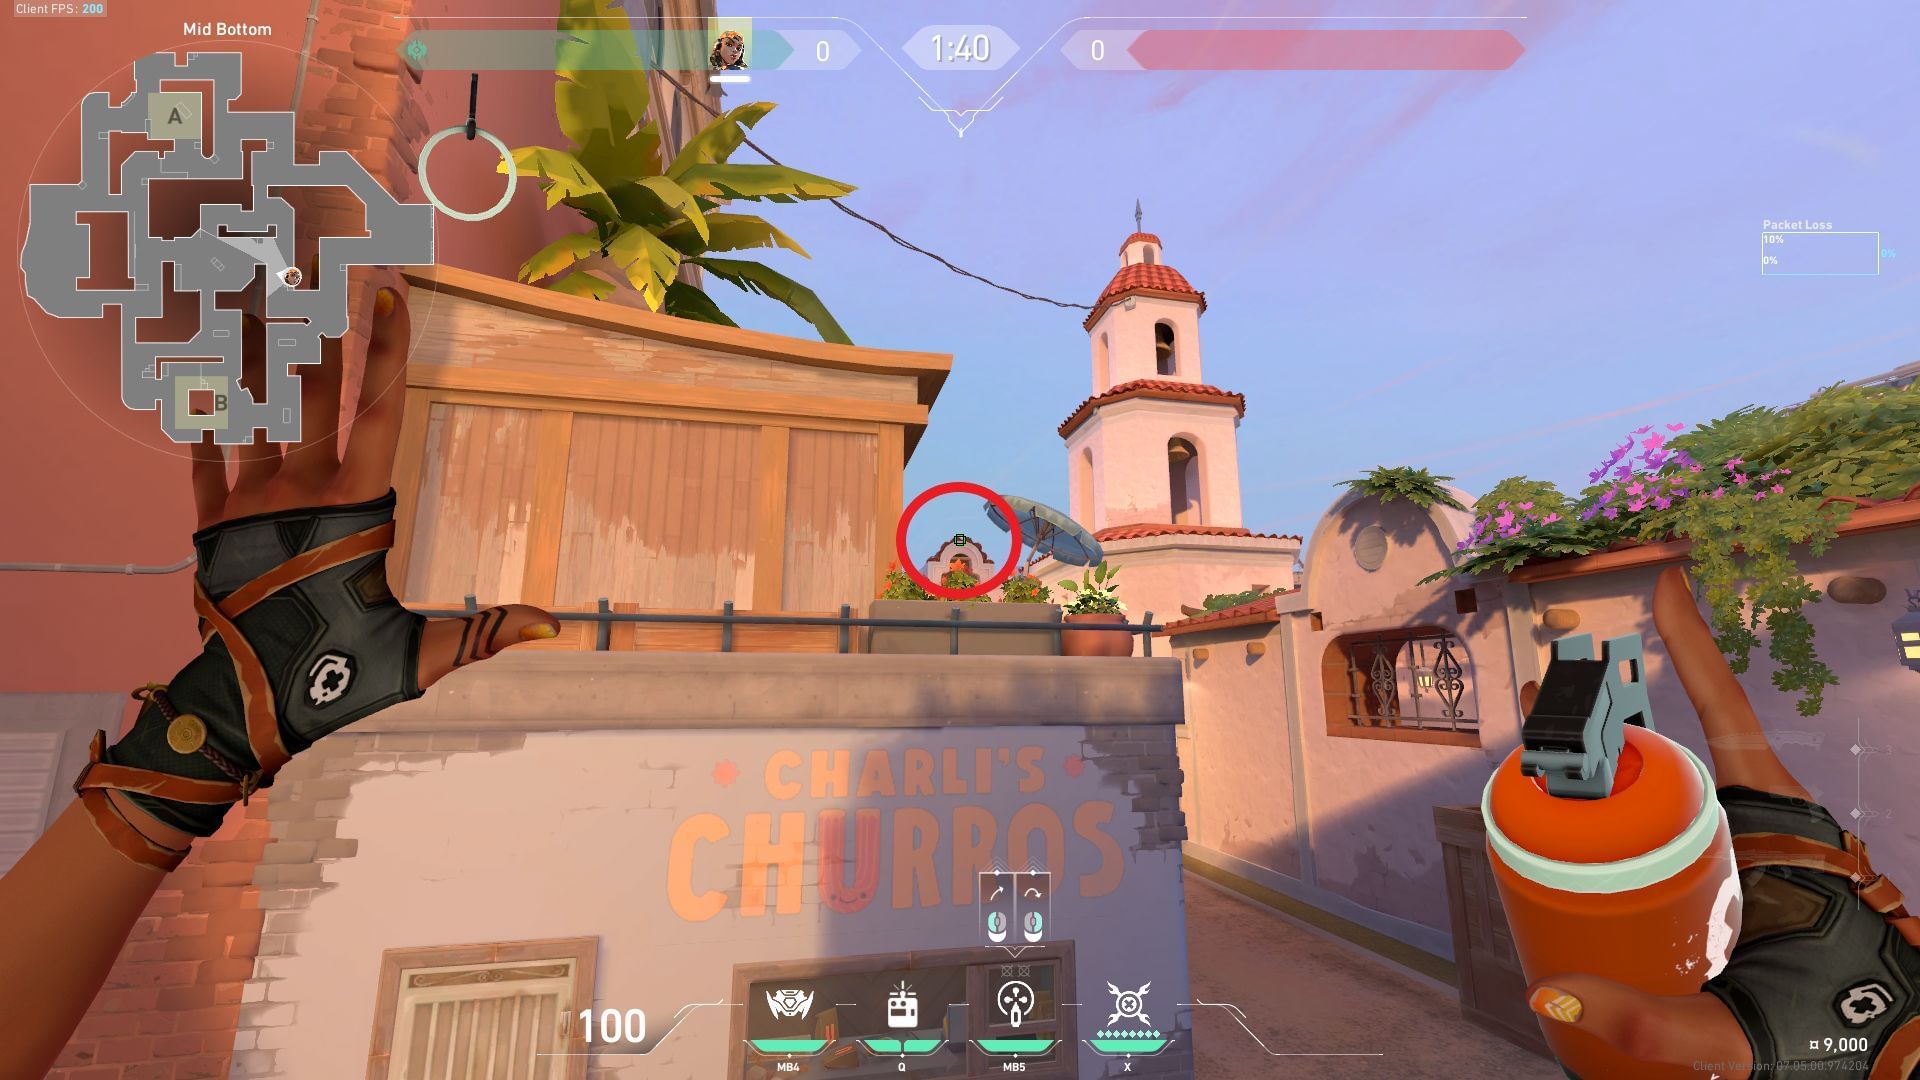
Place your crosshair above the flower pot (shown with a circle) and throw it while moving forward.
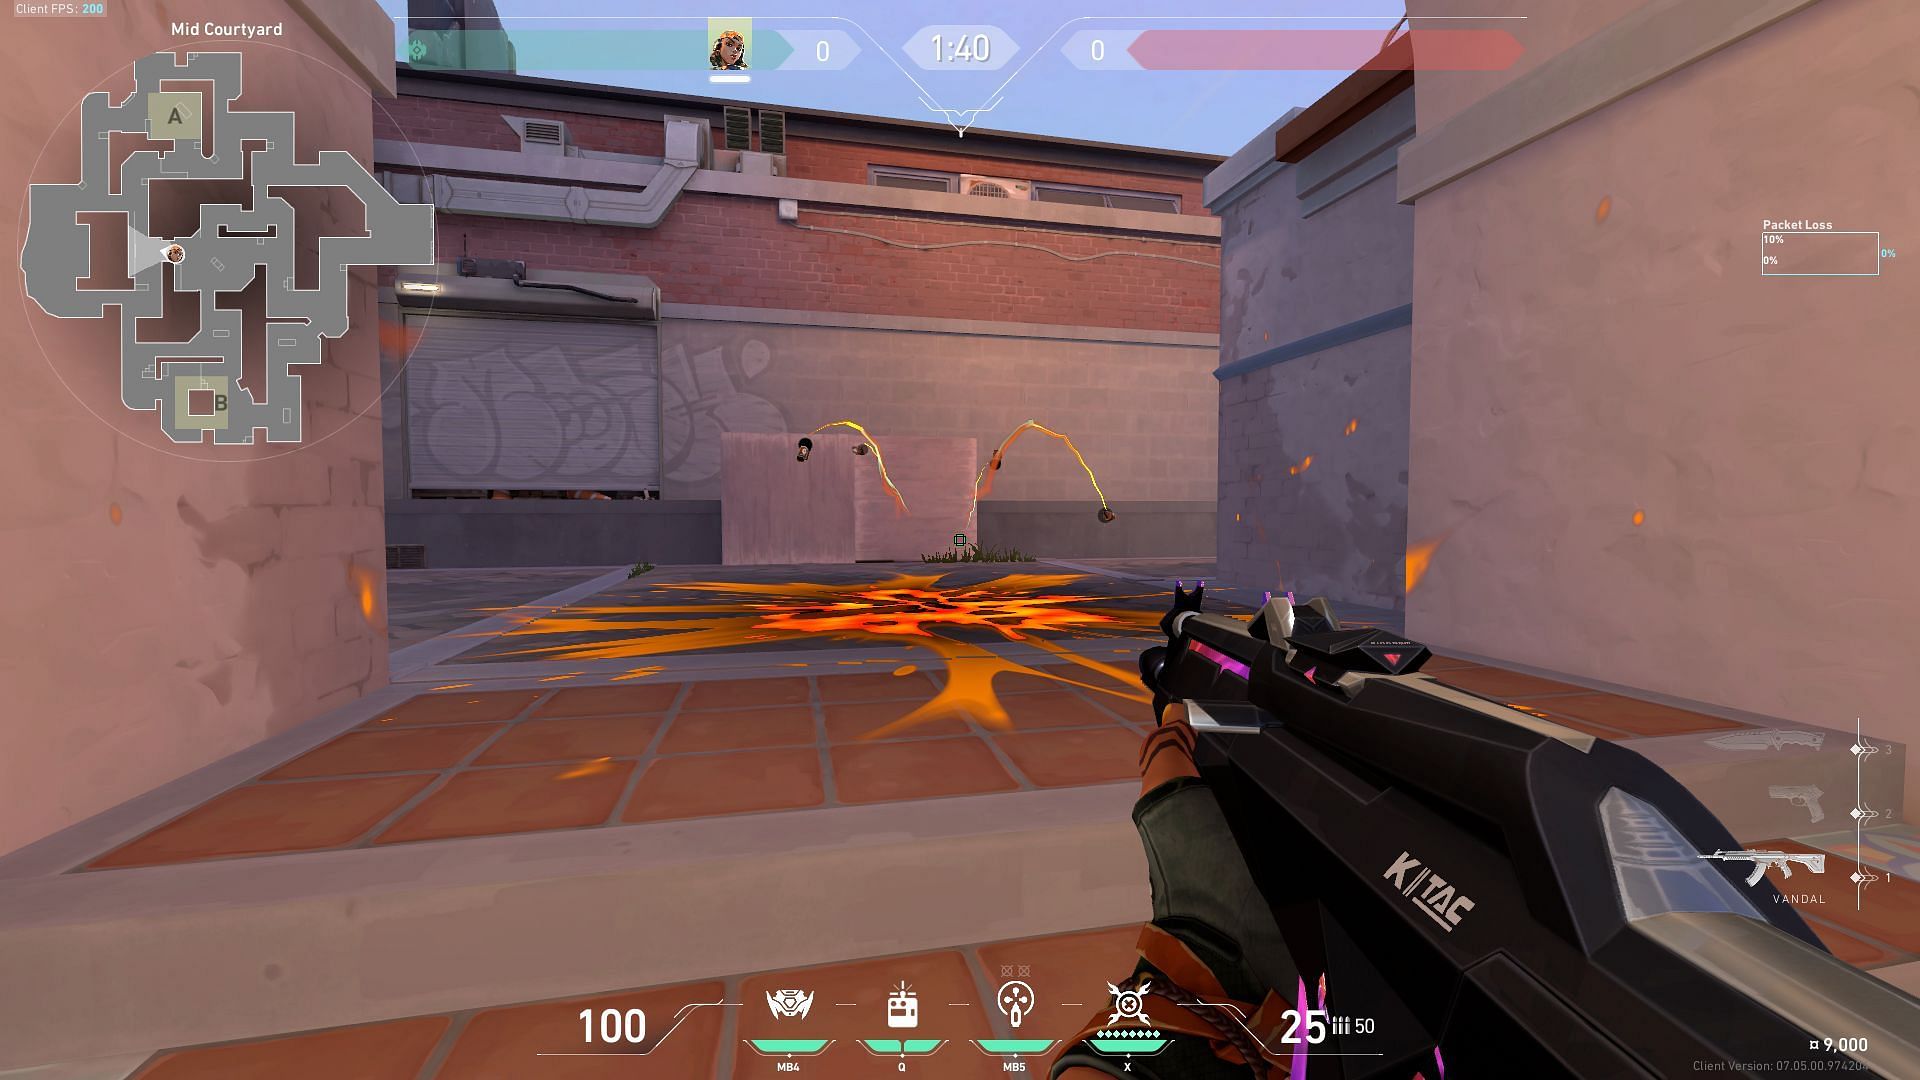
Deploy the grenade before falling off the boxes, and it will land directly in the Mid-Top region below the arches. This will clear out any players trying to peek mid for early aggression and control.
7) A-Site to Mid-Tiles
Position yourself near the A-Site Radianite box, as shown in the image. Look towards the Mid Tiles wall and start aiming towards the tower present on the roof.
Place your crosshair exactly above the roof of Mid-Tiles and to the left of the tower (shown in the image with markers), and deploy the nade with a simple left-click throw.
The grenade will blow up mid-air and drop its fragments below in the Mid-Tiles area.
8) A-Elbow to A-Site
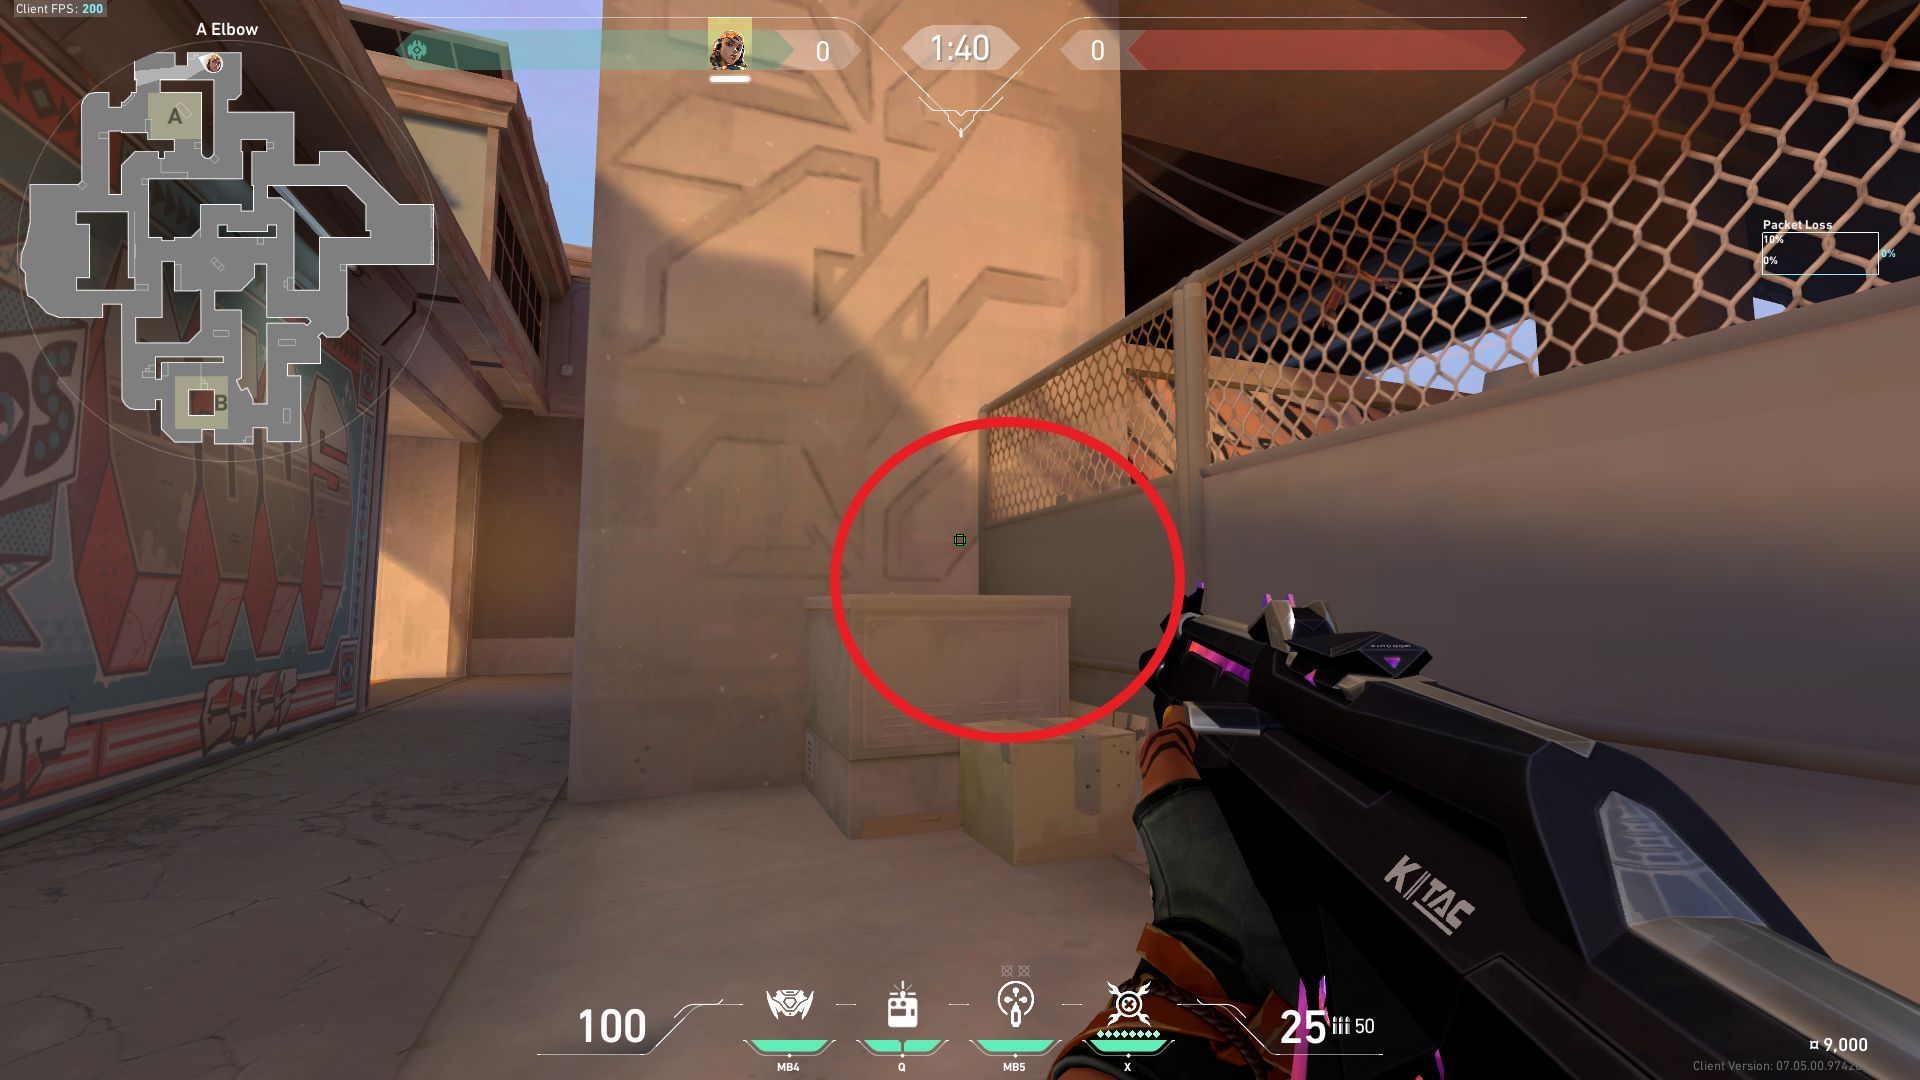
Position yourself on top of the boxes present inside the A-Elbow towards the outer edge, as shown in the image. Look towards the A-Site and aim at the sky above the bomb site.
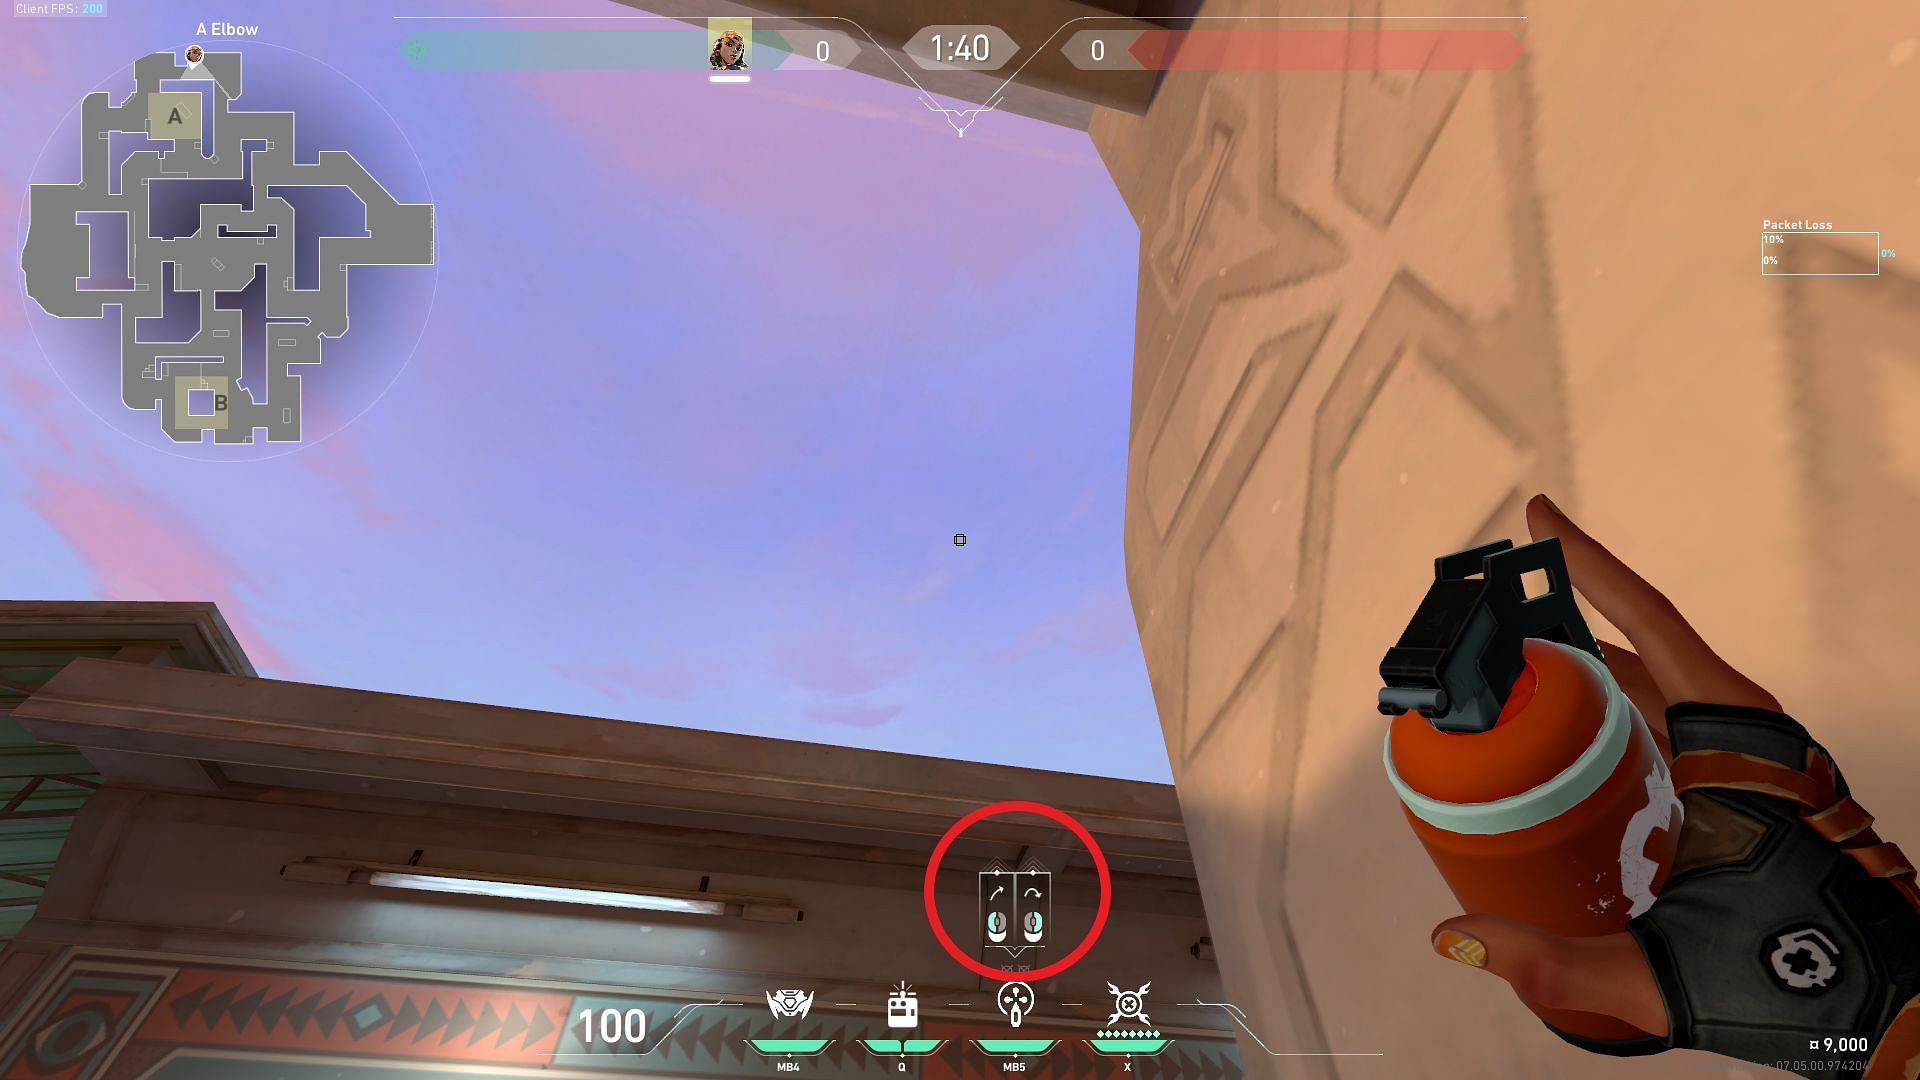
Place your crosshair in such a way that the mouse indicator icons for the nade touch the roof ledge (shown with a circle). Throw the nade with a simple left click.
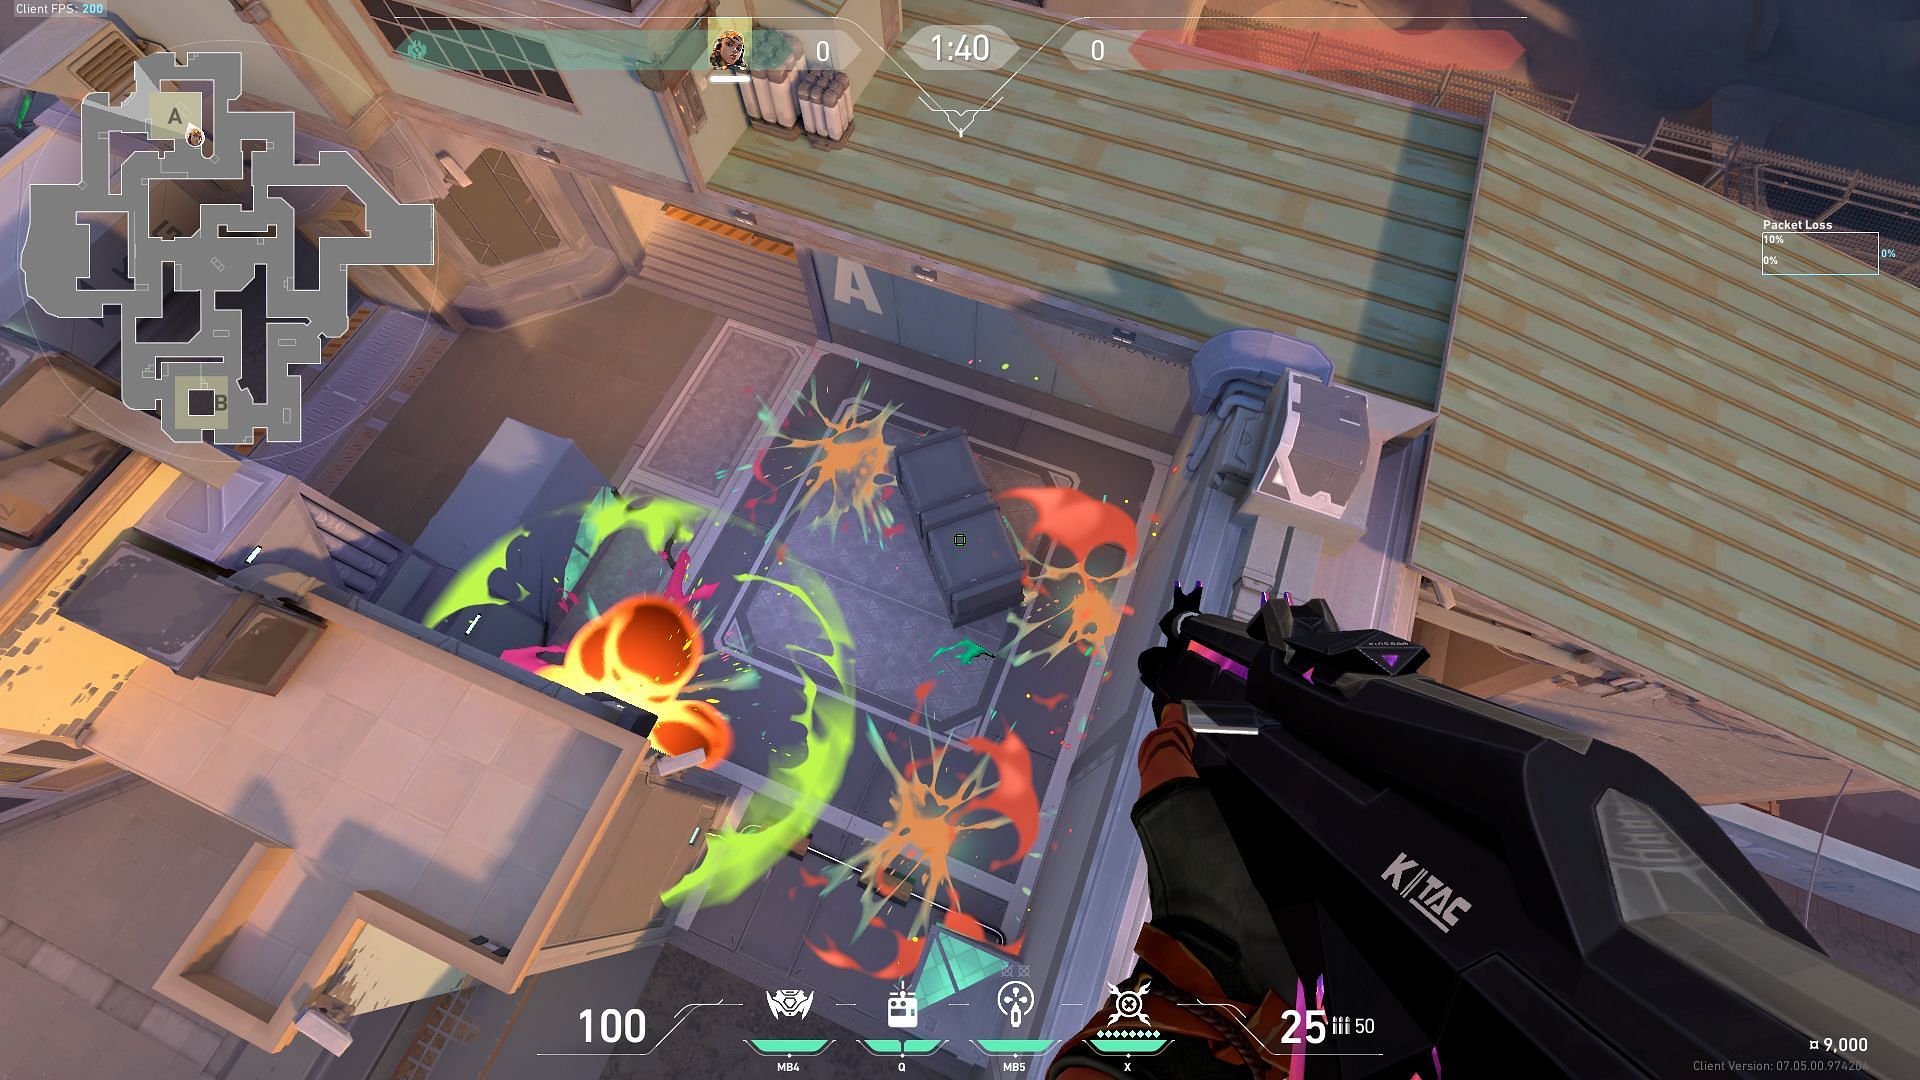
The grenade blows up mid-air and spreads all four of the fragments inside different corners of the A-Site.
Best Boombot lineups for Valorant's Sunset
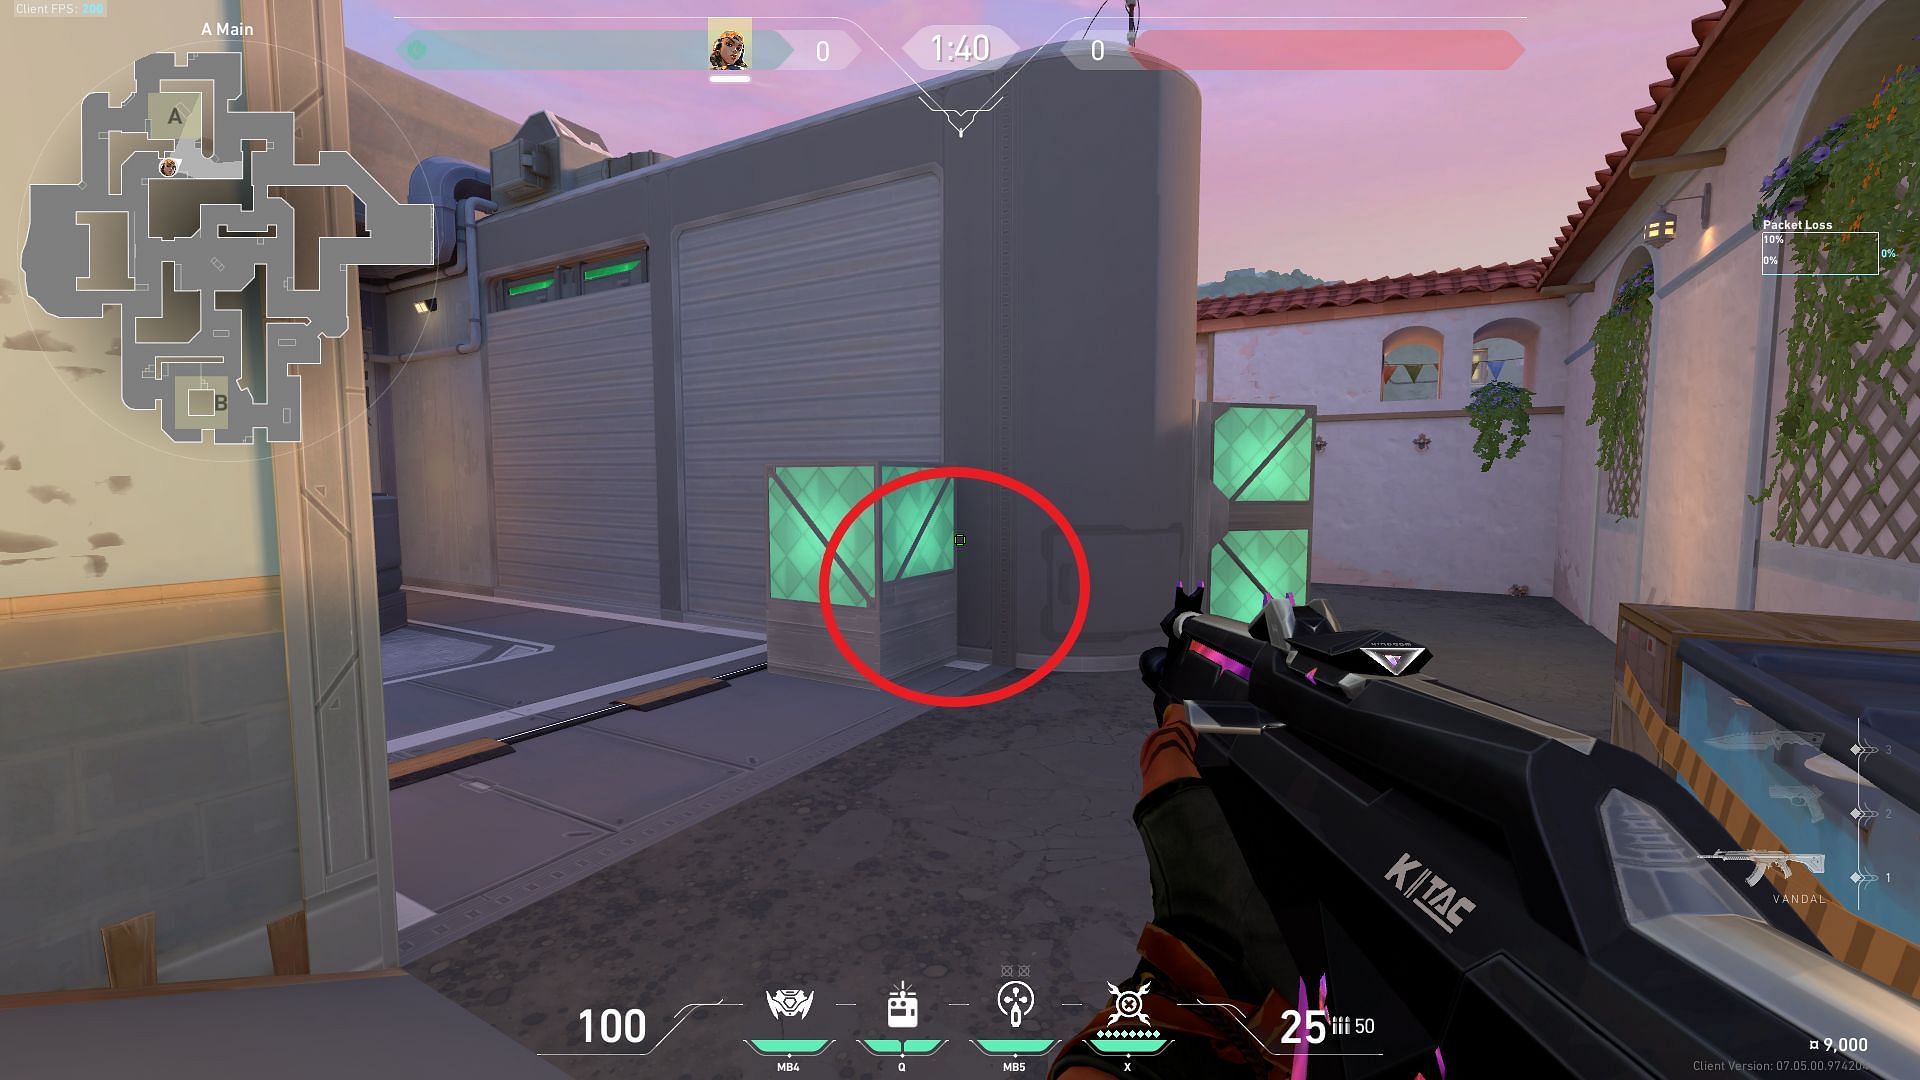
1) A-Lobby to A-Site

Position yourself in the A-Lobby area and face towards the A-Main route. Place your crosshair on the white ledge, as shown in the image.
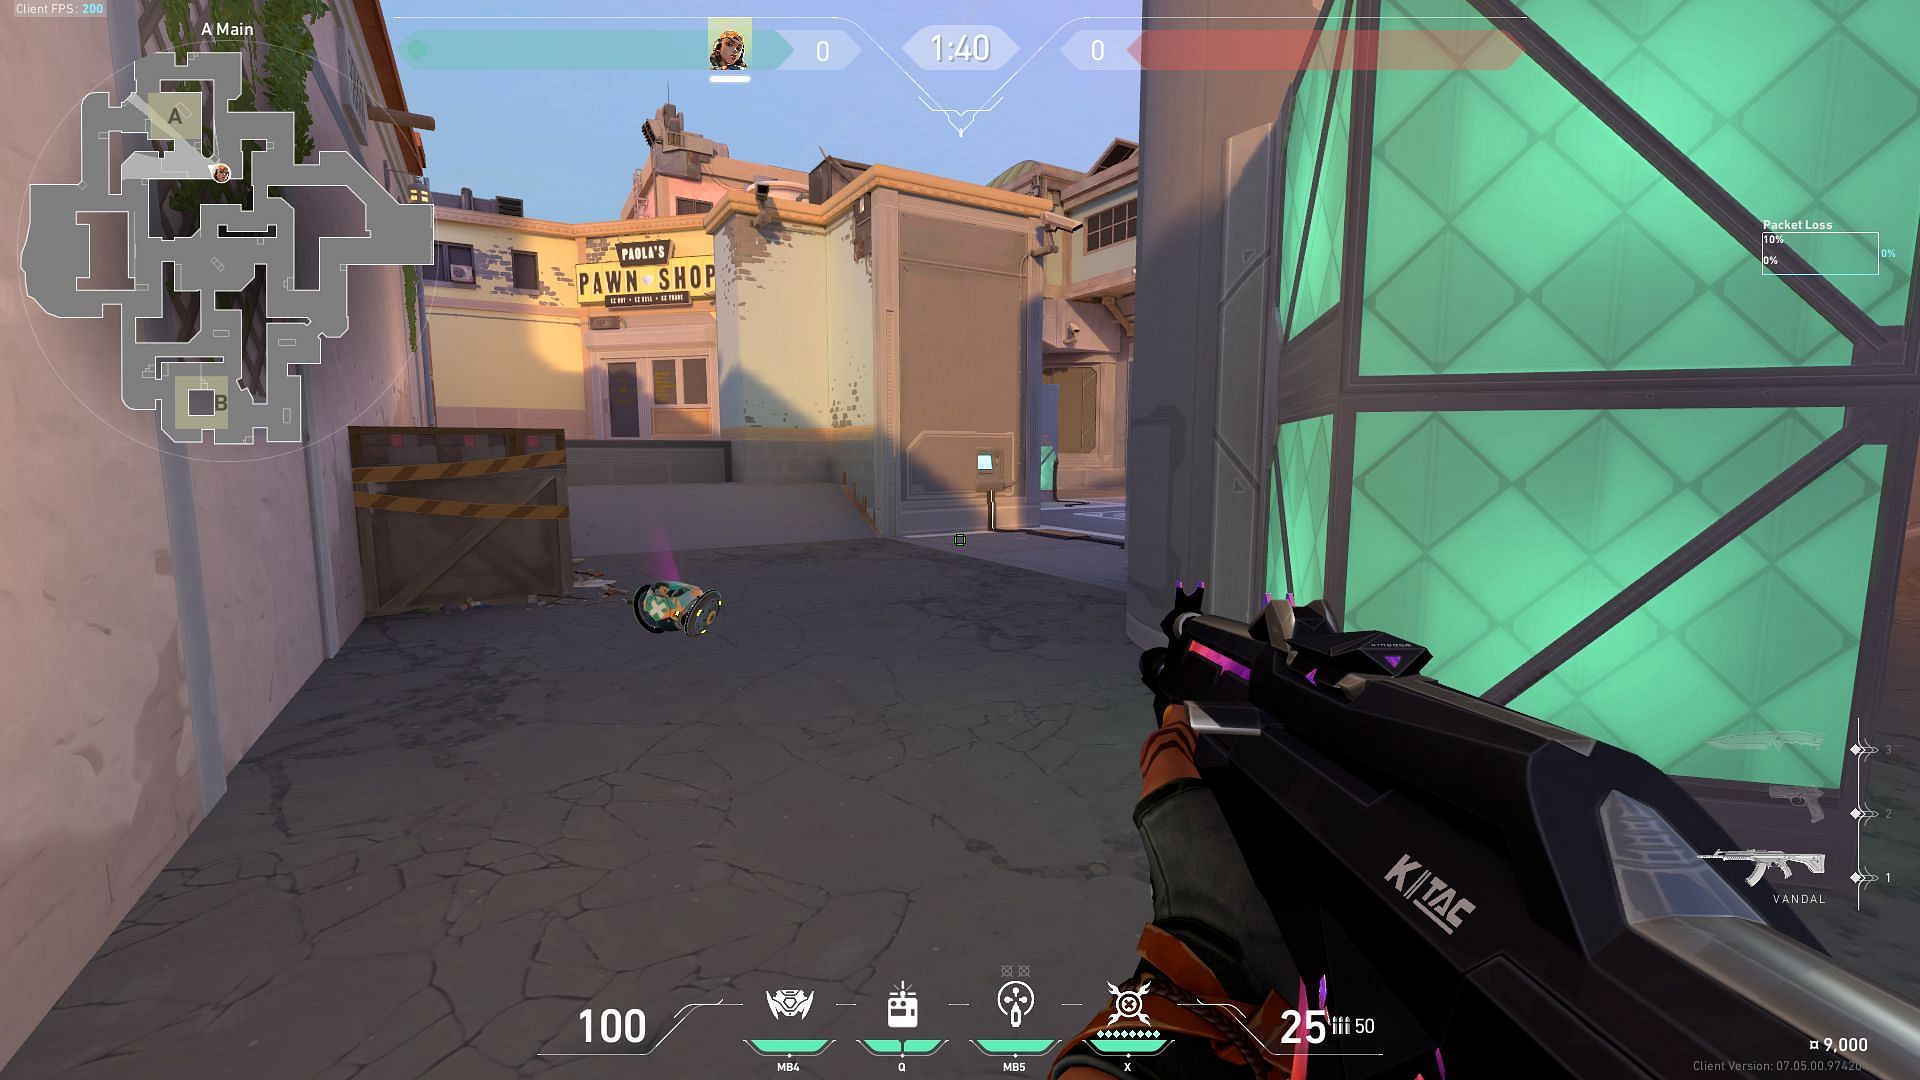
The boombot will travel in the direction and clear out any enemies near the radianite boxes and move to the A-Site entry.
2) B-Main to B-Site
Place yourself near the right corner of the B-Main entrance, as shown in the image. Equip the boombot and align its path so that it touches the pillar (shown with a circle).
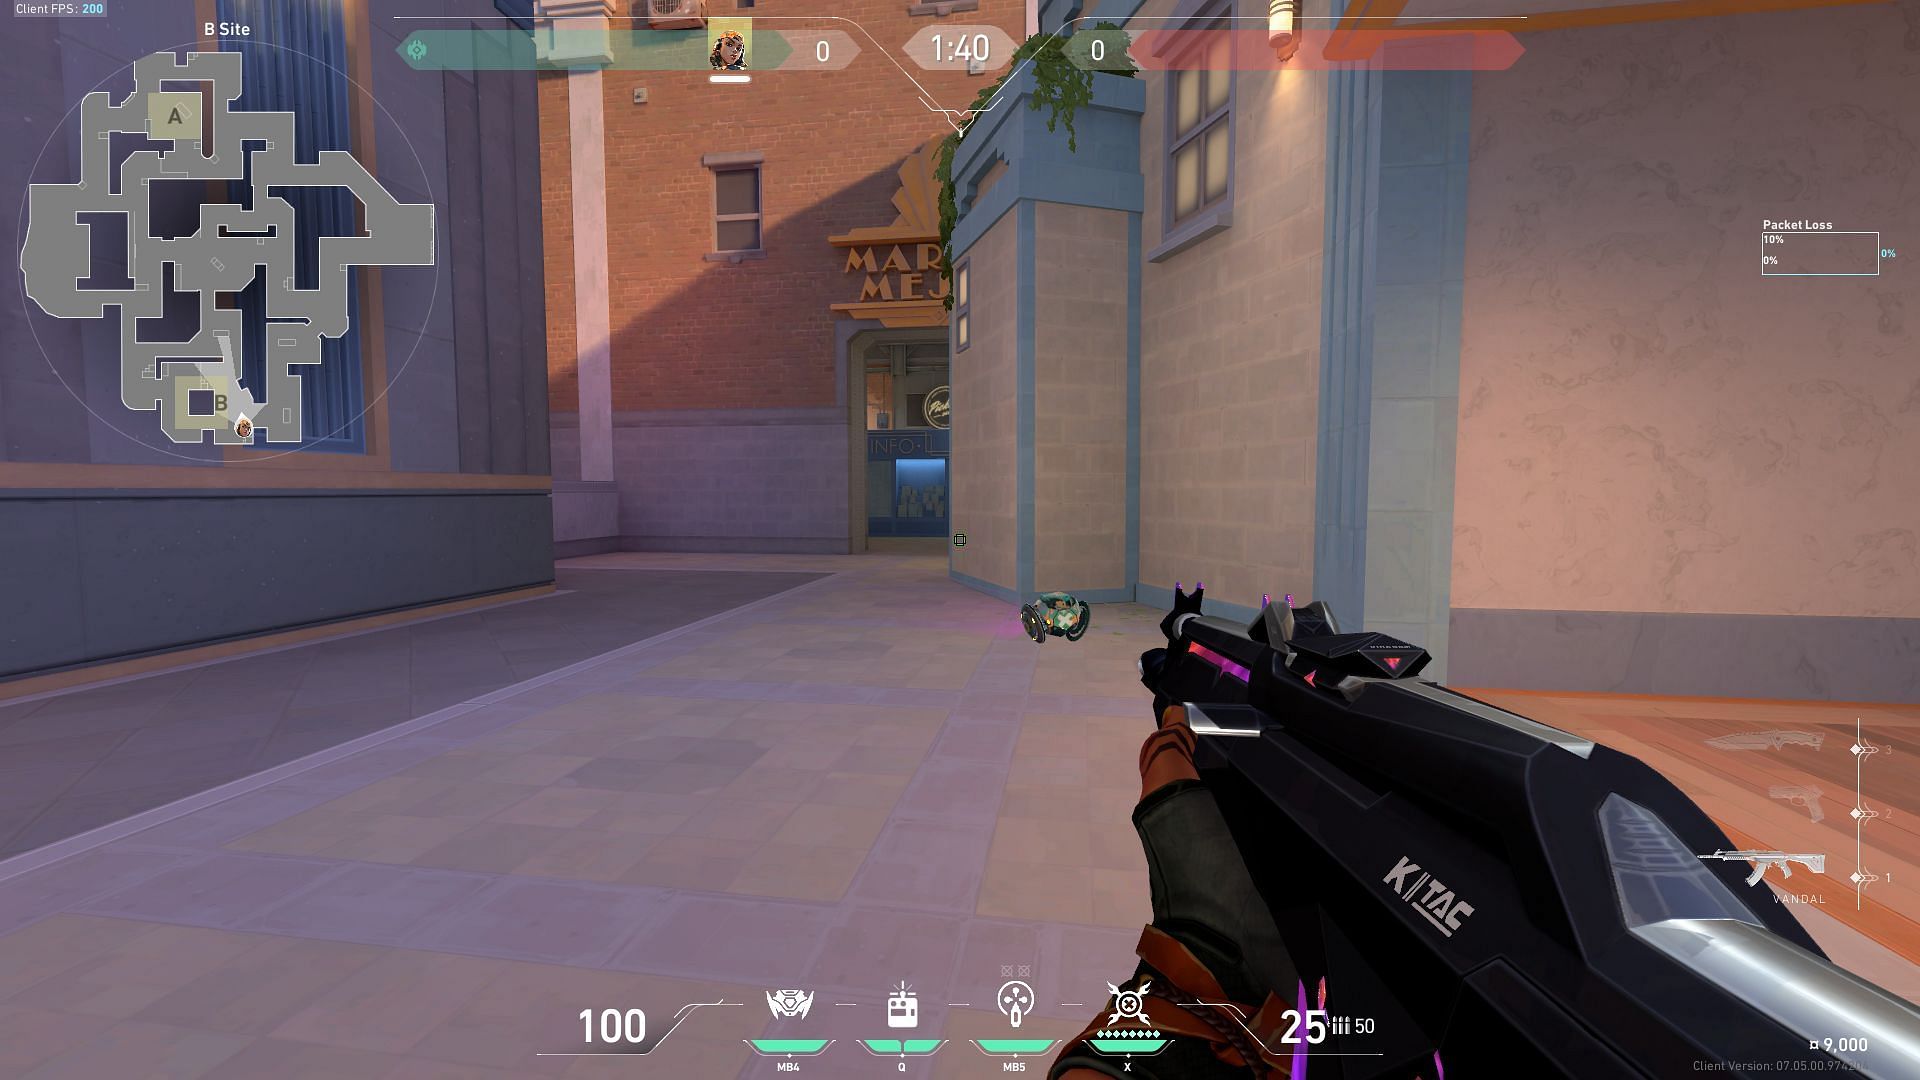
The boombot will bounce off the B-Main entry to clear out the corner on the right and travel to the B-Market entrance.
Follow Sportskeeda for more recent updates and detailed Sunset guides.
