'%20x='0'%20y='0'%20height='100%25'%20width='100%25'%20%0A%20%20%20%20%20%20%20%20%20%20xlink%3Ahref='data:image/jpg;base64,/9j/2wBDAAYEBQYFBAYGBQYHBwYIChAKCgkJChQODwwQFxQYGBcUFhYaHSUfGhsjHBYWICwgIyYnKSopGR8tMC0oMCUoKSj/2wBDAQcHBwoIChMKChMoGhYaKCgoKCgoKCgoKCgoKCgoKCgoKCgoKCgoKCgoKCgoKCgoKCgoKCgoKCgoKCgoKCgoKCj/wgARCAAGAAoDASIAAhEBAxEB/8QAFgABAQEAAAAAAAAAAAAAAAAAAAMG/8QAFAEBAAAAAAAAAAAAAAAAAAAABP/aAAwDAQACEAMQAAAAlkwTv//EACAQAAIBAwQDAAAAAAAAAAAAAAECAwAFEwQGBxEhkrH/2gAIAQEAAT8Ak3Dc4dAJomQzOuRQzEKq9faPJl9HgYPWv//EABcRAQADAAAAAAAAAAAAAAAAAAIAAxH/2gAIAQIBAT8Aqayf/8QAGREAAQUAAAAAAAAAAAAAAAAAAgABAxEh/9oACAEDAQE/AJgFqxf/2Q=='%3E%3C/image%3E%3C/svg%3E)
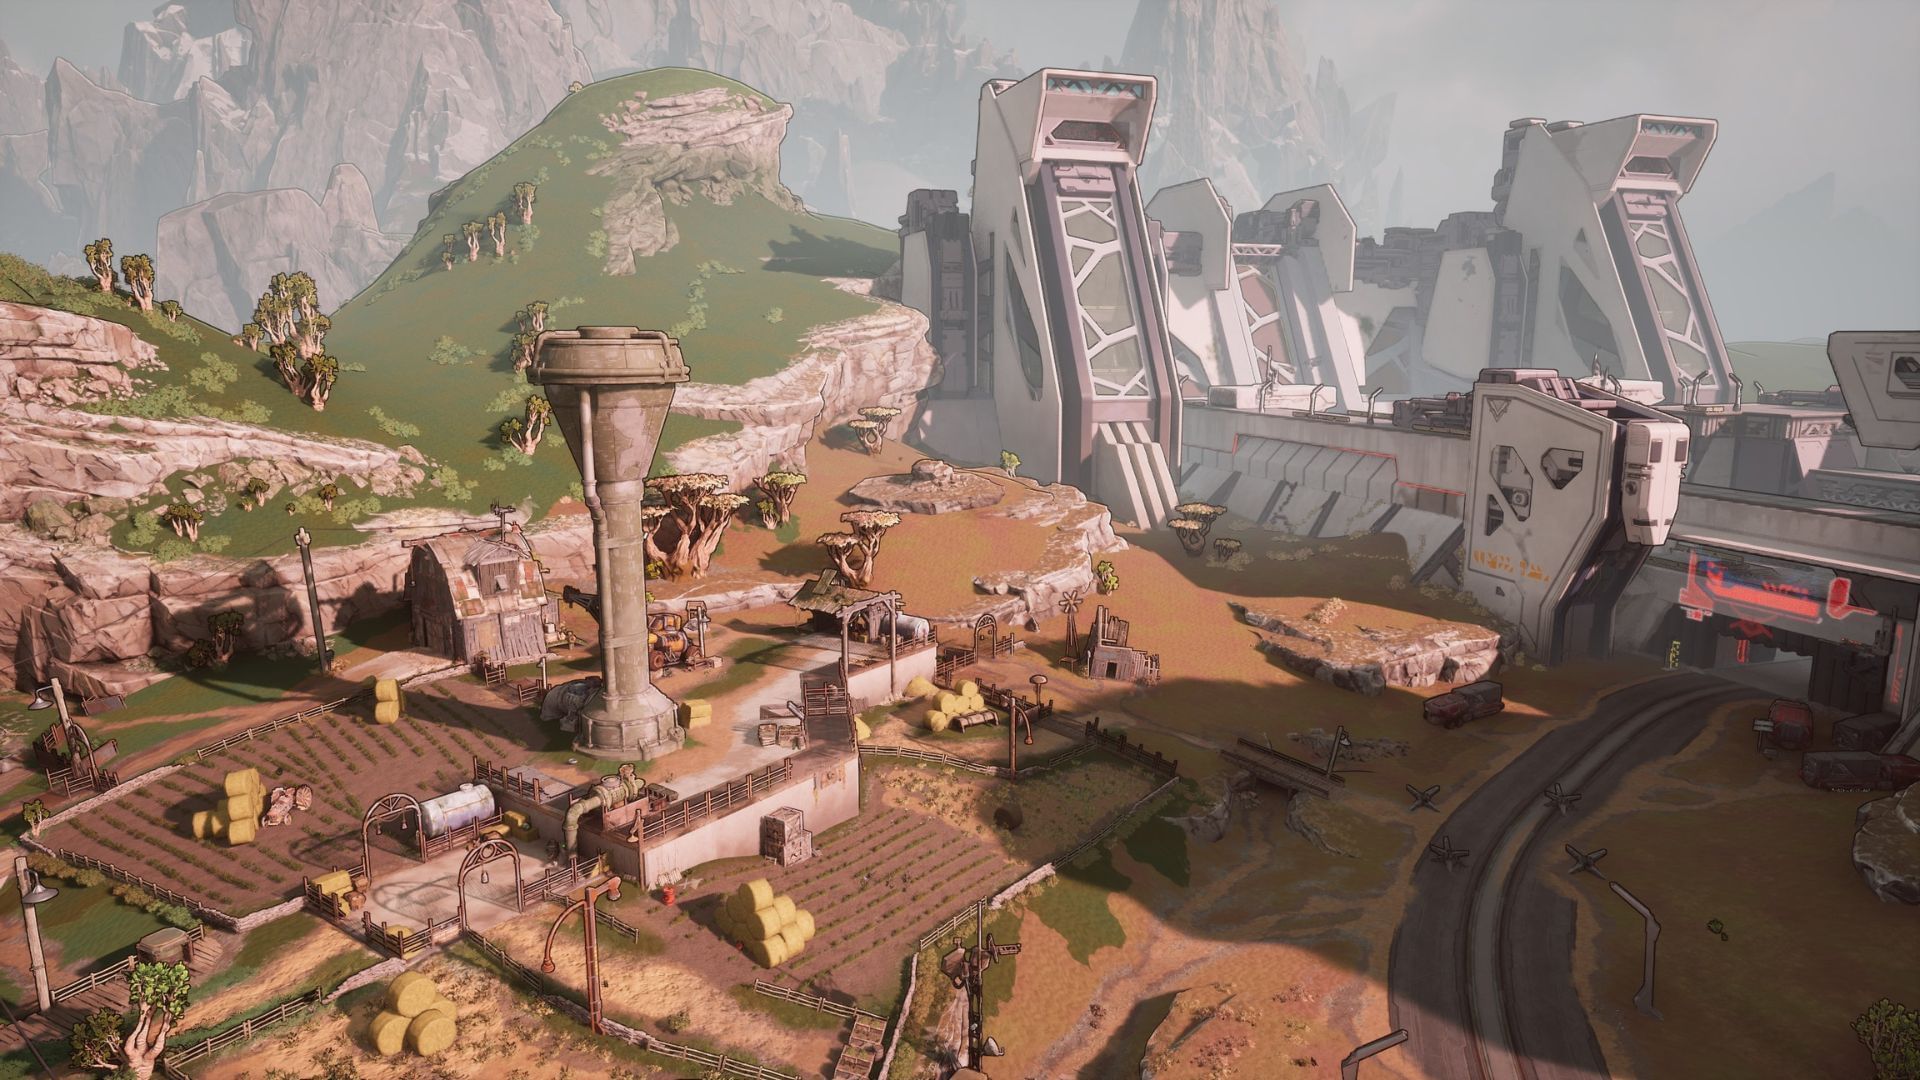
The Dissected Plateau in Borderlands 4 is in the bottom right section of the map. It provides access to the Vermillion Checkpoint, which is the only way to enter Terminus Range after you defeat Idolator Sol. Much like the rest of the Fadefields, this area also contains a variety of collectibles you can find from one corner to another.
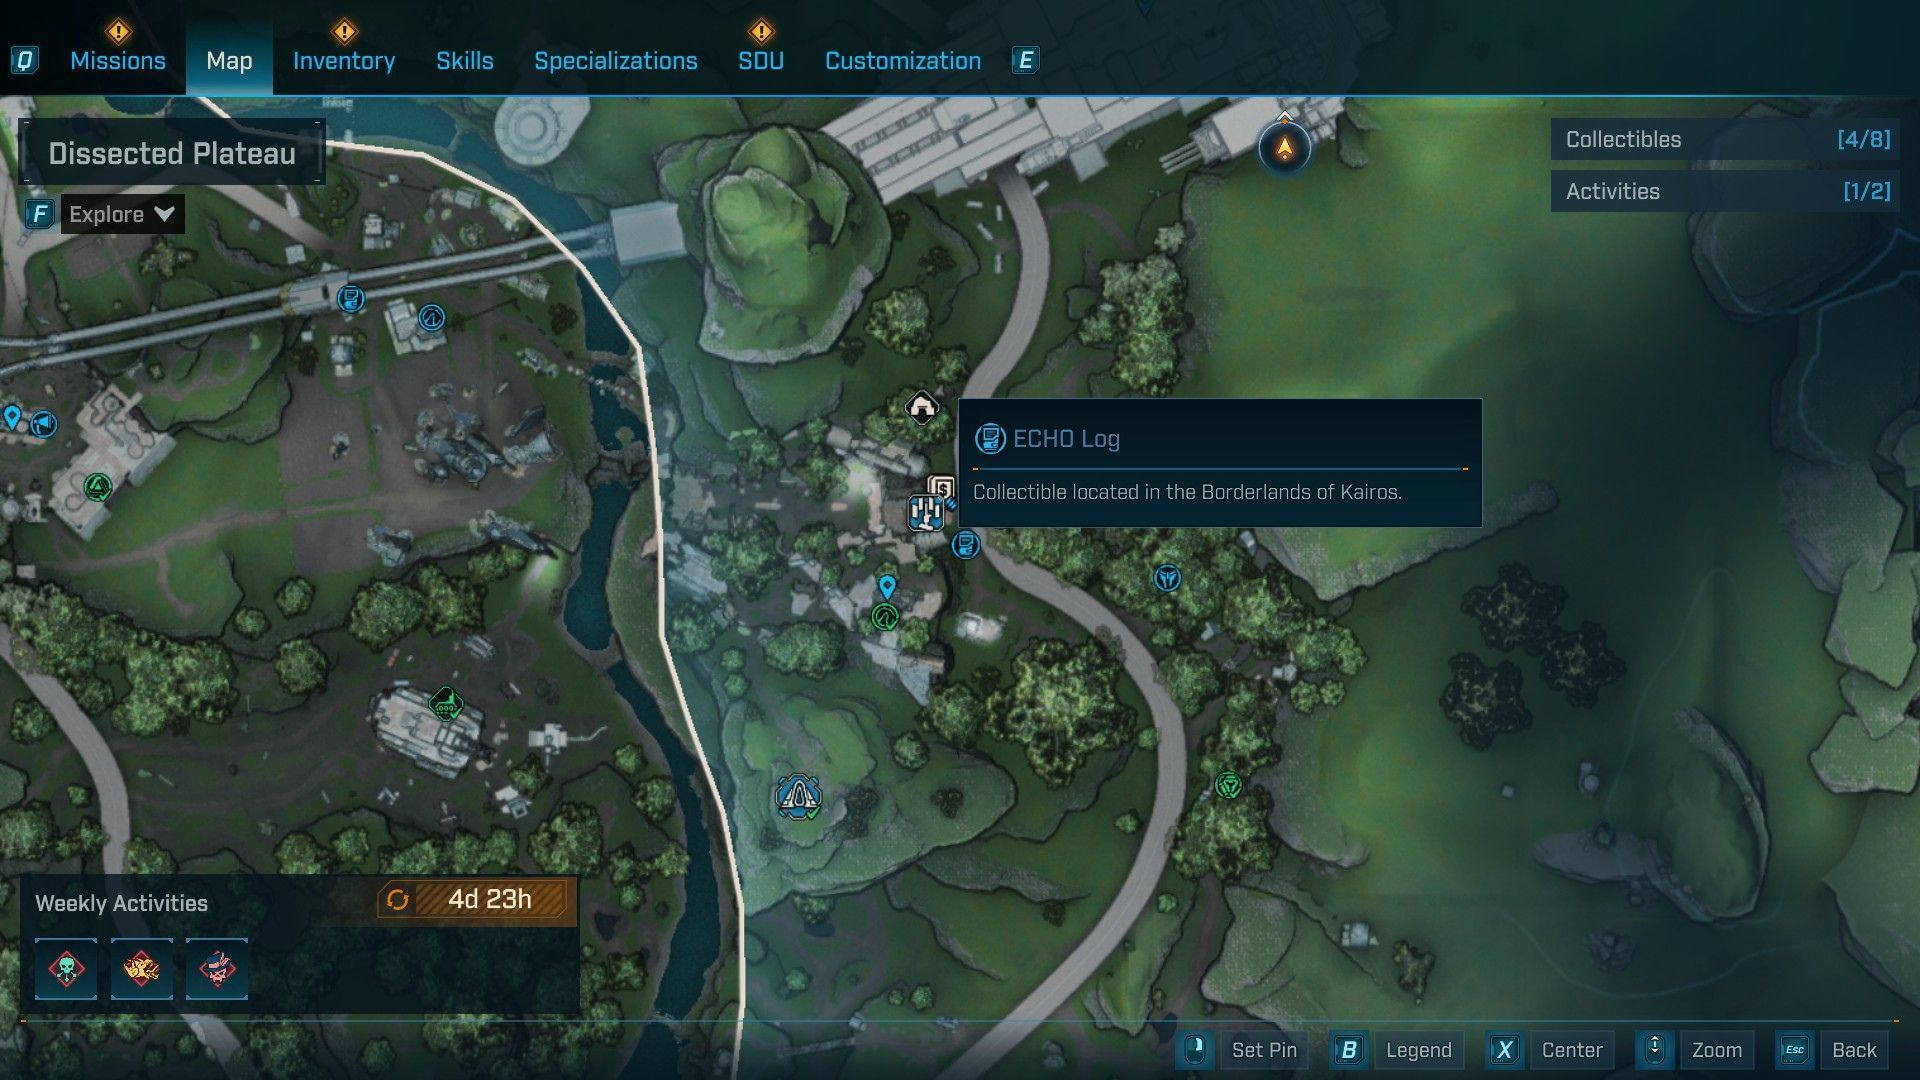
There are 20 collectibles within the Dissected Plateau. Exploring the area by yourself can take a while; that’s why we have compiled a list and location of every collectible.
All Dissected Plateau collectibles in Borderlands 4
Here are all the collectible items in the region:
- Vault Hunter’s Guide to Kairos: 1
- Evocariums: 1
- Dead Bolts: 1
- Lost Capsules: 1
- Survivalist Caches: 1
- Vault Symbols: 2
- Propaganda Speakers: 2
- ECHO Logs: 11
Here are the locations of all the collectibles in the Dissected Plateau region of Borderlands 4:
Vault Hunter’s Guide to Kairos
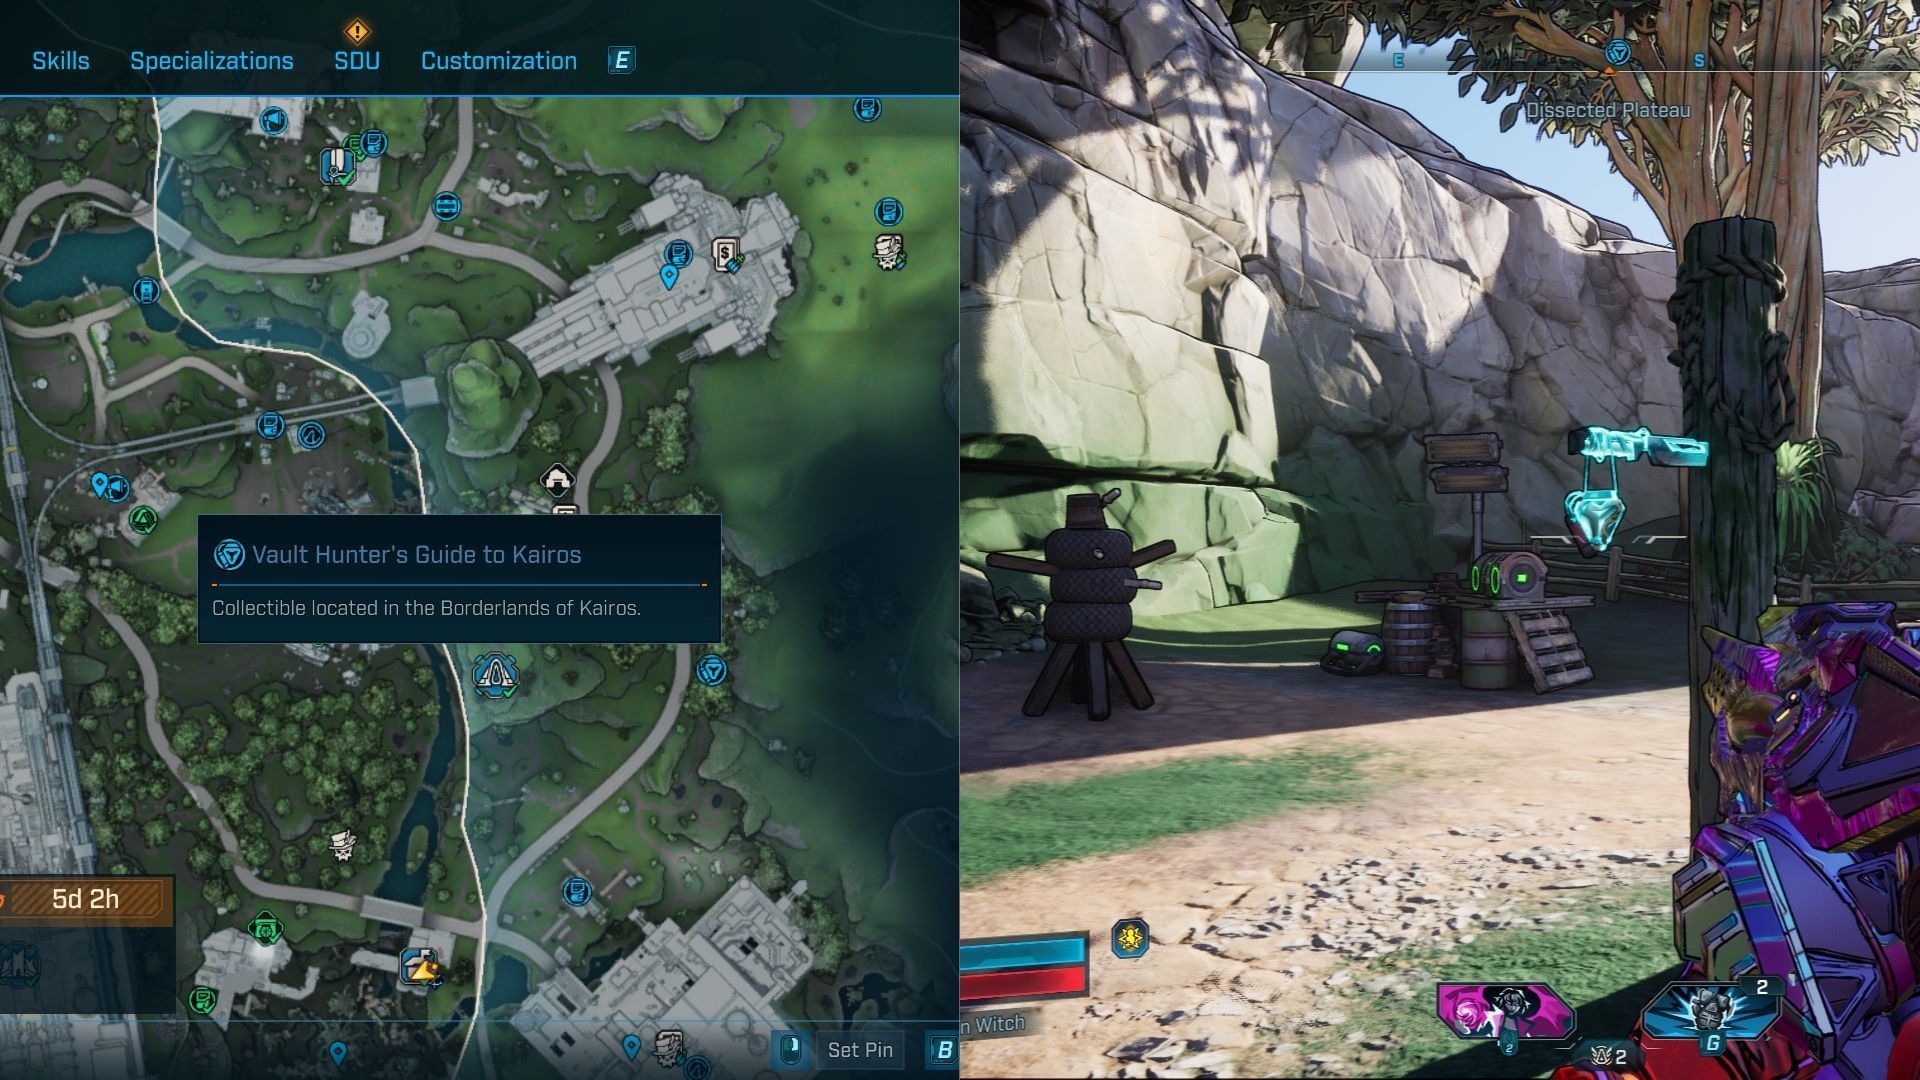
This collectible is at the center of the area near the Arch of Impetus. The closest fast travel location to this item is Zadra’s Backup Plan. Upon reaching the spot, you’ll find Rippers guarding the area. On the left, you’ll find a training dummy made out of tiers and wood. The Vault Hunter’s Guide to Kairos will be hanging by the wooden pillar nearby.
Evocarium
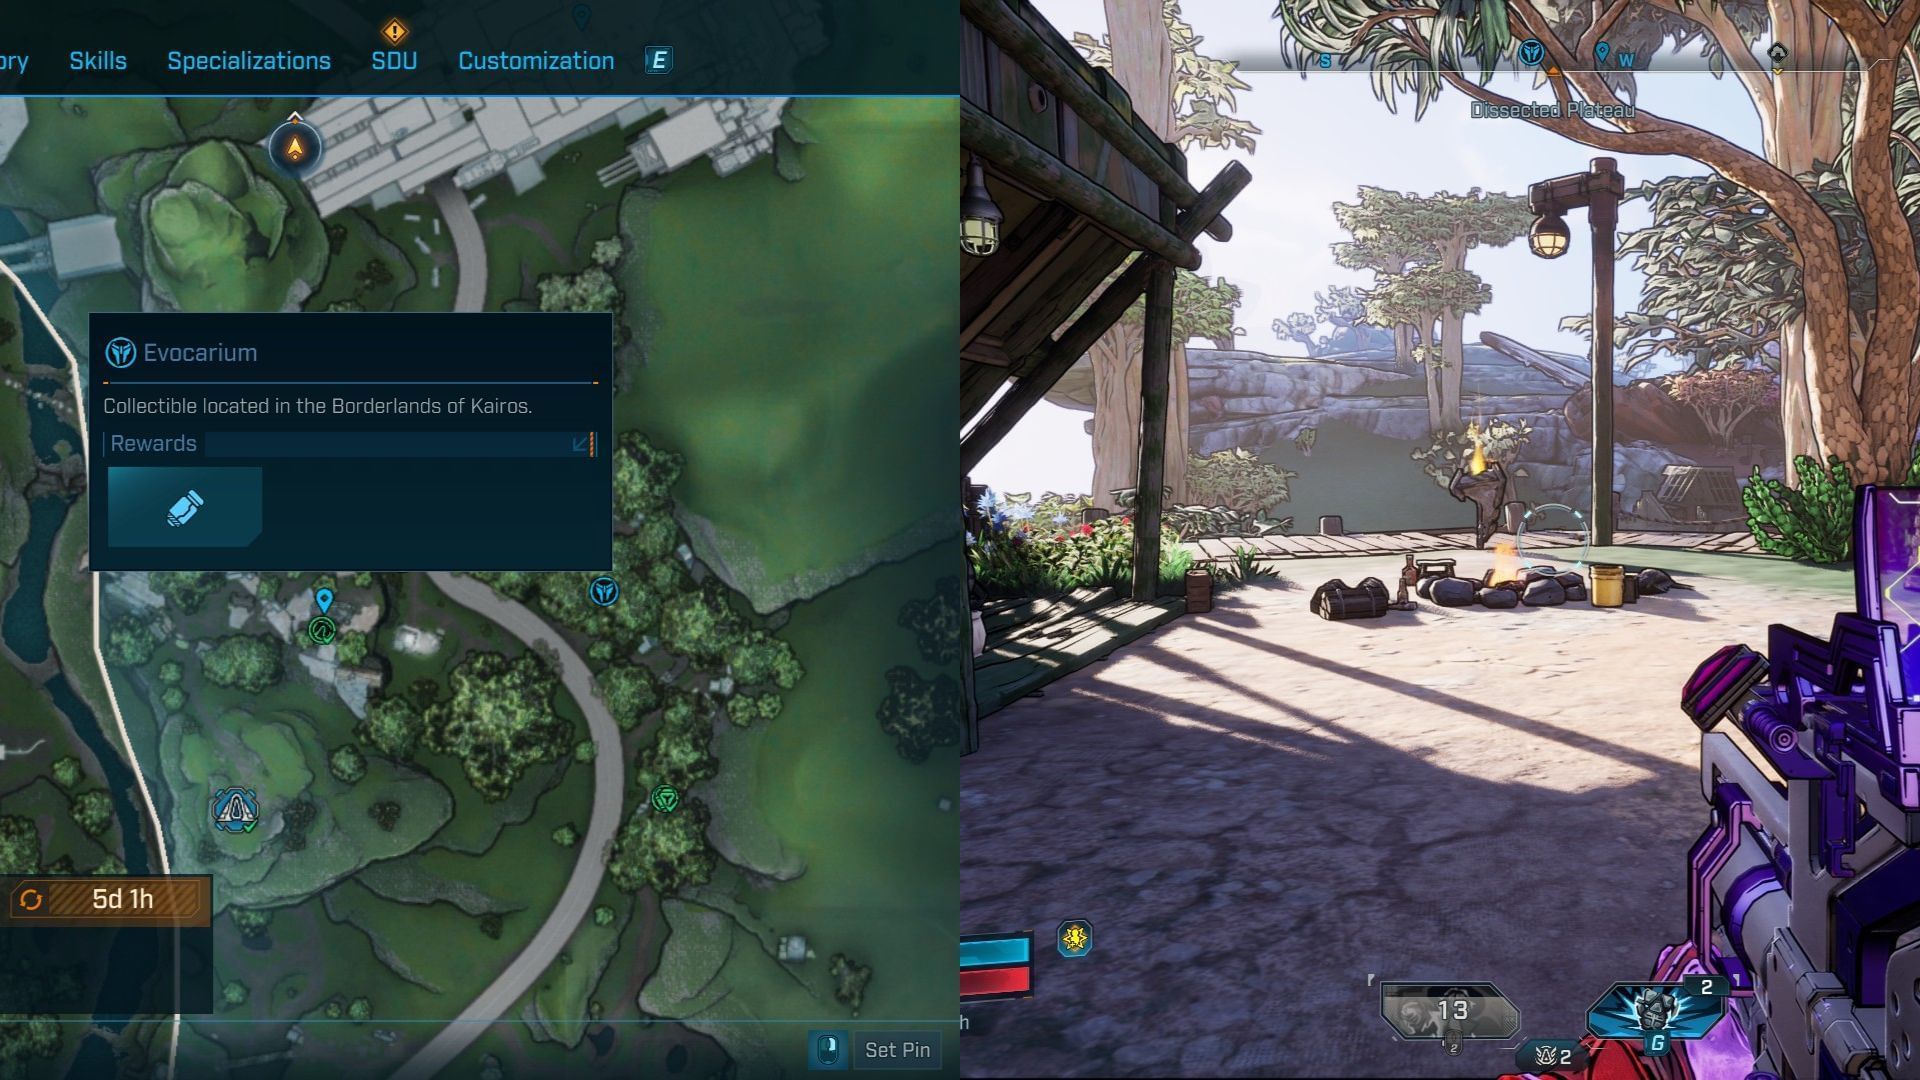
The Evocarium is near the same spot as the Vault Hunter’s Guide to Kairos. Instead of heading left to the training dummy, head right to the top of the hill to find the device. Find all the golden balls and bring them back for your reward.
Dead Bolt
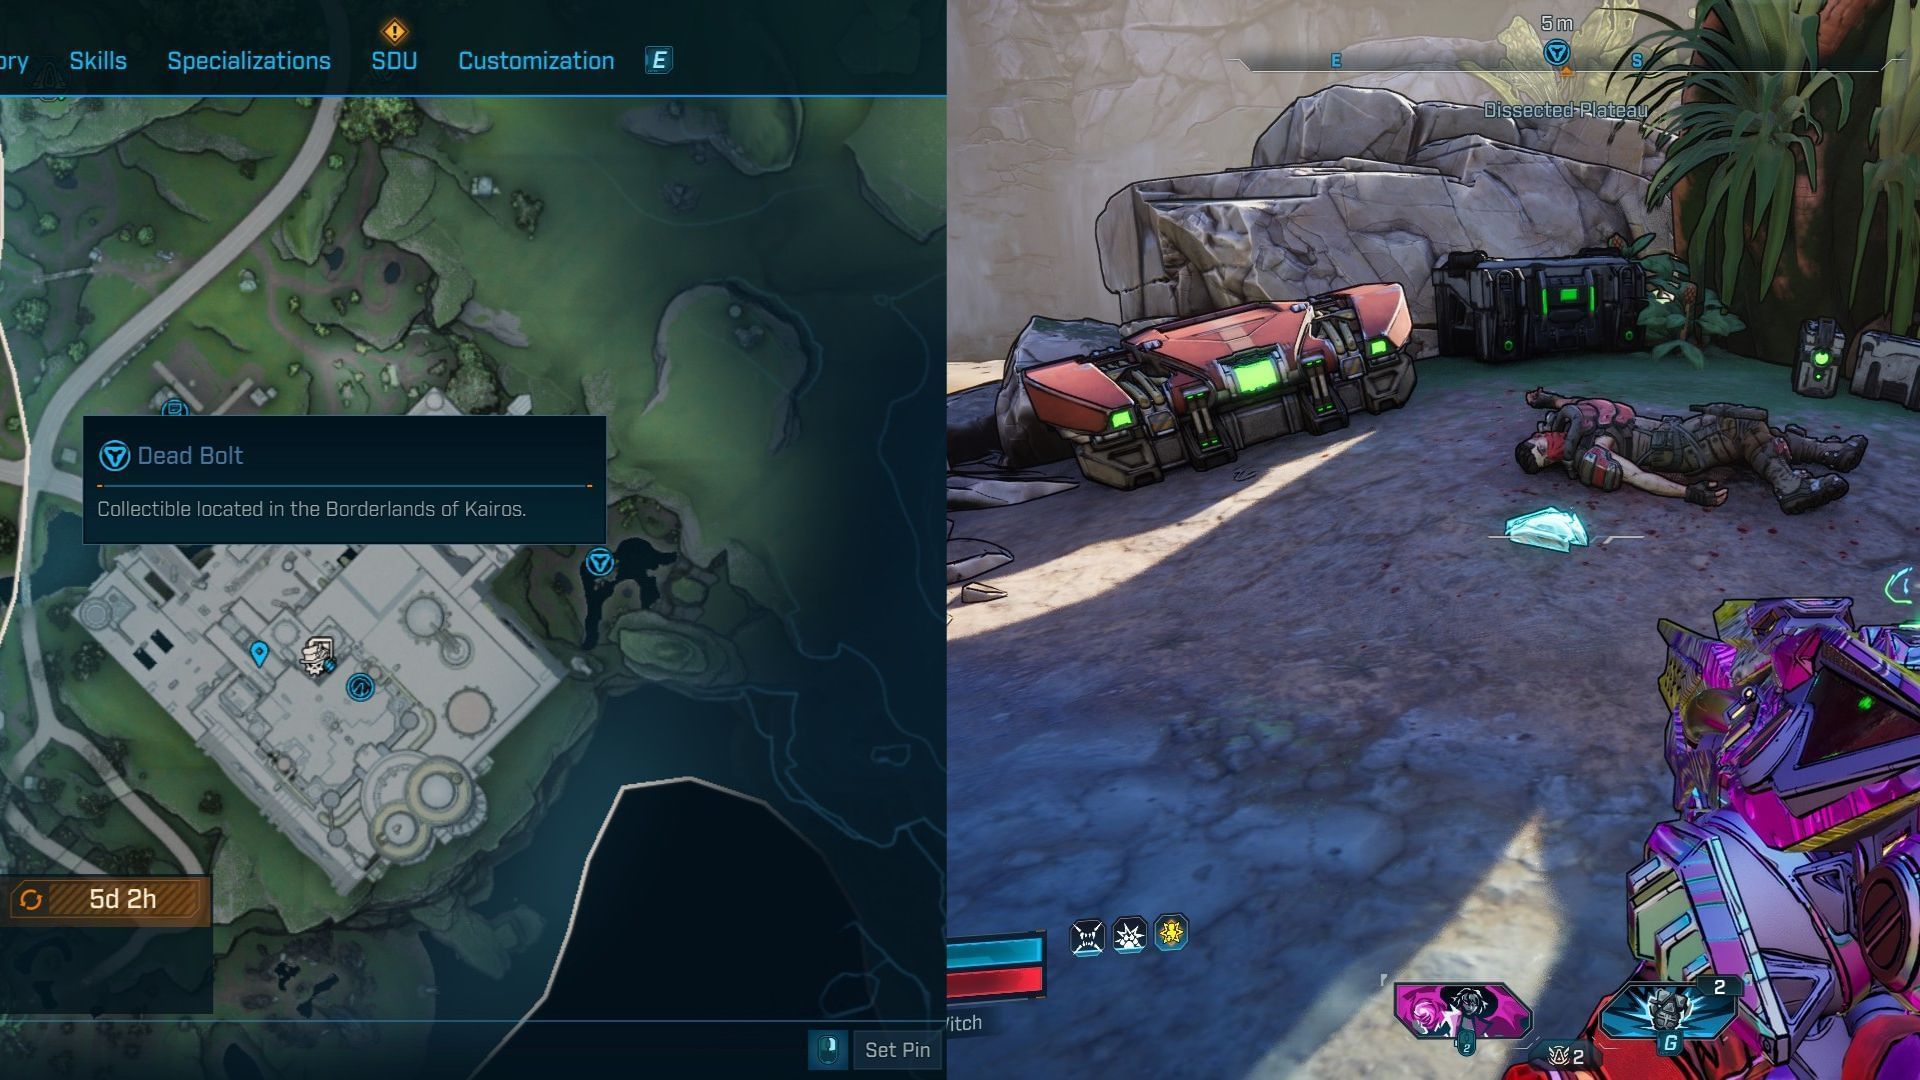
To find the Dead Bold, you’ll need to search the small water body beside the Killing Floor building that features the Opressor boss fight. Go to the left side of the facility to find a Mangler nest and a small path leading to the lake. The bold is at the center of the lake near a red chest, but the area is swarming with Wildhorns that you may want to take out first.
Lost Capsule
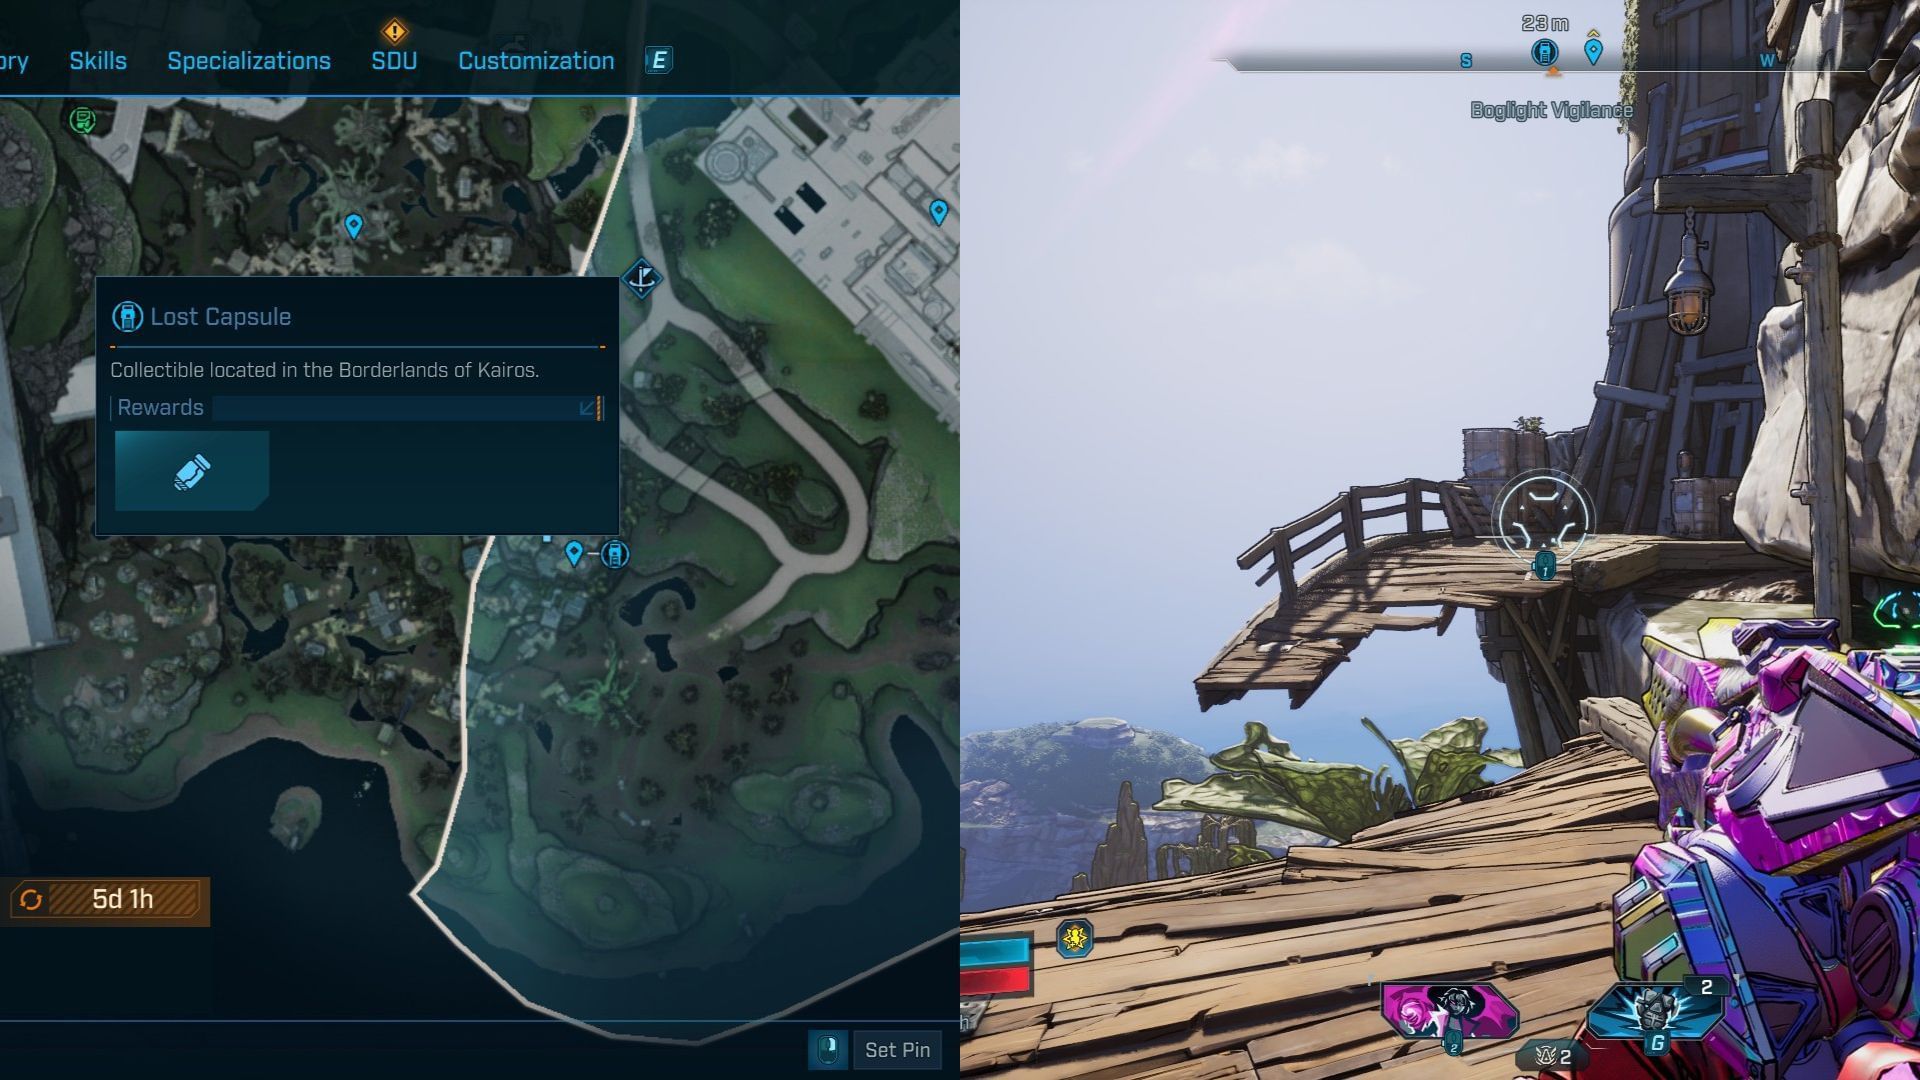
The Lost Capsule is on the Boglight Vigilance mountain top, where you can pick up the "Gone are my Leggies” side quest. After you reach the area, head to the shack on the left to find a wooden bridge leading to the capsule. Deliver it to Wyclef's Reprieve for some gear and SDU points.
Survivalist Cache
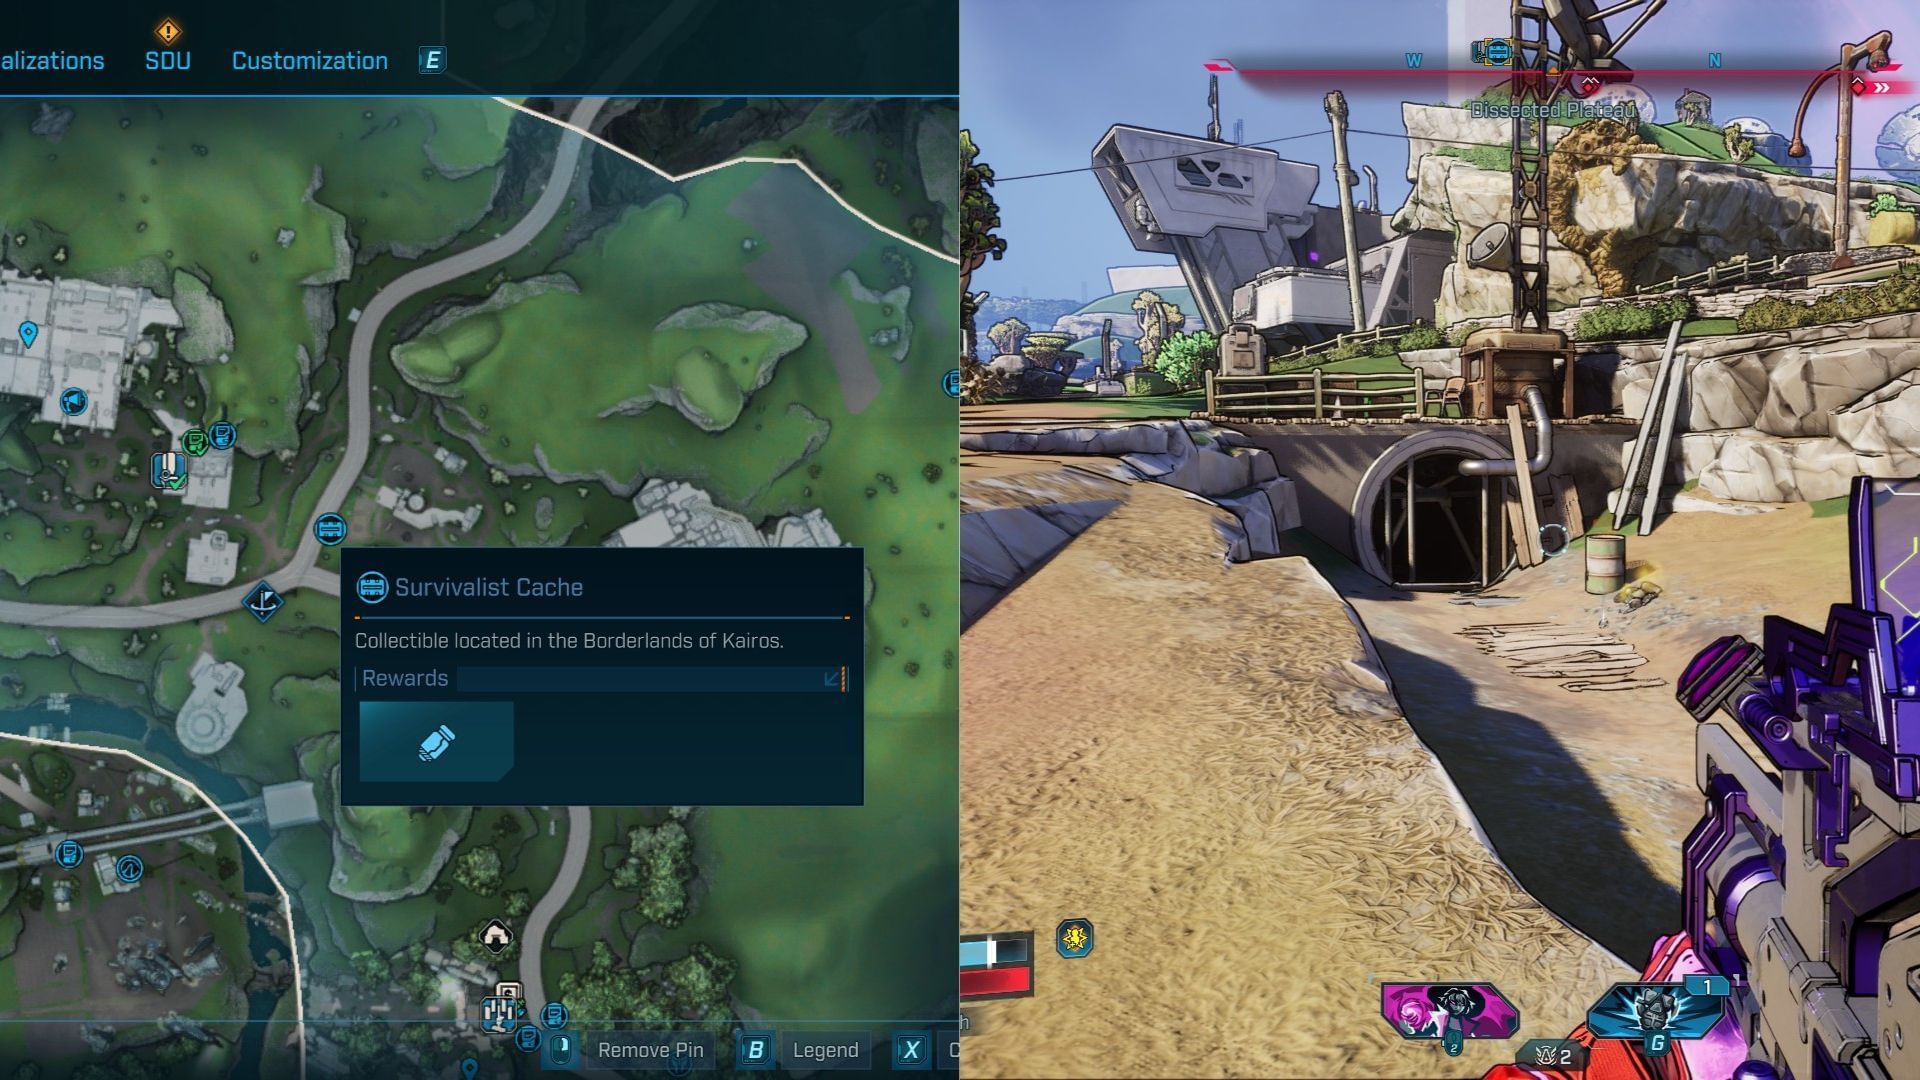
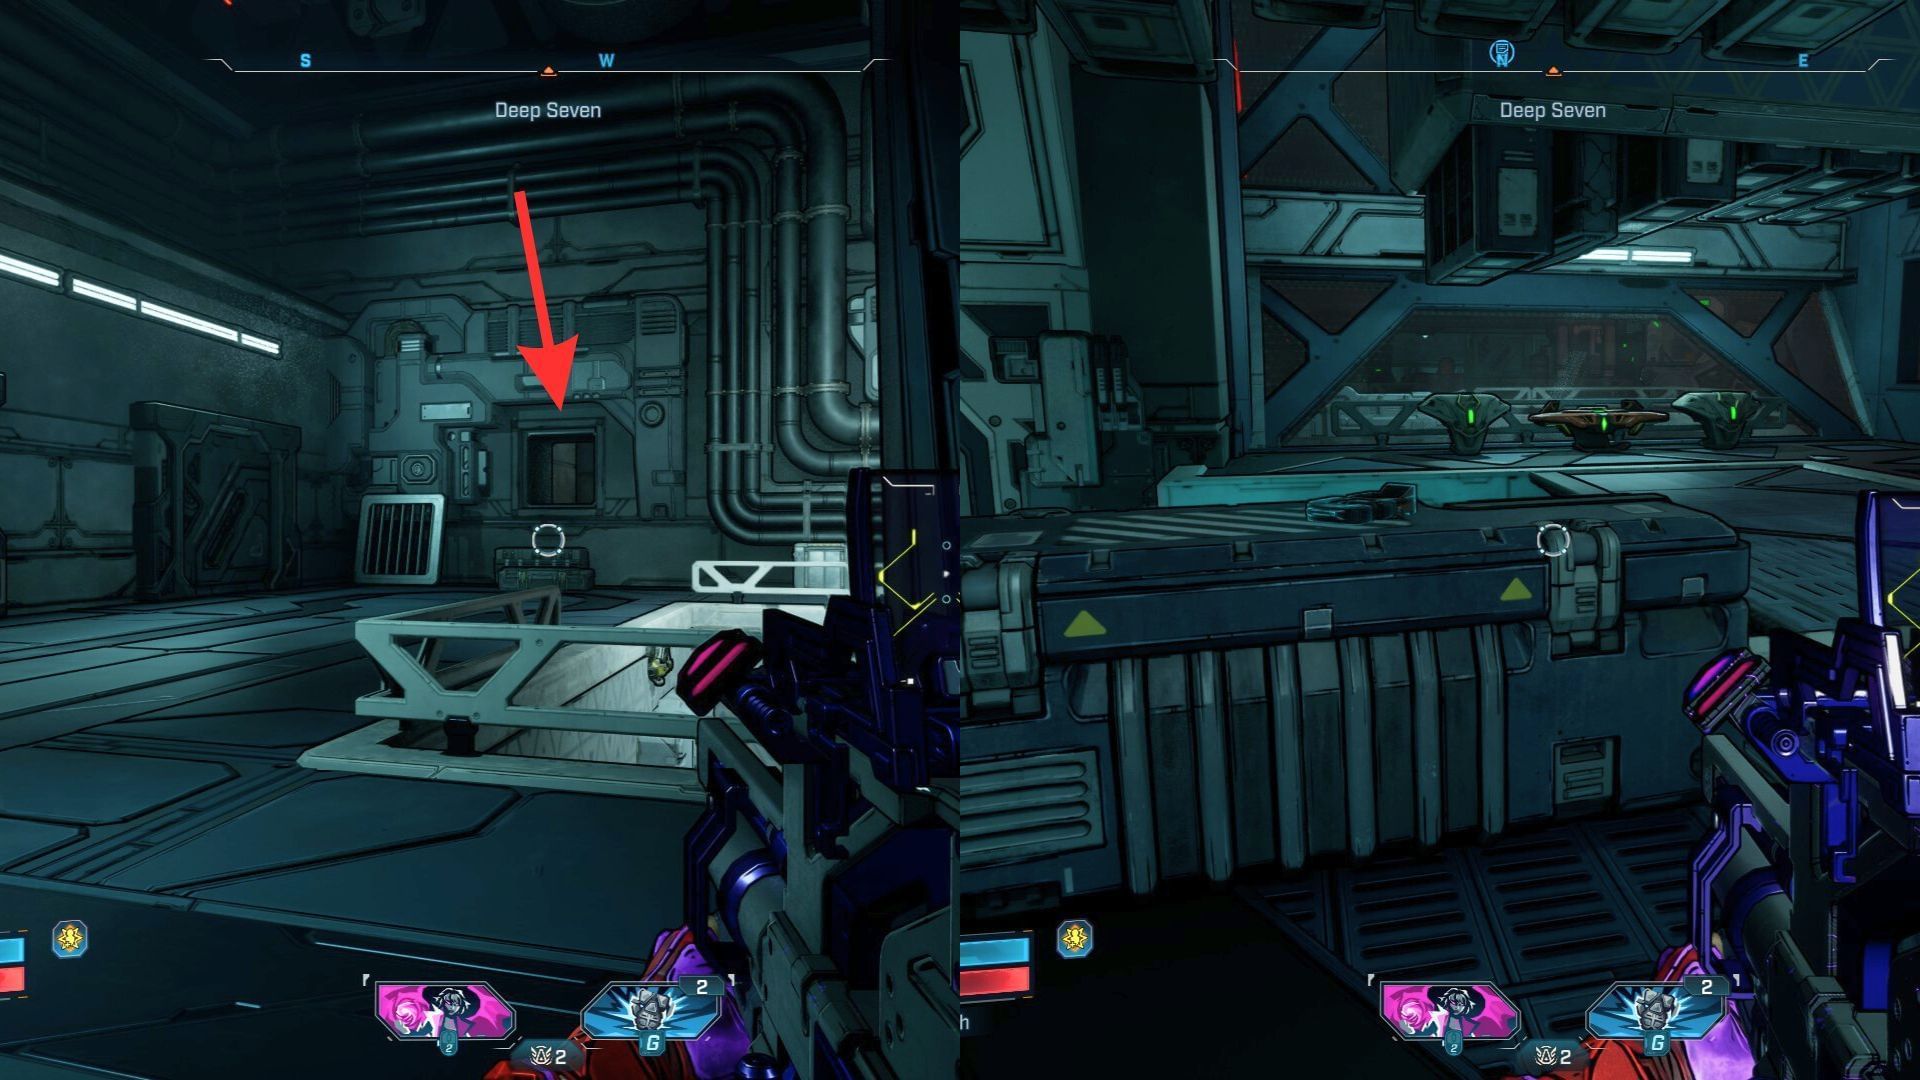
The Survivalist Cache is near the Deep Seven Order Silo. The loot may seem like it’s in the open, but you’ll need to look for a hidden entrance nearby that will take you to an underground bunker straight towards the cache.
Vault Symbol #1
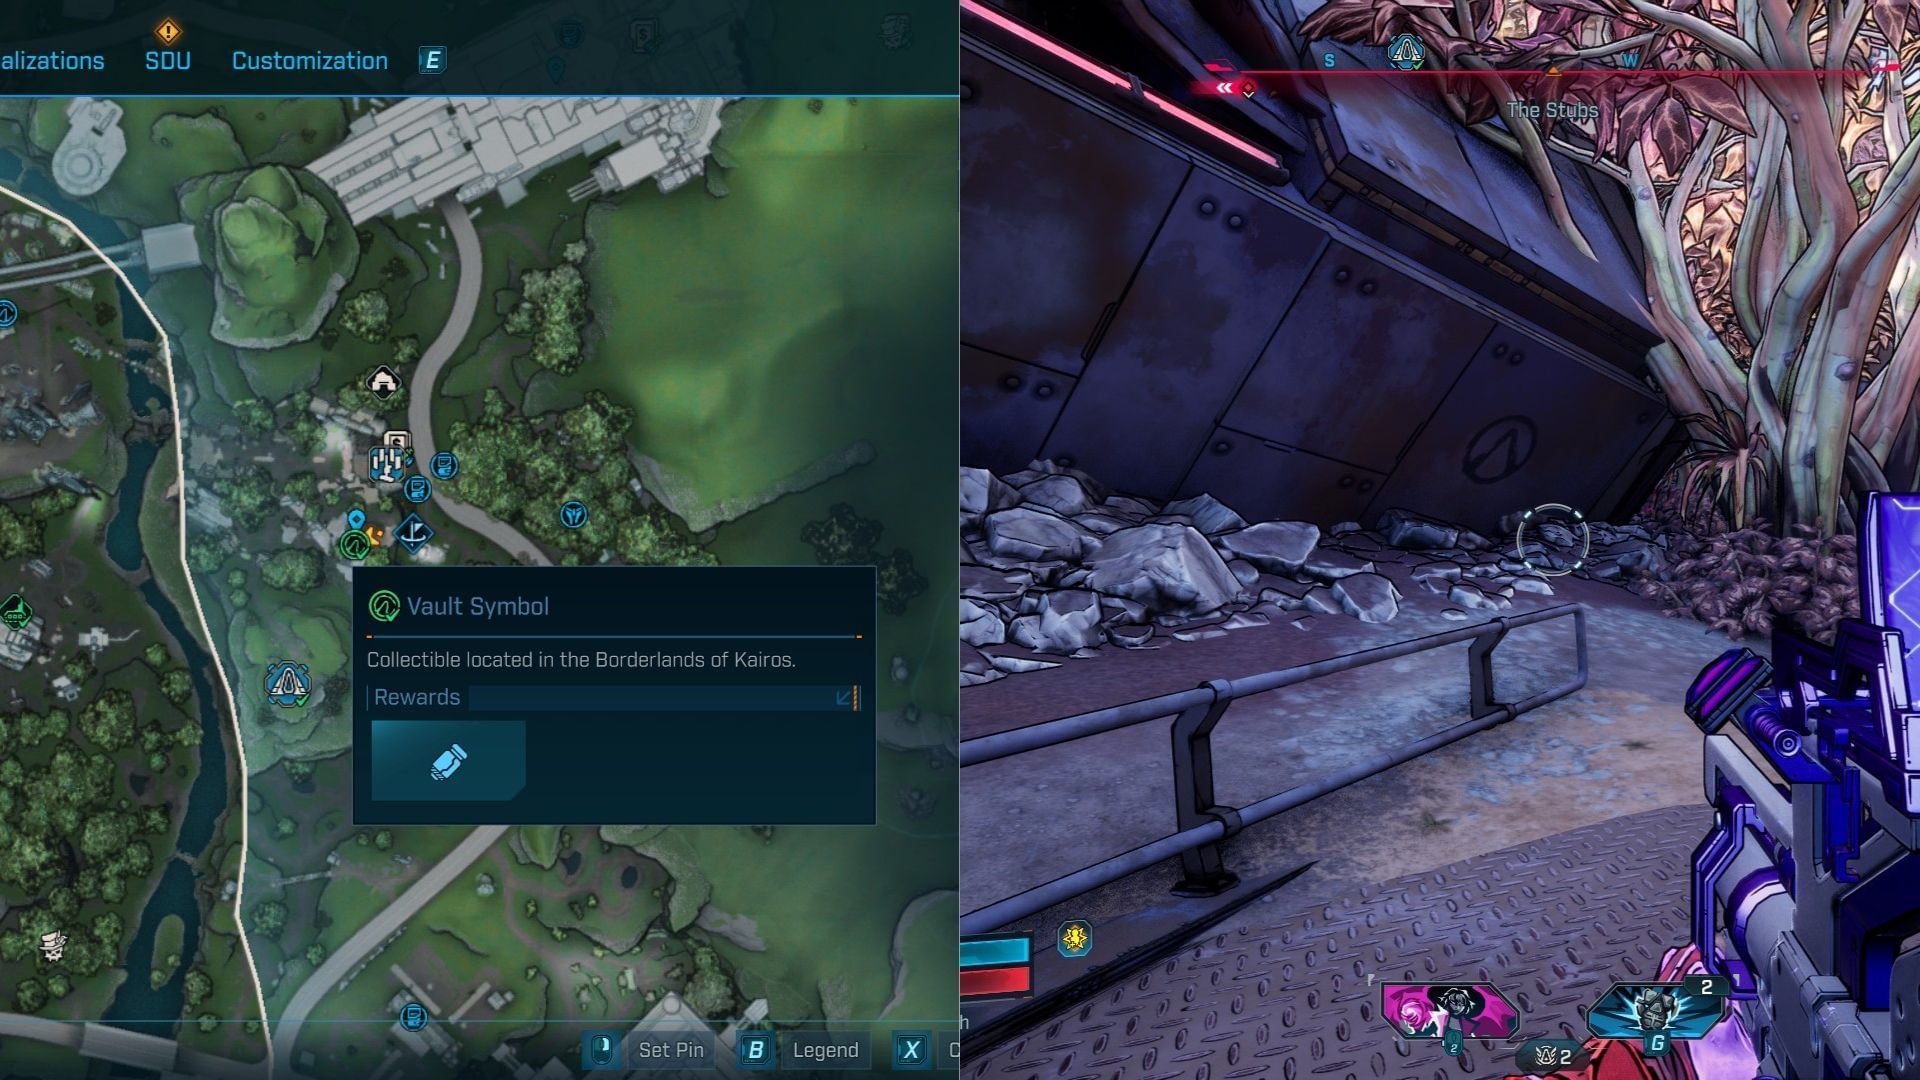
The first Vault Symbol is at a crash site near Zadra’s Backup Plan fast travel point. Head to the left side of the entrance, away from the Mangler nest, to find the symbol on a broken piece of ship hidden by a tree.
Vault Symbol #2
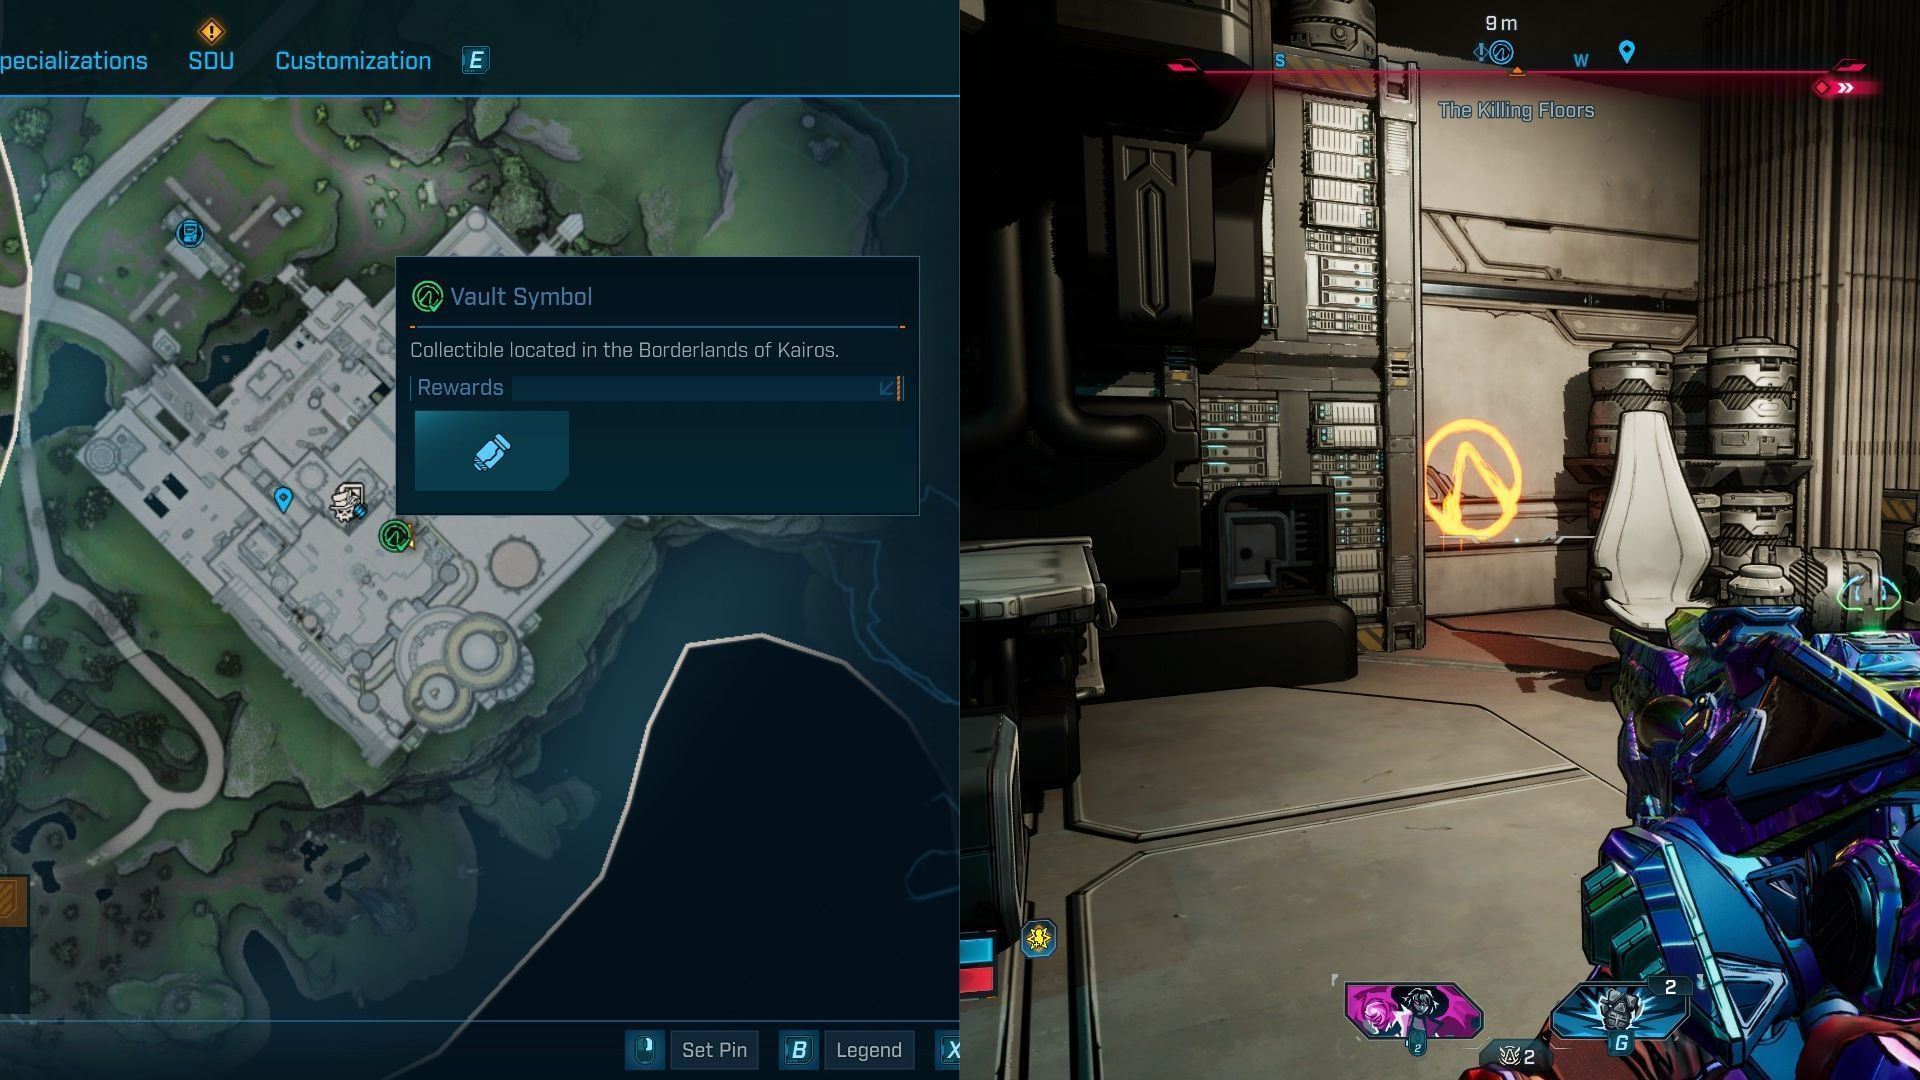
The second Vault Symbol is within the Killing Floor facility. You can find it within the room where the Timekeeper held Zadra before you helped her escape. To reach the room, take the router away from the boss into the processing facility. Alternatively, you can get the room during the ‘Lot to Process’ main quest.
Propaganda Speaker #1
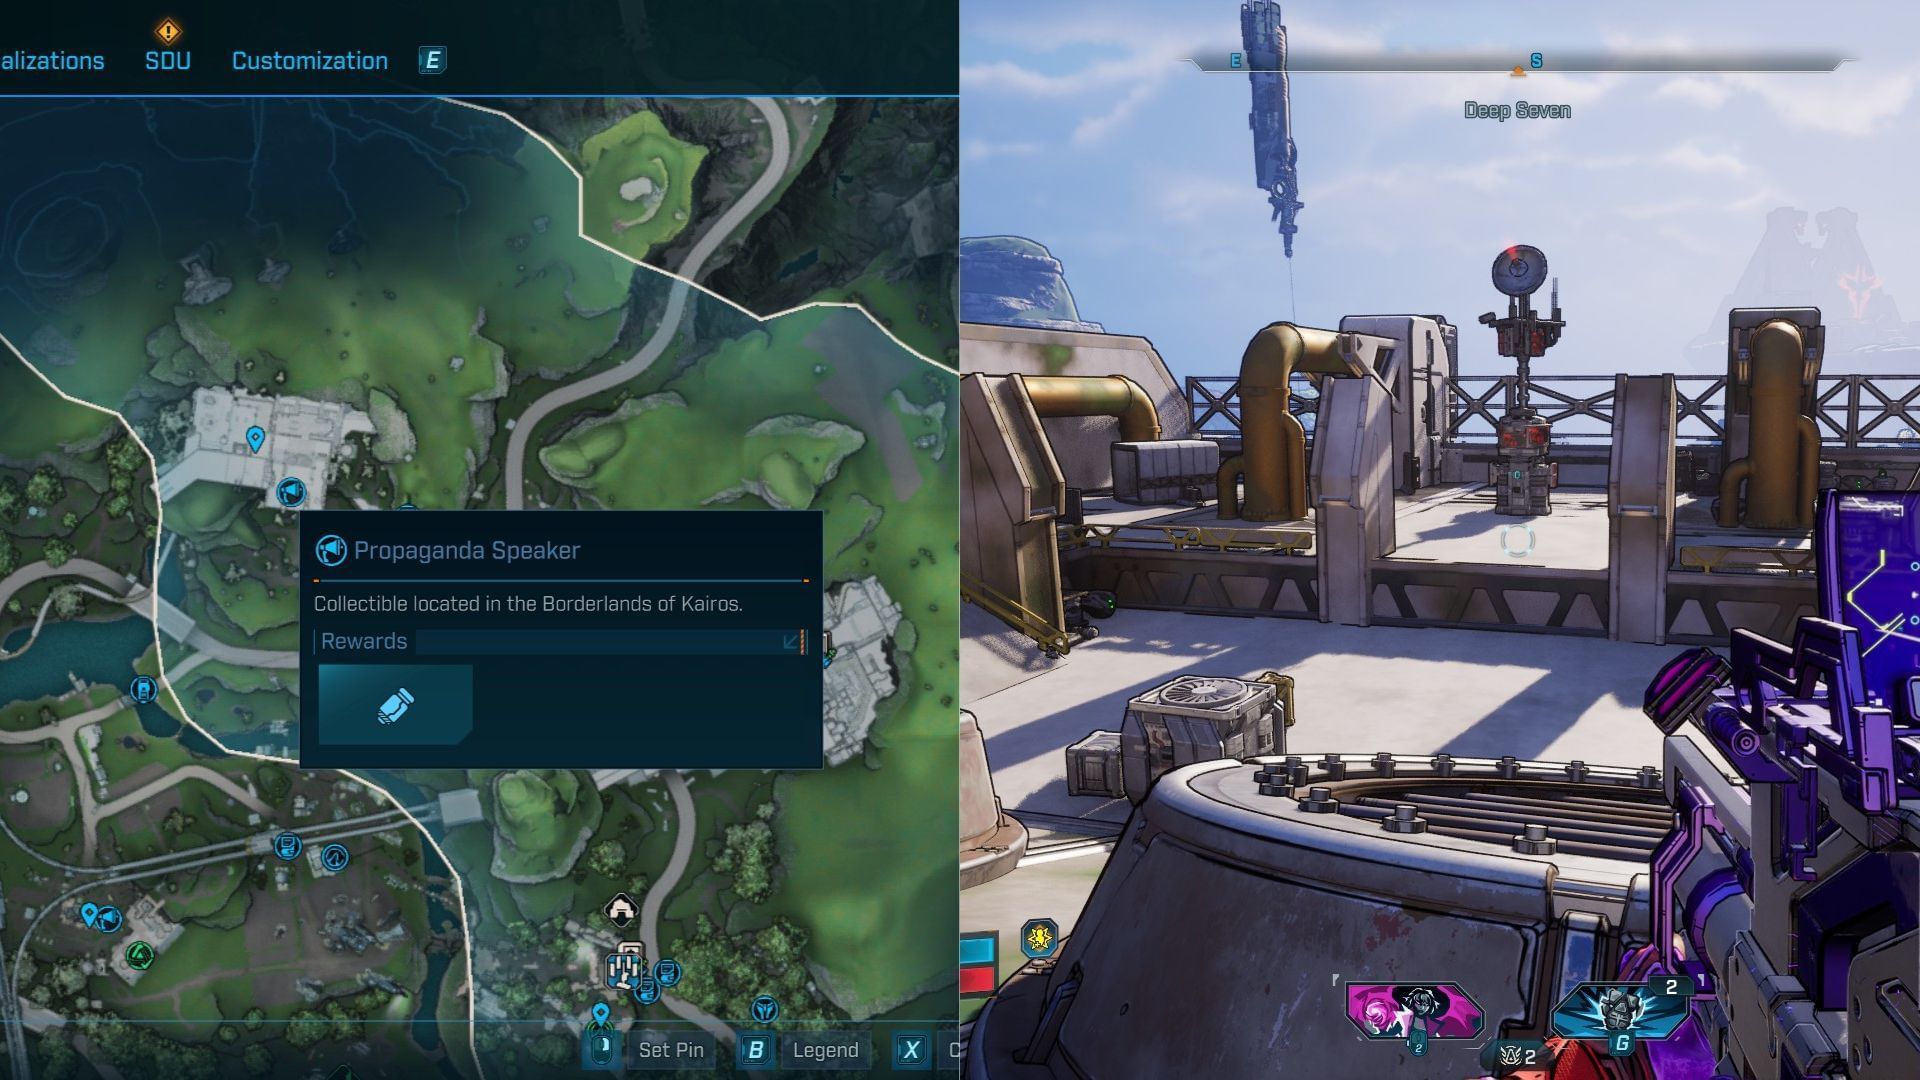
The first Propaganda Speaker is at the Deep Seven Order Silo. While capturing the Silo for the first time, you’ll come across an area with a lot of golden pipes and two massive air vents.
Propaganda Speaker #2
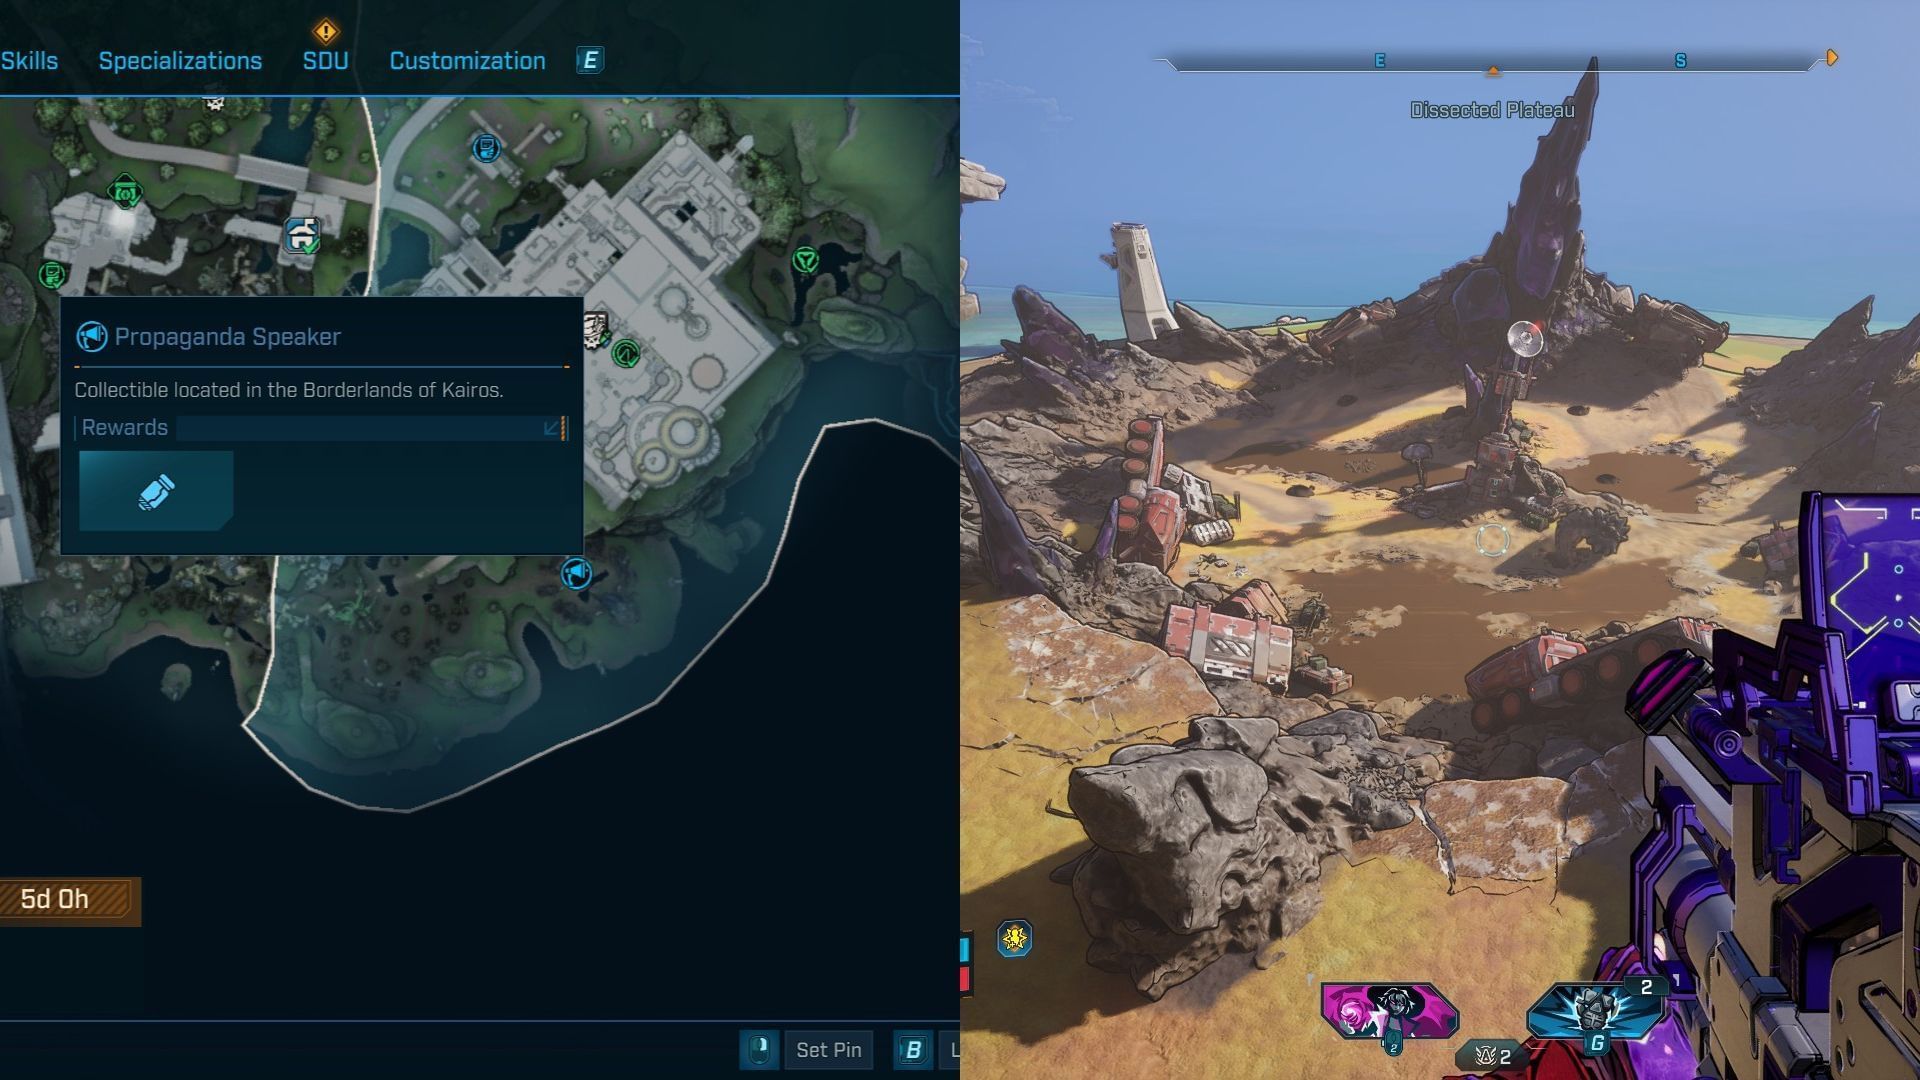
The second Propaganda Speaker is on the right side of the Killing Floor facility at the bottom of the area. The fastest router to its location is traveling down the off-road path until you reach the purple shard, where you will find the speaker in the middle of a Thresher nest.
ECHO Log #1 and #2
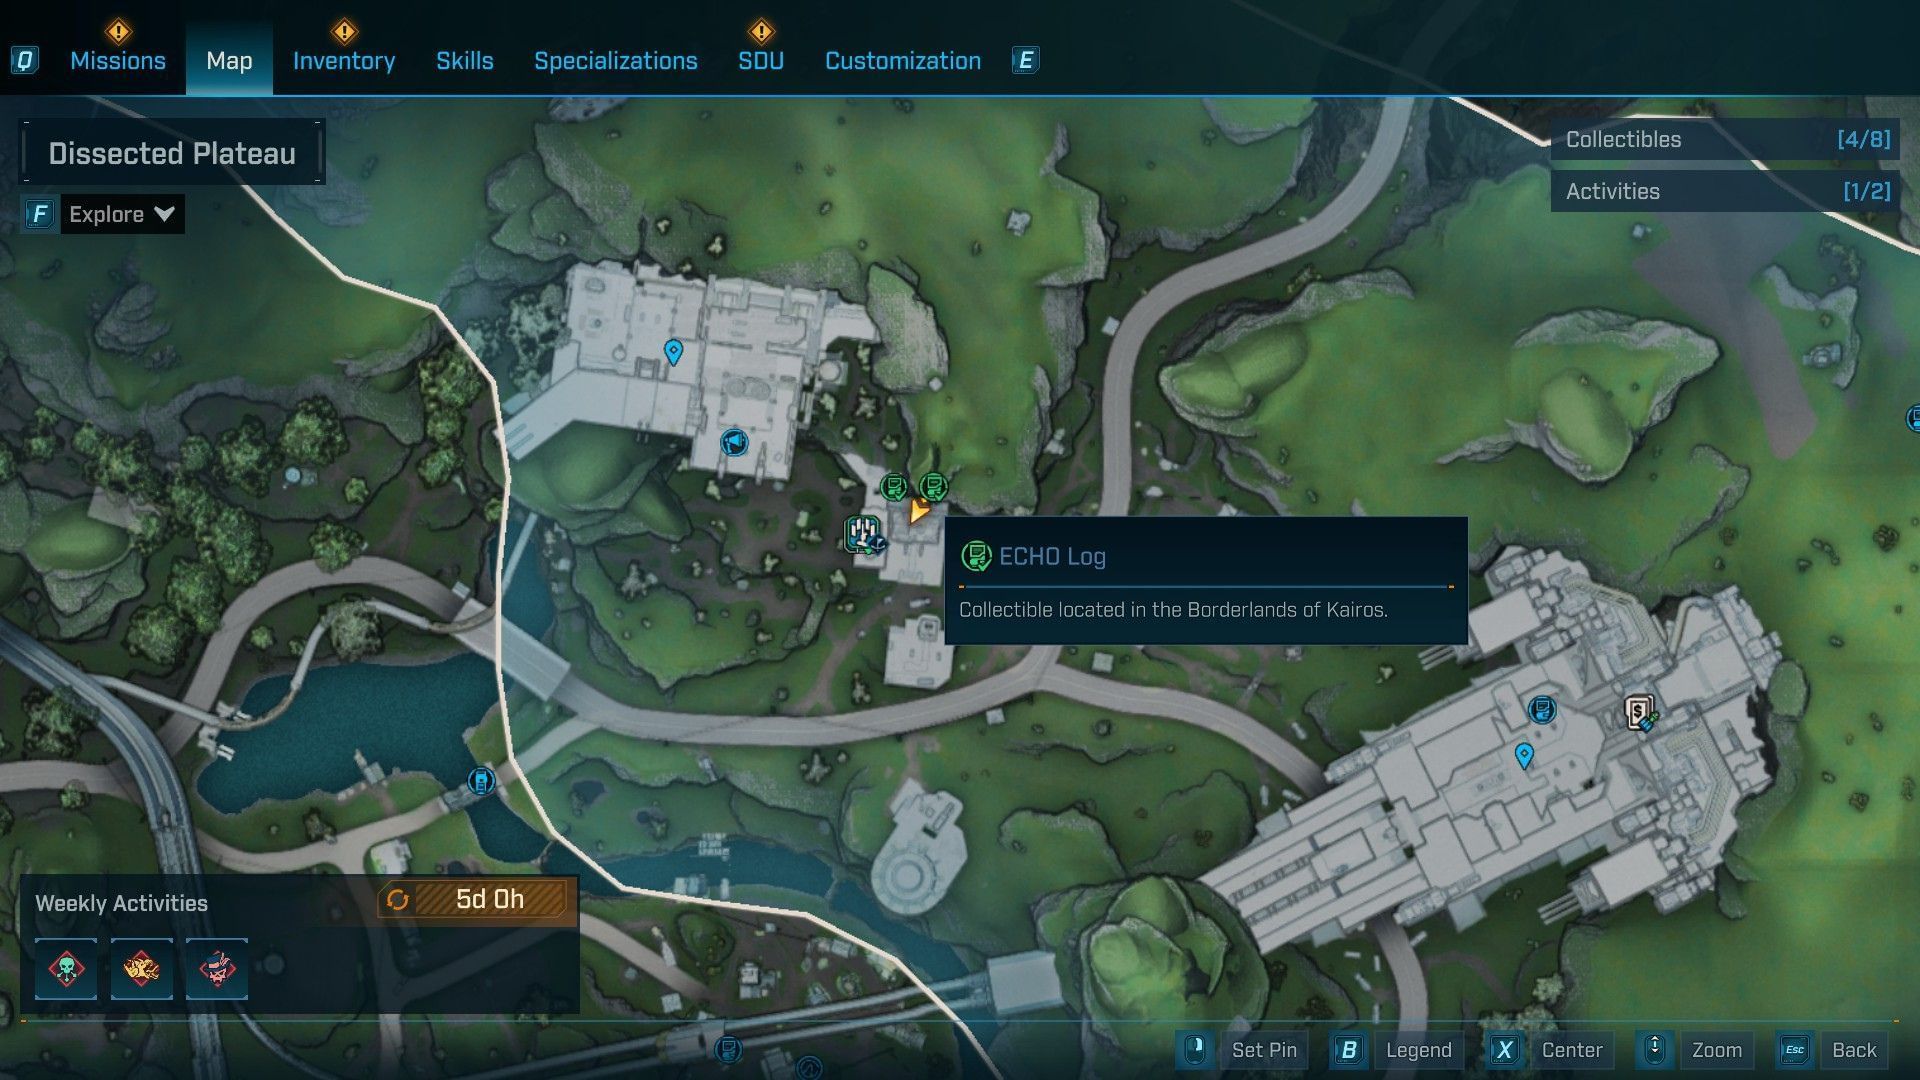
To find the first two ECHO Logs, you’ll need to start the ‘Exit Through the Rift Shop’ side quest in Borderlands 4. Only then will the small bunker under the Deep Seven Order Silo unlock. You don’t need to complete the quest to get the Logs. Start the mission to get access to the bunker.
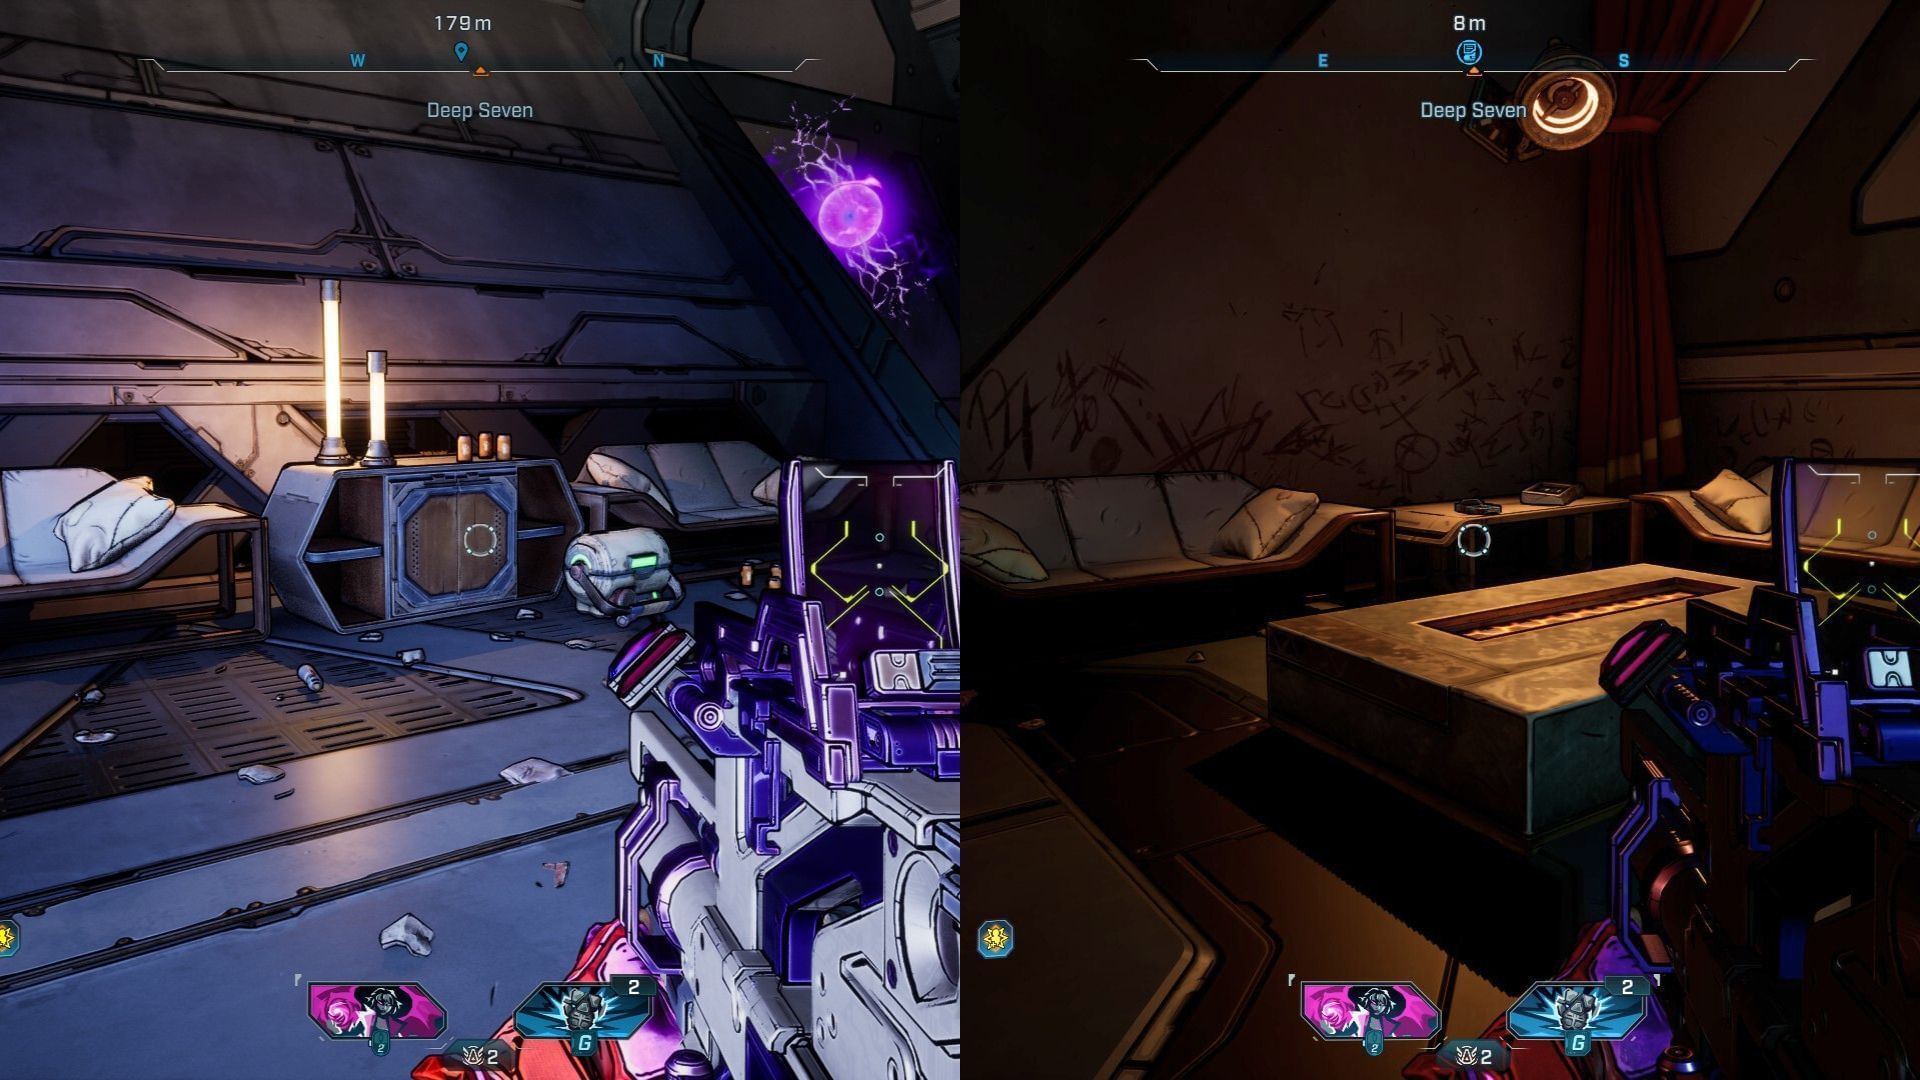
As you enter through the main door, find the first Log to the left on a table between two sofas. The second Log is in a corner, immediately after going down the stairs. It is also on top of a table near a wall, with random gibberish.
ECHO Log #3, #4, and #5
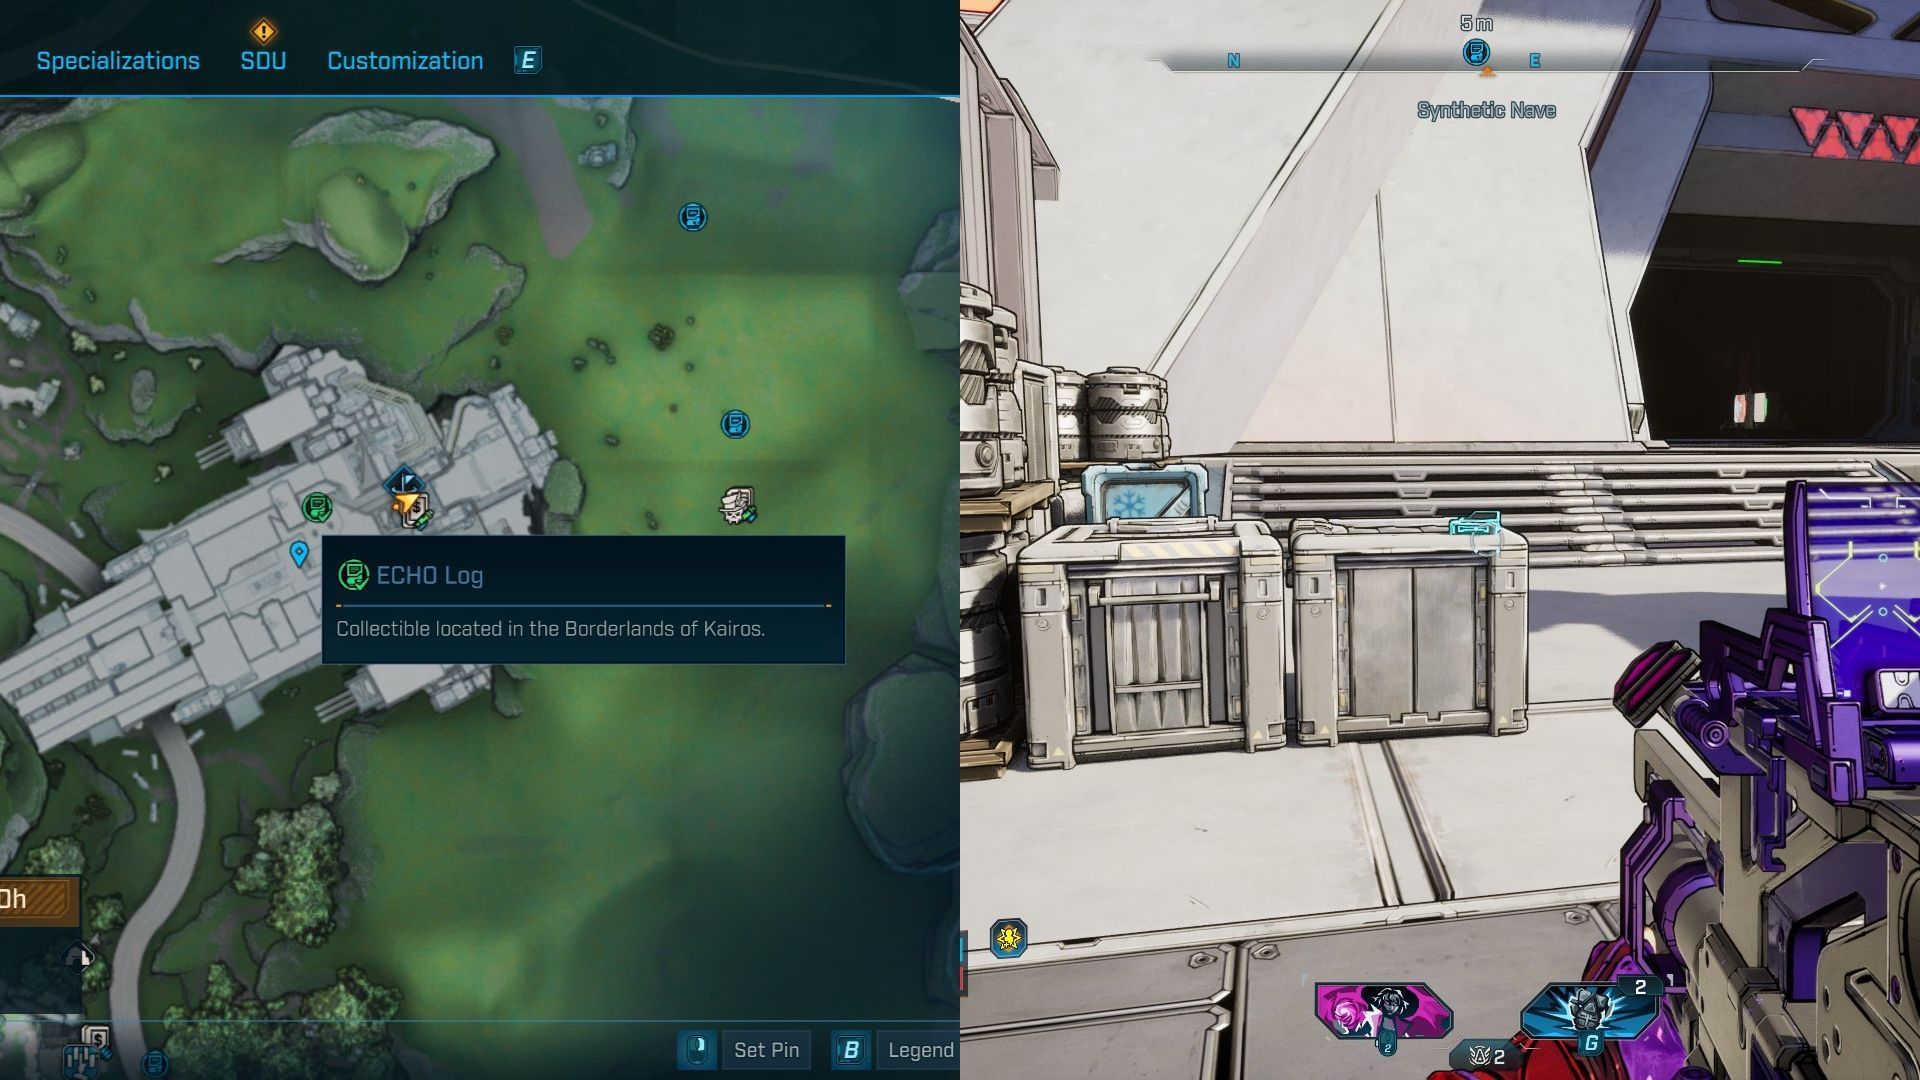
The following three ECHO Logs are within the Synthetic Nave facility, close to the Silo. You’ll explore the facility for the first time during ‘One Fell Swoop’ main quest on Borderlands 4. The first Log is just outside the main door leading into the Order factory.
To find the second Log, head to the right side of the elevator into a room with a transparent yellow pipe. As you enter the room, go left to find another door leading to the control room above. The Log will be on a console near the glass window.
For the final Log, take the elevator to the top floor and enter the room with the command console located in the center. Find a grapple point on the top left, which leads into a vent that takes you into the room with a green pipe and a Locust. The Log is in a container with a blue plastic sheet.
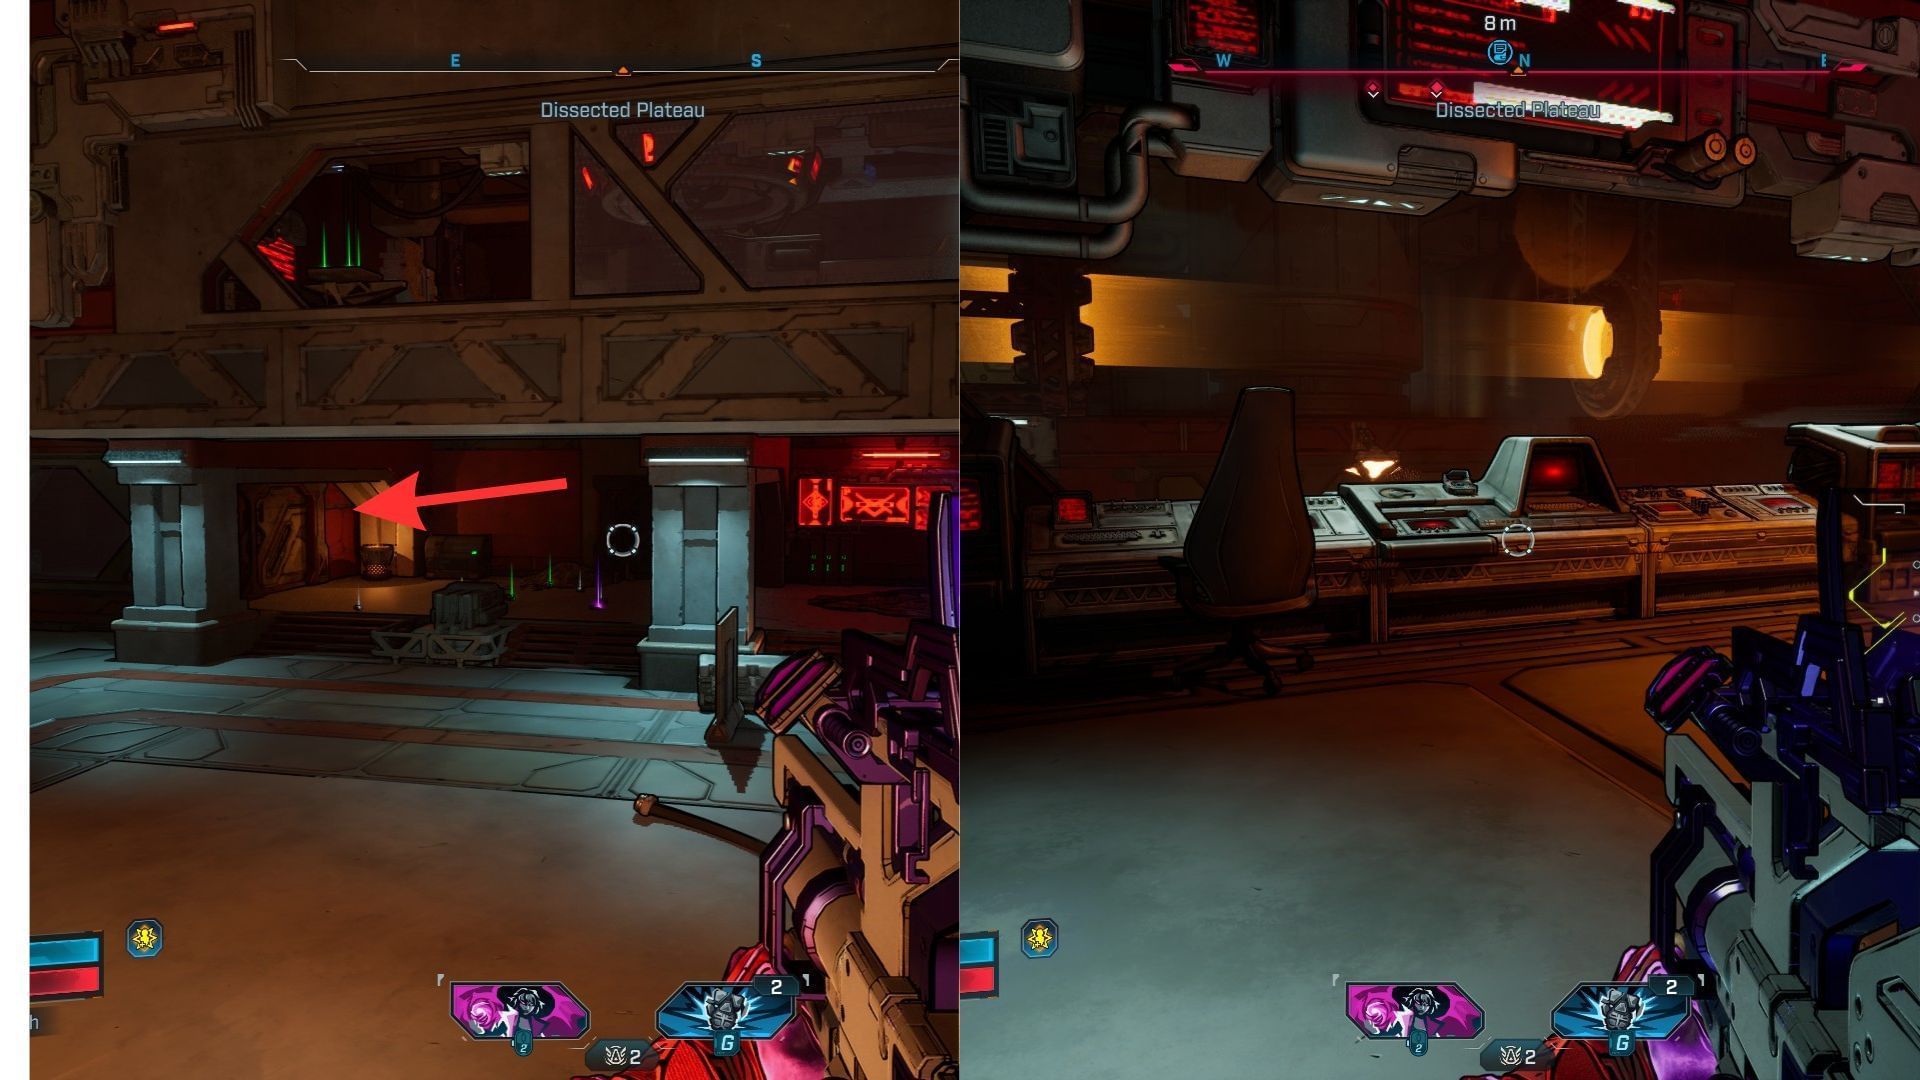
ECHO Log #6 and #7
These two ECHO Logs are within Zadra’s Backup Plan safehouse in Bordelands 4. The first one is in the middle of the room on an experimental table. Had straight after entering the location, and the table is down the stairs.
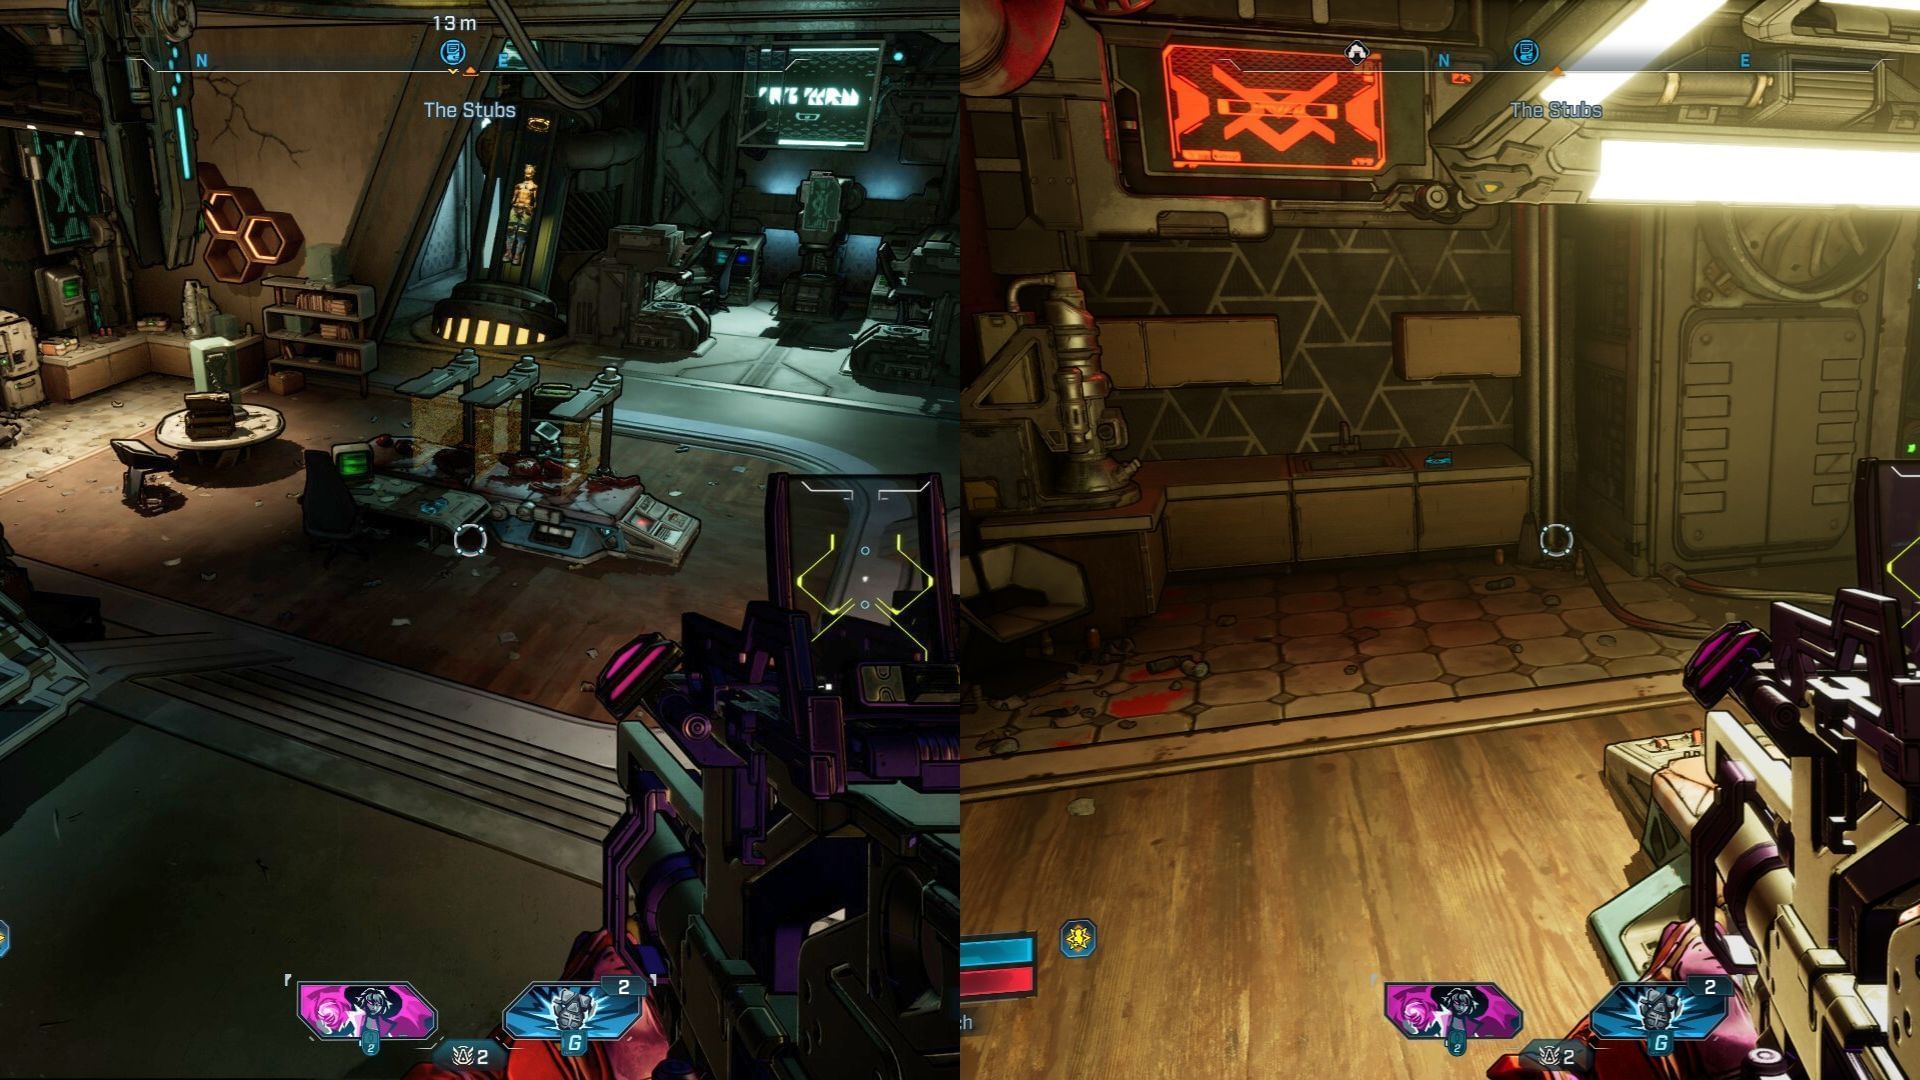
The second Log is to the right side of where you find the first one. Head up the stairs and turn right to see the Log near a sink in front of a medical chair.
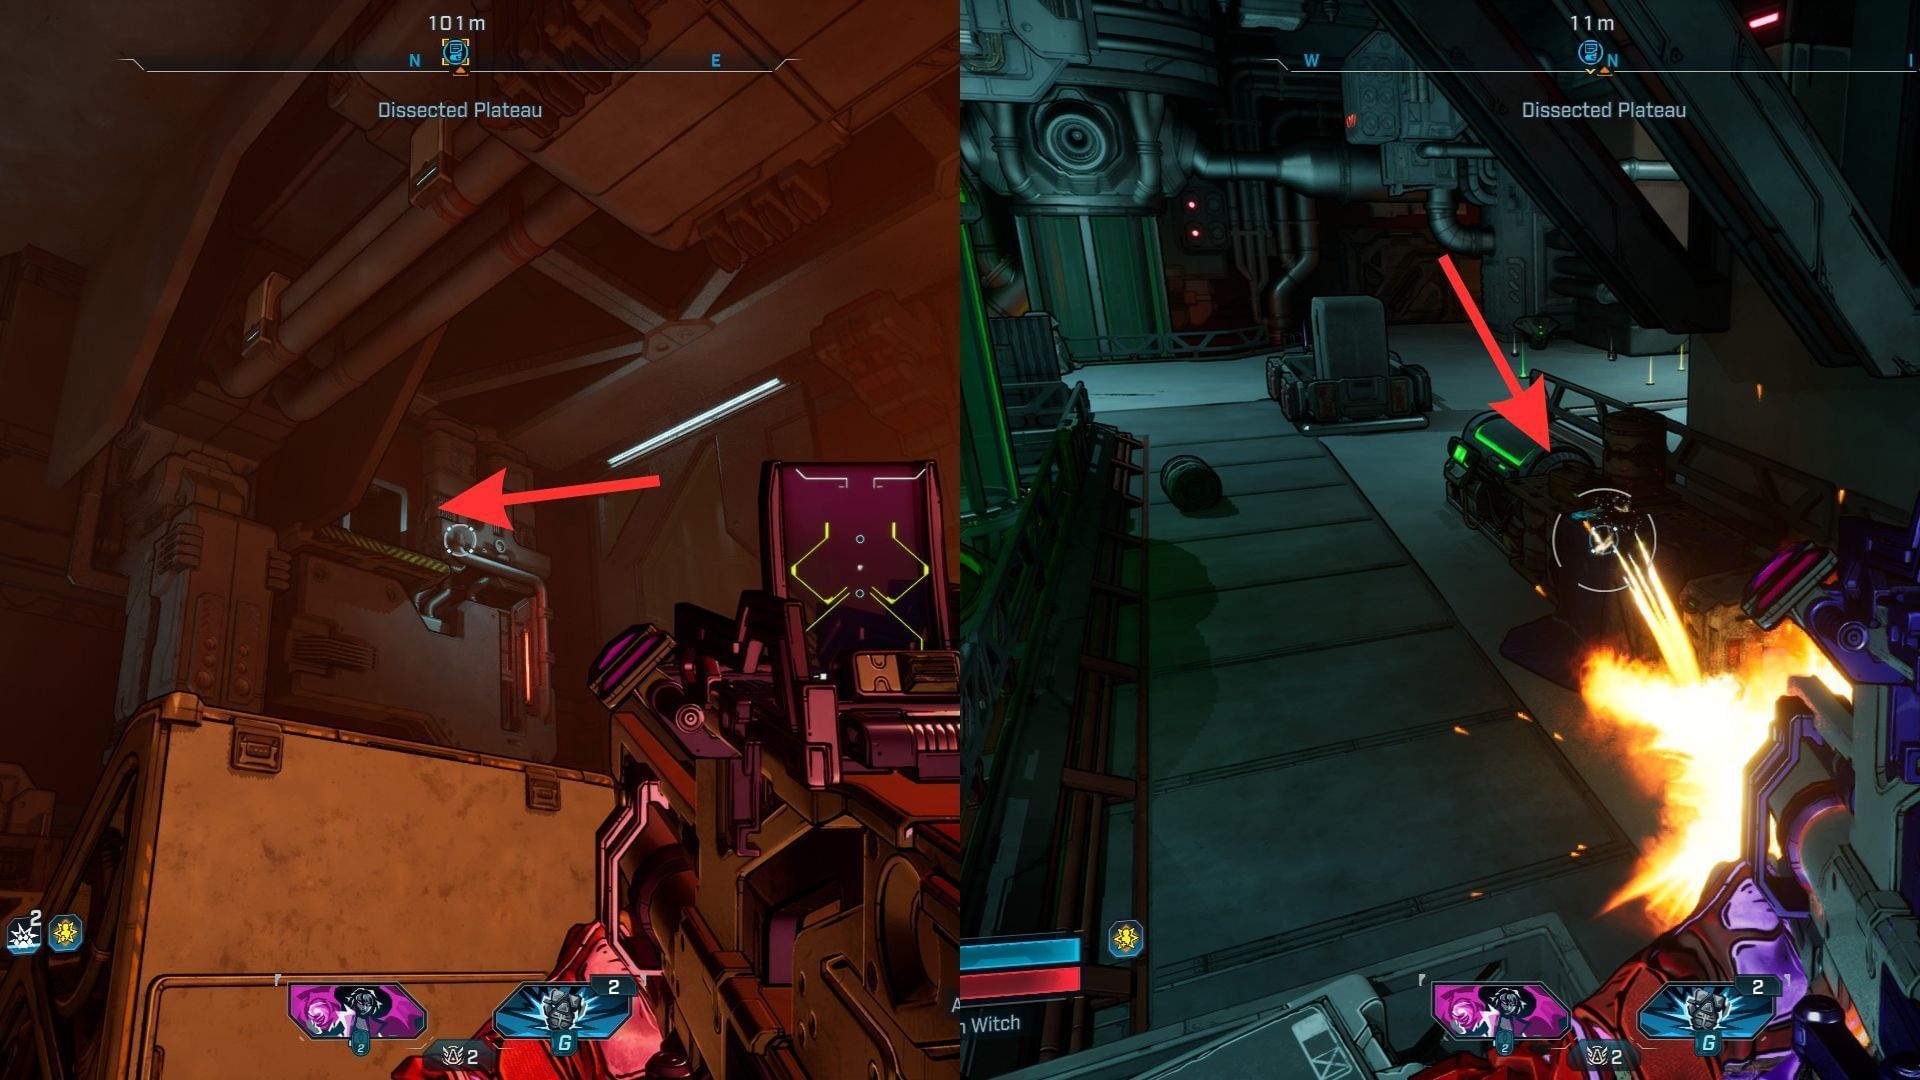
ECHO Log #8, #9, and #10

These three Echo Logs are also part of the ‘Exit Through the Rift Shop’ side mission. As you progress through the mission and let the mad scientist teleport you to an Order facility, you find the Logs scattered around the place where people are being experimented on.
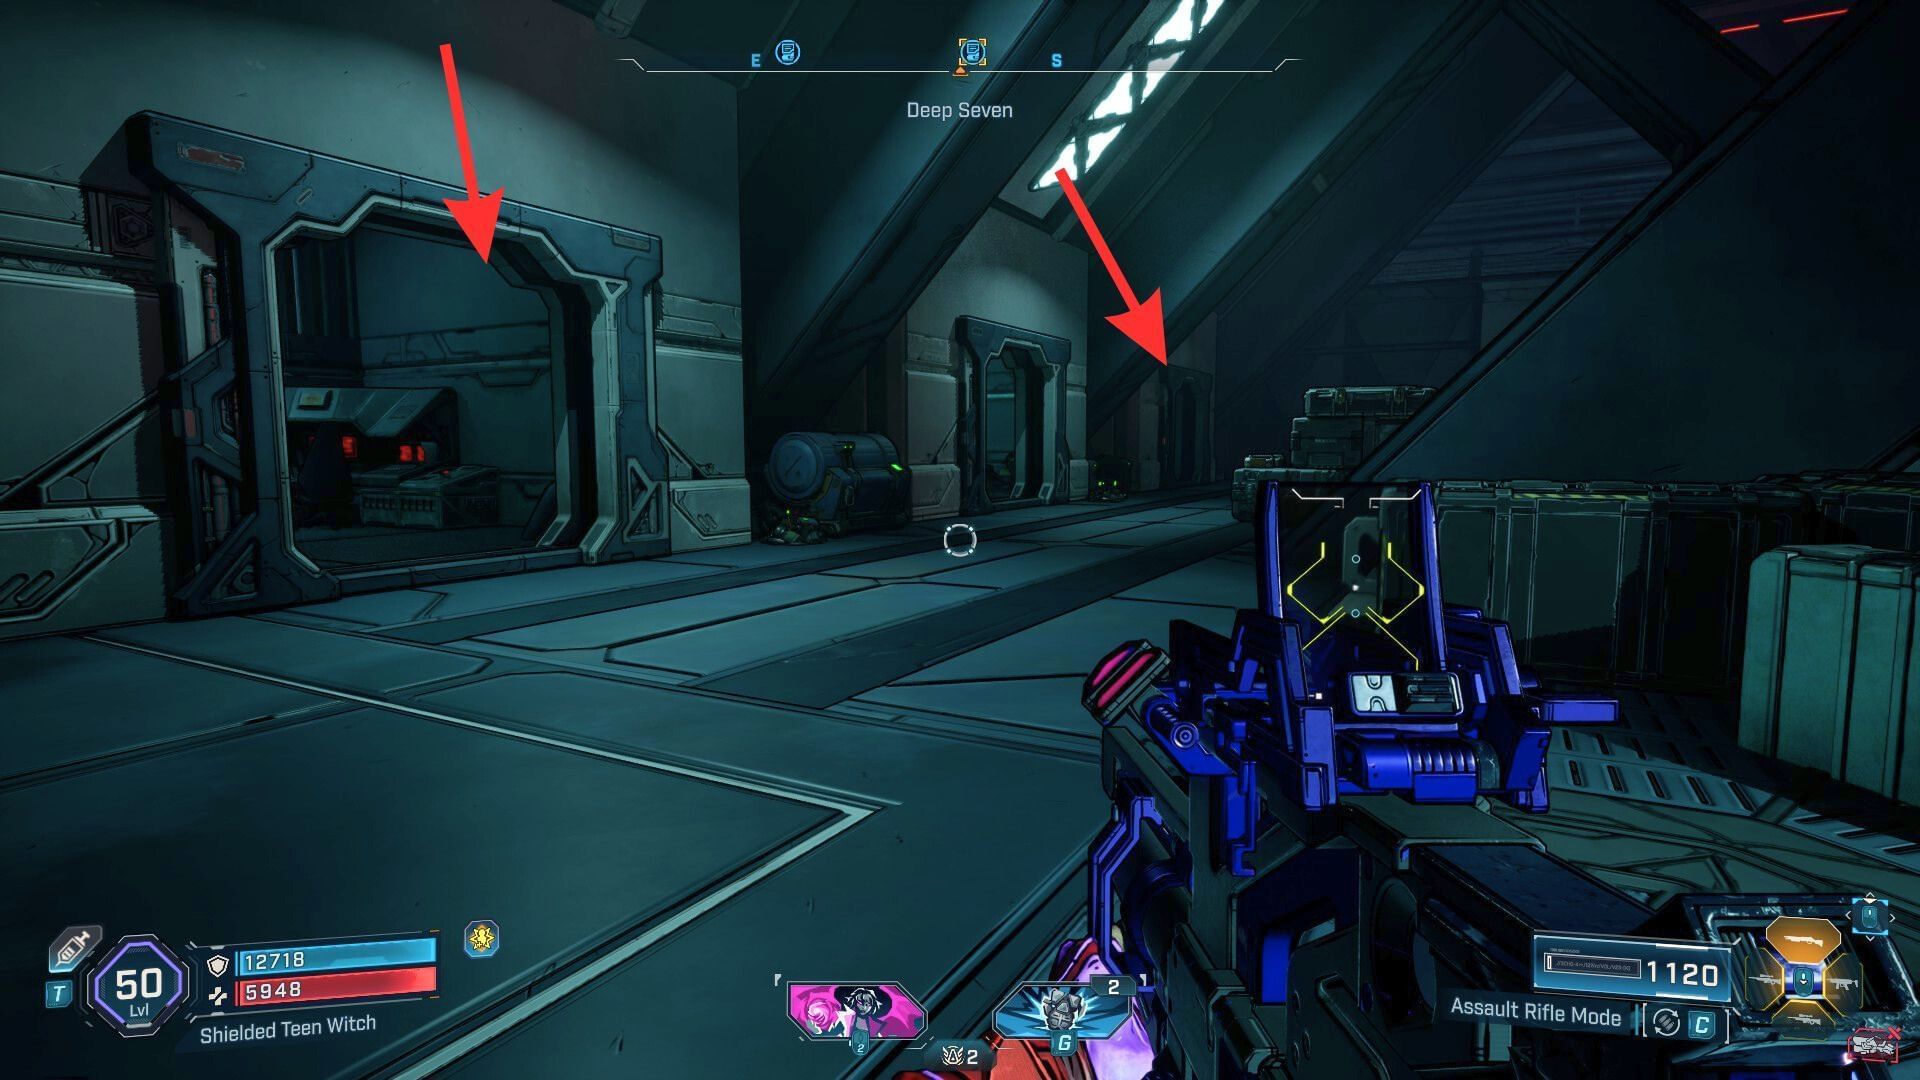
The Logs #8 and #9 are on the upper floor of the prison, where you free the trapped people. Apart from the middle cell, both the other ones contain a Log about the prisoner's mental condition.
To find the final Log in the area, progress the quest to find a grapple point on the upper floor. The vent will lead into a locked room with a red chest and Log #10.
ECHO Log #11
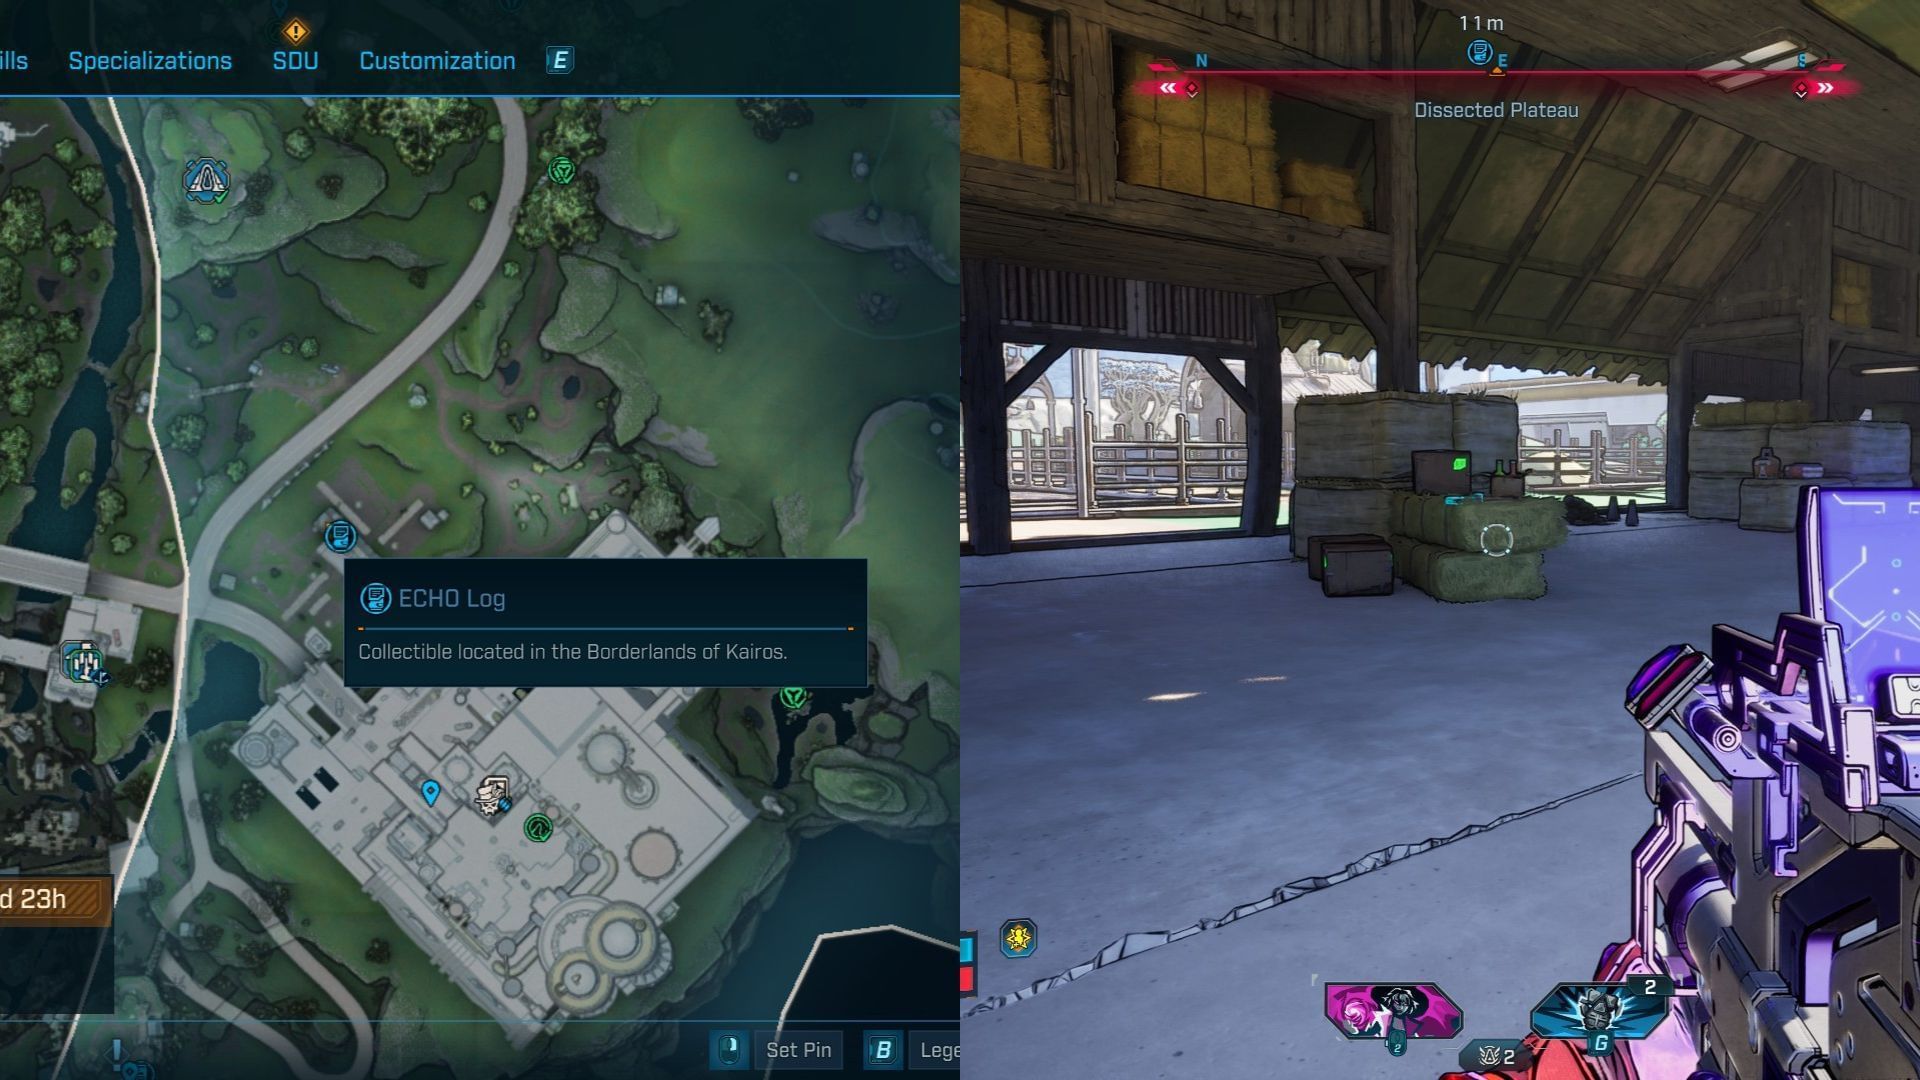
The final collectible in Borderlands 4 is also the easiest to find, depending on the sequence you’re following. It is near Wyclef's Reprieve safehouse, near a barn outside the Killing Floors. The people in there are friendly, so you can walk over there and pick the Log sitting on top of the haystack.
Check out other guides for Borderlands 4:
- Borderlands 4: All Hungering Plains collectibles
- Borderlands 4: All Ripper Drill site locations and boss drops
- Borderlands 4: All Safehouses and datapad locations
- Borderlands 4: All The Howl collectibles
- Borderlands 4: All Coastal Bonescape collectibles
- Borderlands 4: All Idolator's Noose collectibles
- Borderlands 4: All Ancient Crawlers and battery locations