'%20x='0'%20y='0'%20height='100%25'%20width='100%25'%20%0A%20%20%20%20%20%20%20%20%20%20xlink%3Ahref='data:image/jpg;base64,/9j/2wBDAAYEBQYFBAYGBQYHBwYIChAKCgkJChQODwwQFxQYGBcUFhYaHSUfGhsjHBYWICwgIyYnKSopGR8tMC0oMCUoKSj/2wBDAQcHBwoIChMKChMoGhYaKCgoKCgoKCgoKCgoKCgoKCgoKCgoKCgoKCgoKCgoKCgoKCgoKCgoKCgoKCgoKCgoKCj/wgARCAAGAAoDASIAAhEBAxEB/8QAFgABAQEAAAAAAAAAAAAAAAAAAAUG/8QAFQEBAQAAAAAAAAAAAAAAAAAAAgP/2gAMAwEAAhADEAAAAMjPFP8A/8QAHhAAAgICAgMAAAAAAAAAAAAAAQIDBAARBTEUI9H/2gAIAQEAAT8AfmZaK+bCXLMR62O1PQOPcryOzmnDtjvo/c//xAAXEQADAQAAAAAAAAAAAAAAAAAAAREy/9oACAECAQE/AHmn/8QAFxEAAwEAAAAAAAAAAAAAAAAAAAERIf/aAAgBAwEBPwCLD//Z'%3E%3C/image%3E%3C/svg%3E)
Safehouses in Borderlands 4 are one of the few ways to fast-travel across Kairos. Often, your quests will take you from one corner of the map to another. While you can travel all the way there using the hoverbike, fast-traveling saves a lot of time, especially if you’re repeating the campaign on another character. To secure a Safehouse, you’ll need to find its datapad.
There are fourteen Safehouses in Borderlands 4, spread across the four major regions. This guide will show you the locations of all Safehouses in Borderlands 4, along with their datapads.
All Safehouse and datapad locations in Borderlands 4
Here are all the Safehouses in the Fadefields region
1) Abandoned Post (Coastal Bonescape)

The Abandoned Post is the first Safehouse you’ll unlock in Borderlands 4. It is part of the first main quest, ‘Recruitment Drive,’ after you join the Crimson Raiders. Claptrap will take you to the location and task you with defeating your first boss and securing the jetpack to climb up the Safehouse and get inside.

Finding the datapad for the Abandoned Post is quite simple. Once you gain access, find the datapad on the console. Use it to secure the location and progress the story.
2) Shut-Eye Keep (The Howl)

The Shut-Eye Keep is another easy-to-unlock Safehouse during the early game. The only way to access the place is by using the lift located at the base of the tower, near the pond. You can ignore the enemies guarding the area and head straight to the topside.

To find the datapad, head deeper into the structure and reach the vendor shop. After entering the room, look for a grapple point in the upper left corner. The datapad is near a lantern on top of boxes.
3) Someday Rise (Idolator’s Noose)

Someday Rise is situated on top of a hill, and to access the Safehouse, you’ll need to go around the back. Head towards the entrance of the Fortress Indomita. Look for a Ripper drill on the right side; you’ll find stairs and grapple spots.

After reaching the location, defeat all the manglers roaming in the area. The datapad is in a tent in the right corner. Use it to secure the Safehouse.
4) Wyclef’s Reprieve (Idolator’s Noose)

Another Safehouse in the Idolator’s Noose region is Wyclef’s Reprieve, which is across the bridge to the Tipping Point bunker on the right side of Fortress Indomita.

Enter the building and head to the destroyed deck. Jump down to find some boxes, one of which contains the datapad. The cave nearby will lead you back up, and you’ll be able to unlock the Safehouse.
Here are all the Safehouses in the Terminus Range region
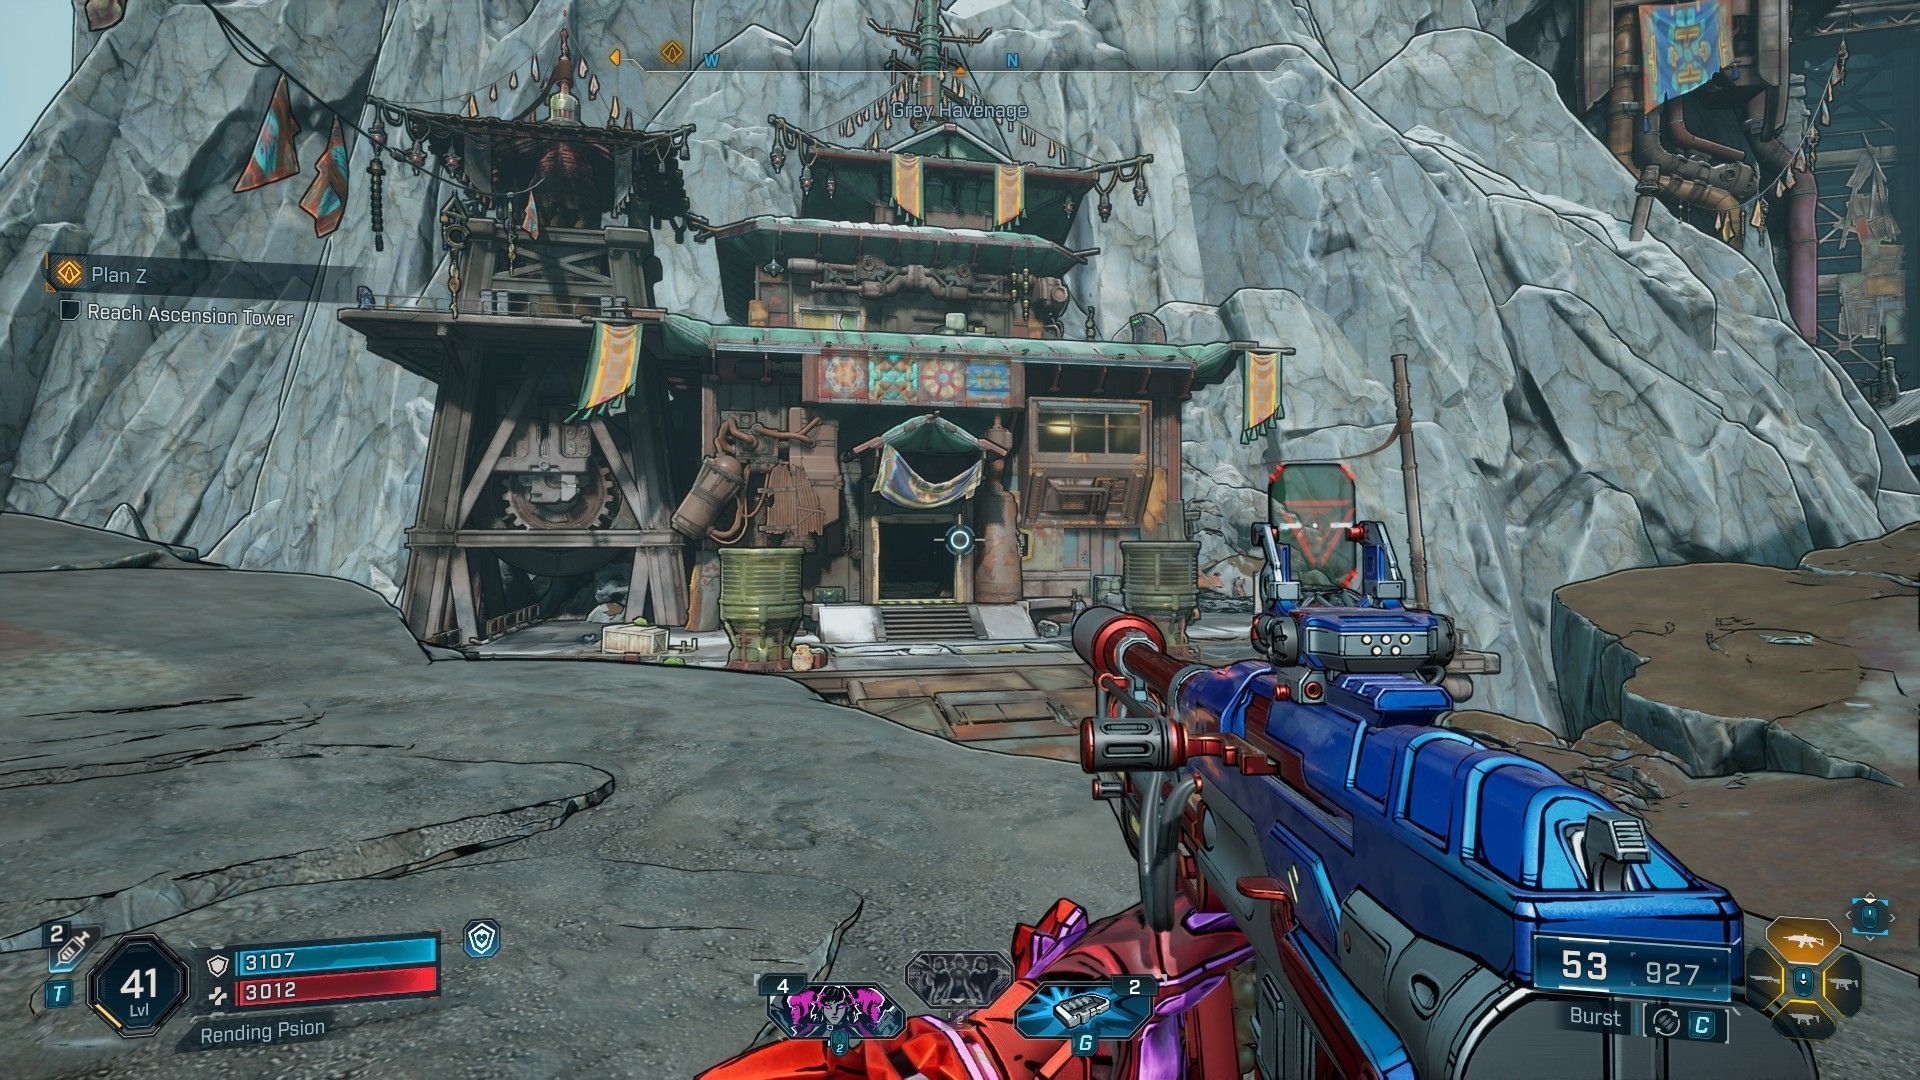
1) Grey Havenge (Cuspid Climb)

Grey Havenge is the first fast travel spot you’ll find in the Terminus Range. It gives a monastery vibe and is close to the lift that’ll take you to the upper section of the region.

The datapad for the Safehouse is on one of the houses in front of the Grey Havenge. Use the grapple hook to climb up and look for a climbable wall. Once you collect the datapad, use your booster to glide on the Grey Havenge and secure the area.
2) Heritage Opus (Cuspid Climb)

Heritage Opus is a multi-section Safehouse also located within the Cuspid Climb area. Use the climbable wall to scale the first section. You can ignore the enemies in the area and head to the other side to find a grapple hook leading to the second section.

Once again, you’ll face enemies that you can ignore until you reach another climbable wall leading to the top. The datapad is on top of a bell shrine.
3) Snowy Wells (Stoneblood Forest)

To reach Snowy Wells, you’ll need to parkour your way through multiple platforms while getting shot from all directions. Even after reaching the Safehouse, you’ll need to grapple your way to another hill on the right side.

Climb up to the platforms on the mountain and glide towards a nearby generator to collect the datapad. Then glide back to the Safehouse and secure the location.
4) The Nightcap (Windspear)

The Nightcap is in the right corner of the Windspear area. It is located inside a cave and is one of the easiest Safehouses to unlock in Borderlands 4. Upon entering the cave, you’ll find a climbable wall on the left side.

Once you reach the top, look to the other side and glide towards the ledge containing the datapad. The door below should now be open for you to claim the Safehouse.
Here are all the Safehouses in the Carcadia Burn region
1) Makeshift Chalet (Lopside)

Makeshift Chalet is the first Safehouse you’ll find when entering Carcadia Burn from Fadefields. While gaining entry is easy, the location is swarming with enemies from ‘The Order’.

To find the datapad, head to the left of the large building with big antenna on the top. Jump down and pick up the key to securing the place on a box. Use the grapple spot and the climbable wall behind you to return to the topside.
2) The Lowrise (Tonnage Peel)

The Lowrise is close to the Crumbled Lurch Ancient Crawler in Borderlands 4. There is a grapple point on a broken pipe near an ‘out of order’ board. Use it to navigate the platforms and reach the Safehouse.

Once you are topside, head to the left of the building. The datapad is on a broken piece of concrete hanging by a metal rod.
3) Wildhorn’s Beard (Ruined Sumplands)

The Wildhorn’s Beard is on a big island of Ruined Sumplands, separated by a broken bridge. It is another rundown place, which, to be honest, you won’t be using much, as the faction town is a much better fast travel point.

Nevertheless, to locate the datapad, make your way around the large hill until you reach a Kratch nest. Pick up the necessary item and come back to the ruined building to unlock the Safehouse.
Here are all the Safehouses in the Timekeeper’s Dominion
1) The Lockaway (Carcadia District)

The Lockaway Safehouse is part of the Falling Wall quest, which is only available after you defeat the main bosses of all three regions. The Electi faction leader, Levaine, will lead you to the Safehouse to use it as a base of operations.

To find the entrance, look for a grapple hook hidden by the hologram of Timekeeper. Follow the stairs to reach the top and locate the datapad on a table.
2) The Food Court (Terminus District)

After crossing the district wall and entering the Terminus District, find the Food Court on the left side after exiting the door. The area contains enemies from the Ripper faction, which I recommend you defeat to activate the terminal without any issues.

The datapad is on top of a garbage dump near the Evolving Chili food stall, and the activation terminal is on the left side, near the ‘All You Can Eat’ sign.
3) Sumpview Falls (Fades District)

The Sumpview Falls is the last Safehouse you’ll unlock in the game. That’s because the Fades District is inaccessible unless you progress through ‘Plan Z’ of the main story quest. Once you gain access, head to the middle of the district.

The safehouse is in a small drainage ditch, and the datapad is inside a small opening in the wall. Use the ladder to climb up and collect the item.
That's all the Safehouses you will find in Borderlands 4. While there are other places like the Order Silos which you can use to fast travel, a Safehouse are spread across the region, allowing quick access to several locations.
Check out other guides for Borderlands 4:
- Borderlands 4: How to unlock all UVHM difficulty levels
- Borderlands 4: What is the max level?
- All Main story missions in Borderlands 4
- 4 economy tips to make money fast in Borderlands 4
- All Easter Eggs and secrets in Borderlands 4
- Borderlands 4: How to get Darkbeast legendary SMG
- Borderlands 4 Vile Lictor boss guide
- Borderlands 4: Imminent Jest walkthrough