'%20x='0'%20y='0'%20height='100%25'%20width='100%25'%20%0A%20%20%20%20%20%20%20%20%20%20xlink%3Ahref='data:image/jpg;base64,/9j/2wBDAAYEBQYFBAYGBQYHBwYIChAKCgkJChQODwwQFxQYGBcUFhYaHSUfGhsjHBYWICwgIyYnKSopGR8tMC0oMCUoKSj/2wBDAQcHBwoIChMKChMoGhYaKCgoKCgoKCgoKCgoKCgoKCgoKCgoKCgoKCgoKCgoKCgoKCgoKCgoKCgoKCgoKCgoKCj/wgARCAAGAAoDASIAAhEBAxEB/8QAFQABAQAAAAAAAAAAAAAAAAAAAAb/xAAVAQEBAAAAAAAAAAAAAAAAAAAEBf/aAAwDAQACEAMQAAAAiKwZK//EAB4QAAEEAQUAAAAAAAAAAAAAAAIAAQMEBgUHERSS/9oACAEBAAE/AMfz21QrU4IKUJ8g8jOZINzNUcGfoUvRr//EABgRAAIDAAAAAAAAAAAAAAAAAAACAyIj/9oACAECAQE/AINVuf/EABoRAAAHAAAAAAAAAAAAAAAAAAABAgQUISP/2gAIAQMBAT8AdHHXlQ//2Q=='%3E%3C/image%3E%3C/svg%3E)
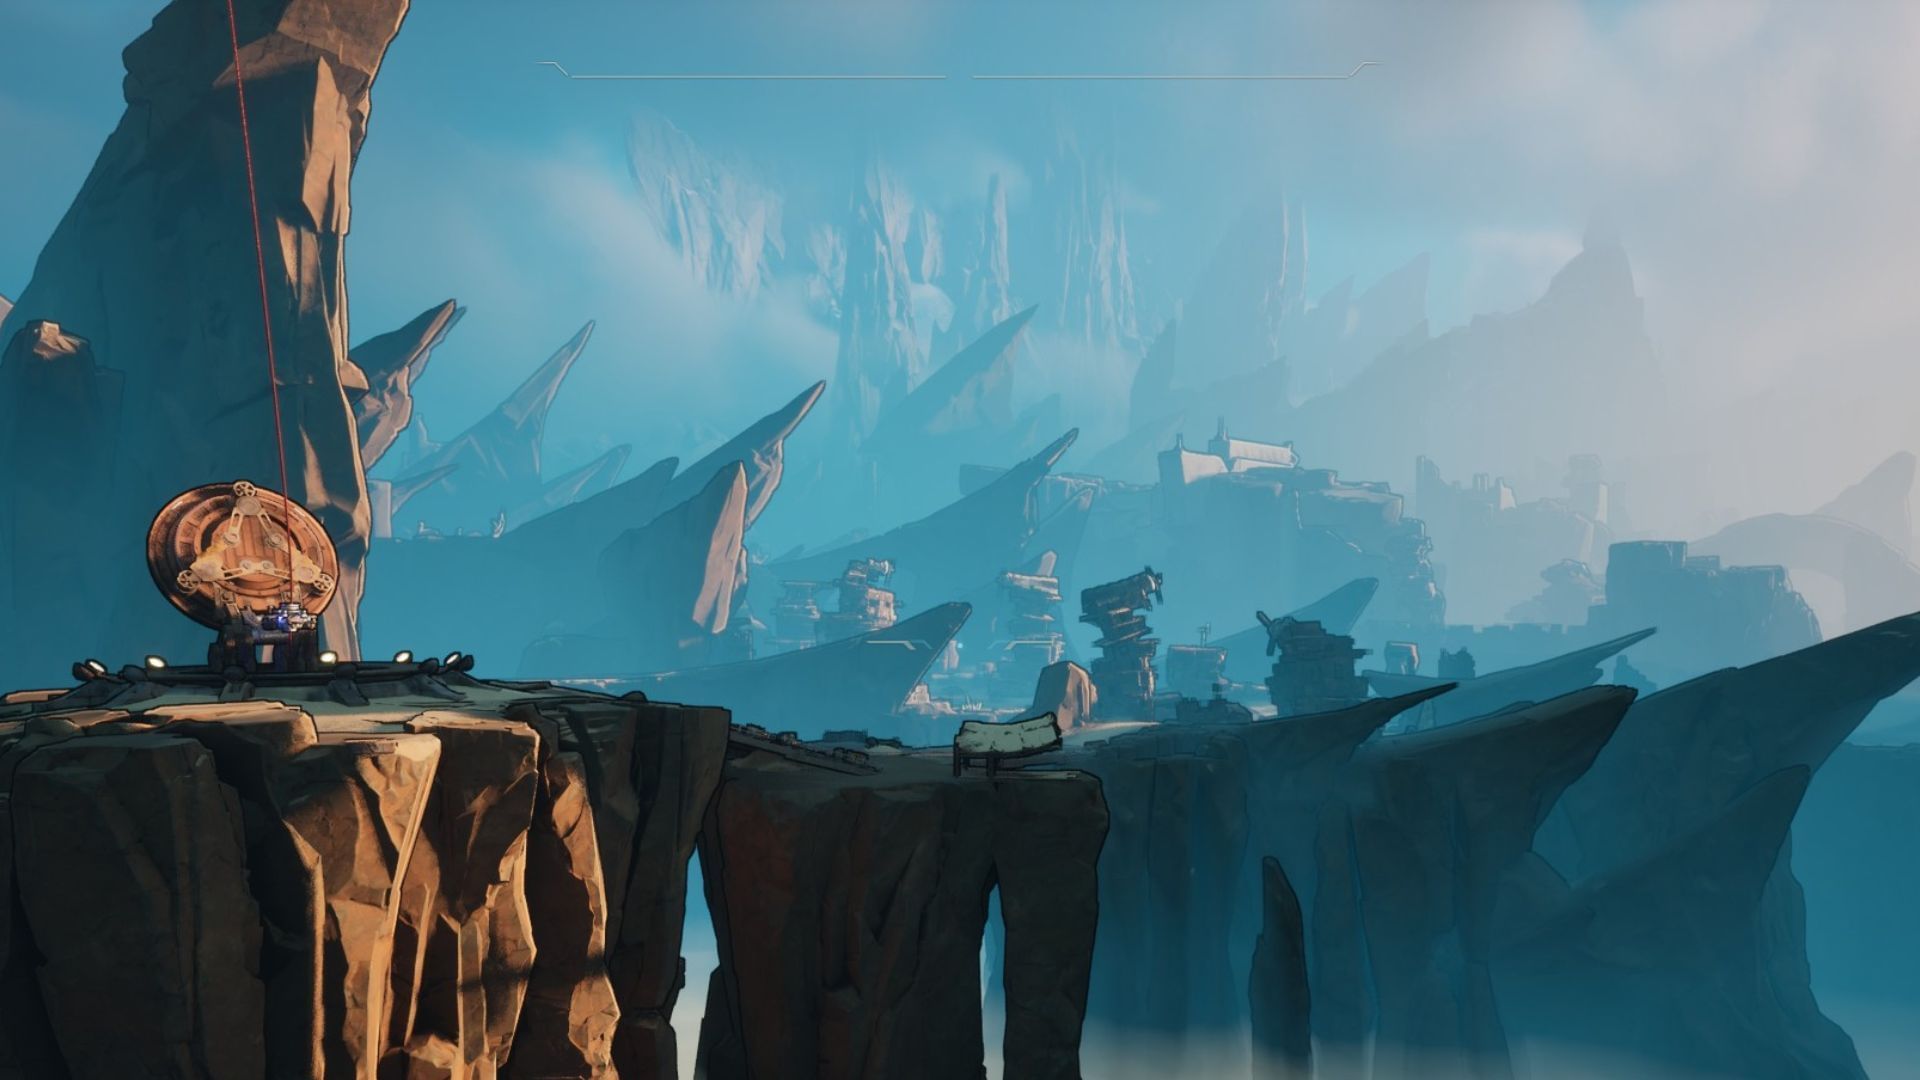
If you love chasing collectibles in Borderlands 4, Ruined Sumplands has over 40 waiting for you to discover. It’s the largest region within Carcadia Burn, and contains the highest number of collectibles out of any area in the game. Finding everything will also grant you a significant number of SDU tokens, which you can use to upgrade your inventory.
However, finding the Items by yourself can keep you busy for a few hours. That’s why this guide will help you find every collectible for Ruined Sumplands in Borderlands 4.
Ruined Sumplands collectibles in Borderlands 4
Here are all the collectible categories and amounts in Ruined Sumplands:
- ECHO Logs: 21
- Lost Capsules: 3
- Vault Symbols: 3
- Dead Bolts: 4
- Propaganda Speakers: 3
- Vault Hunter’s Guide to Kairos: 1
- Vault Fragments: 1
- Evocariums: 1
- Electi Safes: 6
Where to find all Ruined Sumplands collectibles in Borderlands 4?
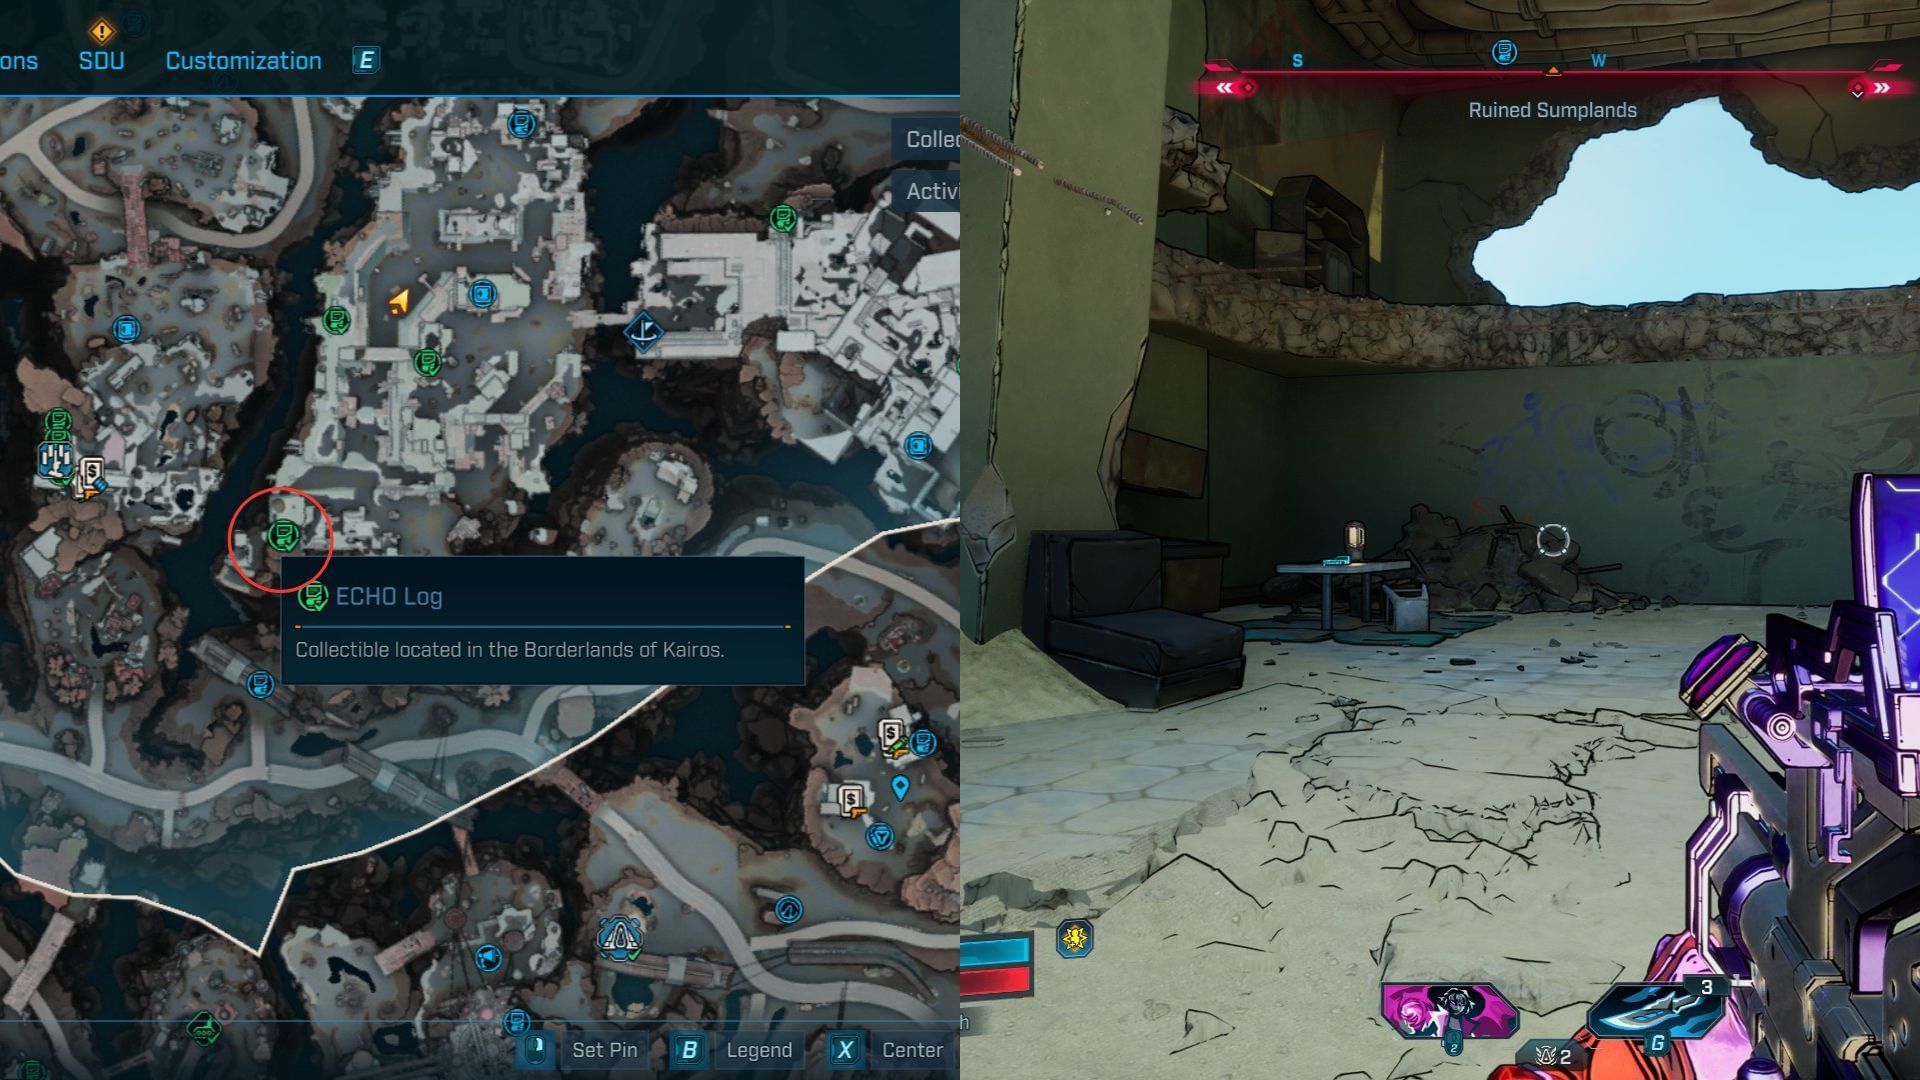
ECHO Log #1
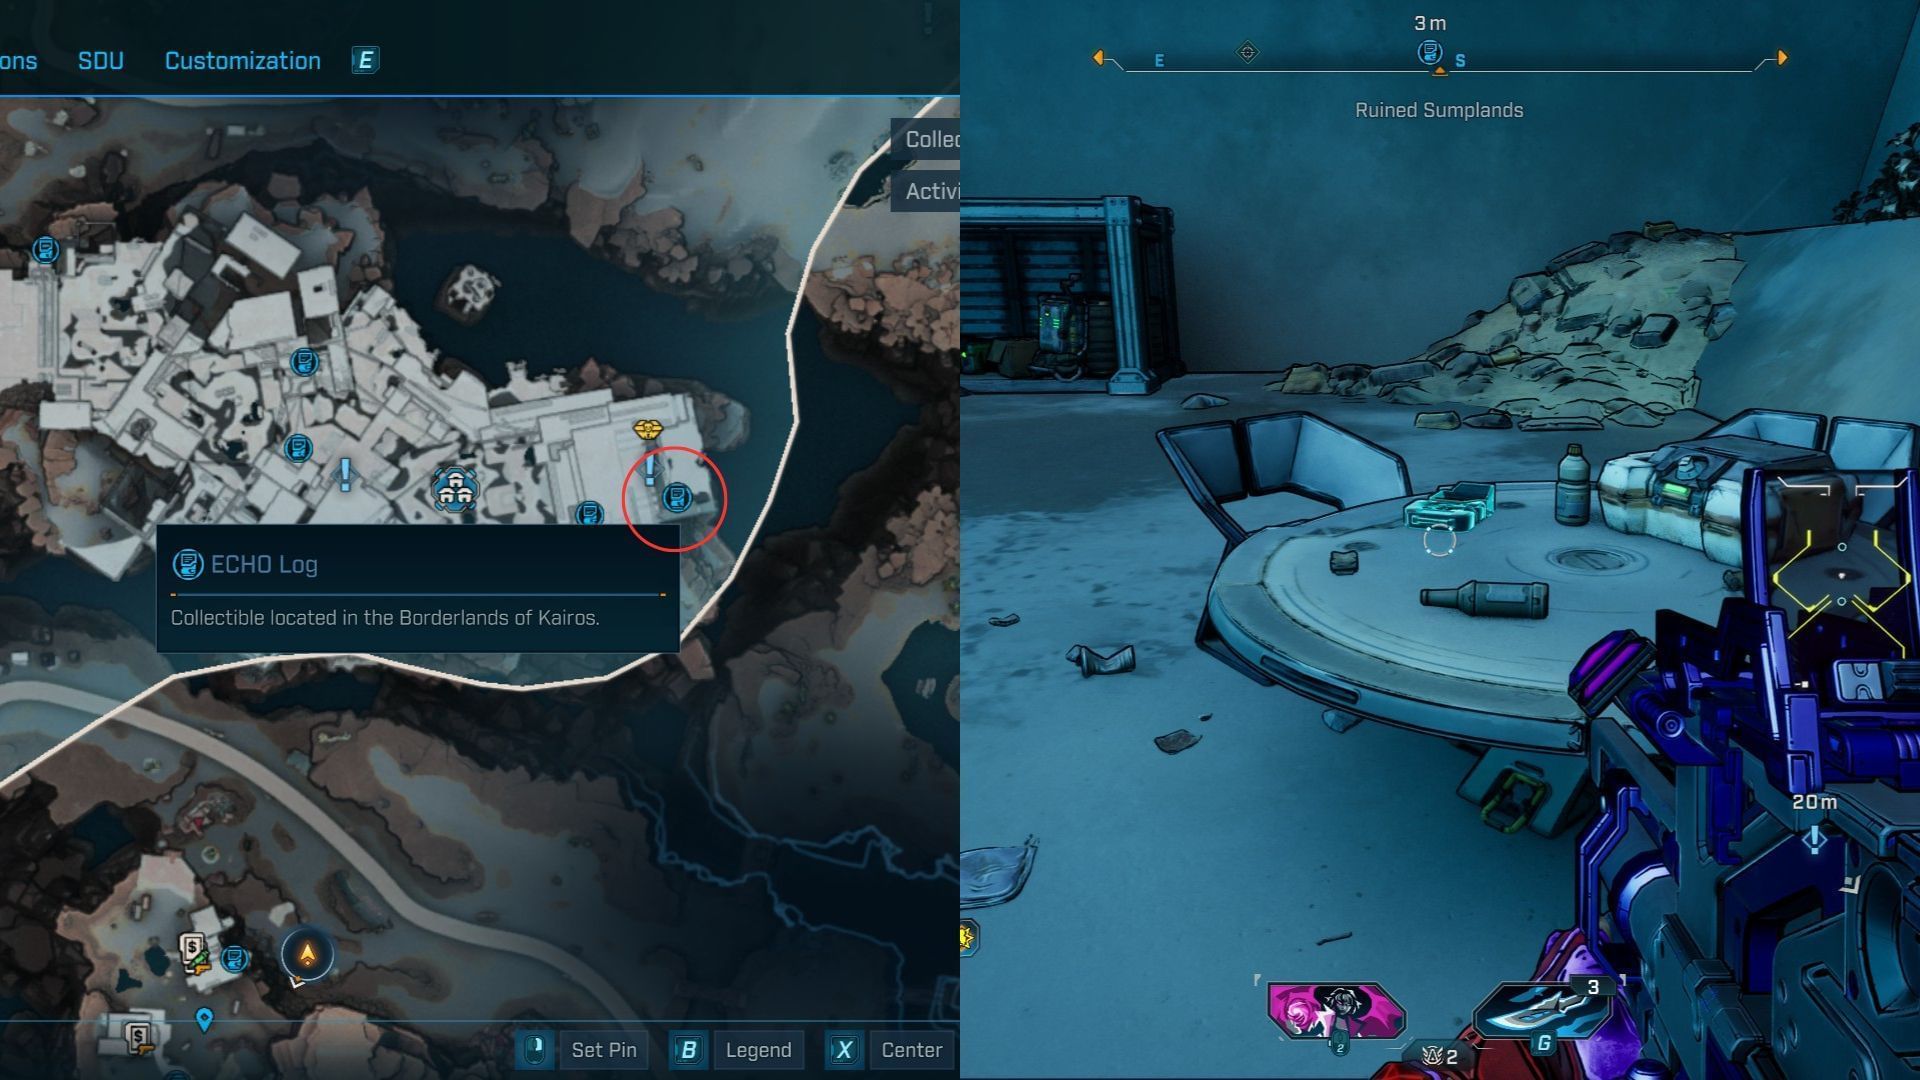
Starting with Carcadia’s Faction Town, you’ll find the first ECHO Log behind the main building. After you get inside, take a left to find the exit leading to an open area behind the building. The item you’re looking for is on top of a table near the multiple ammo chests.
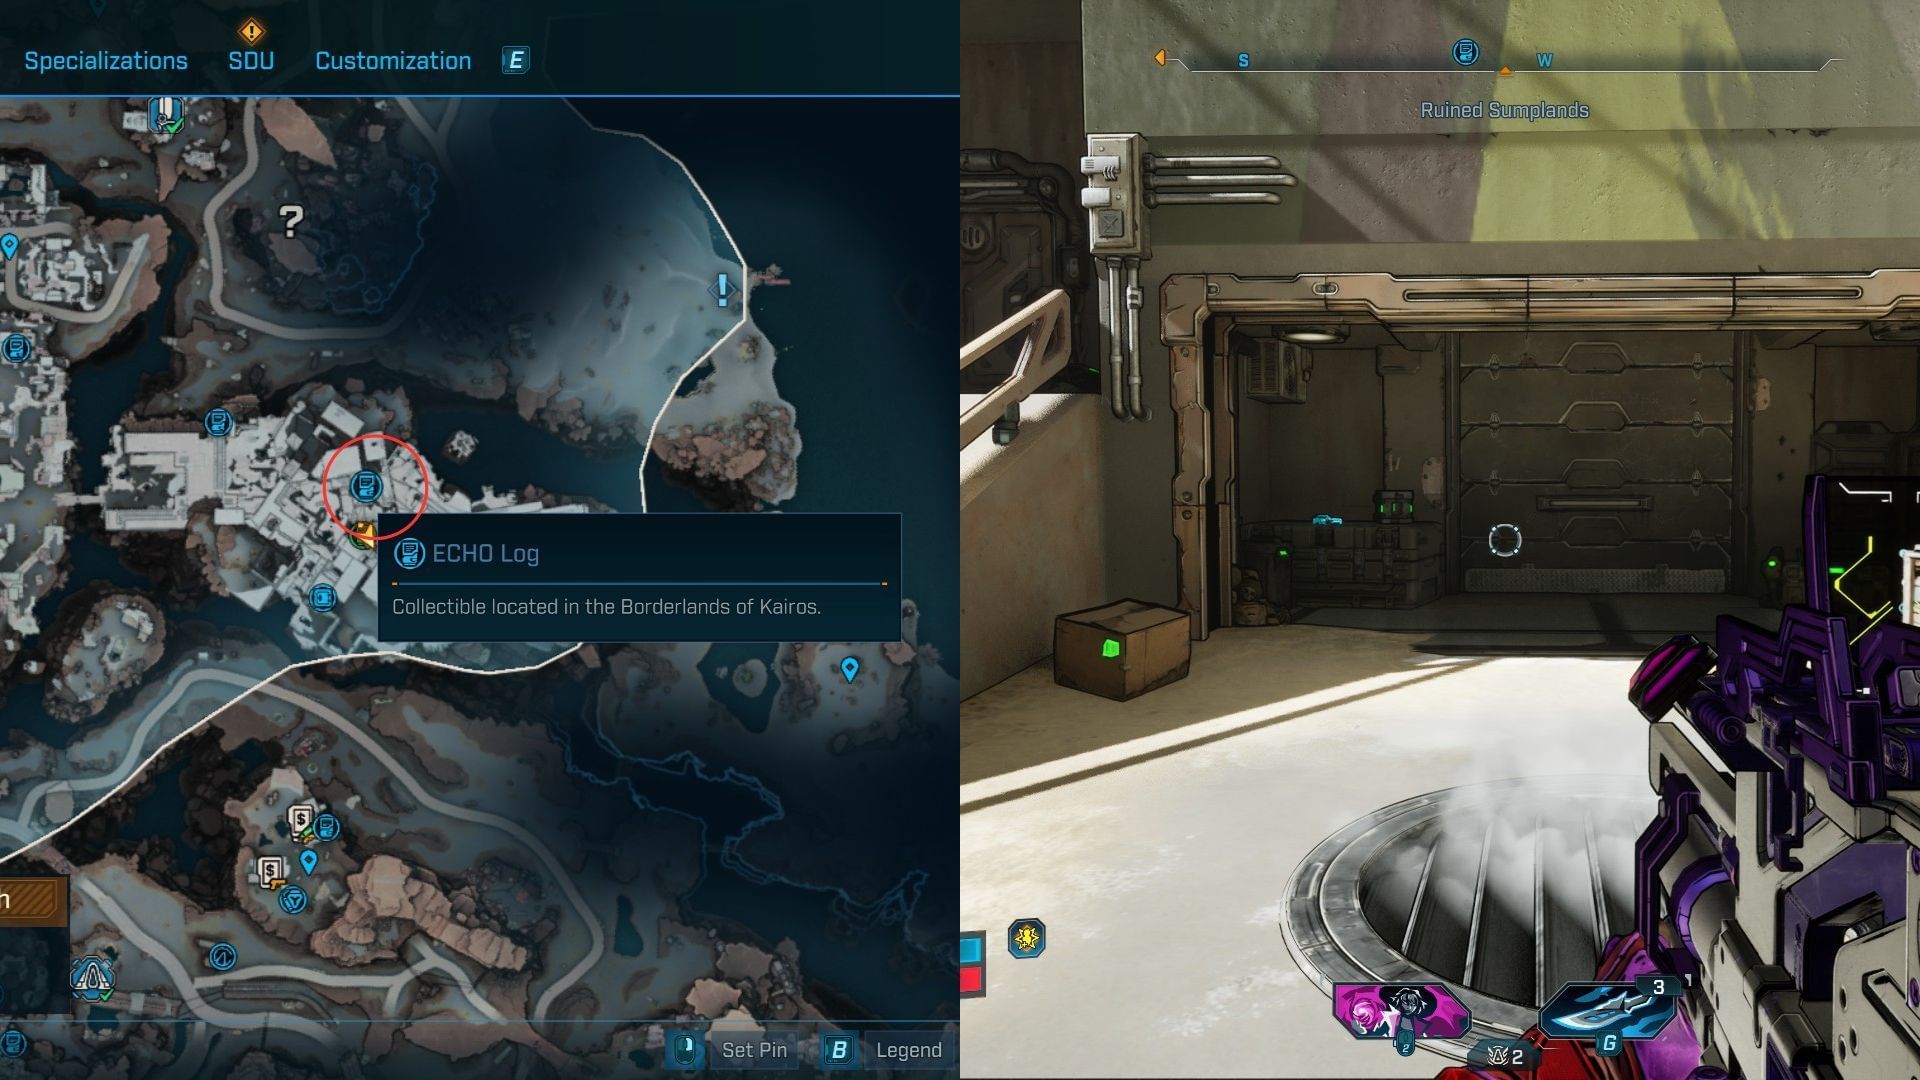
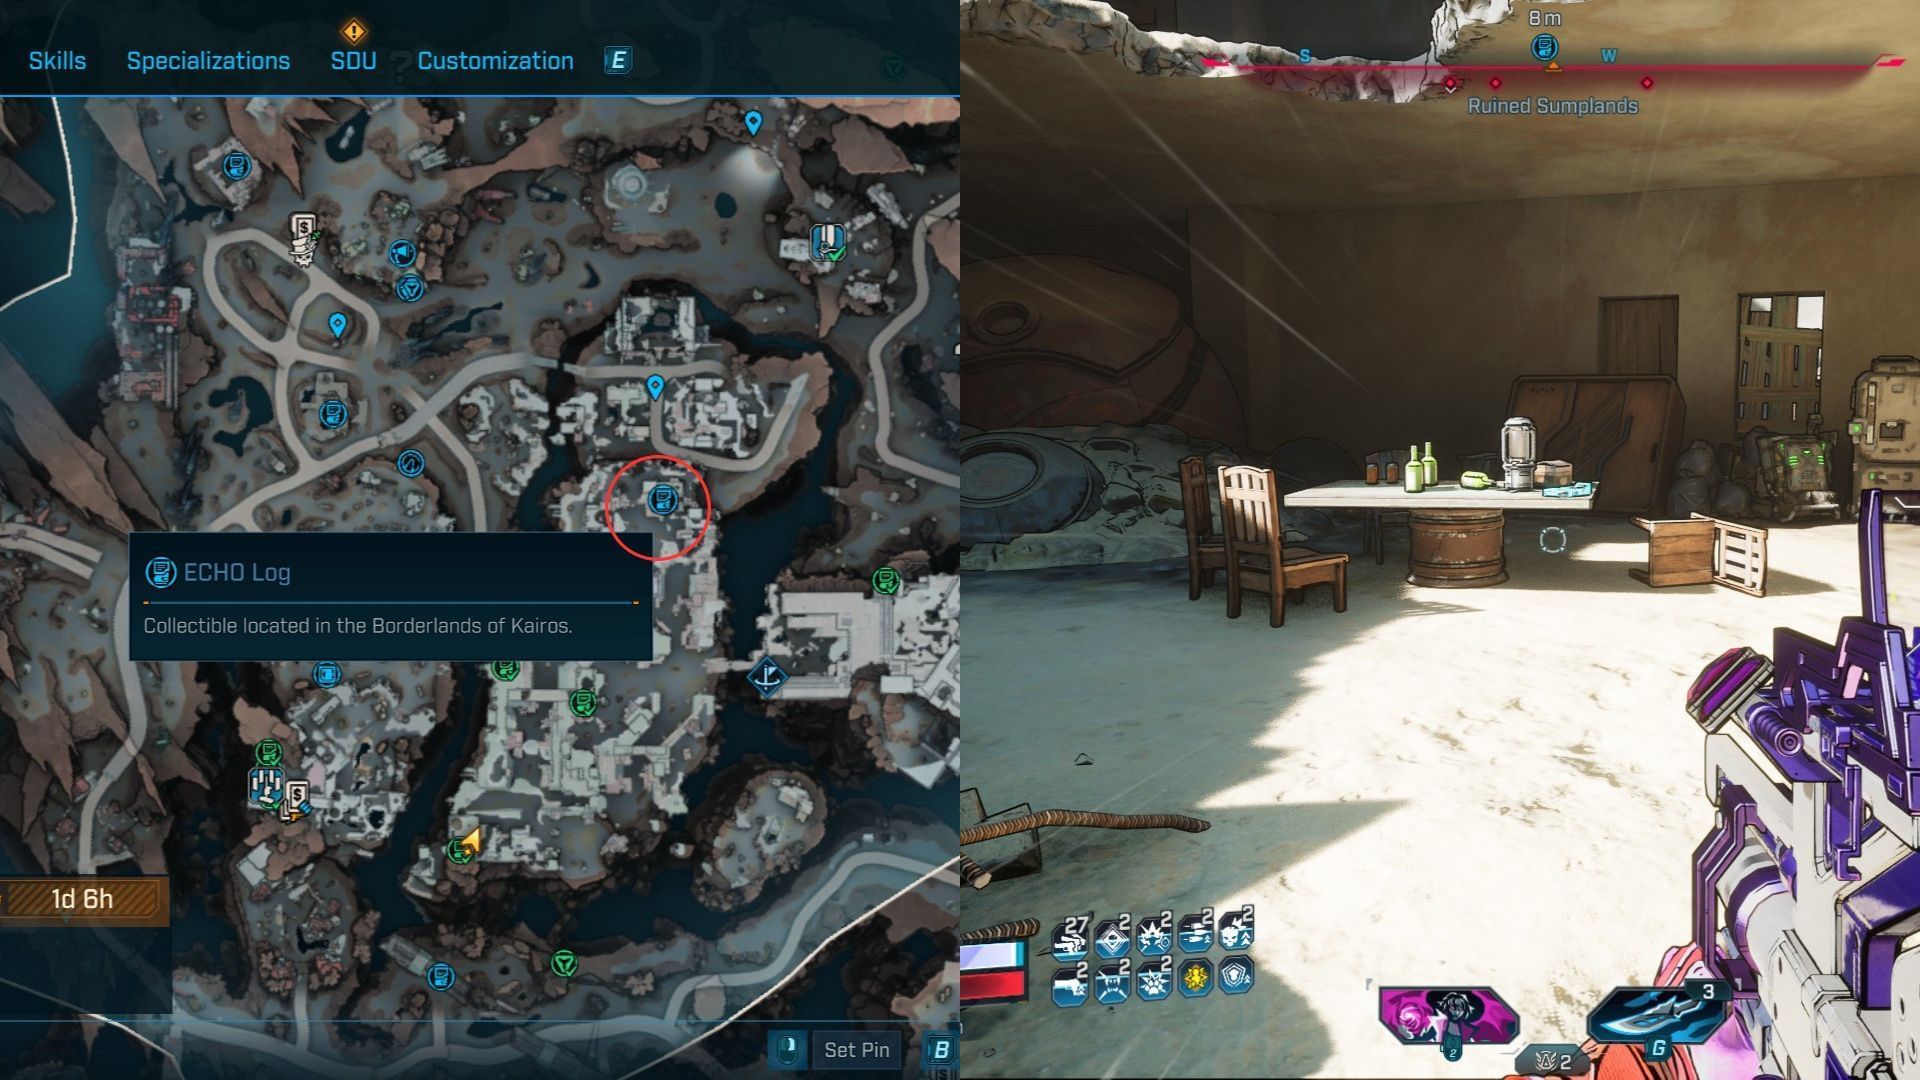
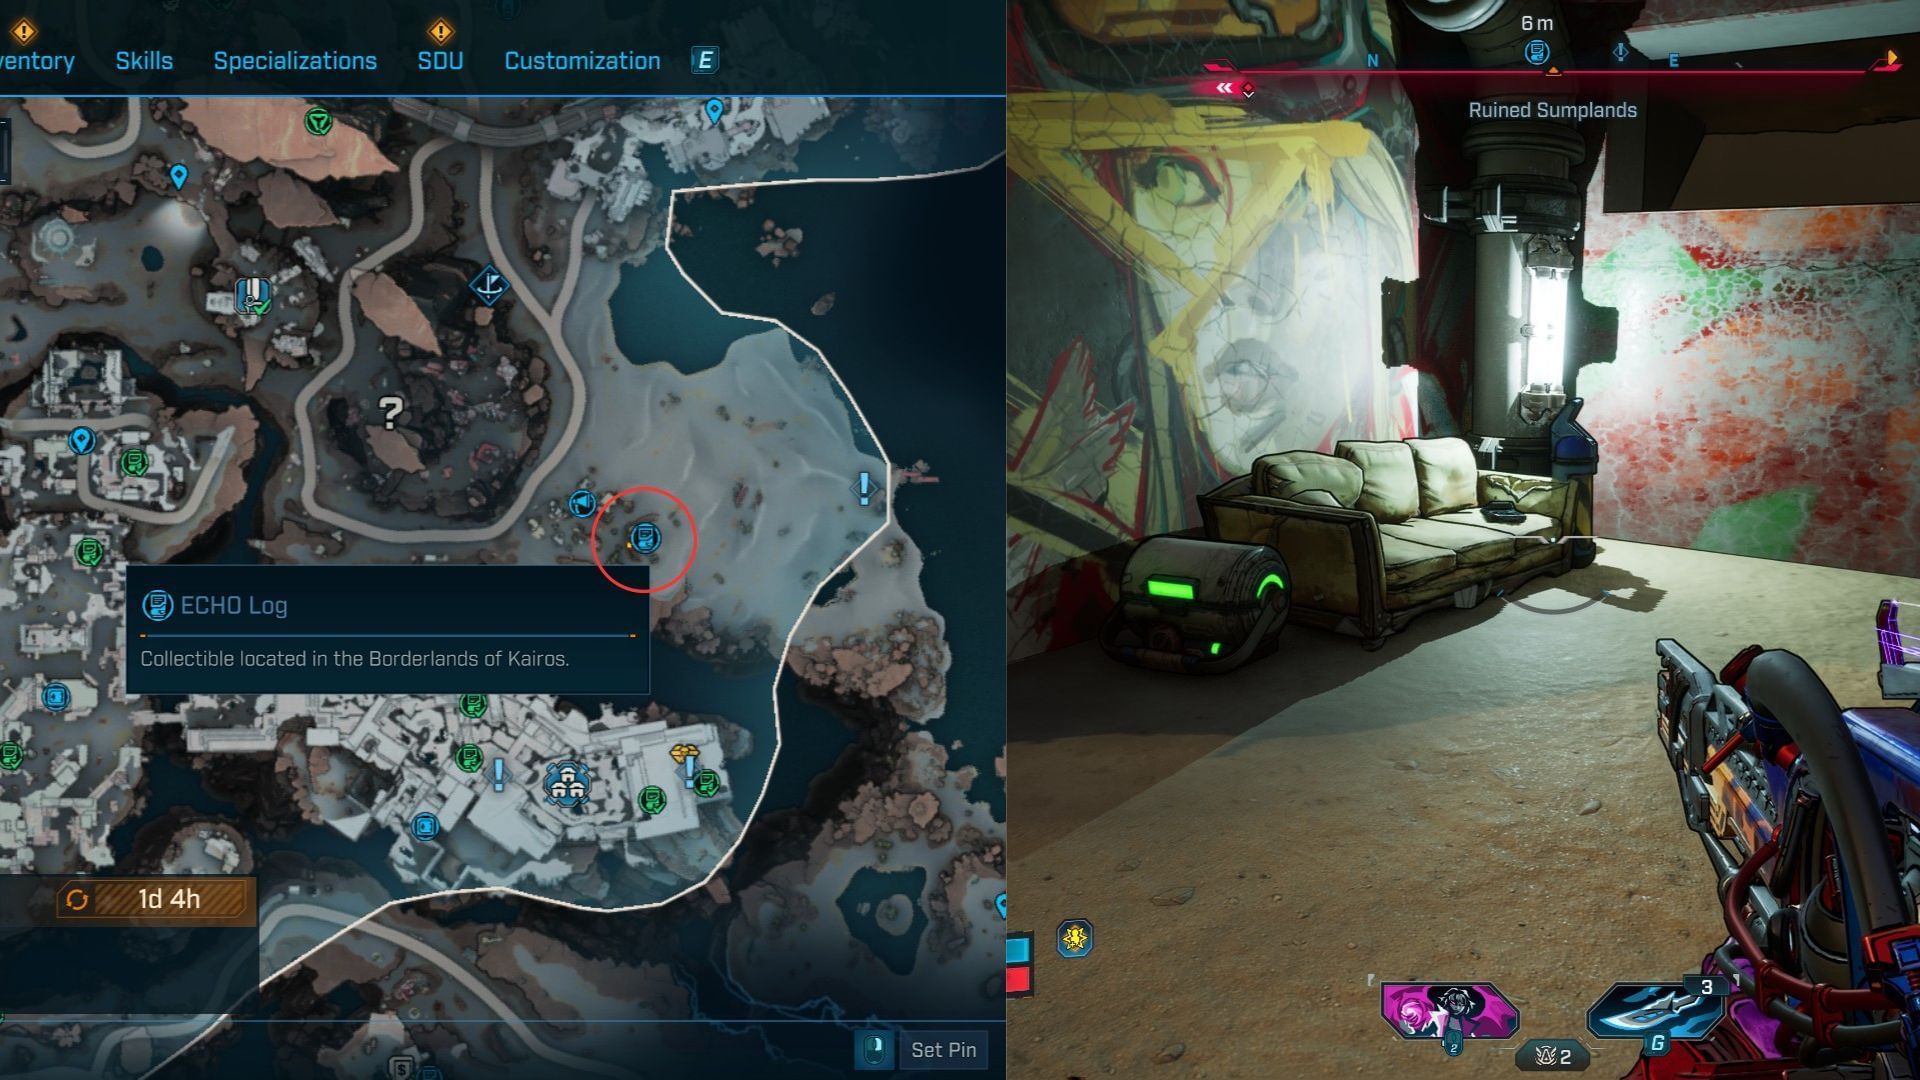
ECHO Log #2
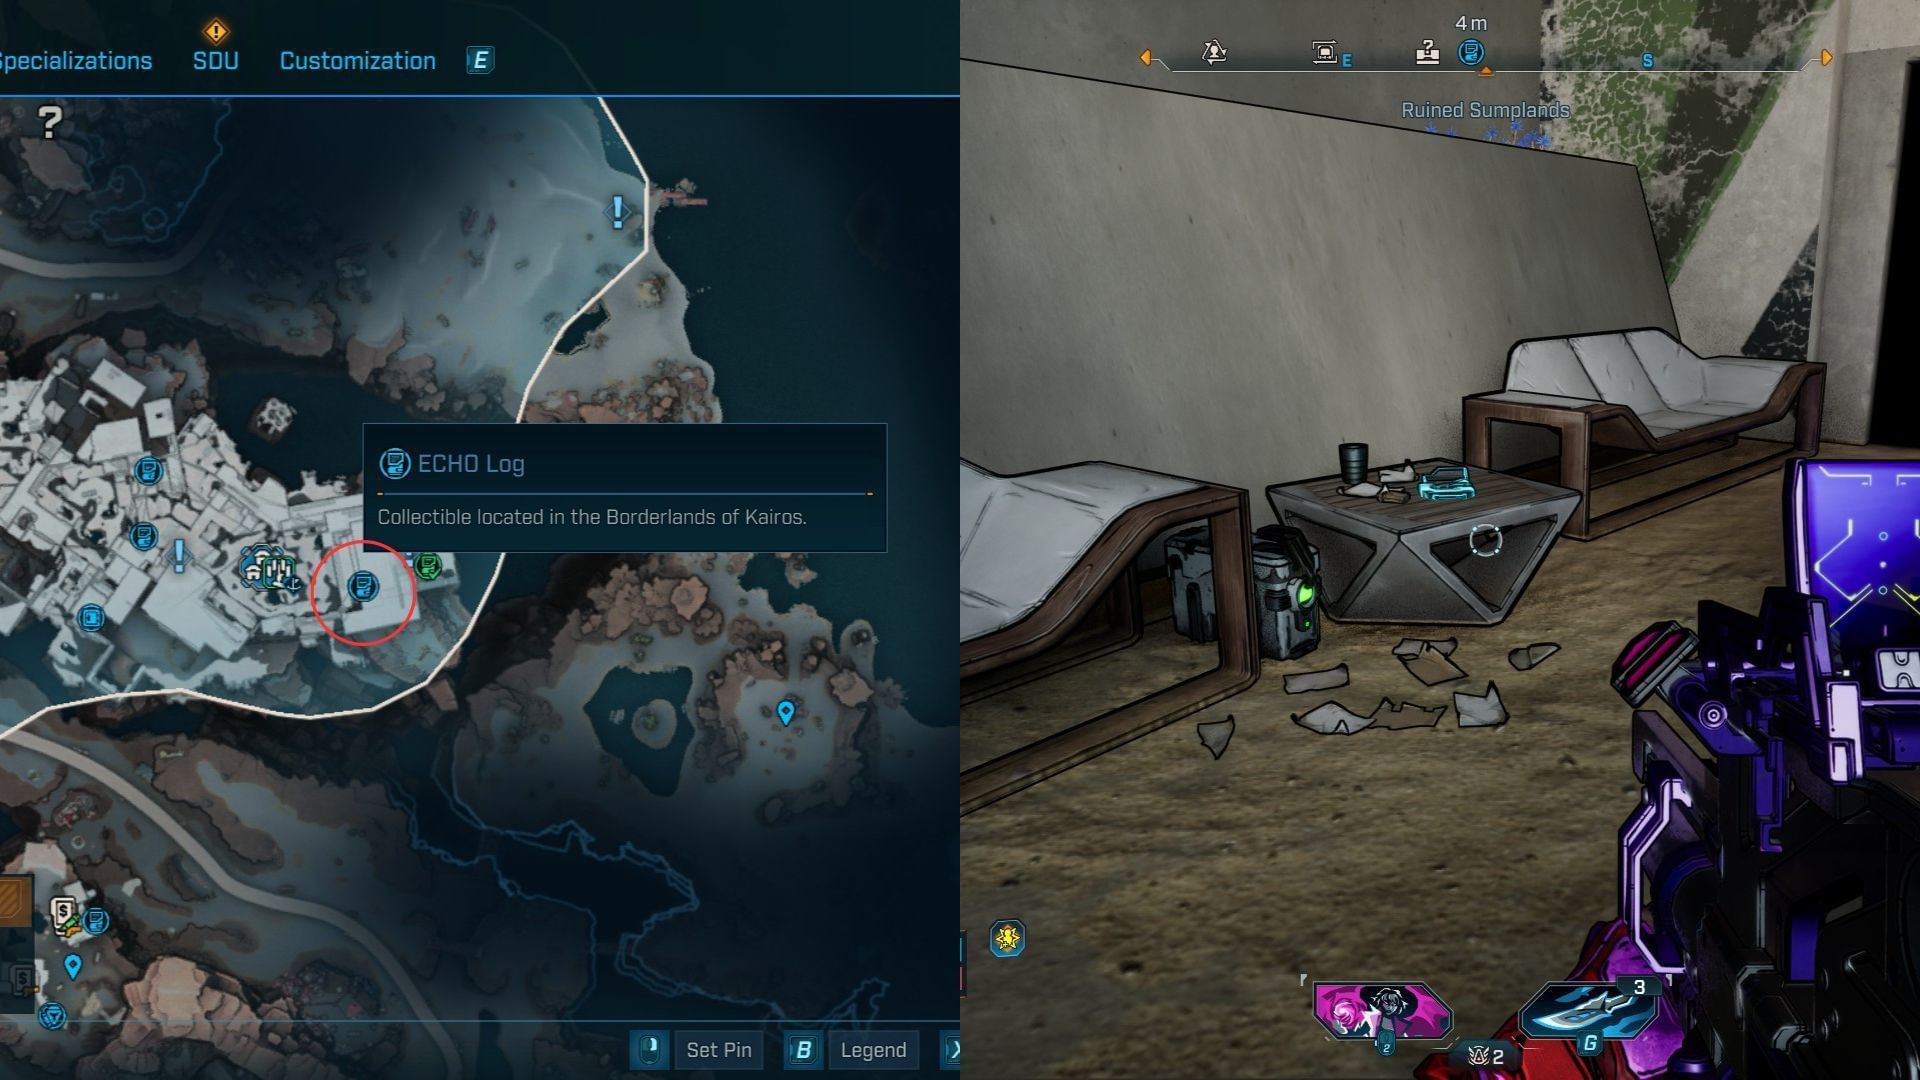
The second ECHO Log is within the building. As soon as you enter, take a left to find sofas in a corner. The Log will be on the table between them.
ECHO Log #3
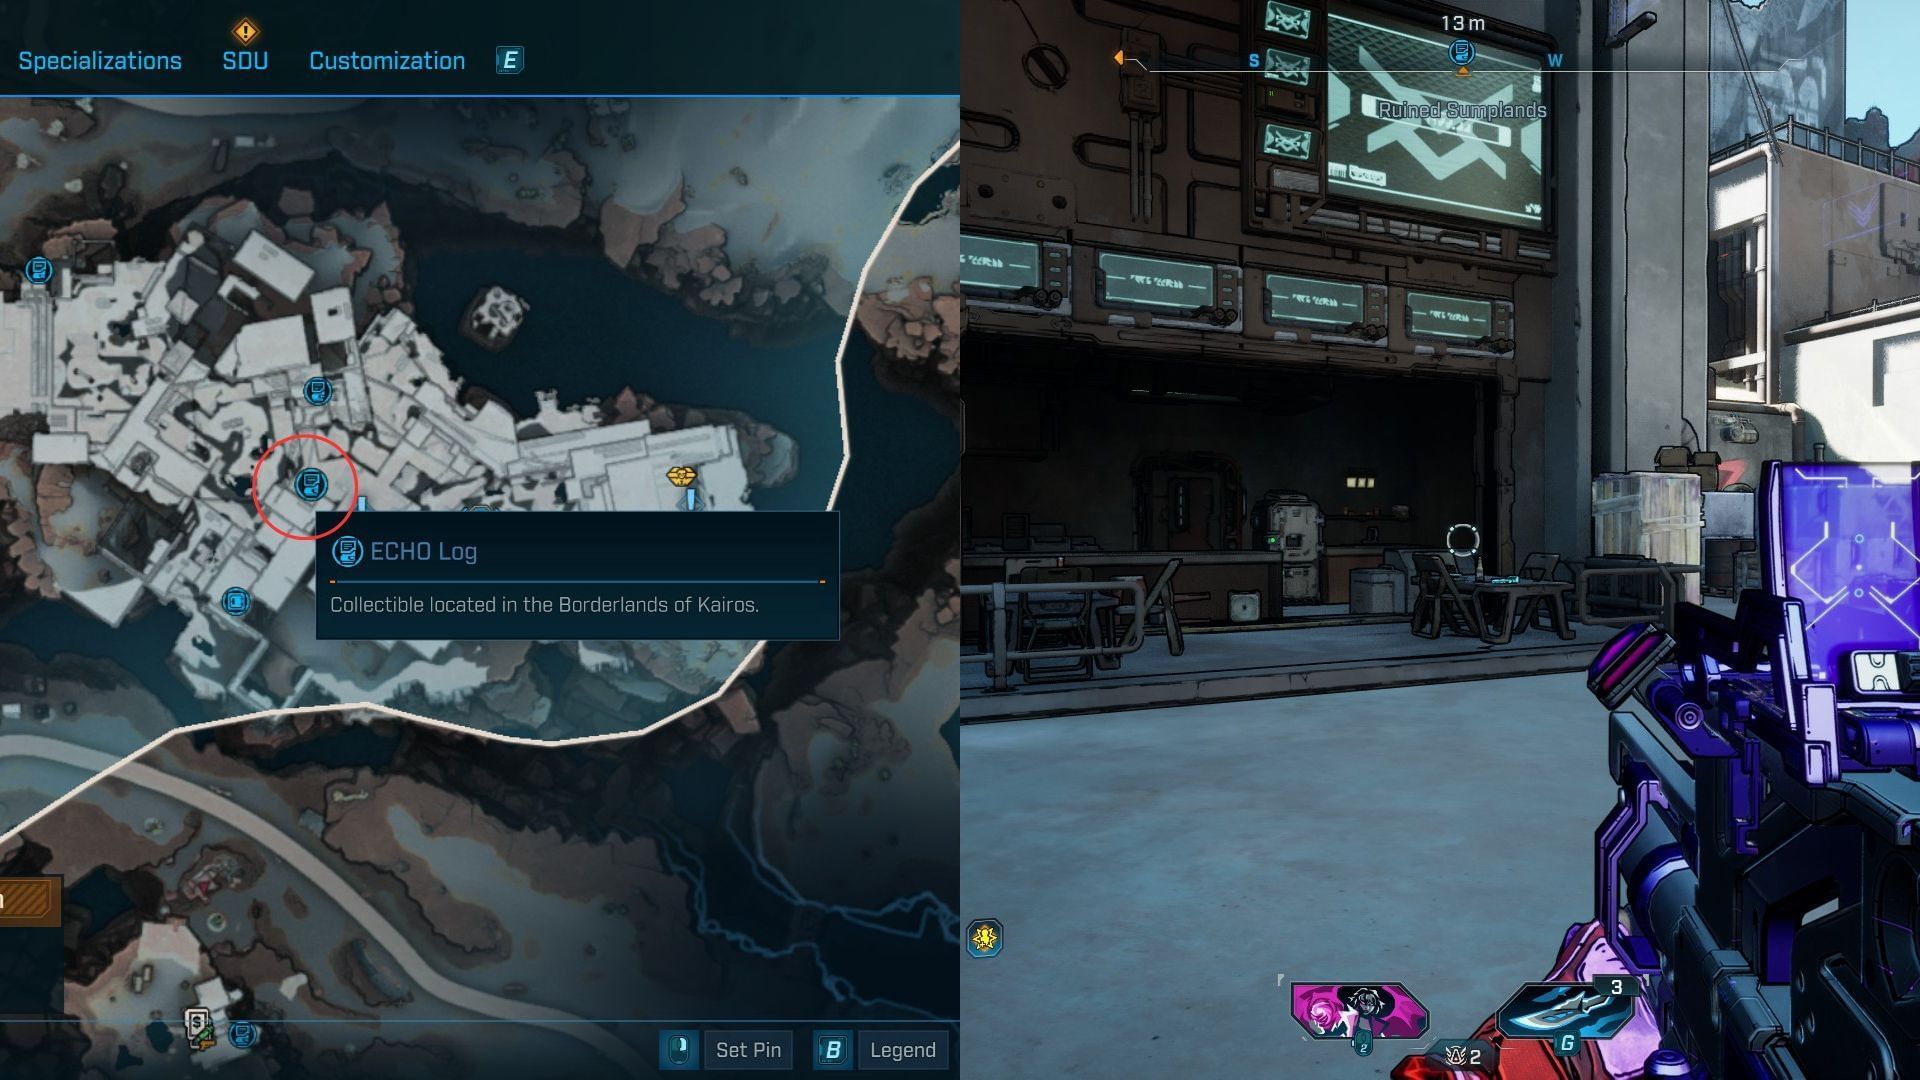
This ECHO Log is on top of a table outside a restaurant within the Faction Town. Find the Log opposite the building with black smoke coming out of the top in the middle of the Town.
ECHO Log #4
The fourth ECHO Log is close to the ECHO Log #3. Head up the stairs on the left side of the smoking building. The Log is in a small storage on top of containers.
ECHO Log #5
There is one final Log within the Electi Faction Town. As soon as you enter the Town, take a left to find a door leading to a cliff. There is a table in front of a sofa with the ECHO Log on top.
ECHO Log #6
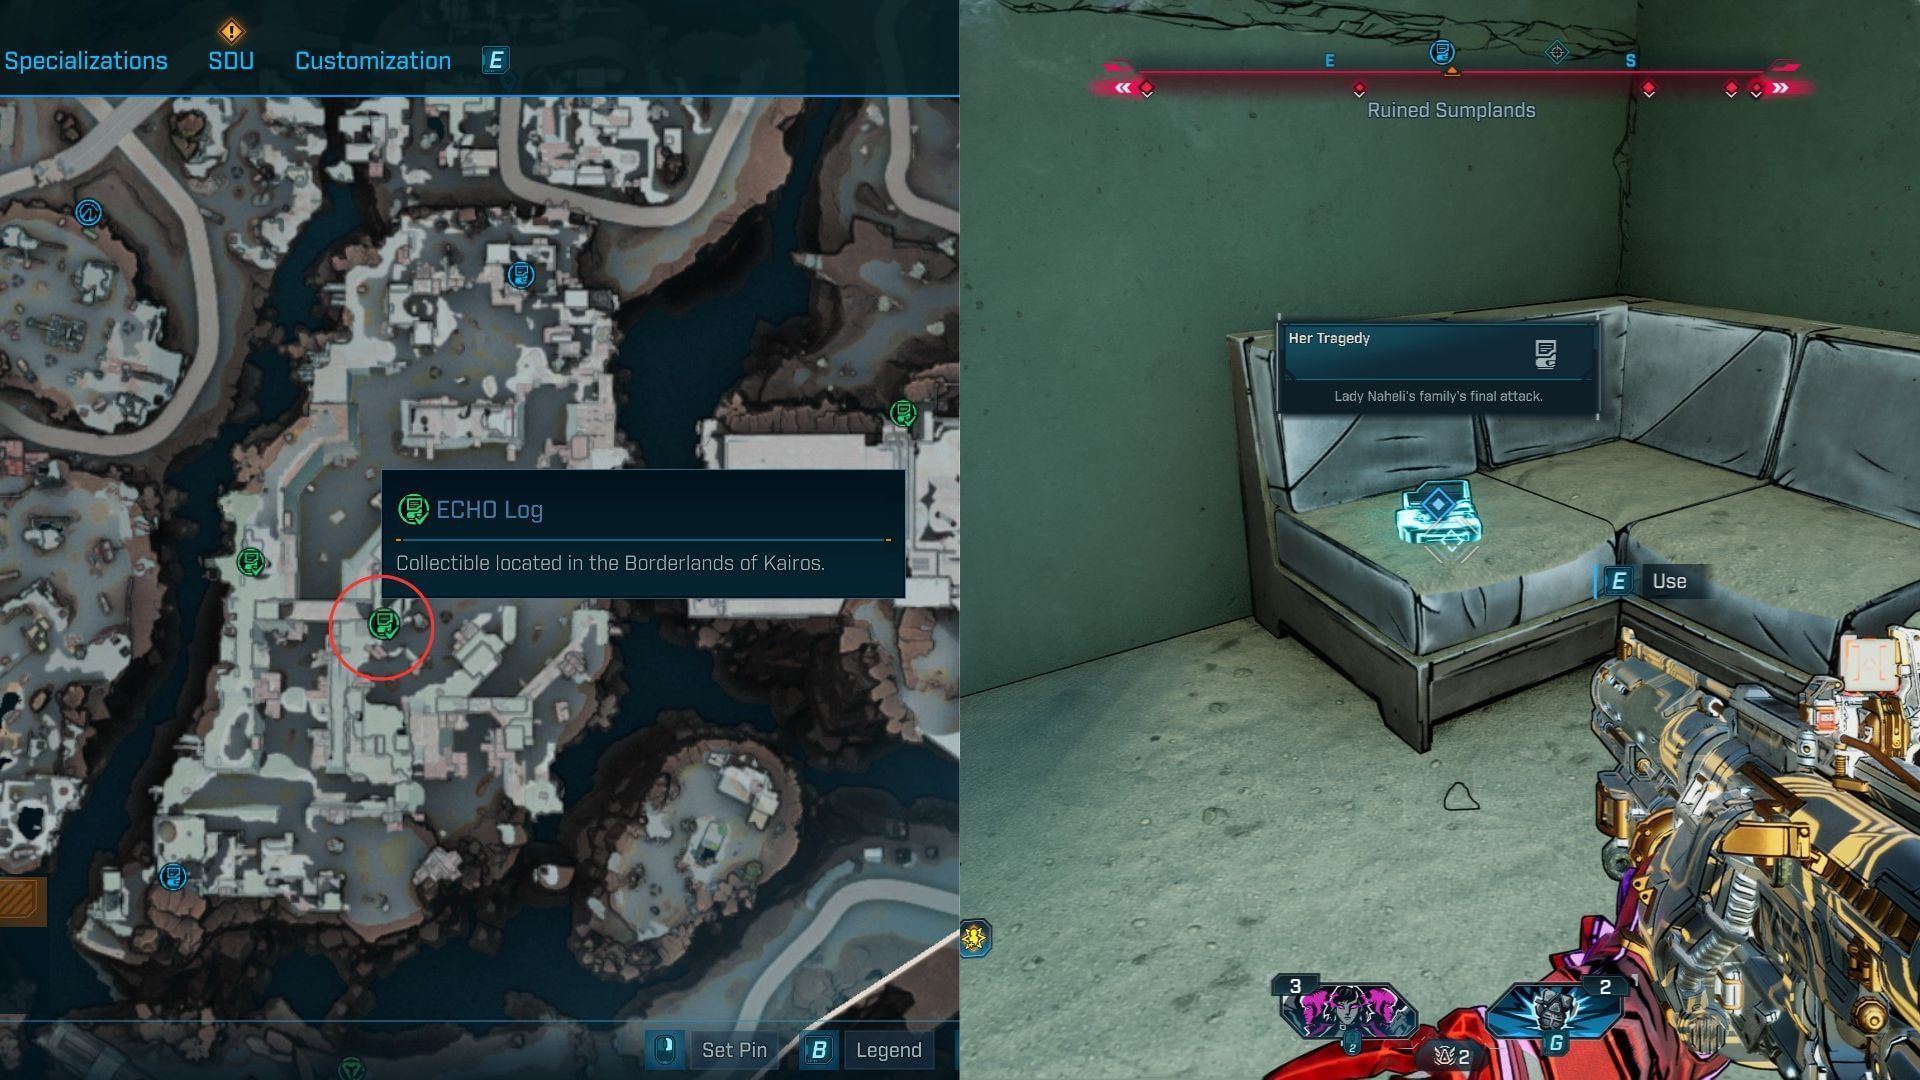
The sixth ECHO Log is on the island connected to the faction town by a bridge in the middle of Ruined Sumplands. It’s part of a side quest called ‘Her Own Funeral’ that you can pick up from a table within the main building of Faction Town. The Log will be on a sofa on the first floor of a destroyed building.
ECHO Log #7
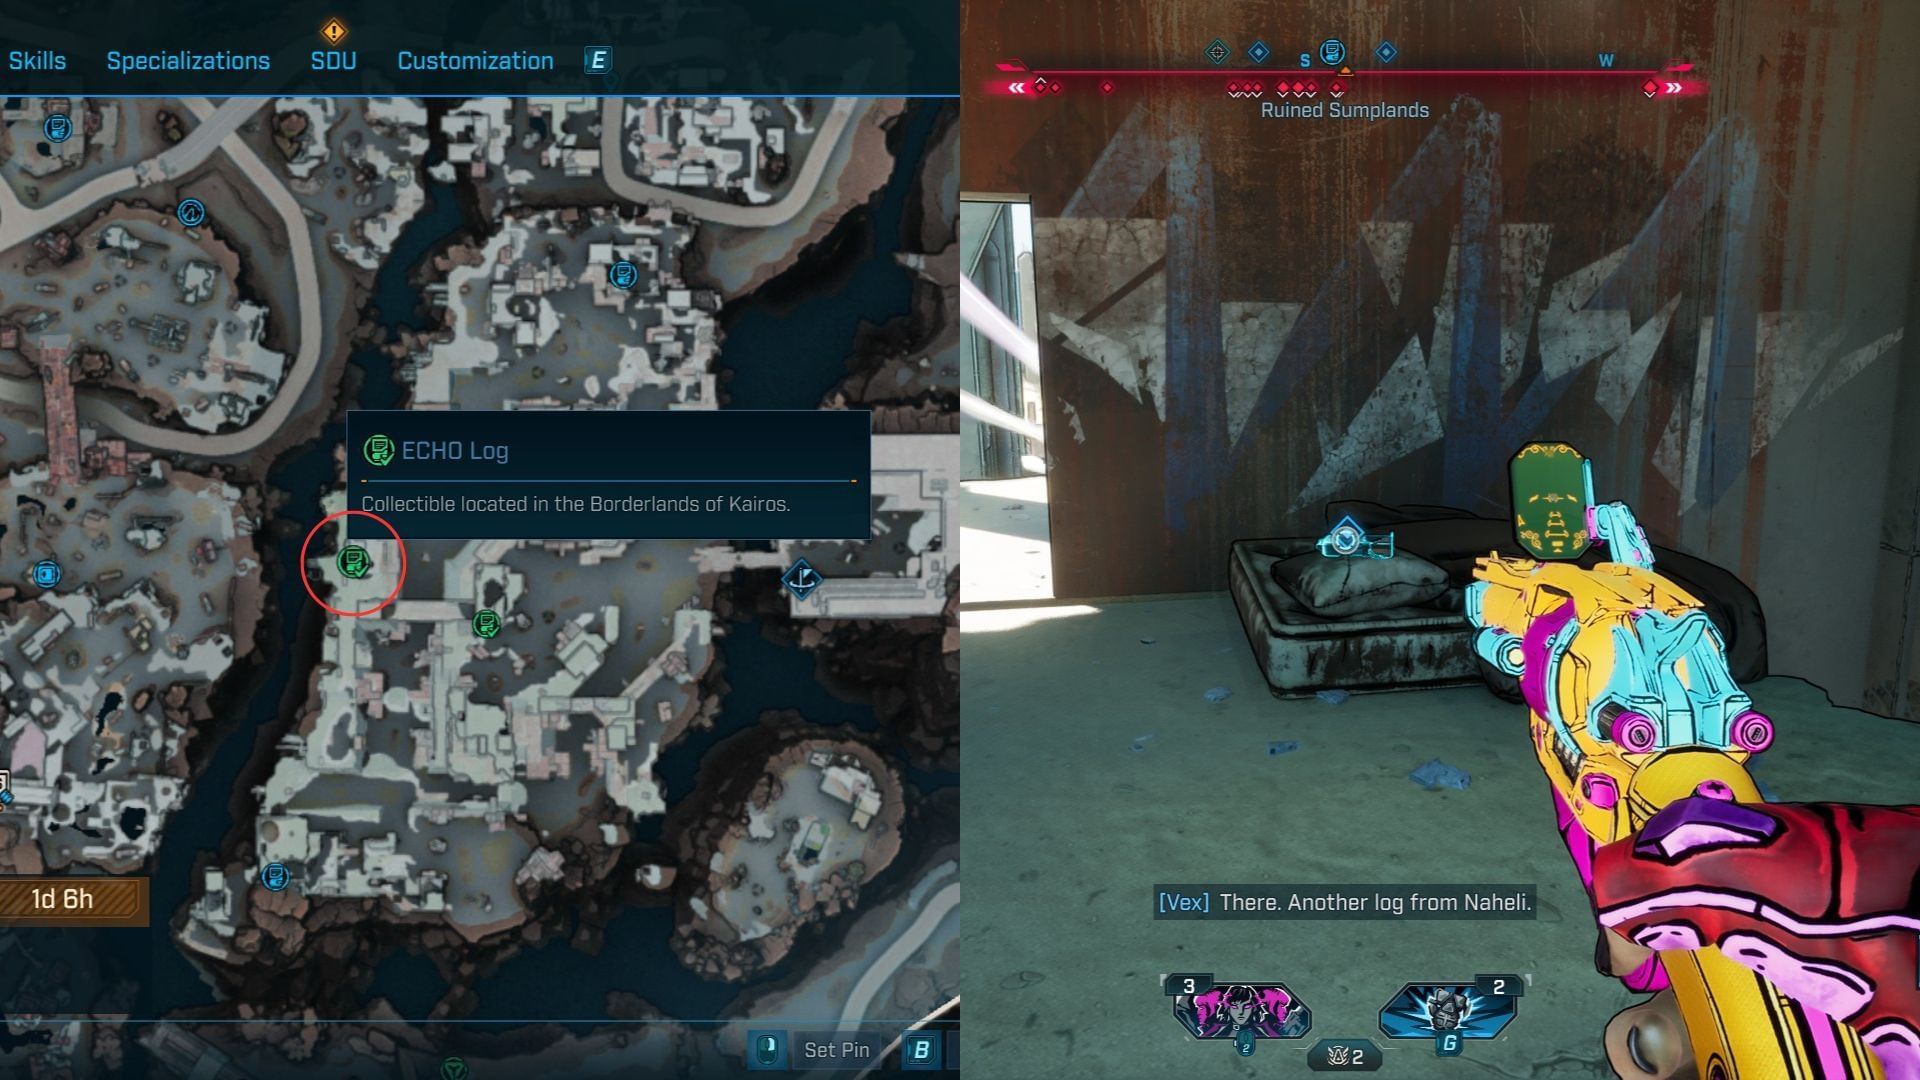
The seventh ECHO Log is also a part of the same quest and will lead you to another building by the west edge of the island. You’ll find the Log on a dirty mattress lying against the walls with graffiti on the first floor.
ECHO Log #8 and #9
The following two ECHO Logs are also on the same island as #6 and #7. Find the Log #8 inside a building with multiple graffiti and black smoke on top by the southern edge of the island. It’s on a table with an electric lantern.
Log #9 is in the exact opposite location at the Northern edge of the island, close to the Pain Street point of interest. There’s a Ripper camp in the area, and the item you’re looking for is the corner building. Once you get inside, take a left to find the Log on a table.
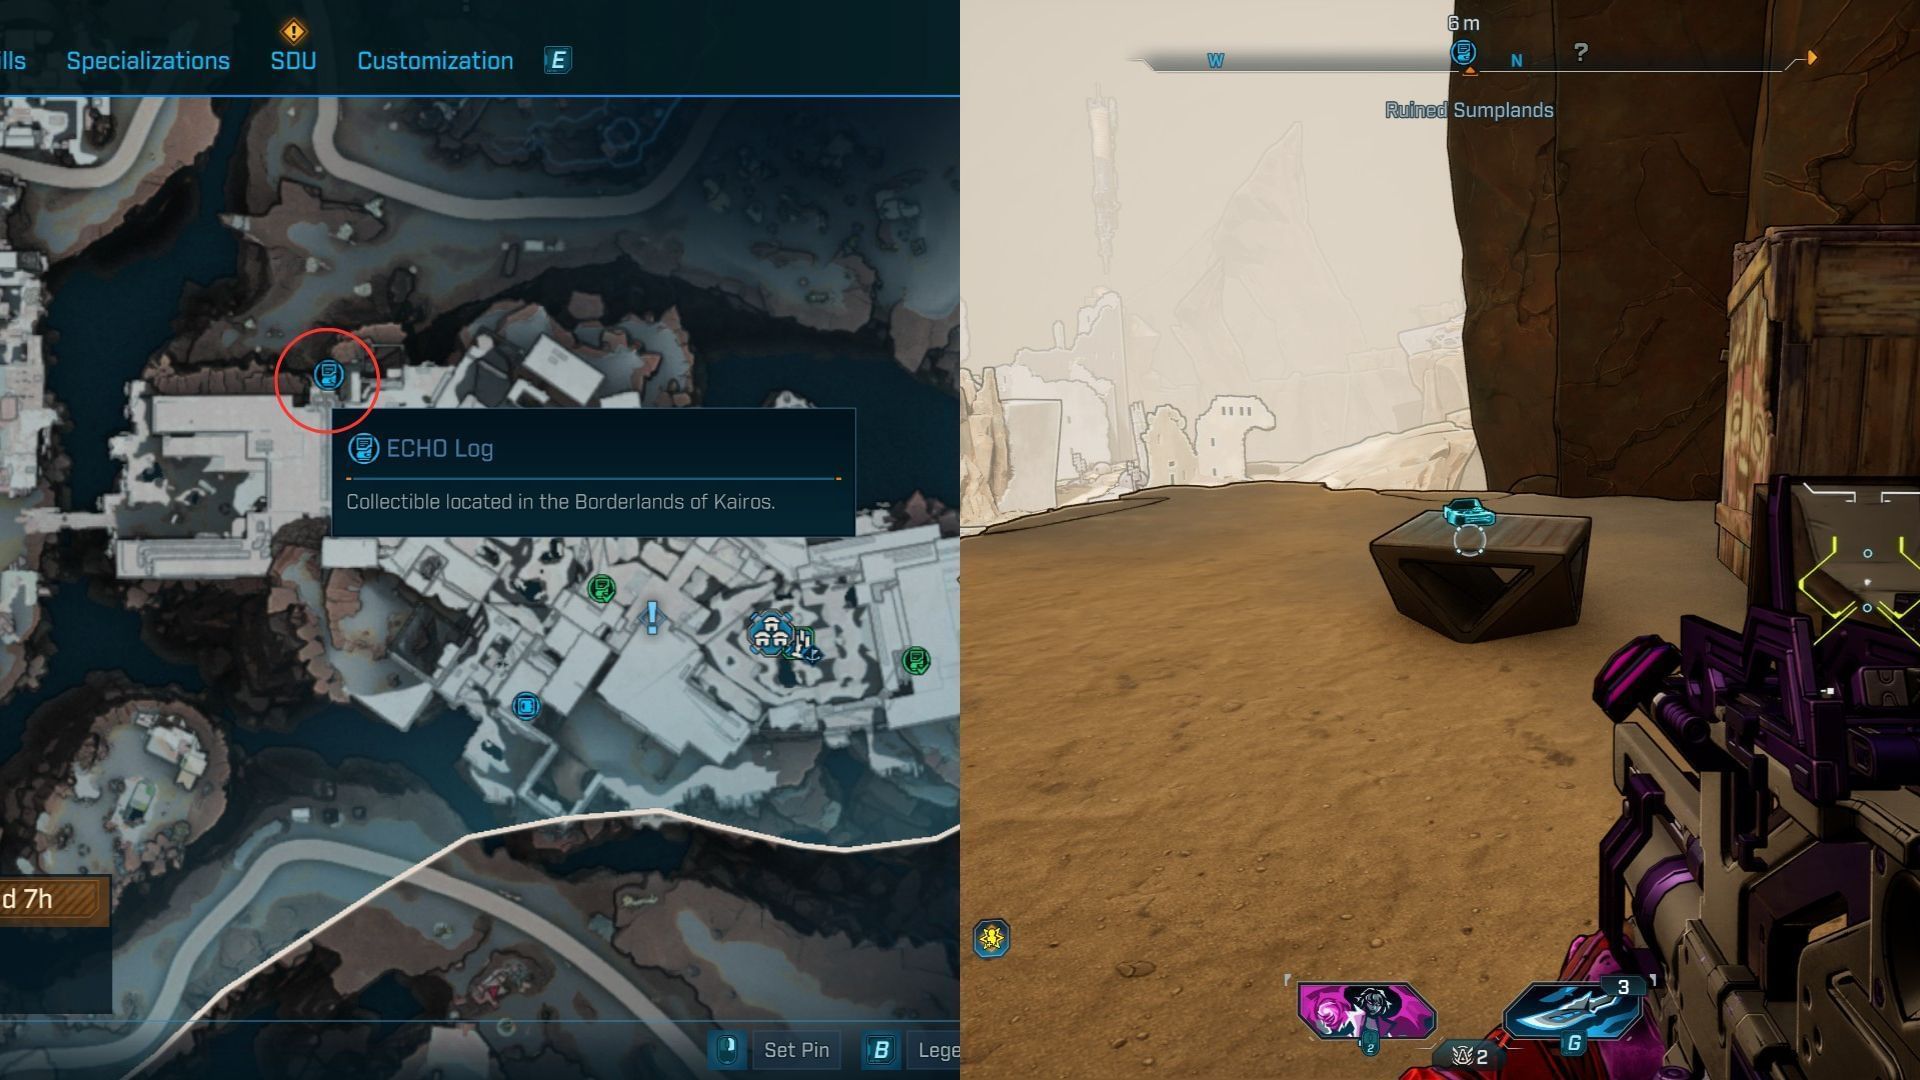
ECHO Log #10
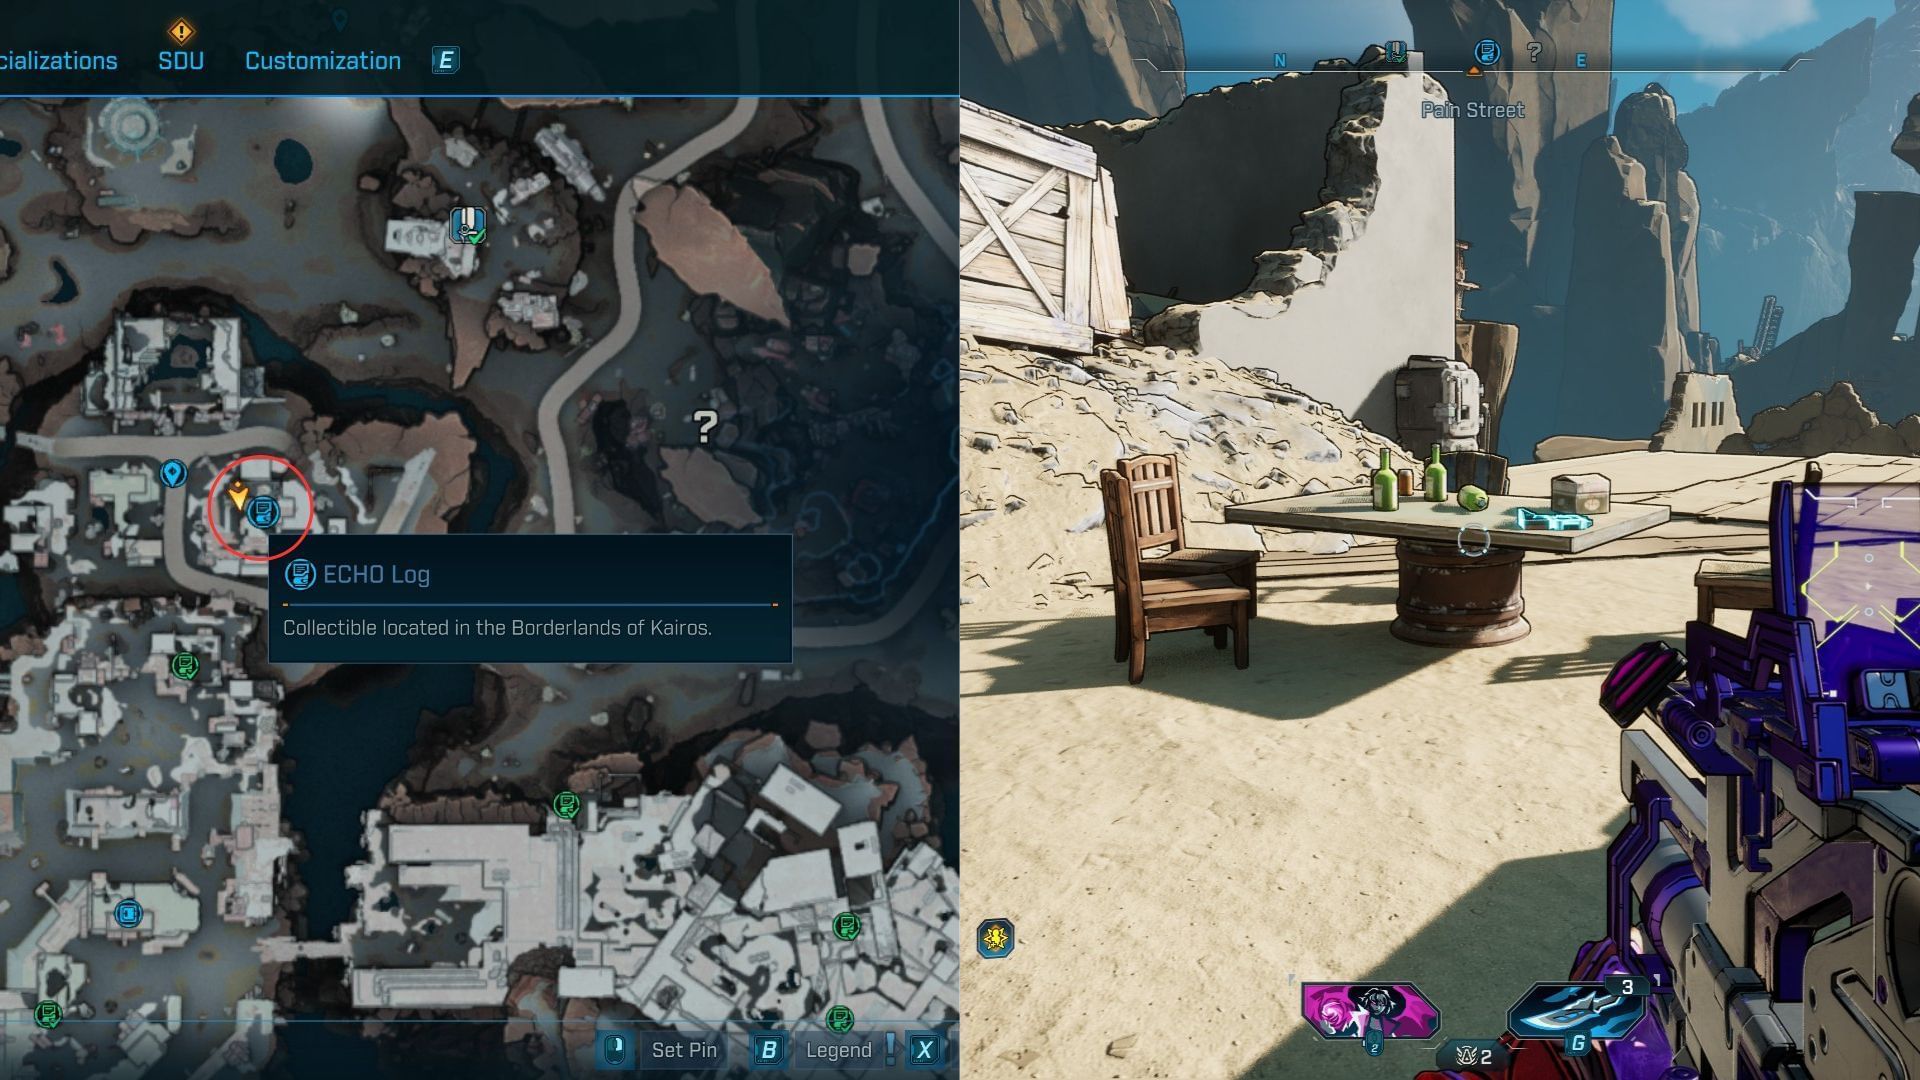
This Log is also close to the Pain Street point of interest. Glide north from Log #9 towards the tallest building with rubble. The collectible is on a table near the barbecue grill.
ECHO Log #11
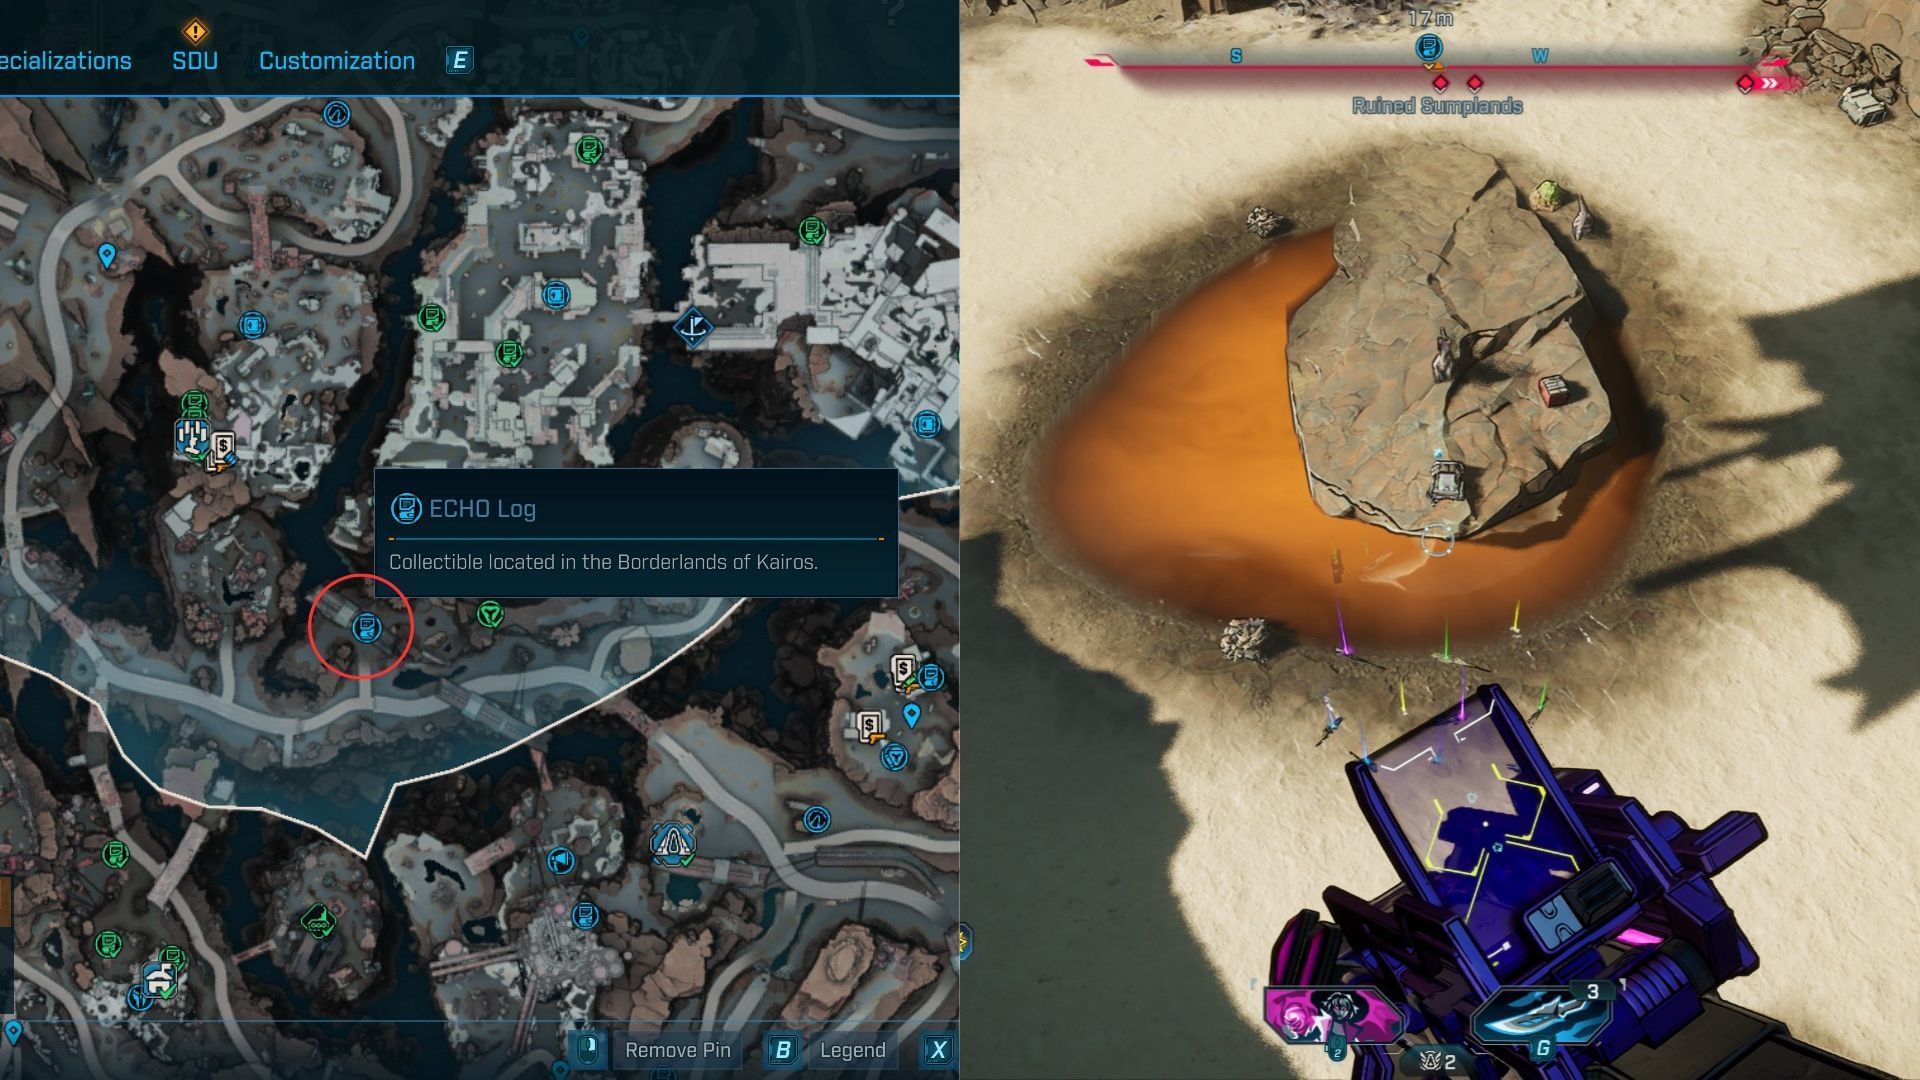
The ECHO Log #10 is near the massive structure across the rift separating the island from the highway. Keep moving south of Log #8 and glide over the gap to cross the rift and land on top of the cliff. The Log is under the structure in the middle of a puddle surrounded by multiple Pangolin.
ECHO Log #12, #13, #14, and #15
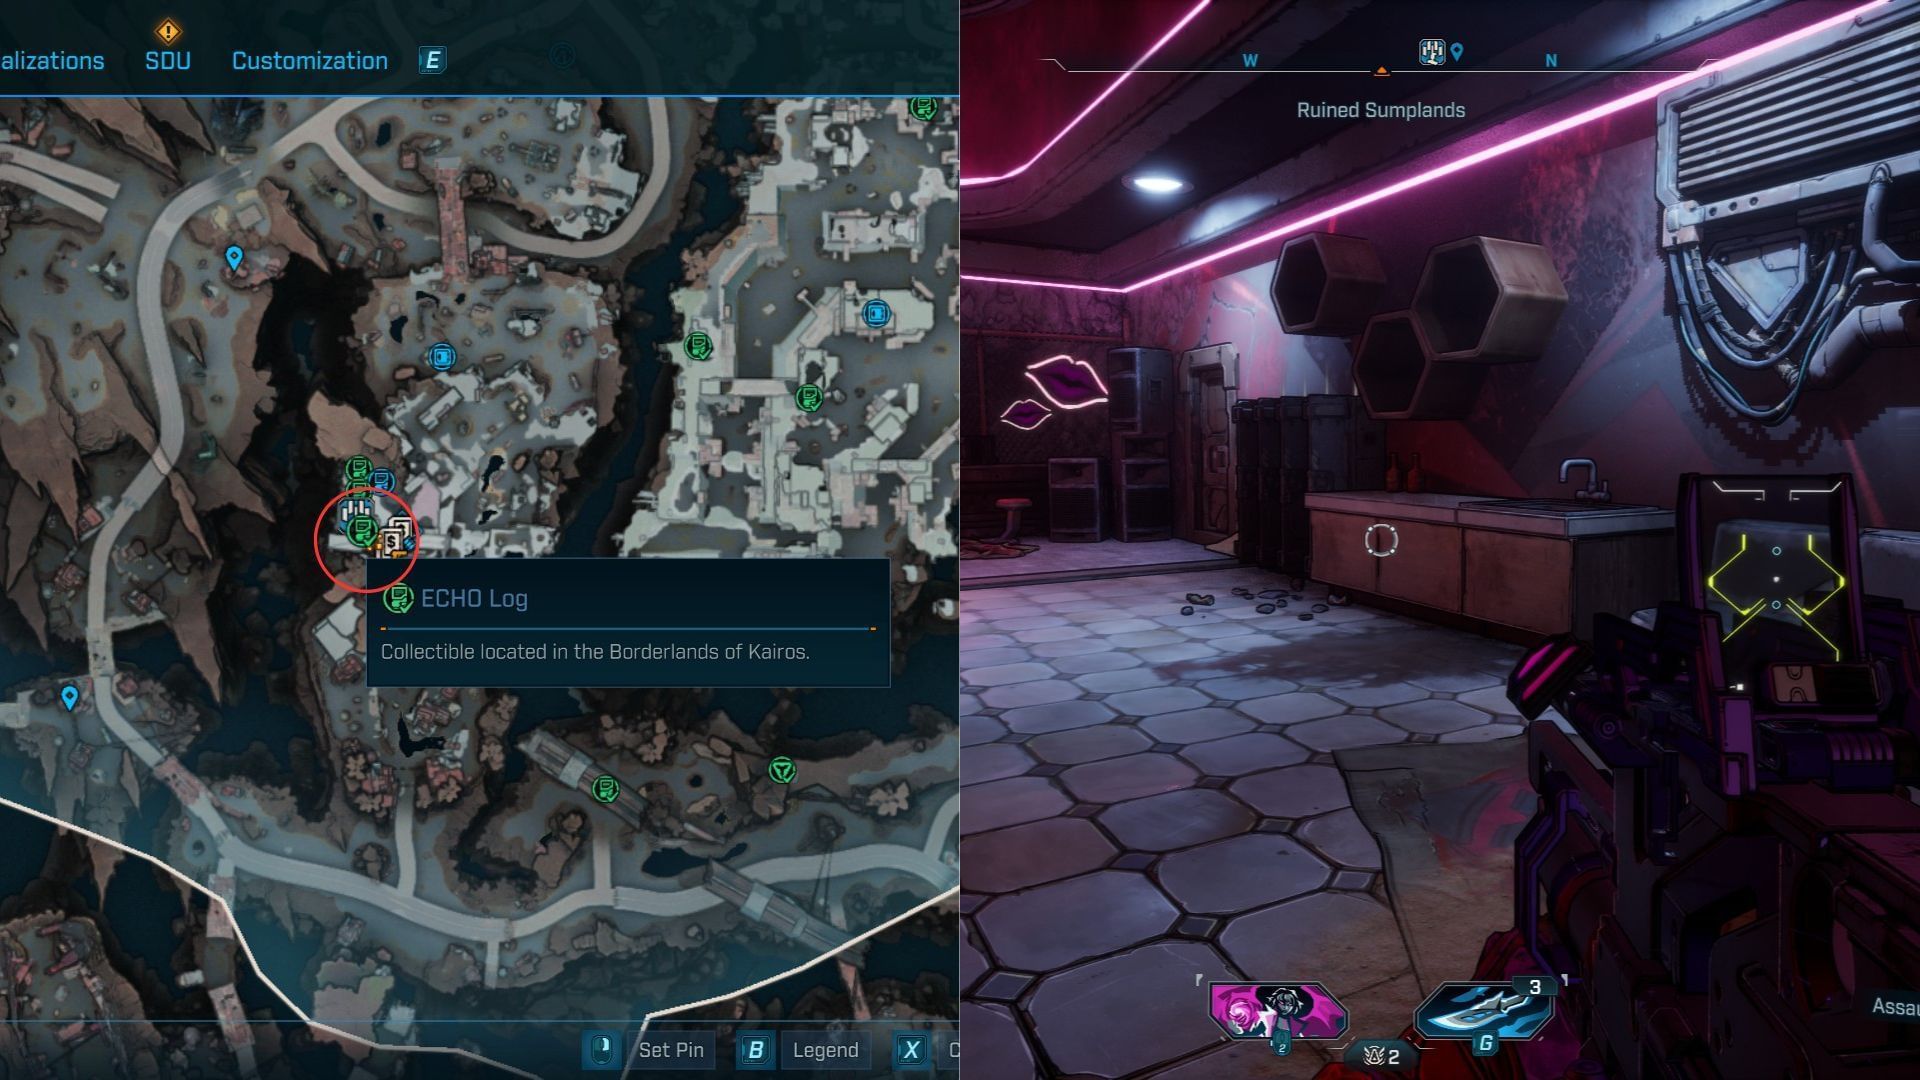
The following four ECHO Logs are within Moxxi’s club. Find the first Log in a separate room that you can enter by heading left to the main entrance. It’s on top of a table near the honeycomb-shaped shelves.
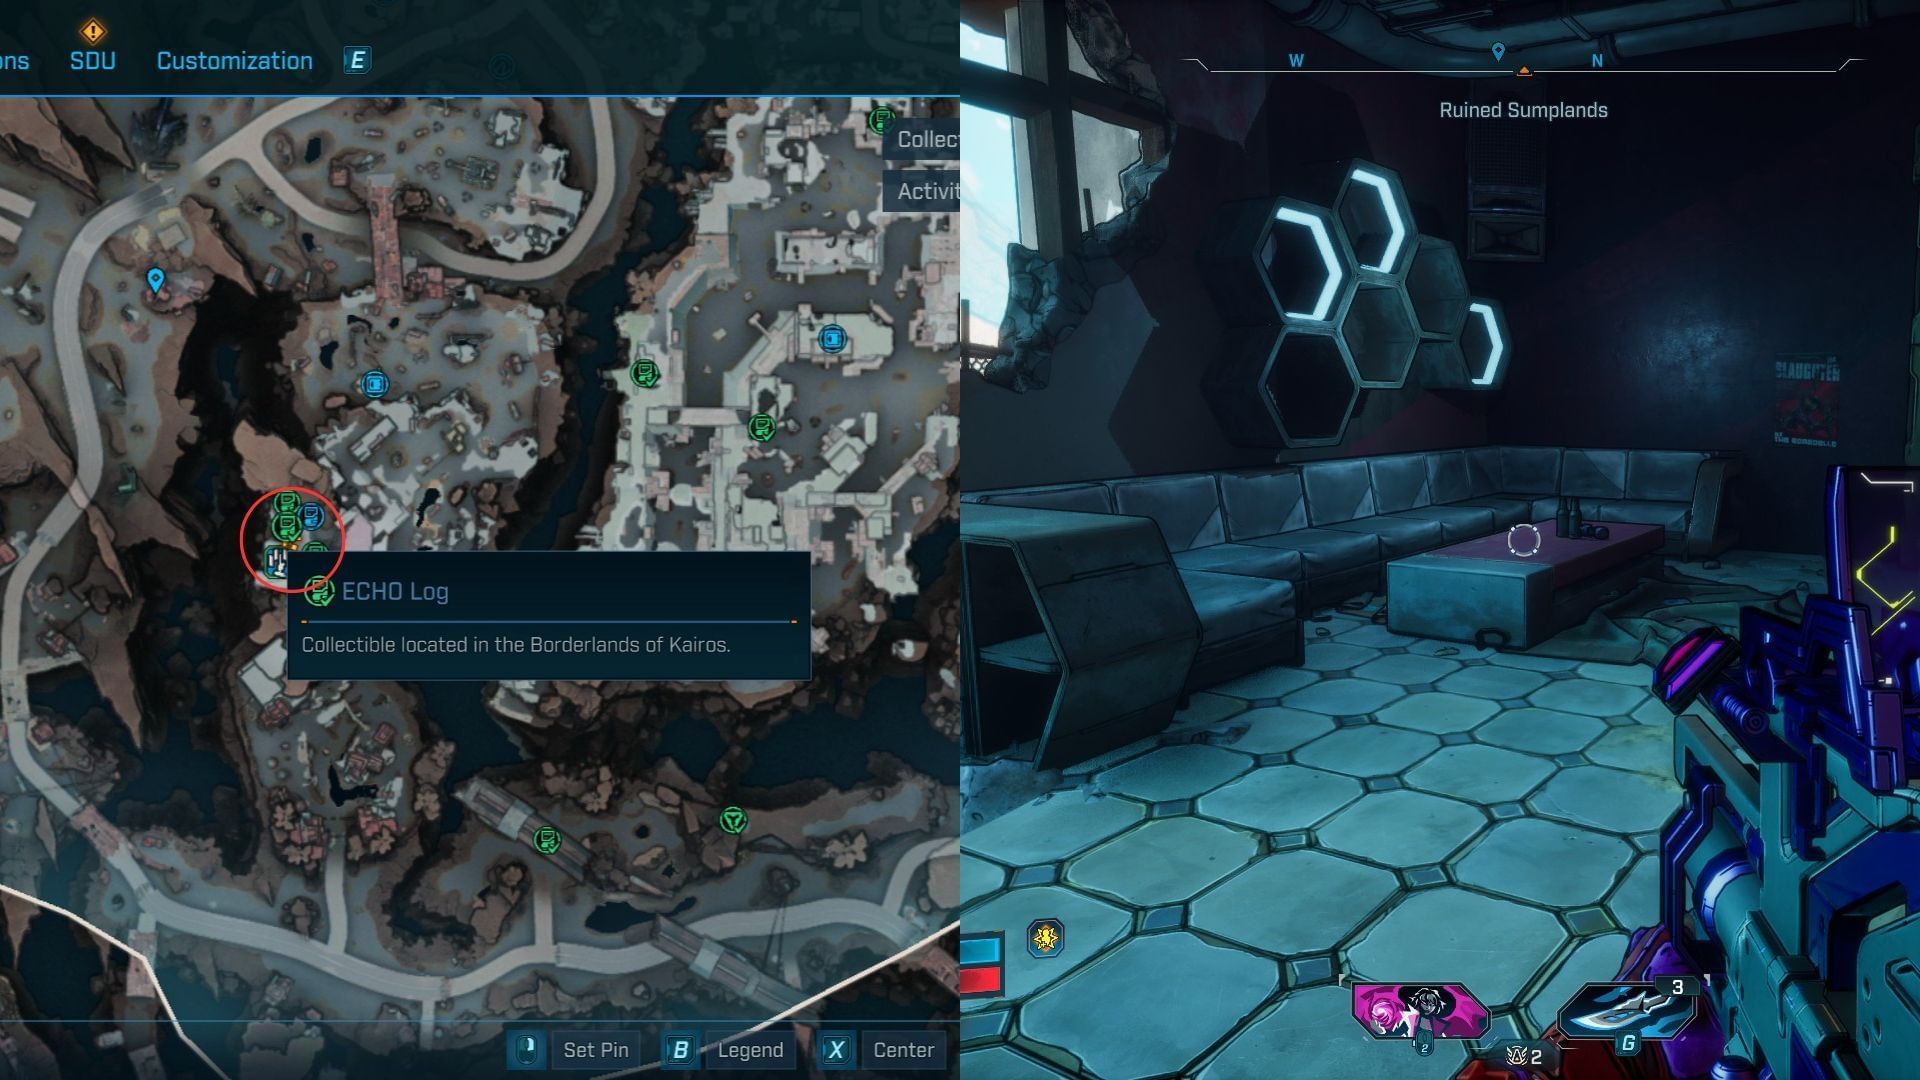
Log #13 is on the left of the central area. There’s a big sofa near a destroyed wall and another honeycomb-shaped shelf. Find the collectible on the table nearby.
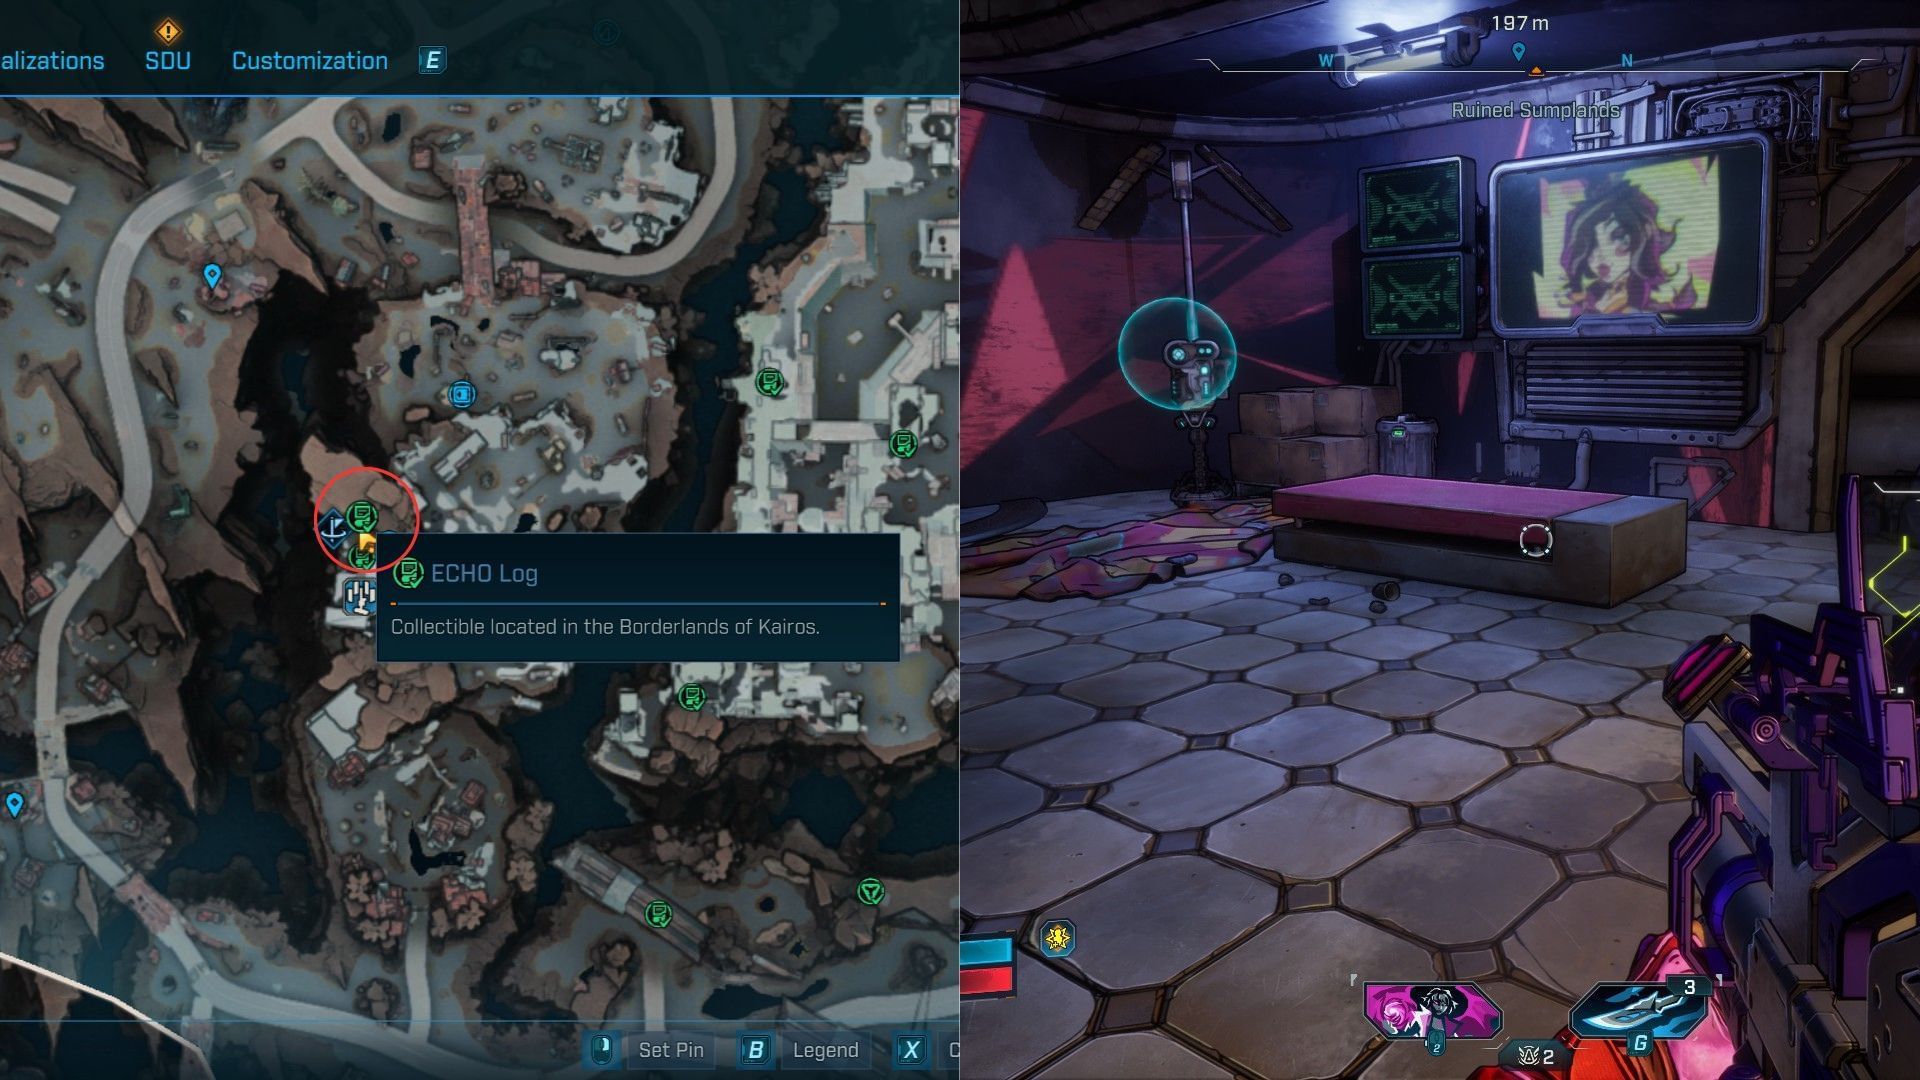
From the exact location of Log #13, head inside the door in front of you into Moxxi’s room. You’ll find the collectible on top of the bed near the television.
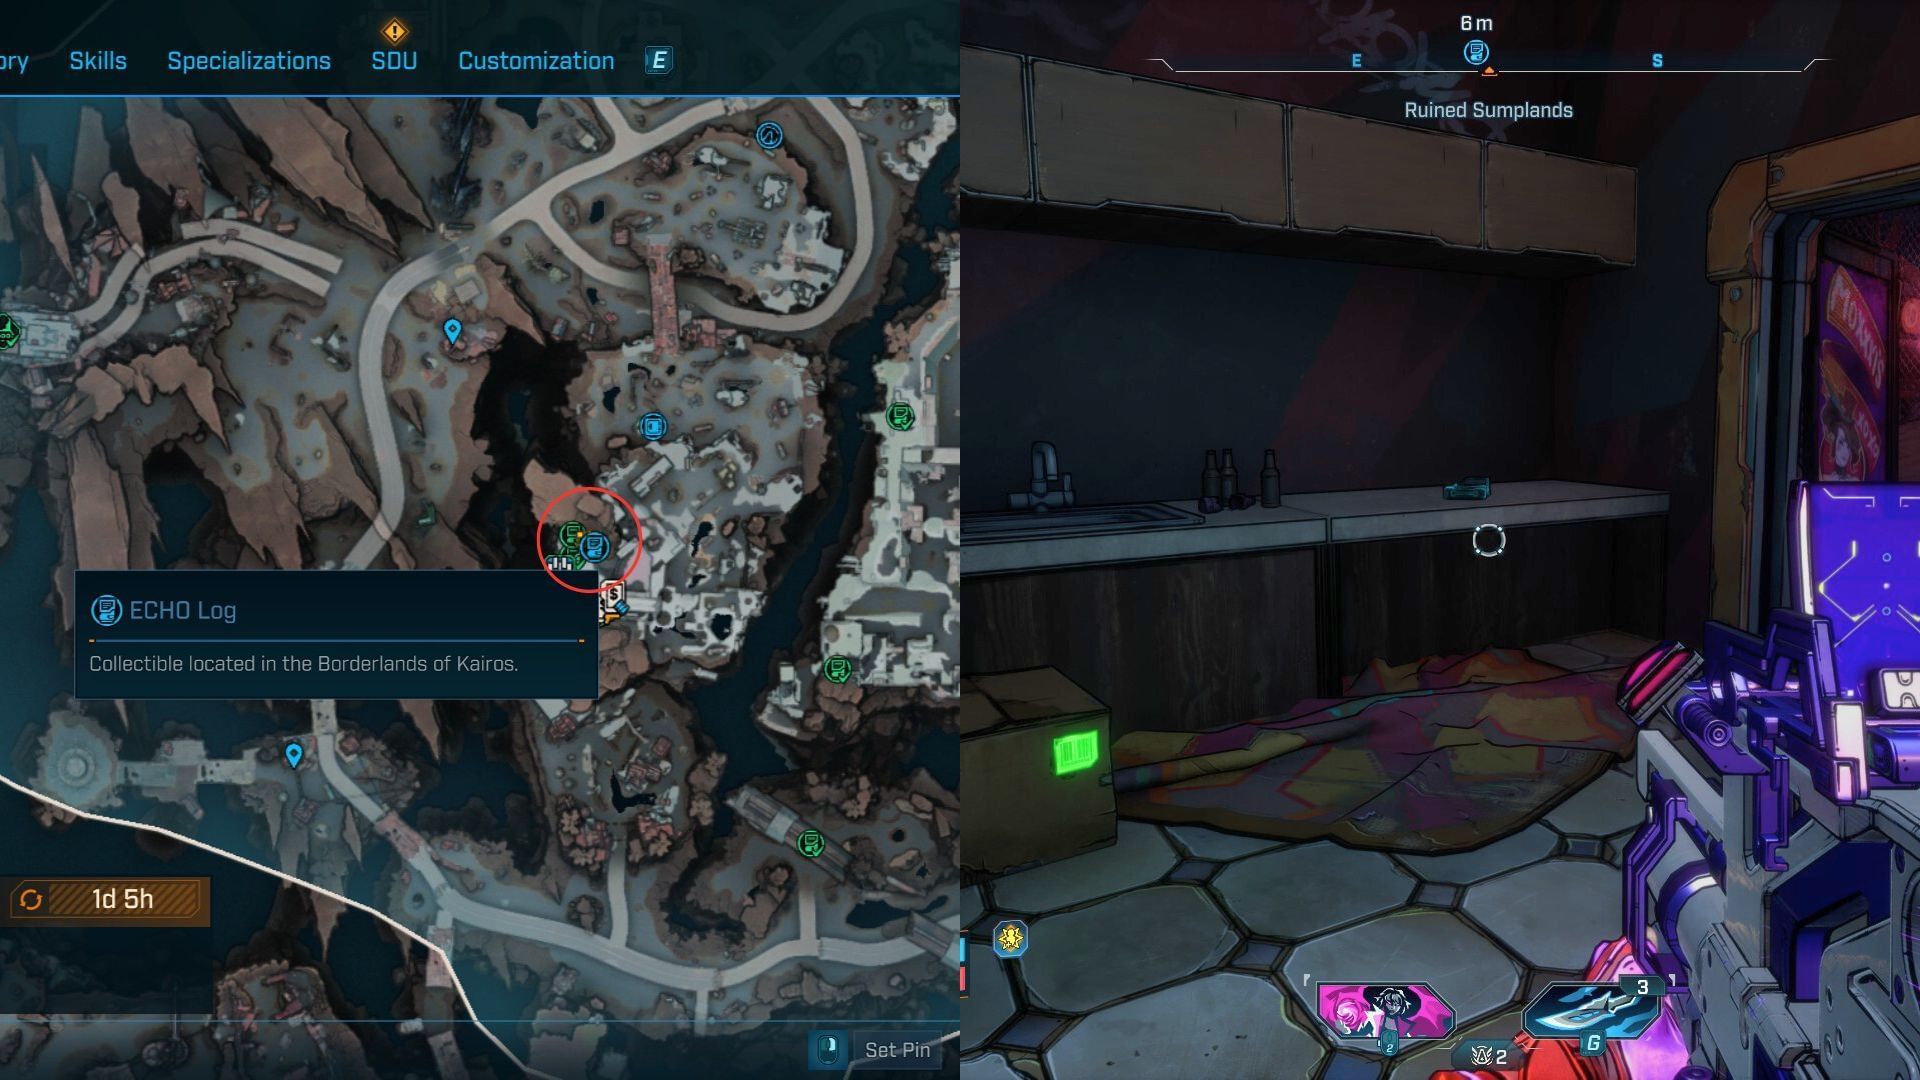
The final ECHO Log in Moxxi’s club is in a toilet to the left of the counter. As soon as you enter the room, look left to find the Log on a counter.
ECHO Log #16
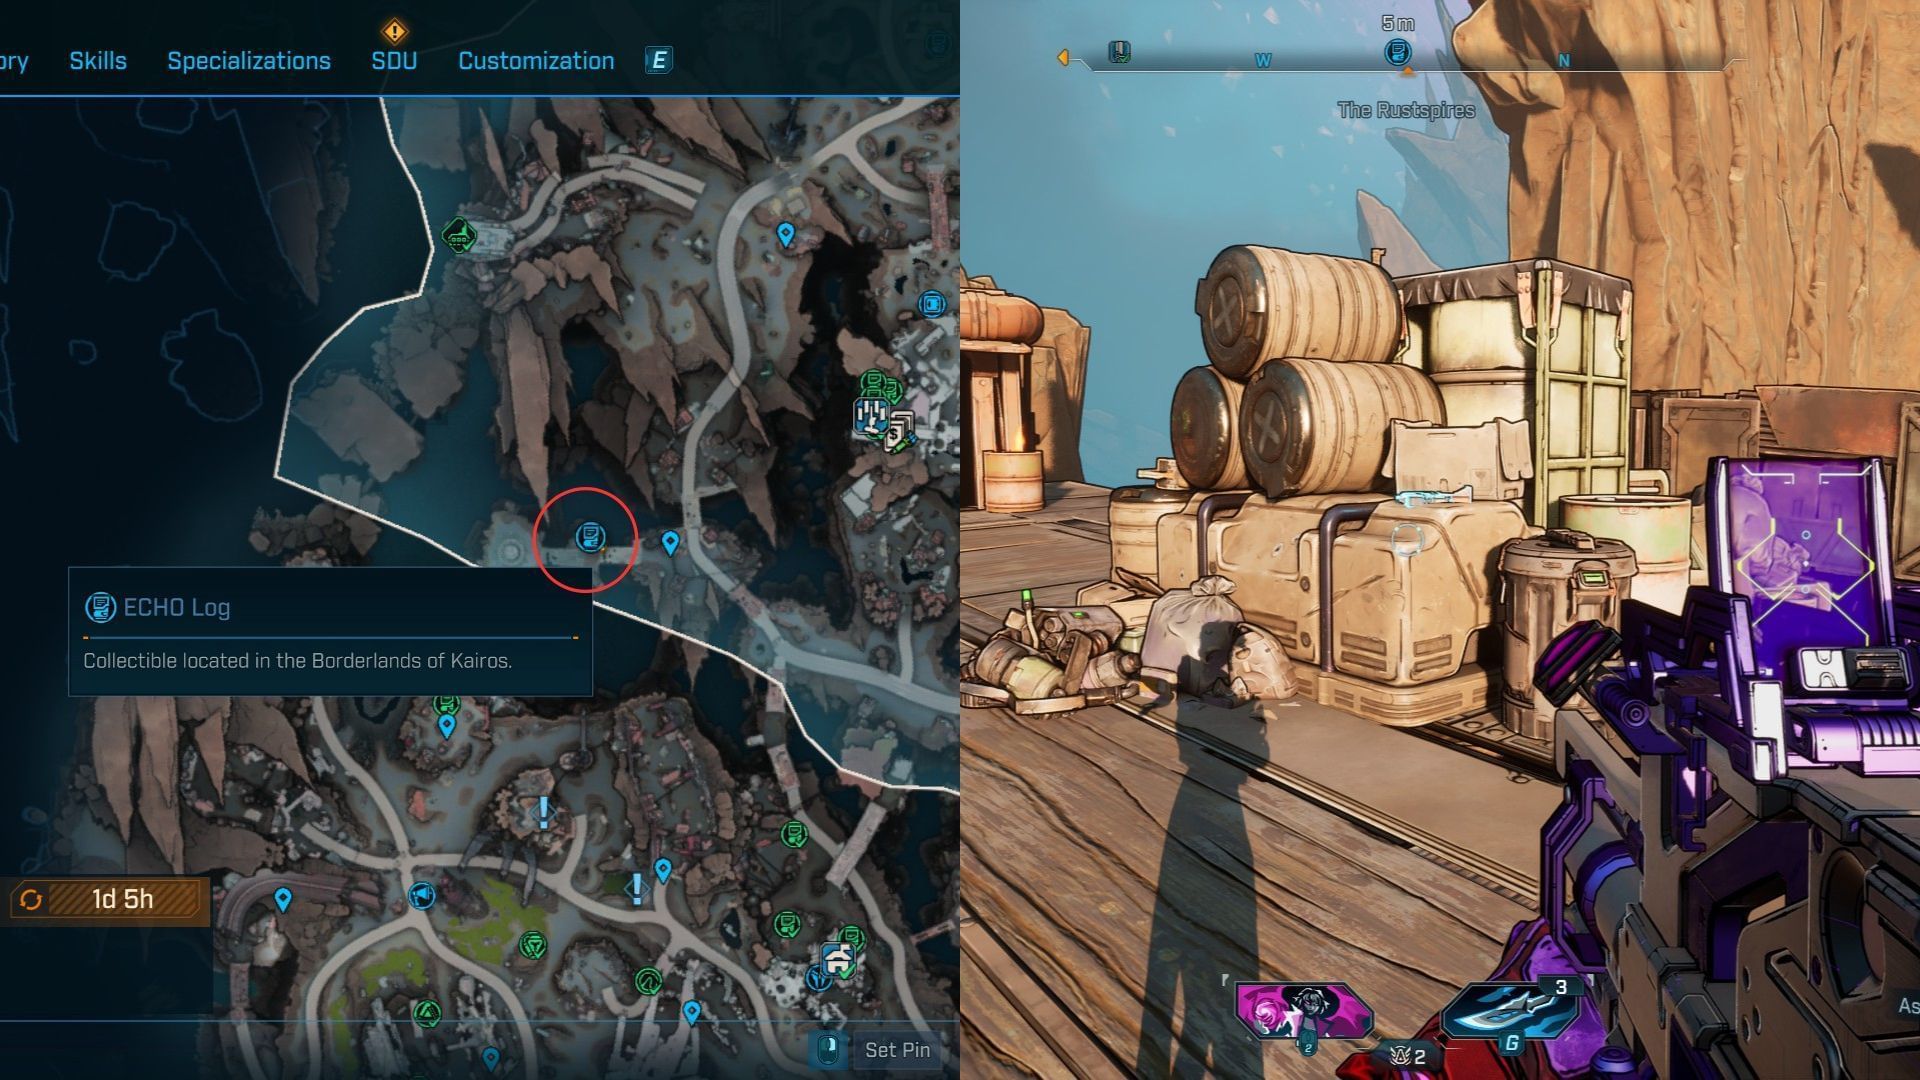
This ECHO Log is near the Rustspires point of interest. There’s a bridge leading to the Order Silo Zipline, halfway through which you’ll find a vehicle. The collectible is on top of some containers behind it.
ECHO Log #17
Log #17 is near the Society for Amateur Seismology Enthusiasts point of interest. There’s a Ripper camp just below the POI marker. You can find the collectible within an enclosed encampment on a sofa near the main building.
ECHO Log #18
Log #18 is also near the Society for Amateur Seismology Enthusiasts POI, but in another Ripper camp north of the one that had ECHO Log #17. You can find the collectible in the center of the camp, on top of a metal railing.
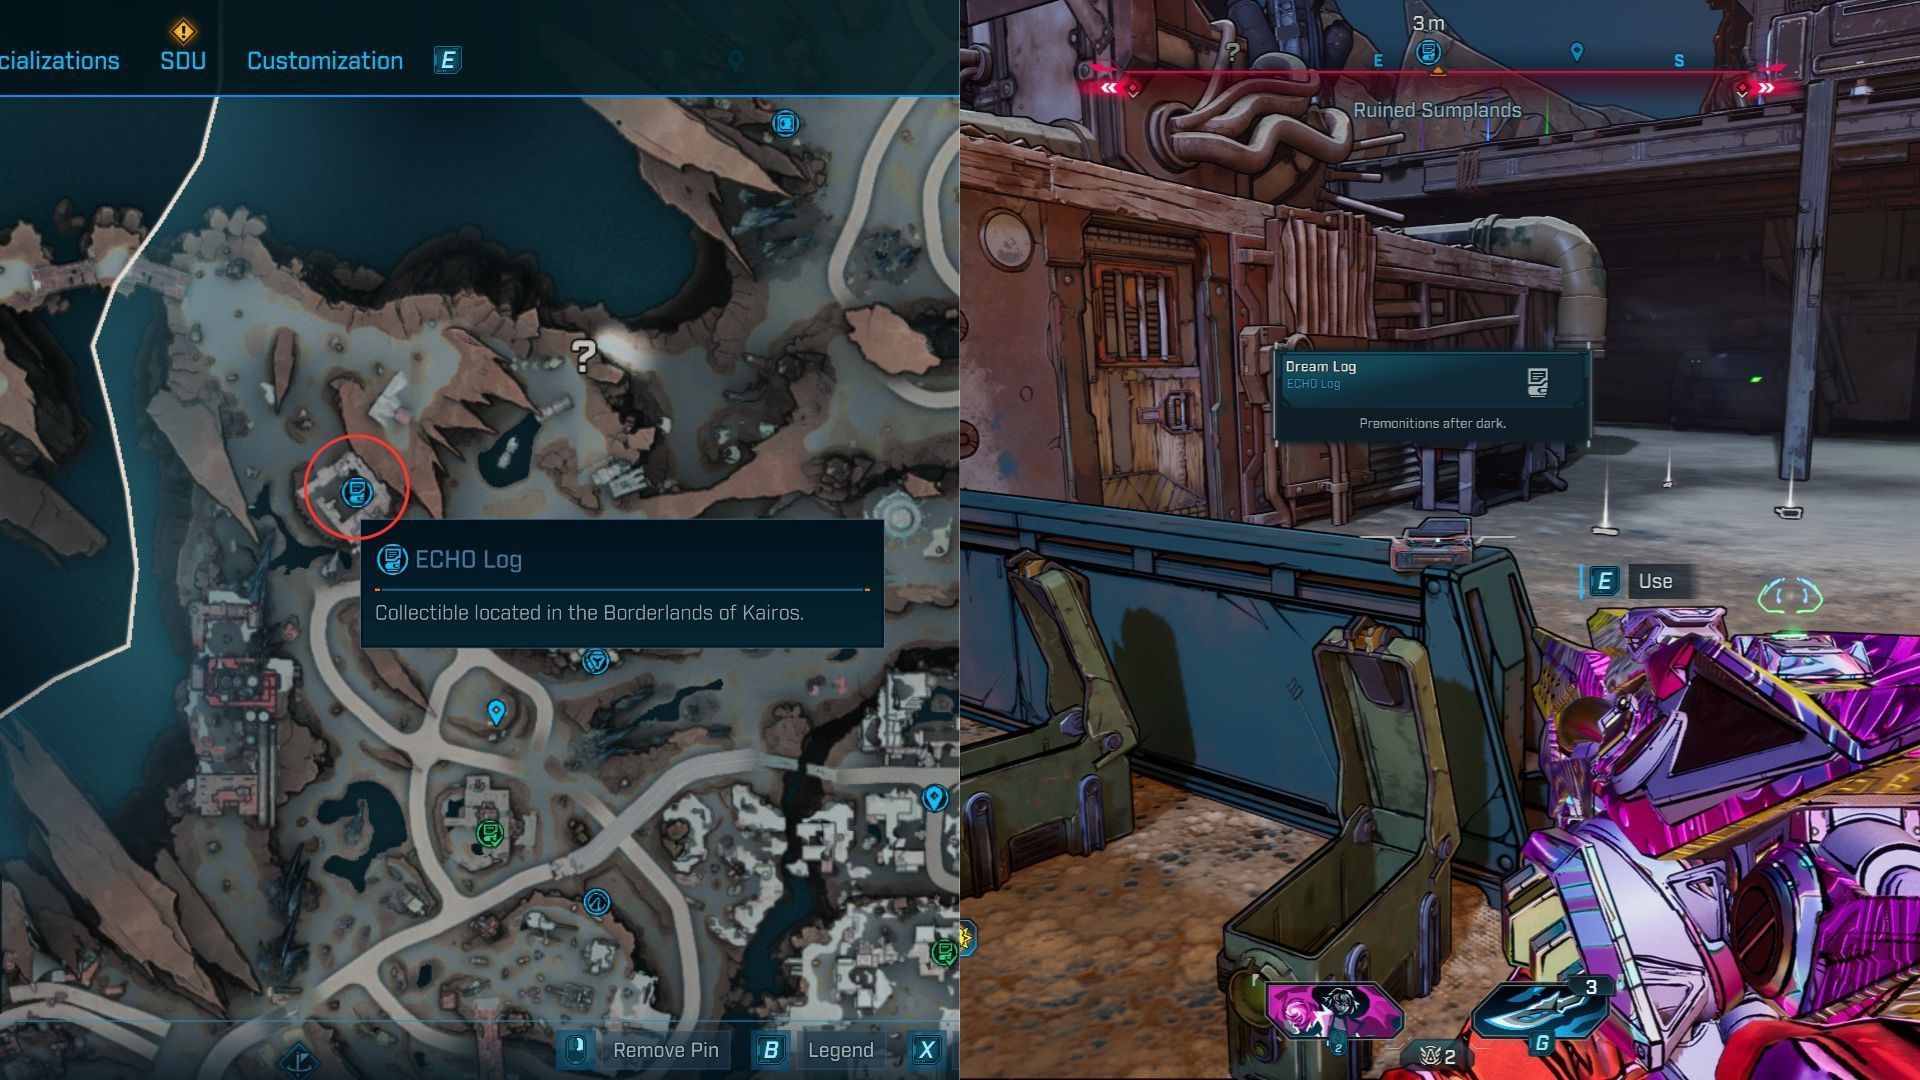
ECHO Log #19
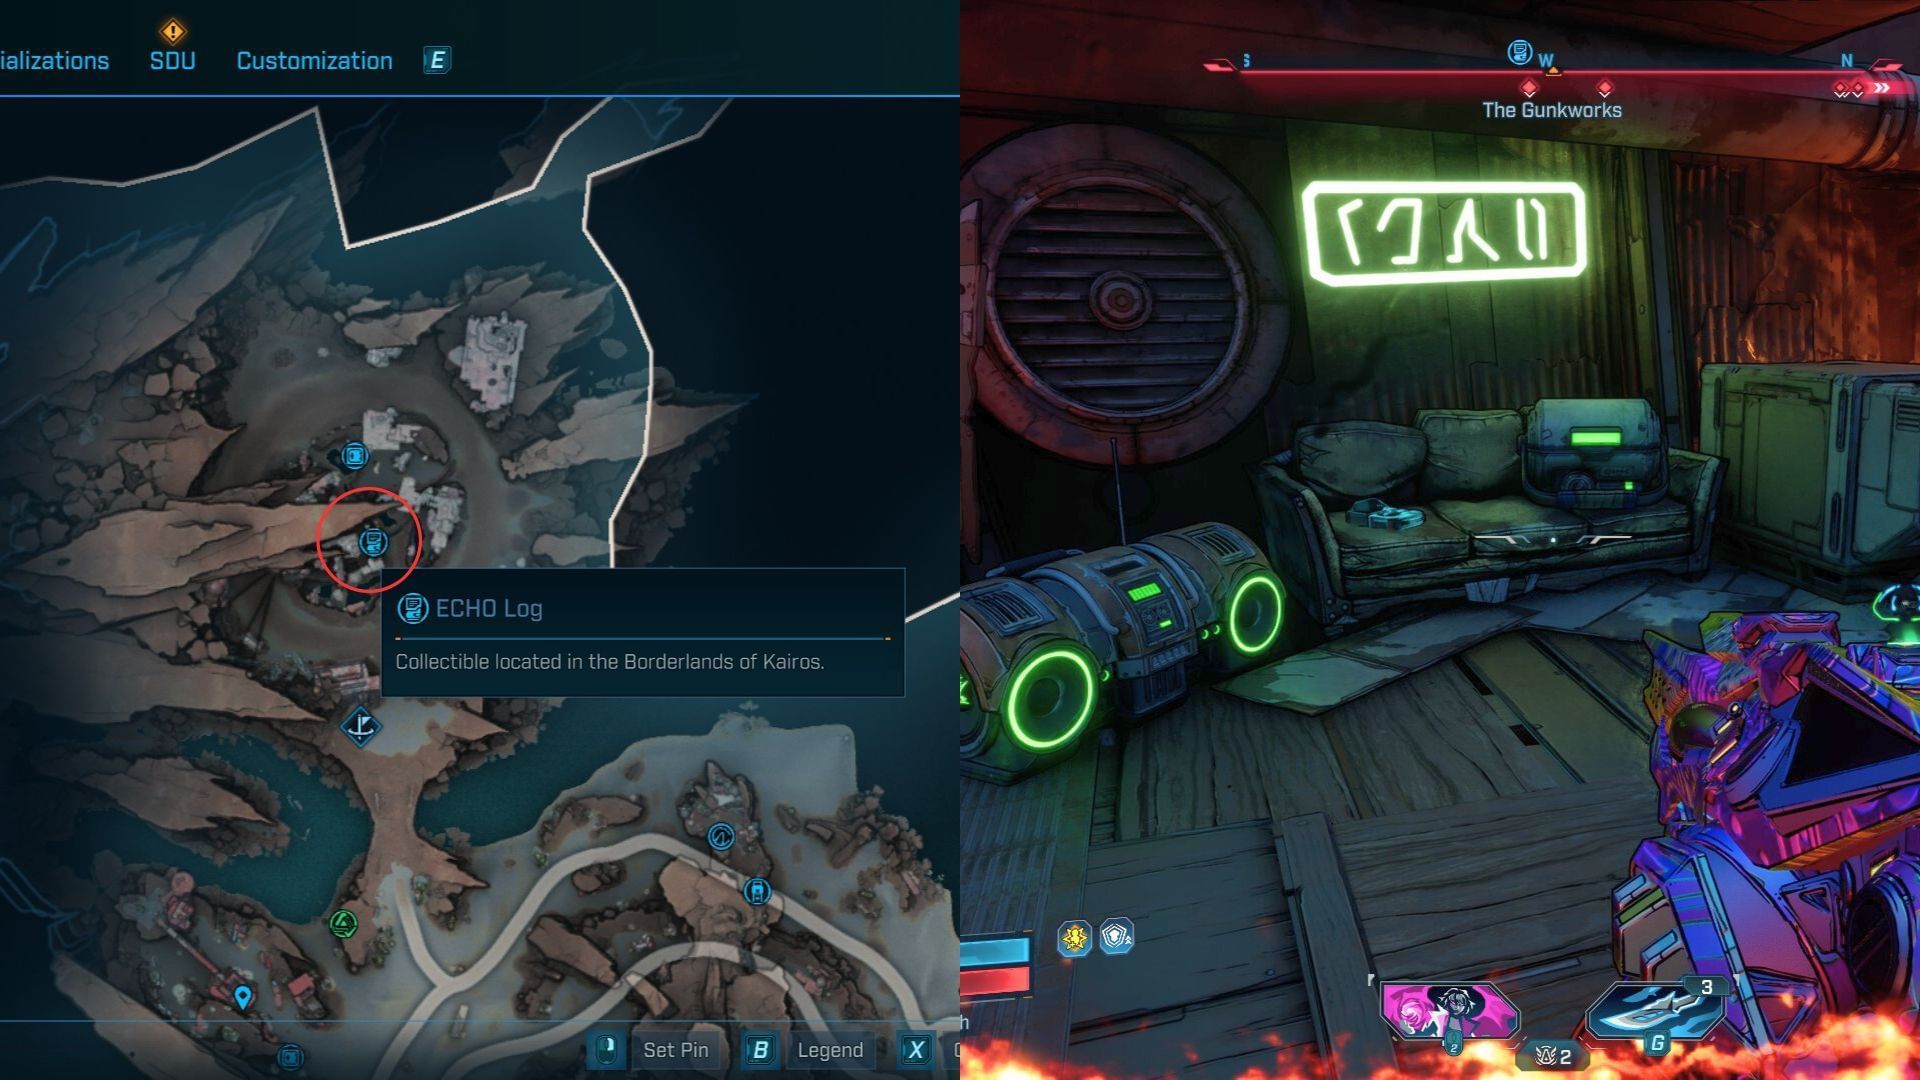
This ECHO Log is in the Gunkworks point of interest, a massive scrapyard captured by Rippers. You can collect the item from the first floor of the building, located directly to the left of the main entrance.
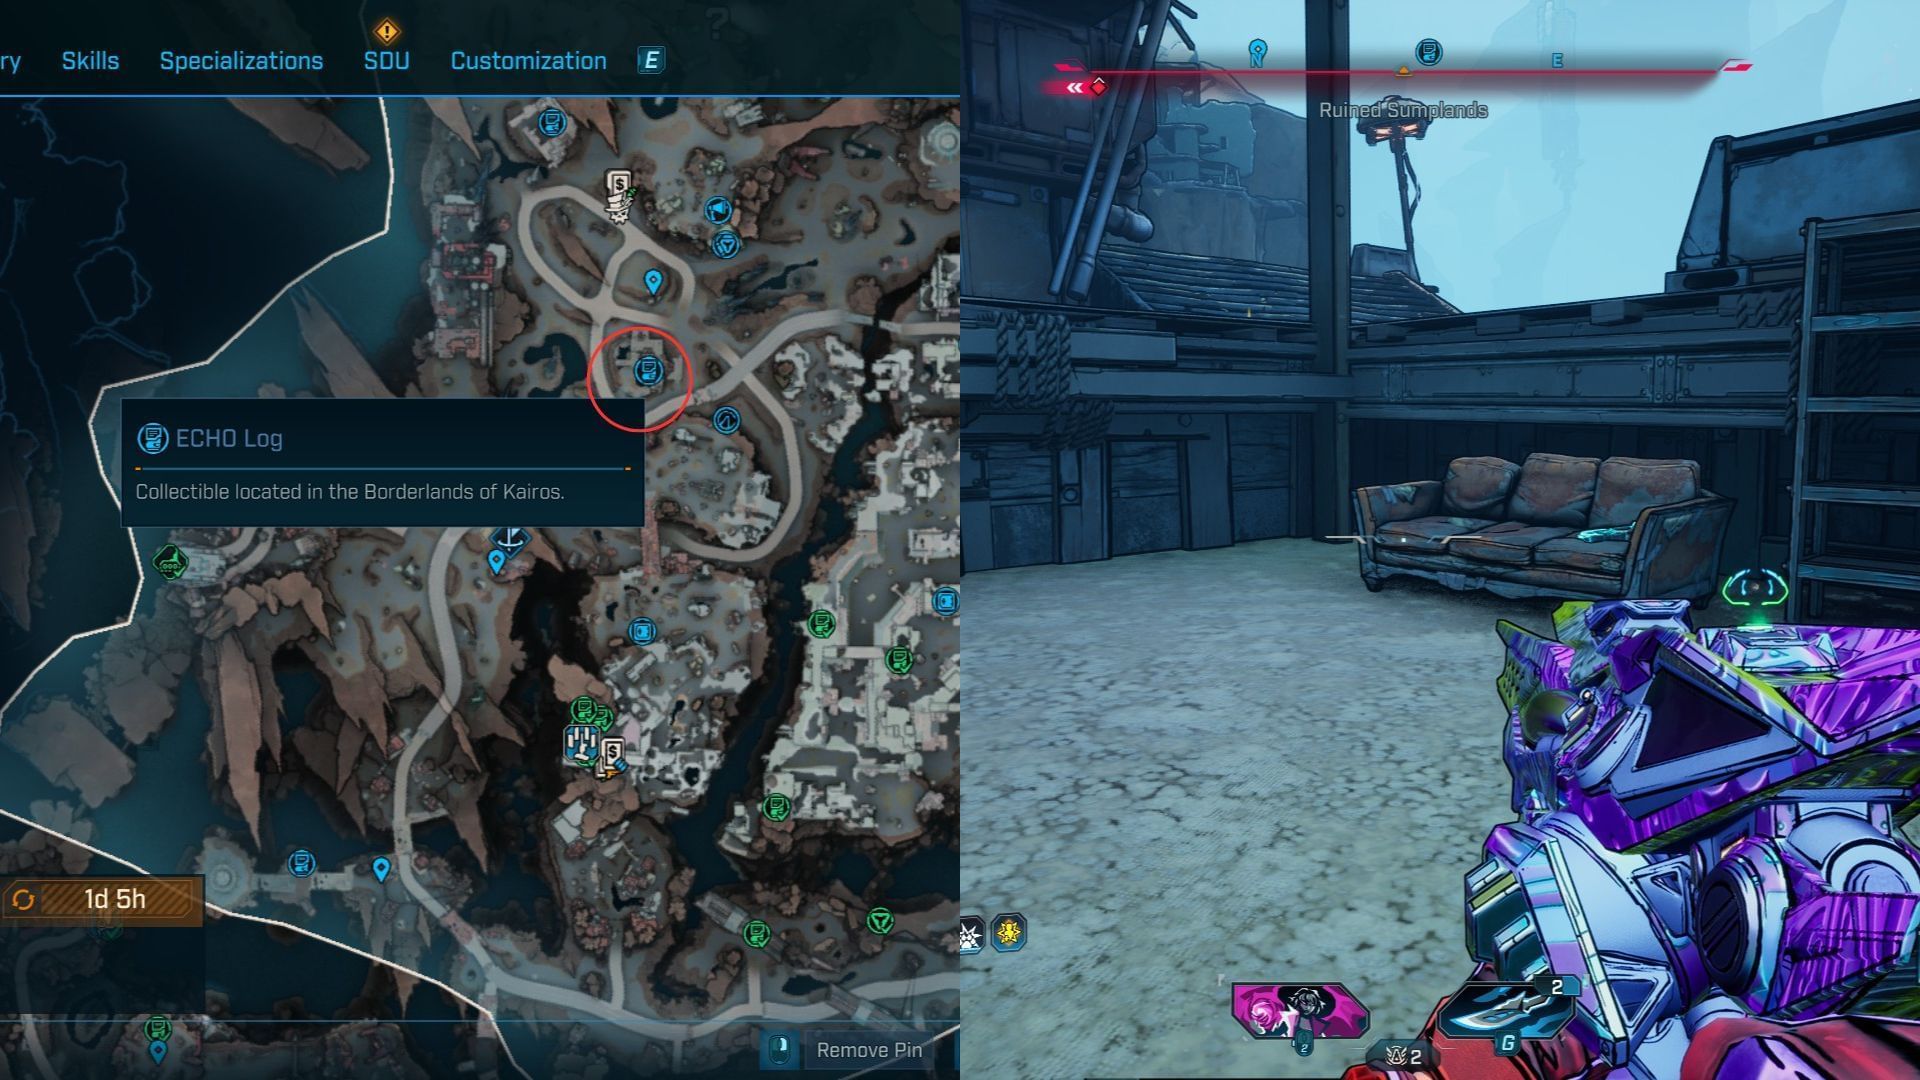
ECHO Log #20
Log #20 is in the small desert northeast of the Faction Town. The collectible is on top of a couch on the first floor of a partially destroyed building.
ECHO Log #21
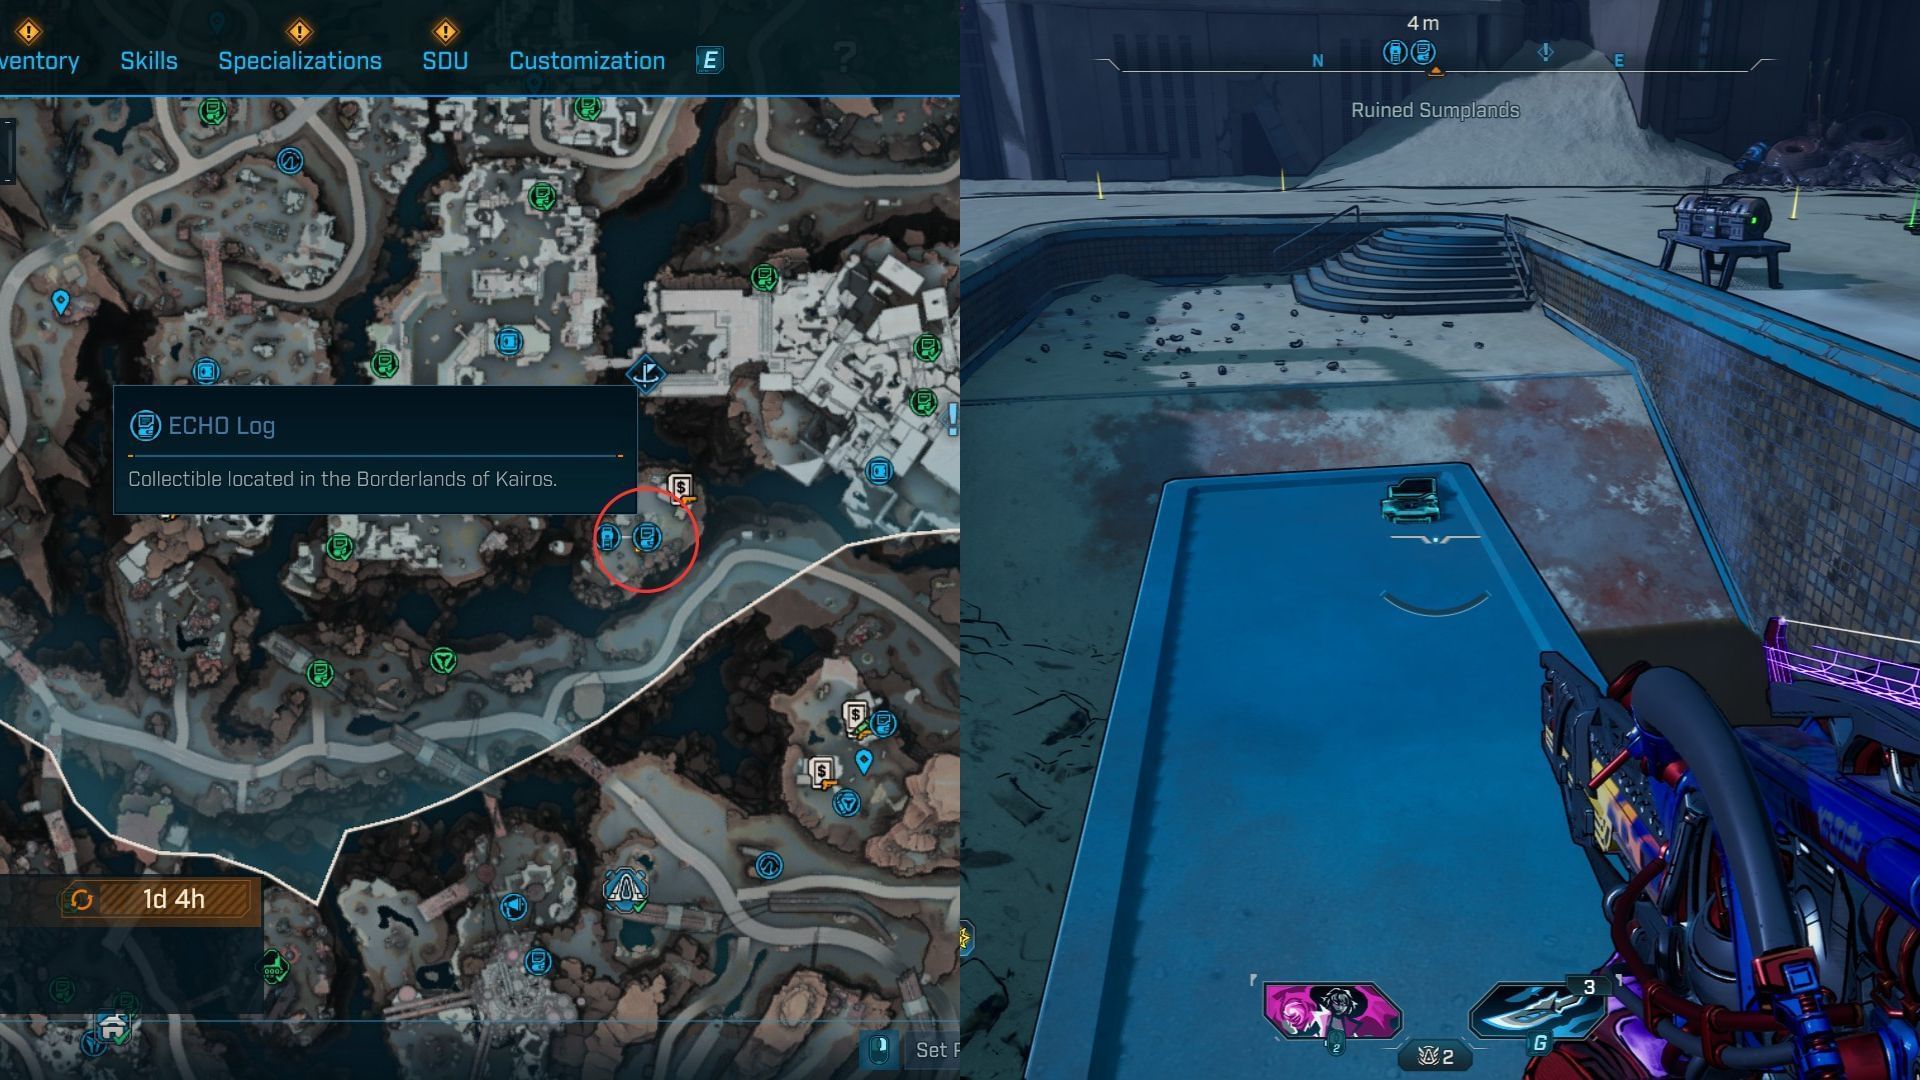
The final ECHO Log of Ruined Sumplands is on an even smaller, Creep-infested island connected to the one that has ECHO Log #6. You can find the collectible on top of a diving board in a pool.
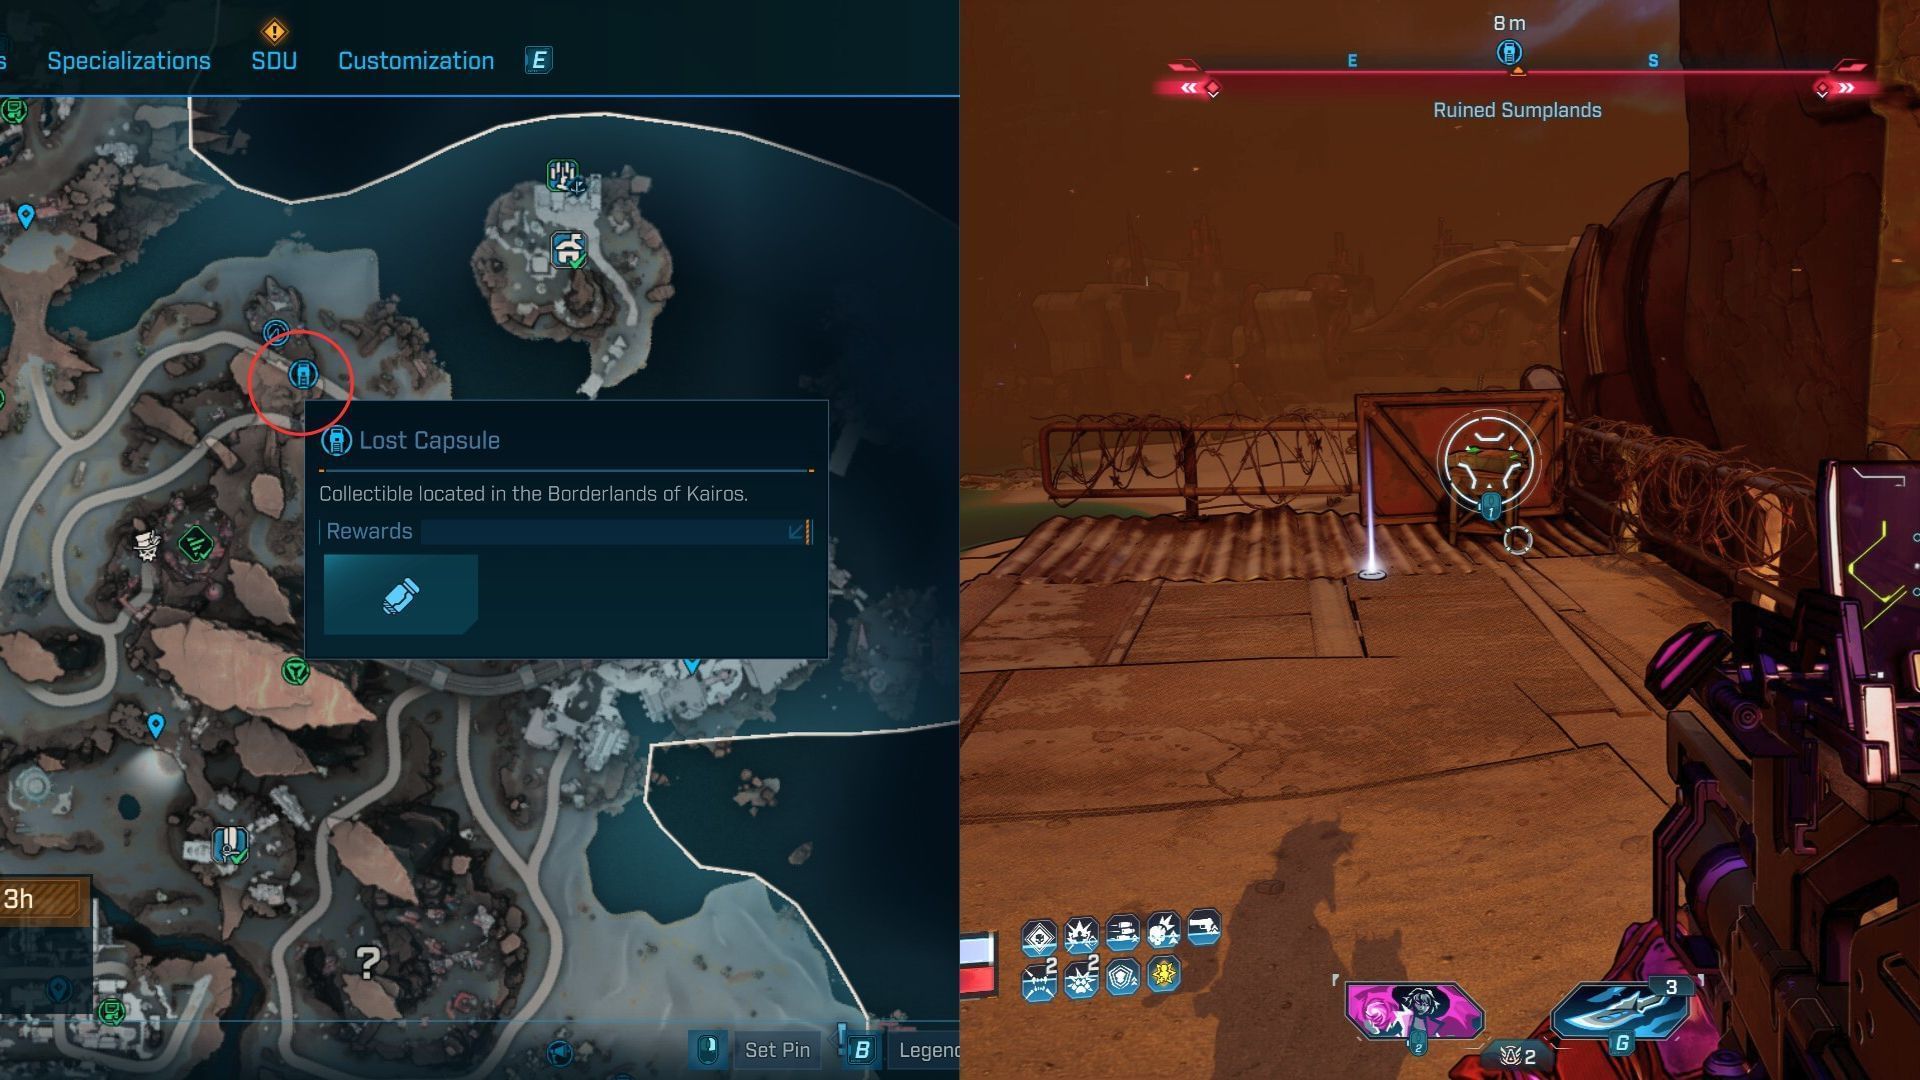
Lost Capsule #1
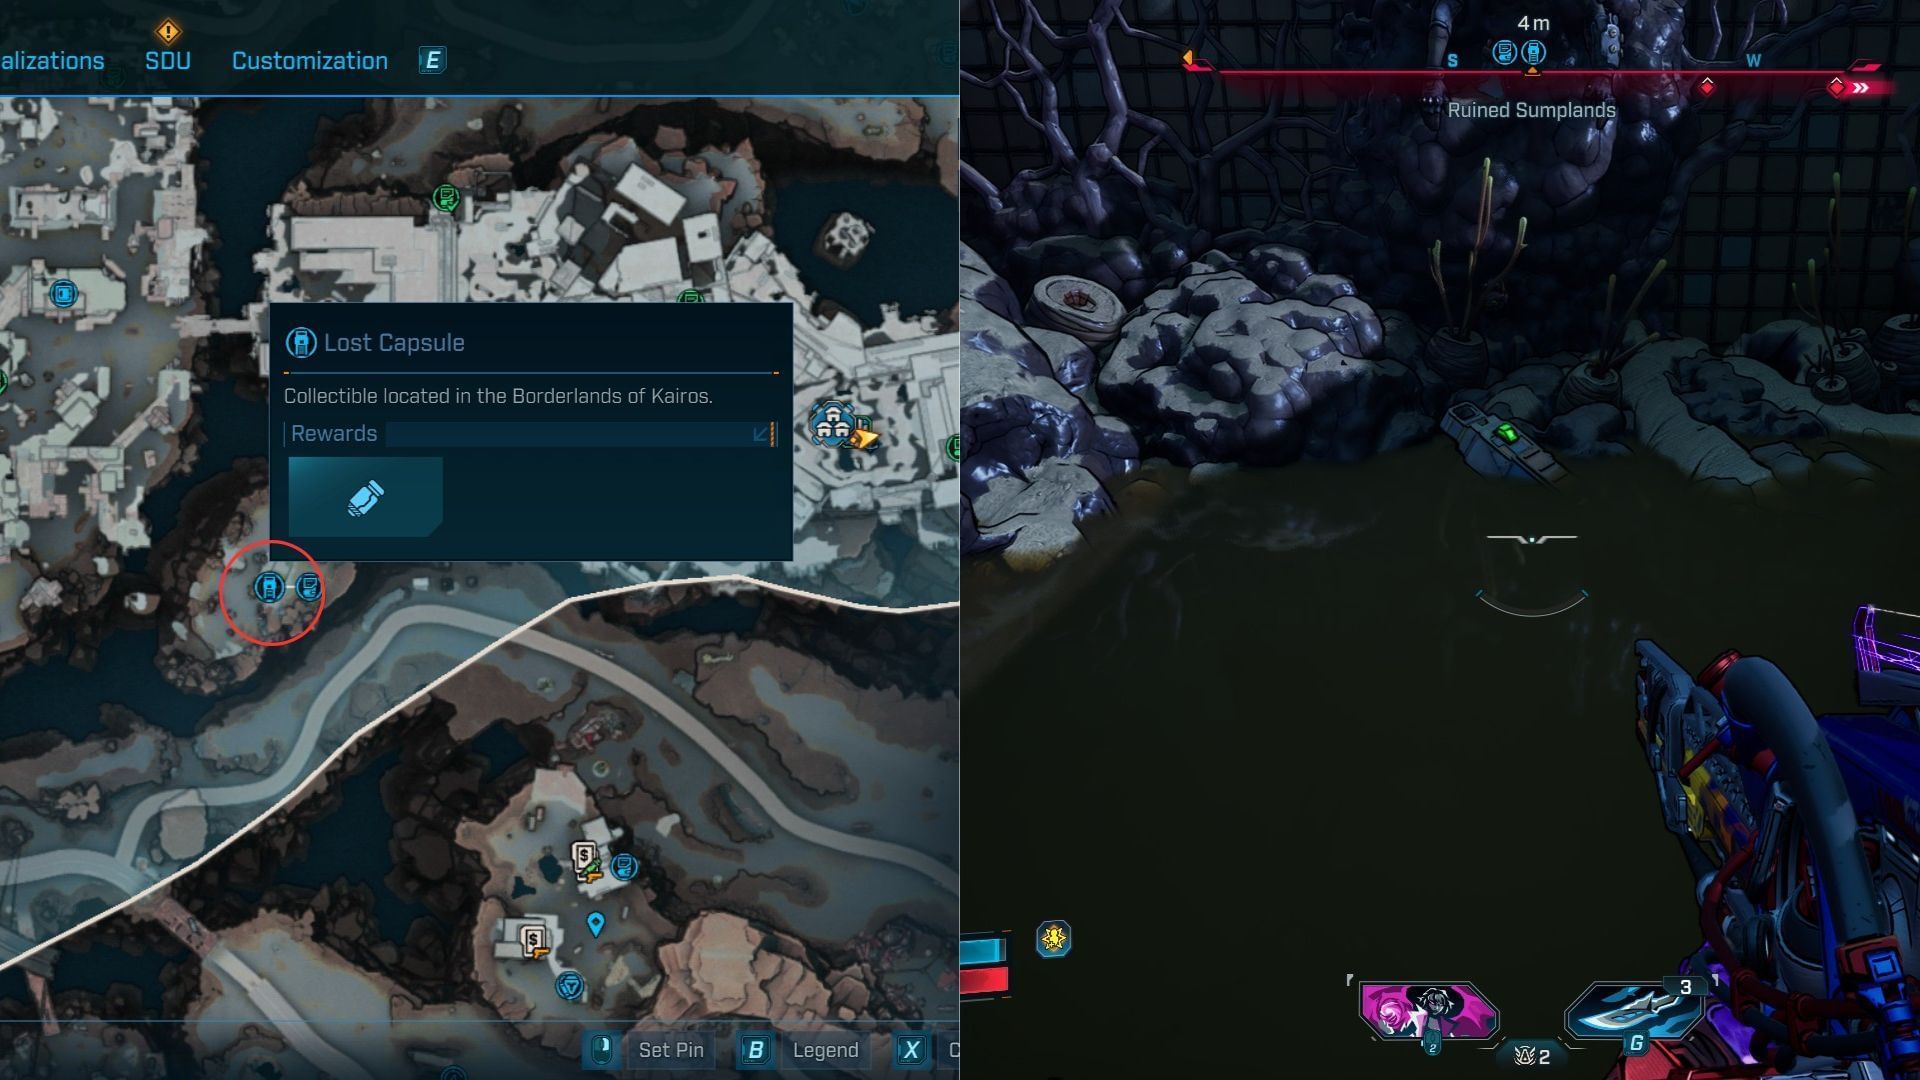
The first Lost Capsule is in the same spot as ECHO Log #21. Simply jump into the pool to find the collectible in the swamp and bring it back to the Faction Town.
Lost Capsule #2
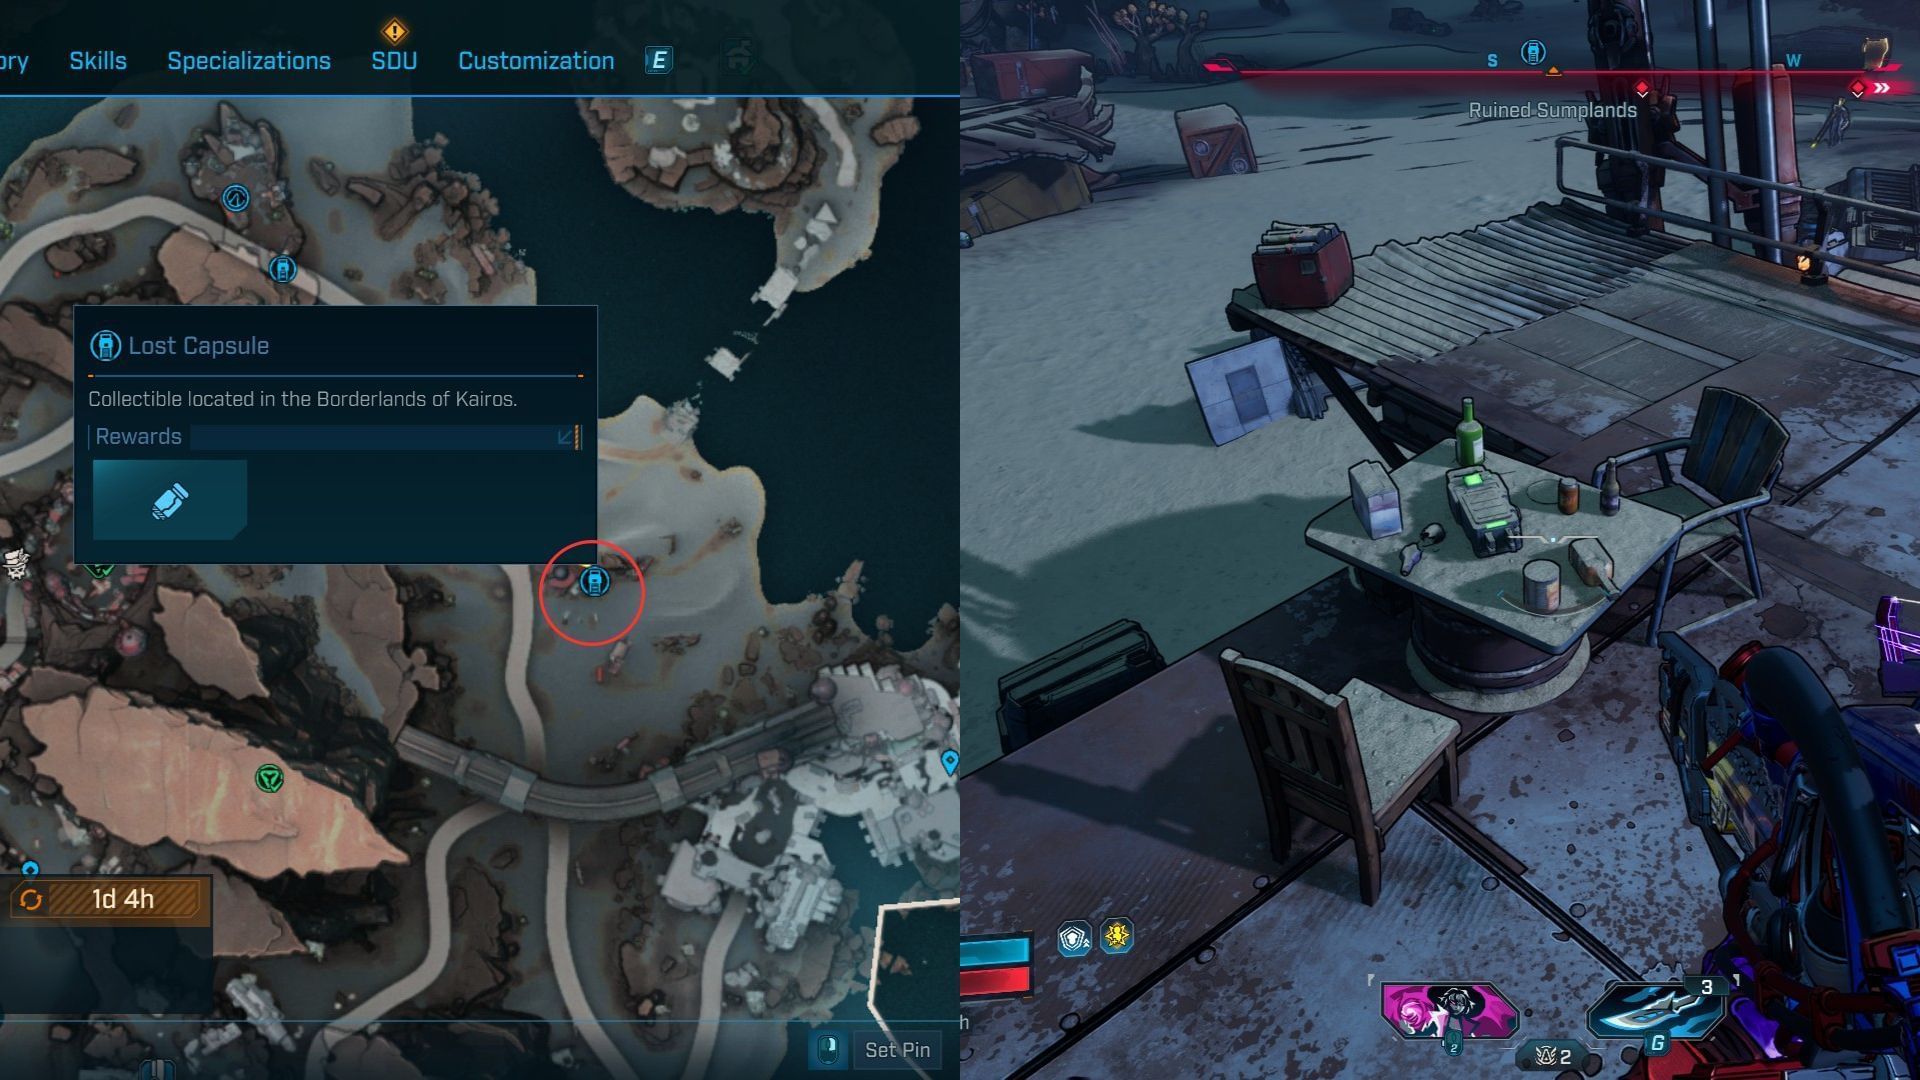
The second Lost Capsule is near the ‘Tarrifton Harbors’ point of interest. It’s on top of a table near a big silo by the road. On approaching the area, you’ll find Rippers and Order soldiers engaging in a firefight.
Lost Capsule #3
The final Lost Capsule of Ruined Sumplands is at a major Ripper camp on top of a cliff. It’s right in the middle of the Gunkworks and Tarrifton Harbors POI markers. After entering the camp, find the collectible on the top of a building on the left with barbed wire.
Vault Symbol #1
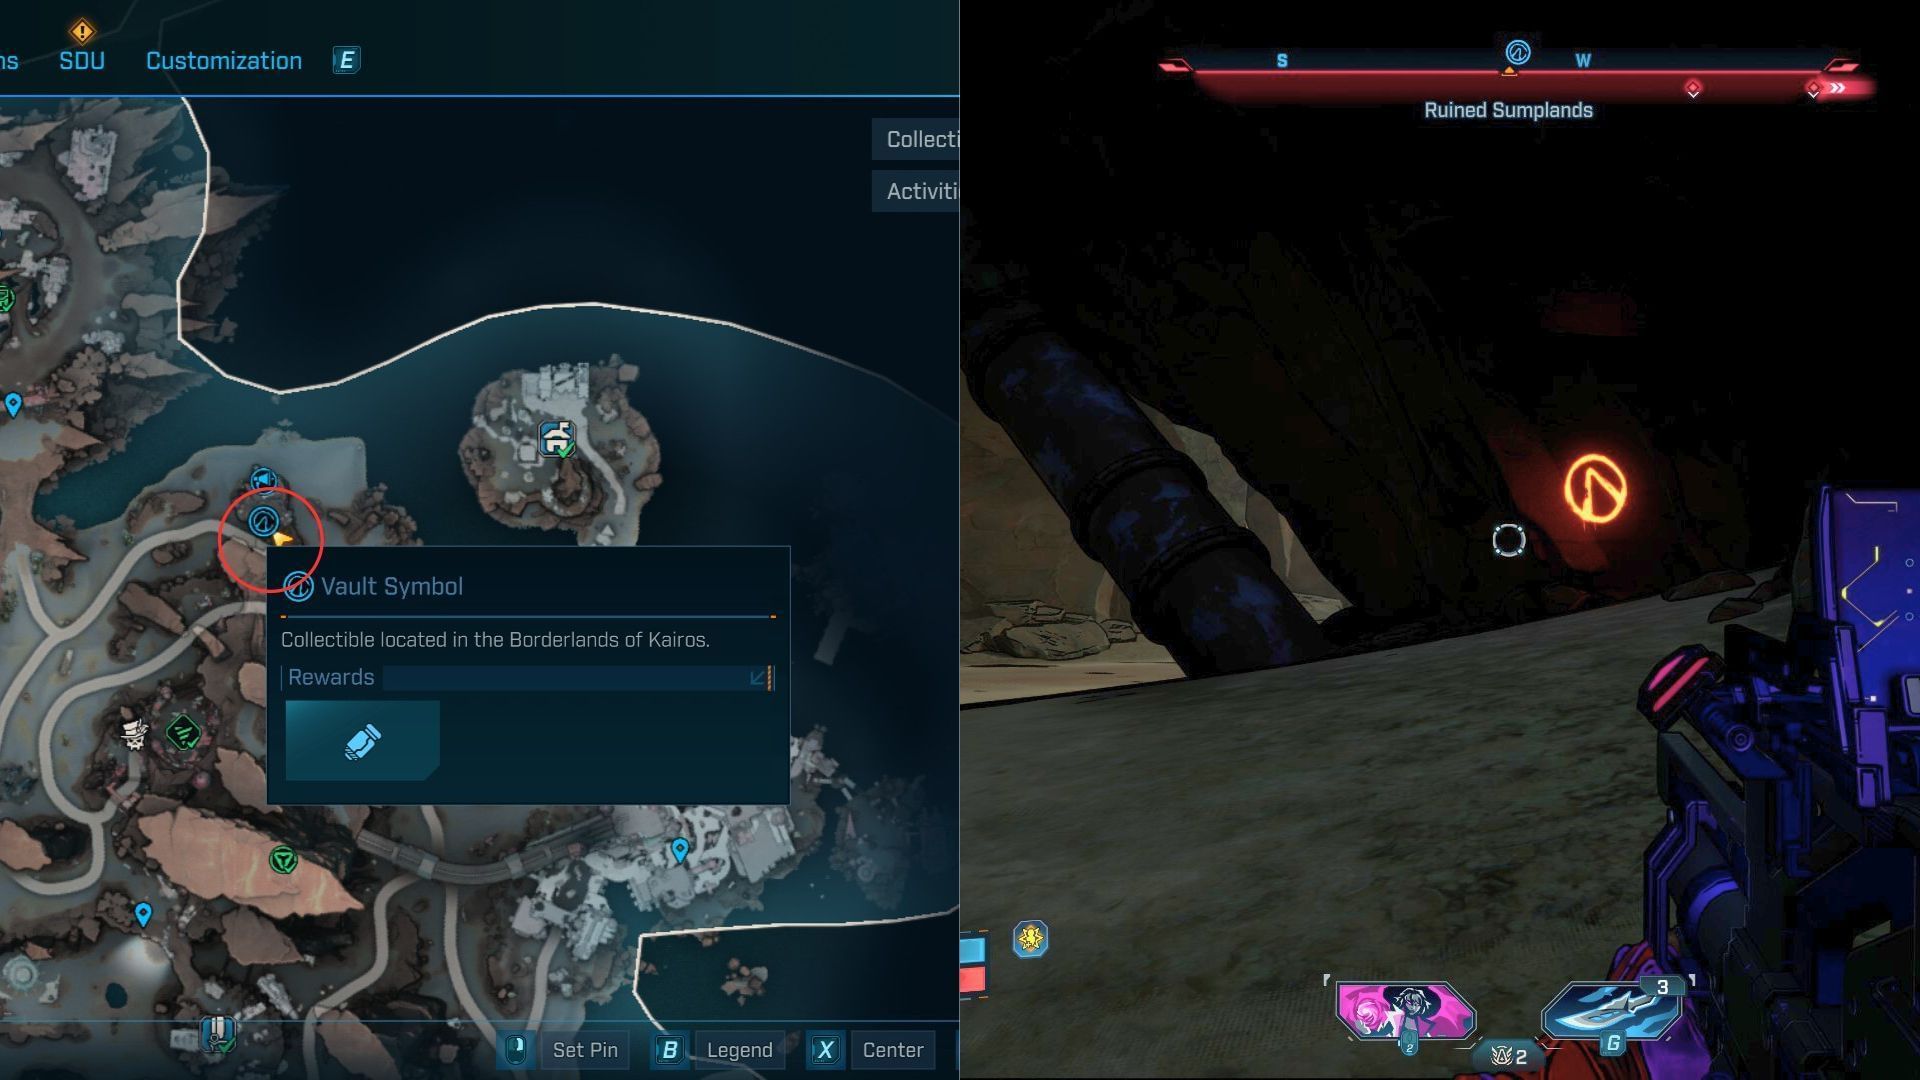
Within the same area as Lost Capsule #3, jump down the cliff onto the highway. You’ll find the Vault Symbol on the wall of the tunnel below.
Vault Symbol #2
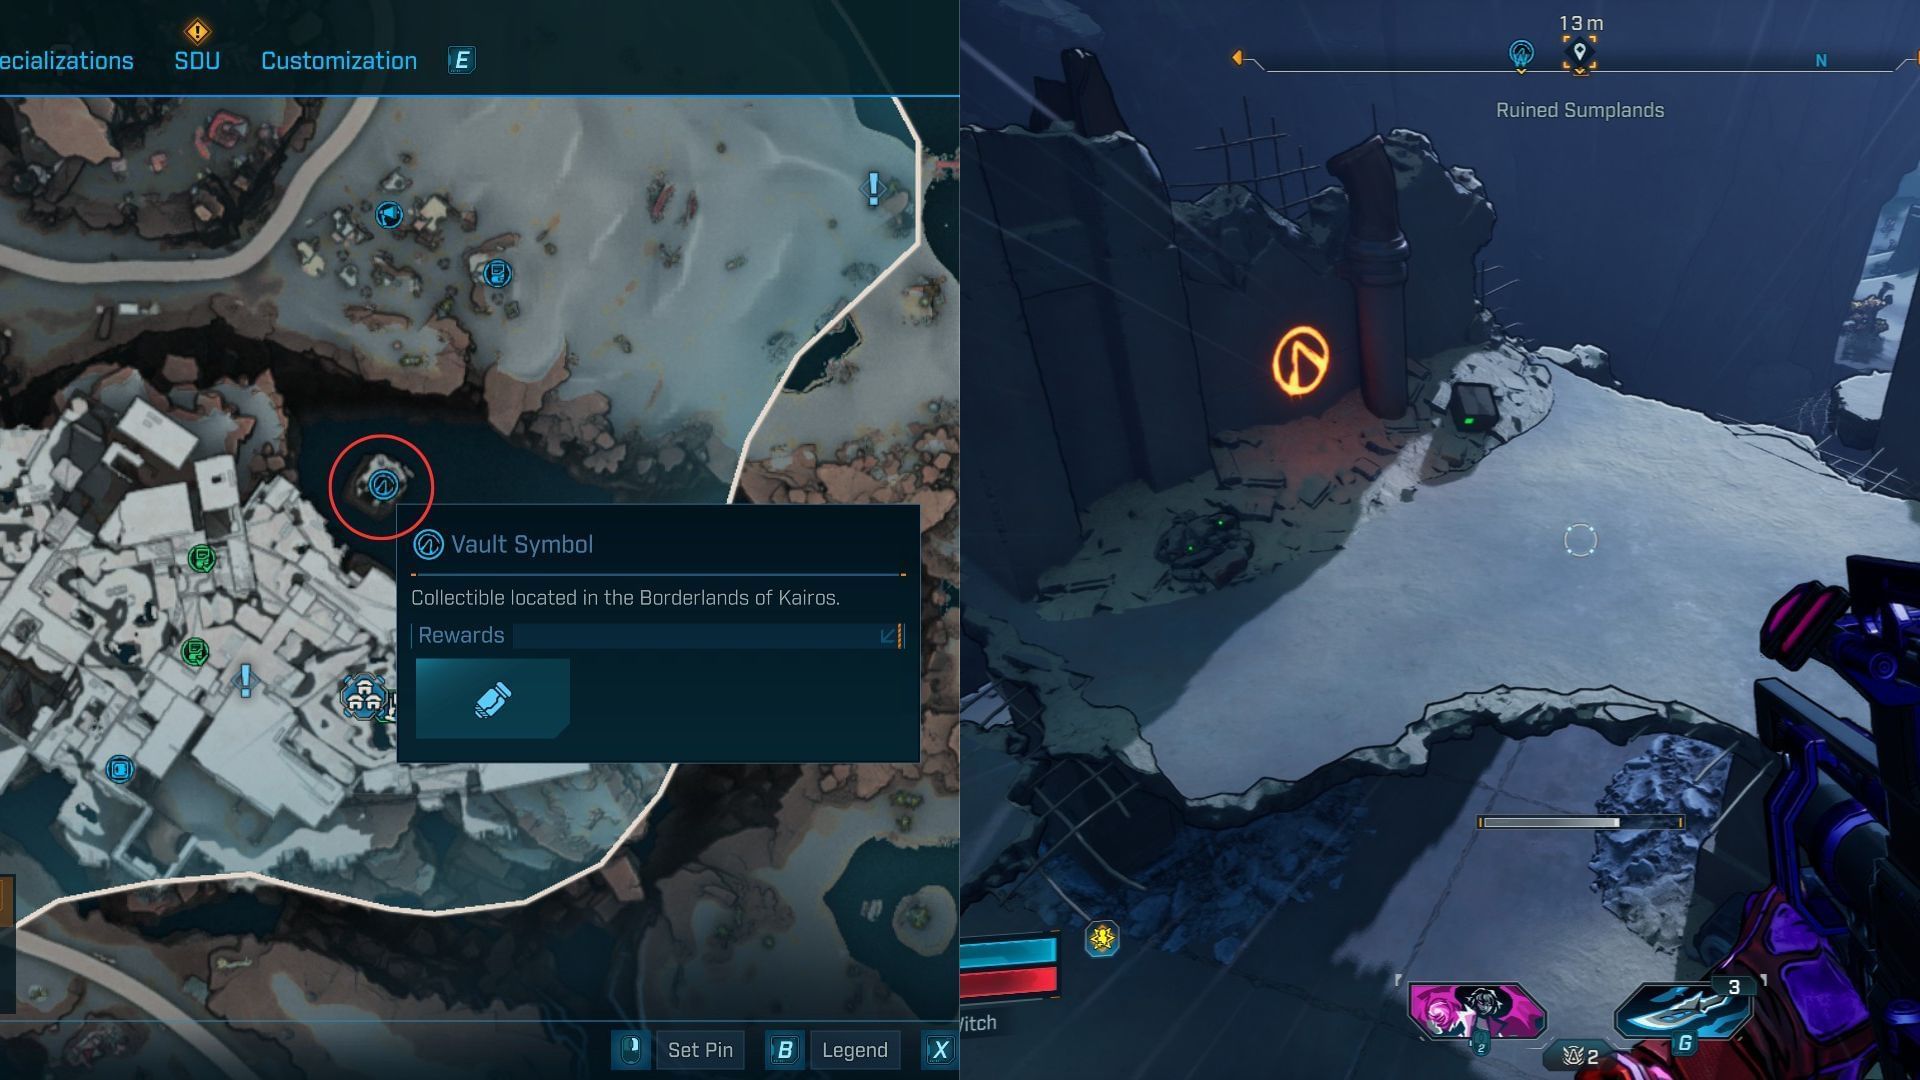
The second Vault Symbol is on a small building on a cliff north of the Faction Town. On exiting the main building, turn right to find an opening from where you can glide towards the collectible.
Vault Symbol #3
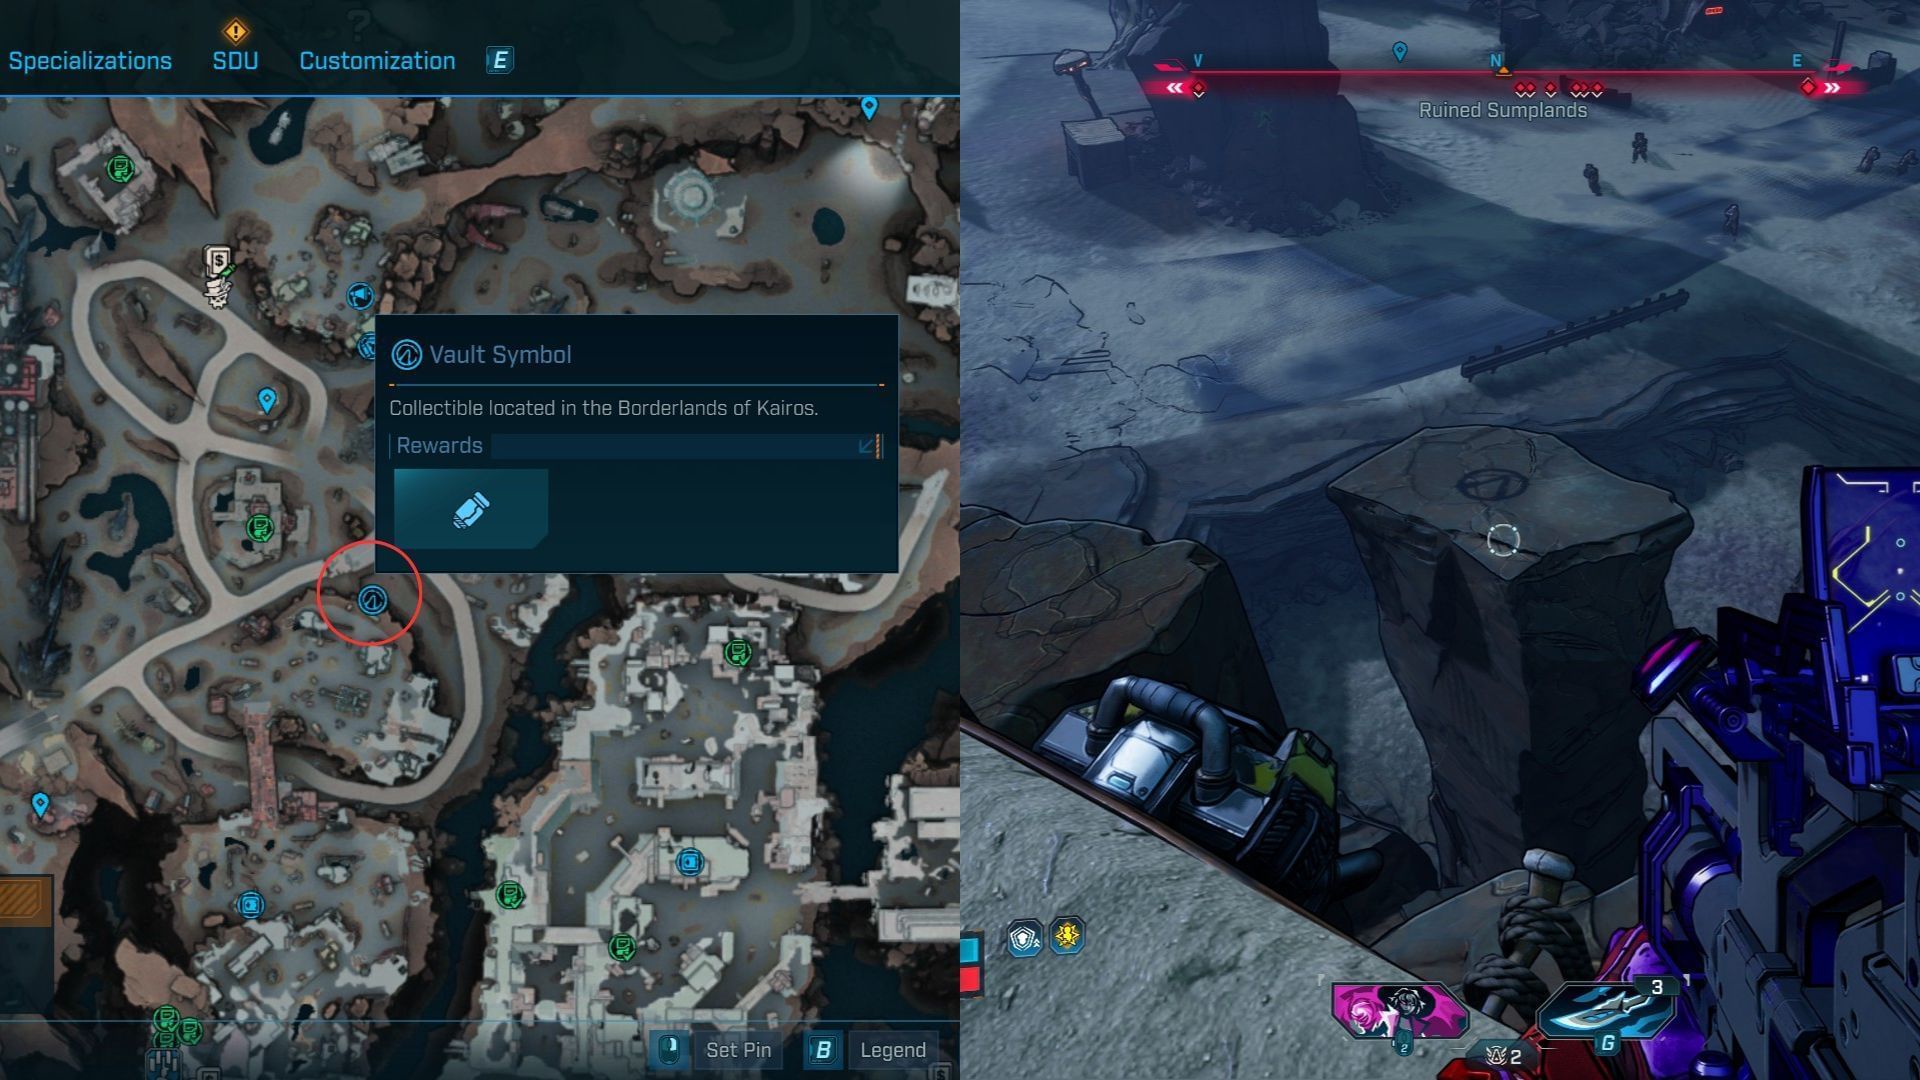
The final Vault Symbol of Ruined Sumplands is near the ECHO Log #17. This one can be tricky to find, as it’s on top of a rock.
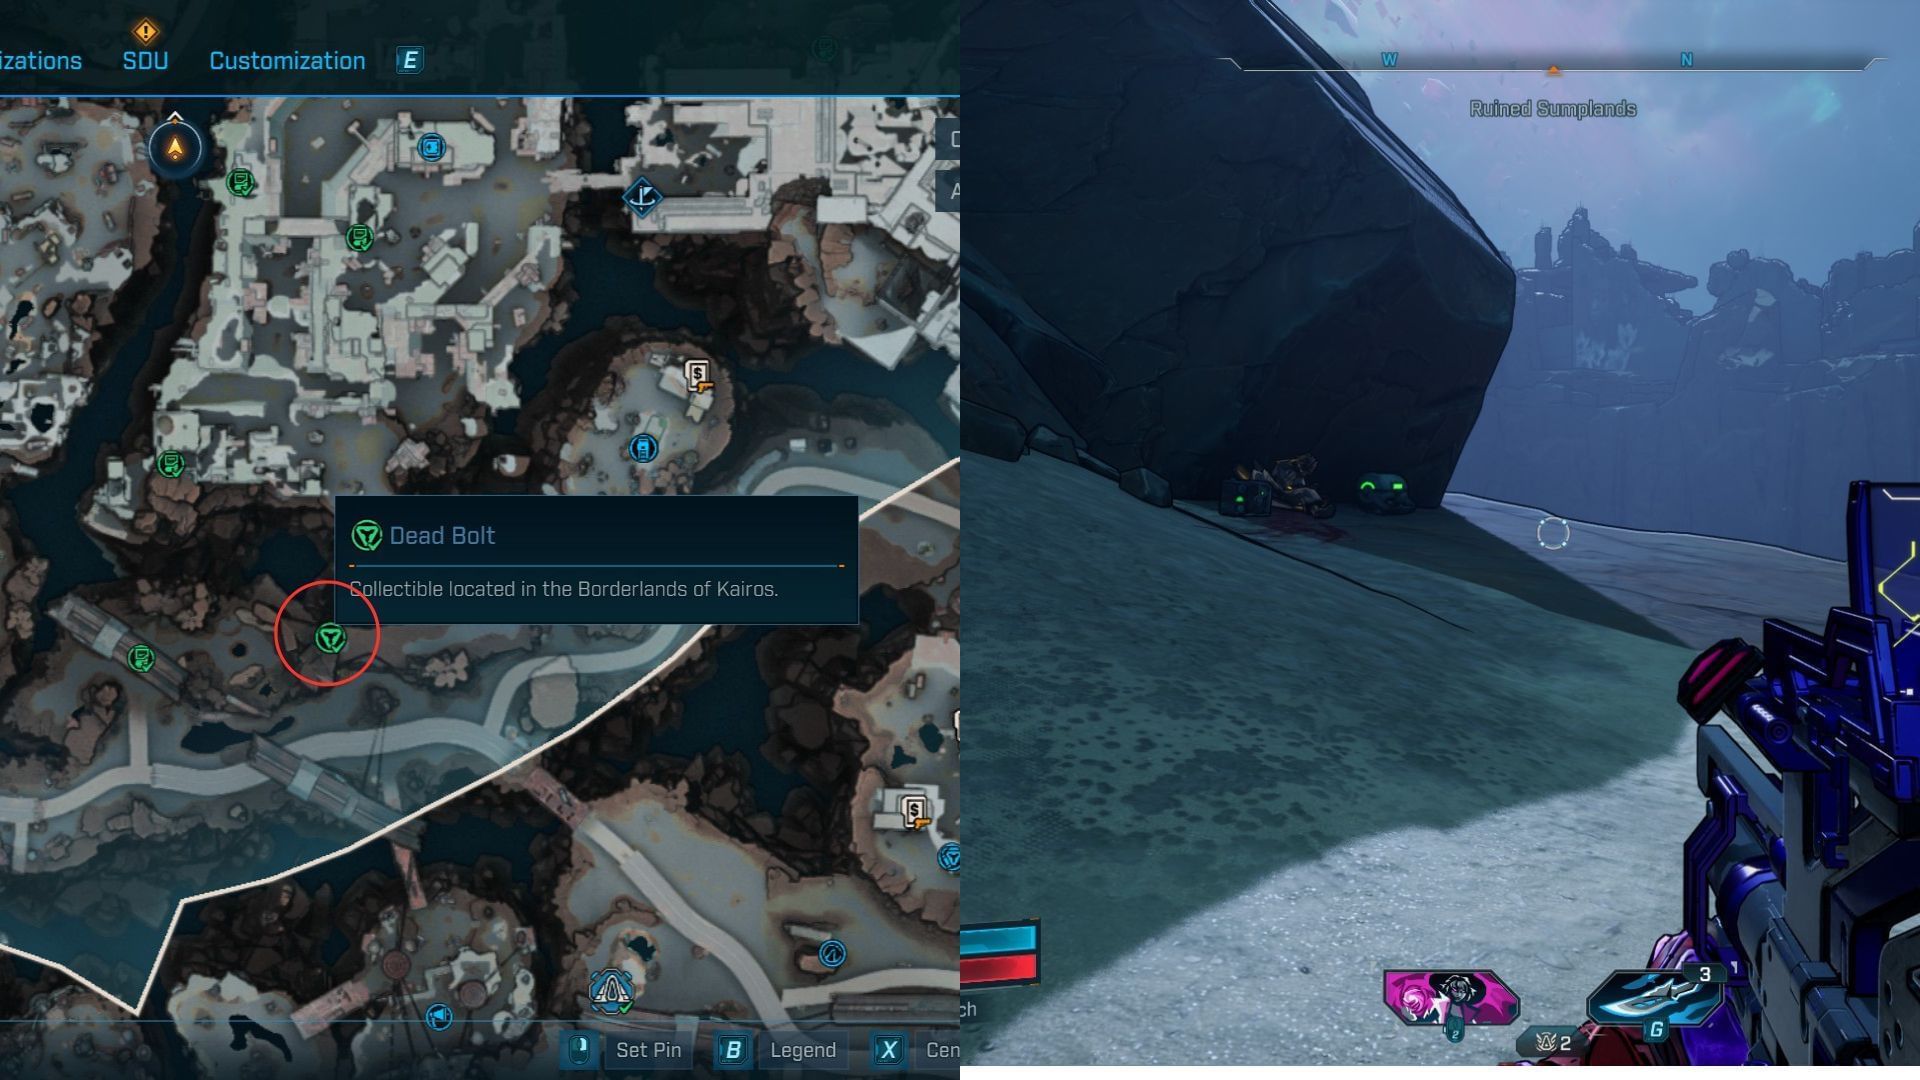
Dead Bolt #1

The first Dead Bolt is within a cave near the Rumbling Cleft point of interest. Inside the cave, you’ll find a Ripper Drill, along with a few bodies and the collectible.
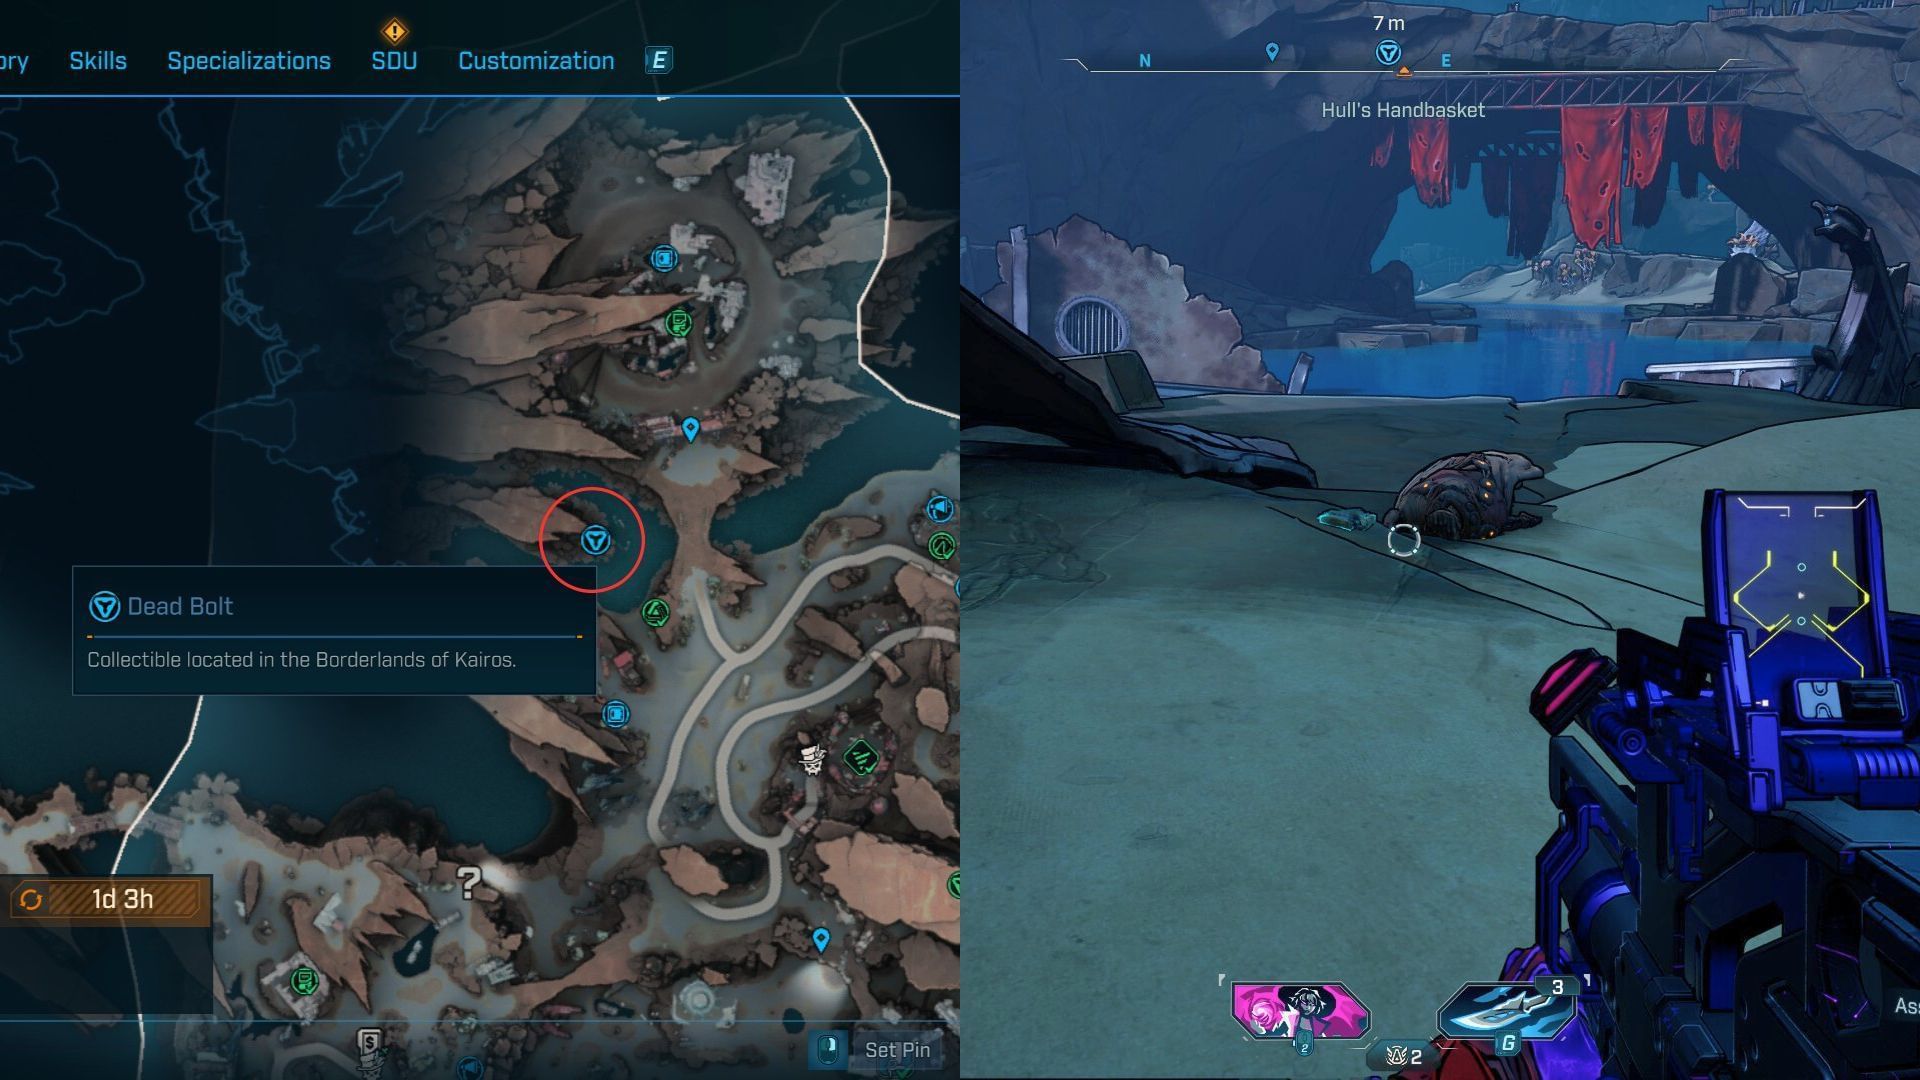
Dead Bolt #2
The second Dead Bolt is close to the small bridge connecting Ruined Sumplands and Grindstone of the Worthy. The easy way to reach the collectible is to jump and glide from the cliff near ECHO Log #8.
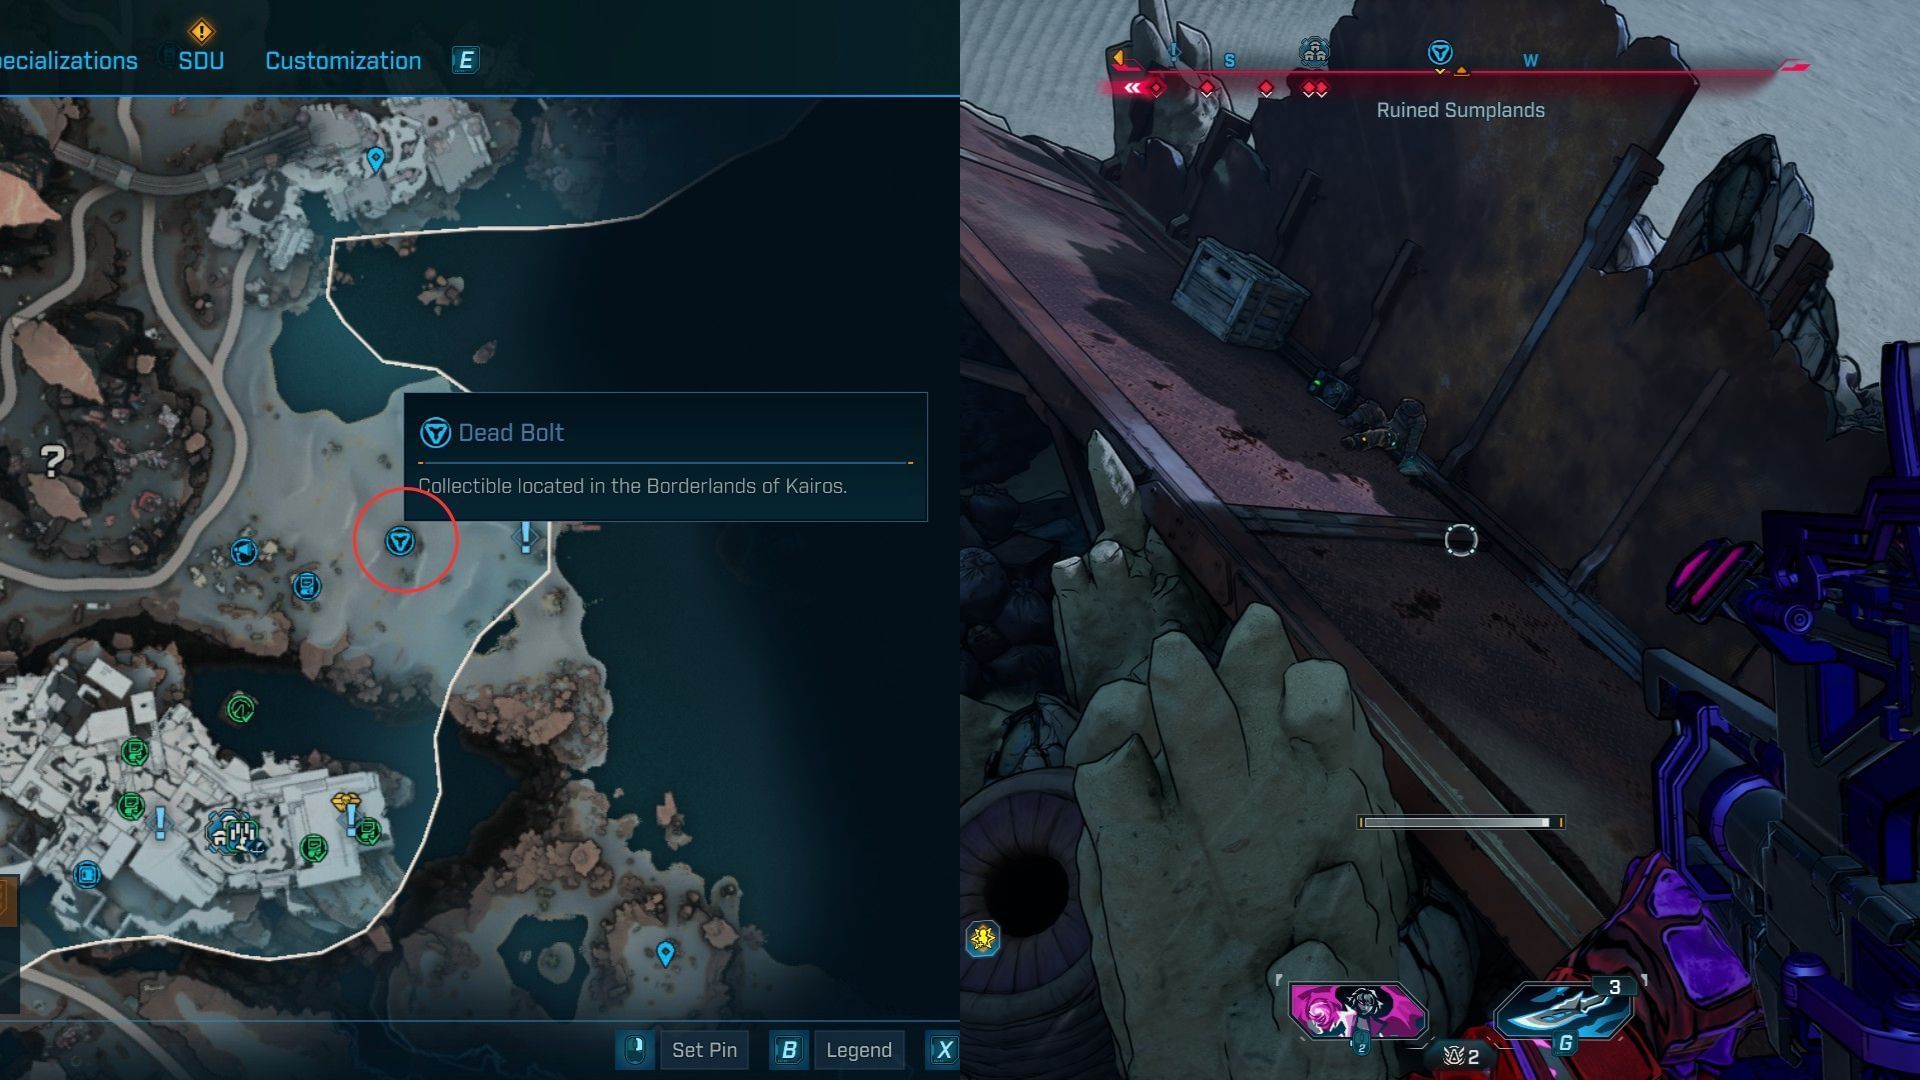
Dead Bolt #3
This Dead Bolt is in the middle of a lake with a rock formation near the Gunkworks point of interest. The collectible is lying near a body, and there isn’t anything else close by except for some ammo caches.
Dead Bolt #4
The final Dead Bolt is in the same area as ECHO Log #20. You can find it near a Creep-infested area in the middle of the desert on a broken metal platform.
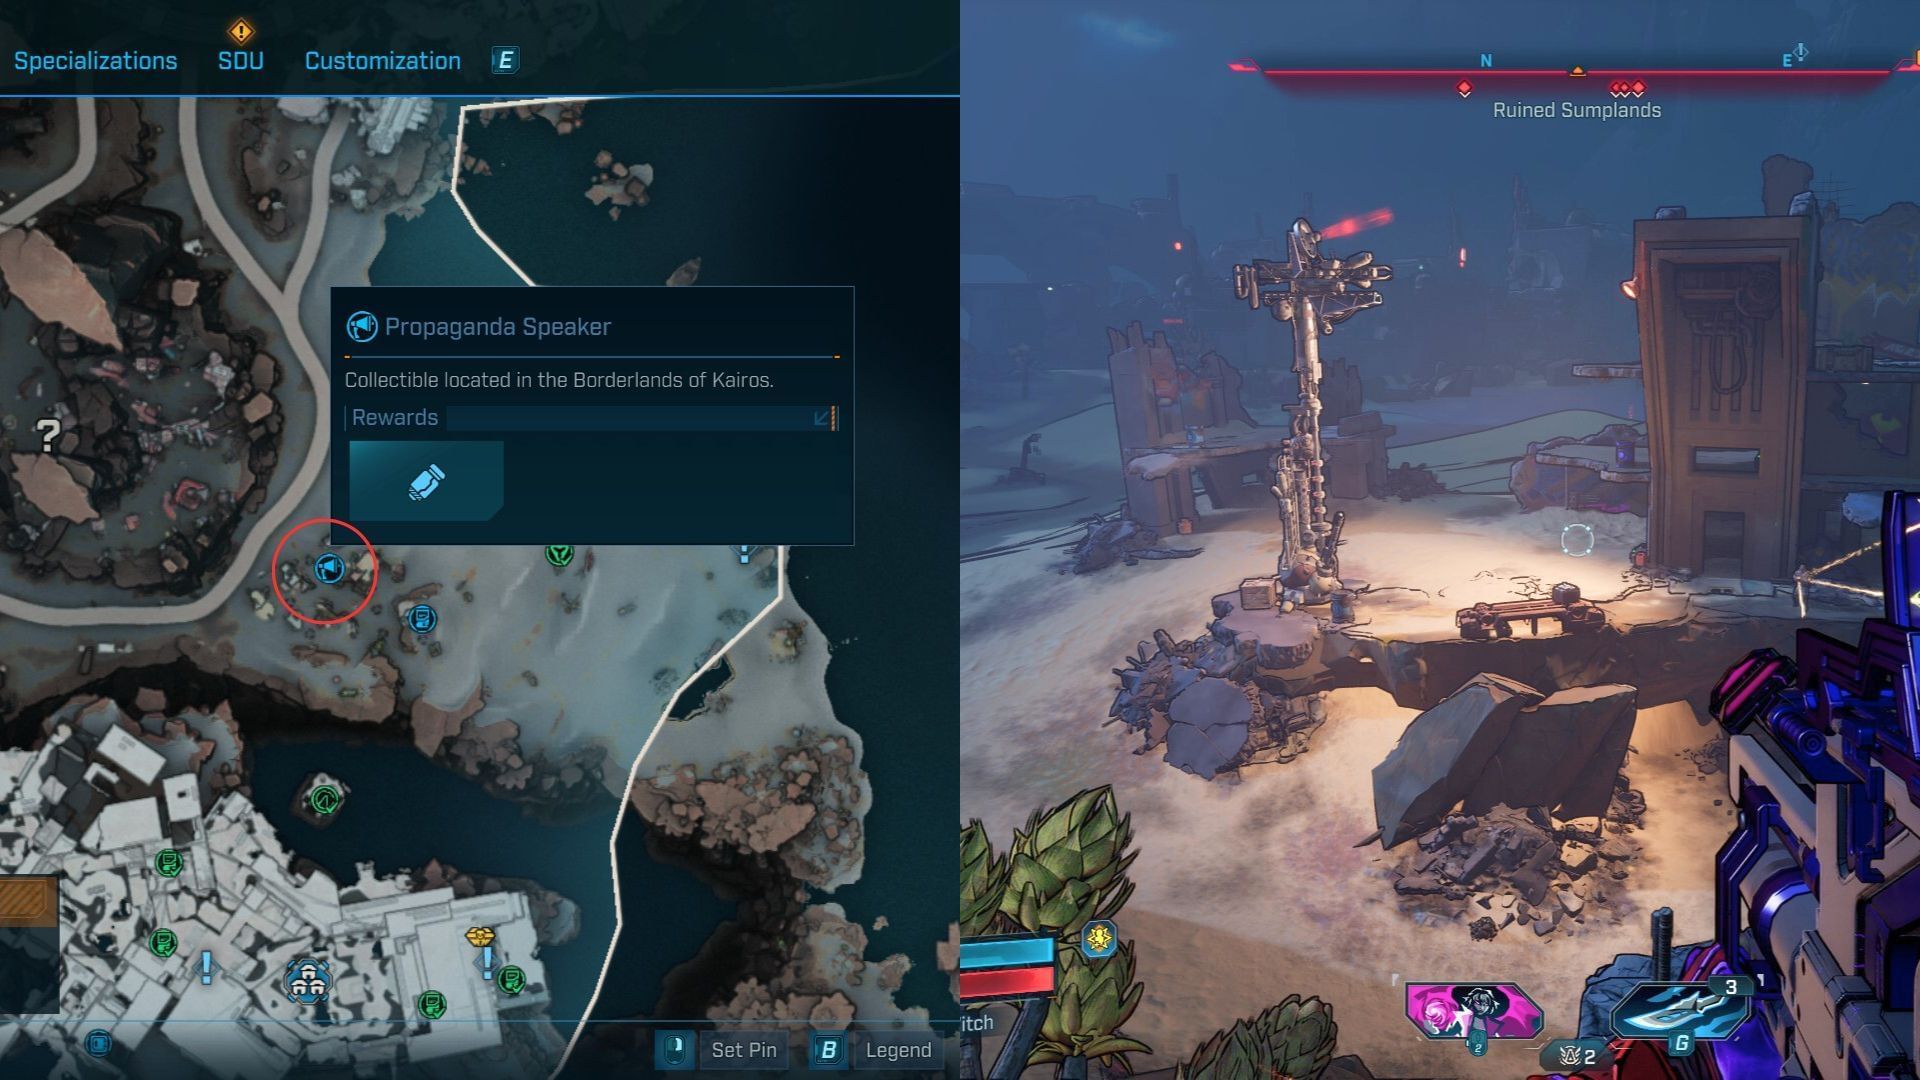
Propaganda Speaker #1

This Propaganda Speaker is on the same cliff as Lost Capsule #3. Keep moving forward to spot the spark that you can activate and complete the activity.
Propaganda Speaker #2
The second Propaganda Speaker is also near the ECHO Log #20. Look for Rippers in the area to find the speaker and complete the activity.
Propaganda Speaker #3
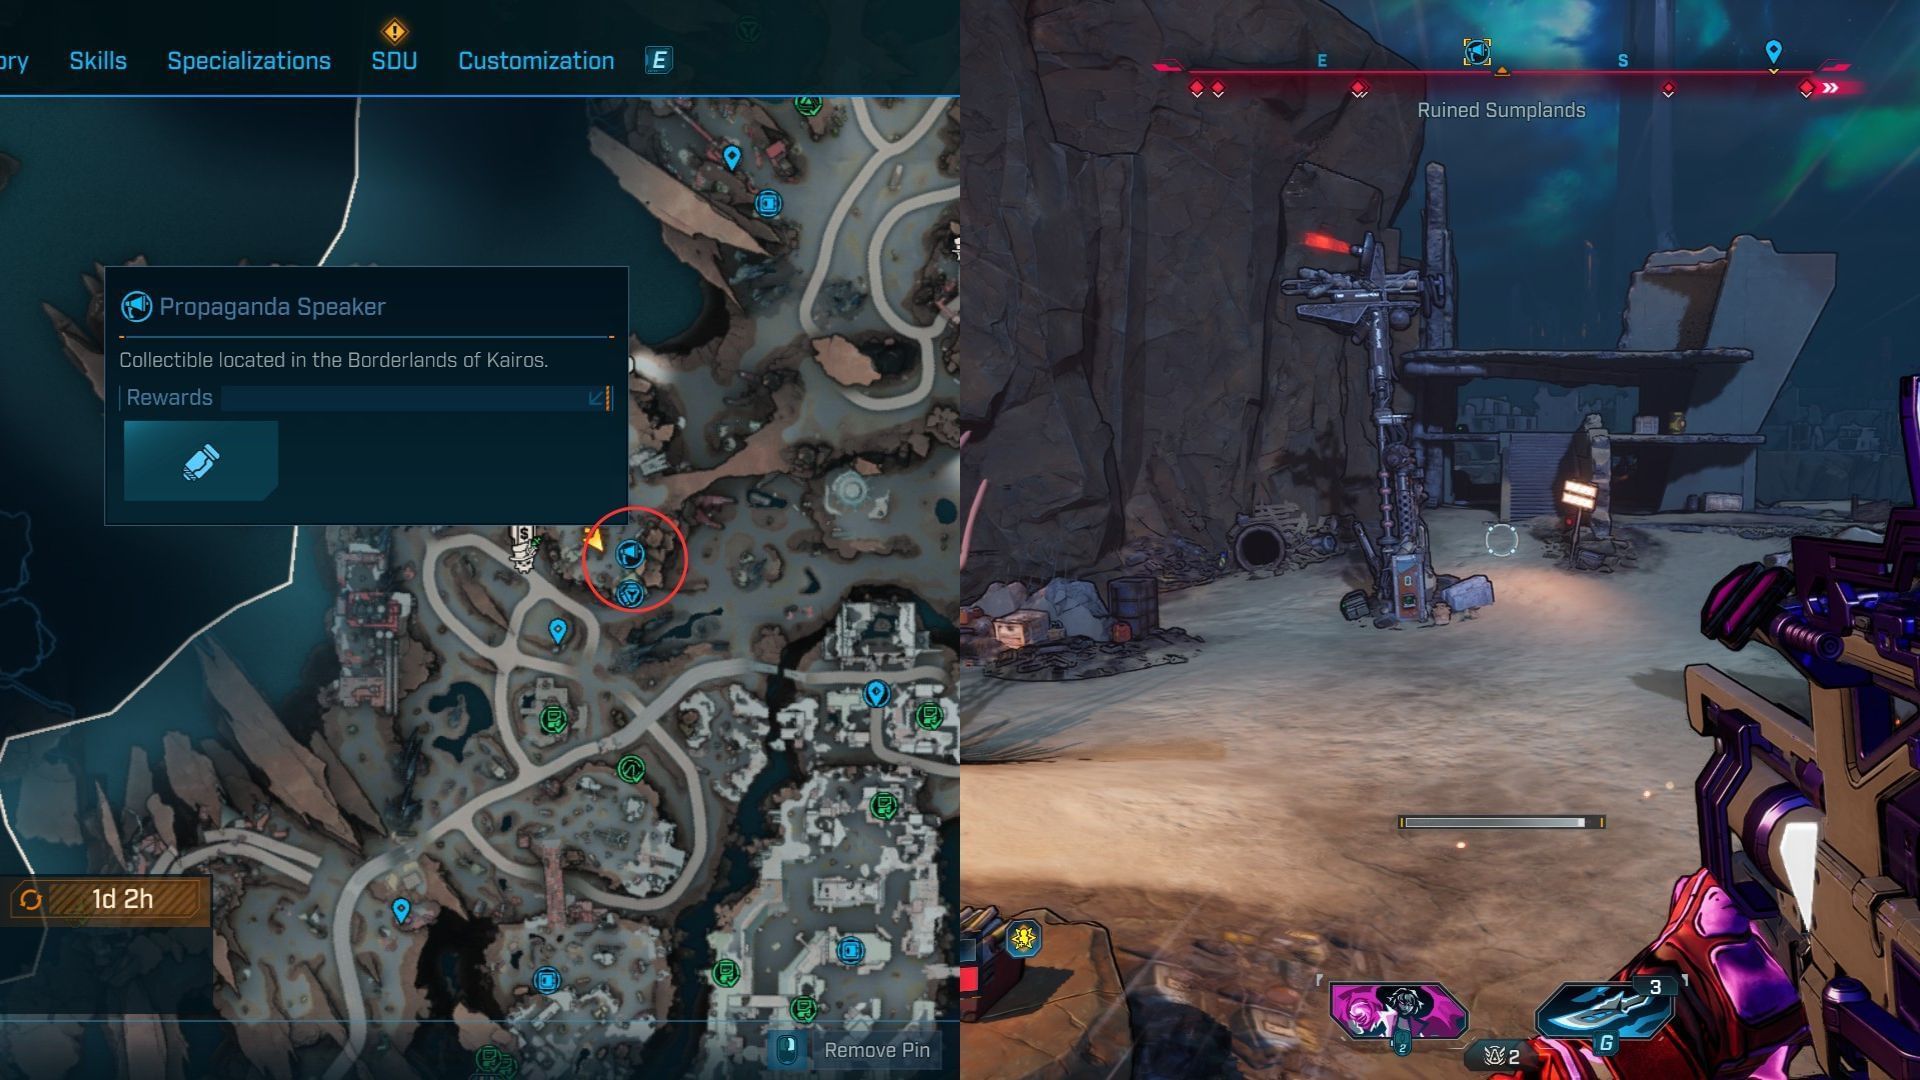
The final Propaganda Speaker is just above the maker for the Society for Amateur Seismology Enthusiasts POI. If you have unlocked the Judgment’s Lapse Order Silo, take the zipline directly to the speaker’s location.
Vault Hunter’s Guide to Kairos
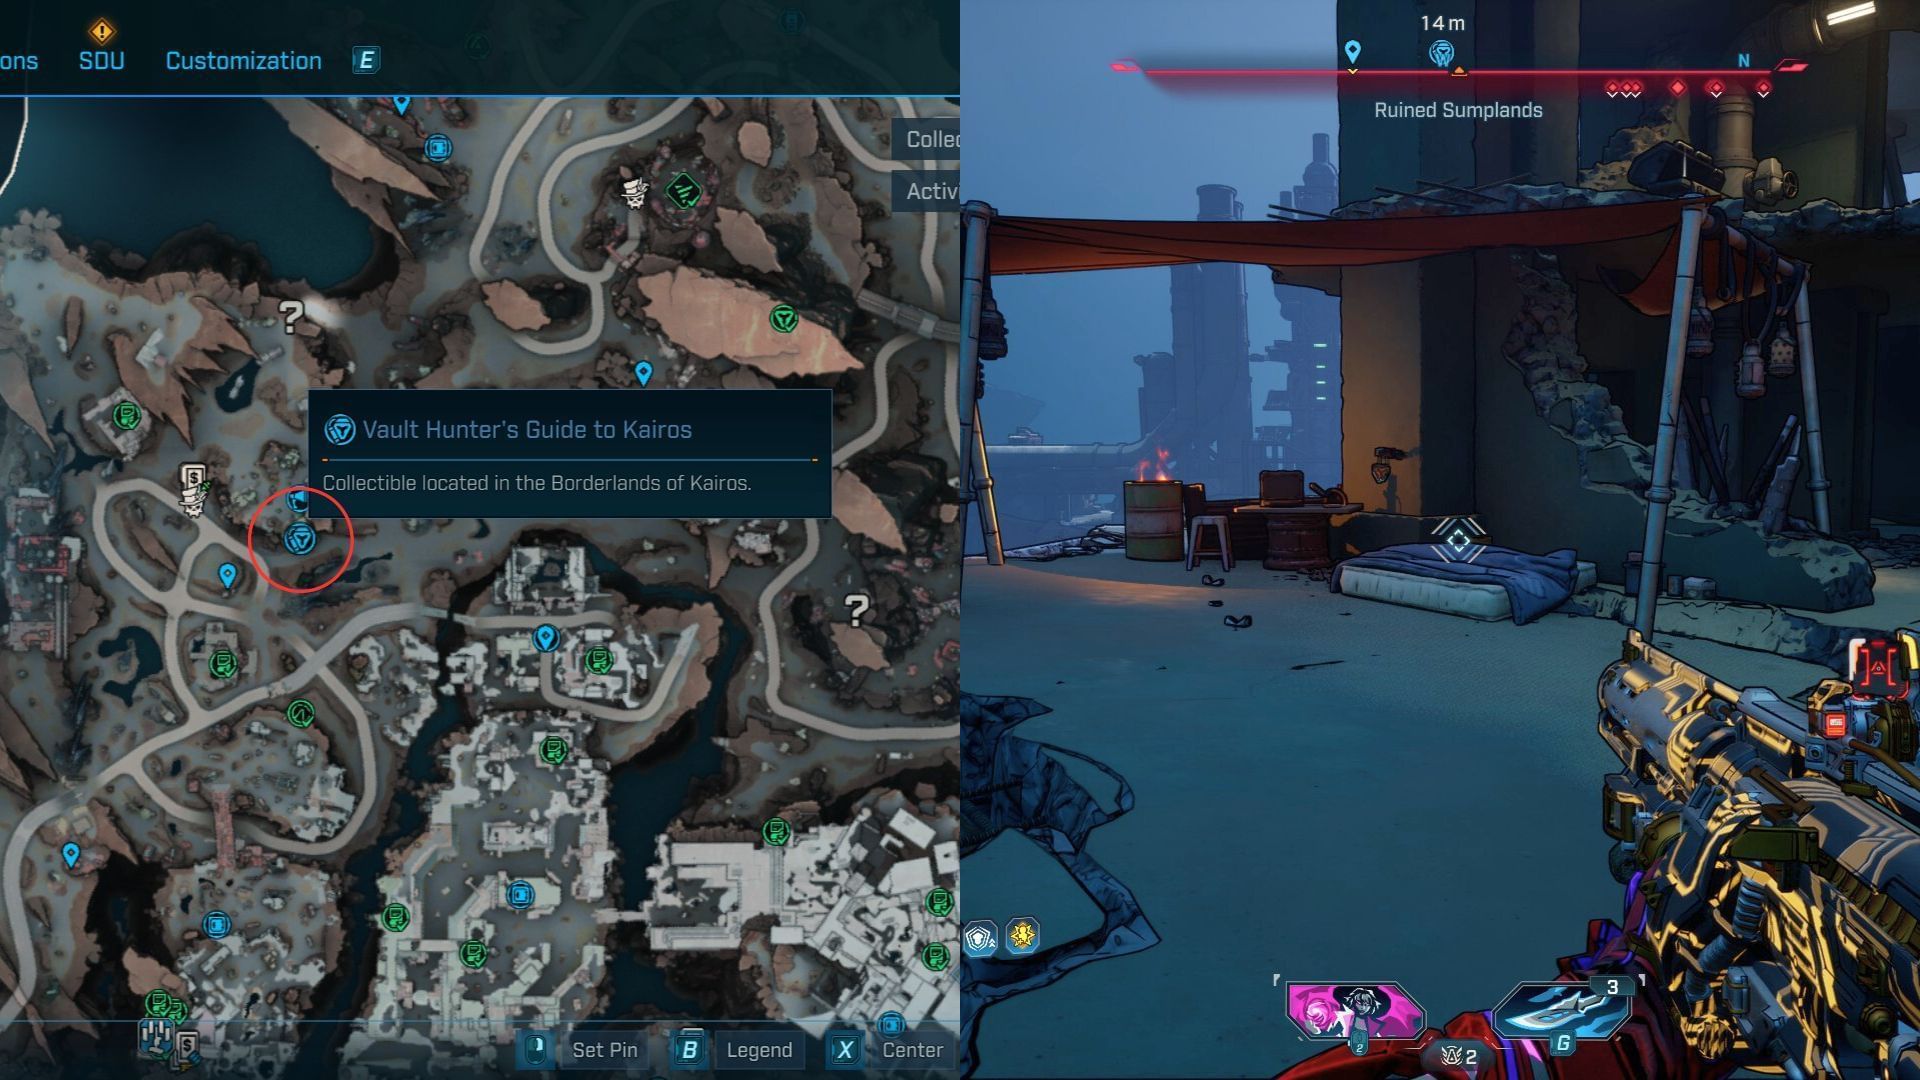
The Vault Hunter’s Guide to Kairos is inside the building behind Propaganda Speaker #3. Make your way up the stairs and find the tent with the collectible on your right.
Vault Fragment
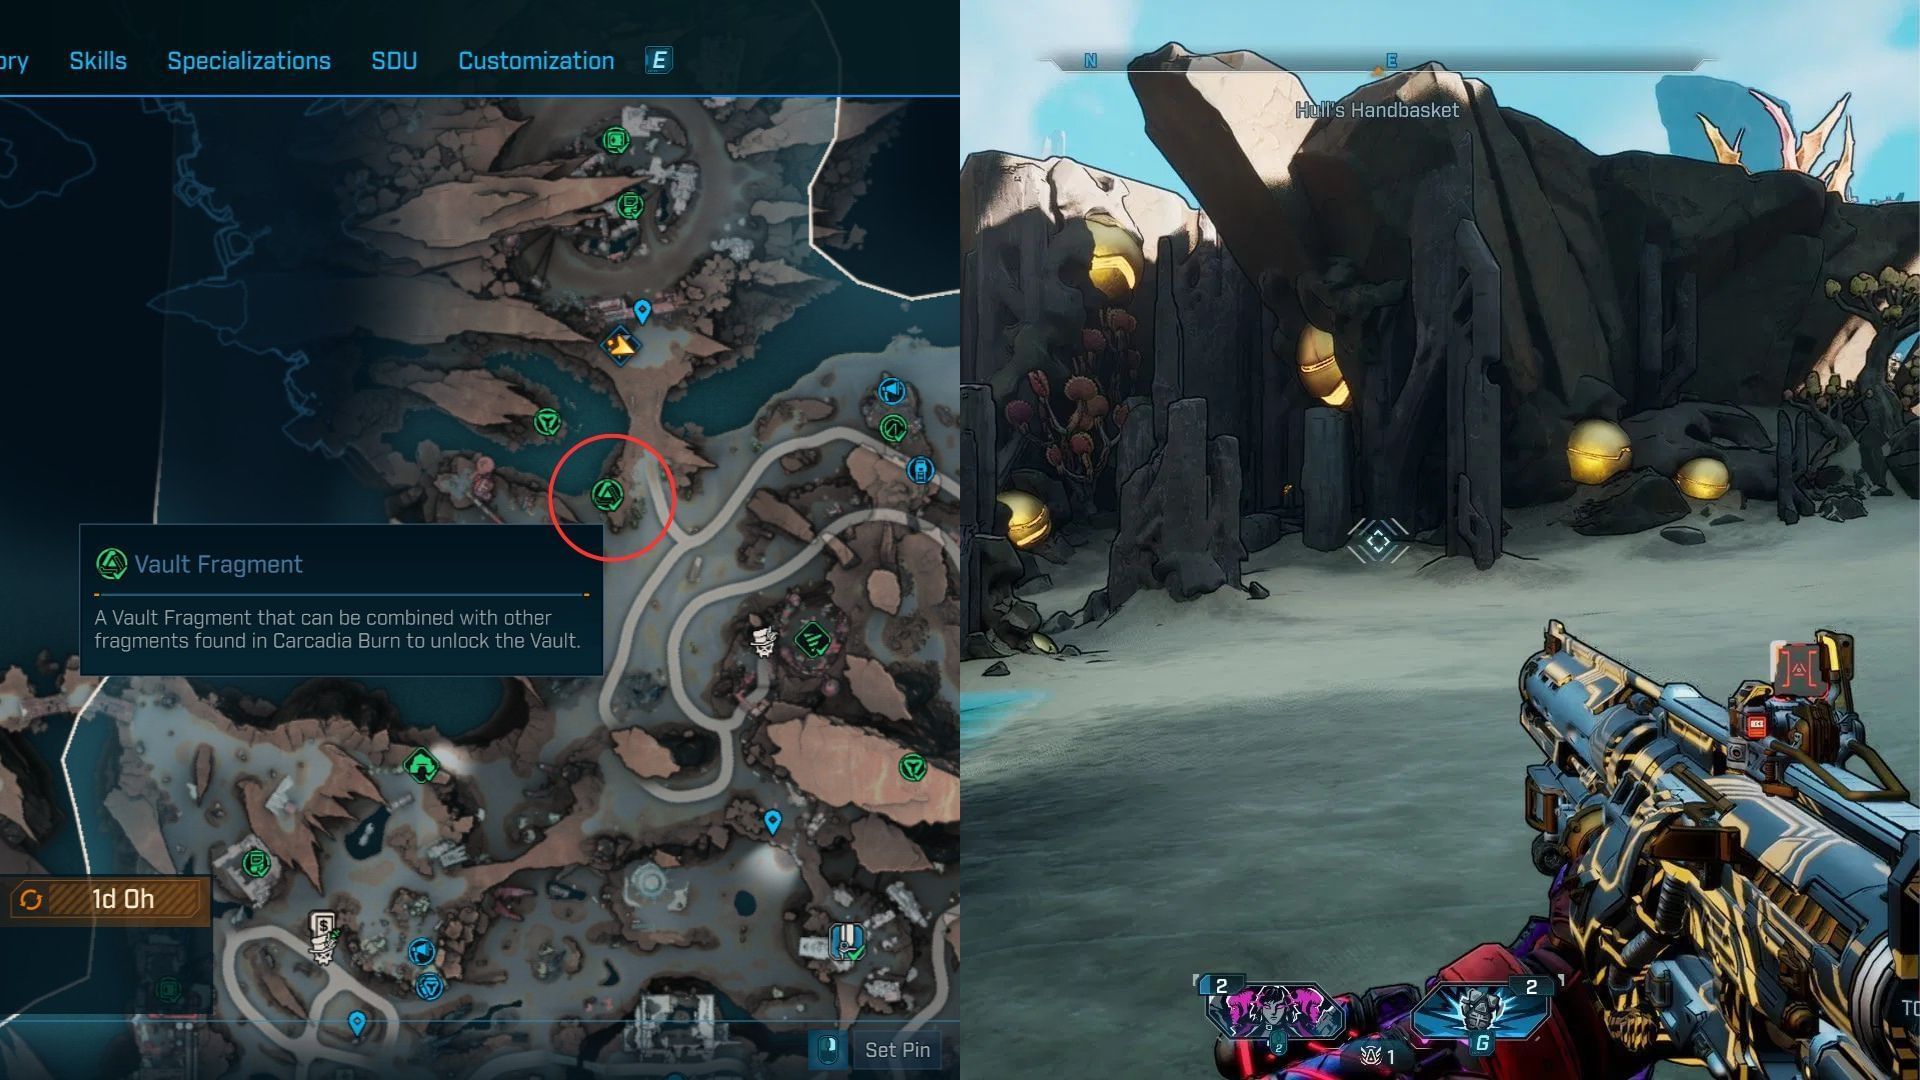
The Vault Fragment within Ruined Sumplands is near the lake where you found Dead Bolt #3. Look for golden orbs around the banks for the collectible.
Evocarium
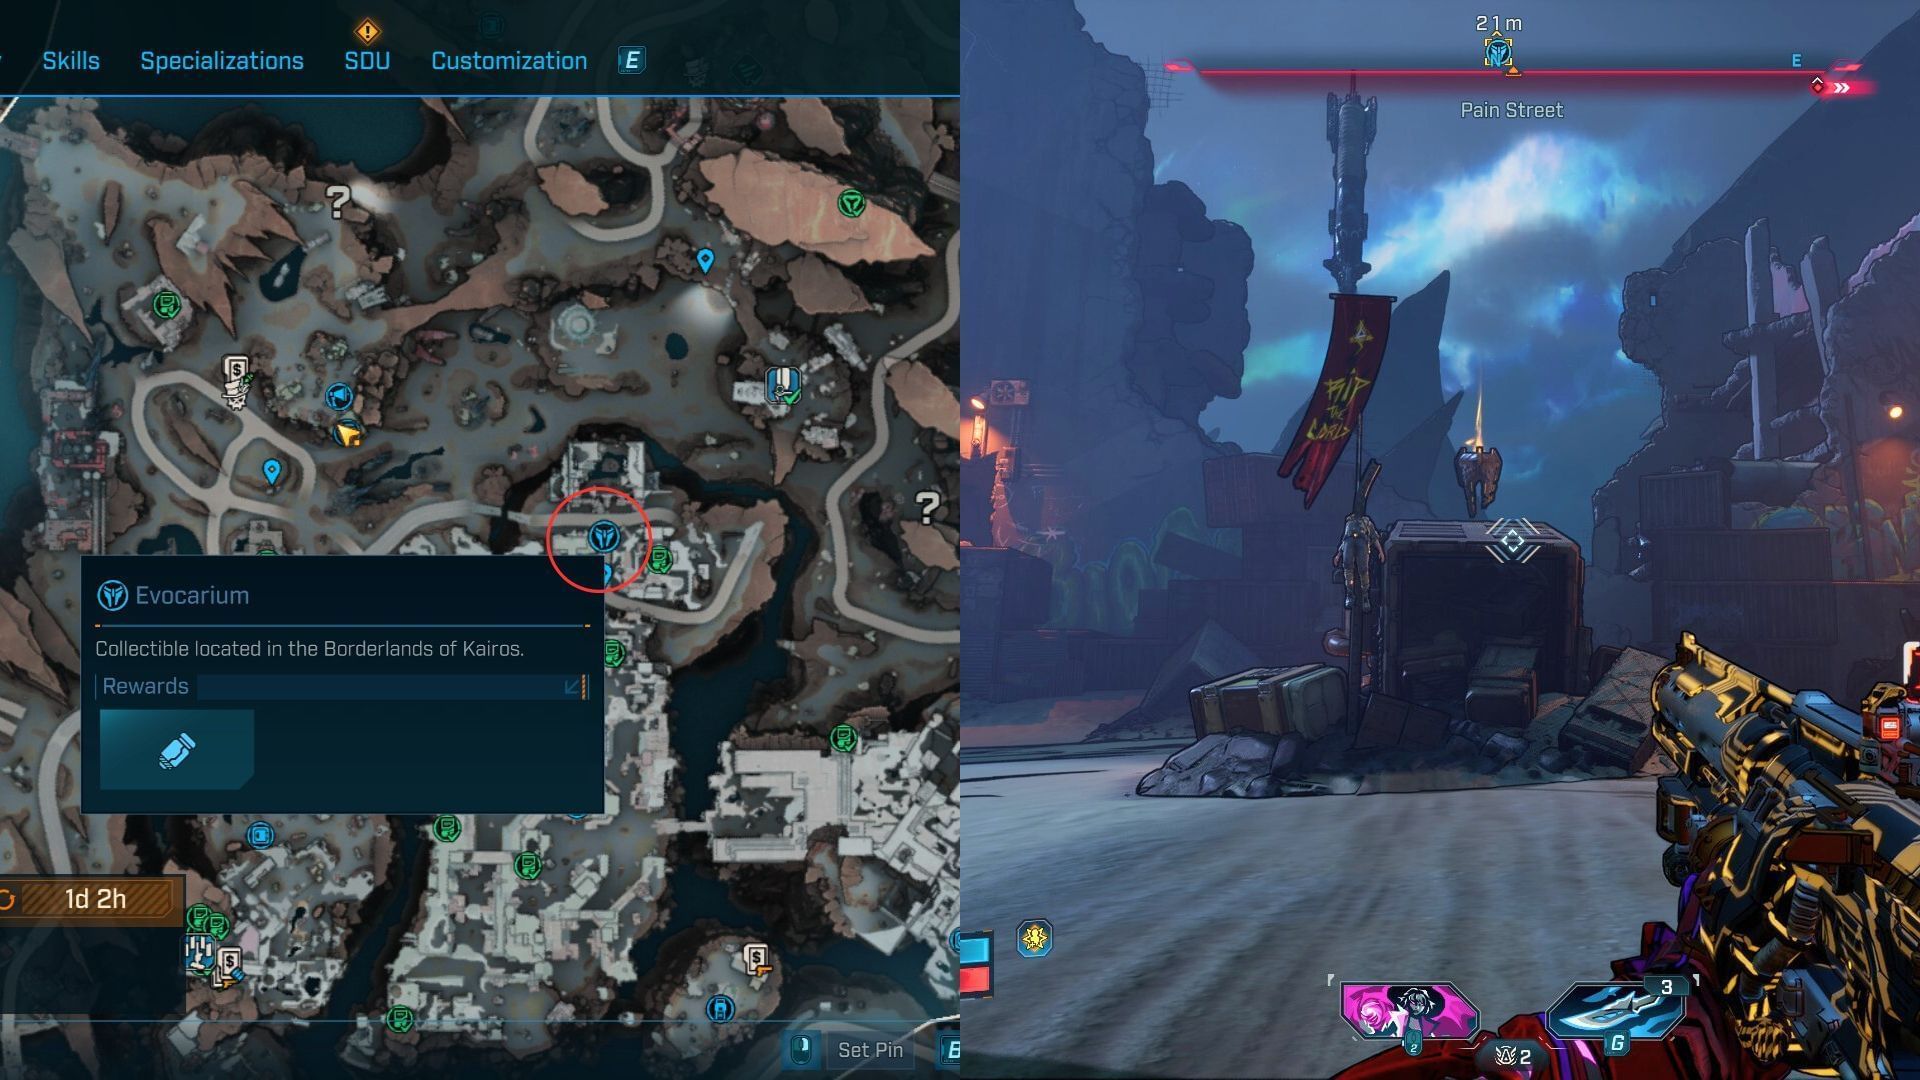
The Evocarium is at the same spot as ECHO Log #10 within the Pain Street point of interest. The collectible is floating on top of a giant container at the center of the Town.
Electi Safe #1
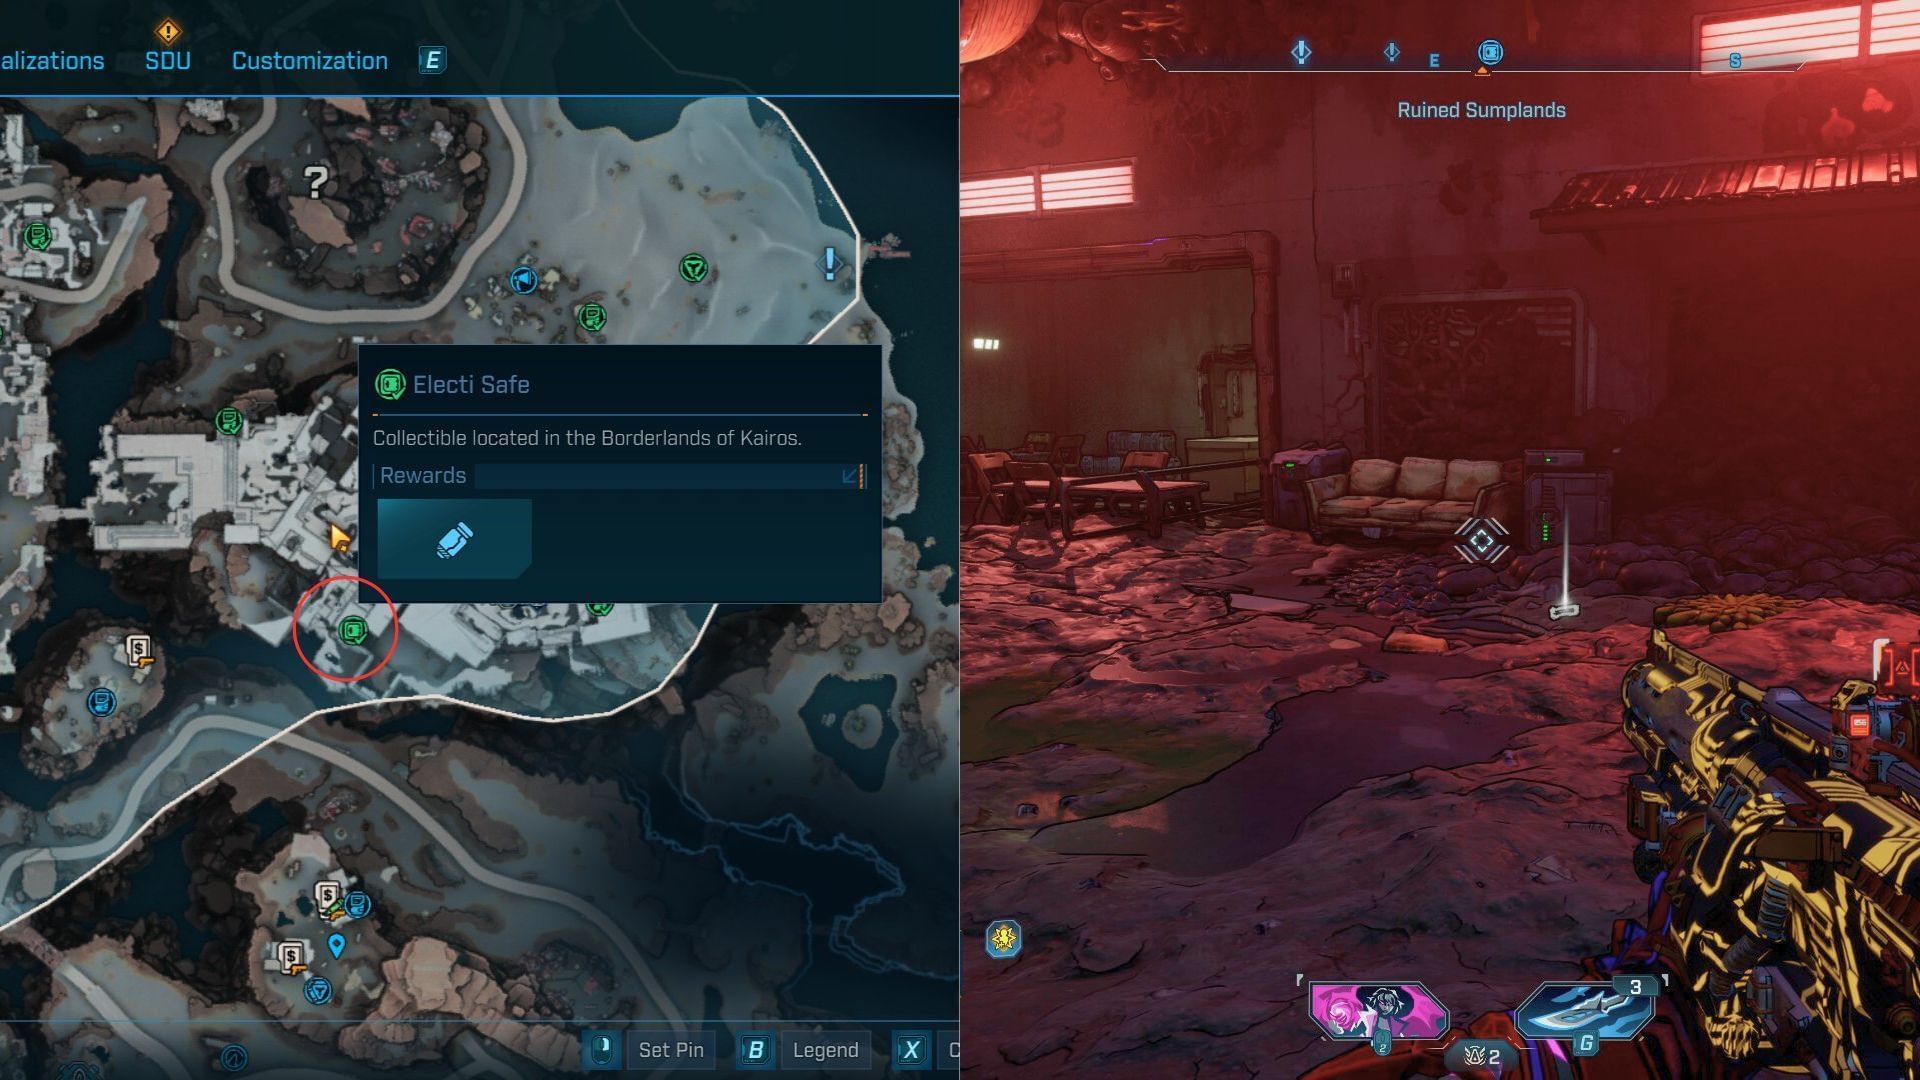
The first Electi Safe is at the Faction Town. After reaching the location, cross the first underbridge and go right towards a small alley. The safe is beside the couch within the Creep nest.
Electi Safe #2
The second Electi Safe is close to ECHO Log #6. Look around inside the adjacent building to find the cache and claim your loot.
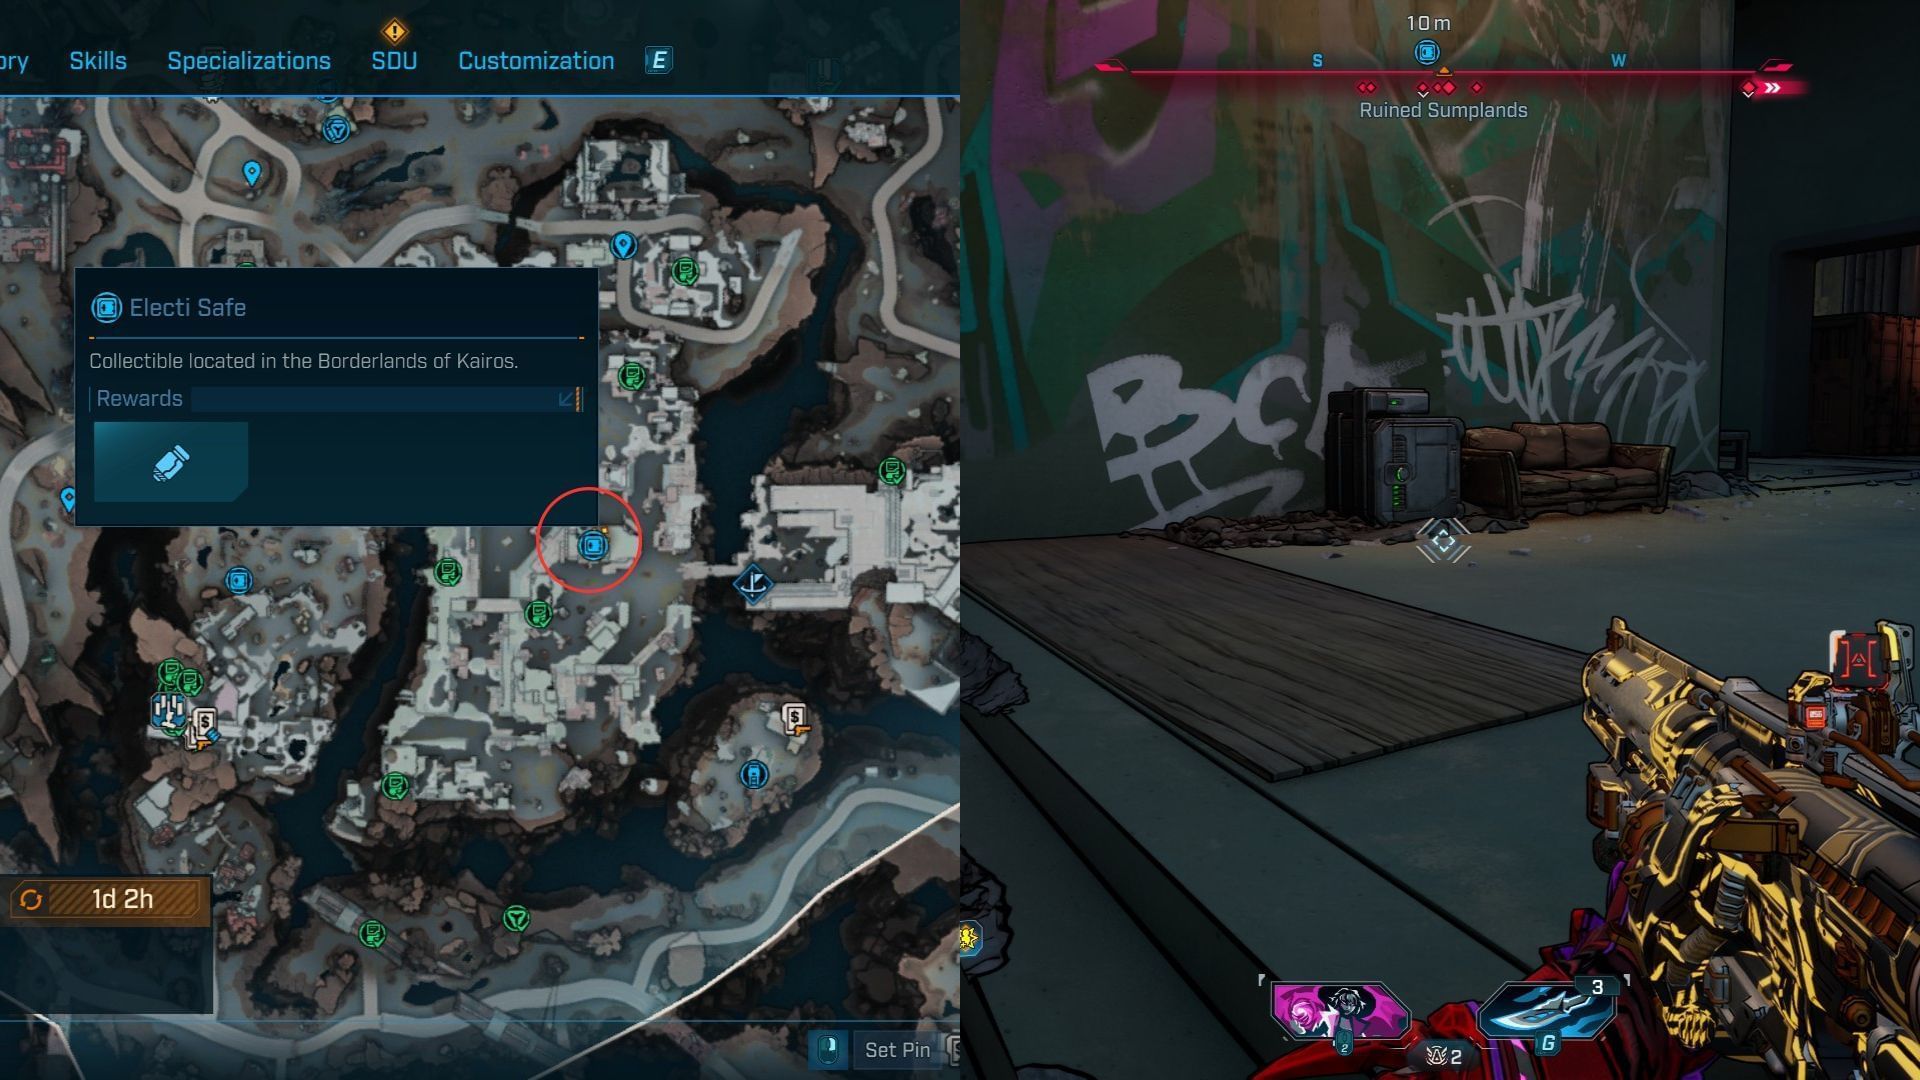
Electi Safe #3
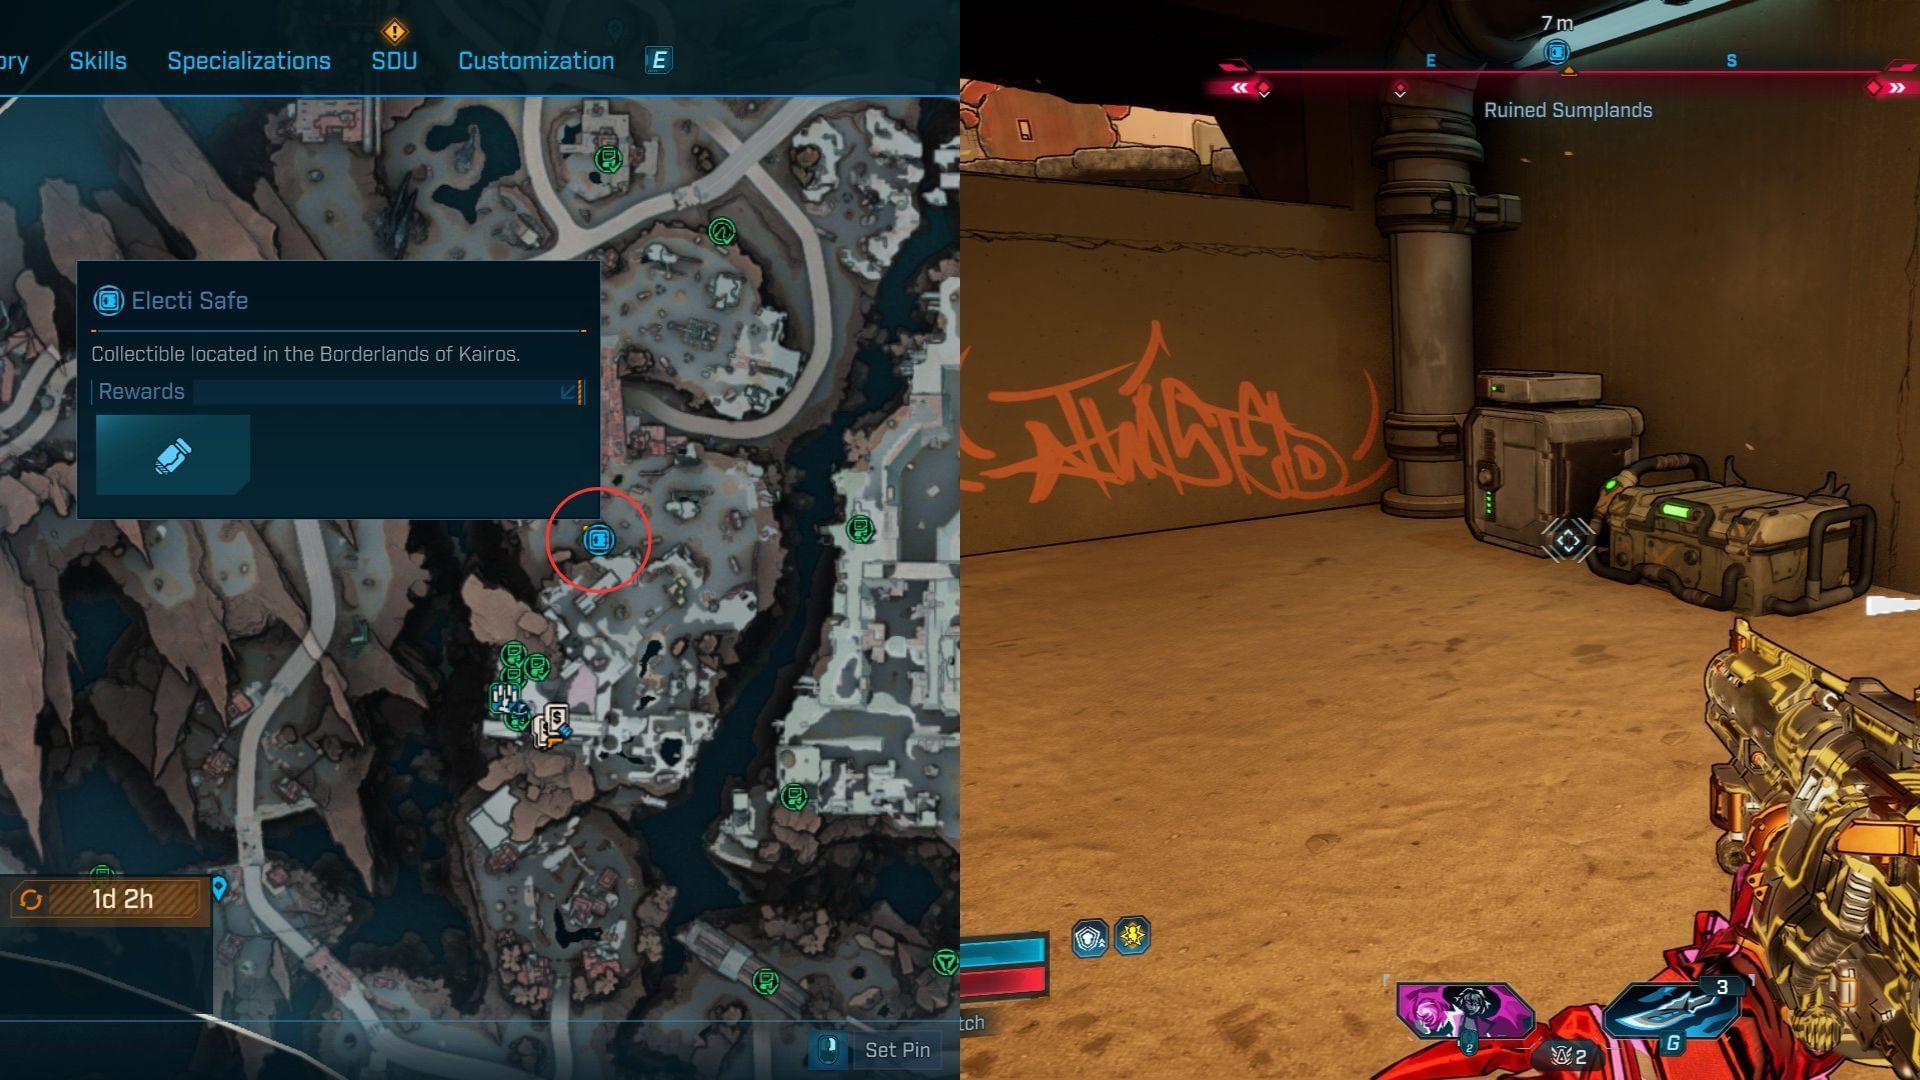
The third Electi Safe is near Moxxi’s club. Exit through the back door of the club and jump down the ledge to find the safe hiding on the first floor of a structure. There’s an orange graffiti on the wall to make your search easier.
Electi Safe #4
The fourth Electi Safe is inside a refinery in the left corner of the Ruined Sumplands. Take the stairs to climb to the top of the structure and claim your rewards.
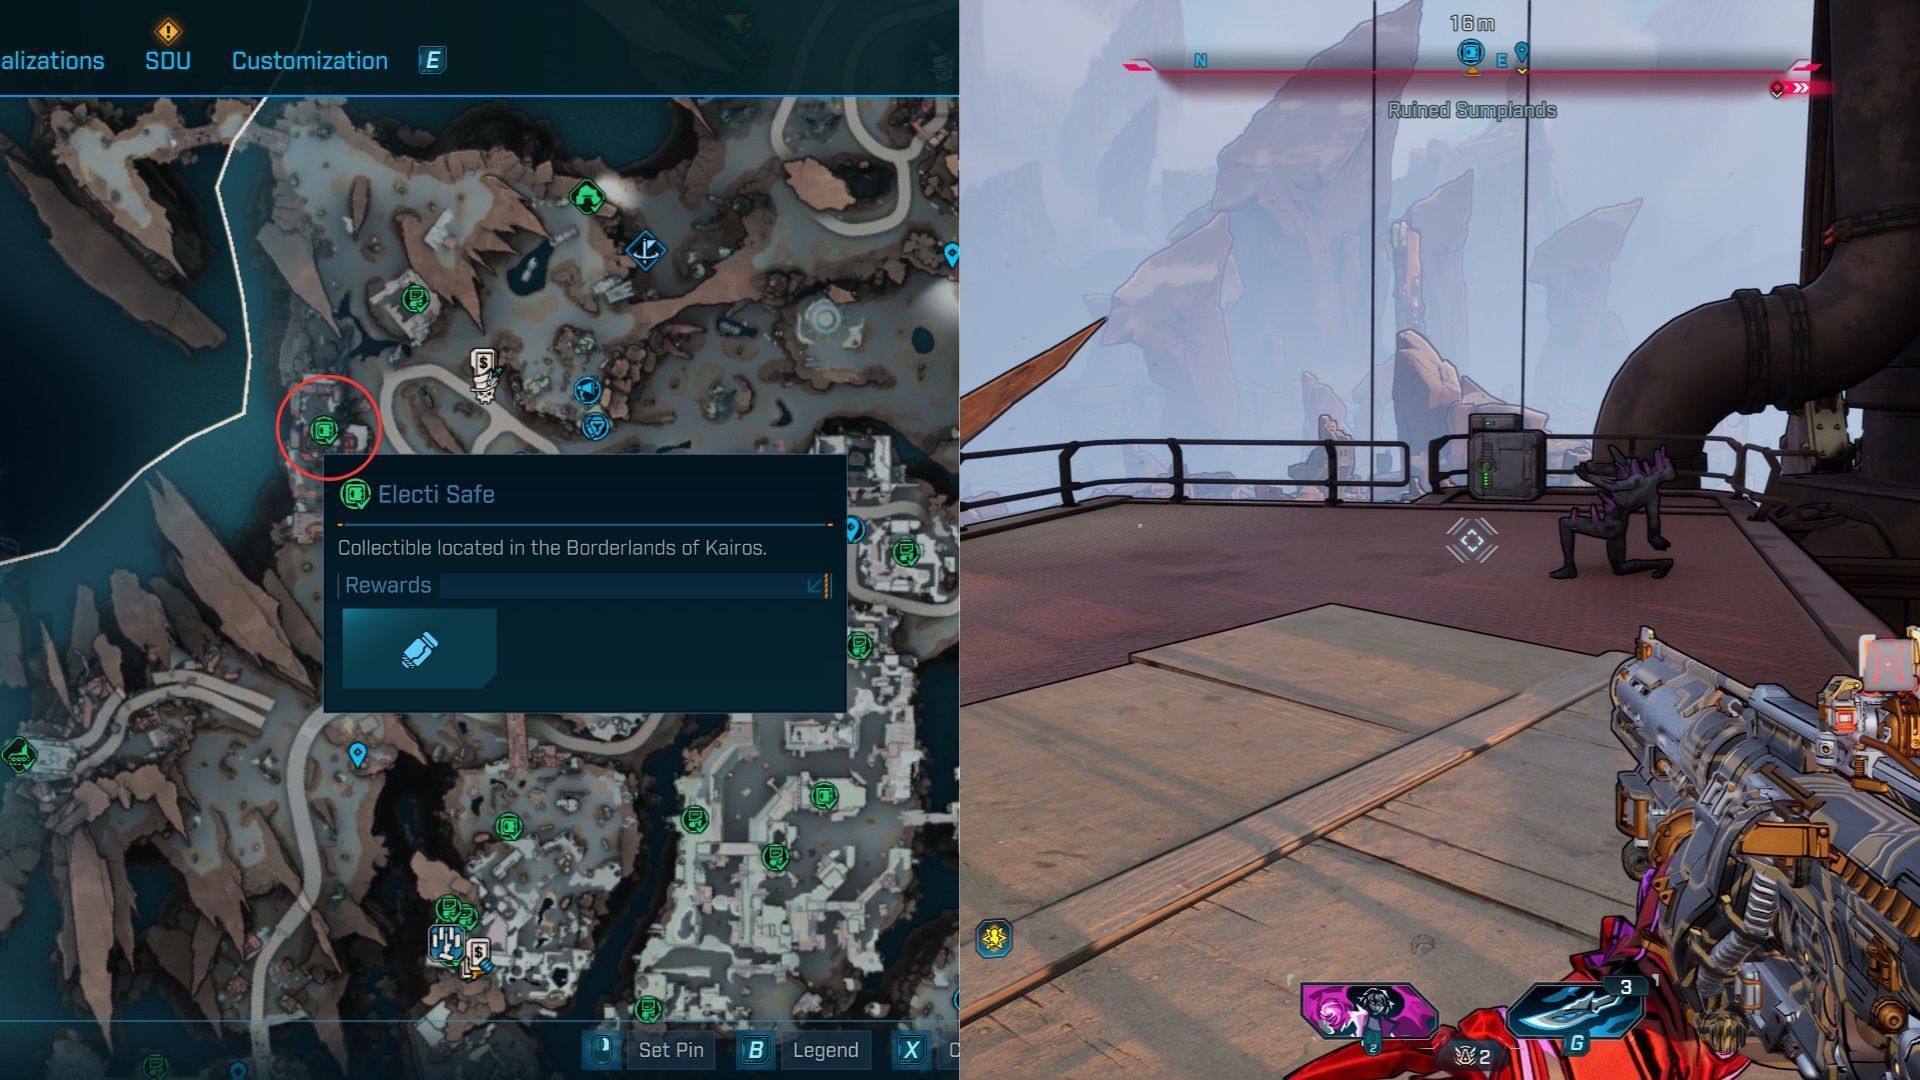
Electi Safe #5
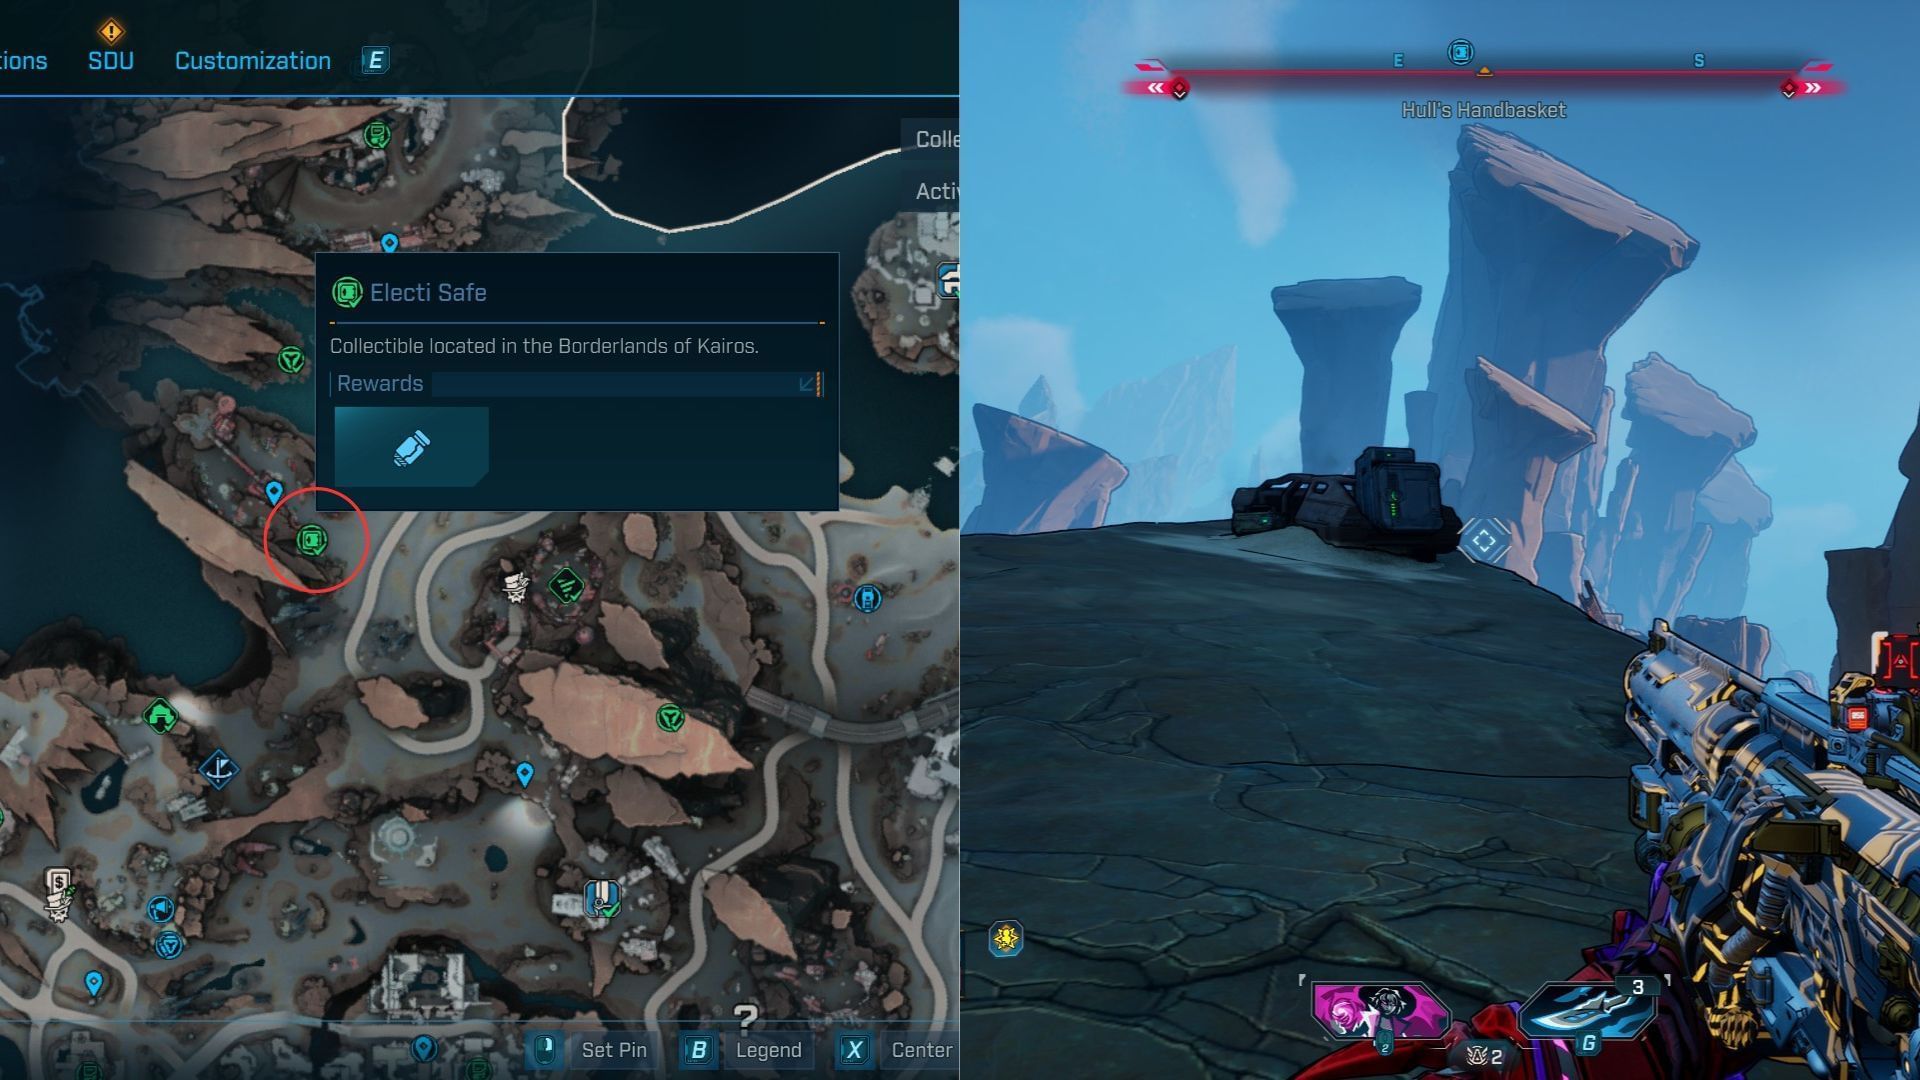
This Electi Safe is at Hull’s Handbasket point of interest. Once you’re inside, go to the other end and take a left to find a way to climb on the rock to find the collectible on top.
Electi Safe #6
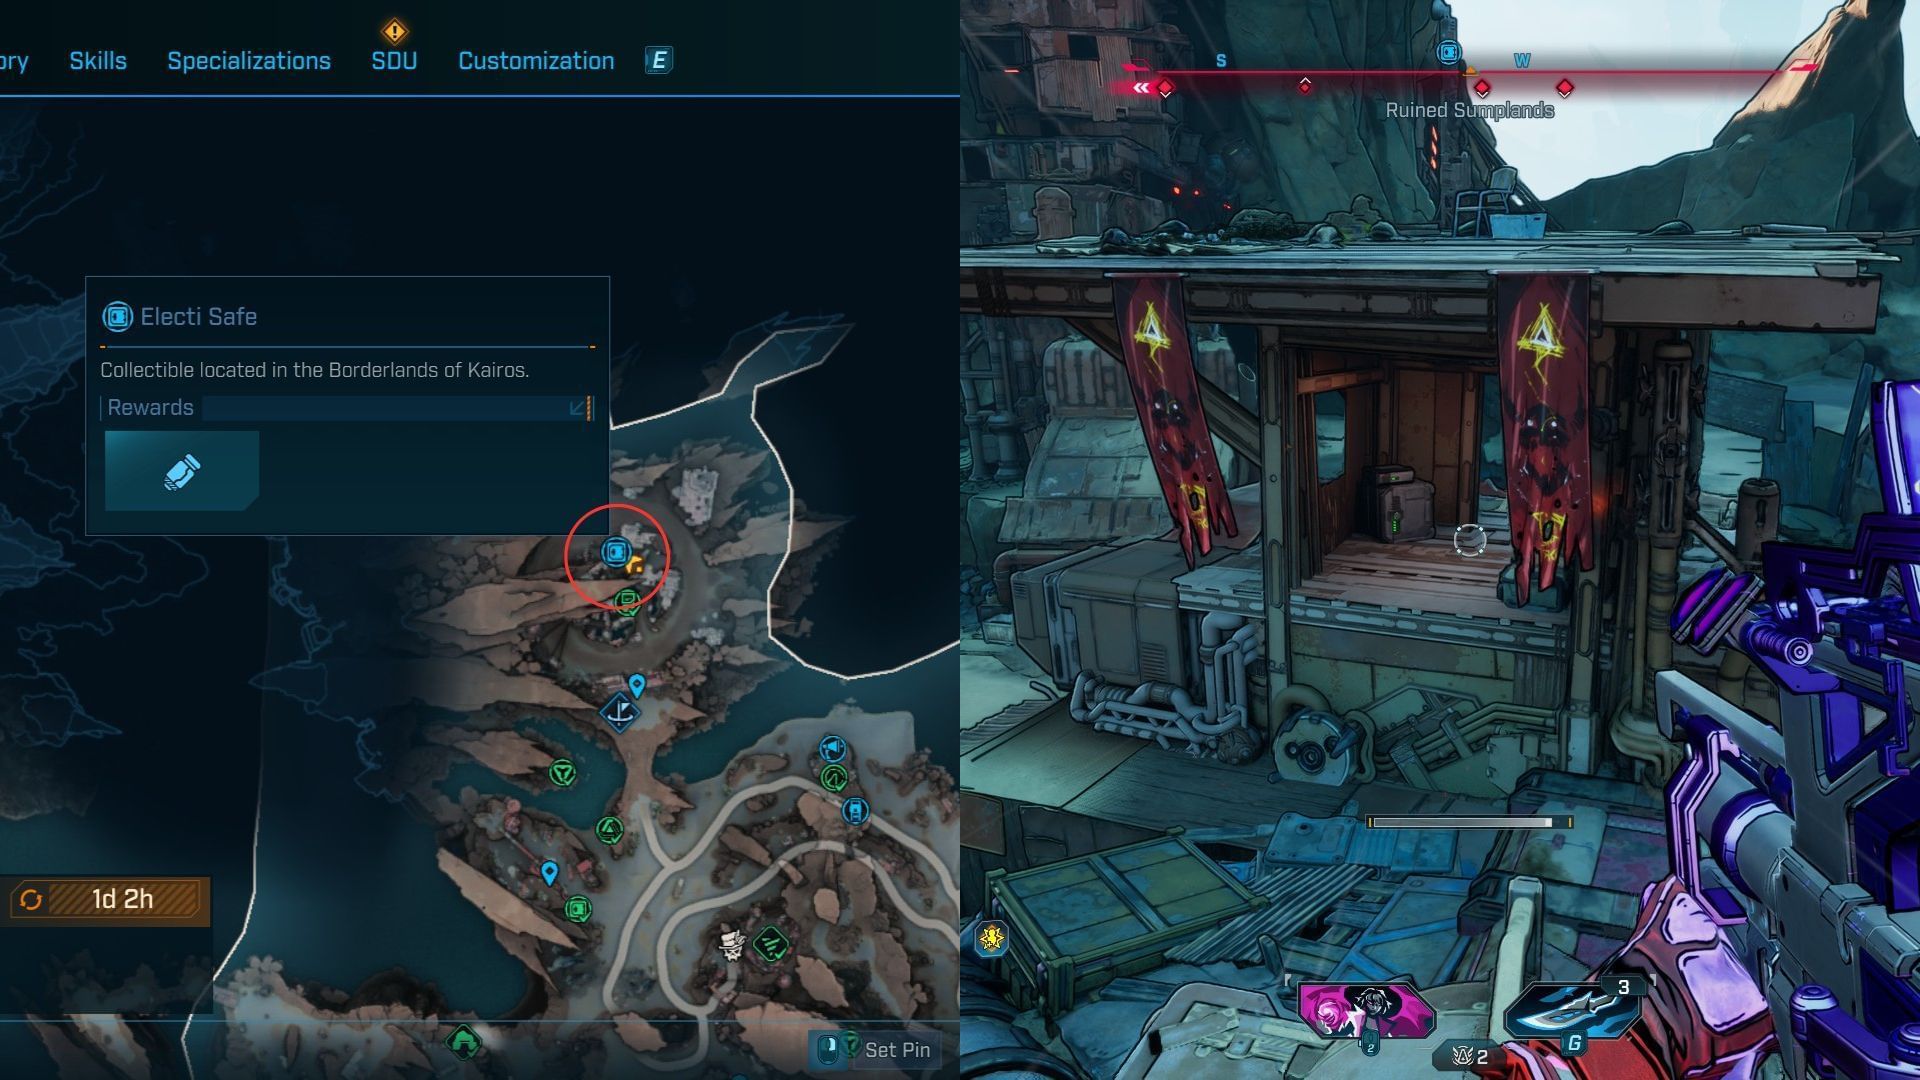
The final Electi Safe within Ruined Sumplands is at the Gunkworks point of interest, the same place as ECHO Log #19. Head towards the middle of the area to find a chimney with black smoke. The collectible is inside the building with red banners hanging outside.
Check out other Borderlands 4 guides and features:
- 7 worst Legendaries in Borderlands 4 that need a buff
- Borderlands 4 Legendary Blacksmith Forgeknight (Amon) Class mod: How to get and unique effects
- Borderlands 4: All Stoneblood Forest collectibles