
'%20x='0'%20y='0'%20height='100%25'%20width='100%25'%20%0A%20%20%20%20%20%20%20%20%20%20xlink%3Ahref='data:image/jpg;base64,/9j/2wBDAAYEBQYFBAYGBQYHBwYIChAKCgkJChQODwwQFxQYGBcUFhYaHSUfGhsjHBYWICwgIyYnKSopGR8tMC0oMCUoKSj/2wBDAQcHBwoIChMKChMoGhYaKCgoKCgoKCgoKCgoKCgoKCgoKCgoKCgoKCgoKCgoKCgoKCgoKCgoKCgoKCgoKCgoKCj/wgARCAAGAAoDASIAAhEBAxEB/8QAFgABAQEAAAAAAAAAAAAAAAAAAAUH/8QAFAEBAAAAAAAAAAAAAAAAAAAABP/aAAwDAQACEAMQAAAAzeSGT//EAB4QAAEEAgMBAAAAAAAAAAAAAAIBAwQRAAYTMZPR/9oACAEBAAE/AGtWgPNDwOOgZ2dmAl0uLq8W1qS75p9z/8QAFxEAAwEAAAAAAAAAAAAAAAAAAAECA//aAAgBAgEBPwBaUf/EABYRAAMAAAAAAAAAAAAAAAAAAAACE//aAAgBAwEBPwCan//Z'%3E%3C/image%3E%3C/svg%3E)
Borderlands 4’s Rush the Gate is the final main story mission for the Fadefields region, and sixth overall main story mission of the campaign. It’s all about finally putting Idolator Sol to rest, and stopping the bio-weapon he plans to obliterate the people of the Fadefields with. After checking on Rush, it will be up to you to put that bioweapon, Locust, to good use. It’s certainly a challenging mission, and the boss at the end is certainly no joke.
However, upon completing it, you do receive a great vehicle in the Driftblade, among other fantastic rewards. It’s a long one, too, with lots of really intense enemy packs, so make sure you’ve blocked out some time to grind through Idolator Sol’s base, and all of his goons. Here’s how to wrap this mission up.
Rush the Gate complete quest guide for Borderlands 4
Mission Information
- Quest Giver: Rush
- Location: Outbounders HQ
- Recommended Level: 10-15
- Approximate length of mission: 45 minutes to 1 hour
Mission Steps
- Check on Rush, Defend the Outbounders, Talk to Rhodes
- Salvage Locust Missiles, Rendezvous with Outbounders, Advance to Idolator Sol’s Fortress
- Open gate with Locust canister, Kill fortress defenders
- Activate elevator, Kill fortress defenders
- Check on Rush, Reach safe separate distance
- Kill Idolator Sol, Enter fortress, Kill Order forces
- Kill Idolator Sol, Find airship hangar
- Disable Sol’s airship, Kill Idolator Sol, Activate refueling platform
- Disable Sol’s airship, Kill Idolator Sol, remove docking clamps
- Kill Idolator Sol
- Take Idolator Sol’s bolt, Return to Outbounders HQ
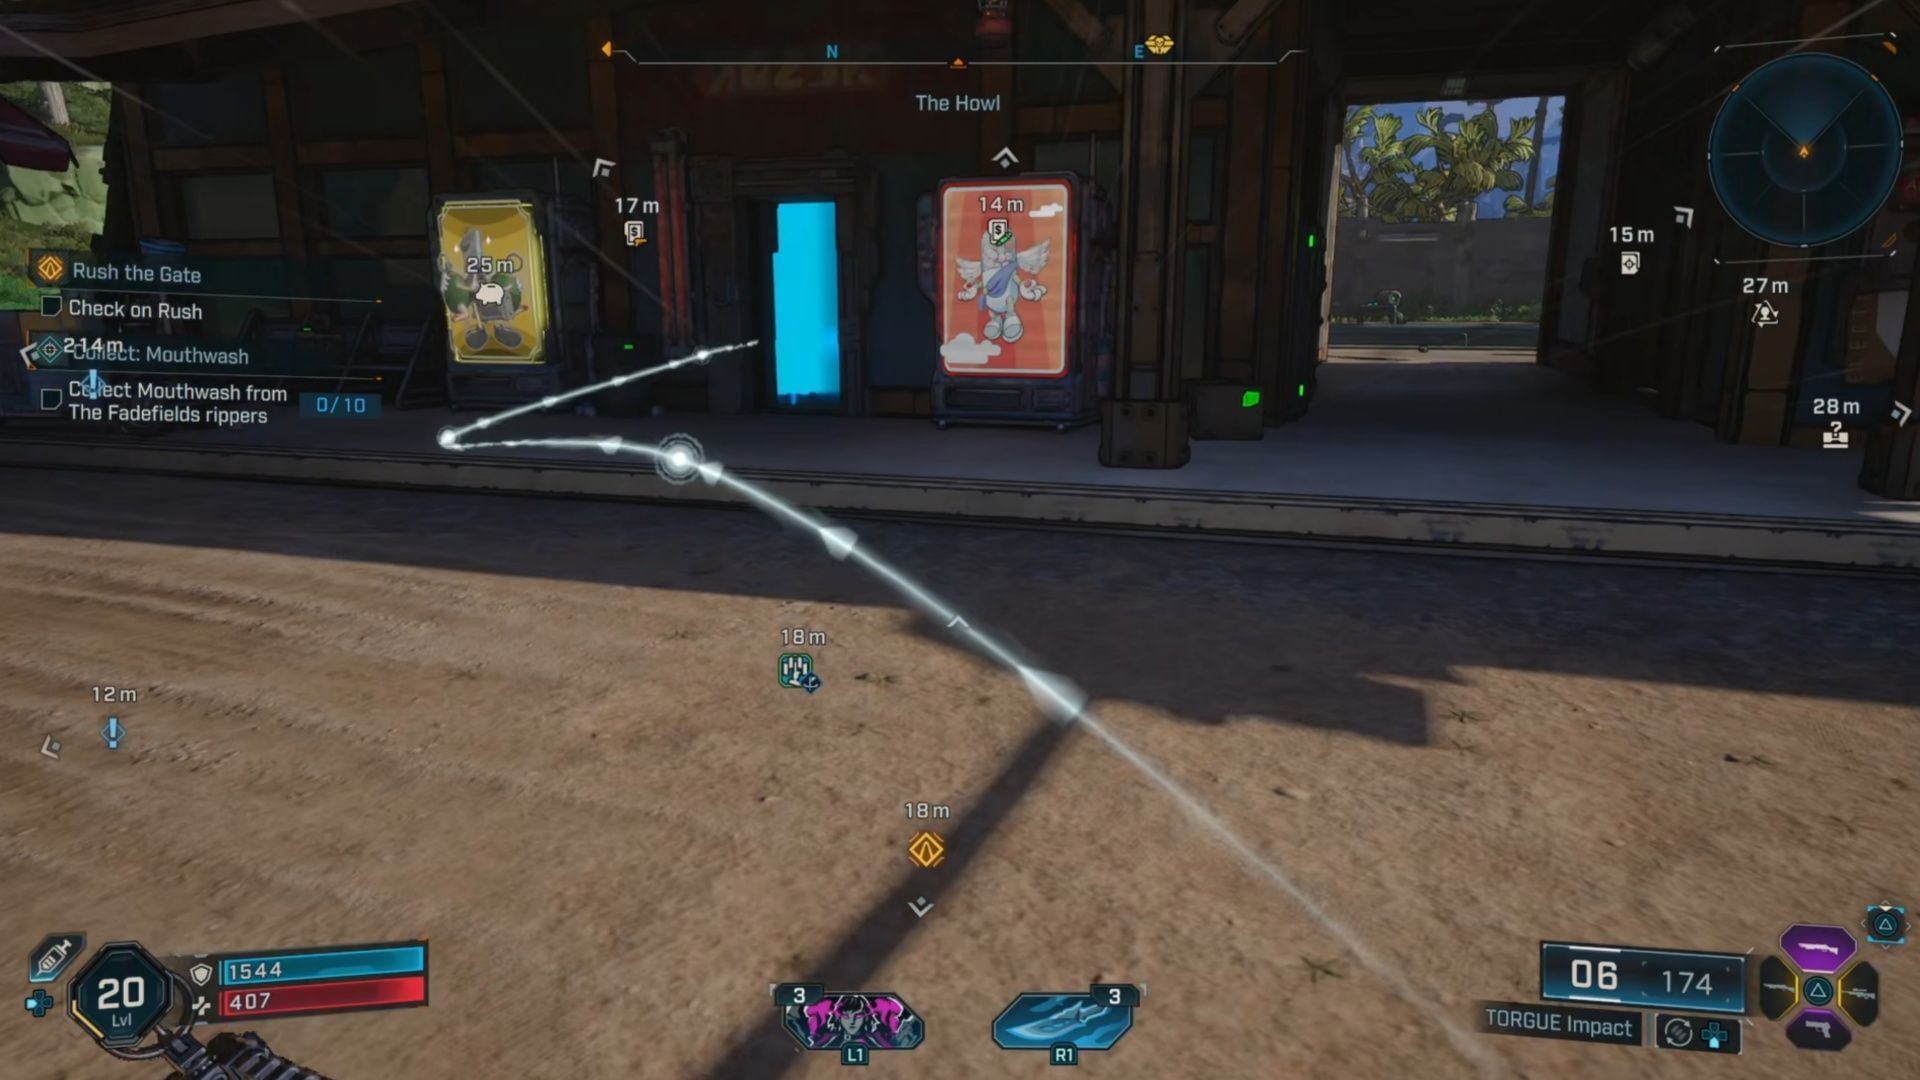
1) Check on Rush, Defend the Outbounders, Talk to Rhodes
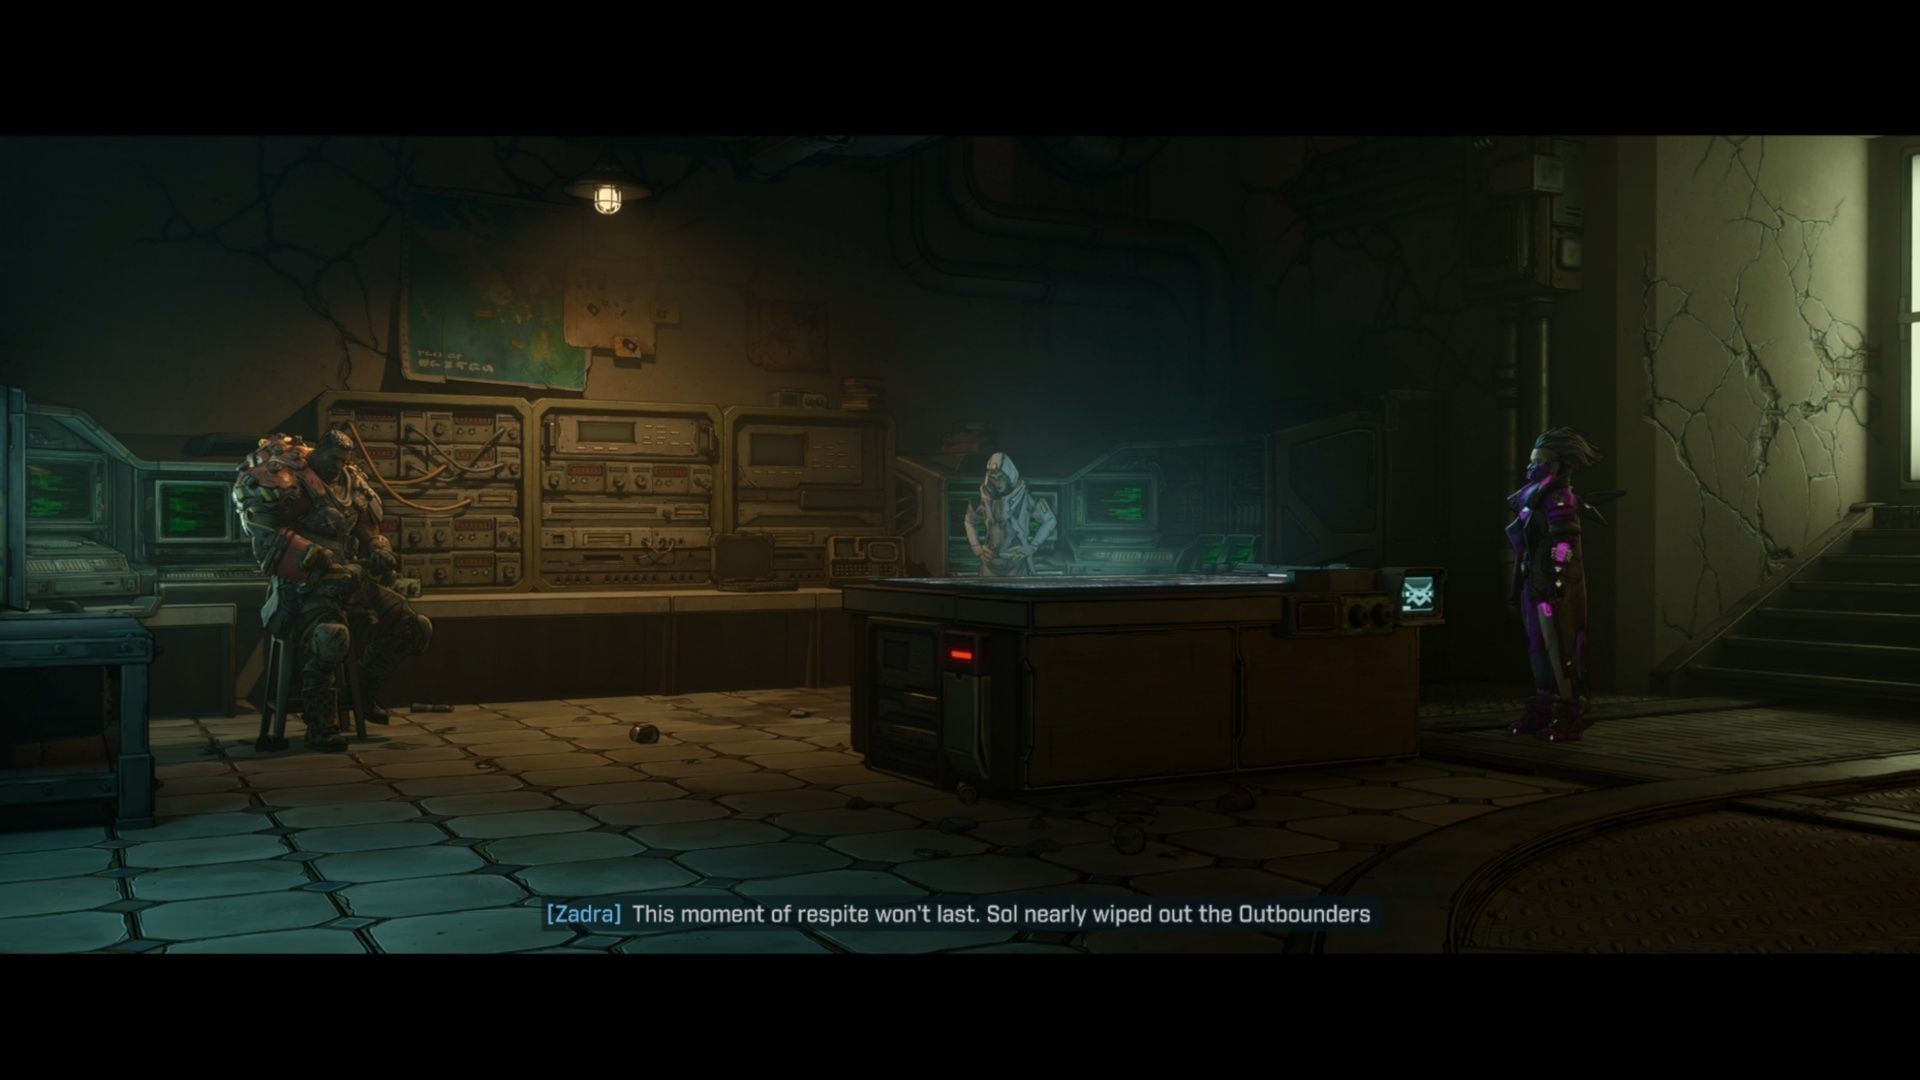
You pick up Rush the Gate immediately after wrapping up One Fell Swoop in Borderlands 4, and you just need to go talk to Rush to get it all moving. After his tense discussion with Zadra, you’re going to need to head out and then Defend the Outbounders. Not too far away from the Outbounders HQ, a group of Order forces will show up, as well as a crew of Rippers. They aren’t anybody special, other than a few Badasses.
If you’re doing some of the Contracts, such as Mouthwash (kill Rippers), this is a great way to kill two birds with one bullet-shaped stone. Once you’ve defeated the swarms of enemies, talk to Rhodes near the crashed ship. He’ll reveal that some of the missiles are still usable, which is lucky for us.
2) Salvage Locust Missiles, Rendezvous with Outbounders, Advance to Idolator Sol’s Fortress
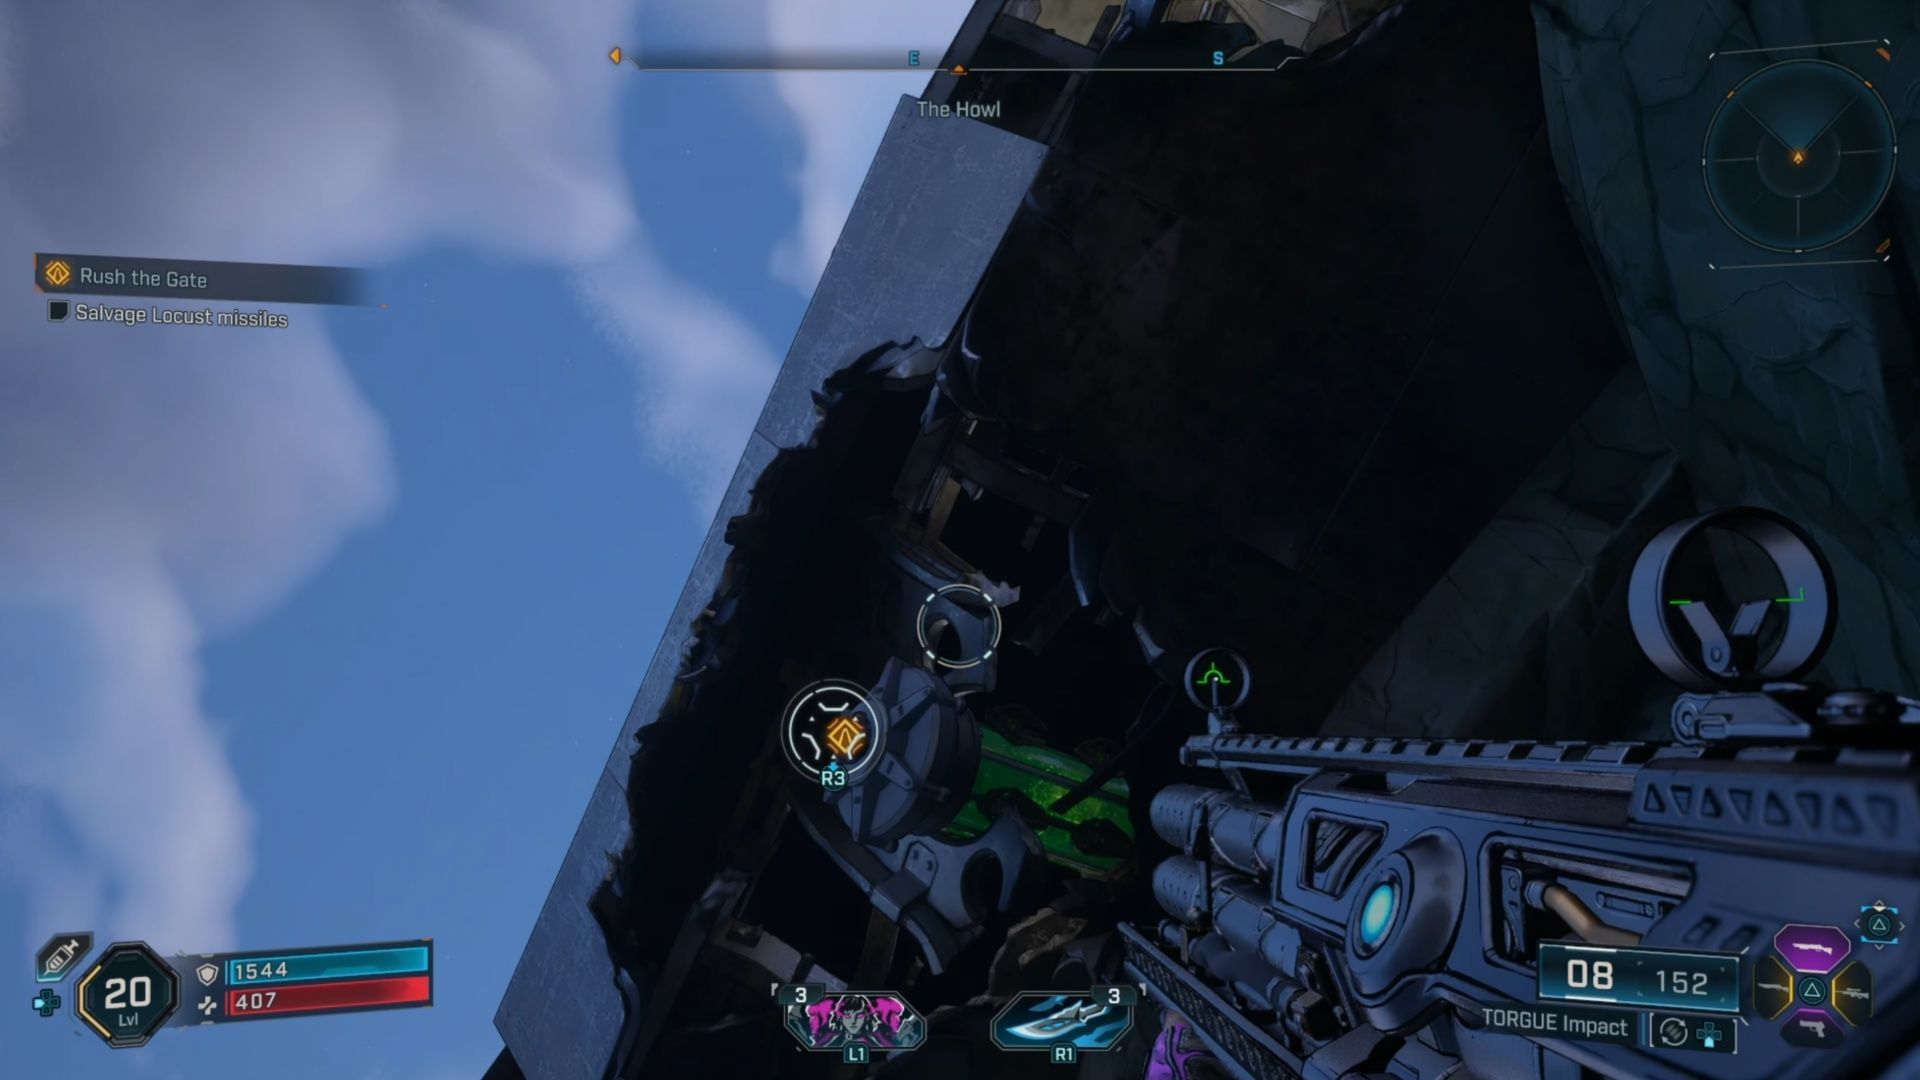
To Salvage Locust Missiles, just jump onto the vehicle underneath the crashed ship that’s above you and Rhodes. Do a high double jump, and use your Grapple at the height of the jump, and you’ll pull one of the canisters down. That’s all you need to satisfy the requirements for this part of Borderlands 4’s Rush the Gate mission.
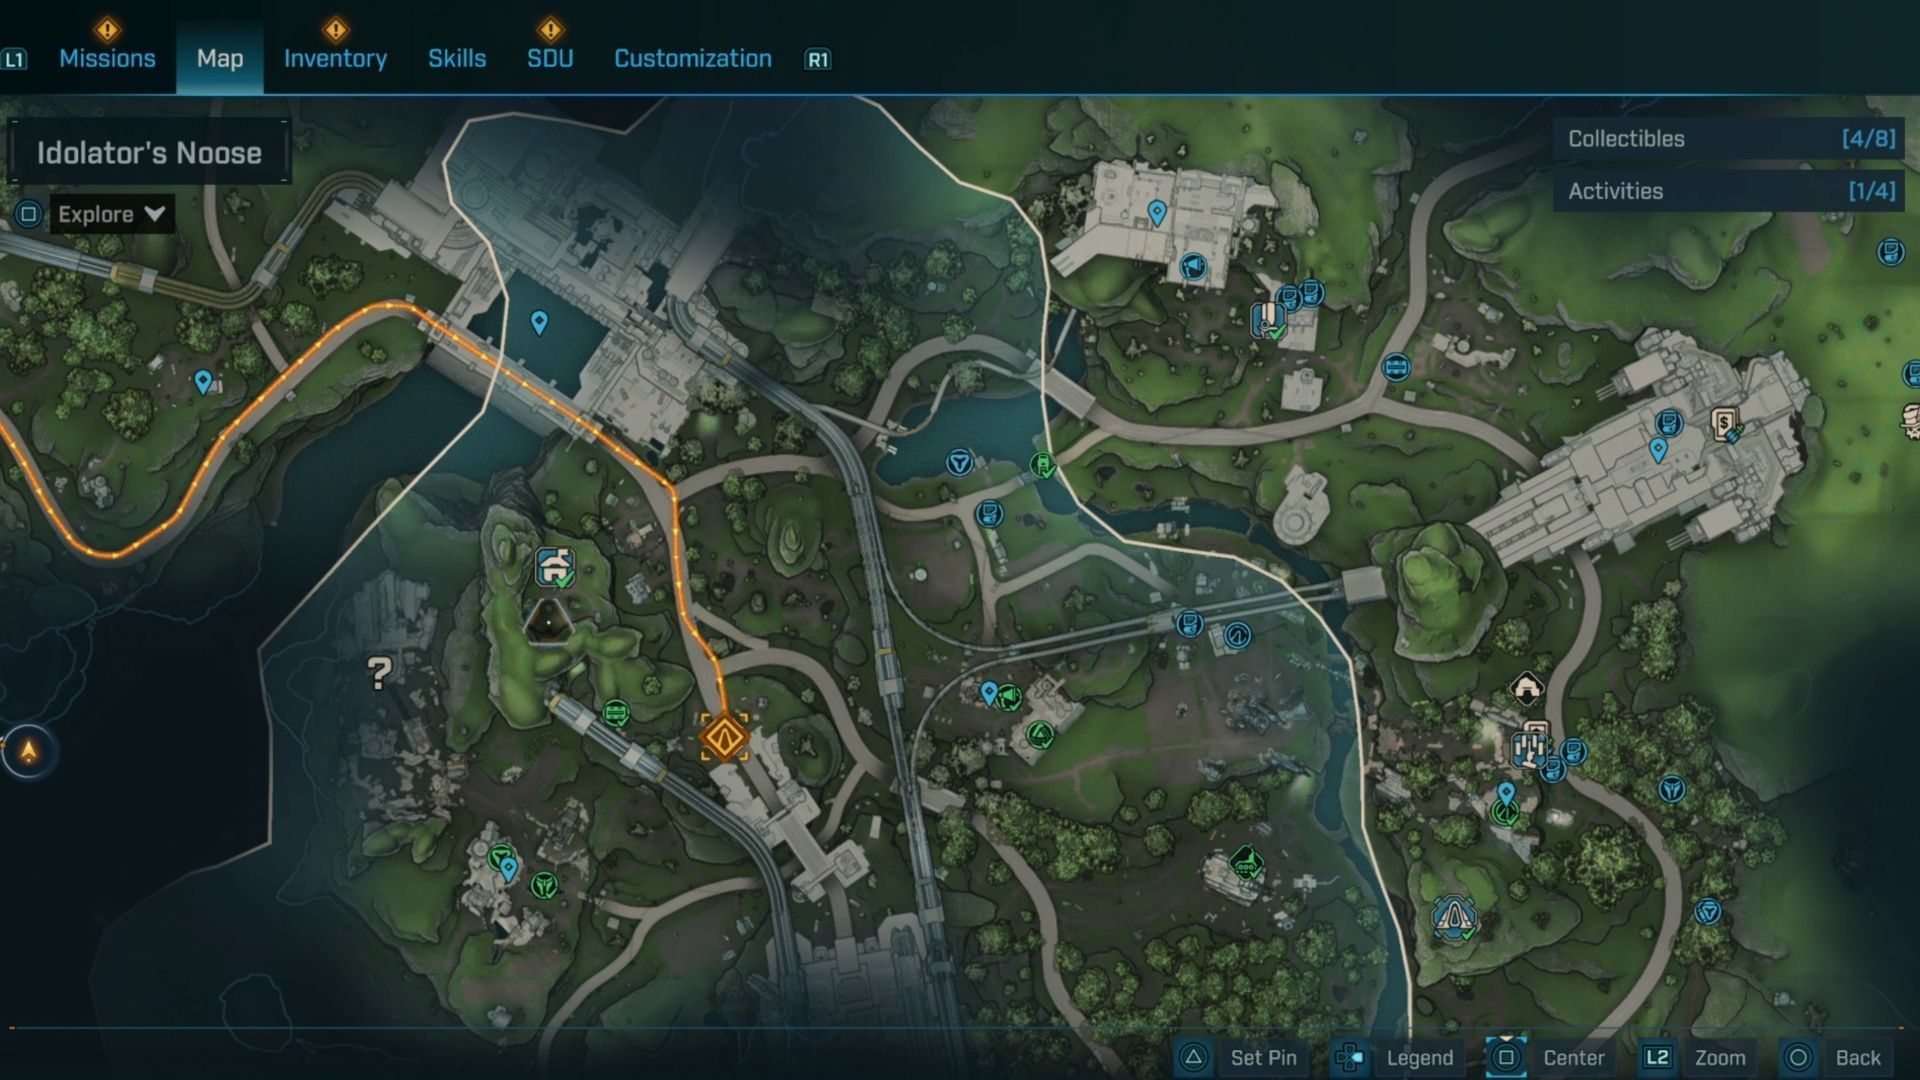
If you have the Someday Rise Safe House, getting to the next part where you Rendezvous with Outbounders is remarkably fast. Just fast travel there, and you’re practically on the doorstep of Idolator Sol in Borderlands 4. You can see the Safe House in the screenshot above. Just head here, take your vehicle, and cruise to the south.
To Advance to Idolator Sol’s fortress, just follow Rush and the cart of Locust Missiles, and kill any order forces that get in your way. Thankfully, you don’t have to protect the cart from damage, so it’s not really a dangerous situation. There are lots of enemies though, so make sure you’re topped up on ammo.
Feel free to use your Grapple to grab Locust canisters and throw them at enemies, too. You have an unlimited number of them, so go wild! You’re likely going to run into at least one Badass, as well, so keep an eye out.
3) Open gate with Locust canister, Kill fortress defenders
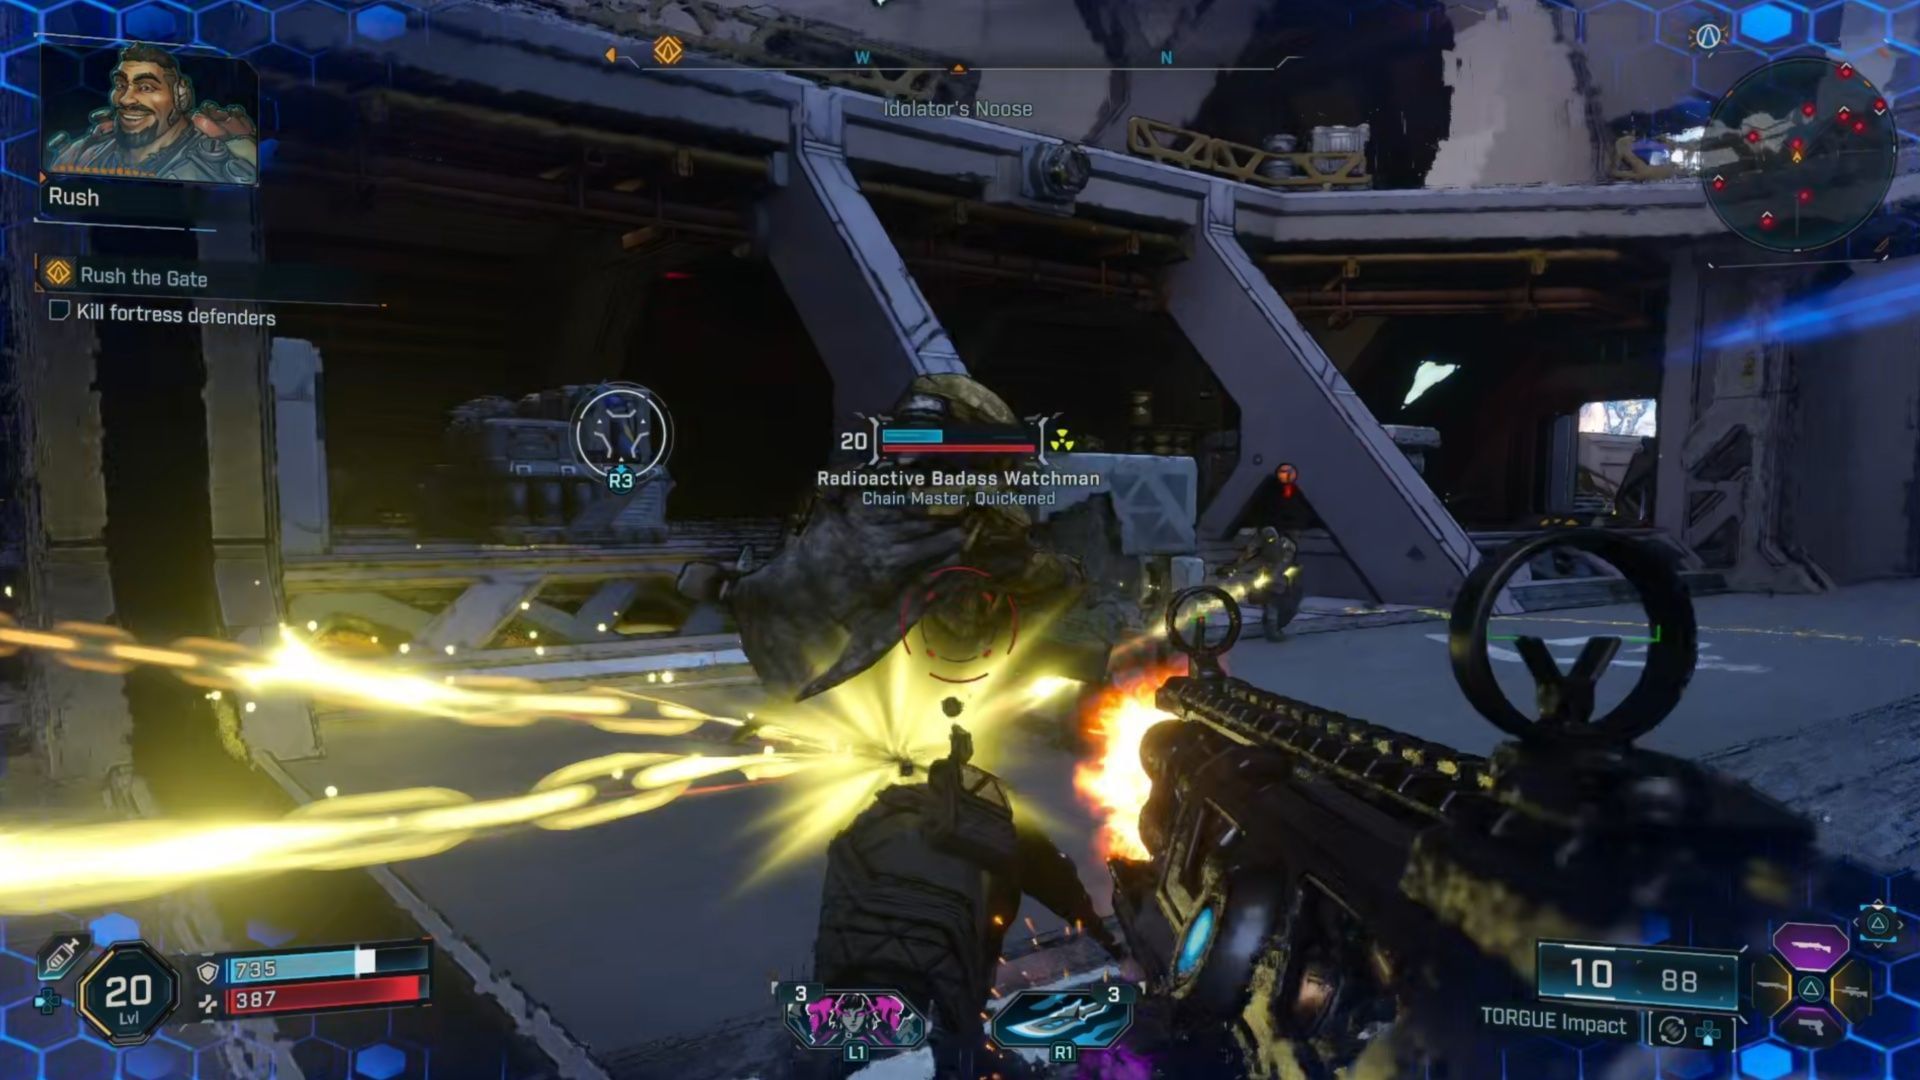
Once you’ve cleared all of Idolator Sol’s forces, use your Grapple to throw a Locust canister at the door. This clears the way for you and Rush to enter the base and kill fortress defenders. This means you’re immediately going to get back into the fight for the Rush the Gate mission of Borderlands 4.
In my experience, there were two or three Badasses here, and pretty tough ones, too. That was on normal difficulty, so depending on what you play on, your experience may vary.
Keep using the Locust canisters, and take out all the enemies you come across on your way over to the elevator. There will again, likely be plenty of Badasses in this area, and a Warhead, so fight your way through the crowd.
4) Activate elevator, Kill fortress defenders
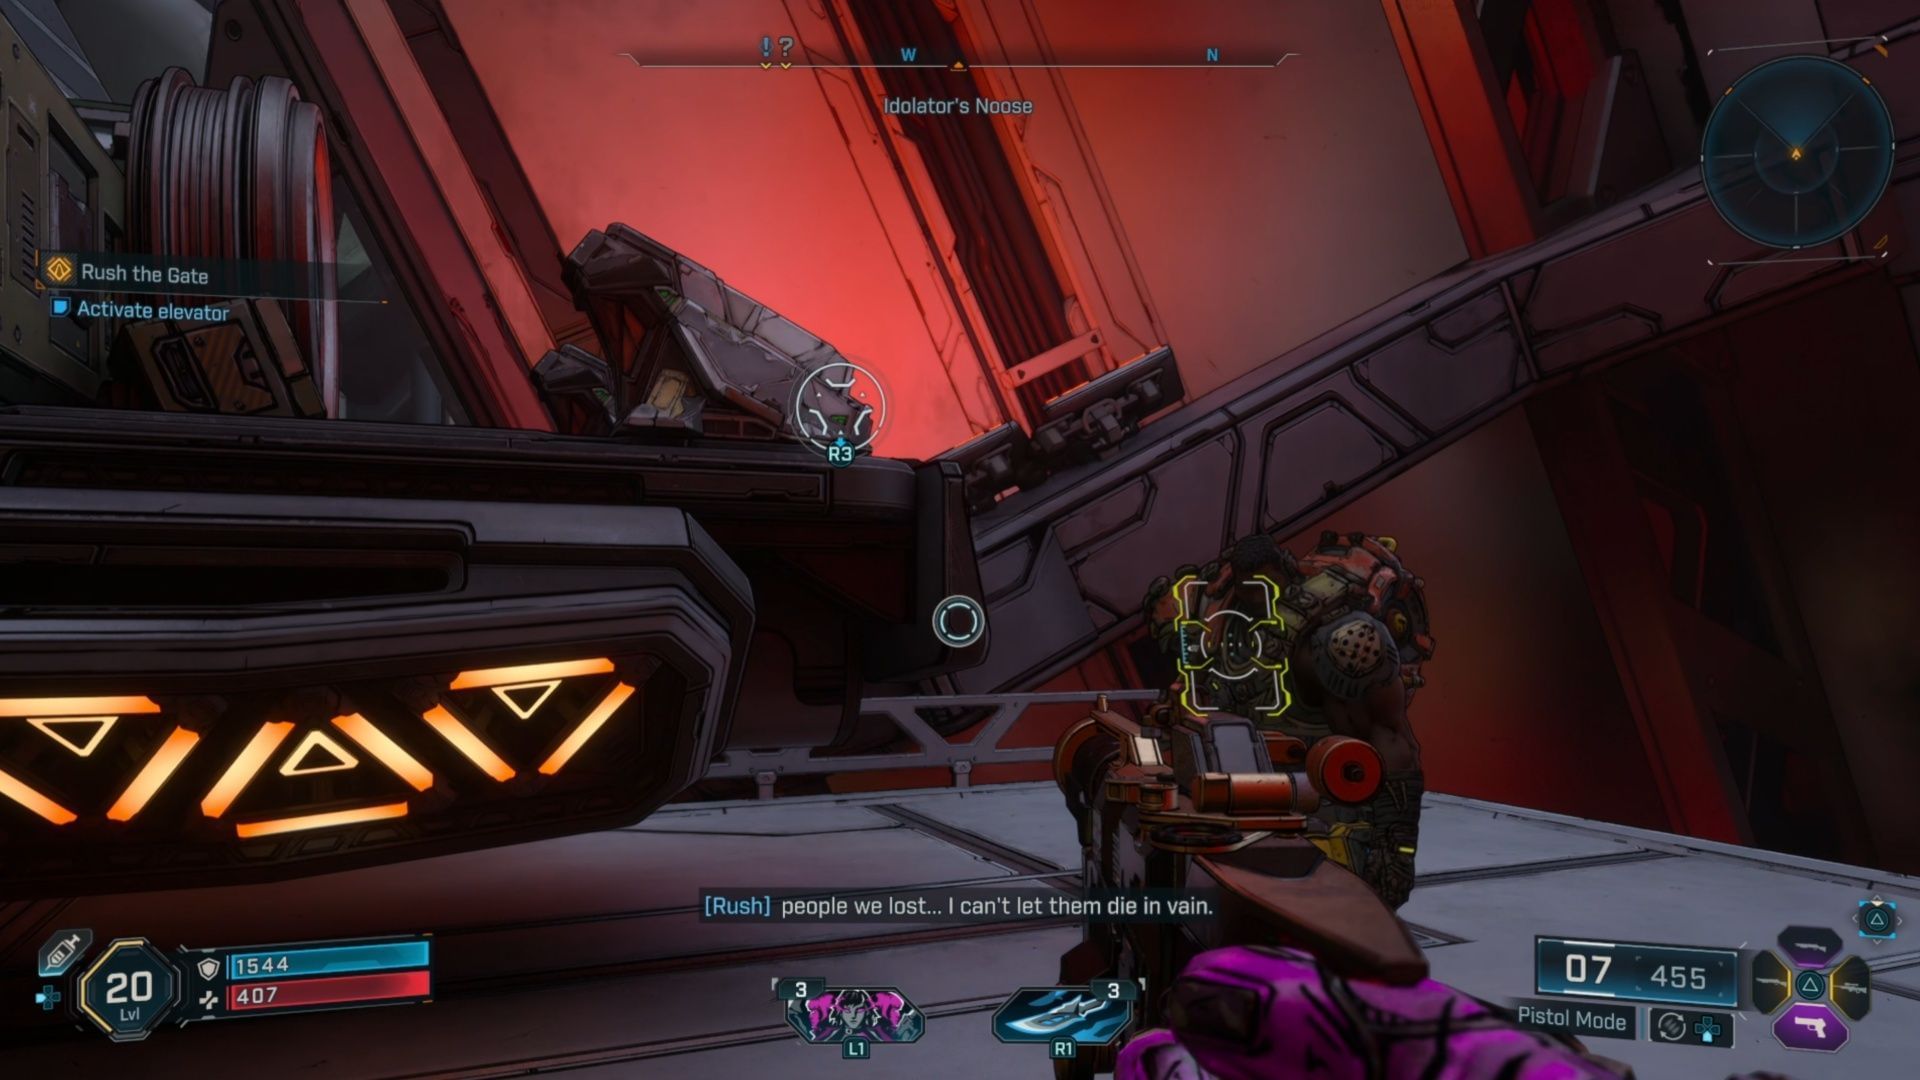
Once you get to the elevator in Borderlands 4, I recommend looting some boxes for ammo, because you likely used quite a lot of it in that last firefight. Then, it’s time to activate the Elevator. Ride up with Rush, and it’s another push with the cart to another gateway.
Naturally, the next step of this Borderlands 4 mission is to Kill fortress defenders. Large swarms of them will hit you again, and once again, I recommend hurling Locust canisters at them to weaken them. Personally, I did this as Vex, so having the Specters made a lot of these fights much safer. However, if you do die, you’ll have to wait on the elevator to come back down, and that takes several minutes.
5) Check on Rush, Reach safe separate distance
At the end of the battle, Check on Rush, who will then tell you to get to a safe distance away from the blast. At this point you learn Rush was going to throw his life away, because you cannot remotely trigger the blast. Thankfully, things don’t go down as he plans. Just watch the scene, and get ready to enter the fortress.
6) Kill Idolator Sol, Enter fortress, Kill Order forces
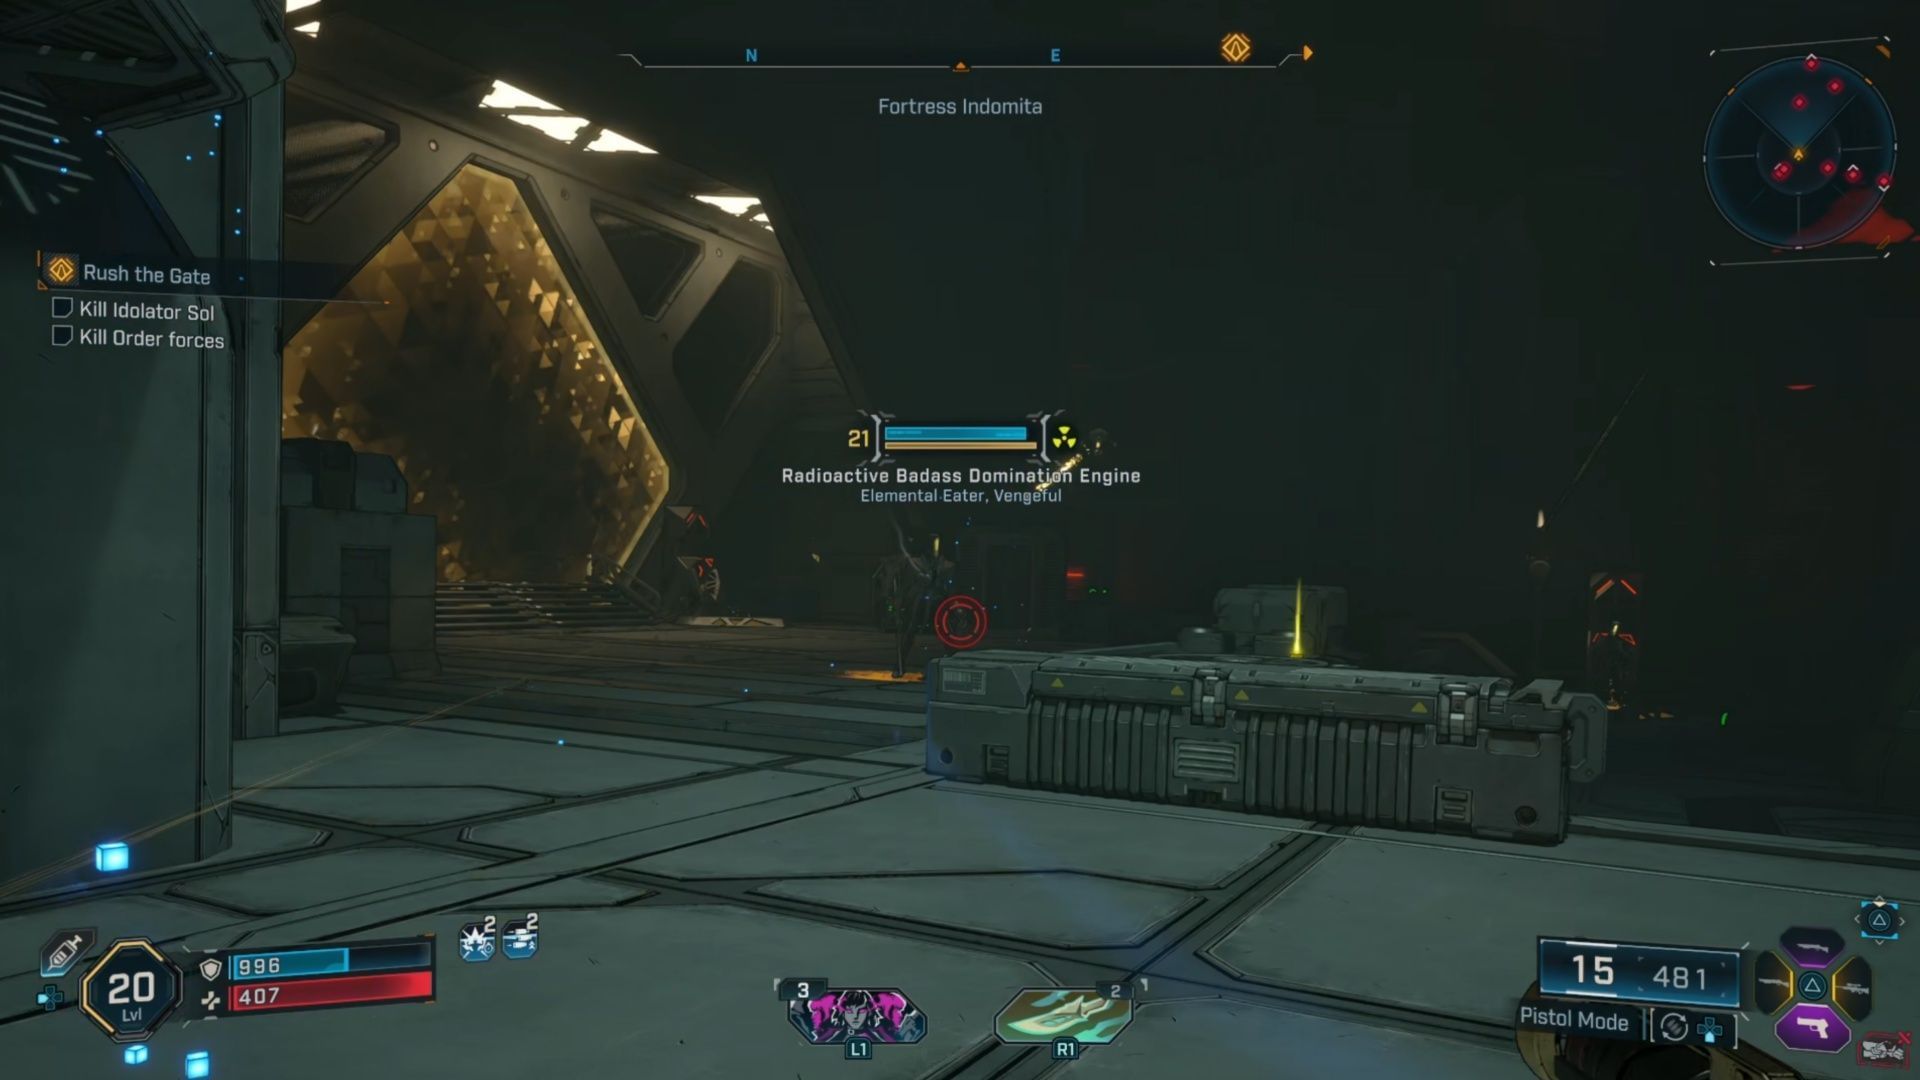
The overall goal is to Kill Idolator Sol, but it’s going to be a while yet before you do that. Just keep his big gross face firmly in mind as you enter the forces and begin slaughtering the Order forces in Borderlands 4. Now that you’re inside Fortress Indomita, use the vending machine to restore your ammo, do some shopping/sell some items if you need to, and get ready for violence!
The first room is a huge one, with enemies coming at you from all sides. The way forward is blocked, so you cannot just avoid these enemies. Go in with guns blazing, and take out the swarms of Order forces that show up here.
You’ll likely see a few Badasses in this room, as well. Wardens, Spiteful Witnesses, all the enemies you’re used to seeing show up. If the scene isn’t ending, you may need to check on the upper areas; there were a few stragglers up there, so Grapple up and take them out as well.
After all the enemies were slain, a Badass Hulkhead showed up, so be prepared to dodge its very annoying AOE attacks. It’s just tanky, but with some electric damage, it shouldn’t pose too much of a threat.
7) Kill Idolator Sol, Find airship hangar
Up next for Vault Hunters in Borderlands 4 is to find the airship hangar, because Idolator Sol plans to obliterate the people of the Fadefields with his Locust Missiles. We missed out on our chance to stop his airship in a previous mission, so we can’t mess up this time.
It will mean the end of the Fadefields. Don’t worry, this isn’t timed. Just keep pushing forward towards the quest objective, and when Zadra informs you that you’ve found the airship, you’ll need to get access to it.
8) Disable Sol’s airship, Kill Idolator Sol, Activate refueling platform
The next step to disabling Sol’s airship is to activate the refueling platform. Keep heading towards the quest marker, and before long, another group of Order forces will attack Borderlands 4 players.
You can activate the refueling platform while the fighting is going on, but you should take the enemies out first anyway. They’ll just keep harassing you, so defeat them, and prepare for the next step.
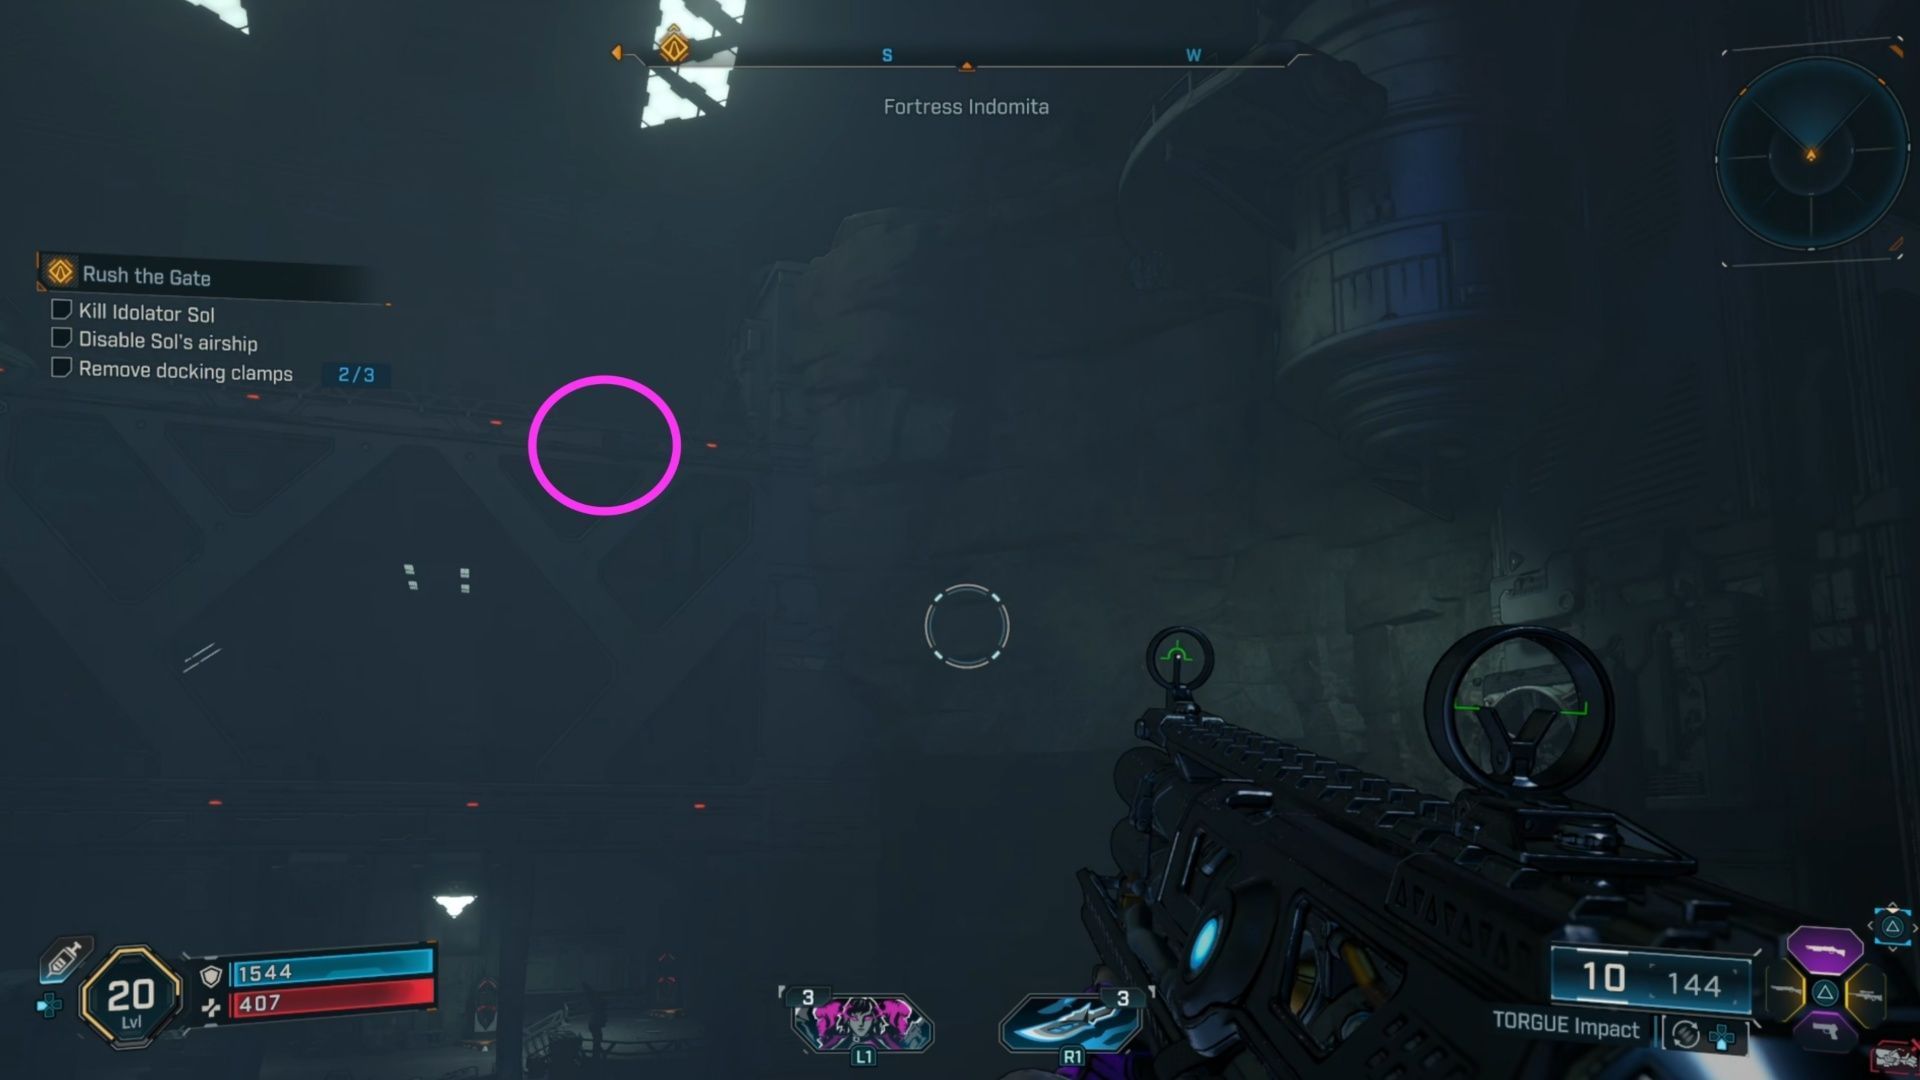
9) Disable Sol’s airship, Kill Idolator Sol, remove docking clamps
Before you leave the refueling platform in Borderlands 4, turn around to face the route you came from, and use your ECHO Device. You should see a Grapple Point on the upper right of the screen. You’ll need to double jump and glide towards it to hit the Grapple, but your reward is a Red Container and an ECHO Log.
Next up is to remove the docking clamps for Rush the Gate in Borderlands 4. You need to use the Grapple on three docking clamps, but it can be a little tricky. The first two are plainly visible; just hop onto the platform in front of the ship, and grapple the points on the left and right. That’s nice and easy.
The third one is tricky, because you can’t see it at first. When you’re on the platform for the other two, drop down on the right side and run around the ship. You’ll find the third docking clamp on the other side. Grab it, pull it down, but also be ready to fight.
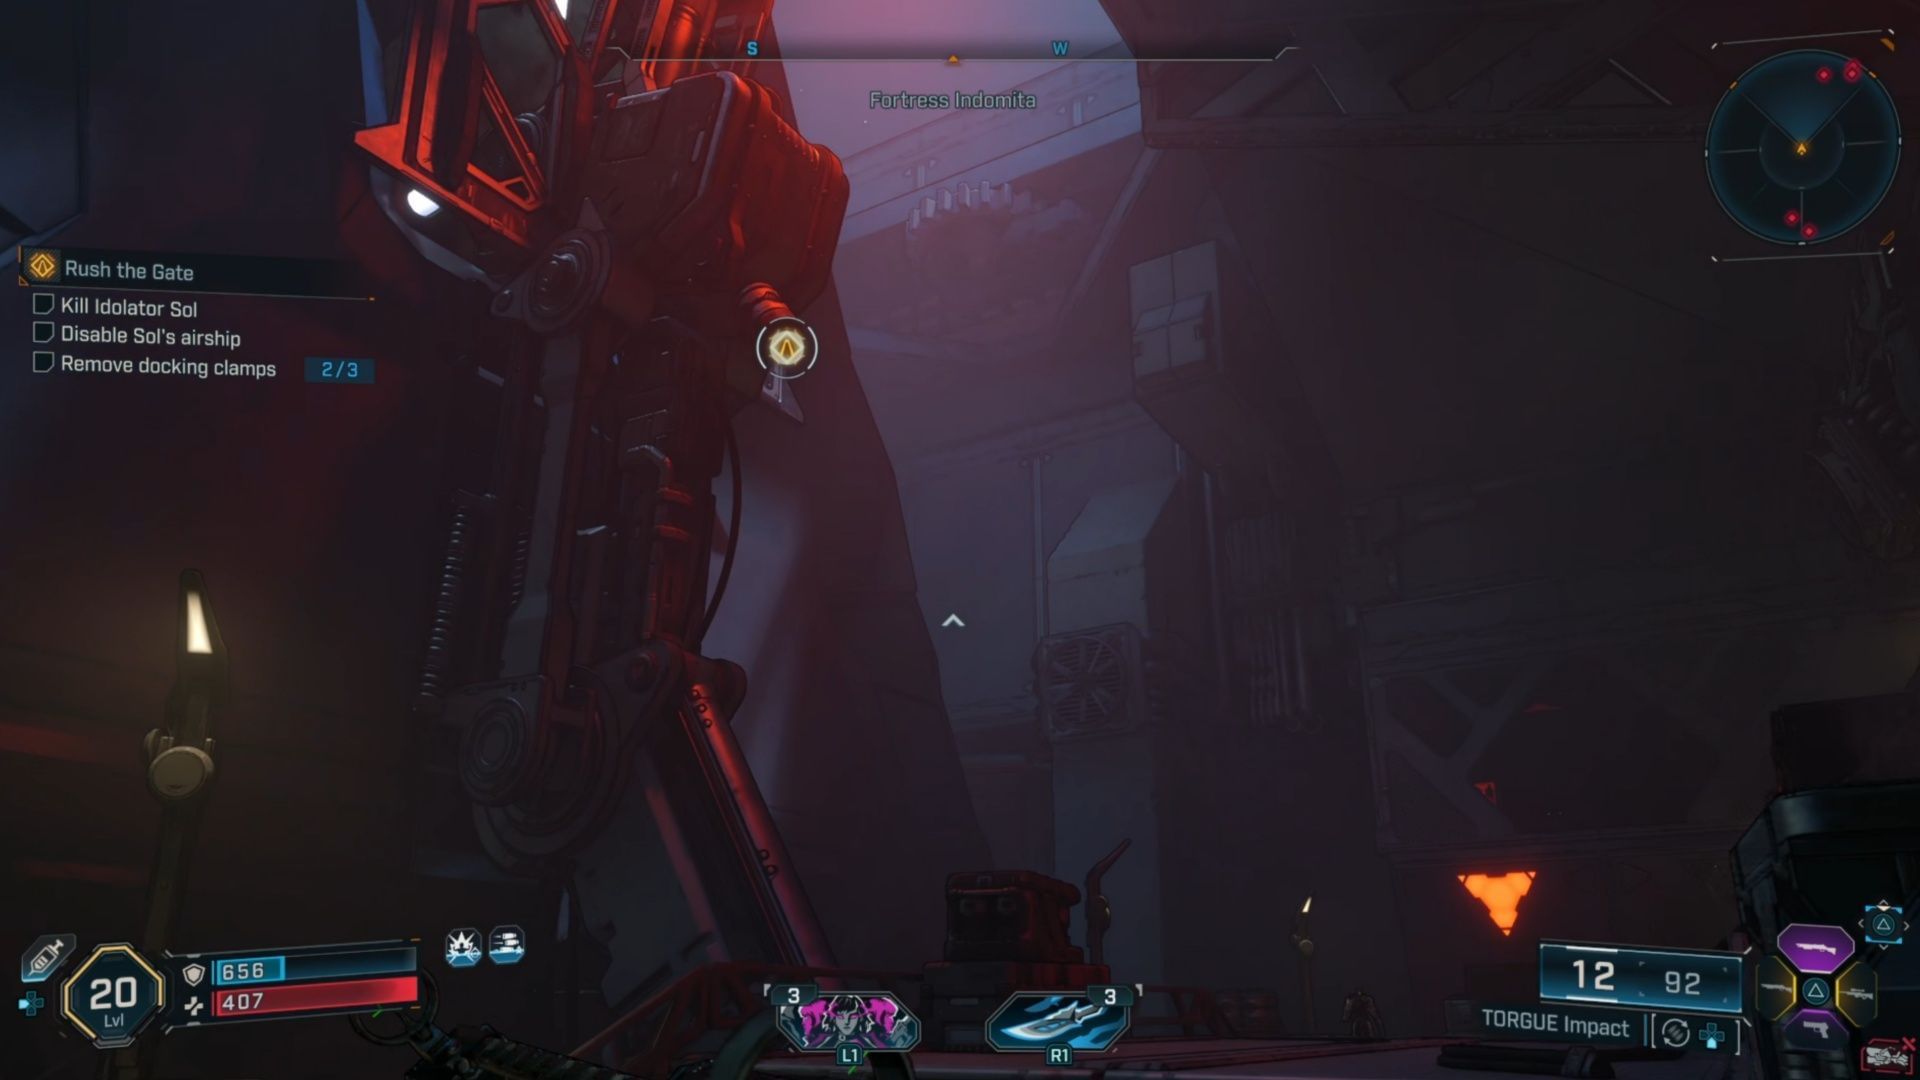
There are lots of enemies back here, too, and likely to be at least two Badasses. When you’ve cleared the enemies, and got the docking clamps, it’s time to serve up some justice. The next step is naturally, to Kill Idolator Sol.
From the platform where you pulled down the two docking clamps, jump up the left docking clamp arm, and double jump/glide your way down to the platform to continue forward. At the end of the path you’ll need to press a button to activate an elevator. Before you commence the violence, turn around and you should find an ECHO Log nearby, close to the checkpoint.
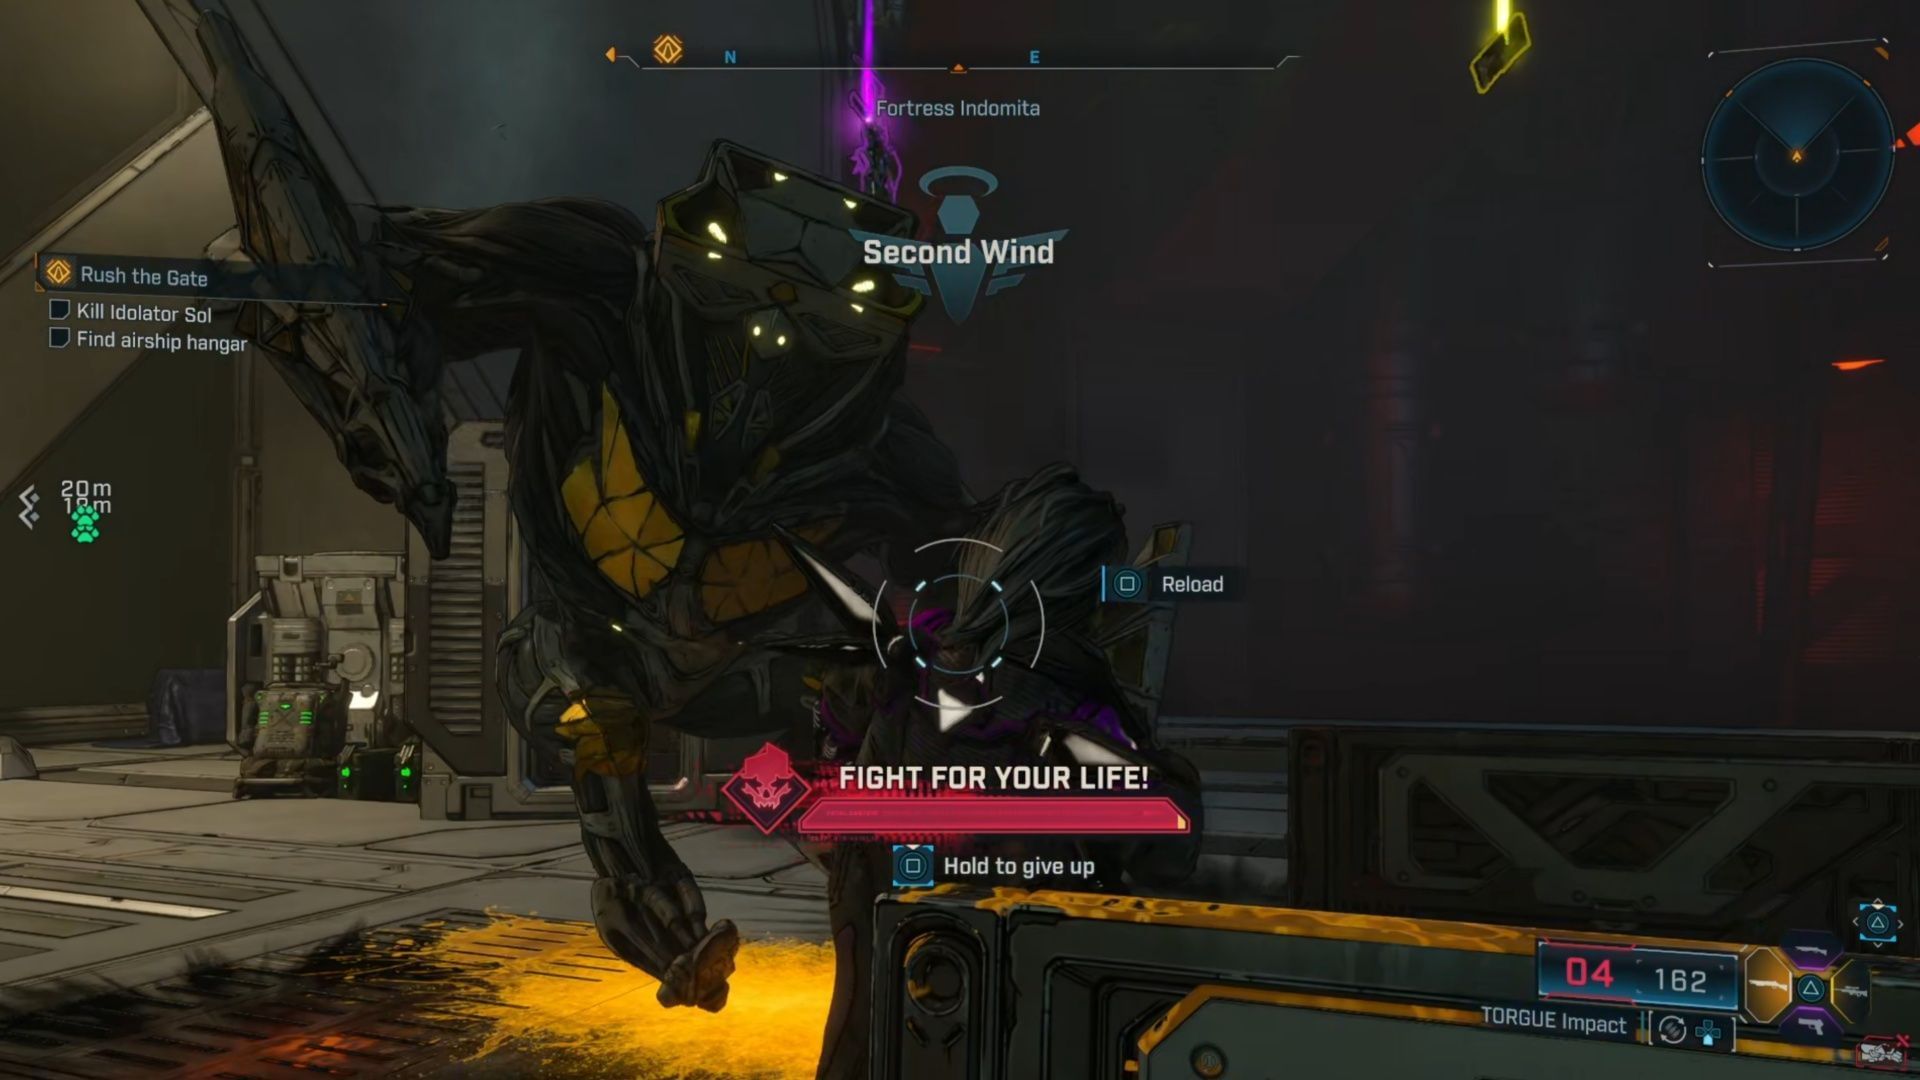
Another group of Order forces will stand in your way, but if you aren’t in the mood to scrap, you can just rush past them. The Badass Hulkhead and Badass Armature are definitely tough foes. I recommend killing the Wardens first if you can, so they stop spawning allies.
I fought them anyway, to get as much as exp as possible, but I was already pretty high level by this point. If you go to the third level of this area, you can also find an ECHO Log in the southwest part of the room.
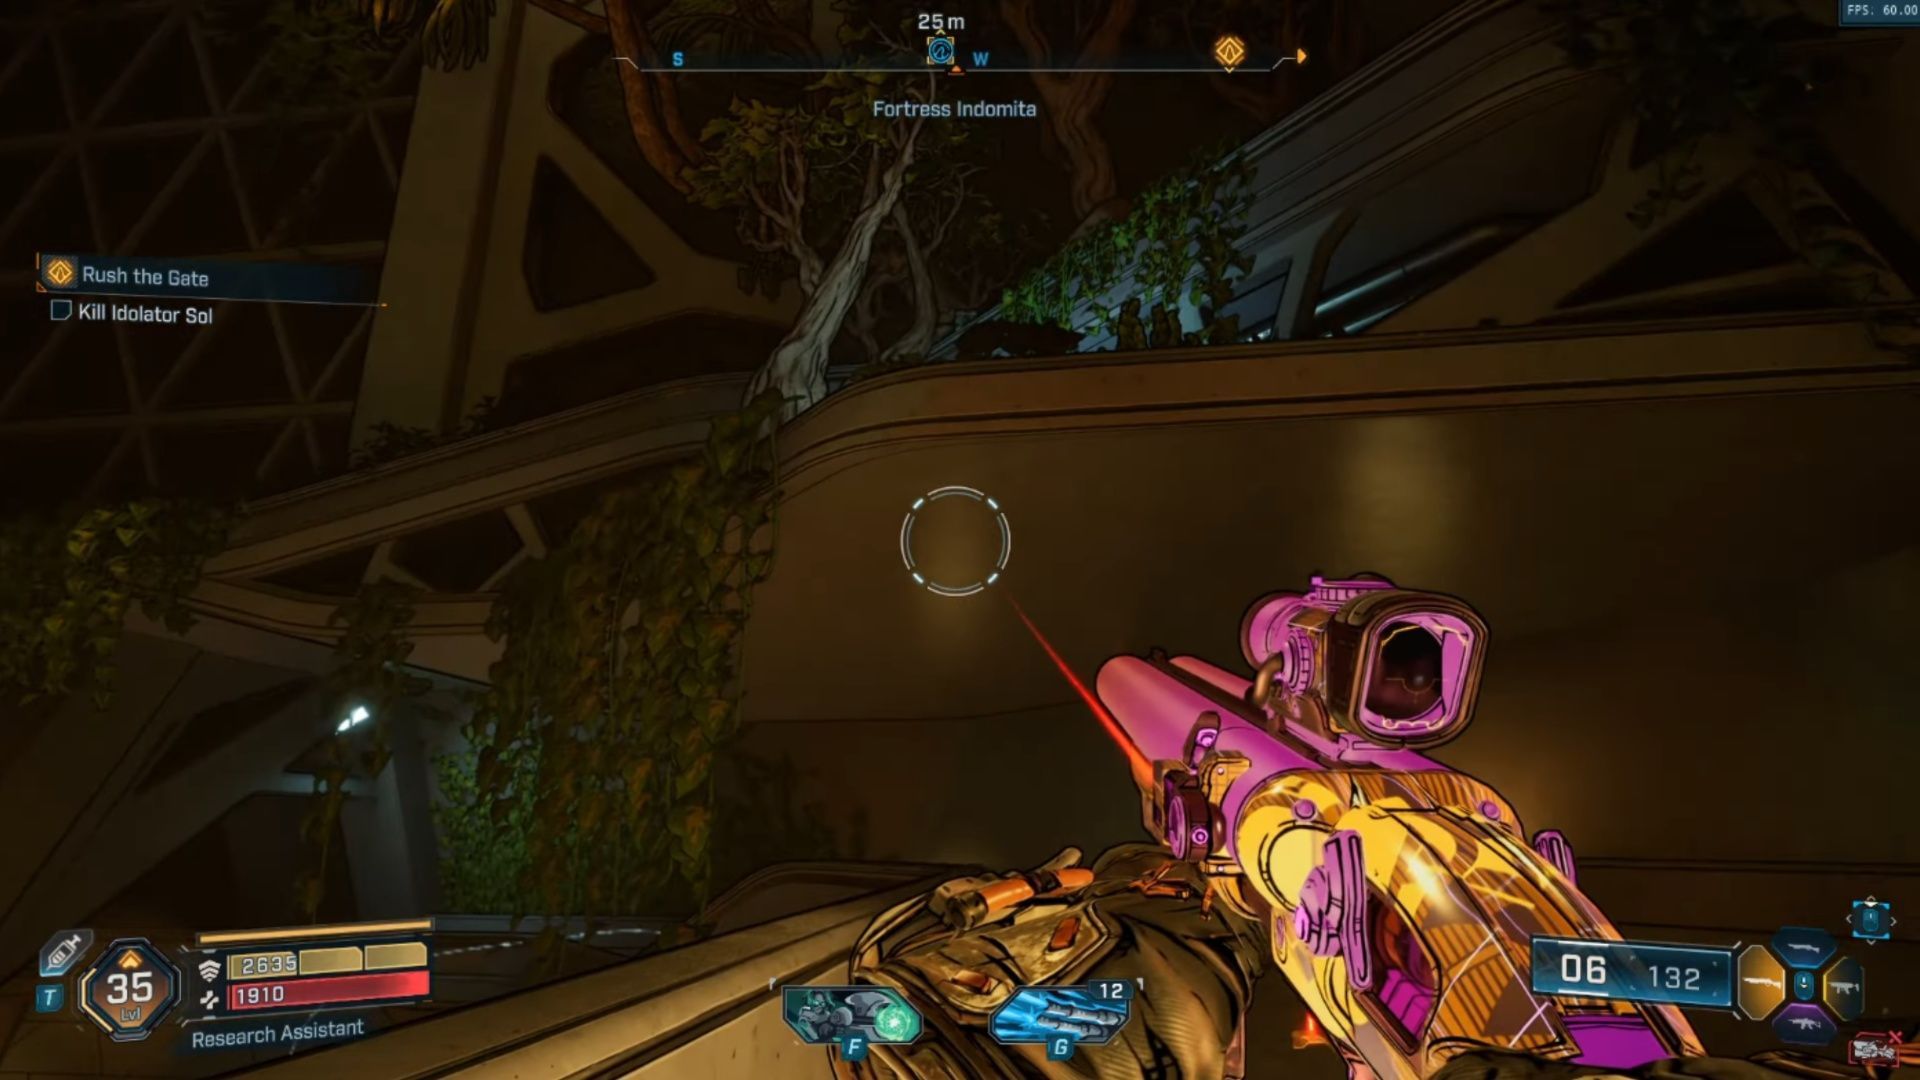
In the section of this Borderlands 4 map with the broken walkways, if you look across from the Grapple point, you’ll see an upper area with lots of plants. Jump up there, and then jump up to the next platform. Get behind the trees and plants to find a Vault Symbol. You’ll hear the chimes that tell you you’re getting close.
Once you’ve killed all the Badasses and cleared all the enemies in this area, follow the quest marker again. Before you drop down the hole, make sure to stock up on ammo. When you’re ready, drop down in the next area that will take you to Idolator Sol.
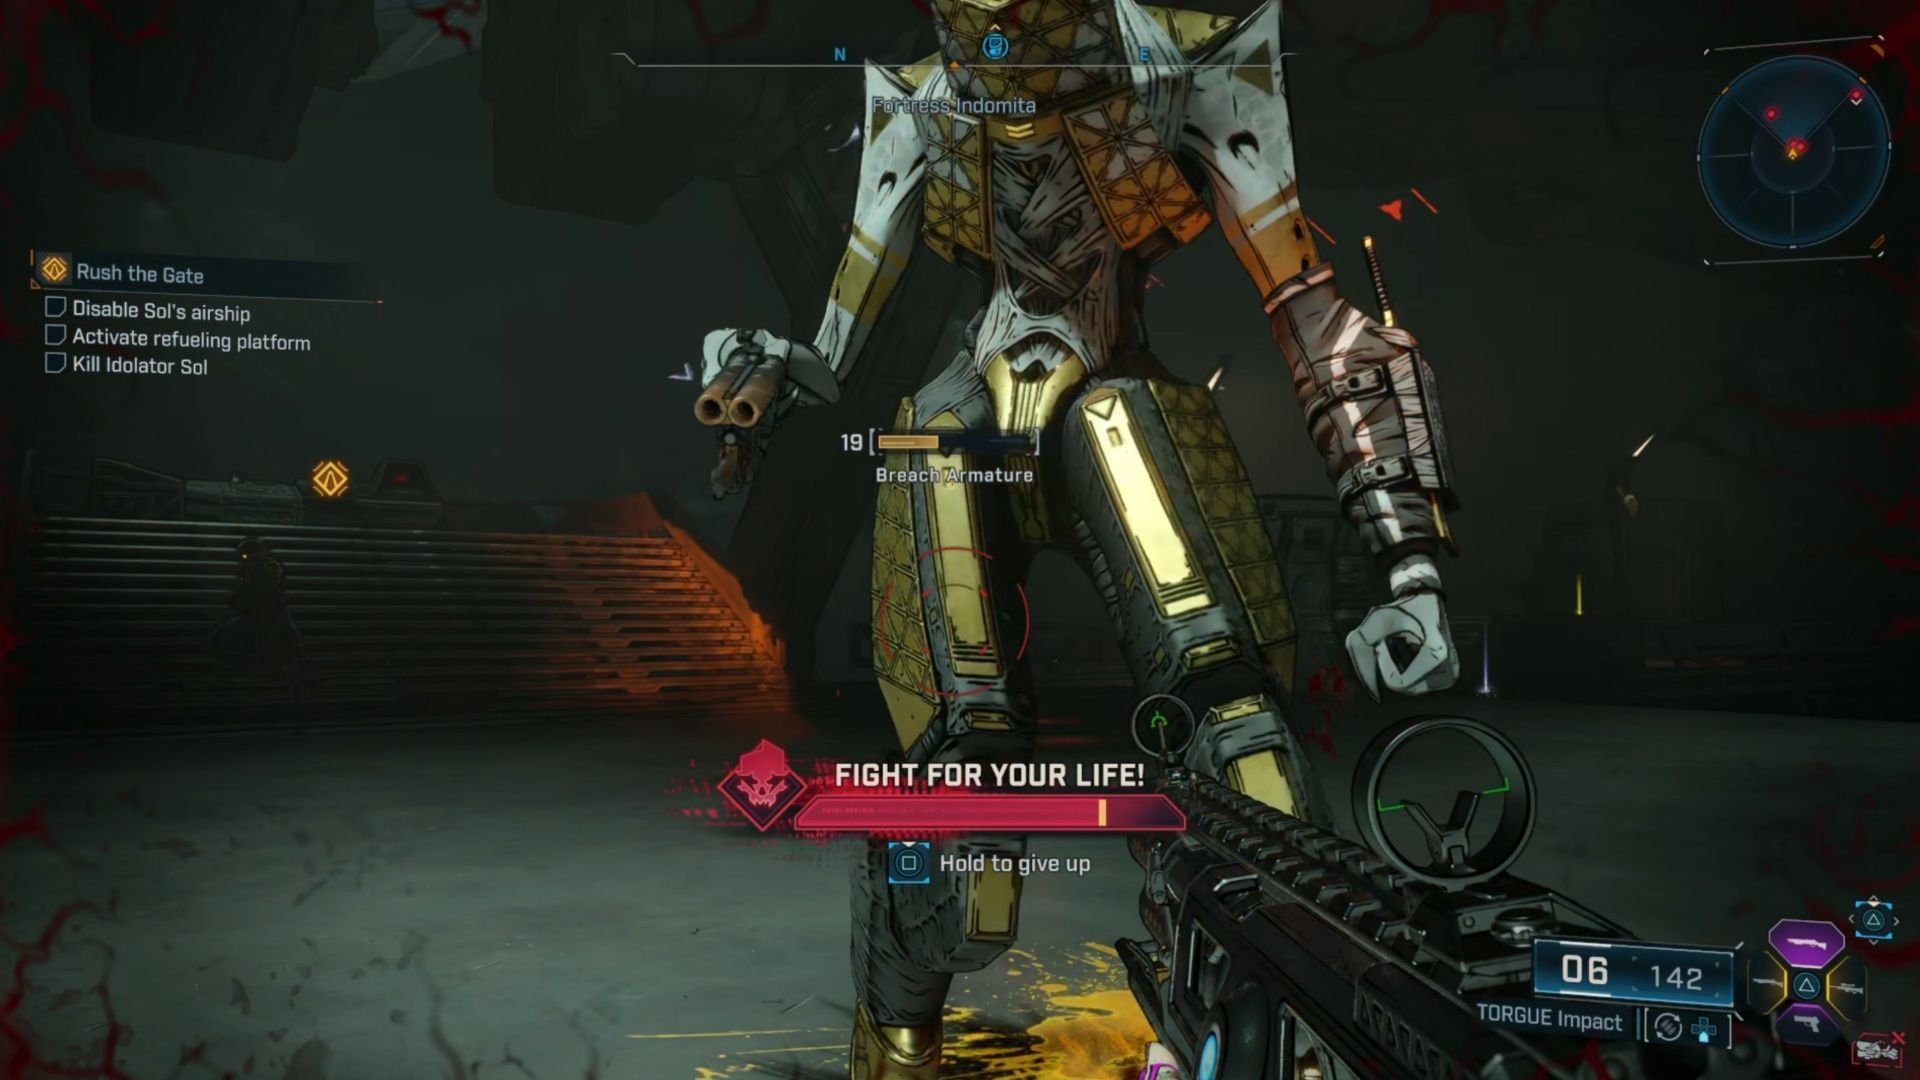
10) Kill Idolator Sol

If you need the full details on how to defeat Idolator Sol in Borderlands 4’s Rush the Gate quest, we’ve got an in-depth guide here. The long and short of it is that he’s completely armored, until you break it with Locust gas. You have to wait for him to cast his Staves into the ground. Use Grapple on the Green Staff and launch the Locust canister at him in order to damage him at all.
Periodically, he’s also going to make the room grow dark; immediately rush to the glowing areas to avoid taking tons of damage. His other big attack is a huge beam of green energy blast that deals a significant amount of damage. He will occasionally convert his armor into a giant sword and swing that, but that and his shield charge aren’t quite as dangerous as his green beam.
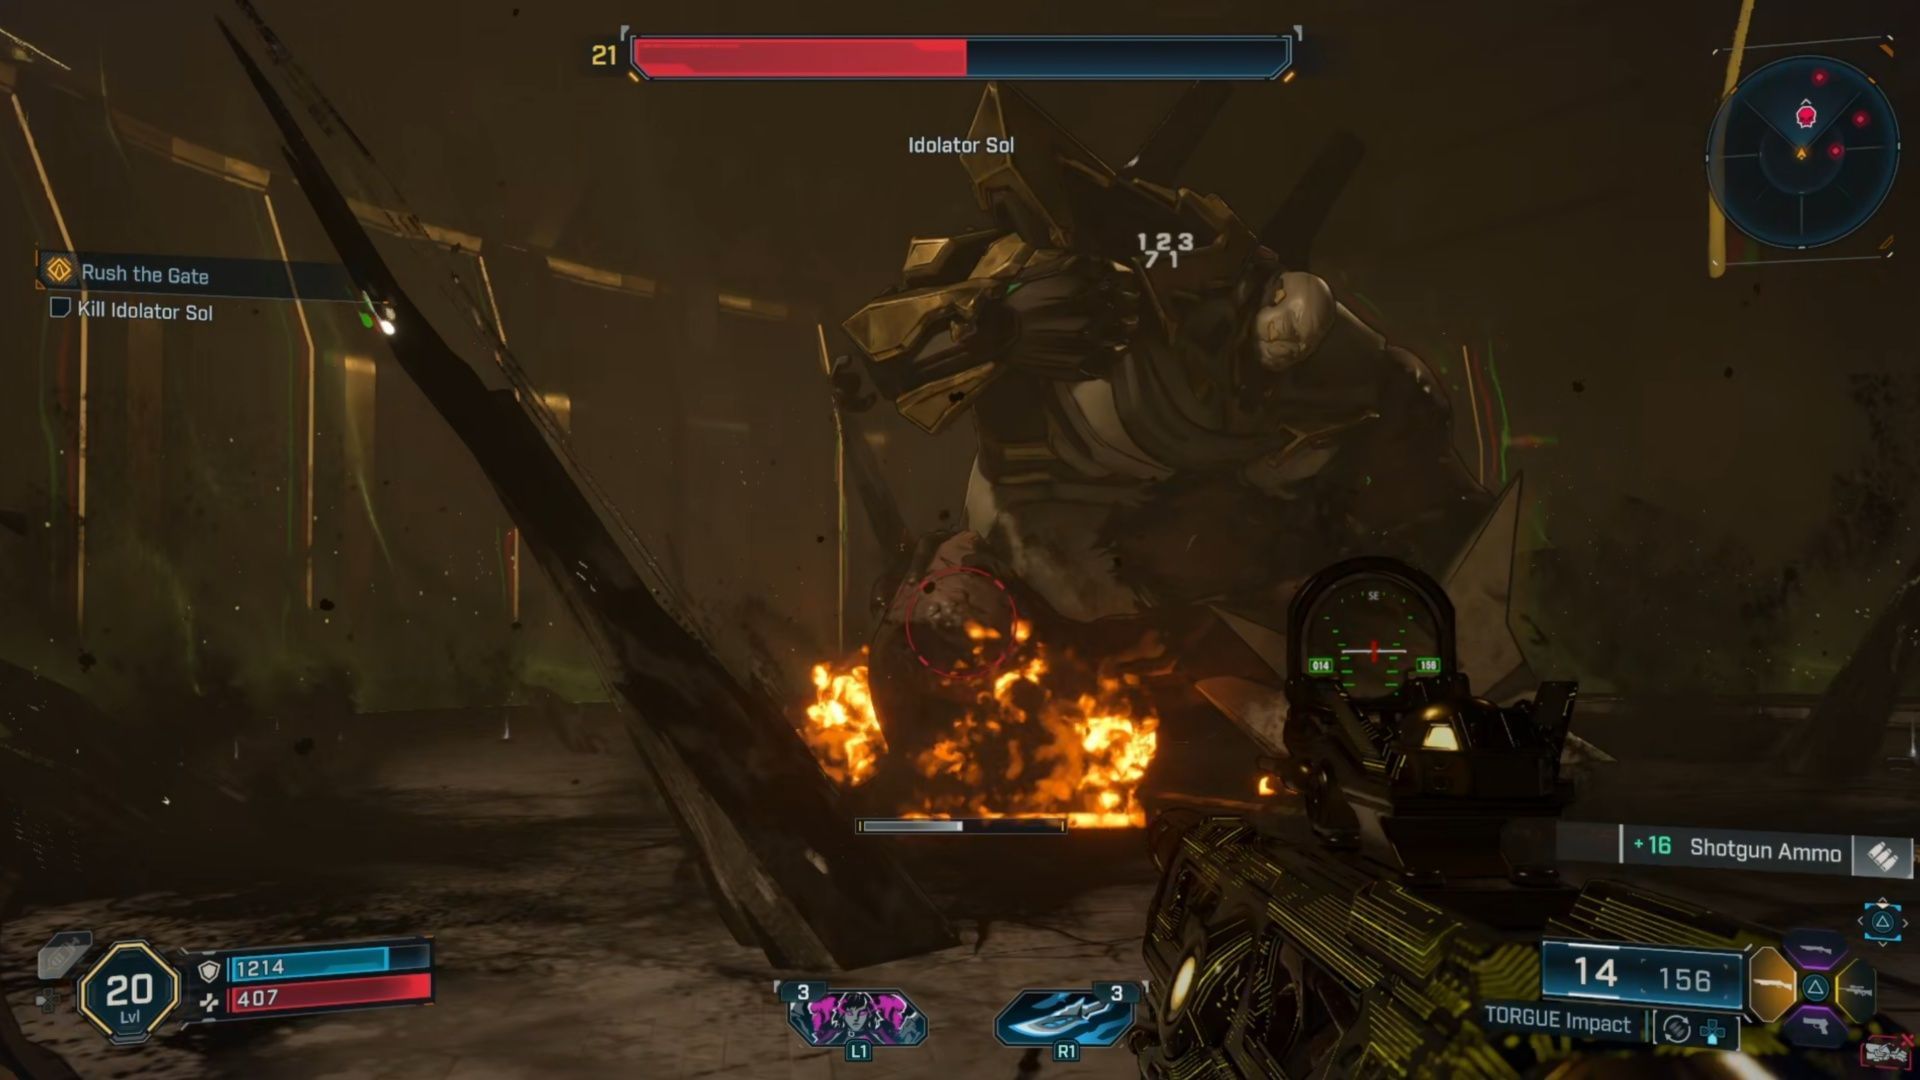
His weak spots are the gross green bubbles on his body, so target those at all times. He’s a pretty easy fight as long as you pay attention to the stave drops and don’t miss them. When he’s vulnerable, just pound him with everything you’ve got.
Idolator Sol will start using a Locust fog in the second half of this Borderlands 4 fight, as well as conjuring huge spikes to avoid. The only other problem in Phase 2 is that he’ll use several waves of the Staves/Rods, before the Green one shows up, so pay attention to that.
11) Take Idolator Sol’s bolt, Return to Outbounders HQ

After you’ve bested Idolator Sol, claim his bolt and return to the Outbounders HQ via Fast Travel. After chatting with Rush, you’ll wrap things up, and pick up a new SMG, XP, Eridium, Cash, the Casual Collection Vault Hunter Head, and the Driftblade vehicle.
Check out our other Borderlands 4 guides and features
- All Weapon Manufacturers in Borderlands 4
- Who is the villain of Borderlands 4?
- What are Enhancements in Borderlands 4?
- Does Borderlands 4 have co-op and crossplay?
